I will have to try a Q-tip the next time since sometimes when I tap with my finger the LED sticks to it and pulls off the MCPCB. :person_facepalming: Then I’m in hurry-up mode to get it back into place since I don’t want to cook the LEDs too much.
Was wondering if would be better to avoid overheating place the Led on mbpcb
just shortly before melting of the tin.
Maybe is hard with small or many Leds to put on 1 board
Cotton swab, for example. Domed or domeless better don't lay your fingers over the leds.
Is it safe to clean the LED surface with good ol isopropyl alcohol afterwards?
That’s what I have used for years, walmart 90% isoproply alcohol. It also cleans flux residue really well.
Cleans threads, lenses, and all contact points well also.
That is good news. The bottle I have at home says isopropyl alcohol 99,5%. It evaporates into nothingness quickly.
I’d say that’s a must. You don’t want to leave behind any crap on the dome that could burn and discolor/darken/ruin the LED.
great video, this is exactly how i reflow, i have “dedicated” frying pan for that, a tiny one about 4”.
Do you know if the pan method would work also with induction stove? Would the induction heating heat only the pan or also the MCPCB directly?
Dioda, since the MCPCB is made of a non-ferromagnetic material the answer is no. The induction stove heats up the pan, and the pan heats up the MCPCB.
I've mentioned that I use an induction stove more than once, and also been quoted on this. Use the Search Within Thread tab above and read more, fellows. And take care. 
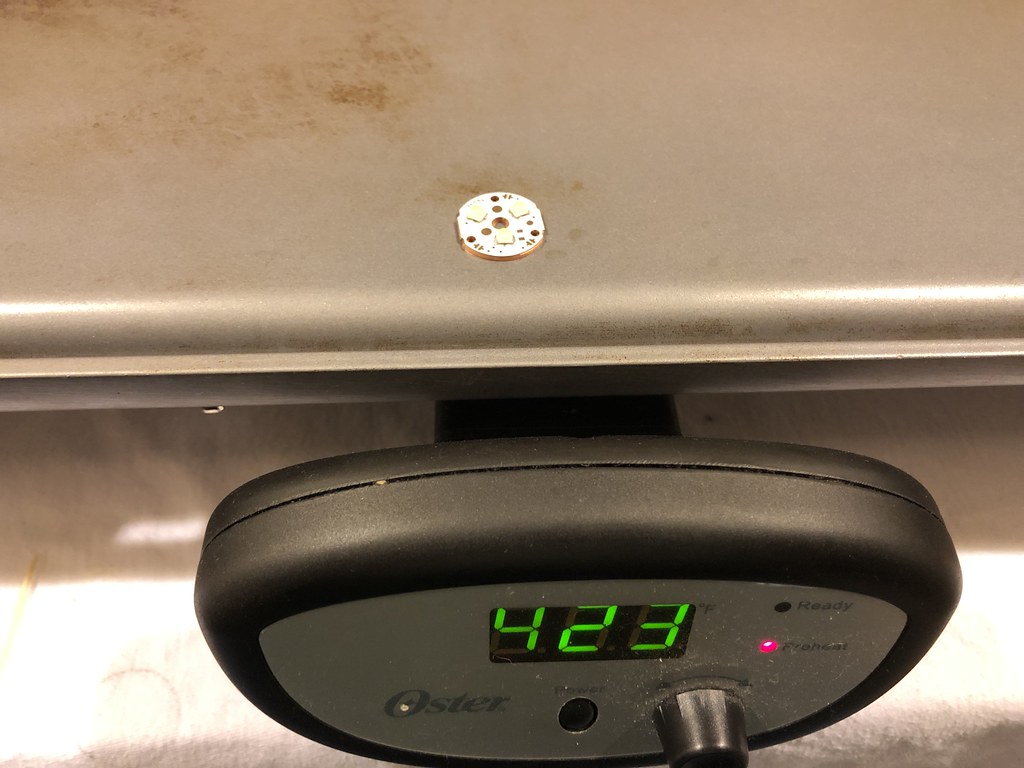
Last night I reflowed some Samsung LH351D (SPHWHTL3DA0GF4RTS6) LEDs. The solder melted at around 450 degrees Fahrenheit, which seems to be the max for this electric skillet.

At first I was going to ignore the solder blobs next to the LEDs since they would not interfere with the Carclo lens. But after I shaved the LEDs, I decided to reheat the LEDs and remove them anyways. Using a Q-tip to hold the LEDs worked well since it gave me more space to swipe away the extra solder vs using my finger.


Another thing to consider is to make sure the back of the MCPCB is flat. As you can see when I first started to sand the MCPCB, the middle hole and outside perimeter were a little more raised than the rest. So I continued to lightly sand the MCPCB on a flat surface (a mirror) with fine sandpaper.


This turned out to be one of my better reflows.

great photos
very clean reflow
did you tap the LED, and if so with what?
did you wash the LED dome and board, and if so, with what?
Thanks jon_slider!
At first I tapped the LEDs with my finger. Then when I heated them up again to clean off the solder blobs, I held each LED with a Q-tip and swiped away the solder with a toothpick. I actually split the toothpick to make the end even smaller and flatter to better swipe away the solder.
Once cooled down, I used Q-tips dunked in 91% isopropyl alcohol to clean everything up. And used a toothpick to pluck off the solder that was stuck to the MCPCB.
Can bad reflows cause LEDs to flicker?
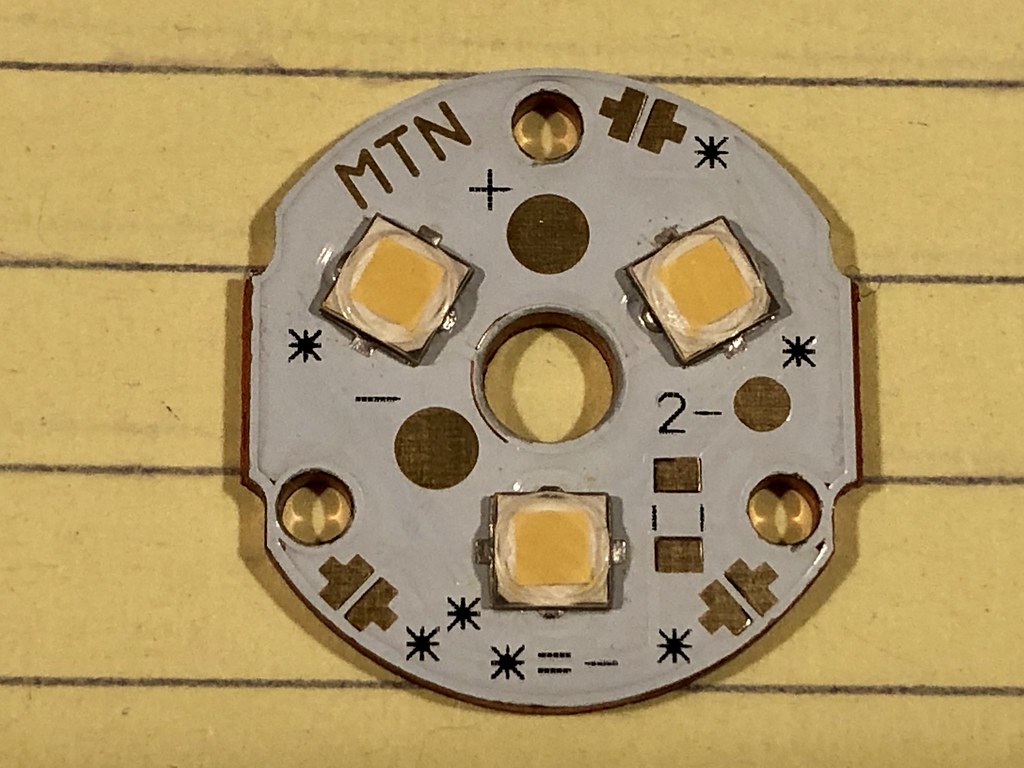
I just reflowed an XP-G3 to replace a bad one a MTN triple mcpcb.
The dome had fallen off the bad one.
I used an 1/8" x 1" x 6" piece of aluminum in vice grips with the MCPCB on the leading edge of the aluminum.
There was enough solder on the mcpcp from the removed LED to reflow the new LED so I only used some KSS flux
I slowly heat the aluminum under the mcpcb with a small butane torch until the solder on the spots for the + and - leads got shiny.
I gave the top of the new led a tap with my finger and then stop the heat.
When the mcpcb cooled I tested it with continuity setting on a voltmeter.
All 3 LEDs lit to about the same brightness and a 10507 triple optic fit perfectly over the 3 LEDS.
The excess flux around the LED was cleaned up with 100% alcohol on a Q-tip.
My previous reflows were done in a toaster oven but IMO this was a bit easier on the 1/8" aluminum bar
Usually flickering is caused by a loose connection somewhere, like a retainer ring on the driver or switch. Doesn’t seem a bad reflow would cause this. Either the plus/minus are soldered and the LEDs work or not. You could test it by connecting the LEDs to another driver. But I would rule out other sources of flickering before reflowing the LEDs again.
I have seen it in two ways.
One where everything worked fine then after run on high for a few minutes it stopped working. Let it cool a few minutes and it would work again but when switched to a med or higher mode it would go off again. Bad reflow were it was just barely connected letting small currents pass and once the joint became warm the connection was broke and no light.
.
Second one was similar to the first but once it became warm it only had a low with flickering. Kind of like low level lightning flashes.
I thought the driver had let the magic smoke out but once I reflowed the led and it worked as it should have, no more problem.
Though not ideal, I use a small butane torch because it’s what I have and I’ve never had an issue with this method. I don’t hold the flame directly on the bottom of the MCPCB. I hold it far enough below to heat it slowly. I don’t use solder paste; I simply tin the pads with some solder and a little bit of flux and lay the LED on top. The second the LED snaps into place I remove the heat and lightly press the top with a Q-tip. I then lay the MCPCB on a block of solid copper. This cools it almost instantly. I’ve done this dozens of times, even with tiny E21As, and it’s always worked well.
I though about picking up a hot air station but since the torch works for my needs, I haven’t bothered.
no.
thermal shock is not good for the leds.
place the leds then turn on the heat.
You can find a recommended reflow soldering profile for many brand LEDs in corresponding pdfs.
E.g. for xhp50
