Good Luck!
That sure is a good looking light, especially in shorty mode! Shame it’s so under driven. It looks like it could be a hell of a thrower. Can you get pics of the pill for us showing what you are dealing with from the front and back? I can’t help but be curious.
Johnny,
I agree, she is a beauty and a great price for the quality.
I’m working on getting the head off. So far, I can only access the pill from the top end, but it’s so deep in the head and has an insulator disc that there is nothing I can do from that angle. I was able to get needle nose pliers down and there and rotate it somewhat, but still cannot unscrew it. From the underside, the best I can see is it looks like a typical 17 mm driver with no components on the underside, not even a positive contact spring. Until I can get the pill out (which looks like it is threaded, I won’t have any other news.
I’m left with no other option but to try and heat the head up in hopes to strap wrench it off. Updates to follow…
I may still purchase one of these. From DX’s description, I knew the tint was going to be far to cool for me and had decided the emitter would need to be switched out for a NW tint. As for the driver, we’ll have to determine if that can be changed out for something better. I’ll let you know when I place my order.
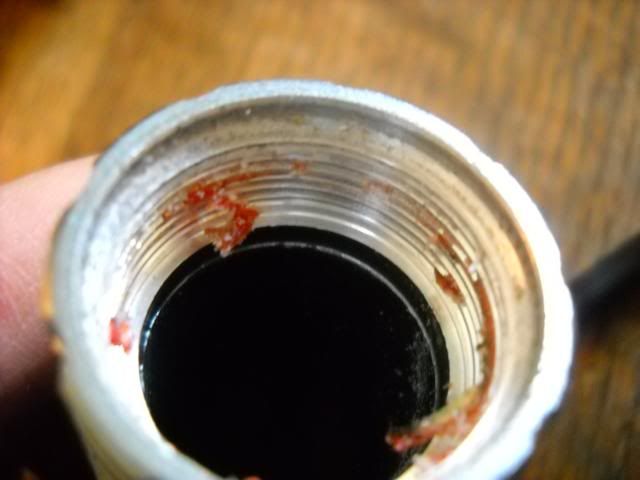
I was determined to get the head unscrewed today. I used a small torch to spot heat the threaded area, and using strap wrenches, managed to twist the head from the body without damage to the torch or breaking a wrench. I was surprised where it did come apart. Based on looking at the pill down through the head, I thought to gold colored section would separate. But it actually unscrewed below that region. There was not a lot of threading there, much less than what connects the two body tubes or tail cap. That was probably a good thing as less glue made it easier to get it off. Some sort of epoxy was definitely used there, as it was very gummy and once dried, became brittle (heat is a good thing in this case). I also had to pry the driver out since it, too, was glued in. Below are pictures of the process.
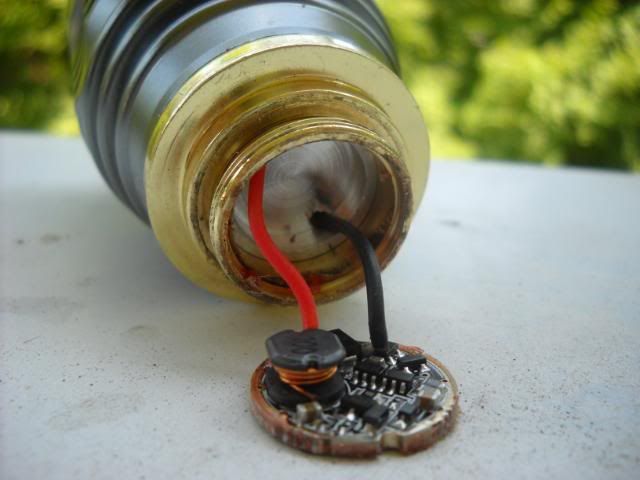
First look after getting the head off. I was overjoyed!

Close-up of threads covered in glue
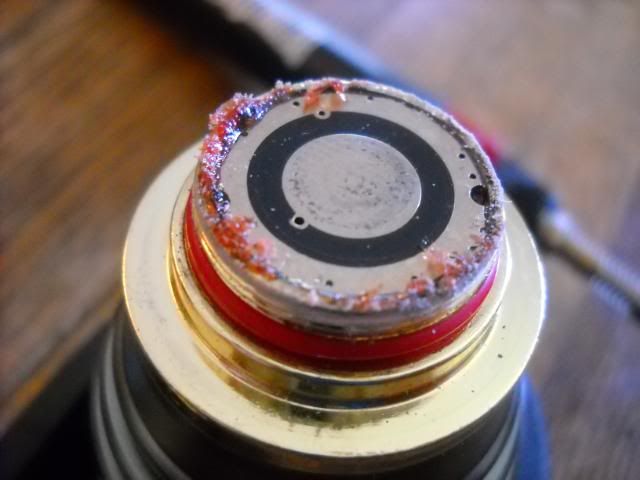
Close-up of driver. Glue seeped into the edges which made it difficult to pry out.
Now that the driver was out, I was scratching my head trying to decide how to get the pill out. There was no obvious holes on either the upper side nor under side to grab with my needle nose pliers.
Looking from the top down I could make out two different threads (head to gold section and gold section to bare aluminum. My best guess was the pill unscrewed and came out from the top, but there was no way to grab from this angle.
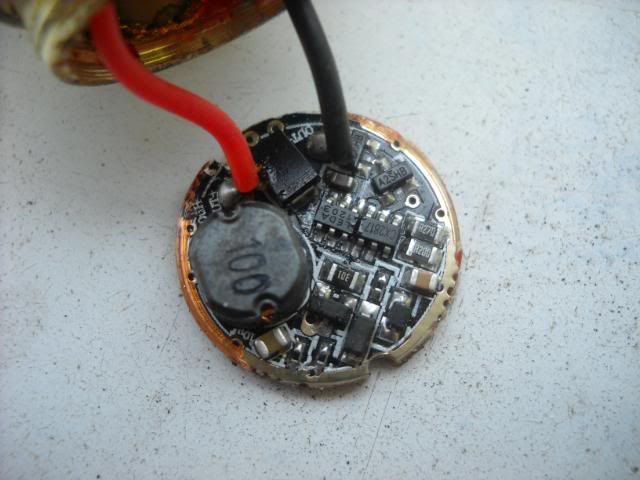
Looking at the underside, the only holes were for the leads, which I was able to grab with pliers, and much to my pleasure, it turned easily. I had to cut the leads to the driver since it would not fit through the opening, but since this was going to be a complete driver/emitter swap, I did not hesitate.
After a half dozen turns, the pill fell out of the head.
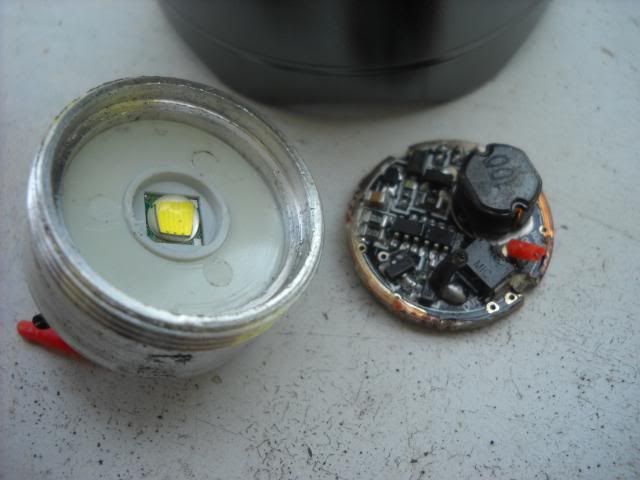
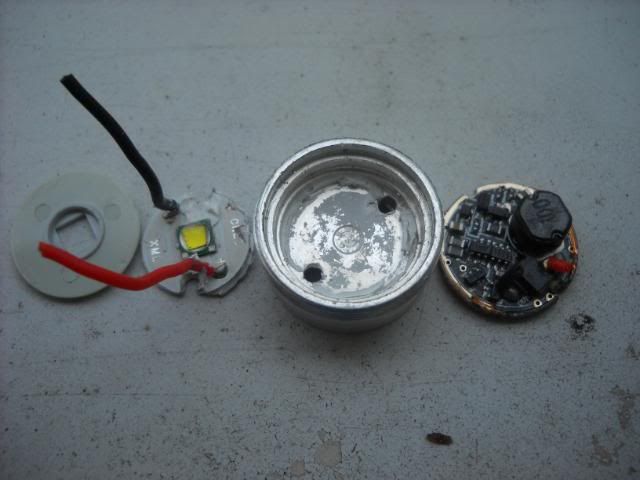
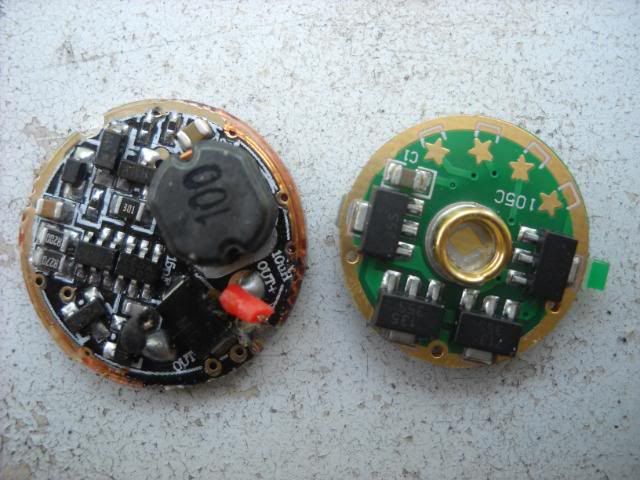
Pill and driver guts
Driver measures 20mm
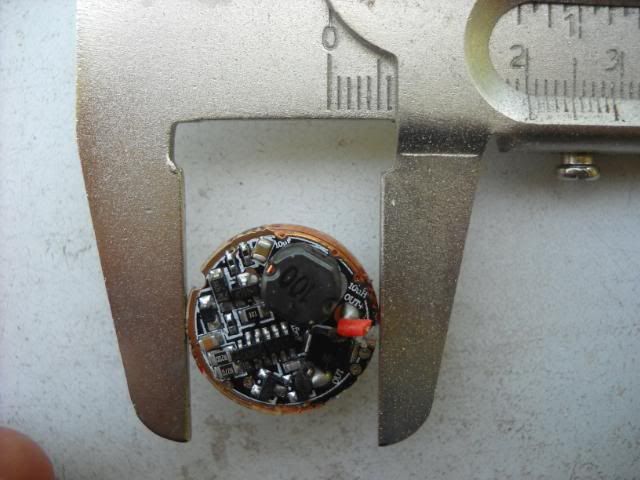
Comparison to 17mm 8 x AMC7135 board
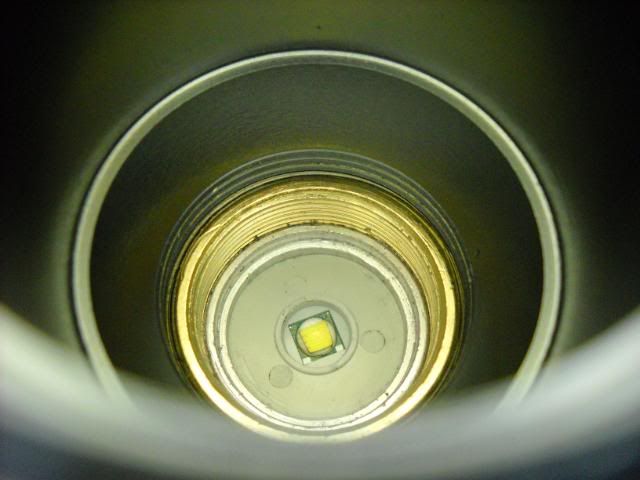
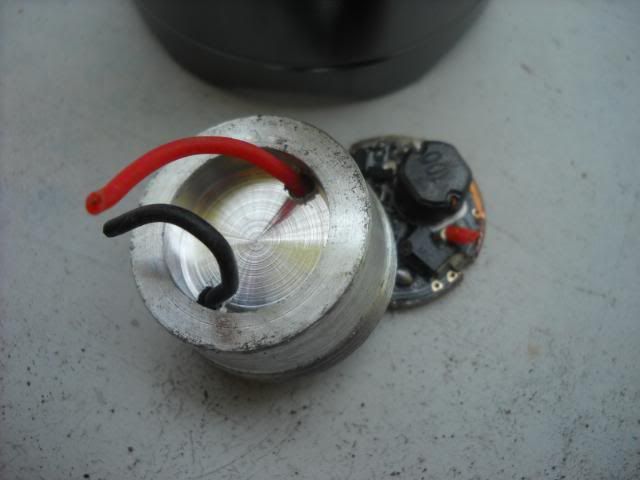
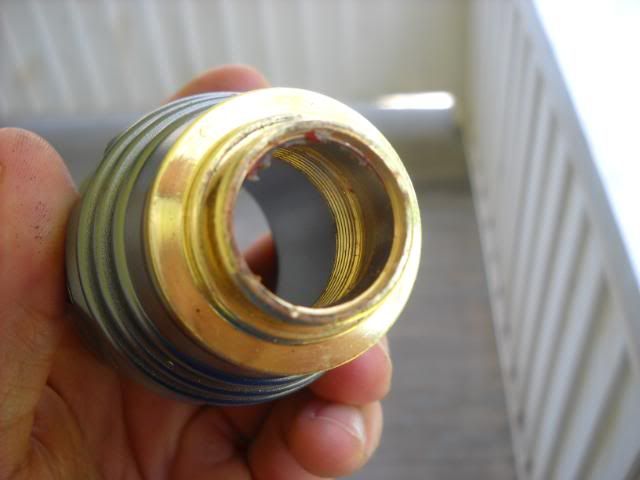
This is what the now head looks like with pill/driver removed. There is still the gold section remaining which should definitely be able to come out, but I have very little to grab onto with the strap wrenches. Since I will be able to accomplish what I need as is, I am going to leave this alone.
Note: Upon cleaning the glue off the end using 600 grit sandpaper, the gold color was removed and I saw bare metal - copper if I'm not mistaken!.
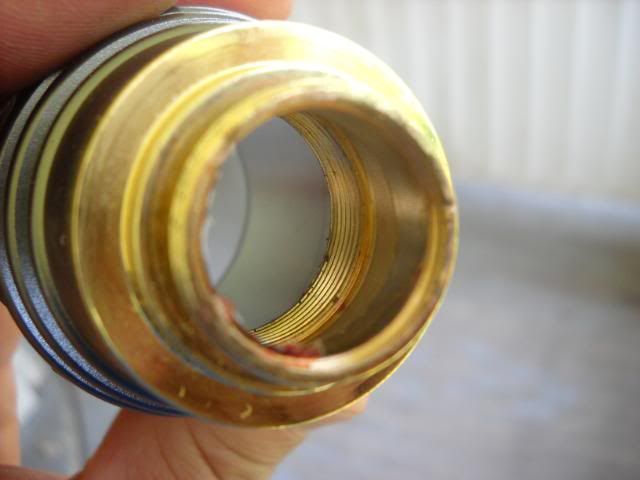
I just finished cleaning all the glue and epoxy. I think that will do it for today.
Now I need a suitable 3.6 - 8.4V 20mm 3A driver. Any suggestions??
Hi Hill, nice going!
Just a couple of questions, given how this light assembles, it appears heat transference should be great and would be able to handle higher power, right? Also, once the glue was cleaned off, does it assemble securely without the need to be re-glued? Thanks.
Richie,
Yes, I’m sure this light could handle high power. Before tear down, I ran it on high until the light shut off (~1.5 hr). The head and body were warm, but not overly so. I would guess it would run fine for a while at 2.8-3A.
No need to glue again. All connections fit together securely.
I have one of these pending for a project, might do the trick.
I can’t reccomend it or the seller as this is my first order, but its coming with a 14mm star and some other bits.
Nice looking light by the way, I’m loving the steampunk style, hope this or another driver works because I’m seeing one in my future. :bigsmile:
Thanks for the suggestion. That has the same specs as this driver from Lightmalls.
But the two look slightly different.
Lightmalls driver


Lck-led driver


Yep, the pictures are different, like I say, never used the store but I do believe others on blf have and since these are my first mods, never used the driver, the one I listed says 18mm, not sure if that’s too small or you can deal with it but I like the modes and my project involves a custom pill so size is not so much an issue. Hope it helps. :bigsmile:
Another possible driver from Int’l Outdoor. Height may be an issue with this one though, and it’s more expensive. But, it will run with 1 x 18650 cell, so may be worth my consideration.


That’s the same driver used in the Skyray 856. I would have liked it better without the blinky modes though.
According to the specs, a non-blinky set of modes is possible:
Features
*Suitable for 1 or 2*18650 or 26650 batteries
*Input voltage: 3-8.4V
*Current and Modes:
High (2.8A) - Medium (700mA) - Low (100mA) - Strobe - SOS
High (2.8A) - Medium (700mA) - Low (100mA)
*Current on High with 1 cell 2.5-2.6A
*Constant current circuit (2 cell only)
*Memory function
*This driver does not use PWM
*PCB Diameter: 18.5mm
*Contact board diameter: 20.3mm
*Total height: 8.9mm
*Gold plated contacts
*Low voltage protection 1 cell: at 3V the light will step down to low mode and start flashing
*Low voltage protection 2 cells: at 5.8V the light will step down to low mode and start flashing
*Reverse polarity protection
*Tinned leads
You can change between the set of modes by turning on the flashlight on low mode for about 3 seconds,the light will flash once, then quickly turn off the flashlight and then turn it on.
I think I’ll order one…or maybe two…