Need any machine work done?
I'd like to get on the buyer list too.
Need any machine work done?
I'd like to get on the buyer list too.
Maybe do some threaded capture rings of different sizes. If a few guys with a lathe did some it would spread it out. They’d all have the same ID but different threads. Unless the switch can use the stock retainer.
After filing down the diameter to fit into the M8 tail cap I had to make this copper ring to act as a riser so the stock retaining ring could press against it and transfer ground into the switch. But the M8 tail cap is totally non standard.

My Cooly needs a Tofty switch

That is a really cool idea. Essentially order the retaining or outer ring needed for your specific light. Just need to have a narrow body on the switch that accepts the rings with various outer diameters and the same ID.
In a pinch if the battery tube is too long, cut a 2mm piece of it to use as a capture ring. The kirf might just shorten the tube enough.
Thanks Tofty. Got my switches today. Very nice solid parts. They drop into my convoy tail caps. I’ll post shim ring dimensions when I cut them. Waiting on new black switch covers.
Tofty might need to gear up soon…fixing to have a few VERY high power drivers hit the street!
Think a 12A Nanjg 105C 32*7135 is good…wait till you see what’s coming ![]()
My Convoy C8 takes one quite nicely, will have to figure out which washer fits between the switch and rubber boot to allow function…or make one…and ream out the aluminum retaining ring a little. Other than that it looks like a pretty easy install on a C8.
The new FET drivers will need these ![]()
The new Samsung 25R, Efest 35A and Sony VTC4 cells will play nicely with these too! ![]()
(7A direct drive to an XM-L2 on copper)
I fitted one of these switches to an FM host with single 26650 direct drive to sst-90. I was to lazy to do the copper braid mod so I had a second spring sitting over top of the first.
After fitting the Tofty switch I carefully screwed the tail cap on. How is this for luck?- It was perfect! That is with no spring at either end of the battery! To my calibrated eye, I reckon there is a noticeable difference in output.
Super Happy :party: :heart_eyes: ![]()
Now I am sure I am getting the full current
That is certainly pumping the amps through the switch. Nice that the switch went straight in. You will have to report back after some extended use.
I received my two extra switches in the mail a week or so ago. Hopefully one may be going in a project coming up. I just need to work out how to make it a forward mounted switch.
I put one of my new one’s in the C8 that Buck made the big 8 ounce copper pill for, used one of the new FET drivers too. It showed 6.31A from a Sony VTC4 through an XM-L2. Had a problem on the driver board though so had to pull it, and then the switch didn’t work with the original Qlite due to a different spring on the driver. But it’s very easy to swap out! ![]()
I had to bore out the hole in a washer to fit over the activation side, so the rubber boot could interact with it properly. Then I opened up the inside of the retaining ring a bit. Other than that it was simple, nothing done to the switch itself at all other than shortening the brass post.
I have always used forward clickies, but am really liking the reverse clicky as you don’t have to turn the light off to change modes. Makes perfect sense now that I’m using it, ruins the many forward clicky’s I’ve got as they’re not a bit exasperating. lol
The Tofty in my M8 is seeing 10.90A now, run through a pair of Sony C4 cells to power the MT-G2 via a Zener modded FET driver. Really sweet! And yep, this is another of Bucks big 8 ounce copper pill/heat sinks.
What I’m really enjoying is the collaboration of parts from different members here, all put together to make an awesome light! Go BLF! ![]()
I got mine today. It doesn’t fit in my Solarforce S11 Tailcap :_(
But it do fit in the standard Solarforce Tailcap, avantageously replacing the Solarforce switch.
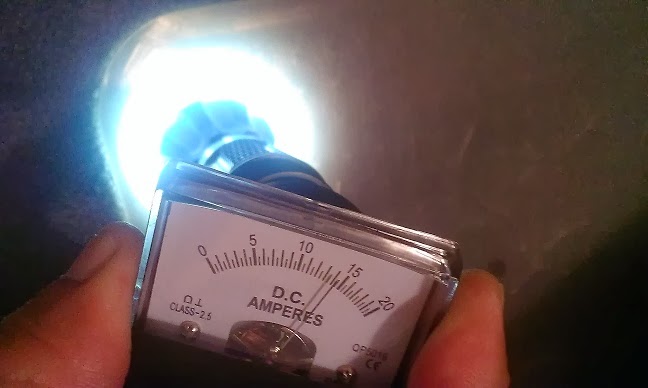
5A “only” for me for the moment, but so far my M3 head is brighter with Tofty’s switch :heart_eyes:
And so far I love the switch, a nice addition over the Mcclicky forward clicky, for those who prefer reverse clicky.
Now I’ll consider a build with a heavily driven MT-G2…
Hey Lithium, why doesn't it fit? Is the opening in the tailcap too small? Does it look like there is a stepped-thread inside the tailcap? My S8 switch was the same, but that extra piece of threaded tube inside the tailcap can actually be removed. Dont use tweezers, as they will bend, but I used a long-nose plier, and that got the threaded tube out, and then you can fit a standard p60 switch in there. The only trick is that you have to get a retaining ring somewhere to hold the switch firm, as the current one wont do anymore after you've removed the threaded tube. If you don't have any spares, buy some replacement switches at Solarforce, they are only $1.x.
Let me know if you need more help ;)
Hi,
Yes, the opening where you are supposed to put the switch is smaller on these S11 (and S6, haven’t tried others) tailcap, exactly like what you described ![]()
But I can’t see nor remove the extra piece of threaded tube inside, it really appears to be in one piece, with two different bore diameter :quest:

Sorry for the crappy pic, but can you confirm there is something to remove, before I destroy my tailcap ? ![]()
Try setting image size to 100 and the picture will be larger.
You can click on the picture to see it 100% (normally) ![]()
There is no sleeve that can be removed in the S11 (and other similar tailcaps). The step is required due to the reduced diameter of the main aluminium body, behind the stainless steel end piece. The S11 switch is smaller than the normal one, as is the retaining ring. I apologise for any confusion. Earlier in the thread i said that the switch will not fit into the stainless ended tailcaps, but that information is easily missing in such a lengthy thread.
Hmmm, yes yours looks slightly different to mine. I could clearly see that the threaded tube was a second piece of aluminum, and there was clear indends in it to use as rotating grabbing places. Also, what made me think it has to come out, was that there was no other way to remove the tailcap boot, as the threaded tube actually held the tailcap boot in place. But I can see you managed to remove that :|
So it doesn't seem like my solution is gonna work for you. It seems like you would have to sand the switch smaller like Dale had to. Maybe ask him for tips.
Good luck
Thank you both for your replies. Well, no problem, I’m going to use the switch in another tailcap, or probably another lamp, since 5A+ are high for those Solarforce, regarding thermal dissipation.