Awesome high cri pocket rocket Dale !!
That is a nice addition to the X6 collection Dale, more special than a triple would be.
Thanks guys, this one makes 14 X6’s, tried to make them all different from each other. ![]() In that 14 are two SS with Cu pills (one stock, one a triple), one full copper (Nichia NVS333A ultraviolet), and a Titanium from Rey (triple XHP-50.2). 3 have extension tubes and run XHP-70 or MT-G2 emitters. One is an SBT-70 on a hefty copper pill (the one like this newest that was designed for a quad, have an Illumination Machines 35mm faceted reflector in that one) The others are variations on triples or quads and 2 have a more normal build, one with XP-L2.
In that 14 are two SS with Cu pills (one stock, one a triple), one full copper (Nichia NVS333A ultraviolet), and a Titanium from Rey (triple XHP-50.2). 3 have extension tubes and run XHP-70 or MT-G2 emitters. One is an SBT-70 on a hefty copper pill (the one like this newest that was designed for a quad, have an Illumination Machines 35mm faceted reflector in that one) The others are variations on triples or quads and 2 have a more normal build, one with XP-L2.
Running out of ways to build em. lol One of the triples has a titanium tube from Rey’s lights, it was for an 18350 but I extended it with a stripped 18350 Convoy tube.
Also have an aspheric X5, a warm white X5, and a stubby X5 running on an 14250 cell. And of course the 2 full copper X5’s that are in the matched sets. So 20 of my 140 are in the X6/X5 family. ![]()
Will have to get some more X6 hosts to be able to experiment further, thinking I really need a triple XHP-70.2…. always wondered how a triple SBT-70 would do, might be hard to find em now. Maybe I should build a quad UV light… hmmm, there still seem to be variations I haven’t covered. ![]()
Lexel, how’d you go about getting the emitter shelf out of the tube on the G35? I have broken the glue bond on the head, haven’t disassembled it further but would like to gain access to the driver…
I cut threads in the 2 holes
Then used long screws and a piece of wood to pull it out
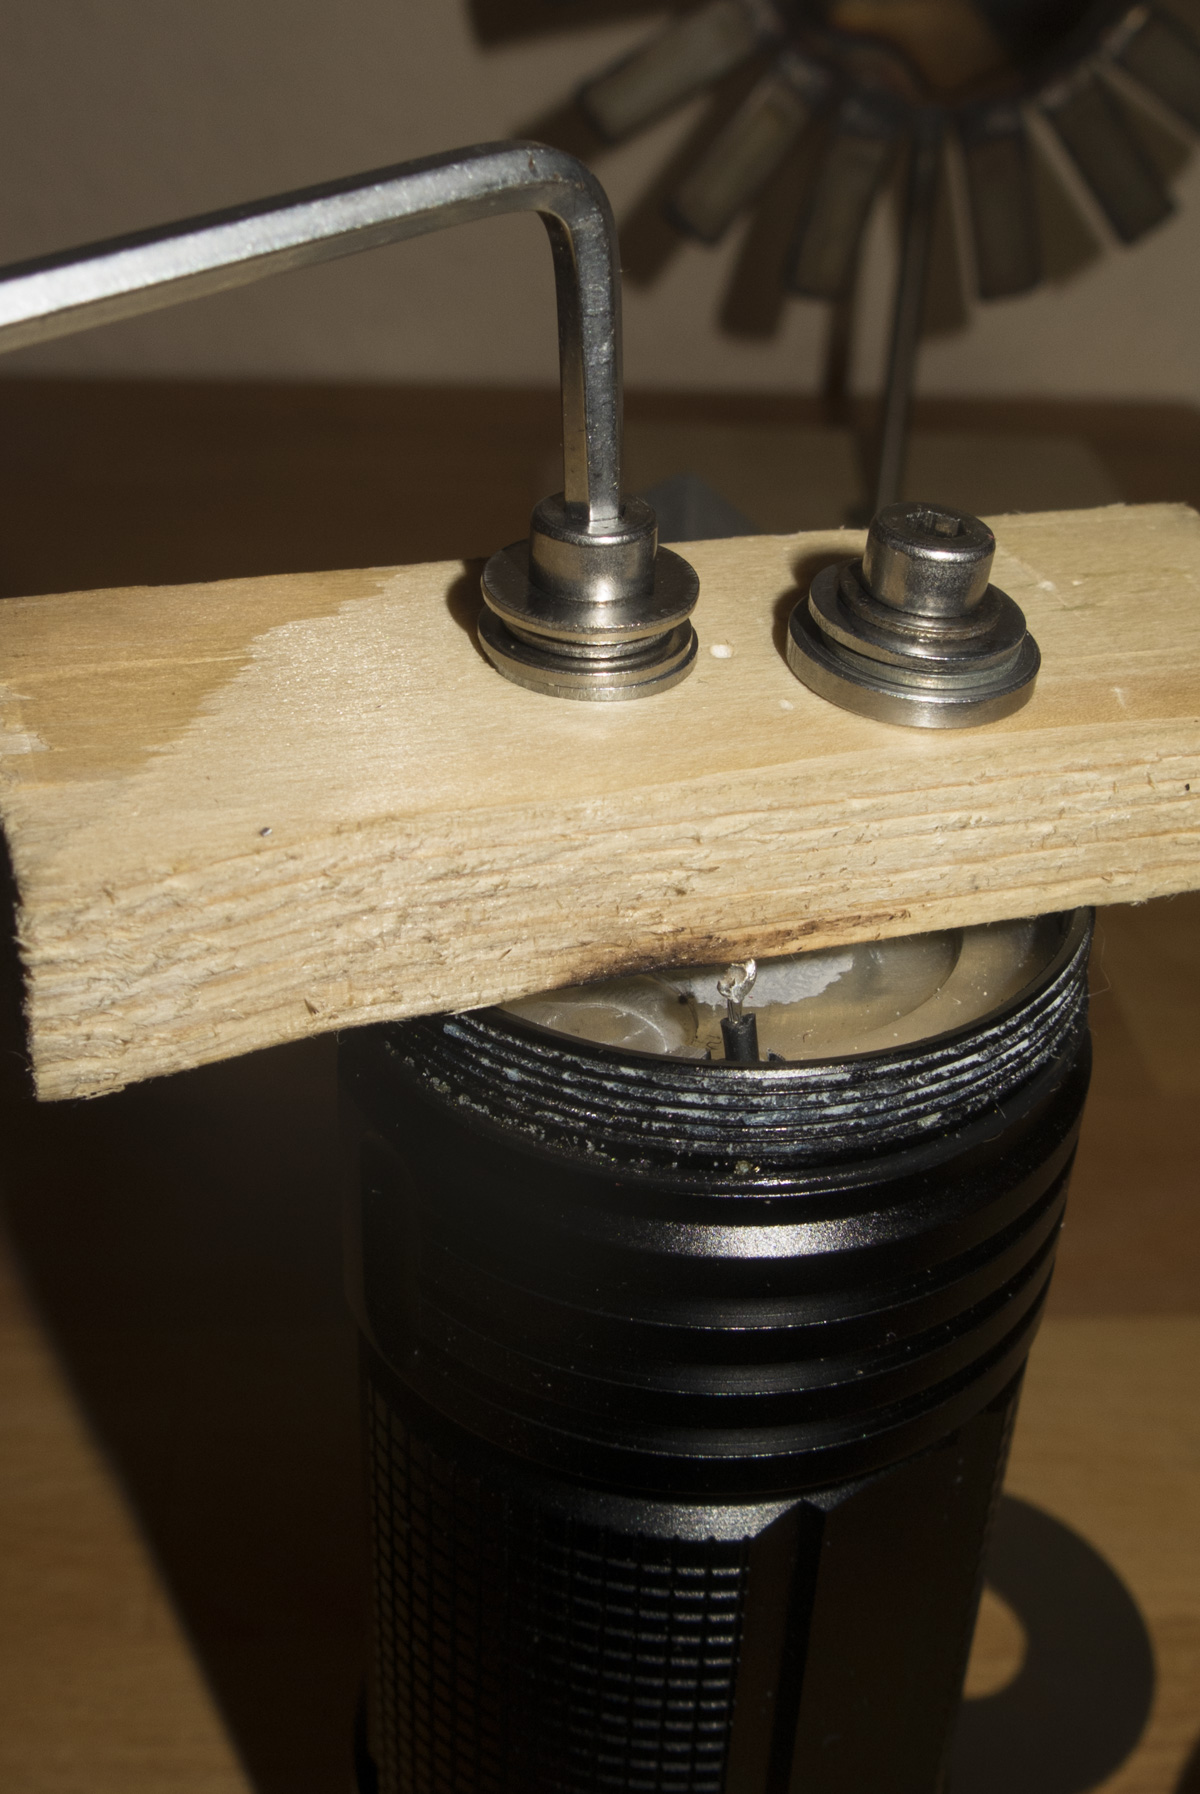
They had it seriously glued didn’t they? I got the head broken loose but it took quite a lot of heat. I cheated though, mounted it in my lathe’s chuck and ran a torch over the thread area, then used my Boa Constrictor strap wrench to turn the body.
I was looking for some separation, needed the reflector to be seated in the head but a bit higher on the emitter. Worked, and for now I’m quite happy with it’s performance. I had already considered the “dent puller” technique to remove the pressed in shelf. Other fish to fry for now though…
Thanks for sharing your technique. ![]()
Well I didn’t want to start a topic of its own just for something kind of off the beaten path , so I thought I would post here………….
I modded a piece of wood……lol
Yea I said wood , plank , board , whatever it may be in your neck of the woods.
Seriously though I was just thinking of ways to take a little less space with my light collection but still have them accessible and in view I had 2 different ideas , with the first taking a little less room and the second one taking up half the space as having my lights just sitting on a shelf beside each other.
Of course I will need 3 or 4 more of each of these to get most of my lights consolidated in a smaller space , but these were a start.
Here is the “chunk” of Oak I did for only 3 lights…….

and then Here is a couple of pictures of the “shelf” I made that can be used in 2 different configurations , 1 for just hanging the lights with a cigar grip , or tactical ring and 2 using it as a shelf and a light hanger combined.


And the missus knows? I rely heavily on my stashes.
If SWMBO saw a shelf like that in our house, she would retaliate with a (not-so-budget) shoe binge buying expedition.
Haha yea , not only does she know , but she usually checks out my lights when I get them and has a number of lights herself that she has laid claim to before I even had a chance to get a review finished on them.
Nicely done robo, great way to condense the collection while still keeping every one of them readily available!
Might have to start thinking about a “flash cabinet” in red cedar. ![]()
Thanks Dale.
The red cedar is my all time favorite wood I think. Love the smell of raw Cedar and when you put a coat of Polyurethane on the outside of a piece it just really makes it pop.
If I can reign in my flashlight spending habit, I might have to commission you to build me a corner cabinet with the Cedar, glass inserts in the face (door) and a light inside with maybe mirror panels in the corner sides to reflect light and show the lights in a 3D perspective. That’d be cool, brass knobs on the door and brass hinges on the red wood. Dang, what am I talking myself into here?!!!
haha……what are you talking US into?
I am sure it could be done though……just have to get me some more cedar here to start drying good before I try to make something like that. I would hate to put it together and then have something crack 6 months or a year down the road from the wood drying out.
Robo, do you or does anyone watching here know if the blue bezel on an Olight S1A unscrews or is it a press fit?
I got a beautiful little solid copper S1A with Rose Gold PVD coating and they put a cool white XM-L2 in it, coming through the TIR it’s got a slight green tint. I’d like to put an XP-L V6 3D in it. Don’t want to mess up the gorgeous finish though, so I thought I’d ask first…
It is probably same fitment as the S1 Baton and S-Mini, on those lights the bezel is press fit.
![]()
I thought it might the case, thanks Bobby. Not really what I wanted to hear but I guess that’s better than threaded and glued tight as a tick on a hound dog.
Now I have to decide if the color is off enough to make me attack this gorgeous light…
It is doable without damaging anything, at least i successfully opened my S1 Baton and S-mini, the S-mini was rose gold version and it did not have single scratch after my work to it.
There is video from a BLF member Thomas X3 on youtube on how to remove the bezel without doing damage to the light.
Here is the video

Nice mod on a few chunks of wood robo. :+1:
Definitely, and thanks for linking my personal YouTube channel ![]()
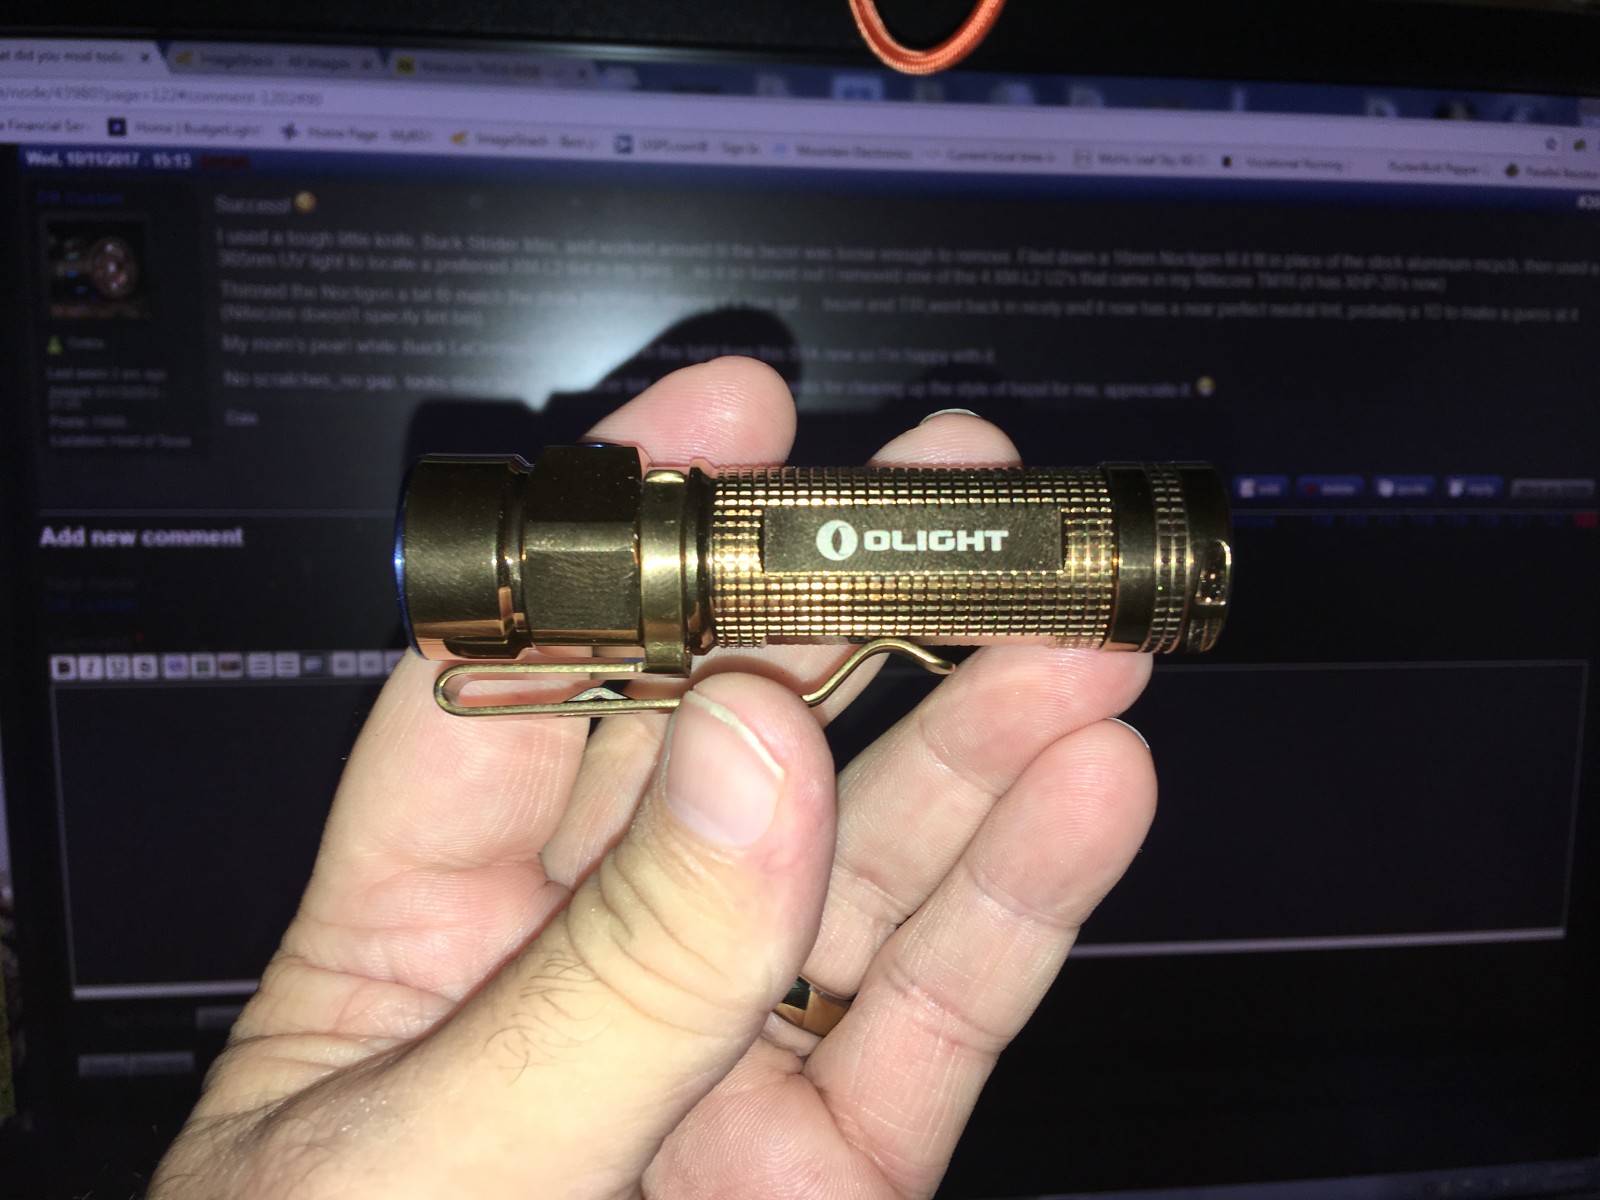
Success! ![]()
I used a tough little knife, Buck Strider Mini, and worked around til the bezel was loose enough to remove. Filed down a 16mm Noctigon til it fit in place of the stock aluminum mcpcb, then used a 365nm UV light to locate a preferred XM-L2 tint in my bins… as it so turned out I removed one of the 4 XM-L2 U2’s that came in my Nitecore TM16 (it has XHP-35’s now)
Thinned the Noctigon a bit to match the stock thickness, leaving it a hair tall…. bezel and TIR went back in nicely and it now has a near perfect neutral tint, probably a 1D to make a guess at it (Nitecore doesn’t specify tint bin)
My mom’s pearl white Buick LaCrosse looks splendid in the light from this S1A now so I’m happy with it.
No scratches, no gap, looks stock but has the nicer tint. A win for sure. Thanks for clearing up the style of bezel for me, appreciate it. ![]()
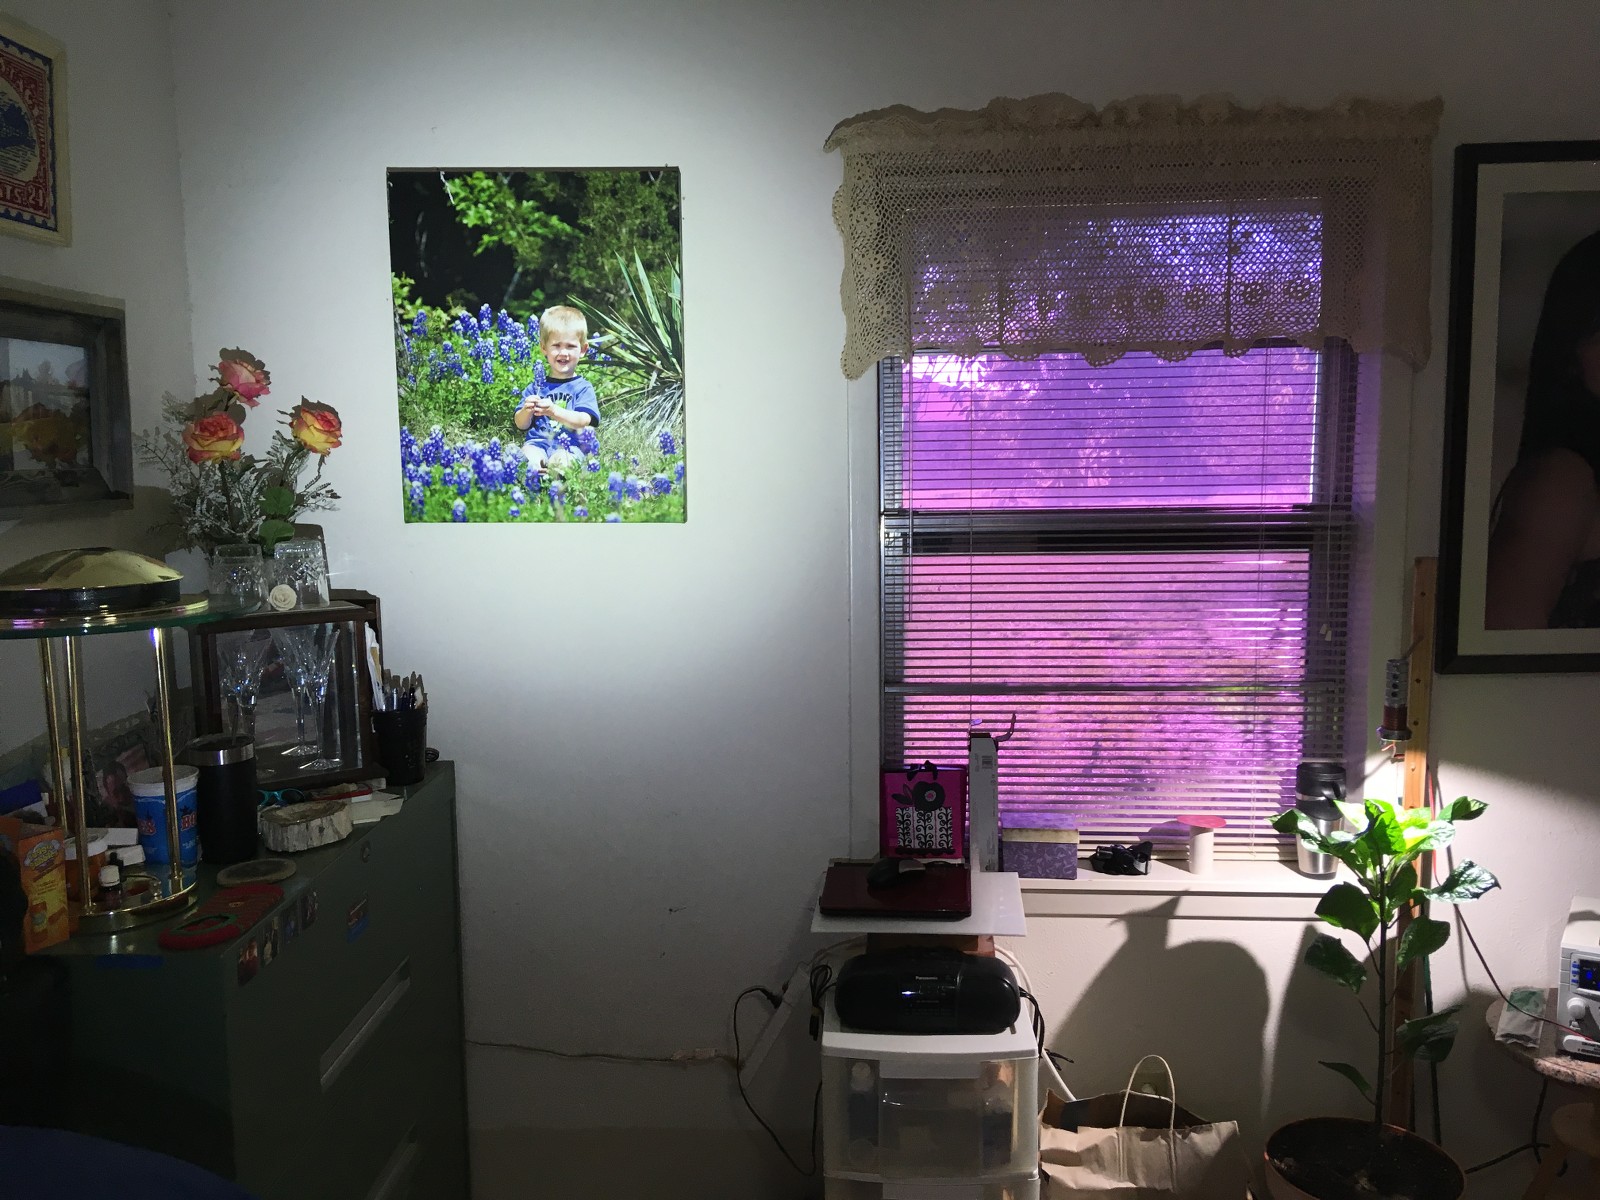
Beam before modification… the plant light is a Cree COB rated at 93CRI for comparison sakes…
The solid copper S1A in Rose Gold PVA…after the mod…
And the beam after the mod, much nicer color! The picture on the wall is a 16x20 canvas of my son when he was little.
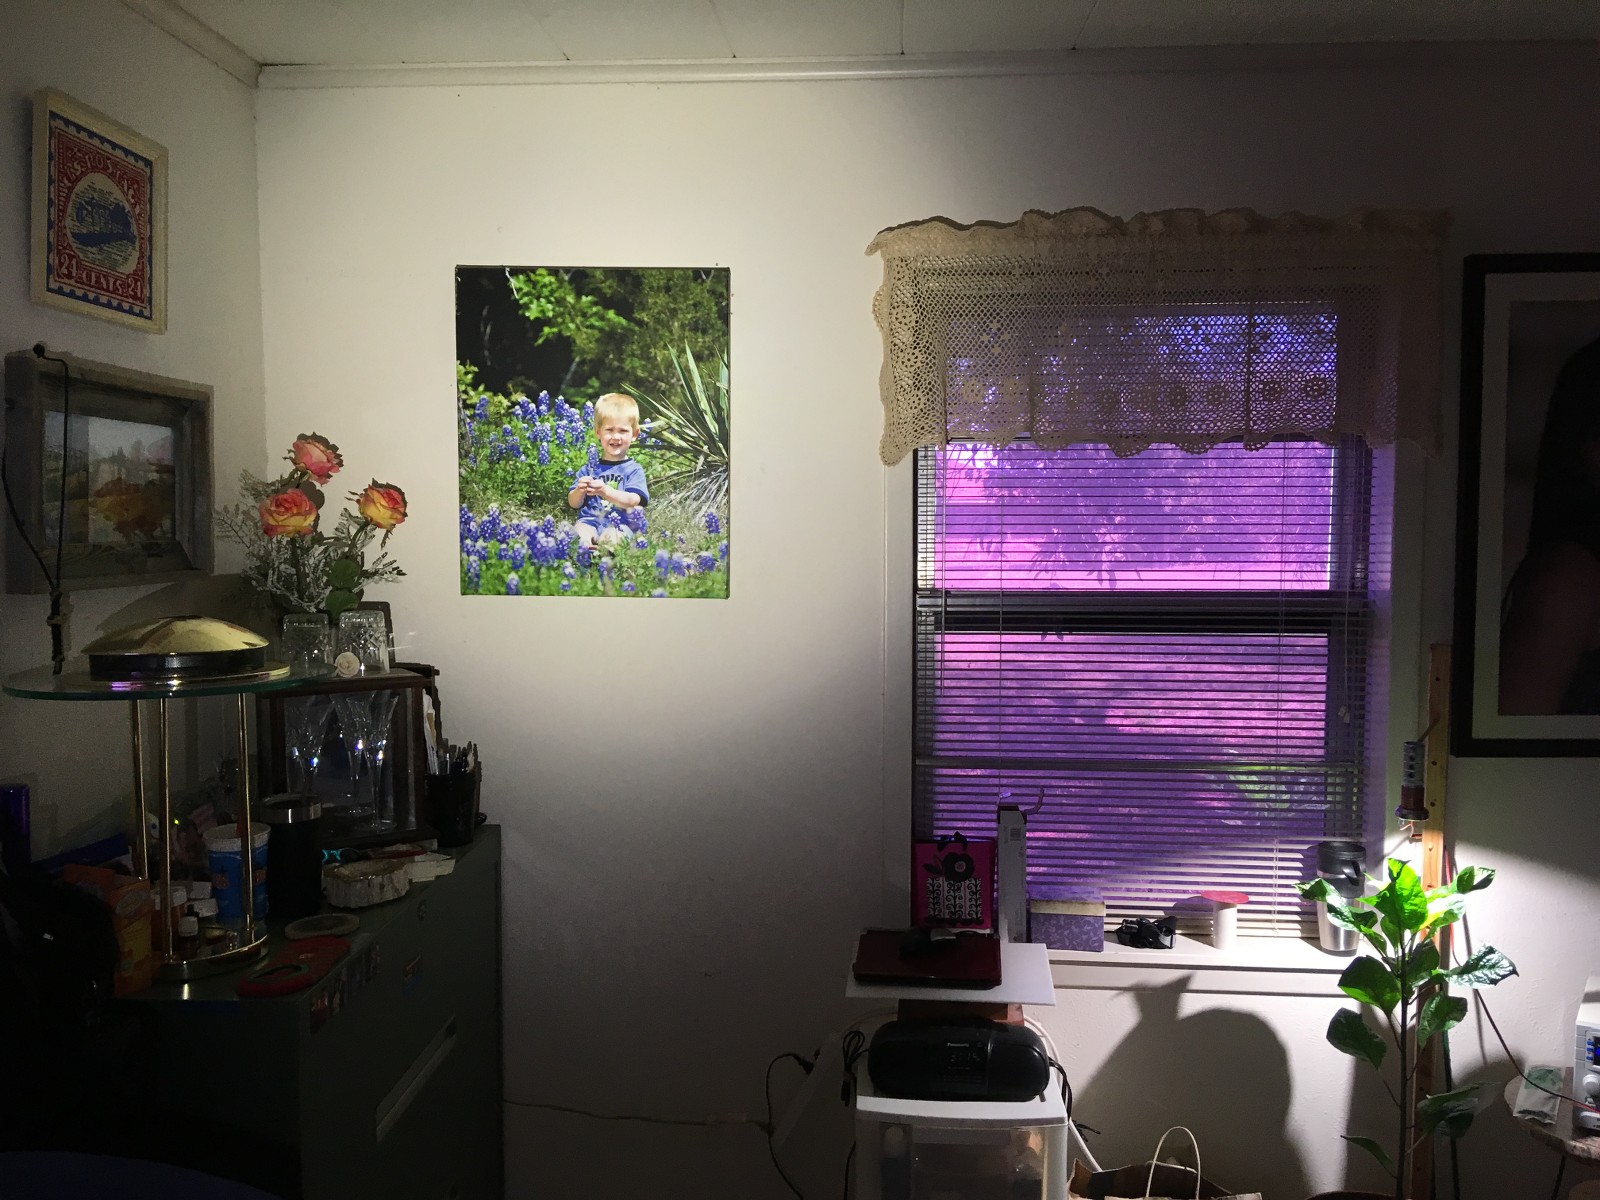
The ceiling tiles, for white balance perception, are white styrofoam. ![]()