That is very cool. I’m a flatworm with computers so flashing chips is out of the question, which I am ok with except for gchart’s smart tails, I’d love to be able to use those.
Quick mod,45°pebbled lens (right) on C01R


Bought here
http://www.aliexpress.com/item/32989679045.html
I just rebuilt two Polarion packs and one of them is fine (14.4V), but the other one shows this exact issue (only 5.55V between P+ and P-). It’s probably noteworthy that the PCBs were different and the one that works looks older…
The voltage between V+ and V- is 14.4V, so the pack is correctly built. Balancing wires are showing correct 3.6, 7.2, and 10.8V, respectively.
I’m afraid they have built in a “safety” program that kills the output after seeing a severe undervoltage (or after some amount of charge cycles? they repeatedly mention that the battery is good for 400 cycles only…).
Does anyone know how to reset that?
congrats on your mod of the 2019 RRT-01… I did not know the reflector needed replacing, but glad to hear the ones we use for the 2012 model, that moderator007 sourced from kaidomain, works in the 2019 model also…
very sorry for the damaged driver, I hope you manage to get it fixed.
fwiw, with the V10r Ti+ reflector, I find the unshaved LH351D produces a perfect beam… I like the 2700K… shown in a V11R

the beams:
 .
.
Did not do much of the work myself. But finally had the time to play with my Bob_McBob SC64 with sw30 219b.
Set the modes up nicely and added a Ti deep carry clip and a wrapped tail magnet.
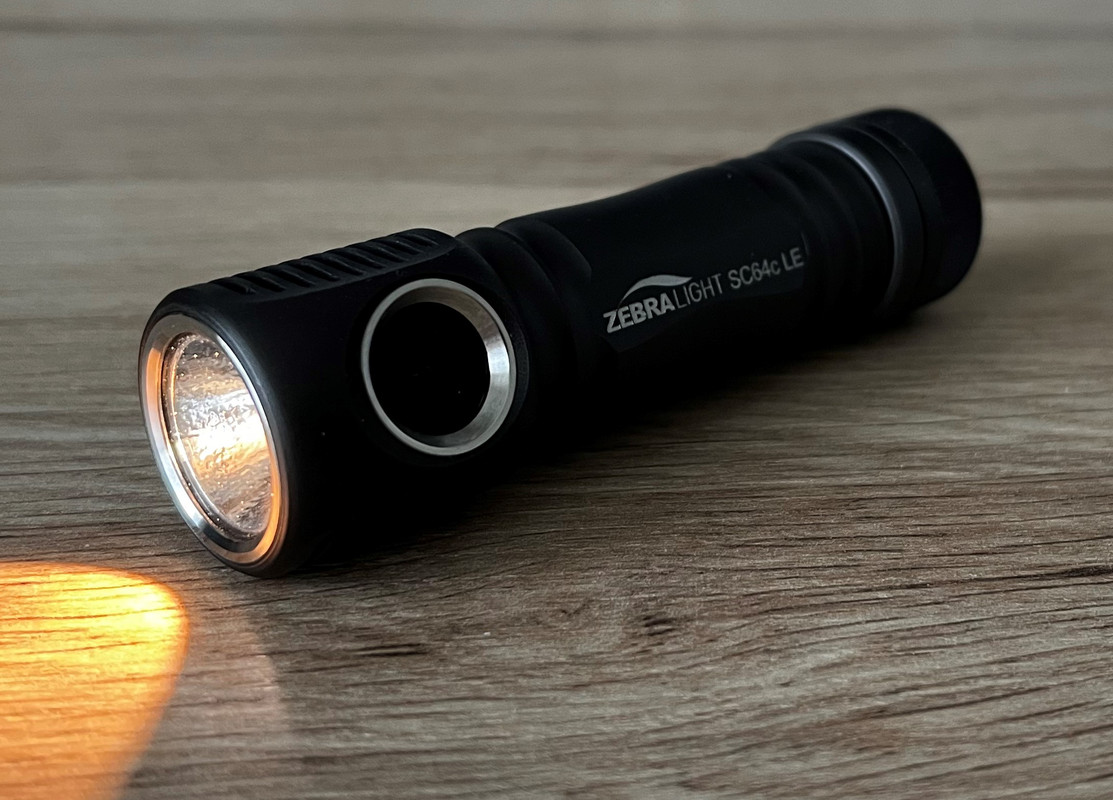


Nice clip and magnet ![]()
It might be pre-2019. I only really know it came with XM-L(2?) and no tail switch.
here are two RRT-01, both are no tailswitch versions:

the 2019 uses an XP mcpcb, does not require removing the driver when splitting the control ring (the design is same as V10/V11 sunwayman)
the original uses an XM mcpcb, and requires removing the driver before splitting the control ring assembly
Thnx! Really like your ‘’old school’’ Jaxman E2L edc.
I just received a Ti S Mini
 .
.
I want to change the LED.
Do you think a 219b can work in a Ti S Mini if I change the Tir to a 17mm Tir for 3535 footprint ?
Certainly if the optic fits. Certainly not if you use the original optic. Maybe good to have an xml2 as backup. It’s not a very hard mod to do btw, just work your way around the bezel with a knife to open it up. Have you seen the video by - X3 - ?
Why wouldn’t the original optic work with 219B?
I have many lights that have reflectors or optics sized for XML2 or XPG.
In my experience, the emitters are interchangeable. The beam might not always be perfect when swapping LEDs, but they always work well enough.
I tried the optic over an 219 when I opened the light the first time and it was not nice enough for me. I have a feeling Jon is a bit snobbish about his beams also.
yes, Ive been reading the teardown threads, including for the S1 Mini… which is where the Yaji Tir are mentioned.
And Ive read that the main obstacle to a S Mini mod to 219b is the stock XML2 Tir… hence my interest in a Tir swap to Yaji 3535 profile.
Ive not confirmed if the S1 Mini and the S Mini use the same size Tir, but I did read that the 17mm Tir fits the S1 Mini.
Urban Widsom or Urban Legend…
I trust Geuzzz, since hes actually done it, and also X3…
so… just covering bases…
I can start with a 219b in the stock XM Tir, to confirm how horrible it is…
then have a couple backup options:
backup Pebble Tir,
backup XM-L2 LED
there is also an Aspheric Tir that I find very appealing
fwiw here is the stock XML2 beam:

sw30, sw45k, NW XM-L2:

thank you both for the brainstorming… Im working up my courage to slip a blade between the bezel
Wow!!! That’s pea-soup green! ![]()
![]()
![]()
Definitely needs a new emitter. Just about anything would be better than that.
Most optics I’ve dealt with that are designed for XM-L/2 provide crap beams for 3535. Original RRT01 beam was crap even with 4040 (luxeon V).
I’m using an original OP reflector from an early version Niteye Eye10 in my TCR-01 with SST-20 right now. I quite like it.
The beam is pleasantly smooth with good throw. Sure the outer edge of the spill is slightly brighter than the rest of the spill, but it’s almost unnoticeable…. even in a white wall test. In real-world use I don’t see it at all the beam looks perfect. I have many lights with orange-peel reflectors designed for their emitters that look much worse.
In my older RRT-01 I currently have a different OP reflector which I purchased from Kaidomain years ago (I think). It gives an even more uniform beam than the Eye10’s beam, but has a noticeably dimmer hotspot.
My original RRT-01 and TCR-01 both came with the same smooth reflector that was absolutely horrible. It produced a horrendously ringy beam even with the XML-2 emitters that came with those lights. Yuck!
It’s a mod! This has been done a lot to firm up the feel of a switch or make it more responsive without going to the trouble of replacing it with a different switch. An easy way to to use some hot glue on the plastic plunger of the switch itself, then you can trim it to suit with a razor blade. A suitably thick plastic disc can be punched out with a paper or leather hole punch and glued on or just tucked in there. Even easier sometimes is to use a different switch boot that has a nubbin attached to it…use it as-is or trim it down a little bit. Something like this type:


@CRC:
For fine tuning the gap between the top of a clicky switch and a button boot I recommend the following:
Layer up small pieces of tape on the tip of the switch.
- I tend to use Gaffer’s Tape or 3M Safety Walk Tape. However, any tape will do…. even masking tape.
- The tape doesn’t need to be strong. It won’t come out of position with use since all the action is straight down into the tape. There’s no lateral force.
- Using tape gives you very precise control of the height of the switch without affecting the feel of the rubber switch. It’s also easily removable and adjustable.
For me, switch feel is soo important. I totally get it. Forward clickies go on basically every light that isn’t an e-switch and proud, hair-trigger setups are my favorite. These are usually always throwers with one mode or dual switch or no mode memory, turbo first. I approve ![]()