Initially, this started as a Lumintop FWAA and a Sofirn SP10 Pro.
I removed the bezels, optics and stars and swapped them. This made the SP10 Pro into a triple and the FWAA into something similar to the upcoming Lumintop FW1AA.
The mod wasn’t too difficult.
The stars were pretty much interchangeable and the bezel threads matched perfectly. Main thing I needed to do was drill new holes for driver wires through the shelves of each light.
I think I also had to replace the driver wires on at least one of them as they weren’t long enough. However, I don’t fully recall as I did this mod a couple months ago.
The pseudo-FW1AA works quite well and has a nice beam pattern. Currently, I have an LH351D inside, but that will be replaced shortly by a Nichia 519A. The black bezel with grey body doesn’t look great though.
For the SP10Pro triple, I wasn’t happy with the low output of the SP10 Pro’s driver with very floody Nichia 219C leds. I replaced them with SST-20s, but the only extras I had available were very greenish. Ugh! I replaced those with Oslon White 1 which solved the floodiness problem but came with bad color-temperature and CRI. More Ugh!
I also ended up swapping out the SP10 Pro driver and replacing it with an SP10v3 driver. The SP10v3 lacks Anduril 2, but its UI isn’t bad. It’s like an Olight interface. More importantly its 5amp max output was much better than the SP10Pro’s 3amps.
It’s also worth noting that the SP10 Pro / FWAA swap is reversible. The only permanent changes are the extra holes in the shelves, but those should not affect long-term operation or prevent the mod from being reversed.
The SP10 Pro also received some other minor mods: I cut down a steel washer and glued it around the ring to make the switch much more resistant to accidental activation. I also replaced the tailcap spring with a Be-Cu low-resistance spring. And swapped in a different clip.
Today, I modded the SP10 Pro again. This time I replaced the FWAA star, optic and bezel with the star optic and bezel from a 4000K Wurkkos TS10.
The TS10’s bezel legos perfectly with the SP10 Pro’s head. And since they’re both black it looks way better than using the FWAA’s bezel.
The TS10’s star is wider and thinner than the FWAA’s. Initially I tried widening the inside of the head with a dremel, but didn’t get far with my available tools. Eventually, I decided to grind down the edges of the TS10’s star. Unfortunately, this means the aux LEDs got ground off and are no longer on the star, so this light has no aux. I would not be able to reassemble the TS10 I took this from and have a fully-functioning TS10.
Because the TS10’s driver is substantially thinner than the FWAA’s driver, I cut a couple washers from copper sheet to lift the star to the correct height. These washers are layered between the star and the shelf with Arctic Silver 5 thermal grease between all of them.
When I did the mod I also swapped out the SP10v3’s driver and swapped back in the SP10 Pro driver. So this triple SP10 Pro has Anduril2 with boost driver. 3 amps from the SP10 Pro’s driver seems fine for the TS10’s emitters. It doesn’t look too dim. I’m undecided whether I want to swap the driver to the more powerful SP10v3’s driver.
The 4000K emitters from the TS10 look great in the SP10 Pro. The beam is much more focused than an FWAA. And the tint, color temperature and CRI are all superior to an FWAA.
I quite like it so far. With a sideswitch and knurling it feels comfortable in the hand. Less slippery than a TS10, and the washer around the button solves the problem of accidental pocket activation.
I’m amazed at how good the TS10’s Latticebright LEDs are. I remember first hearing about Latticebright years ago on these forums. Back then, Latticebright was widely derided for their knockoff inferior clones of CREE leds. Flash forward 5 years and today we have the TS10 whose leds are superior in the tiny-triple format to any of the XP-footprint options on the more expensive FWAA.
I think aux high on TS10 was too bright anyways. It was enough to light up a room by itself. Far more than needed just to find the light on a nightstand in the dark which to me is the main purpose of Aux leds.
Aux low is really the optimum aux setting. Same for other anduril2 lights like the Emisar D4v2
I am just amazed at all the people that managed to get the bezel off the TS10. I’ve been trying to get the bezel off mine since the first day I got it and it just won’t budge. I’ve tried using the rubber sole of a boot as well as a pair of gloves. I even tried a pair of pliers but I’m afraid of applying too much pressure and deforming the aluminum. Is there some sort of tool that can get the bezel off?
Most of the threadlock compounds and glues that manufacturers use will soften up nicely with a little heat. You could try running it on turbo for awhile, bump it up a few times, then immediately try to unscrew the bezel. It usually won’t break loose immediately but if you maintain strong pressure it might just let go. If not then you could try longer/higher heat with a hair dryer or heat gun on a lower setting (don’t want toooo much heat and you don’t want to discolor the anodizing either). There are some clever slotted bezel clamp wrench things (I think it was HDS that made some for their models) that you could make easily…slab of material that can flex a little, hole drilled to match the bezel size, and a v-slot cut into it so that when squeezed the bezel hole will shrink a little and provide even clamping pressure. Similarly you could cut some wood v-blocks to use in a vise but then you also need something to twist the head with…and they make some good polyurethane vise pads these days, too, usually with a 1/2” or 5/8” hole that will grip this light nicely (position it in the center of the jaws). On the TS10 there isn’t anything to provide purchase like flats or a hump, so it’s more difficult and popular strap wrenches are a bit too wide. Just be cautious with clamping because it’s surprisingly easy to bend the thin aluminum in most lights and there’s no good way to make it round again (which can be fine, but it could also make it where you can’t screw the bezel on again or even not be able to fit the lens in there (or could break the lens)). But try some gentle or medium heat first. Don’t try any solvents…if they even get down there you run the risk of vapors affecting the emitters (or the aluminized surface in reflector lights). Also, when it budges, go carefully and be sure that the optic isn’t going to twist with the bezel and shear off the emitters from the board…can press down on the lens a time or two as you unscrew to help there if needed.
I may have been wrong about HDS and those wrenches…they don’t show them on their site now anyway. Here’s the same thing from Four Sevens/Prometheus/Dark Sucks……easy to make.
Regardless what tool I use, the secret to My success is heat.
Put the light in the sun for an hour, or put boiling hot water in a cup, then dip half the bezel into the water for a few seconds. If you do not trust the O ring, put the light in a plastic bag first.
You are right to be afraid of turning a circle into an oval using pliers. I leave the body installed when clamping, precisely to help prevent crushing the head tube.
these vise grips are my weapon of last resort: .
fwiw, the bezel tools that darksucks and Oveready sell, are too big for TS10:
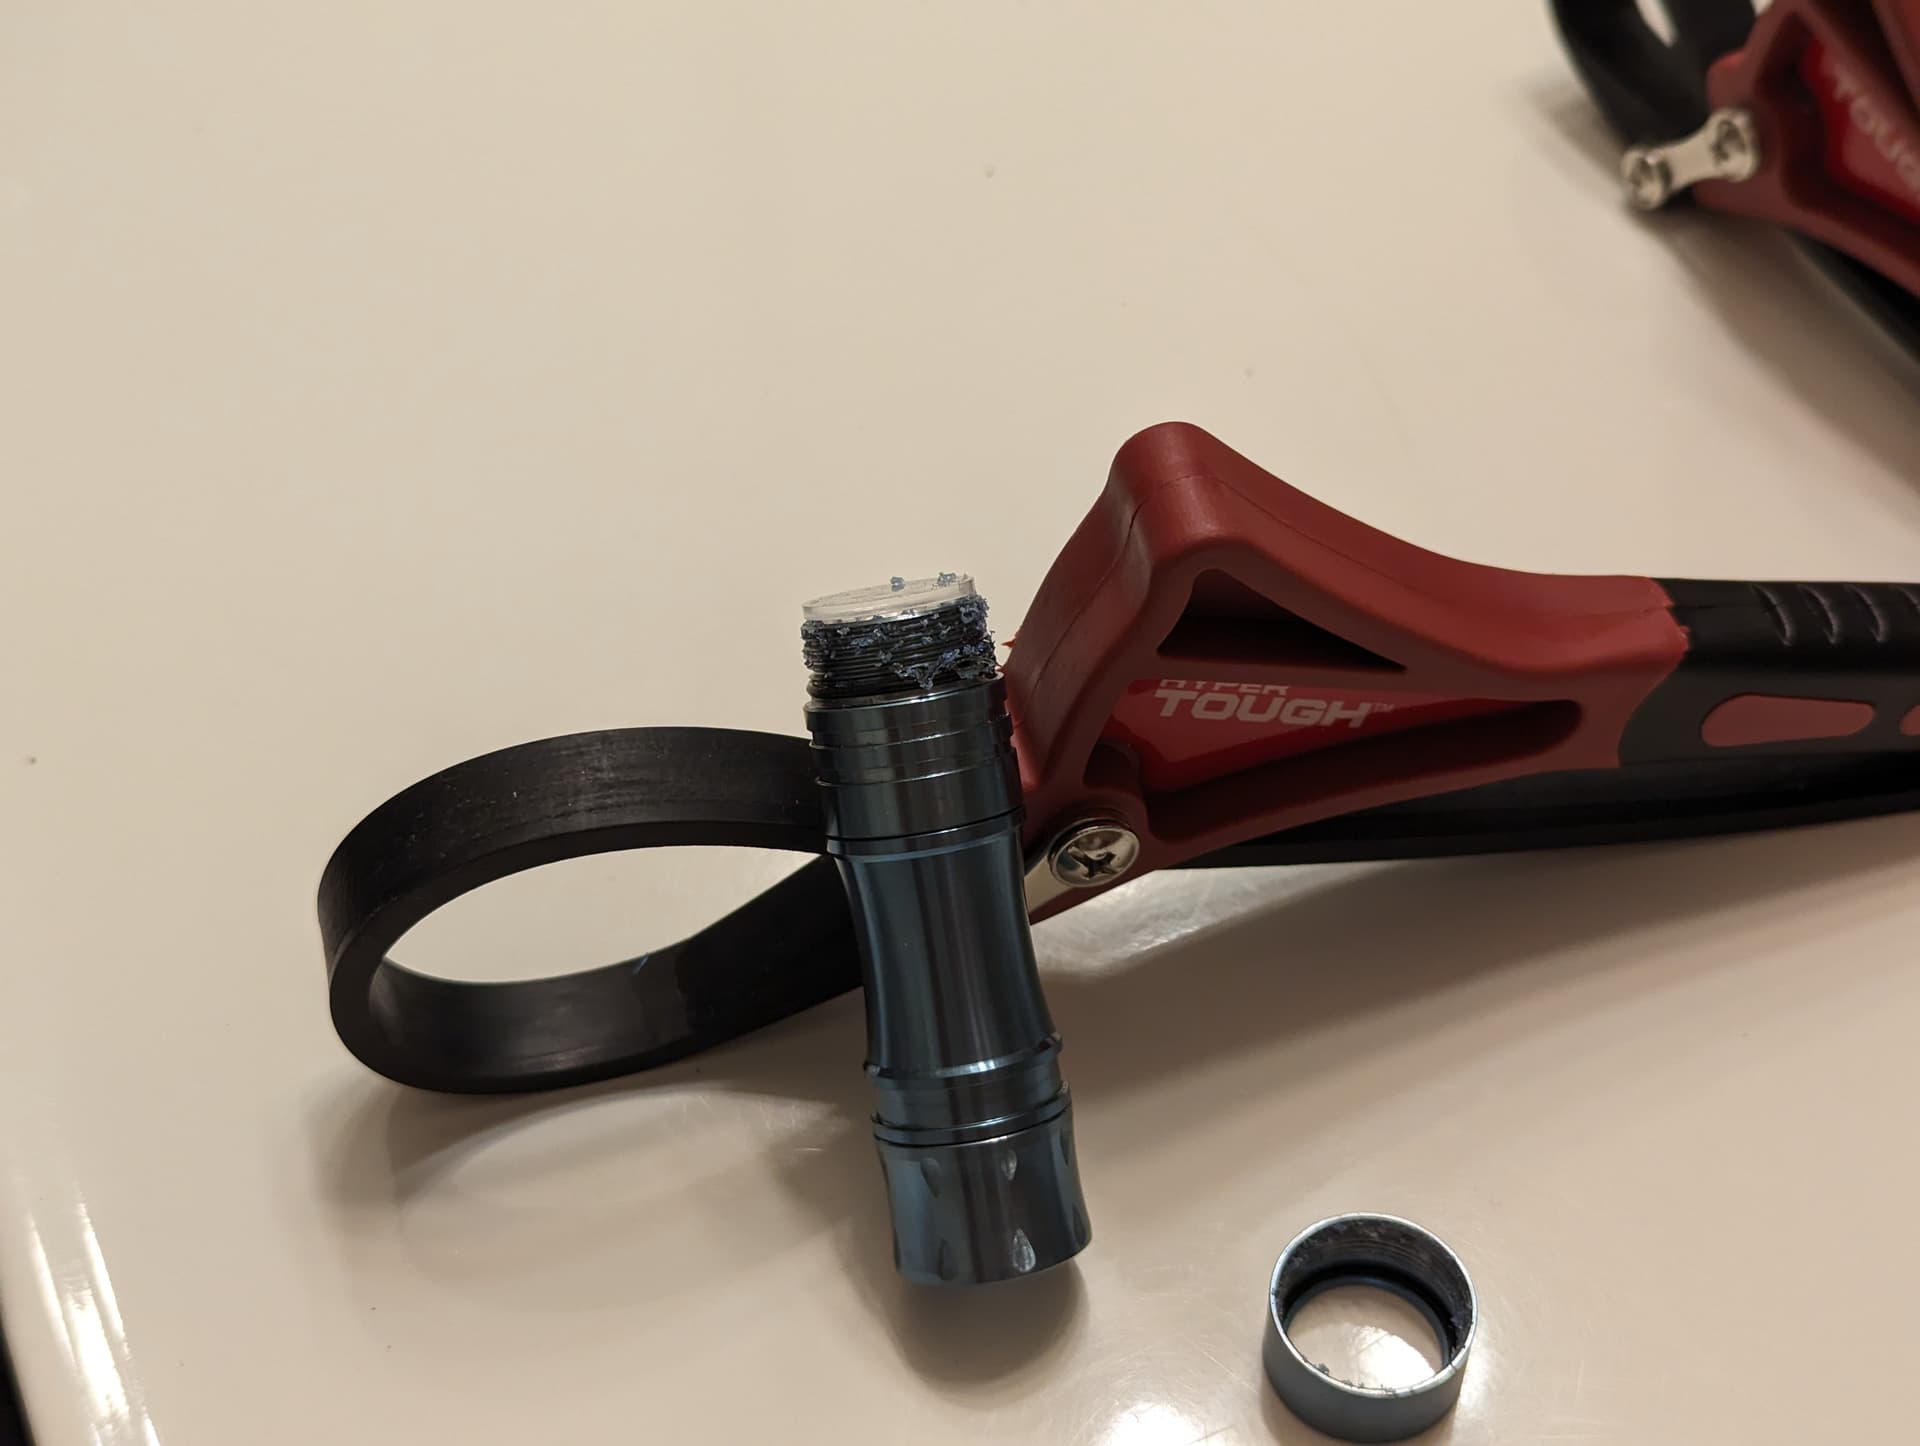
You could try Strap Wrenches: .
Harbofreight has strap wrenches for very little money. Tip: wipe down the rubber straps with alcohol, otherwise theys tend to slip… they are a fiddly tool, but its good to have options.
I’m trying to possibly do an emitter swap. I’ll definitely try adding heat, perhaps with the heat gun I have in my house. Also, I never knew strap wrenches existed until now. Just bought one on Amazon. Even if it doesn’t work for the TS10, there’s quite a few other things in the house that it will be useful for, thanks for the tip!


 .
. .
.

 .
.