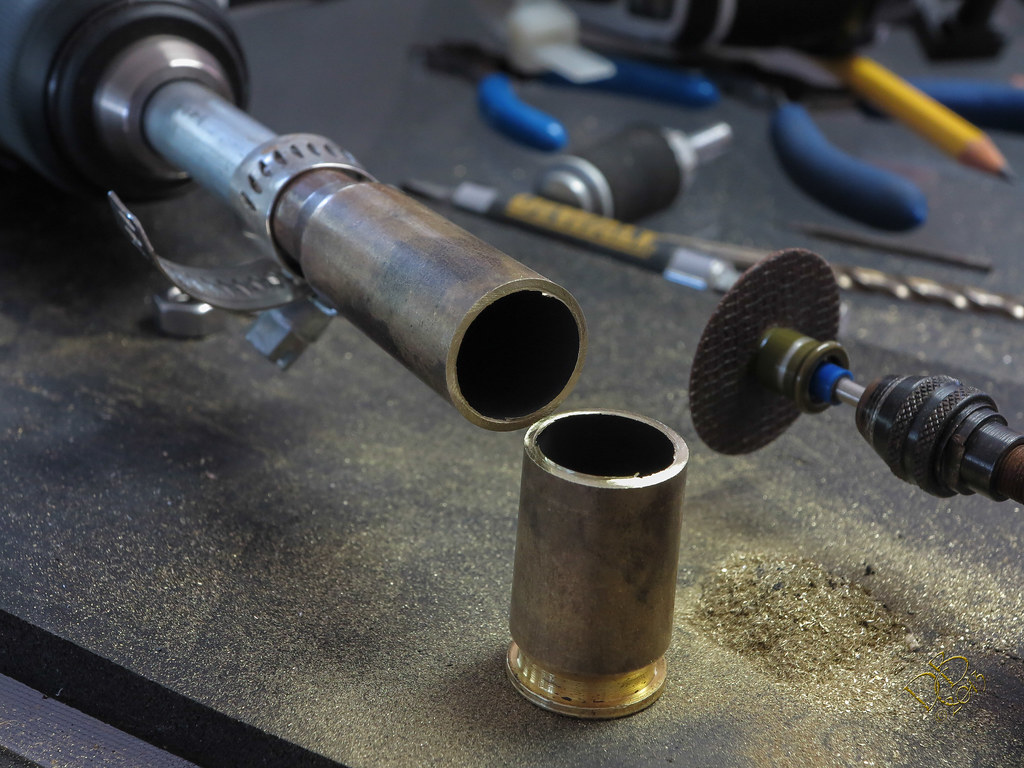
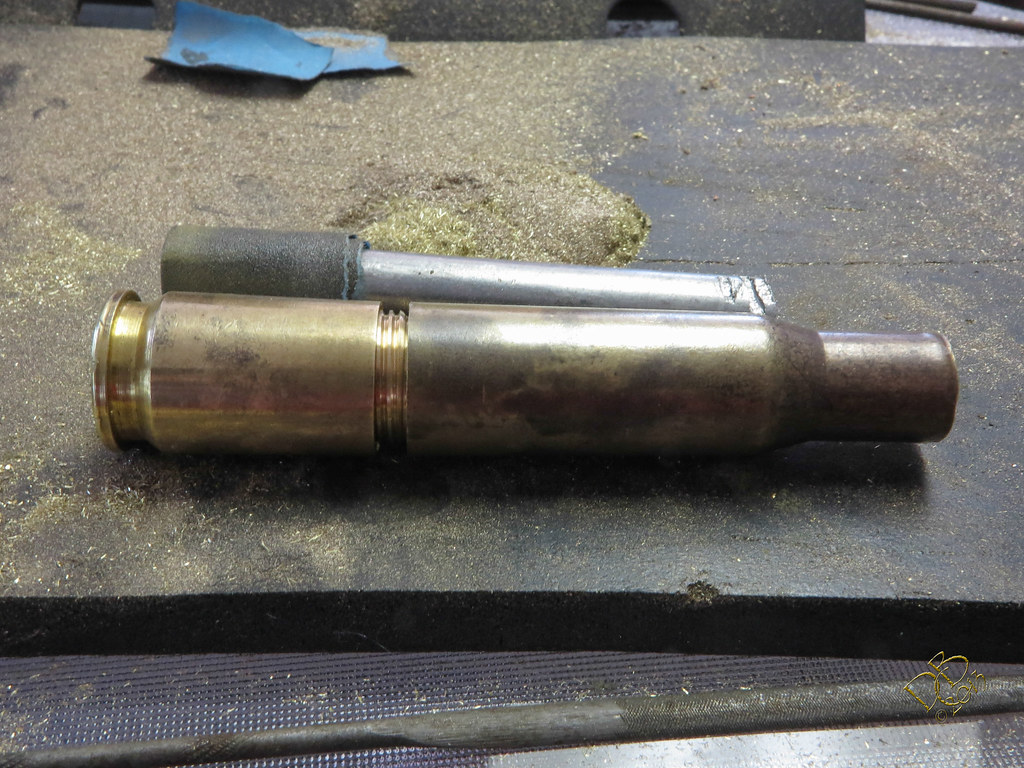
First thing was to get the prime out and start preparing for an TIR Optic. This sounds easy but the primer is this bad boy was equally stout! I think this is a Berdan primer, instead of an anvil in the primer cup, a post is machined in the casing itself with a charge hole on either side. This post made a drill bit want to slip off center, so I had no choice but to dremel it out.
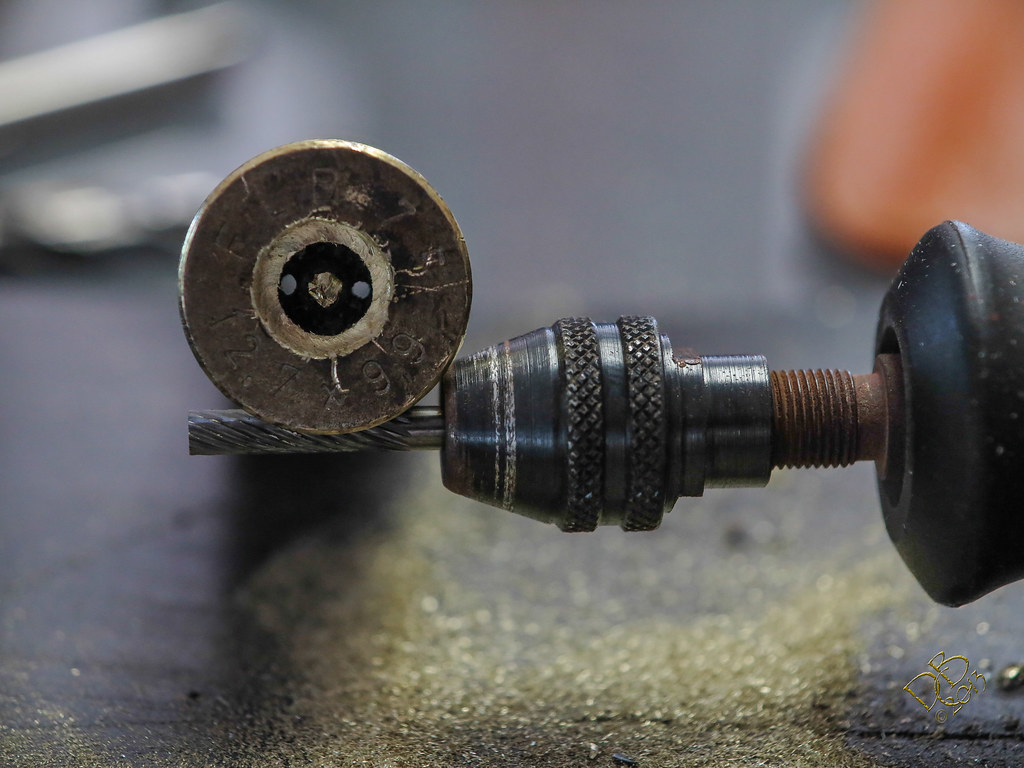
This one lets you see the post better. The dark or black is the bottom of the primer hole where the spent powder burned the brass. Of course, the primer had to be discharged after pulling the bullet in order to get going on this build.
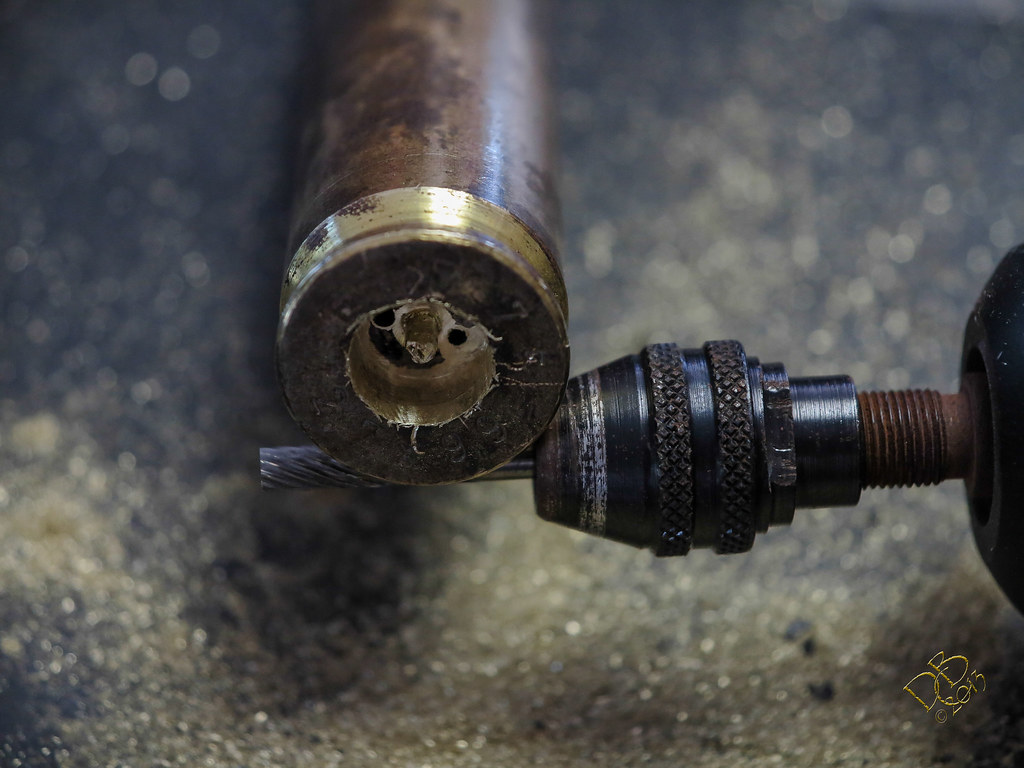
A bit better look at the reamed out primer cup hole with the pinch post still standing but a bit worse for the wear

A nice little pile of brass shavings and some toasted fingers later…
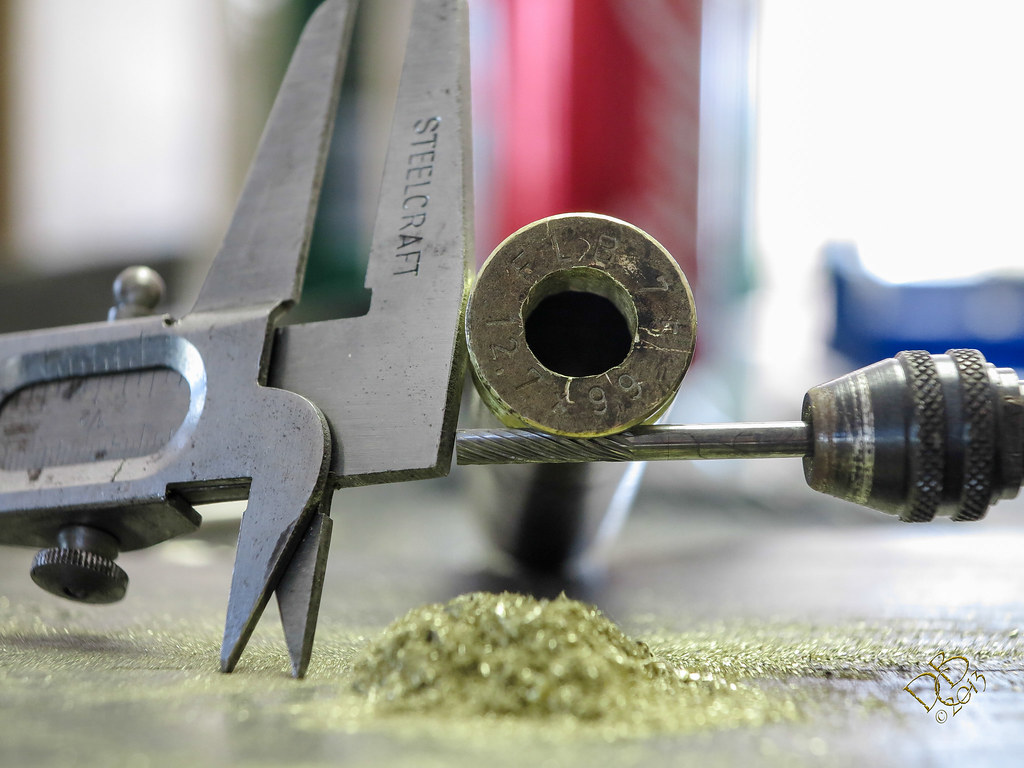
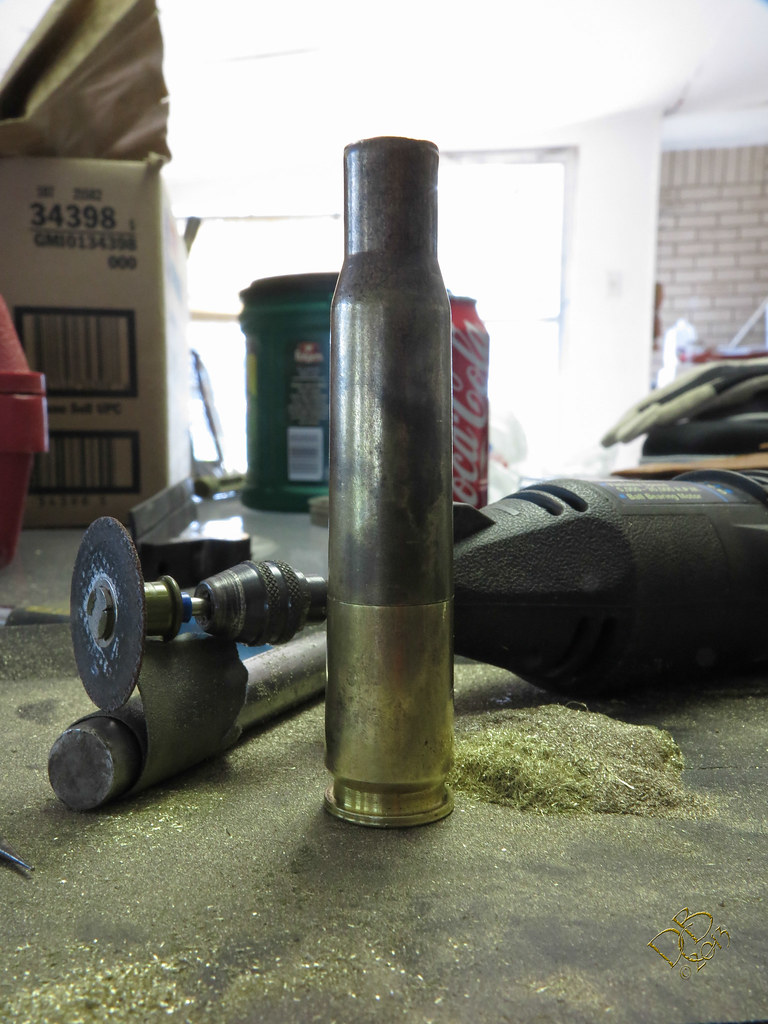
Ahh, who would have thought the base of a .50 Cal round would have 5/16” of brass under the primer? Hopefully that’s the worst of it, we’ll see! ![]()
Plan to reflow the emitter on a Nitro copper star today, we’ll see if I have to turn that down to fit…my luck, probably so. lol
When discussing building this with my neighbor, Steve, I was thinking to make the copper bullet a twisty action to turn on the light. He thought it’d be cool to make it the pushbutton for a clicky. So this is what I’ll be attempting, provided I can get a clicky switch inside of course. So once again, I might have to do some fancy footwork on virtually every component to pull this off. And once again, I am thinking I may be in over my head! I’m a photographer, not an engineer, but hey, how hard could it be?
New pics 6-13-13 Step 2: Body prep
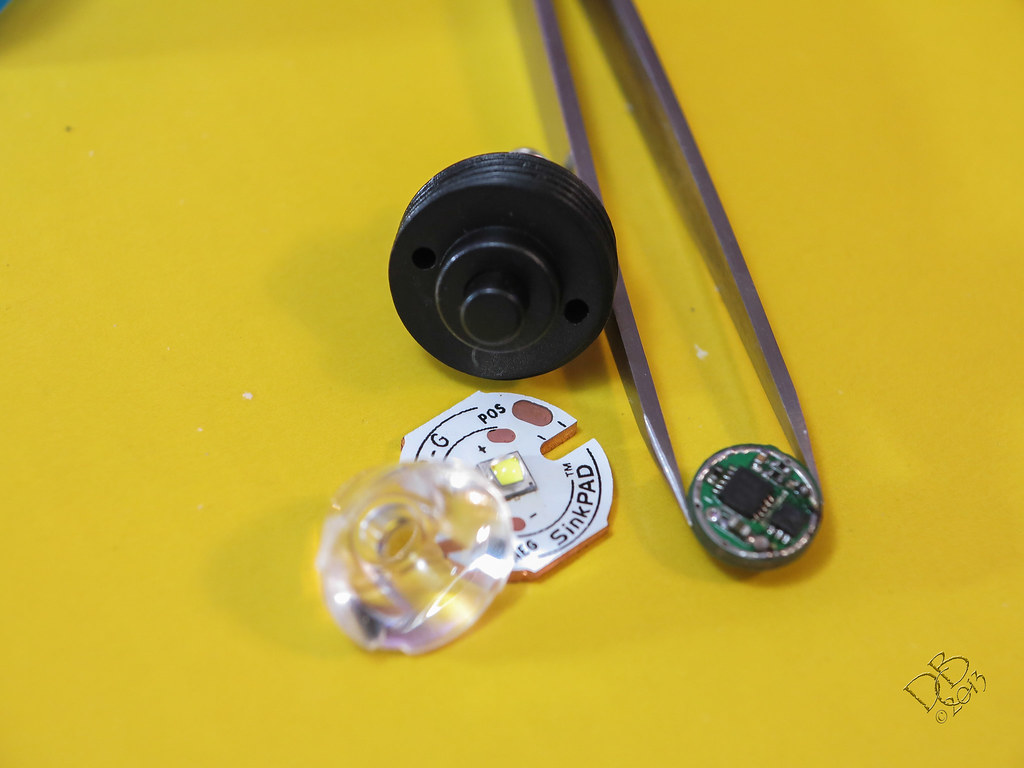
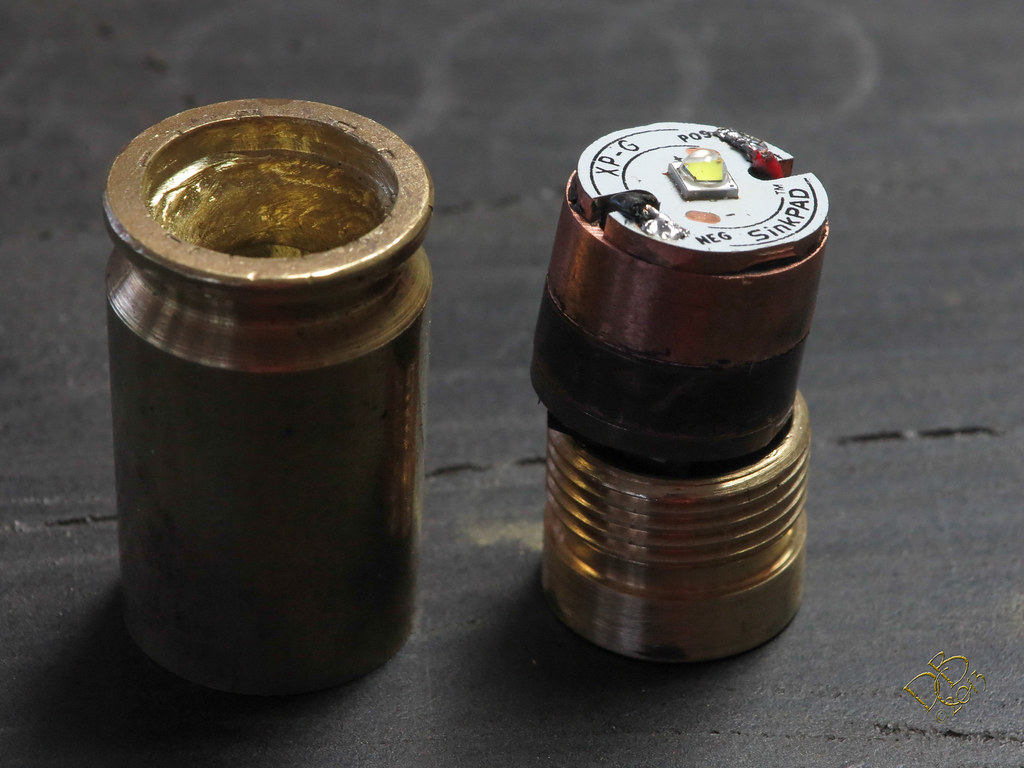
The build ingredients, XP-G2 R5 2B emitter, Ledil Tina2 RS TIR Optic, McClicky switch and potentially this 10mm driver with 1.4A 3 mode…might change that to a 3.04A Q-Lite driver.
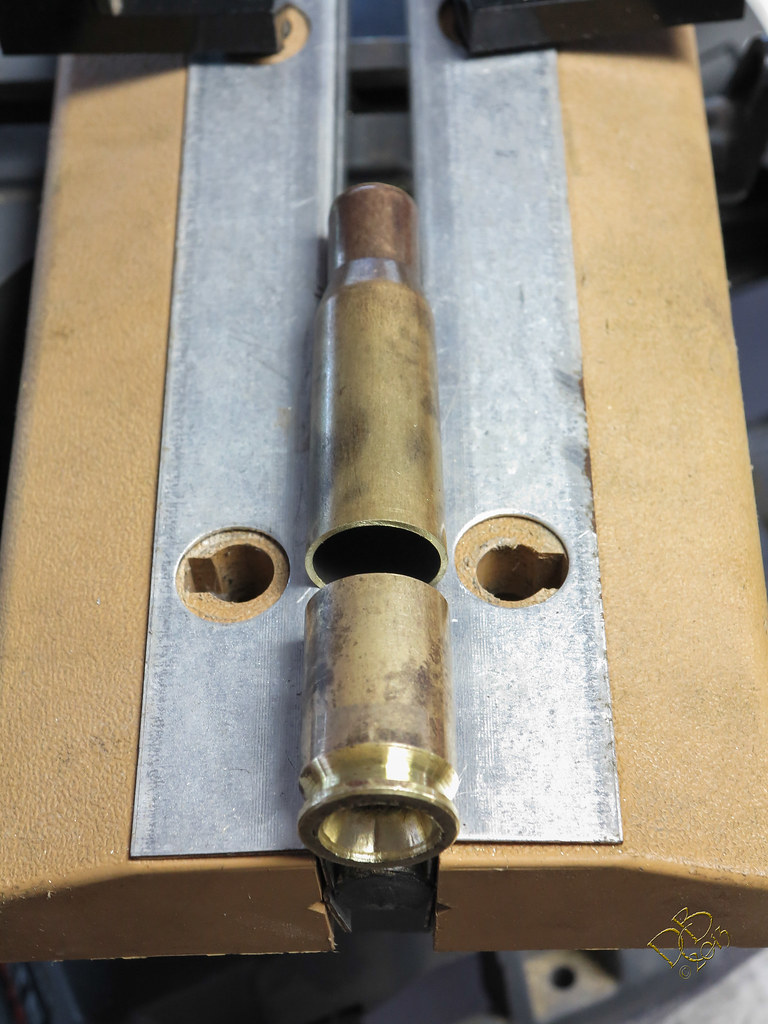
I cut the cartridge to start working the insides…
Finished up the external mount for the TIR…
And got the TIR fitted…

New Pics 6-13-13 PM Step 3, 4, 5 The Pill
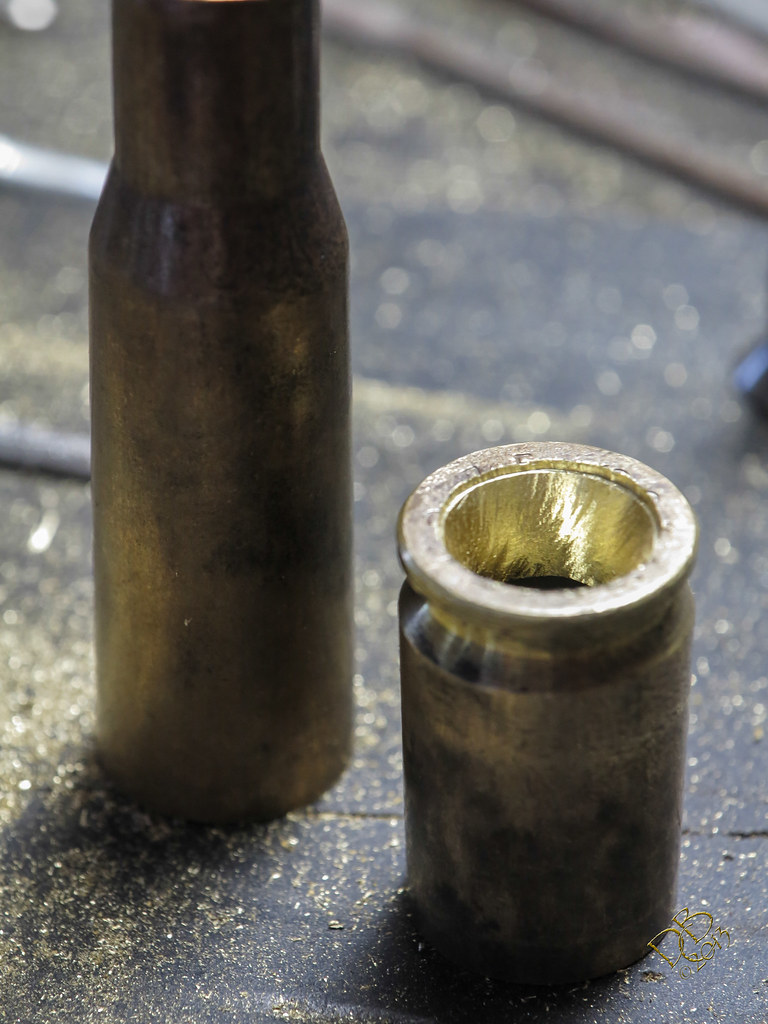
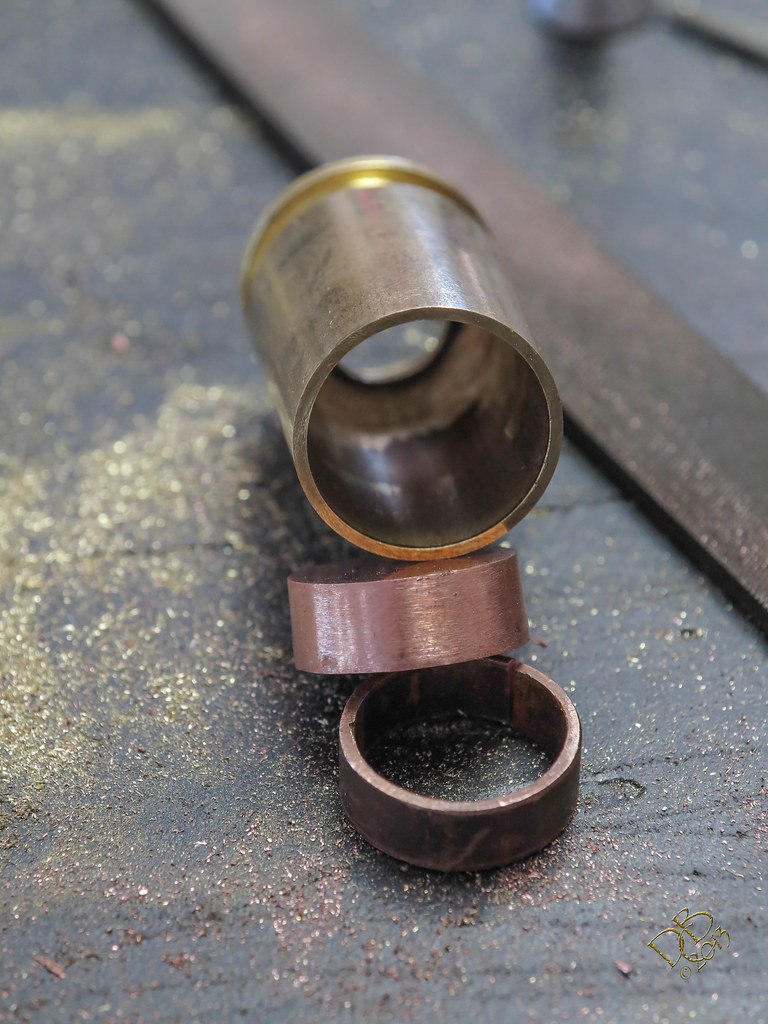
I got busy today and made some good progress. Had to square up the inside of the “head” section, while the cartridge tapered up on the outside, it tapered down on the inside to form a bowl with very thick walls at the platform. So I squared that up, then worked my tail off cutting a rough circle in a 1/4” bar stock (This stuff is hard, it was a bus bar in the telephone company back in the 50’s) Then had to file it down to get it close then finish with sanding using a glass table top to keep it square, so I could get it round! ![]() Then cut a piece of 3/4” copper pipe and fit it so that it’d make a shelf for the driver. Whew!
Then cut a piece of 3/4” copper pipe and fit it so that it’d make a shelf for the driver. Whew!
The squaring of the head…

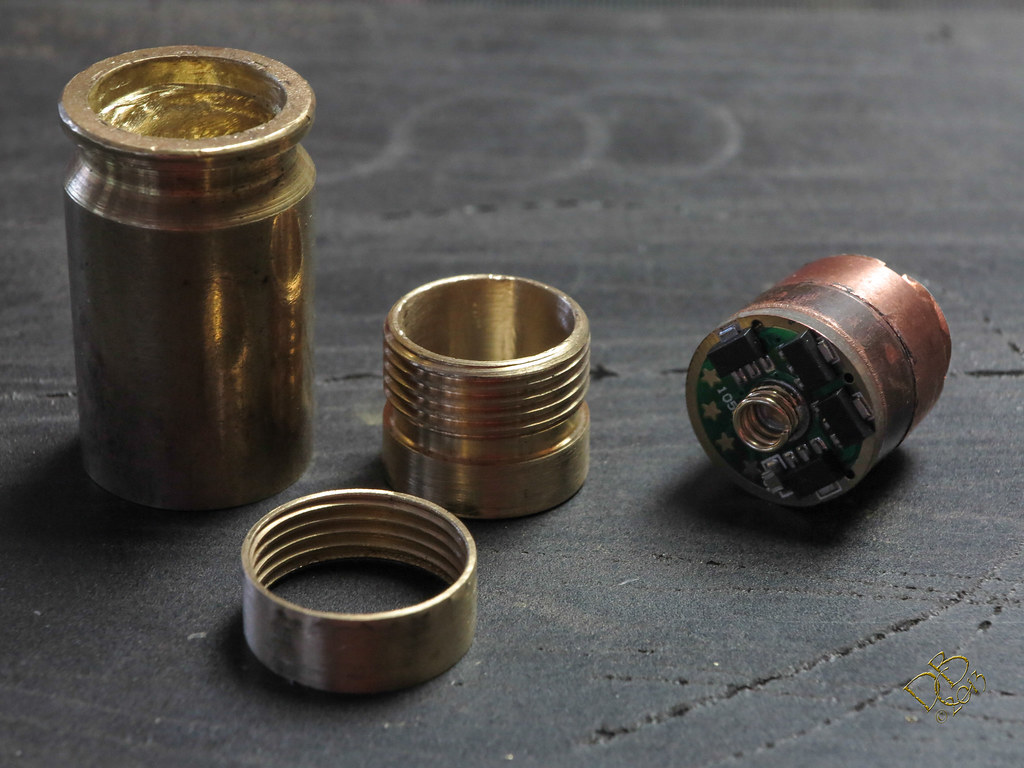
The parts…
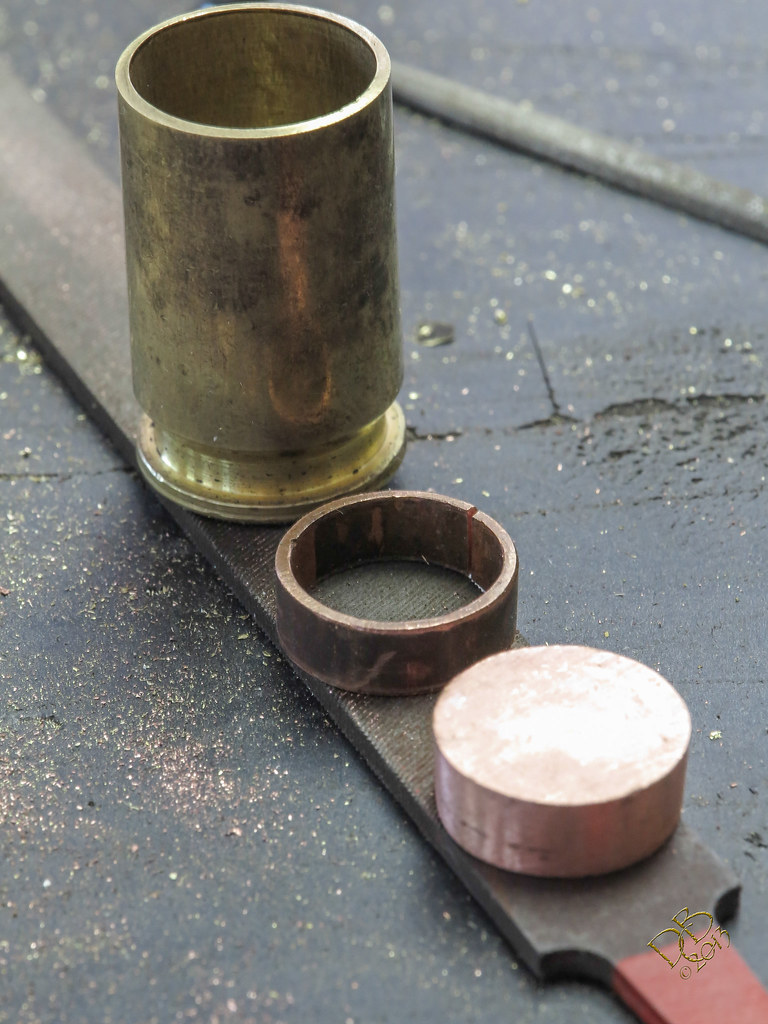
1/4” thick copper heat sink, with copper shelf for driver…
Testing fit…

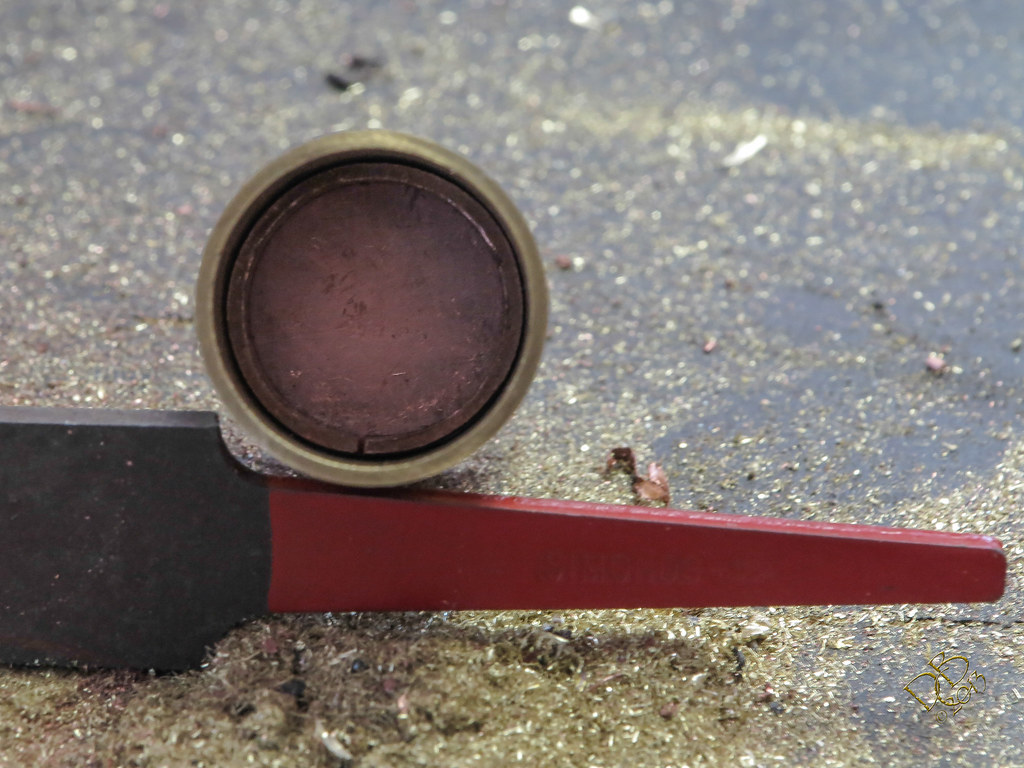
Bird’s eye view, looking down inside the “head” which is of course the bottom of the .50 Cal cartridge…
My fingers are about wore out! I held that little slab of copper in my fingers the duration of filing and sanding it down, hand work never got more manual than this! The rest can wait til tomorrow…
Step 6, Body and Pill assembly
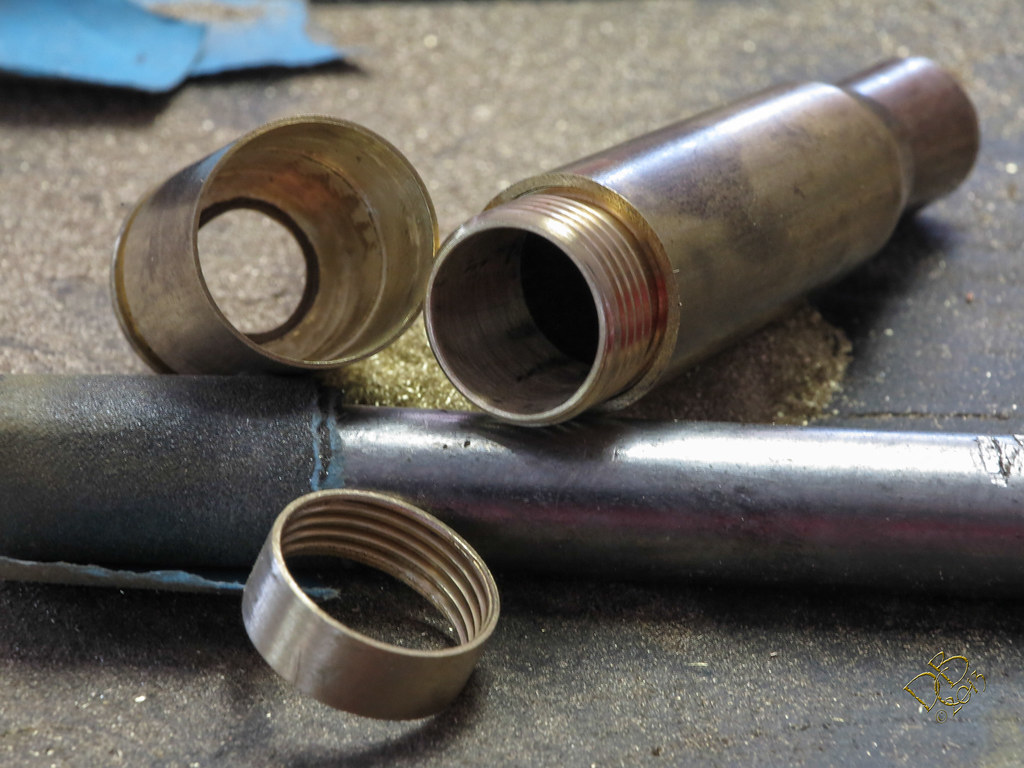
Ok, today I went to town and studied the plumbing section at Lowe’s very carefully. Ended up with a 1/2” compression fitting. Cut the threads out of the fitting and put them in the light, sounds easy, right? LOL Then I put the pill together, and it checks out perfectly! I’m using the Q-Lite 3.04A 3 mode driver with the XP-G2 R5 2B emitter glued to a slab of copper. ![]()
The threads…
These will still have to be glued in, but that has to wait till the pill is dry as well as the TIR, which is glued into the head from the outside…
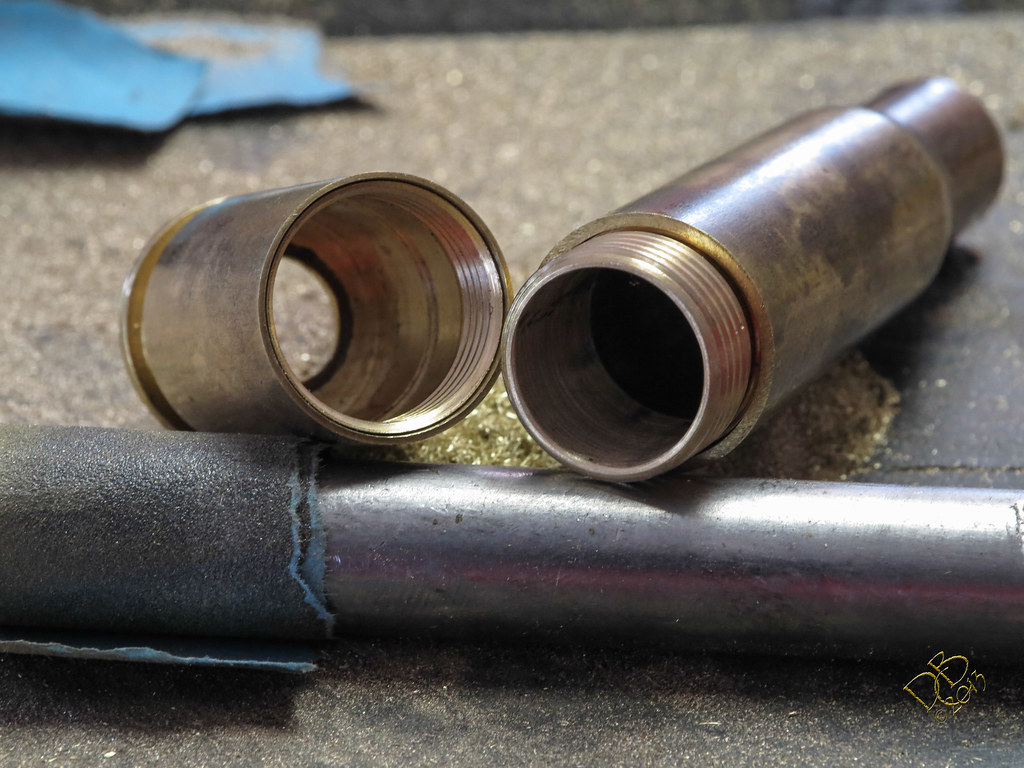
Pieces fit together and thread up quite nicely, a very snug compression fit with zero room left for adjustments…
I’ll work on the visible line and finish when I get everything fitted and working. The “head” has been handled a lot, so it’s taken a bit of a polish from handling…
Between this chunk of copper and all the surrounding brass, heat should have no problem figuring out where to go…
The Q-Lite driver in the pill. I’ll have to ream out the male threads a little more, an Alkaline AA fits easily but a Protected AW14500 doesn’t.
And it’s time for today’s installment of alcohol. ![]() But I’m very happy with progress, and it feels good!
But I’m very happy with progress, and it feels good! ![]()
Step 7, Fitment and testing
So, it’s supposed to work something like this…
No, it’s not finished, but it works! ![]()
Step 8, Finish
And now that it’s fully assembled, with it’s batteries on the way, it gets a polish. Let’s call it Gunner’s Dress Blues .50 Browning Machine Gun or GDB .50 BMG for short.
I need to do some tweaking on the overall inside length, but have to wait for the correct batteries to get here for that. The AW and Intl-Outdoor cells are protected and longer than standard, so I will probably create a copper spacer to allow those to work as well.
Happy Father’s Day!
Step 9
Improvised a work-around to use the cells I have on hand, temporarily. This enabled some working pics. AW IMR 14500 cell should be here in the next couple of days so I’ll get full working amperage readings then and possibly take some more pics. But til then, enjoy!
Beamshot settings set up for the medium level to show difference in beam modes.

Not too shabby! ![]() There’s a dark artifact in the center that’s barely visible that really puzzles me, other than that, it’s a whole lotta light!
There’s a dark artifact in the center that’s barely visible that really puzzles me, other than that, it’s a whole lotta light!
To bring some of the finished pics from the end of the thread to conclude this build, here’s the way it ended up:
With the AW IMR14500 in the light, it closes completely when on for a near seamless finish. I added a copper wire bypass in the spring on the driver to get a 2.82A reading off this cell. And to finalize it, I created a stand to give the light a “Rocket Ship” look when on the shelf. ![]()
And for posterity, this “poster”…
A real fun challenge, Thanks Old-Lumens, brilliant idea!! ![]()

