Hello,
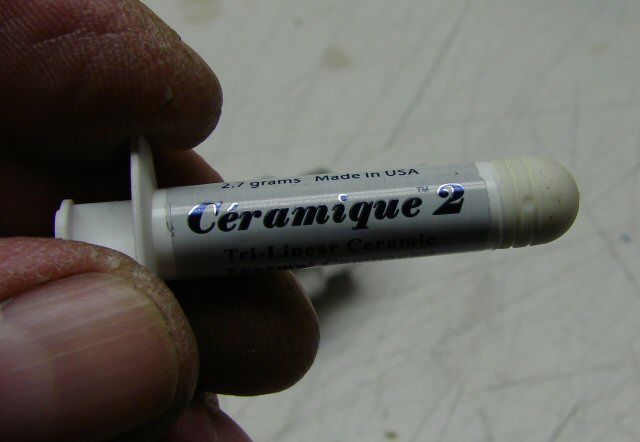
I thought I would show a couple simple mods for the Defiant Thrower, from Home Depot. I see a couple things that would help and hopefully most people will be able to do them. (and some stuff some can't do, but might want to see).
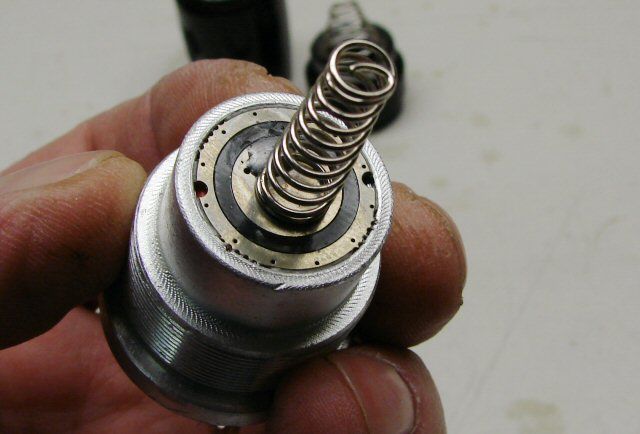
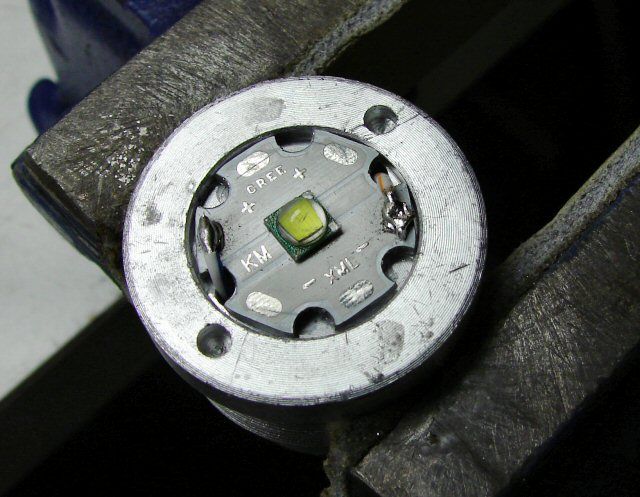
My first concern was to see if the LED/star was making good thermal contact to the pill. It was not on the first light I got. Also, I can lessen the resistance in a couple of places, which would only improve the use with Alkalines, so let's get to it.
Here's the stock pill. You can use Needle Nosed pliers to turn the pill out, using the holes provided.
I de-soldered the wires and here's the problem. No thermal paste under the led and that is not good at all. It needs to be fixed.
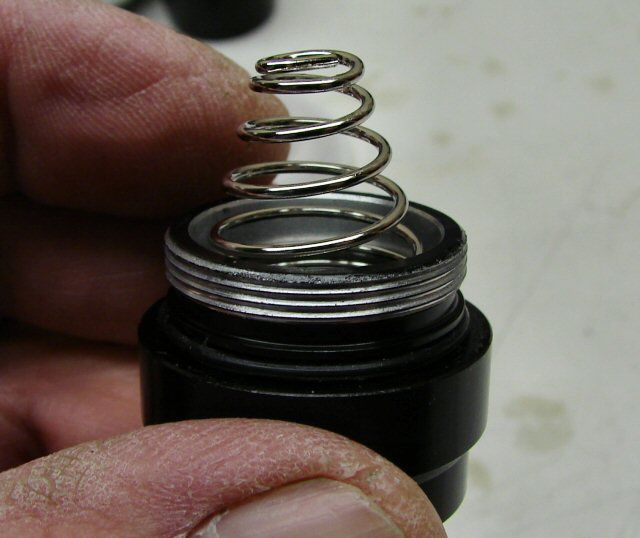
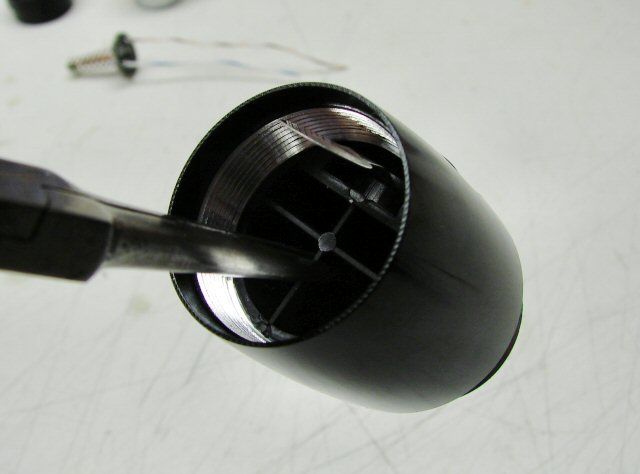
Well, let's look at the rest, before we fix things. Here's the spring that fits between the driver and the switch. It has to be one of the longest I've seen. We can get rid of some resistance here.
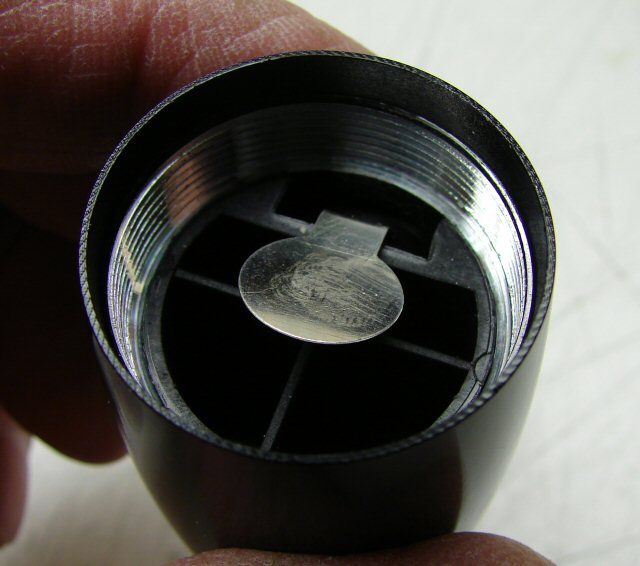
Might as well do the Tail cap too.
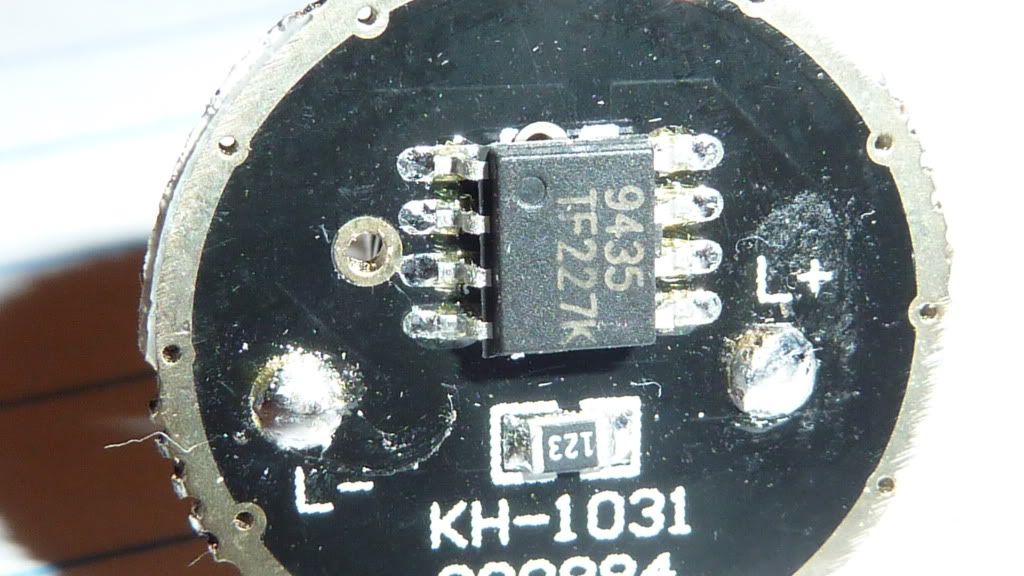
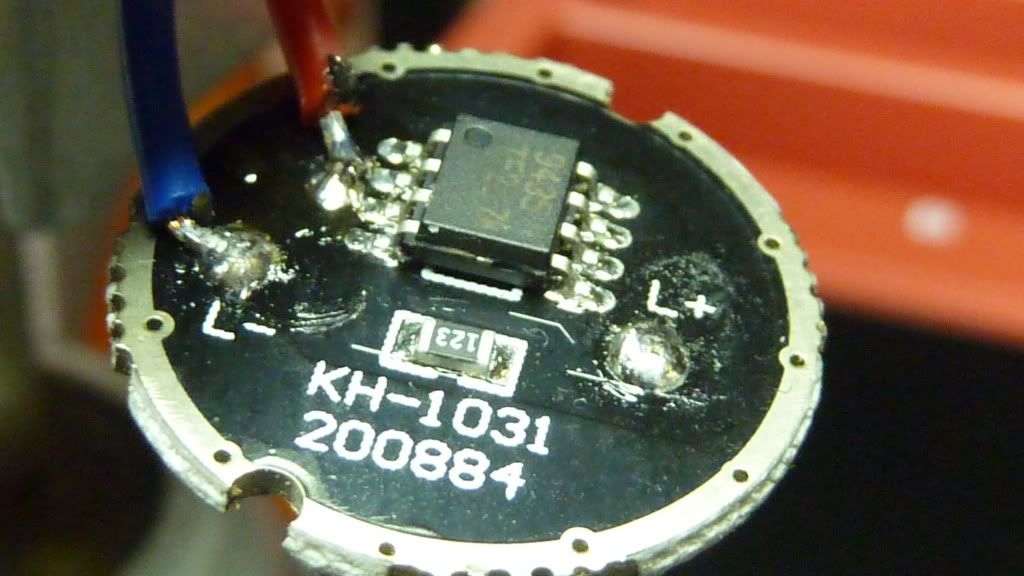
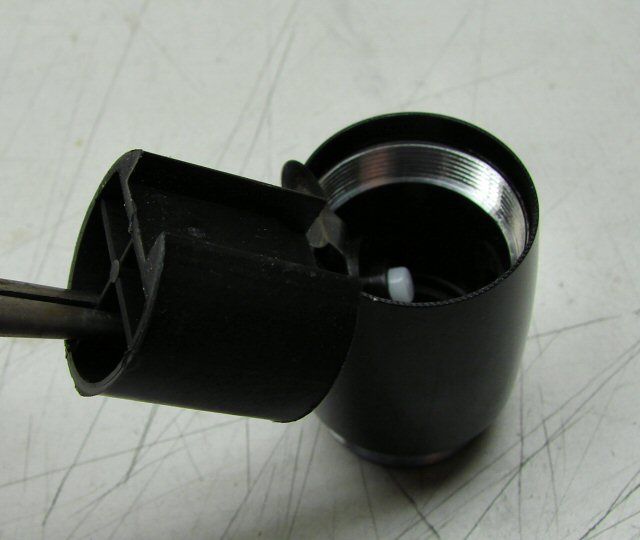
Since the led was off, I decided that I would remove the stock wiring too and use something less resistant.
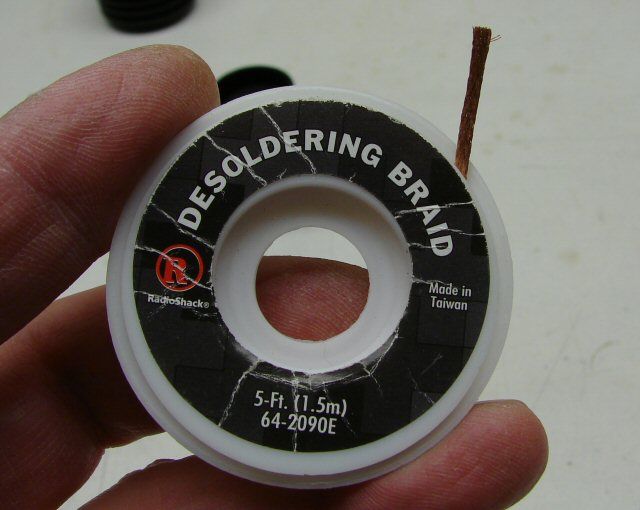
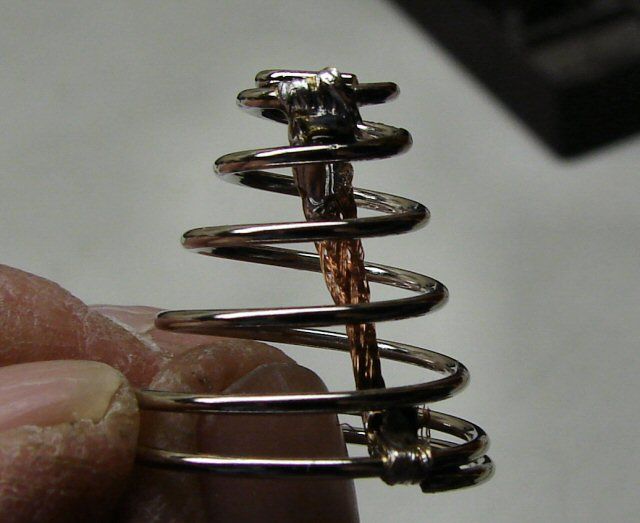
For the spring mods, I use Copper De-soldering braid.
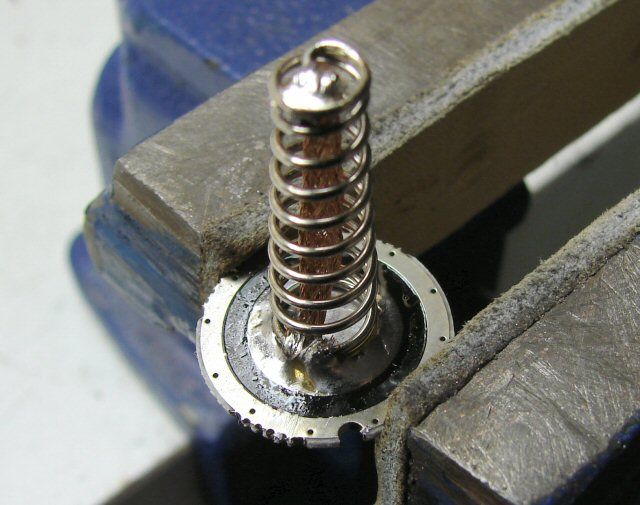
I cleaned off the original solder and re-soldered with my 60/40. The braid is in place and current will flow thru it, before it flows thru the spring. That's the idea anyhow.
The tail cap spring has been done the same way.
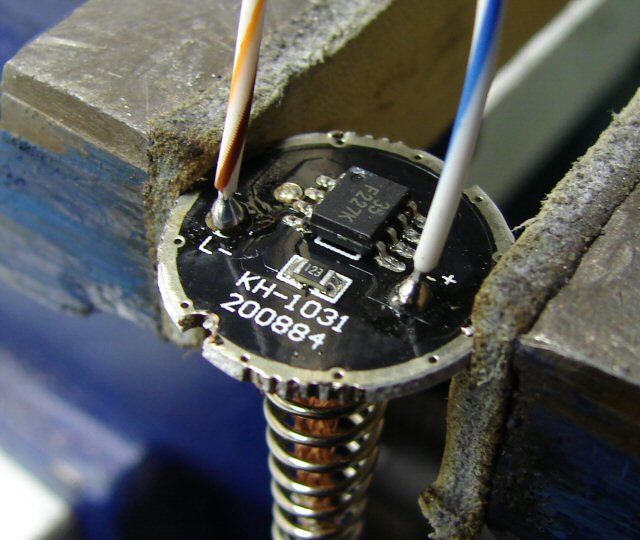
The new wires are 22ga, 19 strand, silver plated, teflon coated and should be better to carry current, than the stock wires.
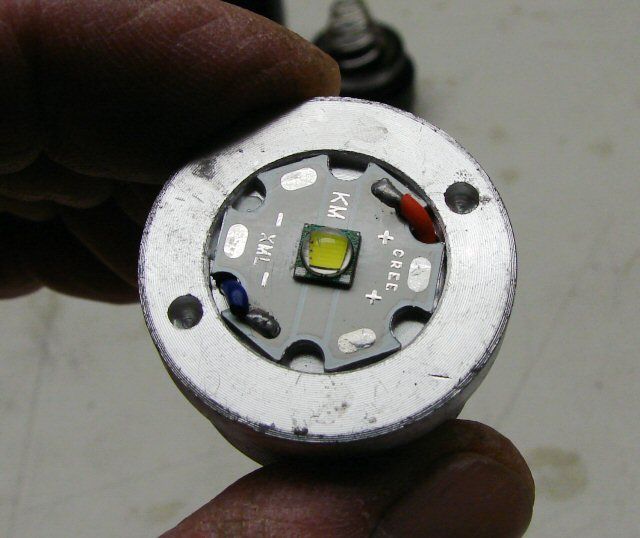
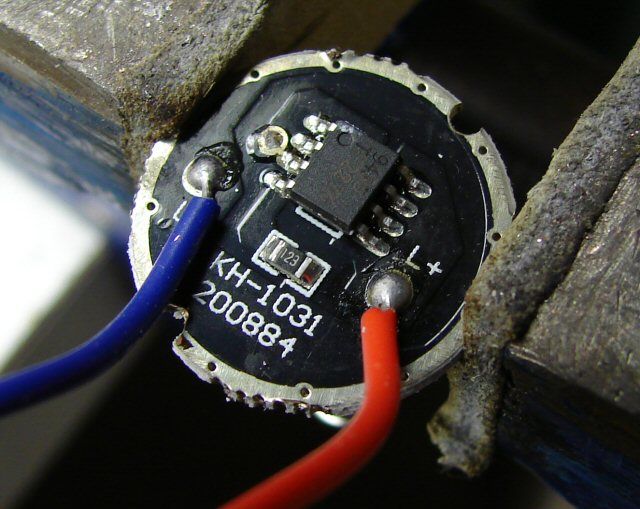
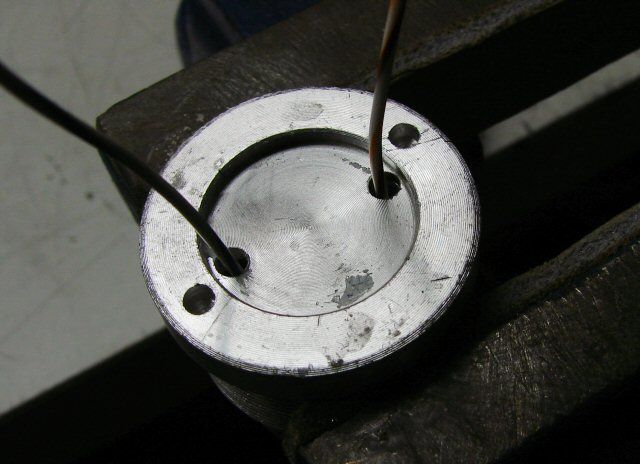
Star contacts re-soldered with 60/40
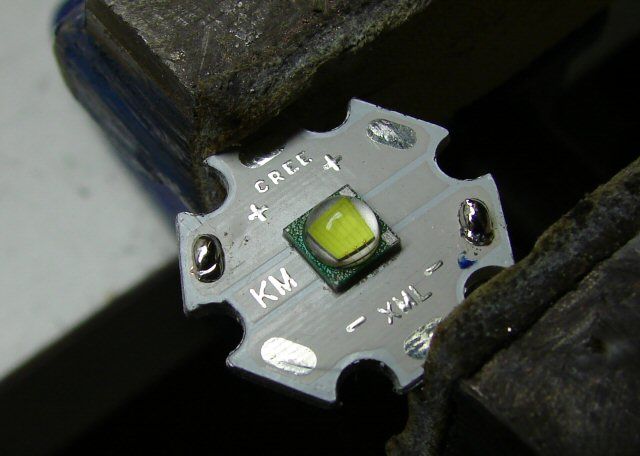
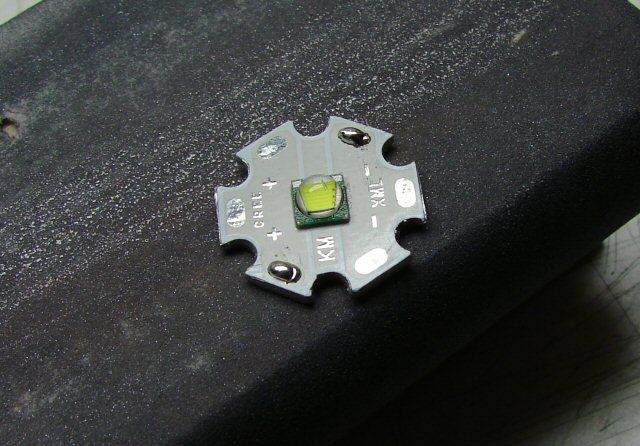
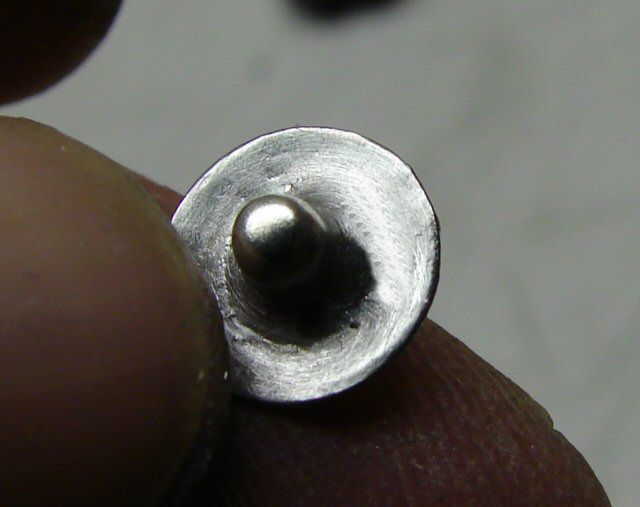
Since the reflector tightens down on the star, I am not using AA adhesive. Instead I am using thermal paste.
I have put on a very thin layer and I want to see if the star is touching the pill.
Well, I would say it is not. The star is too tight going down and it does not sit down flat. Also, I have seen many times, that the seat itself is not flat, but it is deeper in the center than at the outside. This is a problem with lathes. Over the years, I have seen it on many parts that were faced with a lathe.
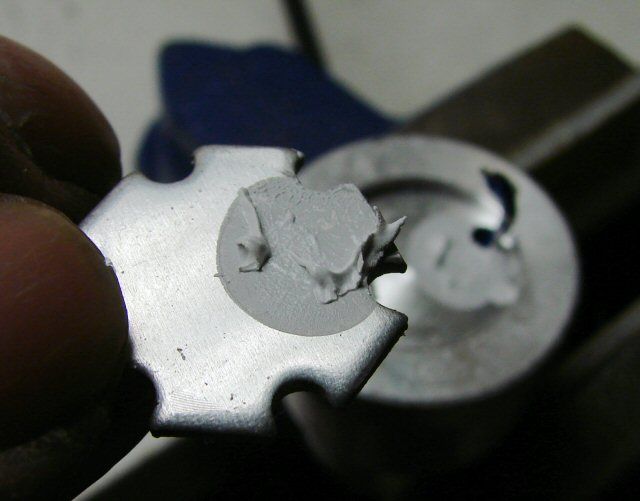
I am using a sanding block and I will sand the edges of the star, to make it smaller in diameter. I only have to sand just a little to get it to fit in easily.

Well, that does look better. The rest of the problem is that the seat on the pill is not totally flush and I have no way to fix that easily, so it's going to end up being more thermal paste. Not the right way, but unfortunately, many times, it's the only way for most people, as we do not have the means to correct it.
Ok, the pill is back together and ready to go.

Another simple thing you can do, is to coat the threads with thermal paste, before screwing the pill in. It will help a lot for heat transfer to the body section.
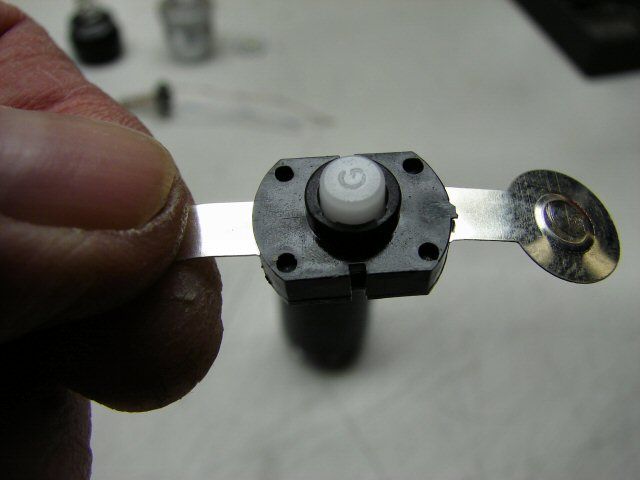
There is not much you can do with the stock switch, to cut resistance, but I will show the removal, just so you can see it. This is the end that faces the batteries and it's where we remove the plastic switch support.
Bend the contact tab up and use a pair of needle nosed pliers to pull out the plastic piece.
It comes out easily and the switch falls out as well.
Remember which end of the switch is which. The end with the raised center is the end that goes to the Driver. The flat end goes to the batteries. They are different lengths and it won't work putting it together back wards.
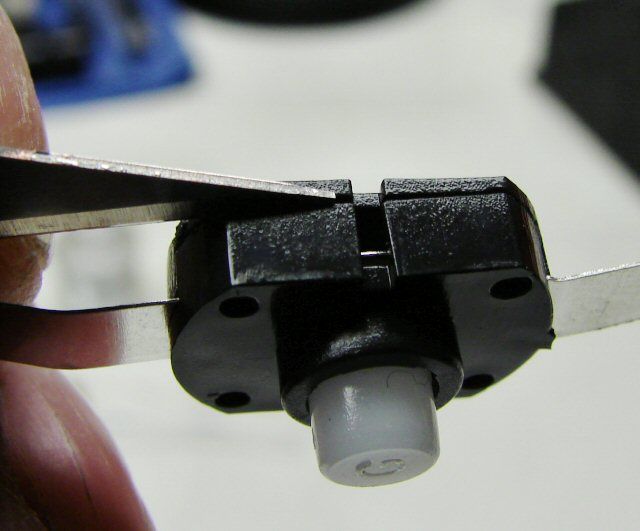
The switch is a two piece housing and I am using an exacto blade to pry it apart at the seam. I pry a little at all four corners, so that I don't break the guide pins.
Here's the switch open. Remember there is a spring there. A tiny spring, that wants to fly out and run away into the darkest corner of your house/shop. The corner where you will never ever find it again, so as you open the switch, make sure you do not let the spring fly out.
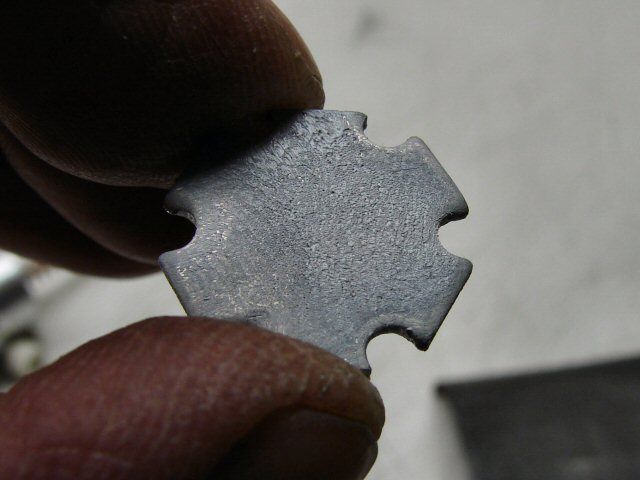
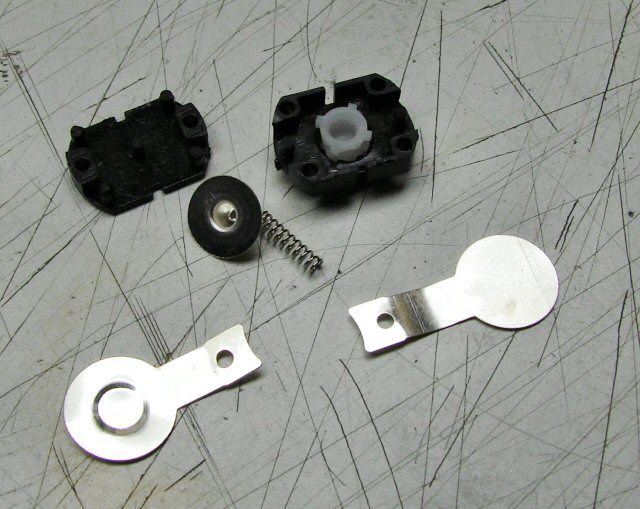
There are the two contacts and a center "hat", along with the spring and the plastic button mechanism.
The "hat" is an issue, as it is rough and does not make great contact. I have tried to make new ones out of copper, but it just tears trying to stretch it to the shape. You can replace the flat contacts with copper.
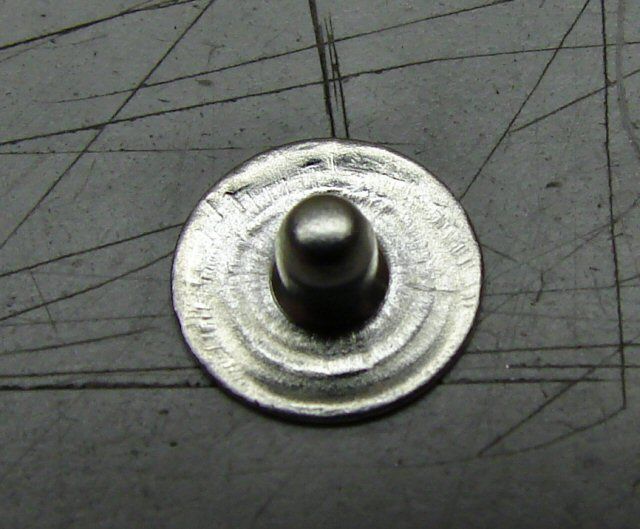
What I do with the "hat" is to put a thin layer of solder on it and then use 1000 grit paper and steel wool to smooth it as good as possible. This photo is before sanding. Does it really help? Hell, I don't know, but it makes me feel better, LOL.
That's all that I have for you. If any of you other members have some easy and simple to do thoughts on this light, post them here.
Thanks,
Justin