Osram Oslon 3rd Gen 6500k tested in Courui D01, Plus De-Doming trials.

After reading Djozz' testing of the new 3rd Gen Oslon, I was interested in the throw potential, as it looked like they might edge out the XP-G2 S4, if able to be de-domed successfully.

Here's the BLUF;

  • Difficult to de-dome cleanly.
  • Smaller footprint than XP-G; issues with centering rings.
  • Not suited to high-drain cells + FET driver (over current).
  • Couldn't edge out the XP-G2.

Here's the long version;

I ordered the minimum amount of 5 from RS online, & they arrived during the week. I was able to spend the day destroying testing them yesterday....

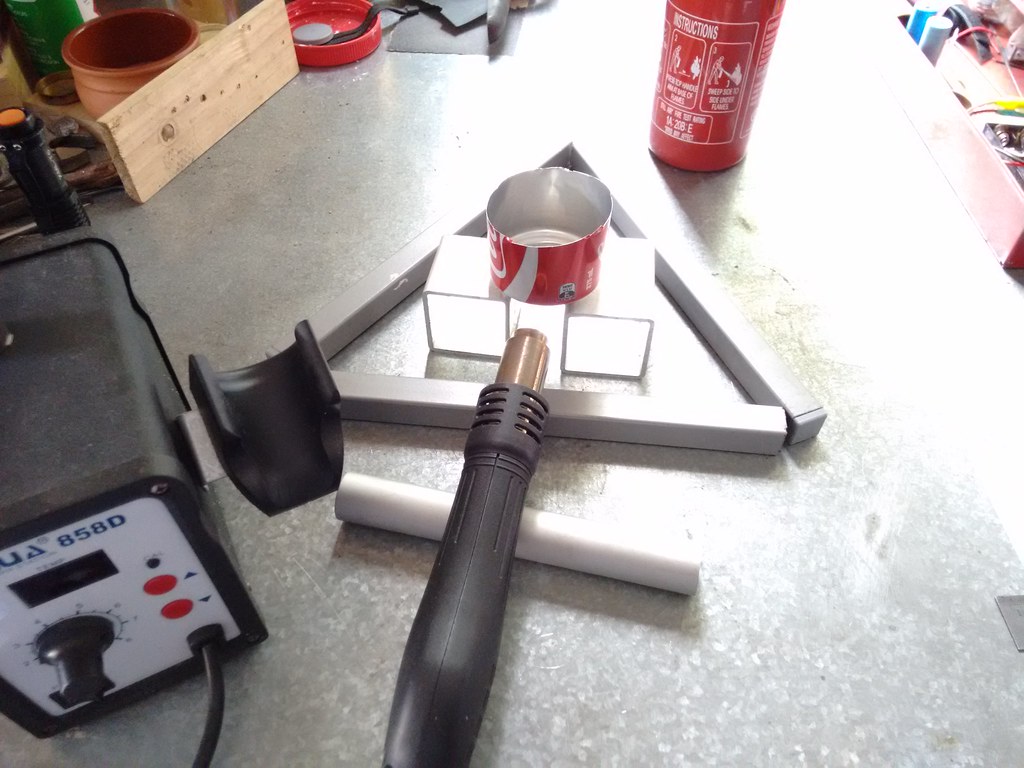
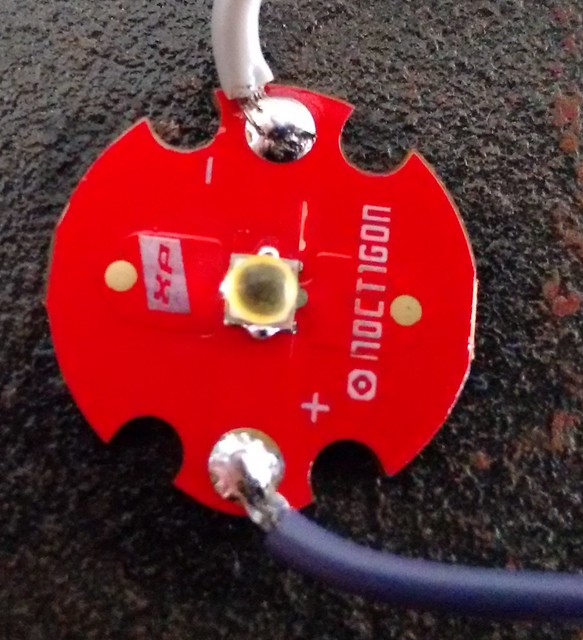
I used a Courui D01, (stock reflector & lens, fully modded internals, ATtiny 85v Fet driver) for the test mule. Cells were 25r's.

First test, as a base-line, & for first impressions, was with the domed emitter;

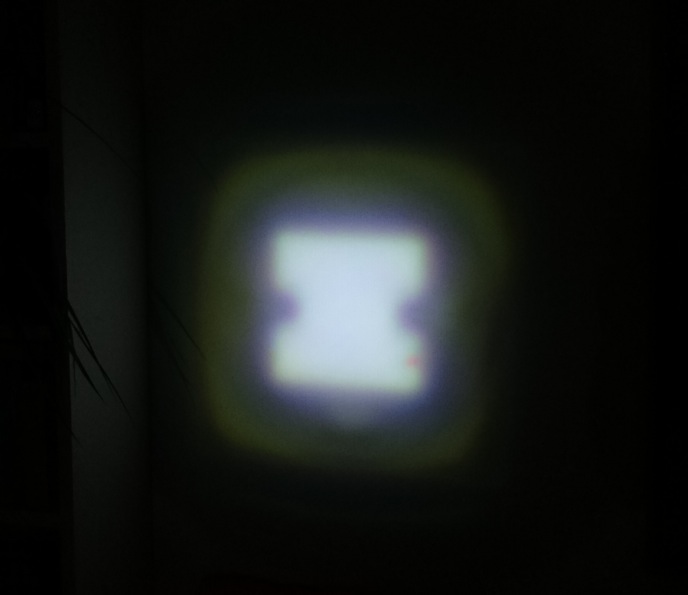
Beam pattern was unusual, due to the placement of the bond wires in the middle, & there was a purple & yellow hue noticeable around the outside of the hot-spot, on a low output mode.

I measured throw at 180KCd, without any fine tuning of focus. Not too bad.

I was also loosing some output due to high current draw; Taken at the emitter with clamp meter, it was drawing 8.05 Amps, after taking the throw reading.

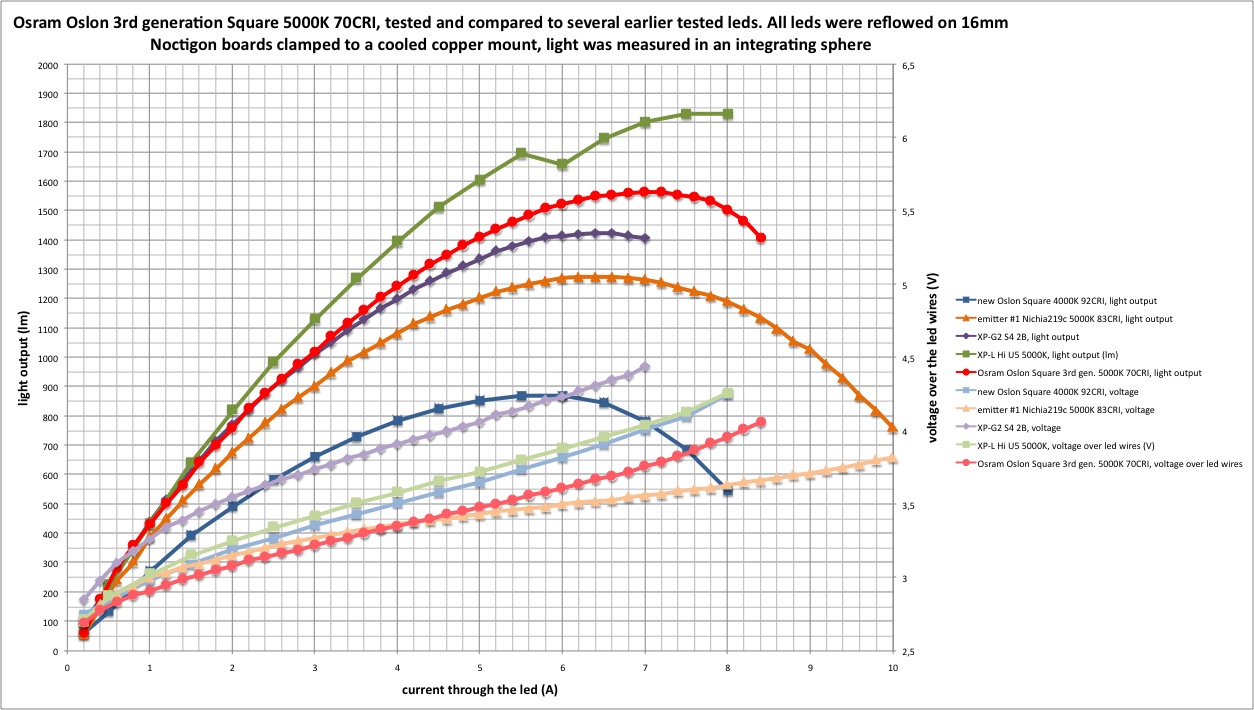
Referencing DJozz' graph, it was about 1 Amp too much for peak output.

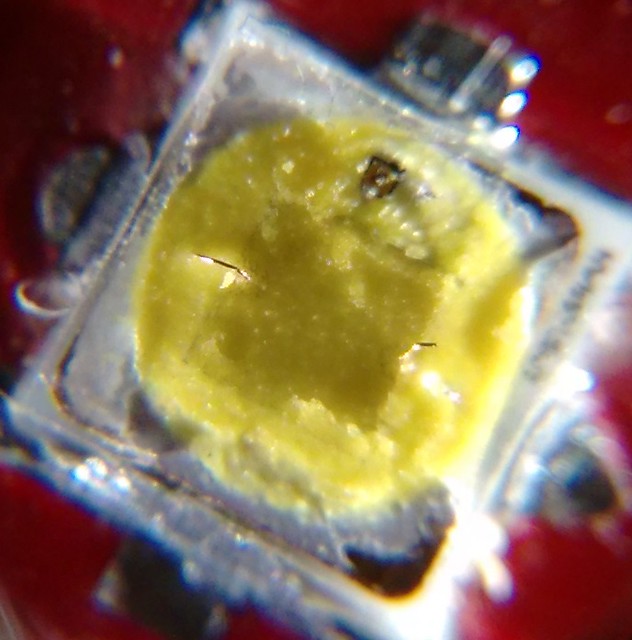
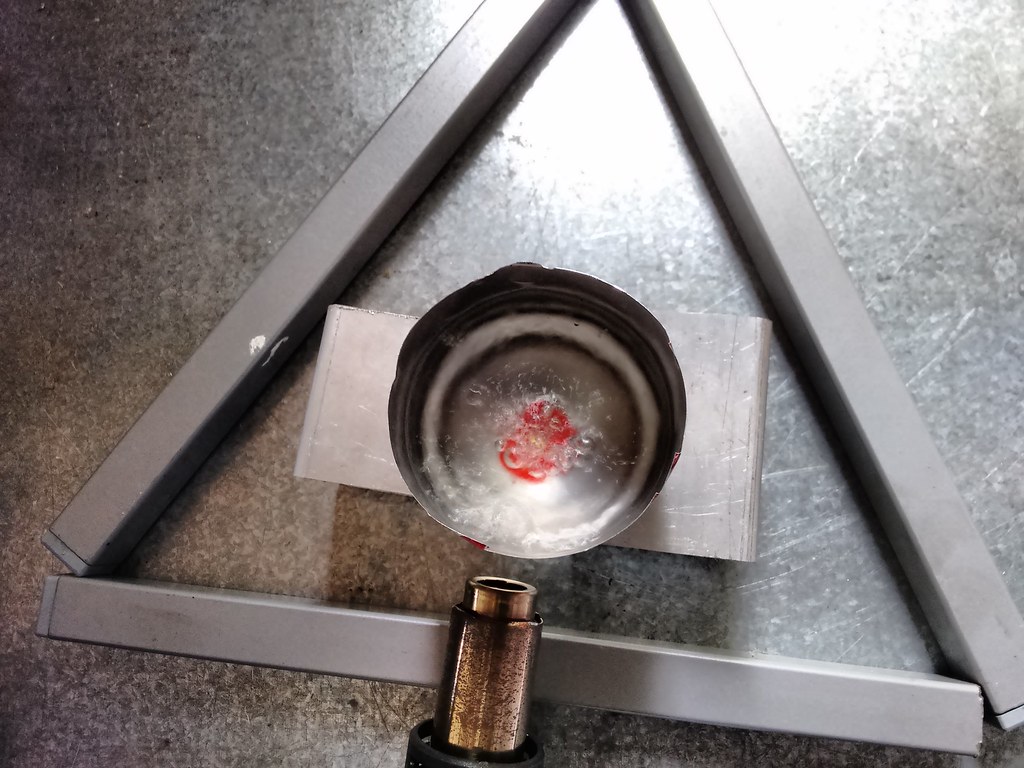
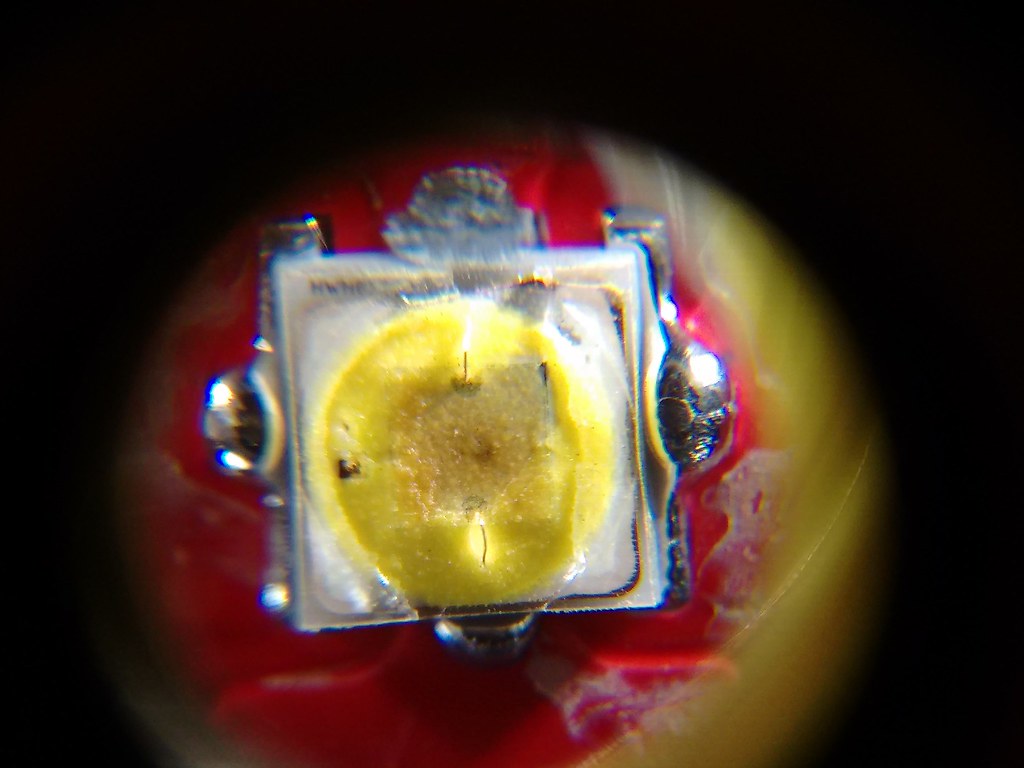
Next test was a sliced dome;

I used a steel washer that was .032" thick as a guide to cut the dome off. The dome seemed easy to cut, & it was looking nice & smooth. I figured that I could go a little lower, so went for another cut, this time using a .024" washer.

Oops, too much; cut off the bond wires. One LED down, four to go.

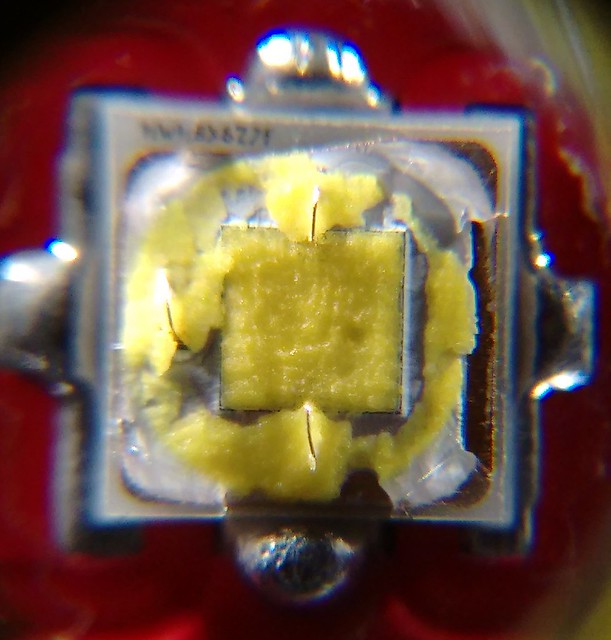
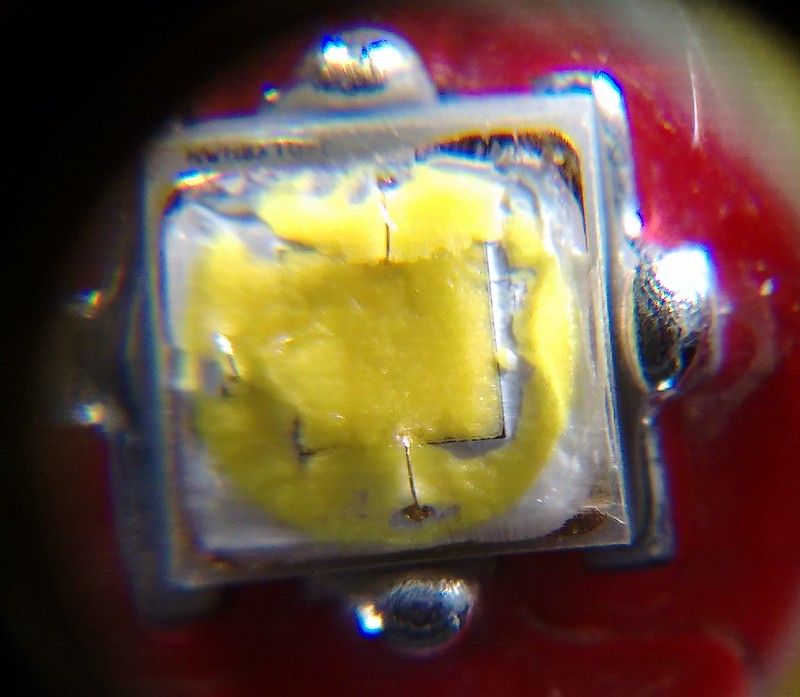
I flowed on a new LED, & repeated the cut with the .032" washer. Once again, it cut very easy & cleanly.

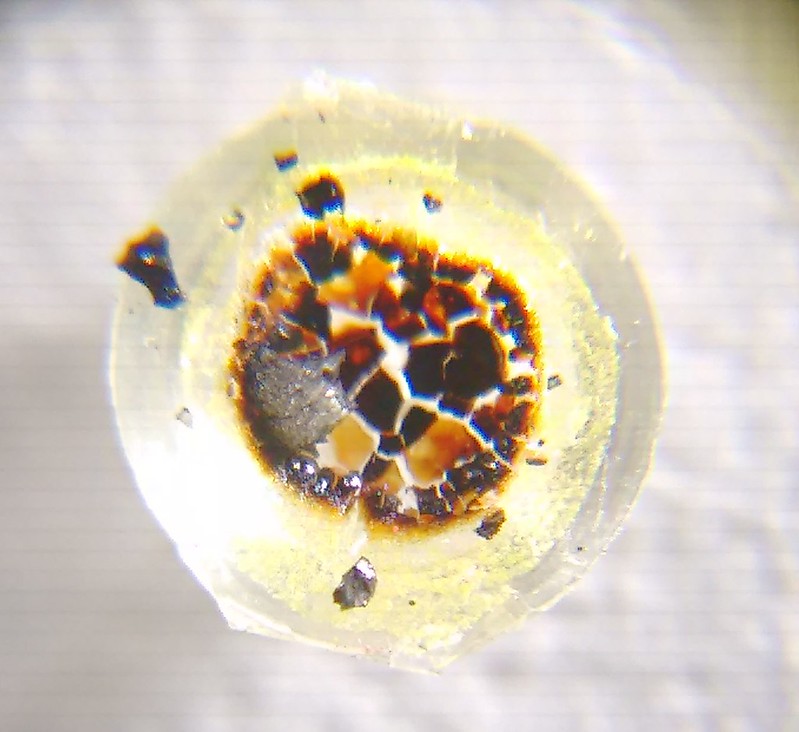
I installed it into the light, & it looked very promising. I cycled through the modes a few times, & was about to go into the shed to take a throw reading, when I saw a burn mark in the center of the LED. I tried shaving it a little more, but the burn was right through to the die.

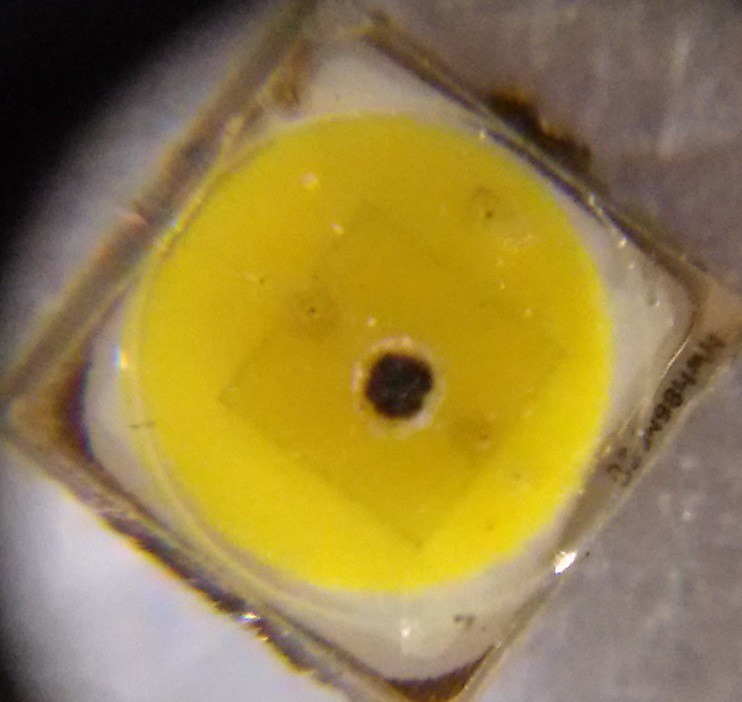
Damn it - I don't know if it there was something on there that heated up, or if it burnt its self up.

Two down, three to go...

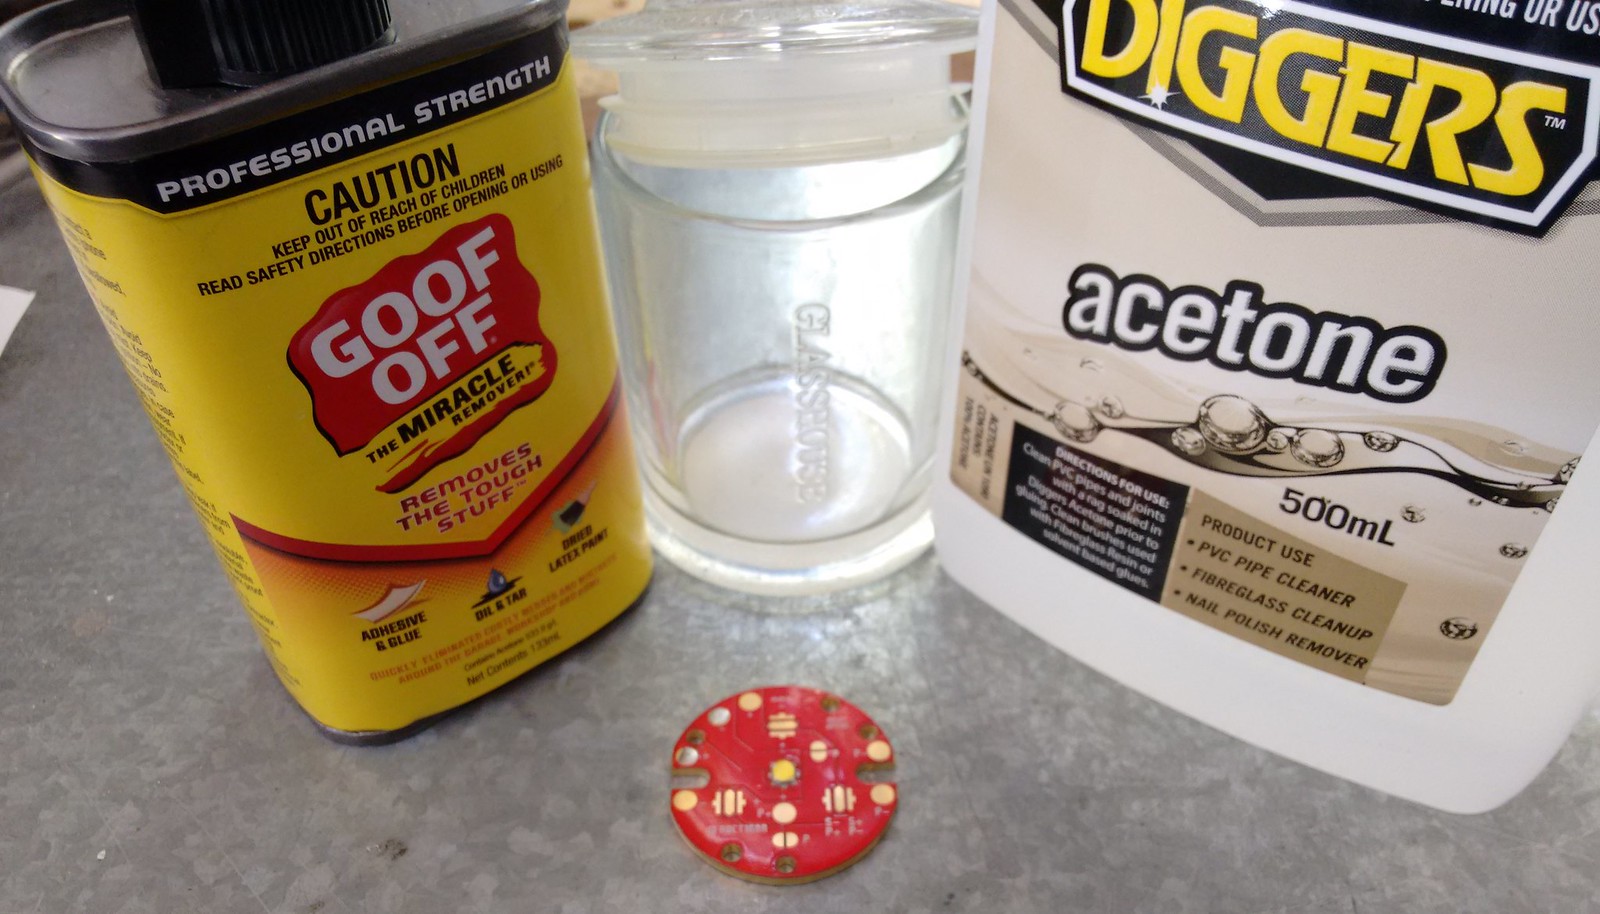
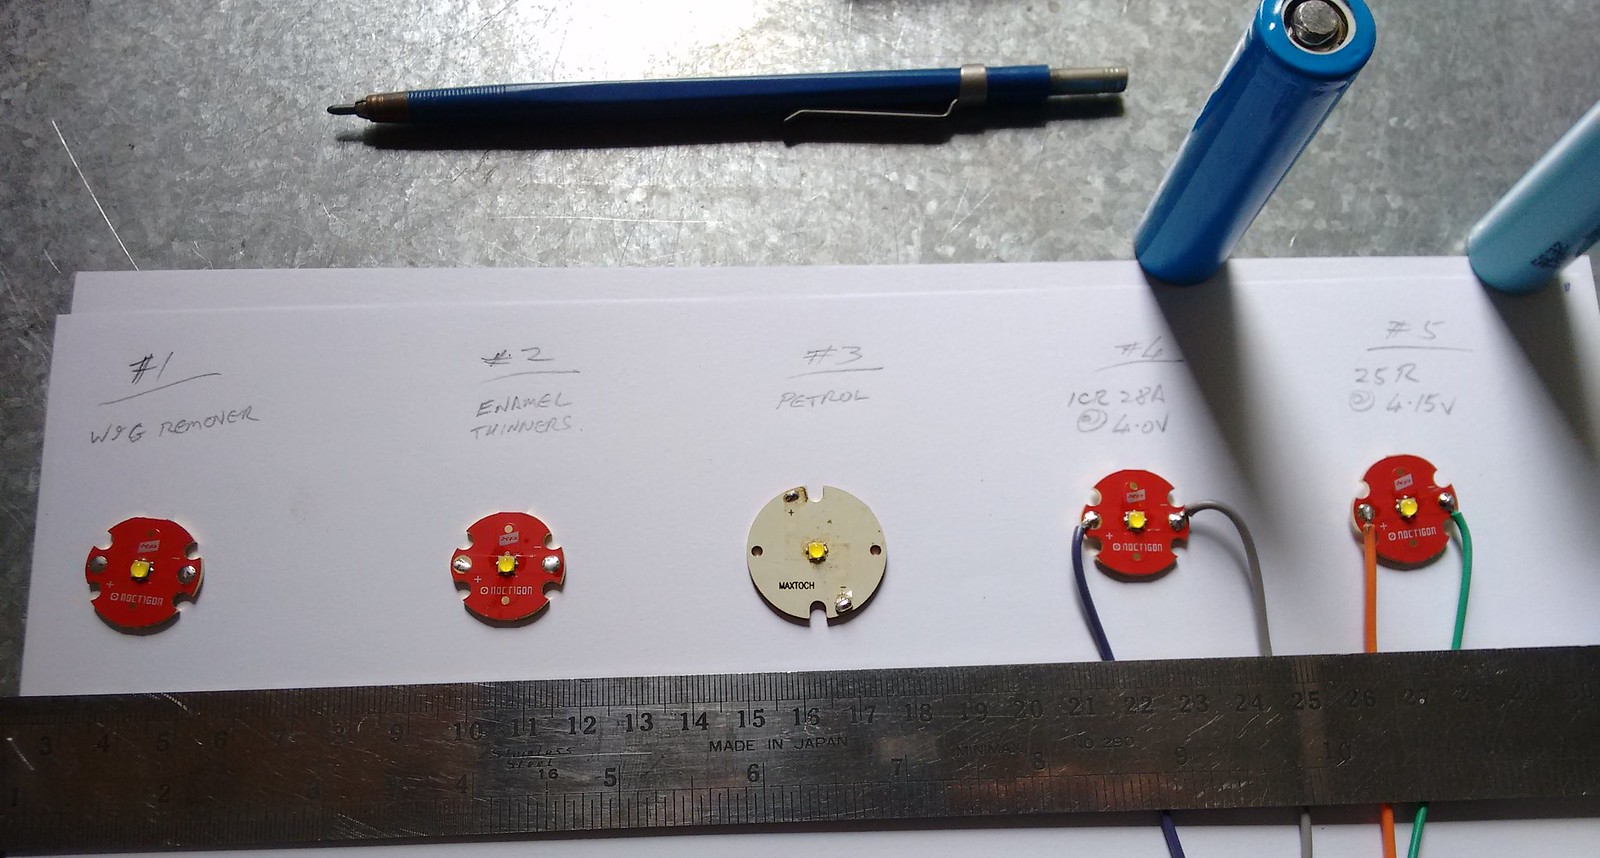
During the above testing, I had two other LED's soaking - one in the tried-n-true petrol, the other in some "Goof Off".

I had never tried the Goof Off, but spotted a small container of it in the hardware store, & remembered other members having good success with it. I noticed it was about 50% Acetone, & there was some 100% Acetone right next to it on the shelf, so I grabbed that as well.

Well, after about 4 hours, the Goof Off had done absolutely nothing, so I swapped it over into the 100% acetone.

Meanwhile, the petrol was showing signs of promise, with a swollen dome, & on closer inspection, it appeared to be separating slightly on one edge.

A couple more hours, & the Acetone had not worked any better, so I cut a few slits in the dome to try & spur it on. Meanwhile, the petrol had swollen some more, & the separation was more obvious.

Another hour later, & the Acetone had fared no better. I tried flicking the dome off, but broke a bond wire in the process. Three down, two left....

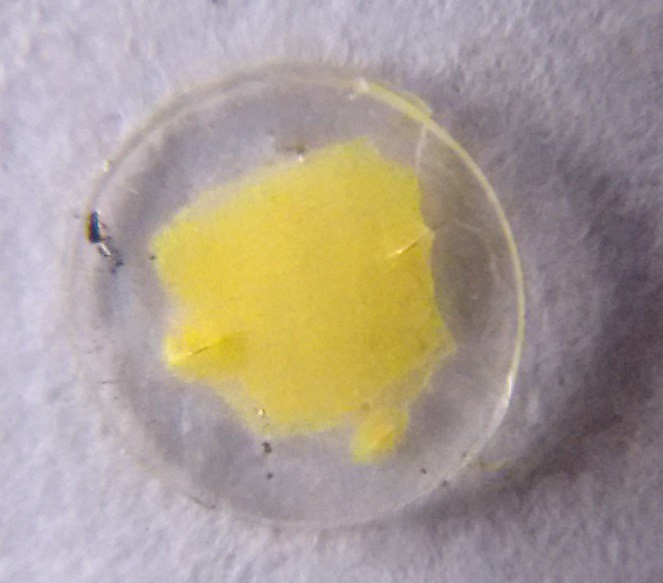
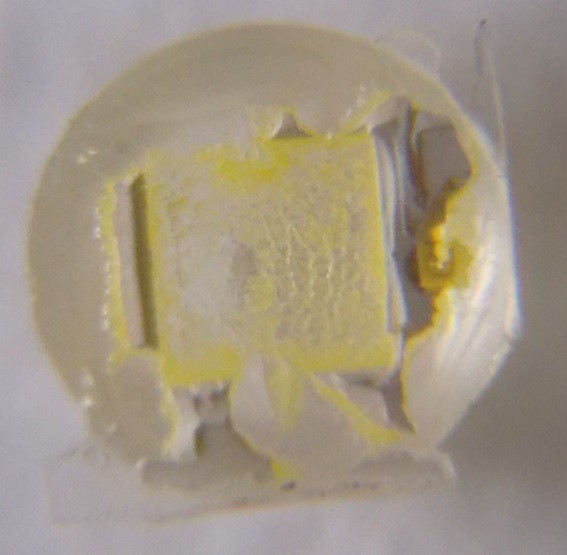
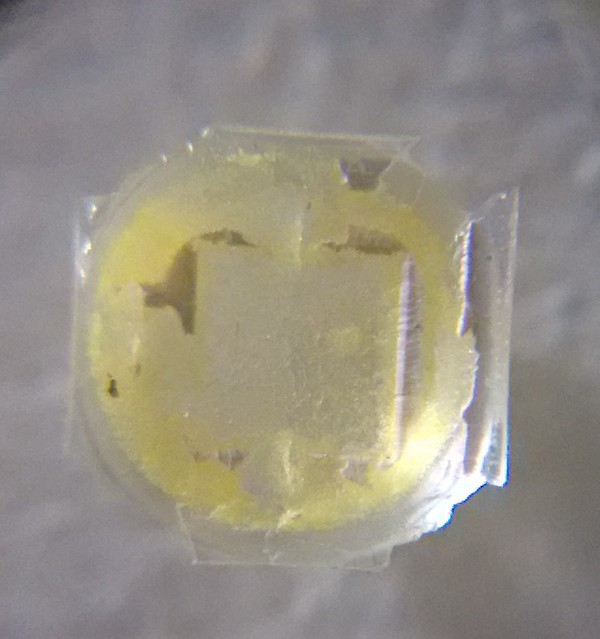
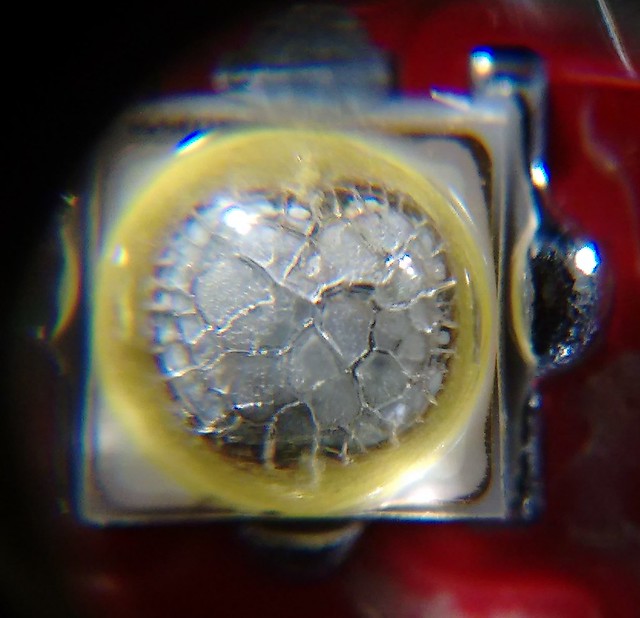
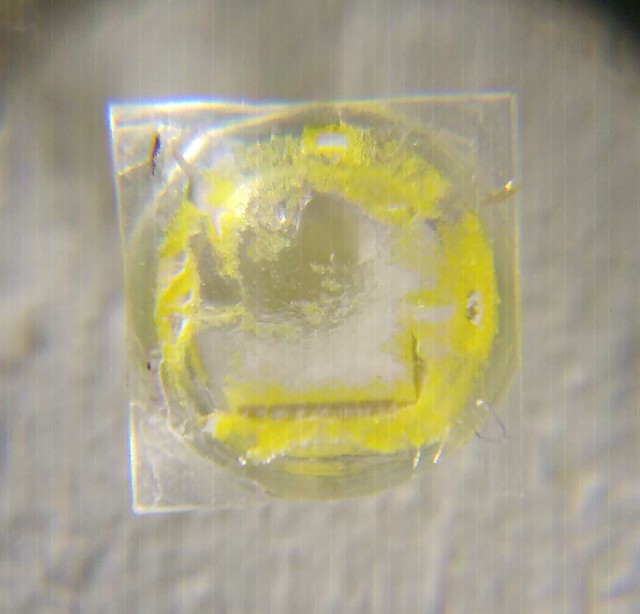
The petrol dome was looking promising, so I worked the dome off from where it had separated slightly.

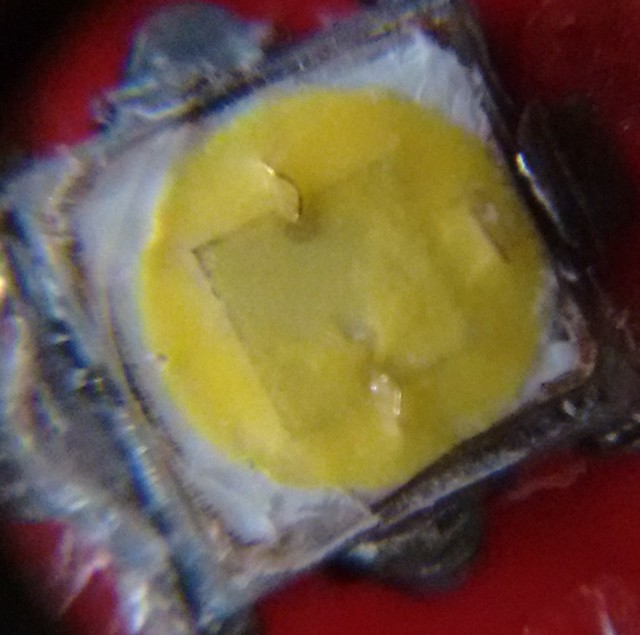
Not too bad, most of the phosphor had remained in tact, & no broken wires.

I decided that I would put the last untouched emitter in petrol over night, & give it a start by cutting around the circumference of the dome, in the same place that the first petrol LED had separated.

Right - now that I had an emitter to test, I installed it into the light. Initially, I measured 359KCd, without focus tuning, & with cells still a little too high.

After several focus adjustments, I was able to get a best of 398KCd.

By this time the cells were down enough for the emitter to be in it's peak range. I confirmed this after the test by taking a current measurement at the emitter; 7.25Amps.

Not bad at all, but with the same setup, I have measured 440KCd with the XP-G2.

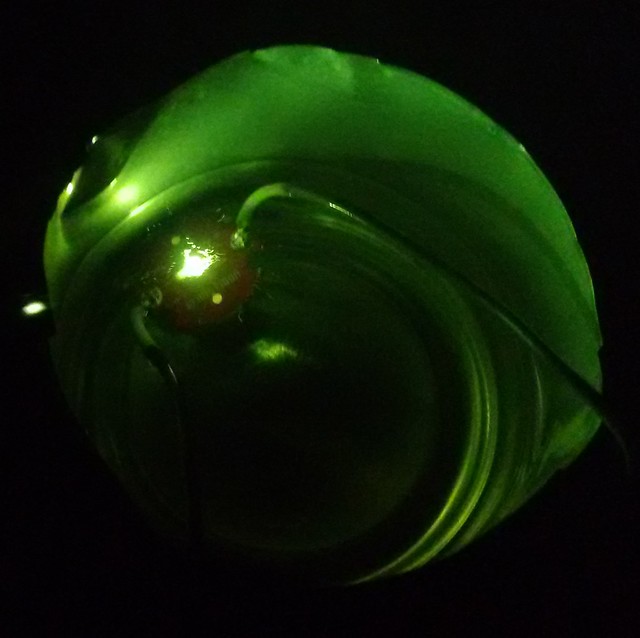
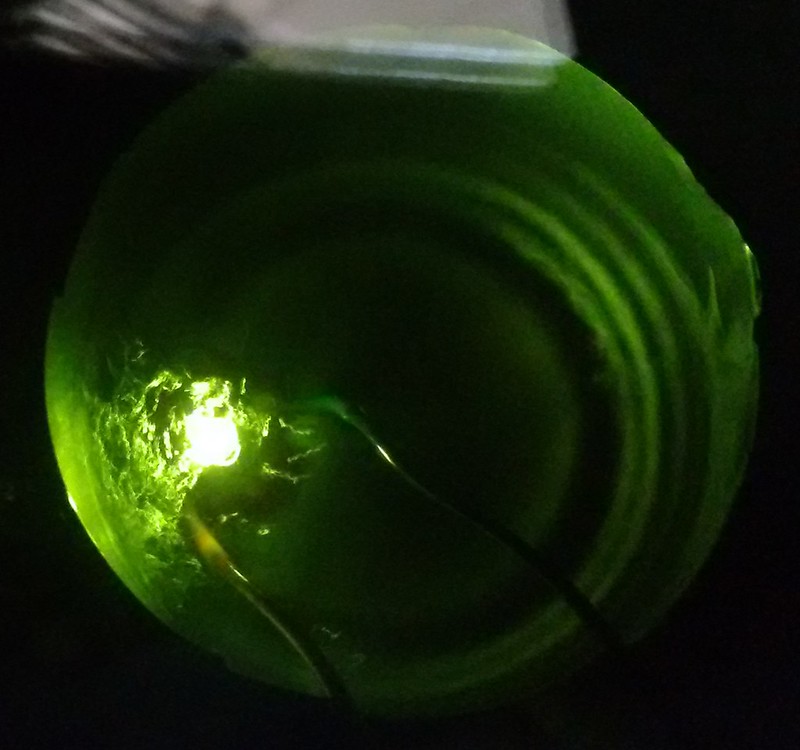
An observation I made whilst adjusting the focus, was that the positioning of the bond wires is presenting the reflector with two dull spots right in the middle of the die, either side of the focal point. I think that if the bond wires were in the same position as the XP-G2, or absent like the Nichia's, then it may have made the difference, as far as a reflector is concerned.

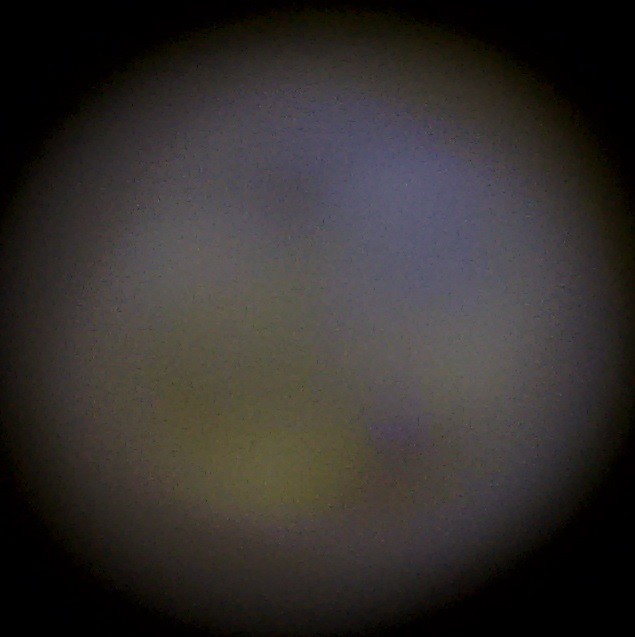
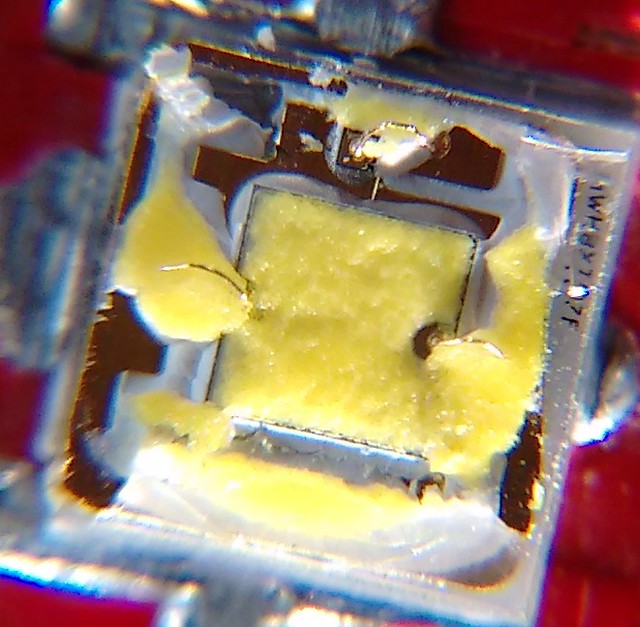
Looking at the white-wall on a lower mode, it looks like the bond wire location is impacting the uniformity of the beam. The purple is due to some missing/thin phosphor, but the bond wires are at 11 o'clock / 5 o'clock. My photo is not the best, but DJozz' photo (on right) using aspheric lens makes it more obvious.

Now, how about that last LED? It's been in the petrol for ~12 hours now...

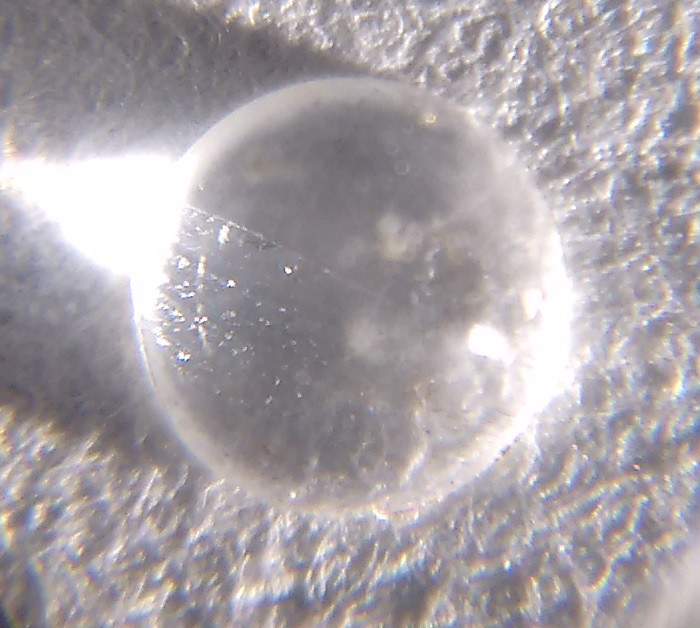
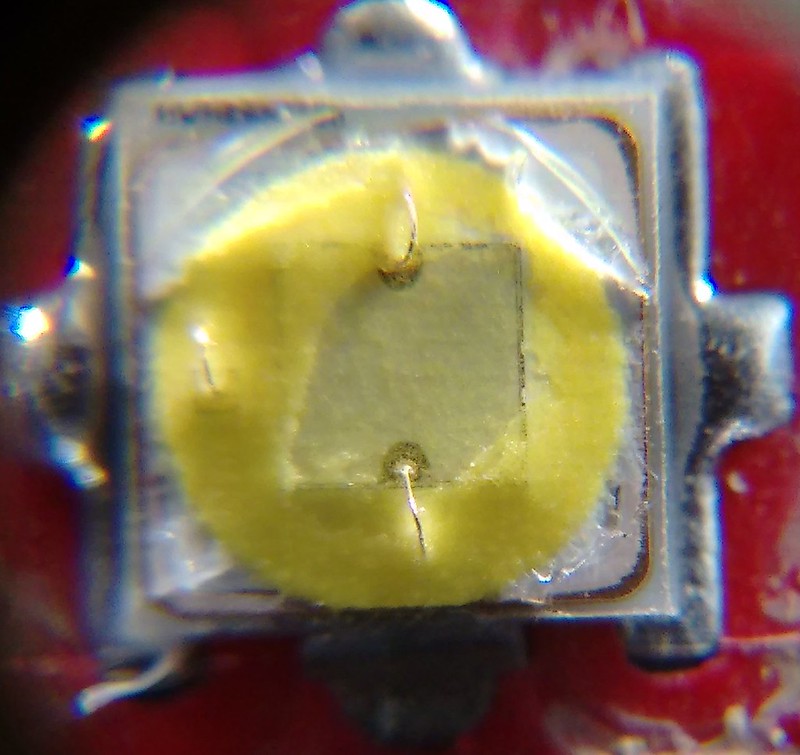
Sadly, the dome was still on, but was swelled noticeably. I tried to coax it off;

It looked ugly, & still took too much coaxing to come off. Unfortunately, one of the wires must have been damaged, as it blew when I installed it....

So, what to do with the one remaining LED? I think it would be best suited to a single cell light, with a regulated driver, or FET driver with a high capacity, low-drain cell.

Thanks for sharing the pain! :beer:

At least you fed your curiosity. Frustration in the name of cutting edge hobby.

Thanks for sharing

Thank you for taking the bullet for us. Now we know what not to do :slight_smile: .

Thanks for doing the led surgery for us and posting it with all the gruelsome details! The series of failures look all too familiar to me O:-) After the Nichia 219C this is another led by a hair failing to triumph over the XP-G2 for ultimate throwers.

I do not think that Cree ever realised that the way they build up their leds (loose dome, quite rigid phosfor layer) made it so easy for flashlight amateurs to take off the dome, making the XP-G2 even while the competition makes better leds now (output, voltage, toughness, tint) still the led of choice for throwers.

Thanks for the testing and interesting read.

I would try hot gas method ? :slight_smile:

Hot gas desolves much faster than cold gas. The colder it is the longer it takes. Hotter it is sooner it takes…

Look at this last page especially Mitko posts: A Perfect Dedome?

Easy way: Put it in a glass jar and in a hot water (refresh hot water constantly).

Yes, I think it’s worth another round with these emitters, seeing as the xp-g2 seems to have changed now.

This would be sensation. No matter for that 2 dots in center :wink:

But don’t don’t tuoch anything until you see it fell off by itself…

For faster process you can use scalpel and cut on emitter base edges (watch out to not damage something).

Fluid will enter and start degrading much faster.

Hot gas is in method.

Edit: I would also try .032” washer method again. It seems a bit of metal particle fell on top of the silicone and made burning crater.

I had another 10 of these Oslon's arrive today, so this w/end I plan on "round two" of the de-doming trials...

I will try the heating method with both petrol & thinners, plus I have another idea in mind that involves heat, but I have not heard mention of anyone trying it before... :???: It may work, or it may end in tears, you will have to wait until the weekend to find out though.

Also open to any suggestions regarding de-doming methods/chemicals.

I really think you’ll not need any other method… Hot gas and thinner will do it. My suggestion is to cut it around silicone layer with scalpel before putting in those (gentle cut and watch out to not damage something). Fluid will enter and start degrading much faster…

Hope we will have new throw champ soon :beer:

I hope so too…

These things are not like the Crees - I have done plenty of XPG/XM/XPL, & they are a cakewalk compared to these things…

+1 these are not Cree’s. The silicone is much different. One thing I encounter with this stiff silicone in petrol is that the dome does not de-attach as a whole, and with gentle force it apoears so brittle that pieces break off instead of lifting the entire dome up. You have to retry 20 times with every little piece leftover.

Scalpel cut at strategic places like dome base should alow better fluid entry and faster working time.
Gas or hot gas is not same. Hot gas (de doming possible in less than 10 minutes :slight_smile: )

So I really strongly believe it can and it could work. Right paint thinner is even more capable than gas and no need for isopropyl alcohol bath after de doming. Gentle compressed air blow and finished :wink:

Would something like Prepsol possibly work better? It may not be as harsh as petrol.

Didn’t think of prep-sol. I’ll add it to the list.

i went thru a period whrere i went on a “mad de-doming spree”… i mean, other than the obvious candidates, like XMLs ?? i did a nichia, an XBD… lol

the nichia was whatever one has 5 dots, arranged like a “# 5” on a dice…

ugly when dedomed in my 68 clone the nichia came in… left the other 68 untouched, liked it better.

=

let it soak in gasoline, as long as it takes… dont be impatient. manual force to hurry it up only runs ris of breakng stuff… after letting it soak for as long as it takes? i use the spray “electronics cleaner” to drive off little bits… the kind that evaporates instantly.

let the gasoline do the work, keep your mitts off of it, lol…

Try slicing /carving the bulk of the silicone off first, then HOT GAS it! :smiley:

Today was "Round 2" of the Osram Oslon 3rd Gen De-Doming trials.

It was a long day, full of fumes, danger, trial & error. Again, there were five lucky candidates, but unlike last time, all of them are still working after the de-dome.

I started the day by purchasing a spare fire extinguisher, as I had planned to add some heat into the equation today, along with some Prep-Sol, Thinners, & Petrol.

Here are the five candidates laid out prior to starting;

And here is the test setup I used. Hot air re-flow station, with tip removed;

I had no idea how it would perform, but at least it was adjustable, & there was no naked flame....

Test #1 was the Prep-Sol (Preparation Solvent), which is generally used to wipe down a surface directly before applying paint to it. The LED was not altered/cut, & was immersed into the hot liquid.

In it goes;

The setup worked very well - I was able to quickly bring it to the boil. There was also a little turbulence as a result of the boiling. I monitored it with an IR thermometer, & kept it around the 120 DegC mark.

I kept it in there for an hour, & periodically removed it to check progress. After ~15 mins, I noticed one side of the dome had separated. The dome appeared to open up gradually, like a clam-shell, but never fully separated. I had to top up the fluid several times, & ended up boiling off around 200ml.

I decided to put it aside, keeping it in the fluid, & move on to test #2.

Test #2; Enamel Paint Thinners.

This was probably the most likely to go up in flames...

The second unmodified LED was boiled for over three hours in the thinners, with periodic checks, & many top-ups. I went through about 700ml in this test.

Similar to #1, the dome separated early, but never came completely off. I was tempted to give it a prod, but I kept hearing "keep your mitts off of it" in the back of my mind....

After three hours, it was clear that it was not coming off by it's self. I could see that the dome had completely separated from the phosphor over the die & bond wires, but was still attached to one edge.

During this time, I decided to put LED #1 into the thinners as well, so it ended up being in for 1.5 hours.

Both LED's were in the same "Clam shell" state, so I carefully removed the dome off the last edge of them both;

LED #1 & dome;

Ignoring the left-over phosphor around the perimeter, it came out fairly well.

LED #2 & dome;

Not so good; a large patch of phosphor is stuck to the dome. This was not done by me removing the dome - it had already occurred during separation in the fluid.

Test #3; Petrol.

The unmodified LED was submersed in the boiling petrol, & after ~5mins, the dome was starting to lift at the edge.

It was in for a total of only 14mins until the "Clam" had opened, again leaving the dome attached at just one edge.

Here's how it looked;

Again, some phosphor has stuck to the dome during the separation process in the petrol.

Test #4; Powered LED in room temperature petrol.

This is the method that I hinted at in a previous post; Applying power to the LED whilst submersed in petrol.

Here's the setup prior to adding the petrol;

Cell used is a Samsung ICR 28A @ 4.0v.

The plan was to observe it using the auto-darkening welding mask.

This was a little intimidating - I really didn't know what to expect when I hit the power button....

The LED lit up, & within a few seconds, there were bubbles coming from the dome. I cycled it a few times, & checked it, but there was no apparent change yet.

When I was pretty sure it was not going to explode, I grabbed a photo through the welding mask;

After that, I let it run for a while, when all of a sudden it let out a 'pop'! I had my finger on the button, so let it off immediately.

I regained a little composure, & inspected the LED - there was a black bubble in the center, but it did not look like the dome had been breached.

The LED still worked, but I figured it was toast, so I put it back in, & this time hooked up a 25R to it. It bubbled away again, a little more vigorously this time. I realized that with the low voltage of these LED's, I had applied too much power initially.

When I was taking pictures after all the testing, I noticed that this one had turned from black to grey, so I decided to flick off the dome;

There was a crater inside the dome, but the phosphor was still surprisingly in tact, albeit a little burnt, possibly from being over-driven?

Test #5; Powered LED with dome perimeter cut, in boiling Prep-Sol.

Last test of the day, & I wanted to combine the best results so far. I used the Prep-Sol, as it appeared to have the cleanest result so-far, & I carefully used a razor around the perimeter of the dome, cutting in from the edge.

This time, I used a weaker battery, @ 3.65v.

The dome lifted, & "Clam shelled" as before, but still refused to come off completely by it's self.

This is probably the 2nd best effort, with #1 being the best of the bunch.

I'll install at least #1 into the Courui test mule, to see what the numbers are.

In the first round, I almost hit 400KCd, so maybe will be better this time. I'm not sure what can be expected in this setup out of the "new" XP-G2, but I'm guessing it's less than that, so already we may have a new thrower "king" by default.

The hurdle to overcome here, is that the phosphor is stuck to the dome almost as well as it is to the die.

I still have another five of these emitters, so will "sleep on it" for a while, before going in for the 3rd round...

:beer:

-----

Update; Installed LED #1 into the Courui, & after a bit of fiddling with shims, it was able to produce 410KCd.

------

So much effort and patience. Thank you for doing this.

Thank you very much for doing this… This Osram is hard nut to crack :slight_smile:

Please if you have some spare emitters try your .032” washer method… It looks promising… Worth another try…