The Prime C2 – Armytek’s new entry-level model of the Prime flashlight series. Small and with a simple user interface. But also tough, great switch and magnetic charging.
The flashlight was provided by Armytek for this review, without any obligations. Thank you very much!
You can find the German version of this review on my website: SammysHP Blog › Armytek Prime C2 (ohne „Pro“)
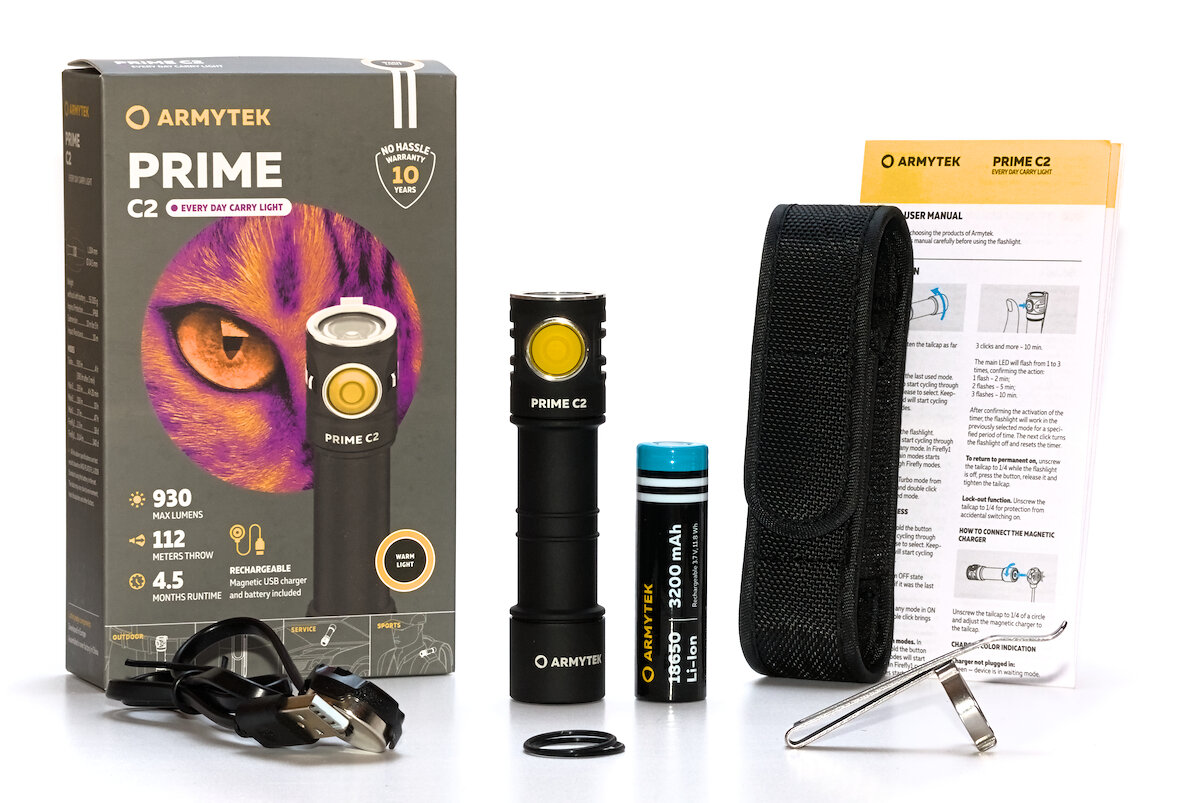
Supplied parts and hardware
- 18650 Li-ion battery with 3200 mAh (3.36 V at arrival)
- Magnetic charger
- Holster
- Clip
- 2x replacement o-ring
- Quick start guide (EN, DE, FR, RU, FI, SE, NO, PL)
In the past there was a QR code in the quick start guide which linked to a PDF of a comprehensive manual with all details. Unfortunately this isn’t available so far. On the other hand the operation of the Prime C2 is so simple, that you won’t need more than the quick start guide.
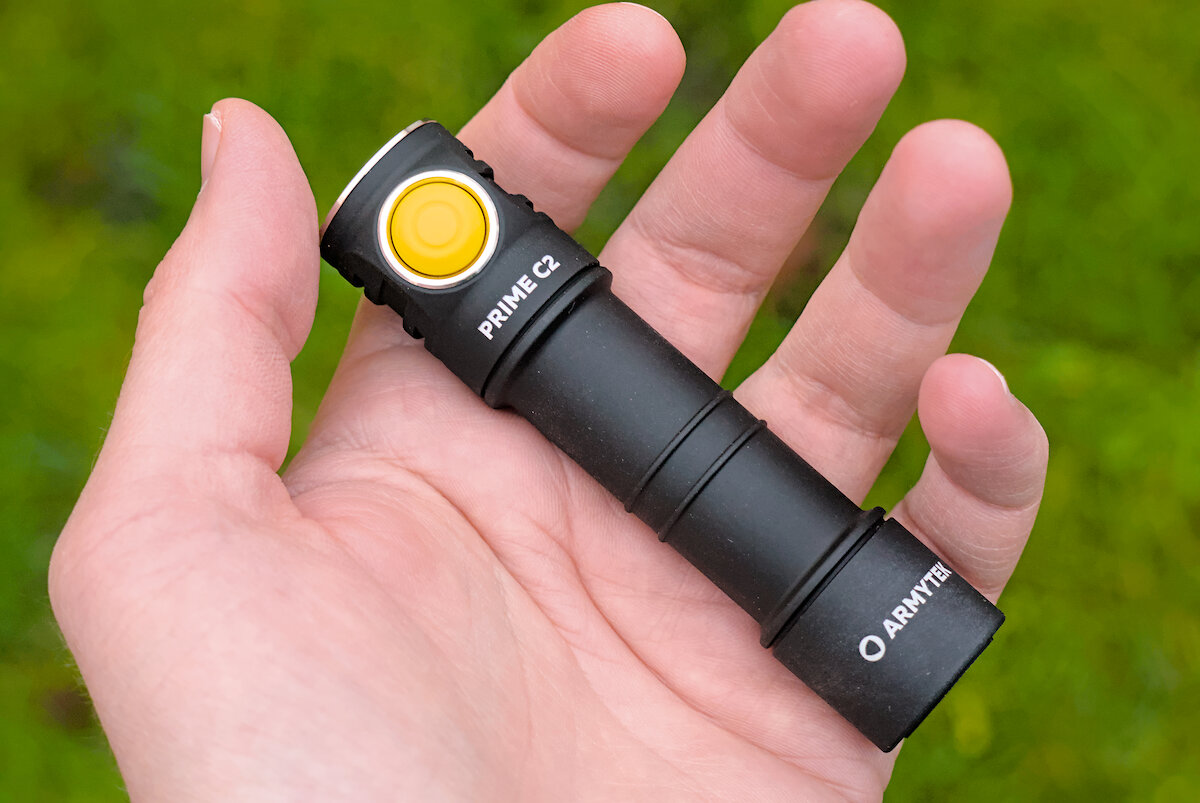
Within the Prime series, the Prime C2 is almost the smallest flashlight. Only the Prime C1 Pro with its 18350 battery is a little smaller.
Length: 104.0 mm
Diameter (head): 24.5 mm
Diameter (battery tube): 20.6 mm
Diameter (tailcap): 24.5 mm
Weight (without battery): 54.0 g
Weight (18650 battery): 45.0 g
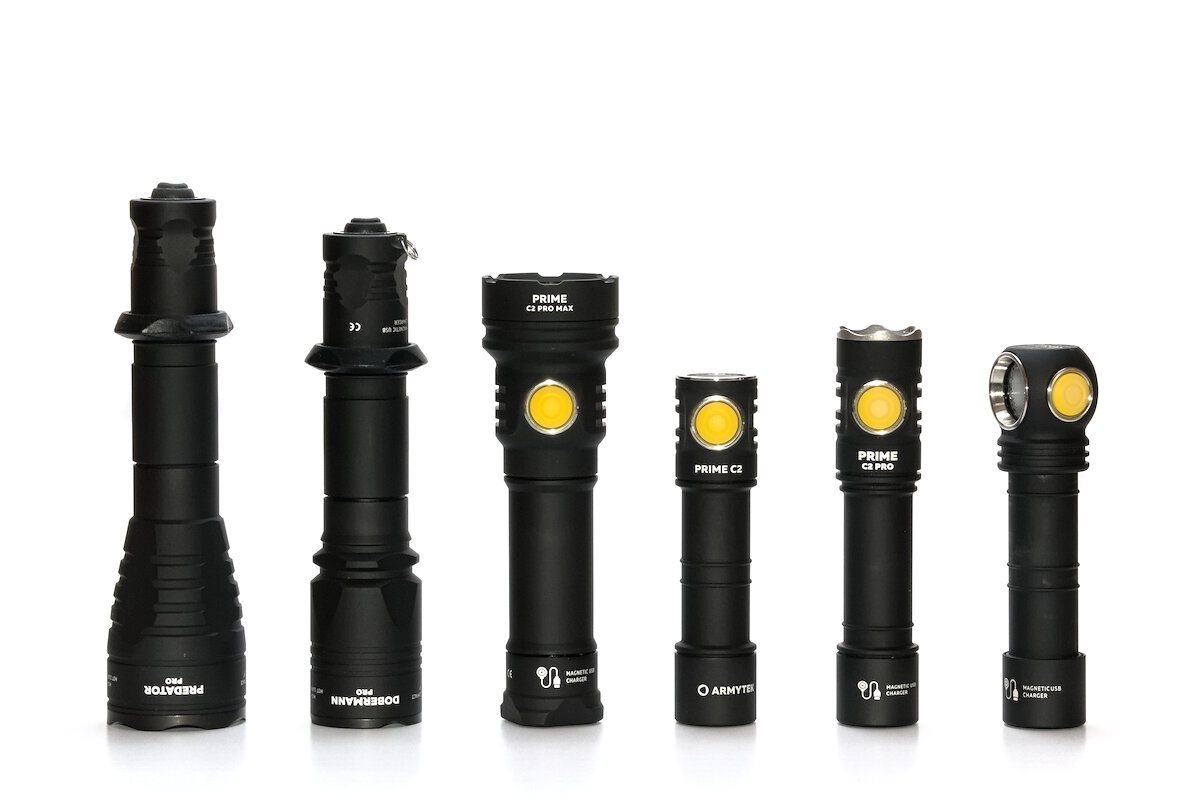
Predator Pro | Dobermann Pro | Prime C2 Pro Max | Prime C2 | Prime C2 Pro | Wizard C2 Pro
In comparison to other 18650 flashlights the Prime C2 is average in size.
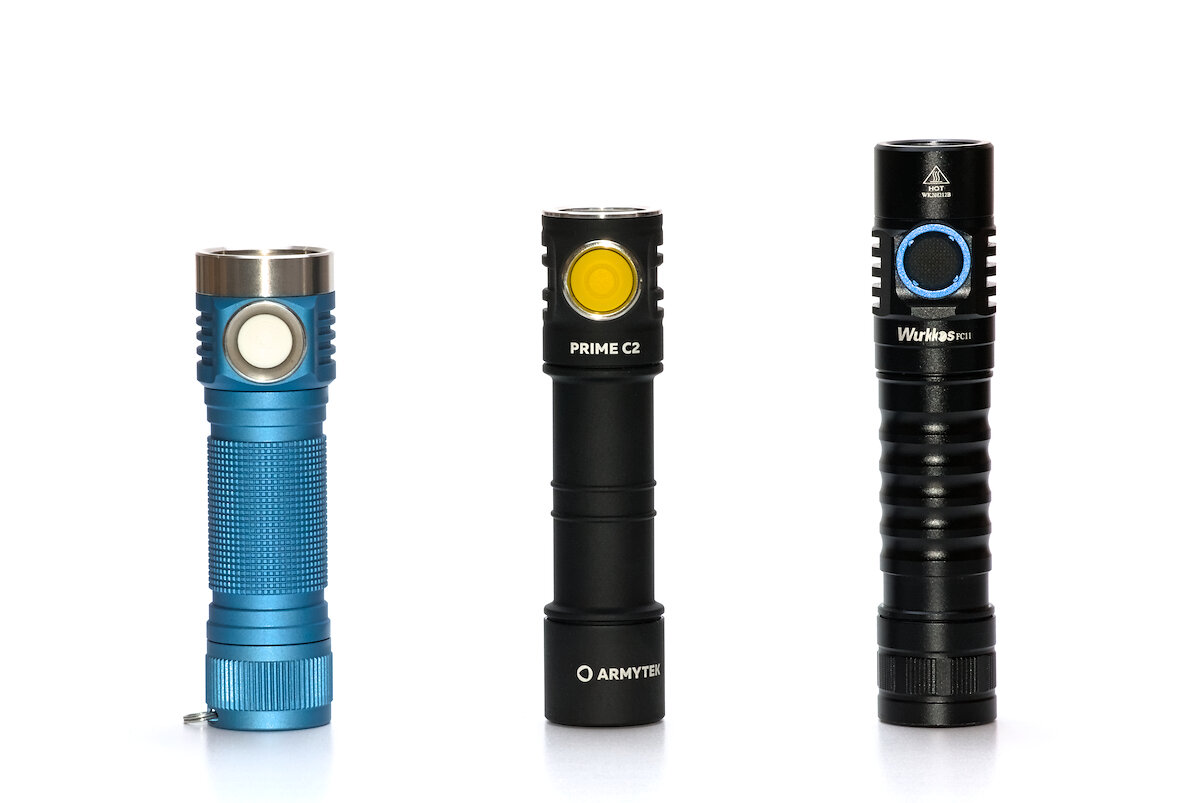
Emisar D4v2 | Armytek Prime C2 | Wurkkos FC11
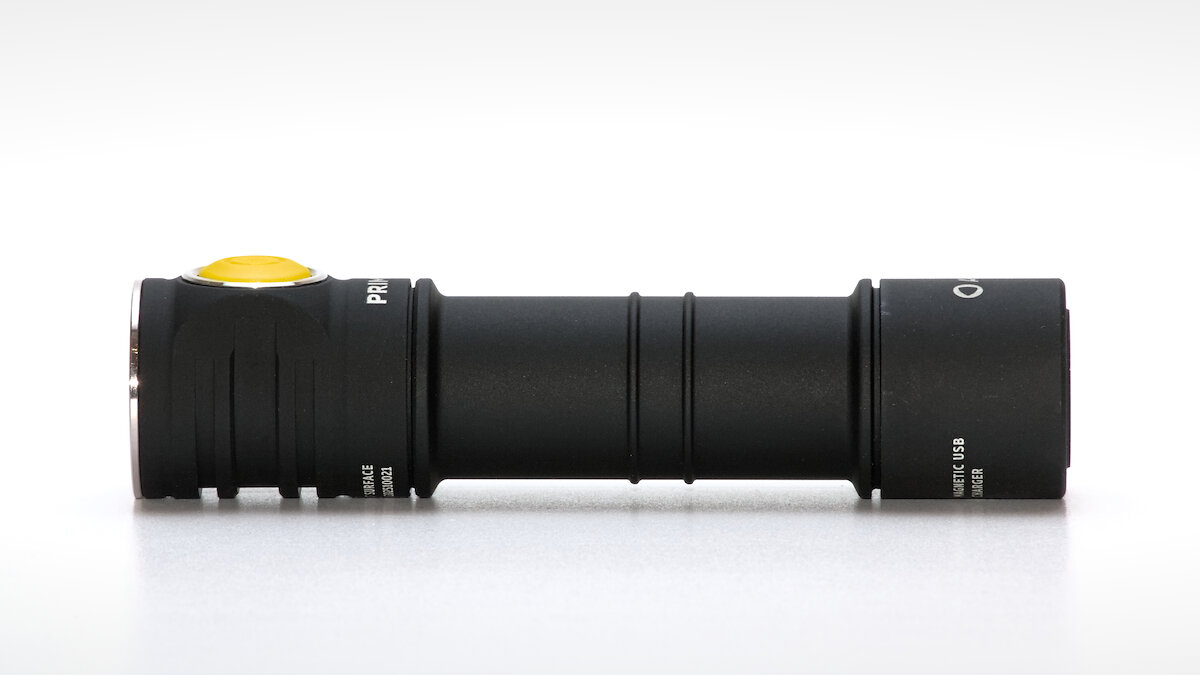
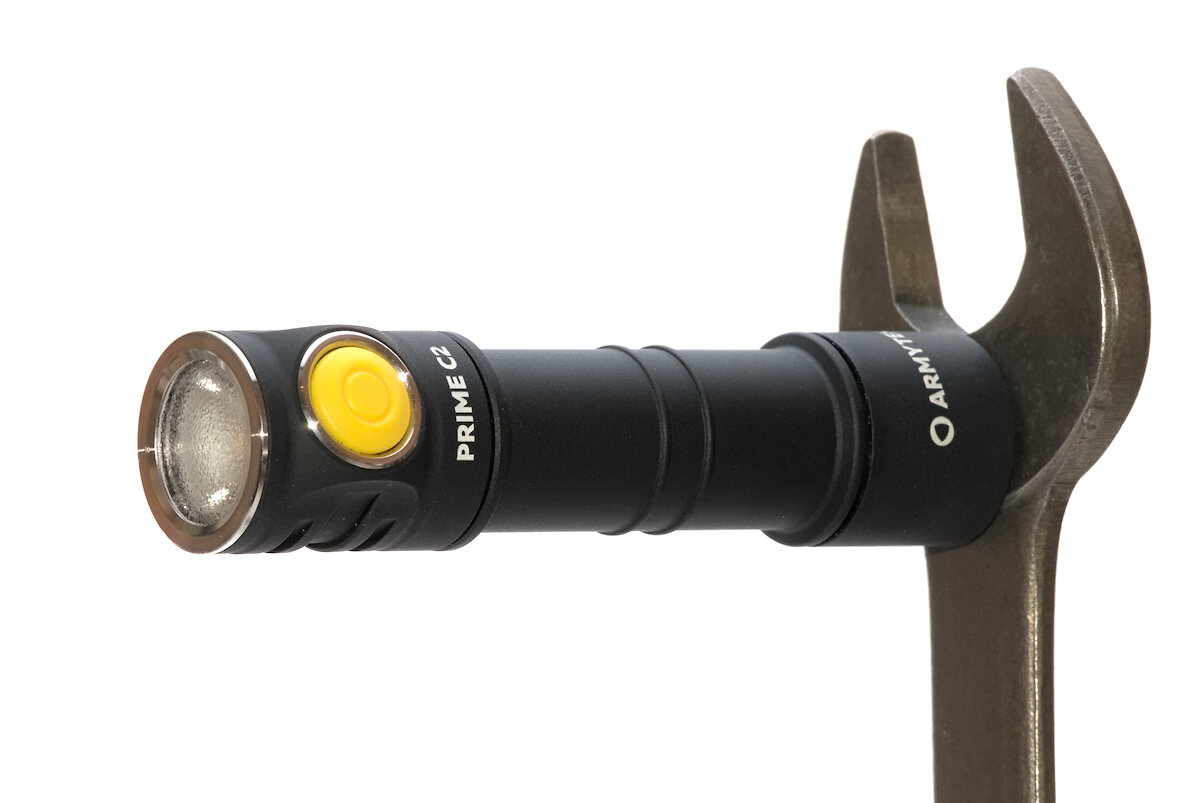
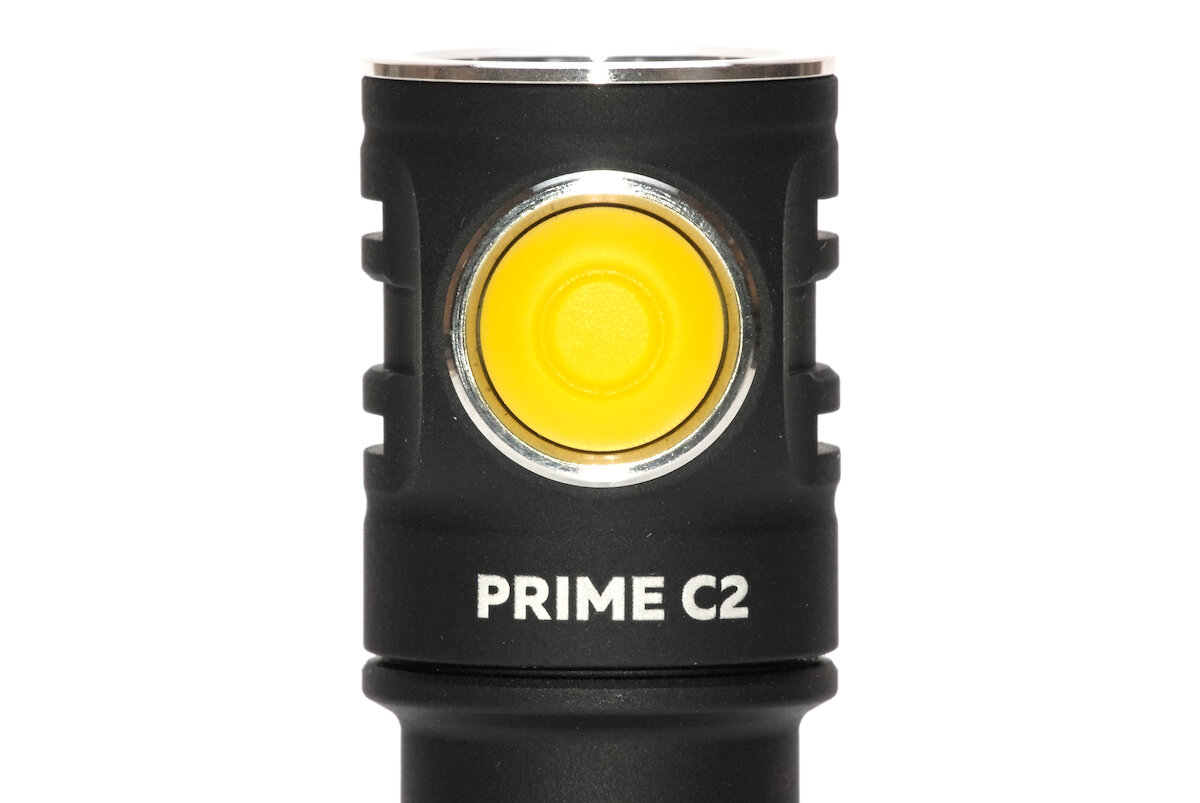
It’s definitely a Prime in its design. Especially the prominent, yellow switch. The TIR optic is held in place with a pressed-in stainless steel bezel.
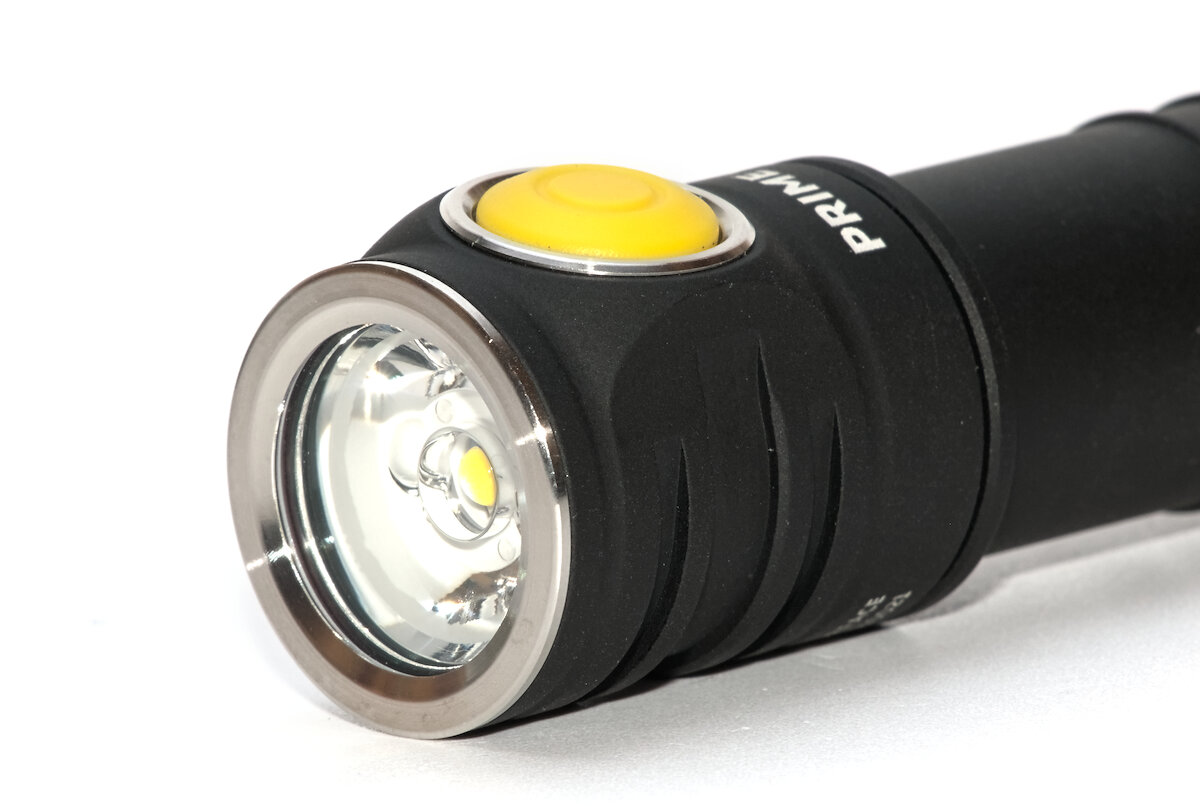
The rough anodization allows for a secure handling even without knurling, but makes it harder to clean. It’s almost like a chalkboard.
The protruding switch stops the flashlight from rolling away on a flat surface.
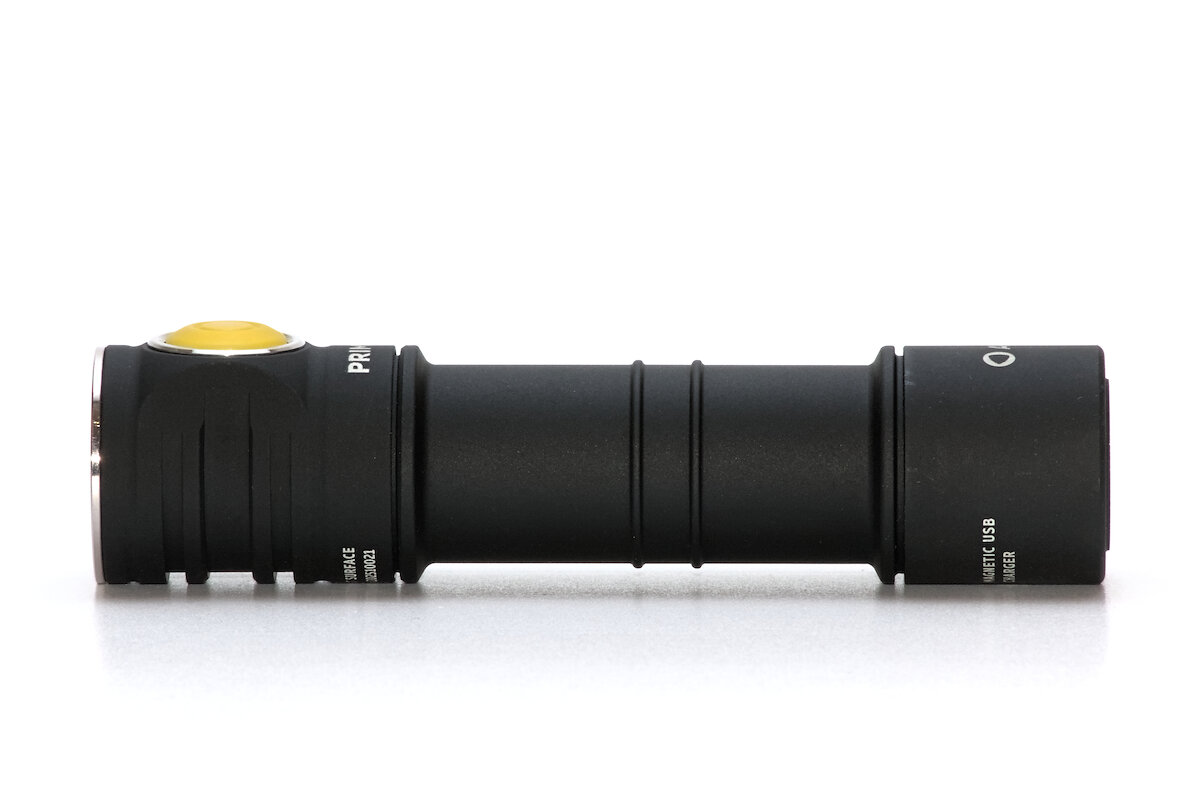
You can attach a clip at the middle of the battery tube. It is very tight and will damage the anodization when you try to attach it, so I didn’t. But it allows deep-carry if you risk it.
There’s no direct way to attach a lanyard. You can tie it around the battery tube or the clip, though.
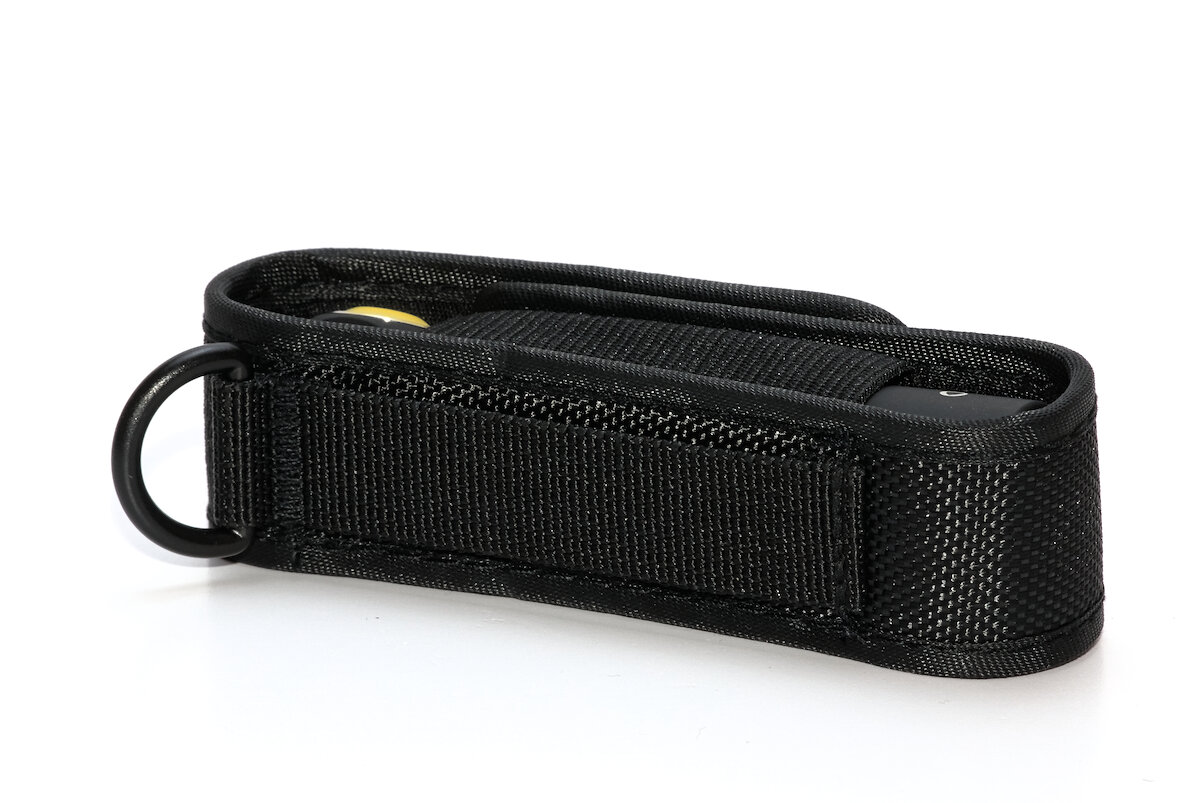
For storage or carrying it comes with a nice holster made of a thick webbing and Velcro to close it.

It can be attached either with a closed loop or with a D-ring.
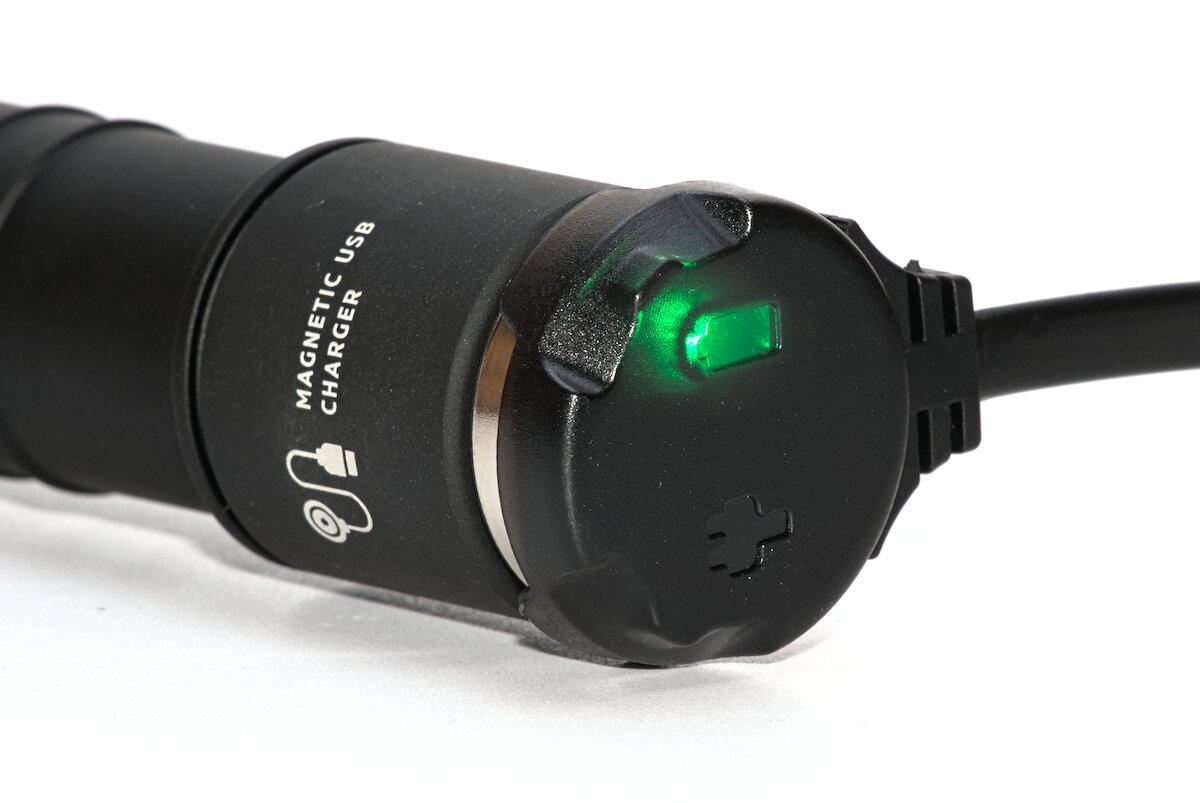
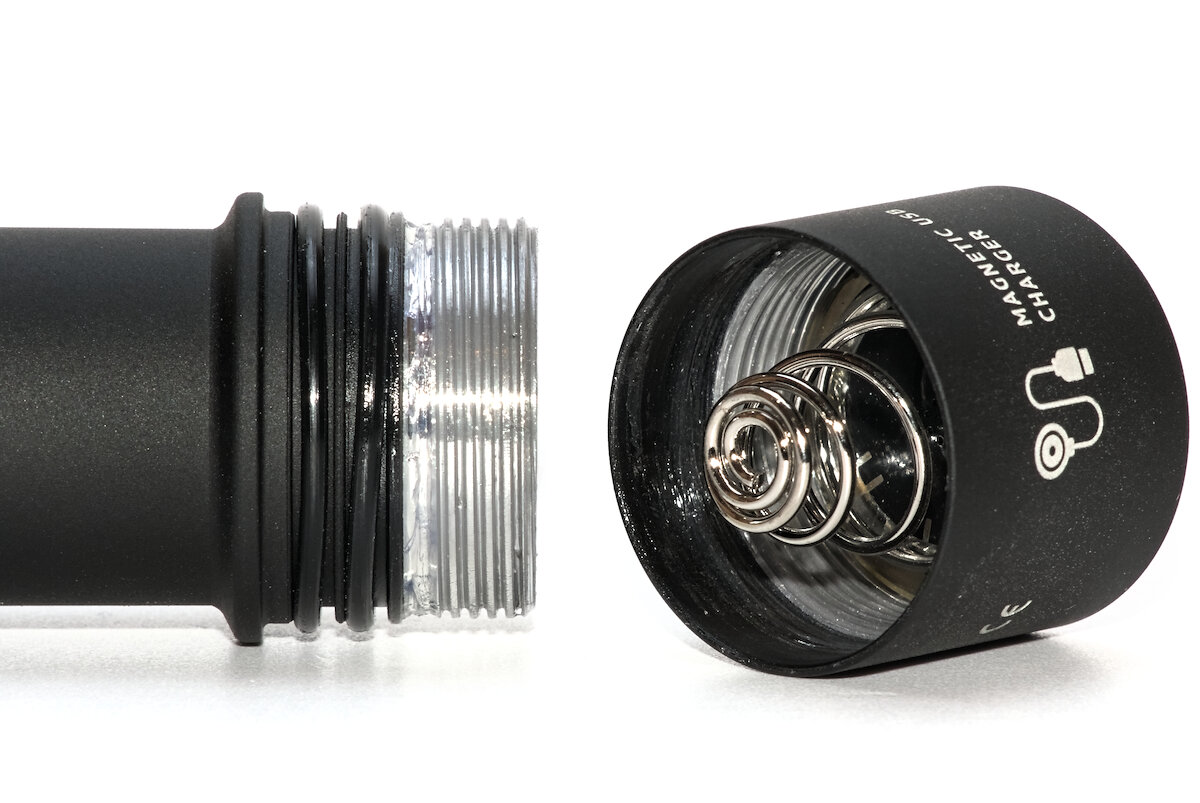
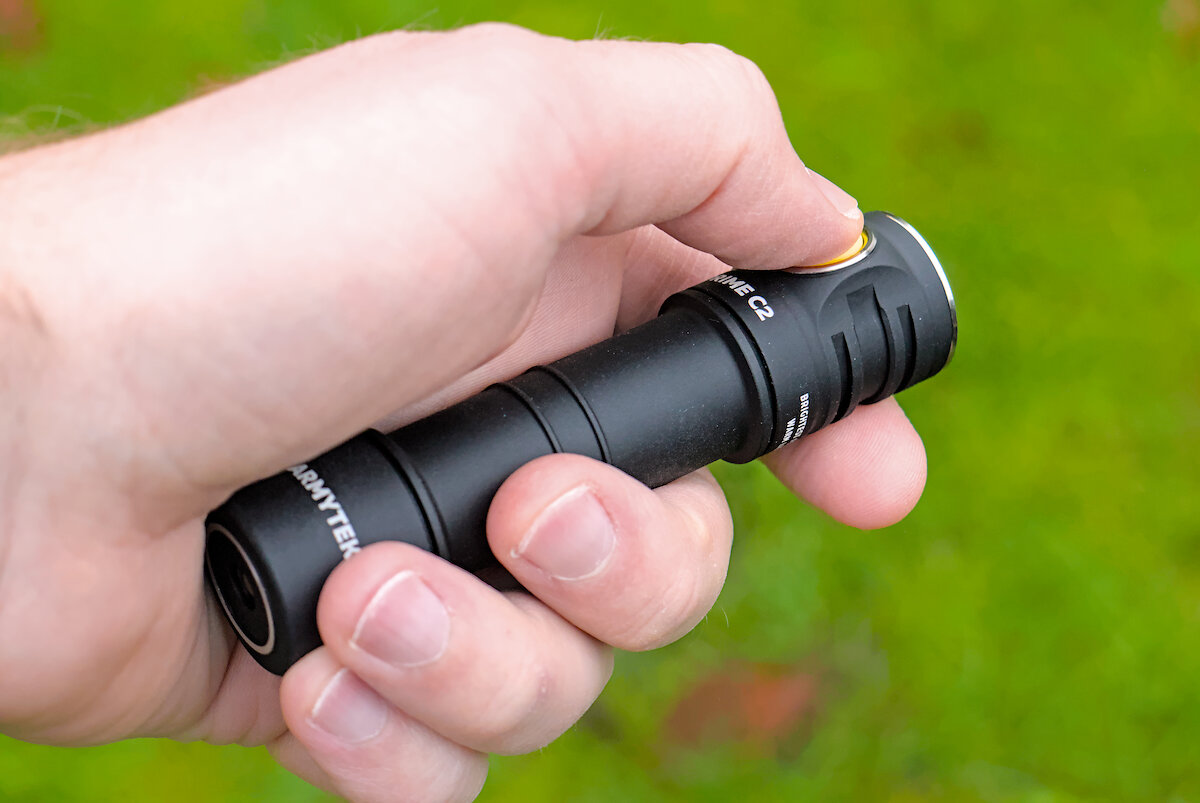
The contacts on the tailcap make it possible to charge the battery inside the flashlight. A very good system to make it more robust against water and dirt compared to a USB port, but it requires the special magnetic charger.

For charging, first loosen the tailcap a bit. Then bring the charger close to the contacts and it will snap in place automatically.
LEDs in the charger tell you the current charging status. Neat: After 30 seconds the LEDs will slowly fade to a low level to be less annoying in the dark.
| Color | Meaning |
|---|---|
| green | standby / charging finished |
| red blinking | loosen tailcap |
| orange blinking | input voltage too low or dirty contacts |
| red | charging (1 A) |
| orange | charging with reduced current (0.5 A) |
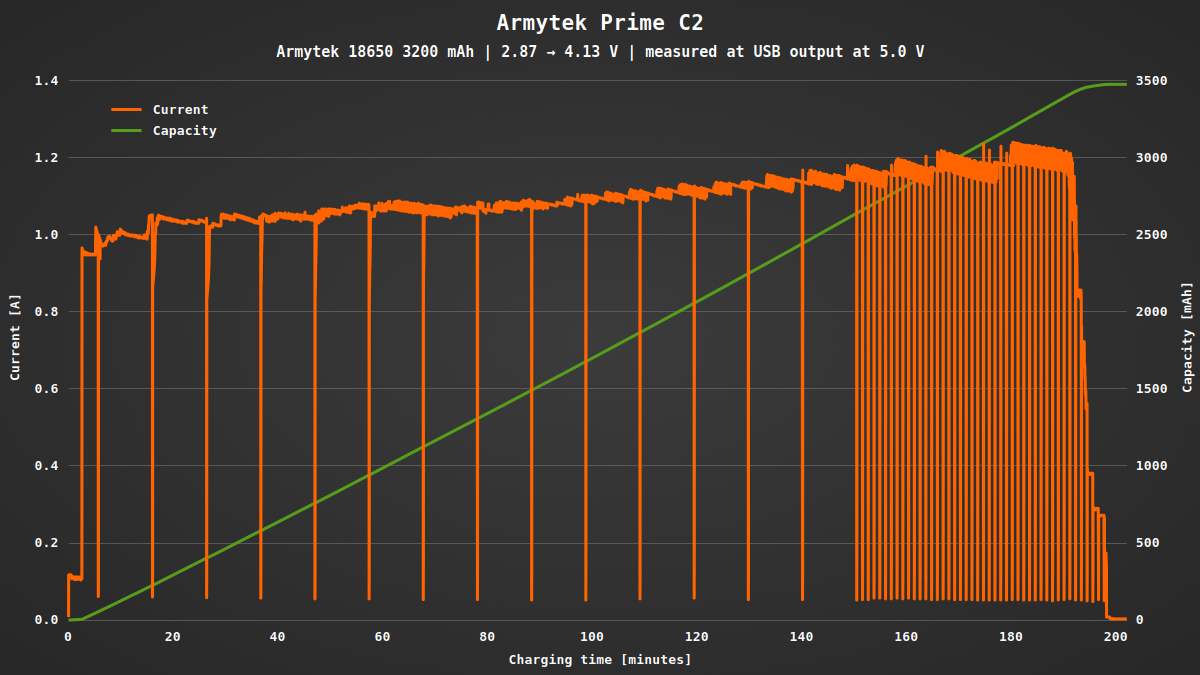
Charging is started only when the battery voltage is below 4 V. Otherwise the green LED indicates a full battery. During charging the flashlight cannot be used.
It charges with up to 1.2 A in a very special way. Instead of the common CC/CV method it charges mostly with constant current only. Every now and then the charging is interrupted for a short moment, maybe to measure the open circuit voltage. From my knowledge this isn’t a recommended way of charging Li-ion batteries and it could shorten the battery life.
The magnetic tailcap works also to hold the flashlight horizontally on a metal surface. There’s no risk of shorting the contacts: The center contact is recessed, while the tailcap is tightened the two contacts are bridged and when it is loosened there’s also no current while the flashlight is off.
Two o-rings in the tailcap protect it against water. It is rated for five hours at ten meters depth under water (IPX8). It has also an impact resistance of 10 m. Tightening the tailcap takes 5 turns.
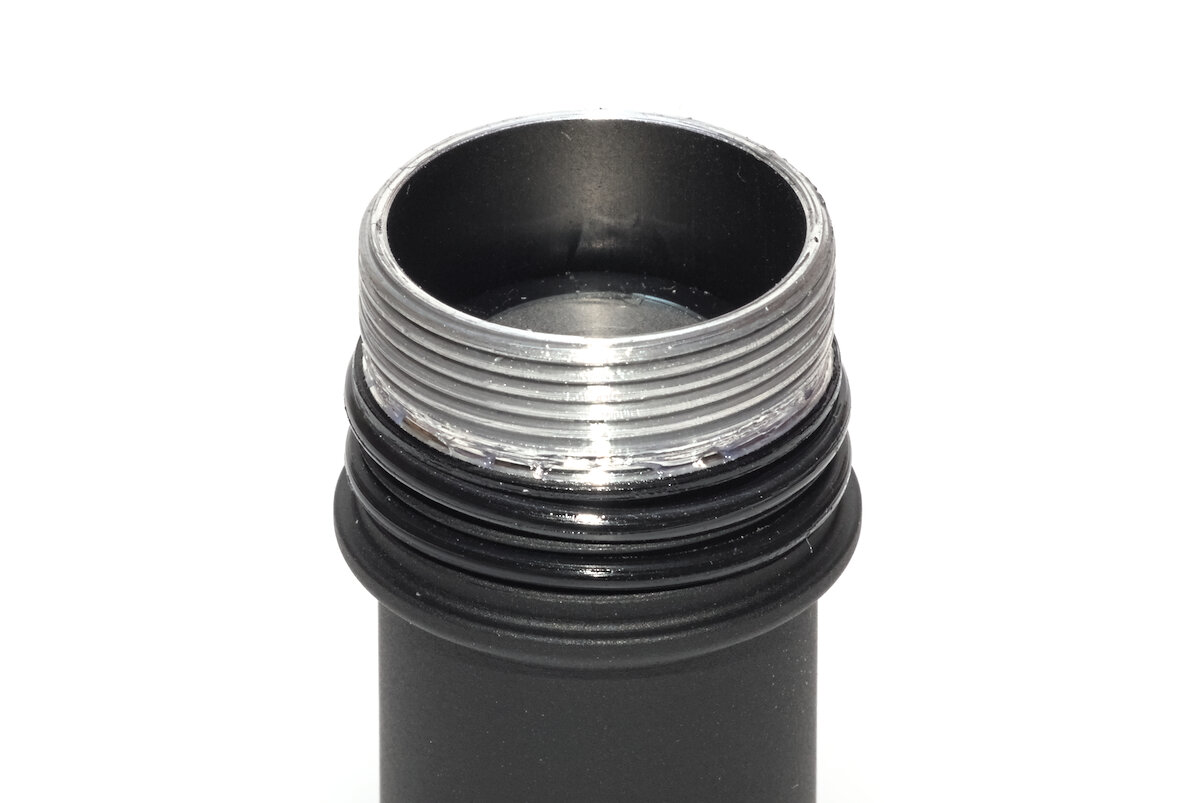
The head is glued and cannot be removed. There’s a little button as a contact instead of a spring.
The tailcap has a very long spring. This makes it possible to use almost any 18650 battery – flat top, button top, protected, unprotected. Without this flexibility the flashlight could be quite a bit shorter.
Overall the manufacturing quality is awesome. It feels very robust and has no defects. Only some edges like the cooling fins or the ring of the charging contact are a bit sharp.
User interface and features
(Almost) everything is done with the large, yellow switch at the head of the flashlight.
As an entry-level model, the Prime C2 only comes with a simple “General UI”. The “Advanced UI” is something you only get with the Pro models.
| State | Action | Function |
|---|---|---|
| Off | 1 click | Turn on (last used mode) |
| Off | Hold | |
| On | 1 click | Turn off |
| On | 2 click | Turbo or back to previous level |
| On | Hold |
No strobe, no beacon. Also no button backlight for indication of the remaining battery capacity or to find the flashlight in the dark.
Surprisingly there’s a “hidden” timer mode. So far I haven’t really understood its purpose.
- Loosen Tailcap
- Press and hold switch, tighten tailcap
- Release the switch
Now if you hold the switch again, you’ll get momentary light in the last used brightness for up to five seconds. Holding it for longer starts the timer programming:
- Hold switch for five seconds. The flashlight starts to flicker.
- Press switch 1 – 3 times to select a timeout of 2, 5 or 10 minutes
- The flashlight blinks 1 – 3 times for confirmation and then turns on in the last used brightness
- After the selected time it turns off. Now you can start at step 4 again.
Loosen the tailcap and shortly press the button to exit the timer mode.
The switch has a loud and solid click. It is easy to find because of its exposed location. It’s also protruding some millimeters, so be careful while carrying it in your pocket. Mechanical lockout is possible.
Illumination
The Prime C2 is available in a cool white and a warm white version. Both have a Samsung LH351D in the CRI70 variant. I don’t understand why Armytek hasn’t chosen the much better CRI90 variant. I got the warm white version for this review.

A very unusual TIR optic shapes the beam. The middle part of it is flat and offers a clear view of the LED. Then there are two “bubbles”, little holes for the screws which hold the MCPCB in place. The TIR optic is contained in a little plastic cup and hold in place with the bezel. As seen in the photo, there is an oily residue between the cup and the TIR, changing its optical properties.
The result of this construct is simply shocking. A bright and smooth spill from the middle part. It has a much higher color temperature than the yellow and green spot. Even d-c-fix couldn’t fix this.

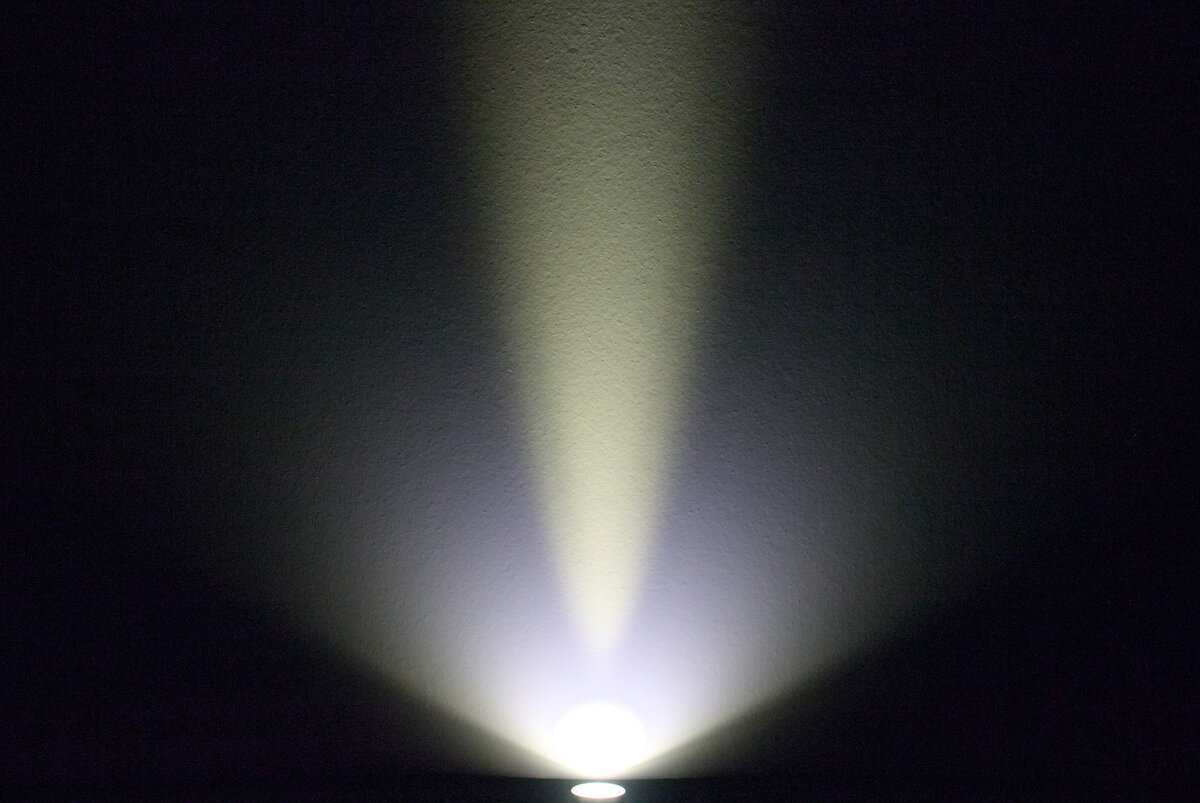
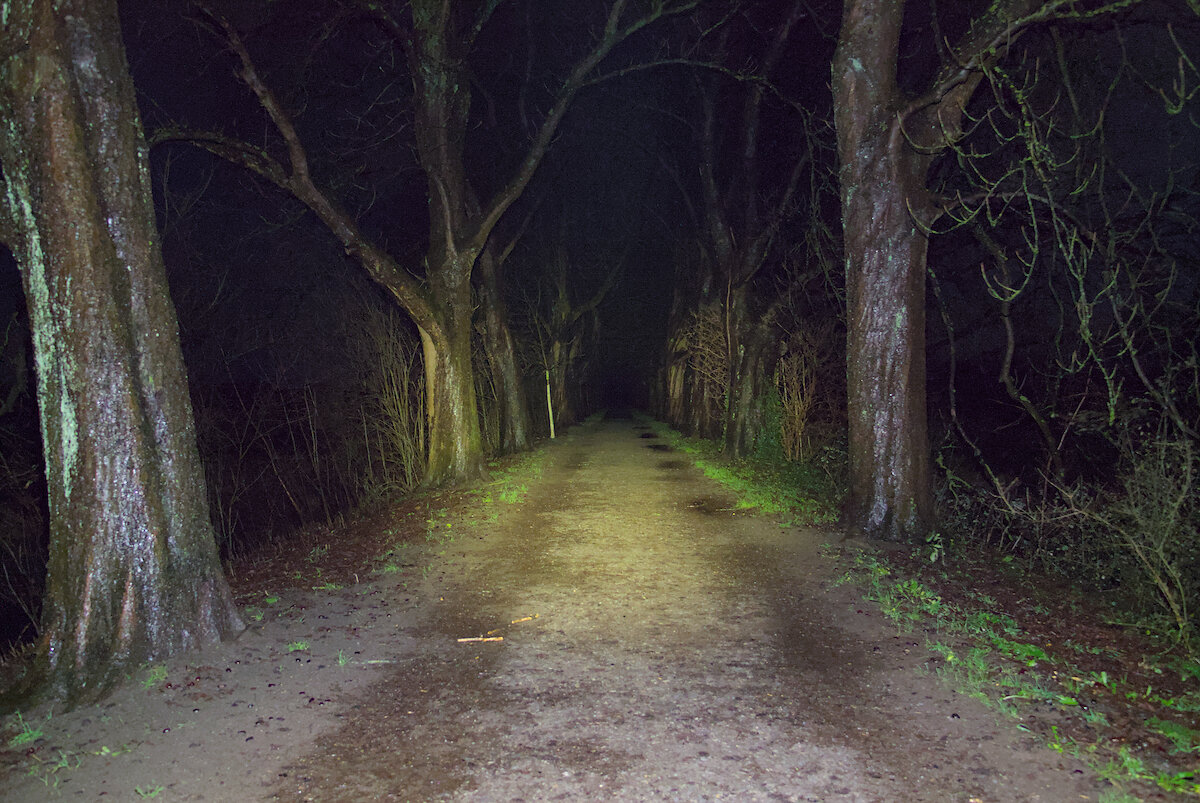
The very distinct difference between spot and spill is even visible outside. I like flashlights with a warm and cozy light. The color of the Prime C2 is daunting.
There would be such a simple solution to this problem: Nichia 519A. Brighter, much better tint, very good color rendition, same footprint.
Driver and runtime
The only place you’ll find information about the brightness and runtime of the levels is at the side of the packaging. Not sure if these are the values for the cool or the warm white variant.
| Mode | Brightness¹ | Runtime¹ | Intensity¹ (Throw²) | Current³ |
|---|---|---|---|---|
| Turbo | 930 lm / 390 lm | 2 min + 4 h | 3136 cd (112 m) | 2.37 A |
| Main 3 | 335 lm | 4:20 h | 0.62 A | |
| Main 2 | 158 lm | 10 h | 0.27 A | |
| Main 3 | 37 lm | 47 h | 0.07 A | |
| Firefly 2 | 2.3 lm | 18 d | 0.01 A | |
| Firefly 1 | 0.14 lm | 140 d | < 0.01 A | |
| Off | 8 µA |
¹ According to manufacturer ² ANSI FL1 ³ Measured
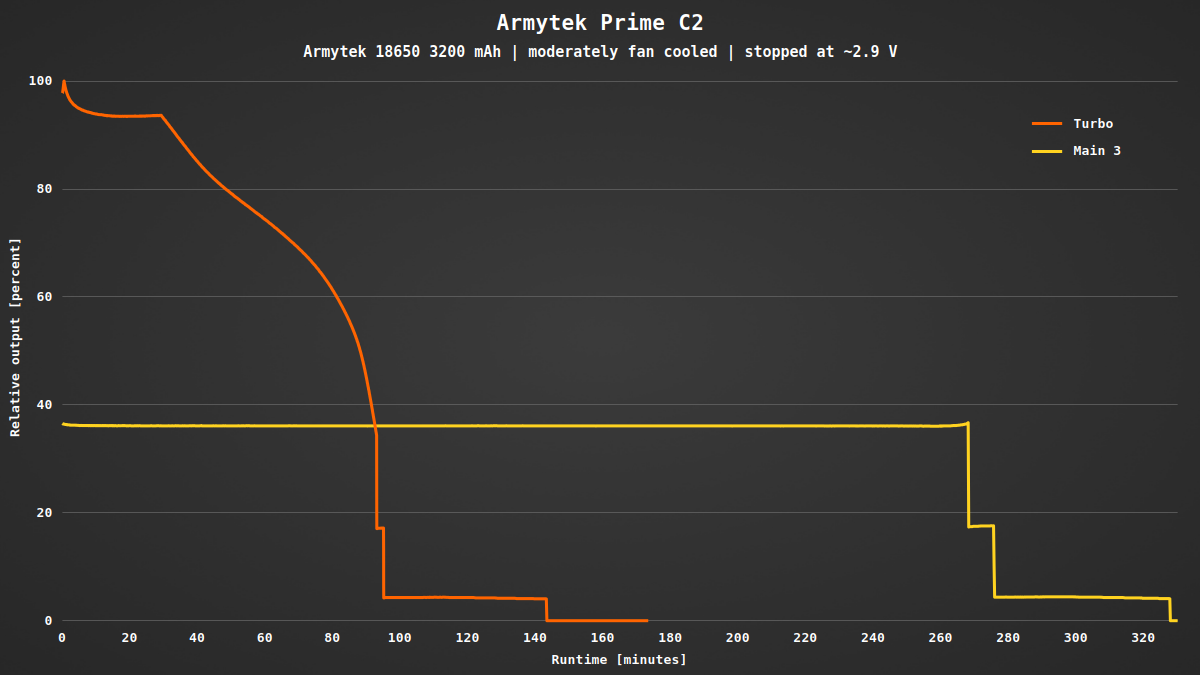
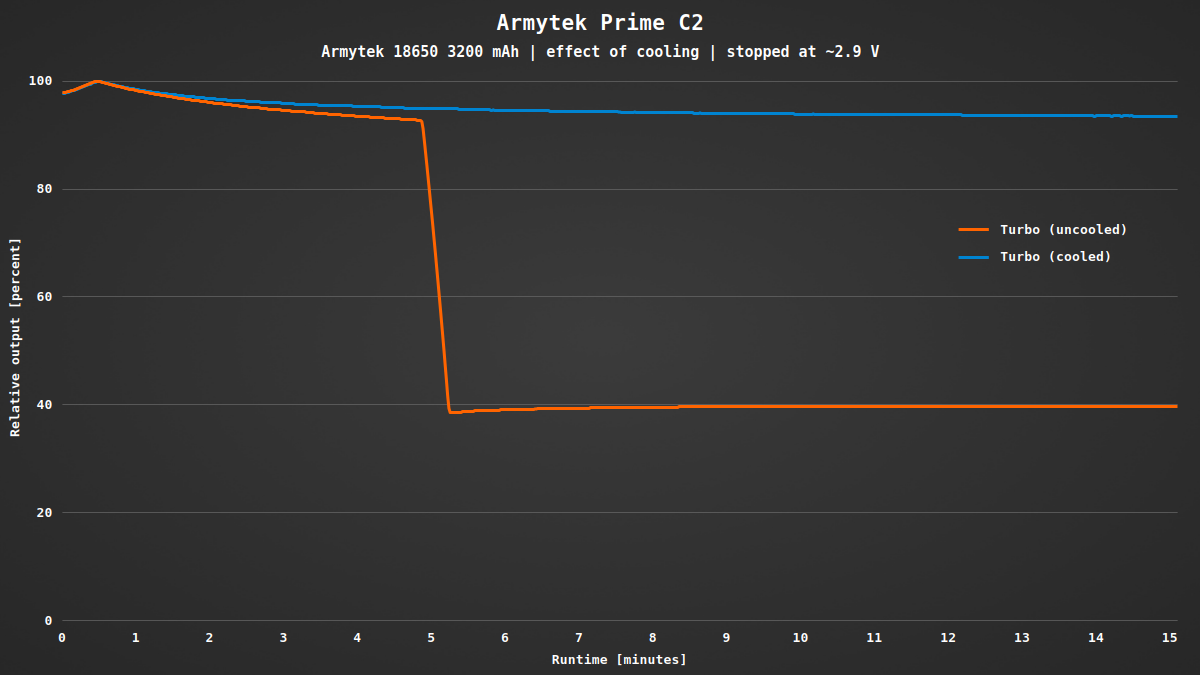
The full brightness in turbo quickly drops and follows the battery voltage. Looks like a buck driver with a high resistance, quickly operating like a direct-drive driver. For the lower levels the result is much better and mostly constant brightness.
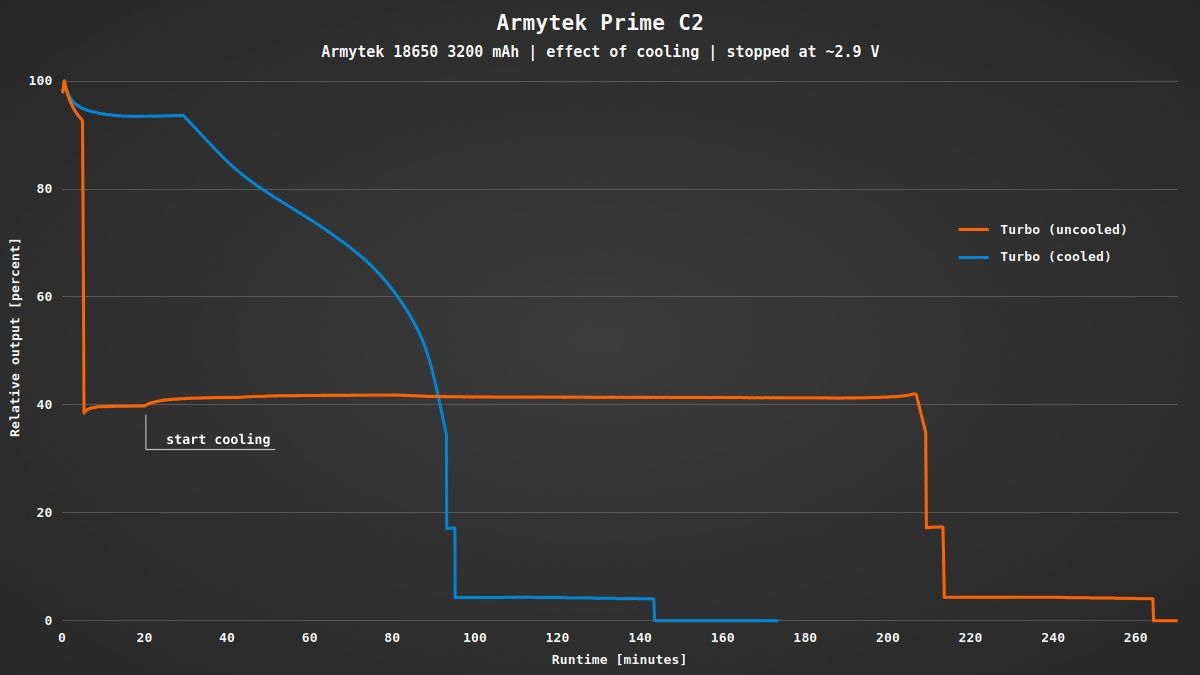
Depending on the cooling you’ll get different results. In turbo the head reached about 51 °C with cooling. Uncooled it heated up to 55 °C, when the brightness got reduced automatically. Turning on the fan again after 20 minutes slightly increased the output, but probably just because of temperature related properties of the components on the driver.
I noticed that the current is rather low: only 2.37 A in turbo and 0.62 A in the second highest level. The LH351D could be driven much harder (except for the high forward voltage, that could be a problem for the driver).
While I couldn’t measure any real PWM with my oscilloscope, I could observe a very strong modulation at about 16 kHz.
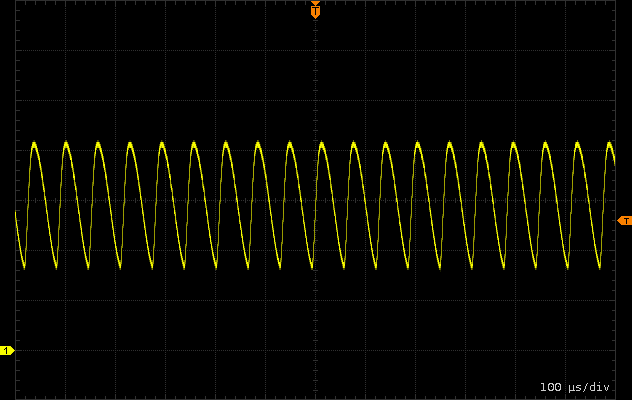
Output oscillation at Main 2
The flashlight turns off at 2.69 V to protect the battery. While there’s no battery indicator, the flashlight blinks once after turning it on if the battery is low.
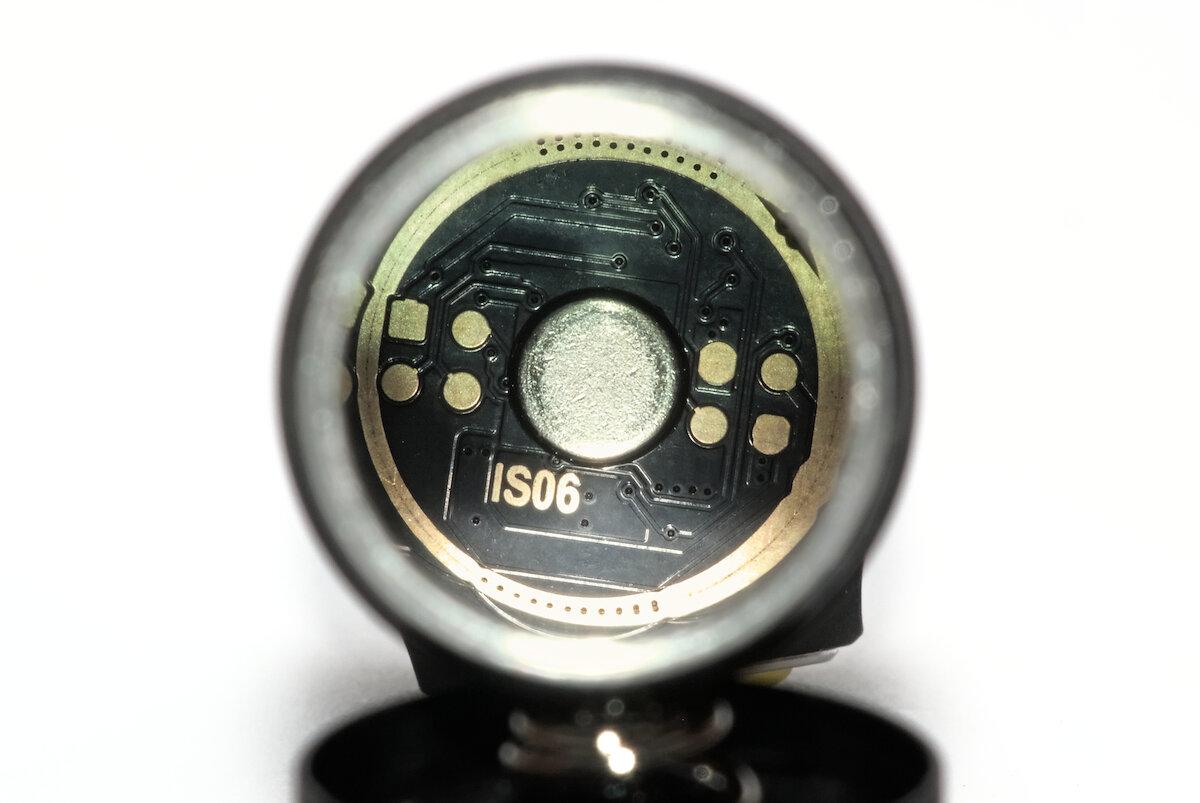
Btw, the magnetic charging in the tailcap doesn’t contain any magic. The center contact is connected to the negative pole of the battery, the outside with the host. When the tailcap is tightened, the battery tube presses against the tailcap PCB and both contacts are bridged. When it is loosened, the connection is broken and the body becomes the positive pole for charging.
Another interesting detail: The driver is labeled “IS06” – the same is also printed on the Prime C1 Pro driver. I guess they are identical and only differ in the firmware.
Conclusion
As an entry-level model, the Armytek Prime C2 is intended to introduce customers to the brand. A simple flashlight for simple day-to-day tasks with low requirements. At first glance everything looks good: compact size, good switch and the proven magnetic charging system. I really like the flashlight in terms of design and handling.
But in my opinion there are too many compromises with the driver, the firmware and especially the light quality. Why was the battery level indicator omitted? The LED is probably still hidden behind the switch. Why is the current so low? The LED could handle more. And who approved this horrendous beam?
I would have been happy to recommend this flashlight. I was really looking forward to it myself. Unfortunately I got disappointed. But just try it out and decide for yourself whether you like it or not. Alternatively, I can recommend the Prime C2 Pro, which is a bit larger but otherwise better in many respects.
Got curious? You can get the Armytek Prime C2 in the cool white and the warm white version at armytek.com. The code “SAMMYSHP15” gives you a 15% discount.