Skilhunt is known for their magnetic charging system used in the famous H and M flashlight series: Simply bring the charger close to the charging contacts and it will snap into place and start charging. It’s easy, but also requires the special charging cable. The EC series uses USB-C charging instead. And that series just got extended by several nice variants of the EC200.
You can find the German version of this review on my website: SammysHP Blog › Skilhunt EC200
The flashlight was provided by the manufacturer for this review. Thank you very much!
Skilhunt vs. ESKTE
Skilhunt is in the process of being rebranded to ESKTE, at least they list some flashlight models under both names. New packaging, same content.
![]()
According to the manufacturer, ESKTE is the stylized form of “SKT” and this name was also used briefly several years ago. Now try again in a slightly modified form. But whether it’s Skilhunt or ESKTE – this review will be about the product and not the name.
Variants
The EC flashlight series by Skilhunt got extended by several new models:
- EC200: Base version with three LEDs of the same color, either cool white (6500 K) or neutral white (4500 K) with high CRI. They are available in black and grey color.
- EC200S: Variant with two channels: One channel with two LEDs in cool white (6500 K) or neutral white (4500 K) with high CRI and a second channel with one warm white LED (3000 K) with high CRI.
- EC200S Red: Like EC200S, but with a red LED (620 nm) as the second channel.
- EC200S UV: Like EC200S, but with a UV LED (365 nm) as the second channel.
All models are also available as a “Mini” variant with a short battery tube to use 18350 batteries. You can choose between black, grey, orange and brown color.
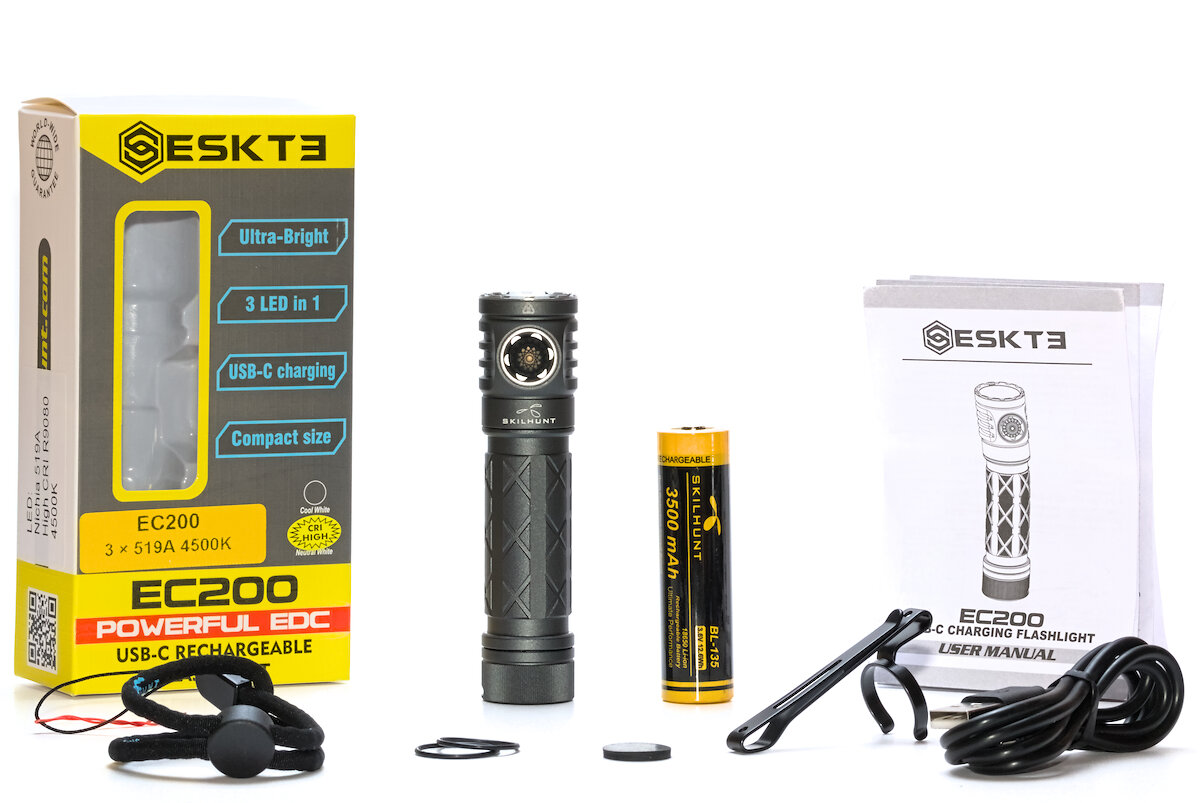
Overview and hardware
- Skilhunt “BL-135” 18650 Li-ion battery with 3500 mAh (protected, button-top, 3.60 V at arrival)
- Lanyard
- Dual-way clip
- 2x replacement o-ring
- Rubber disc to replace the magnet
- USB-C charging cable
- Manual (EN, CN, DE, ES, FR, IT, NL, PL, RU)
Length: 102.2 mm
Diameter (head): 25.0 mm
Diameter (battery tube): 22.1 mm
Diameter (tailcap): 23.5 mm
Weight (without battery): 57.5 g
Weight (18650 battery): 49.4 g
Weight (total): 106.9 g
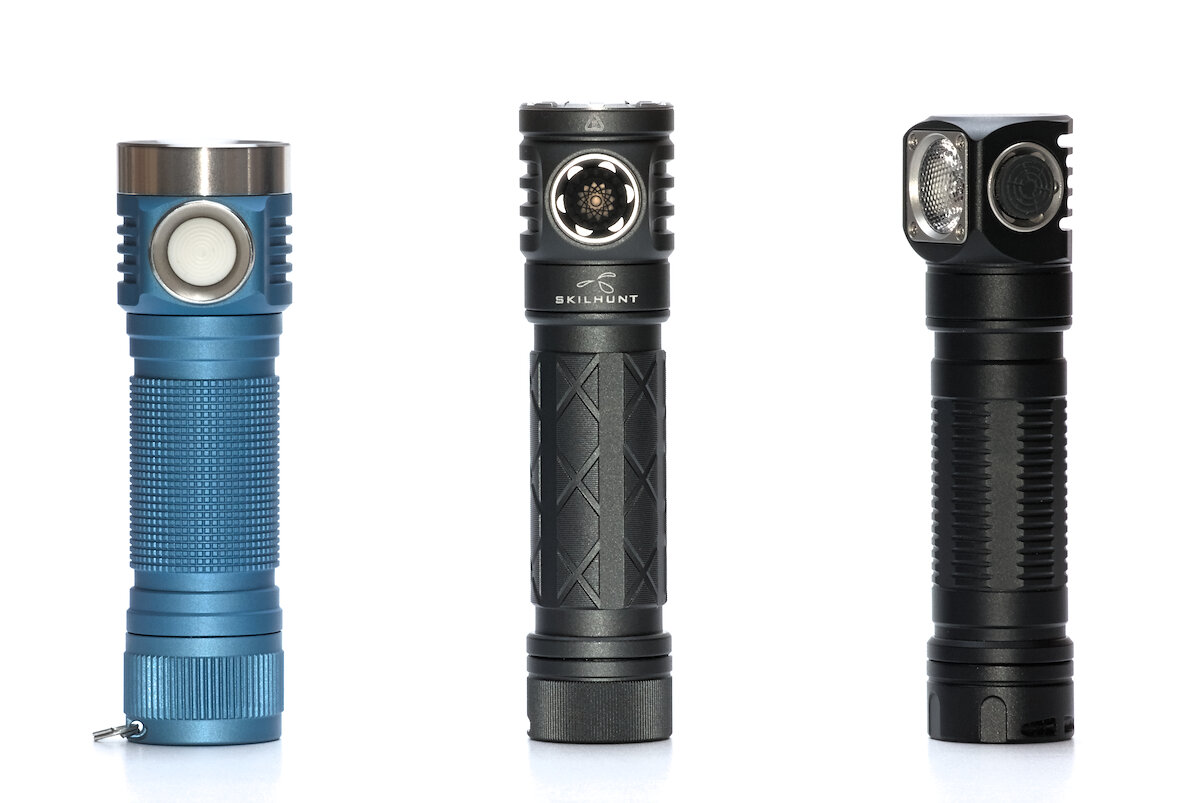
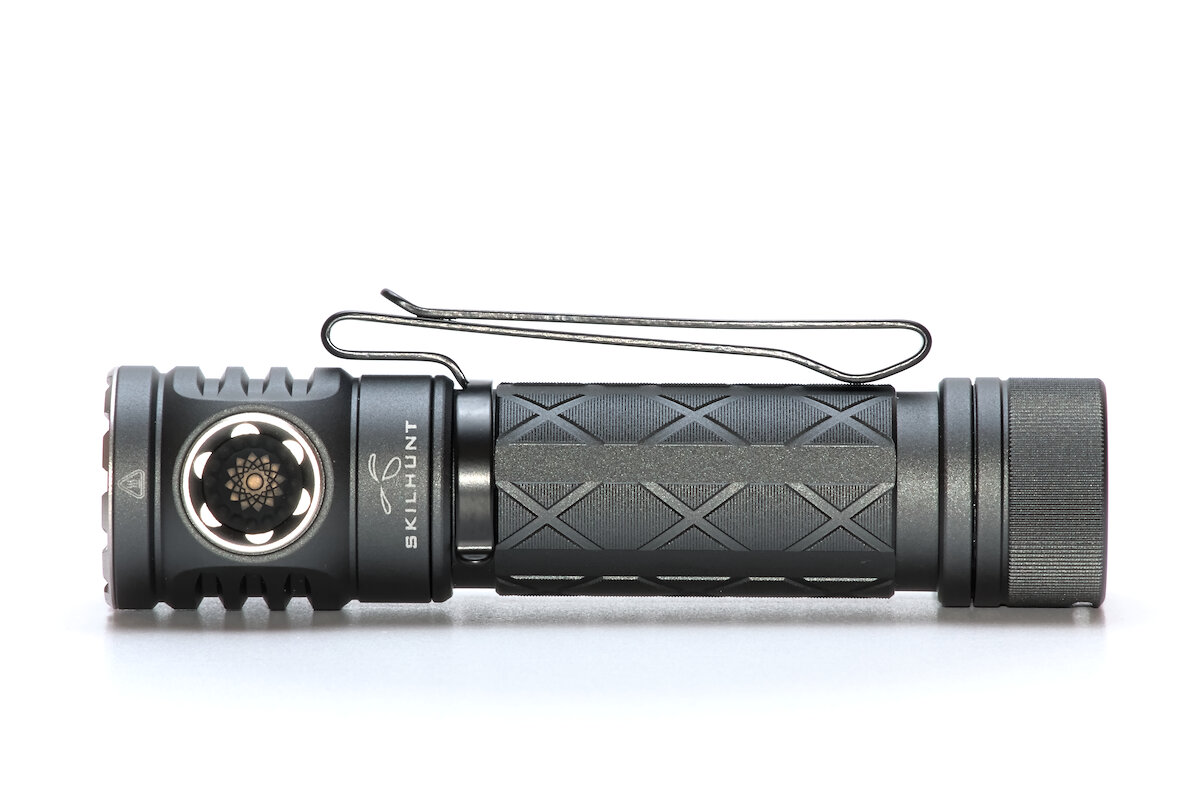
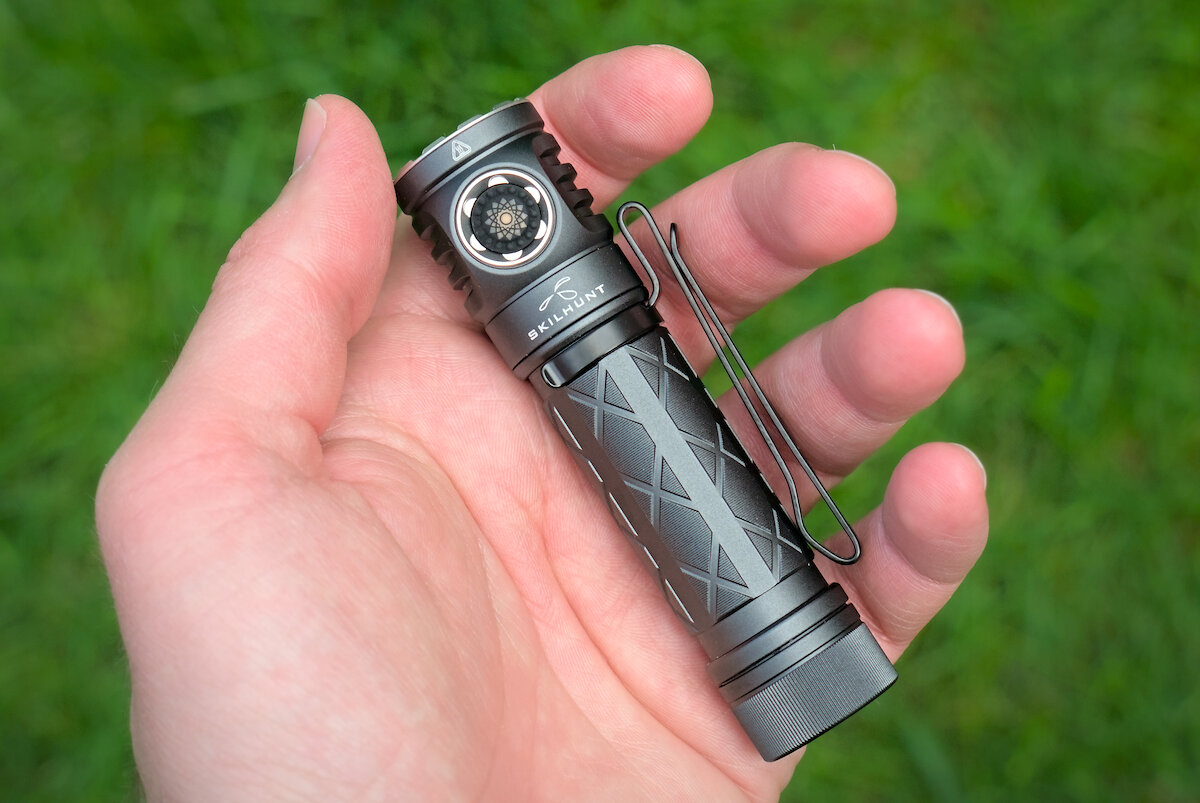
For its features the EC200 is pretty short. Sure, there are shorter 18650 flashlights like the ZebraLight SC64 or the Emisar D4v2 shown in the photo below. But they lack the charging port.
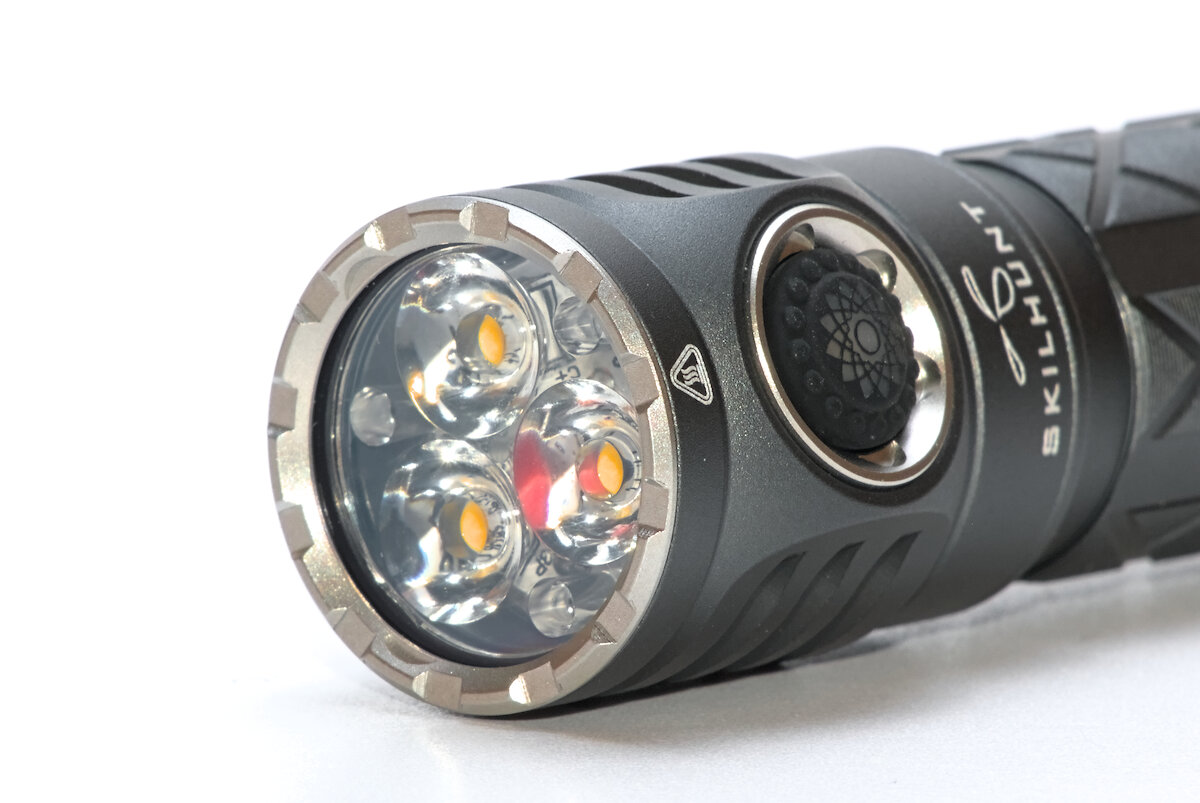
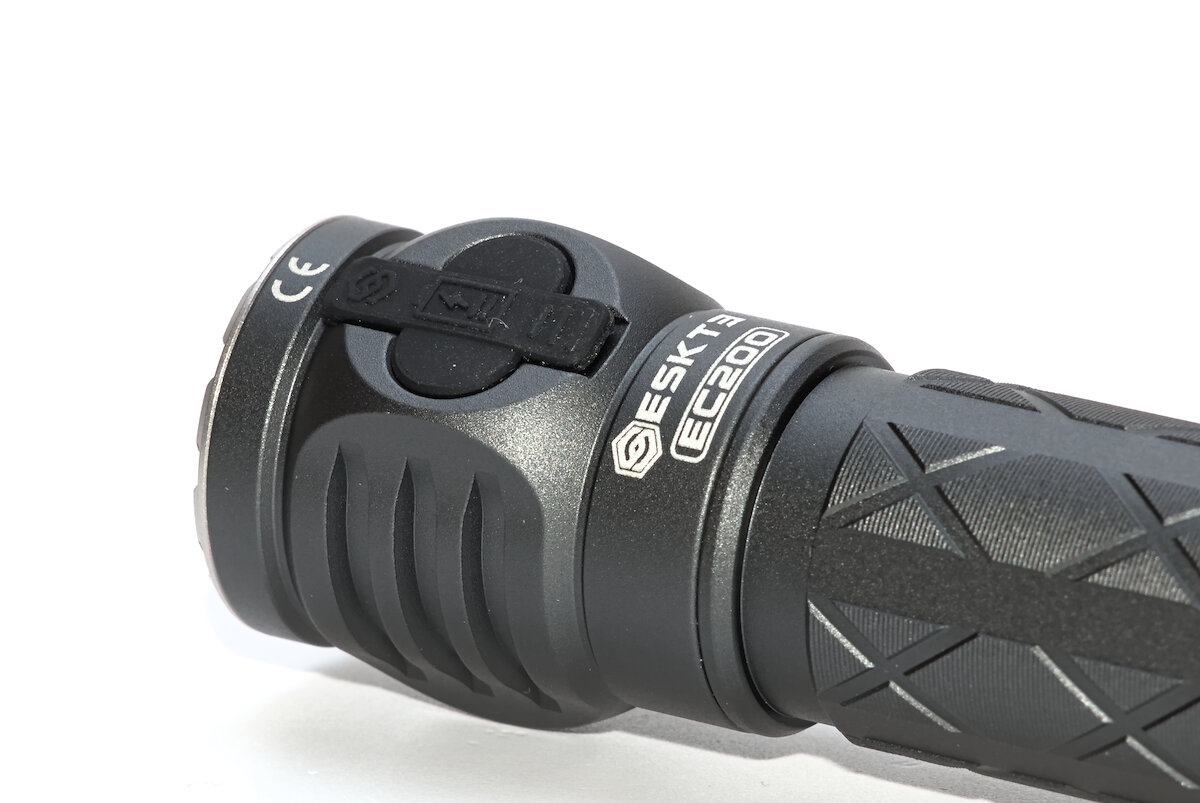
There’s a crenelated stainless steel bezel holding the optic and protecting the light from impact. Also it lets you see if the light is turned on while standing on the head. The protruding parts of the head (switch and charging port) stop the light from rolling away on a flat surface.
The battery tube has very fine teeth, almost like a file. It is divided by a larger, diamond shaped pattern. All in all it gives very positive feedback and prevents slipping.
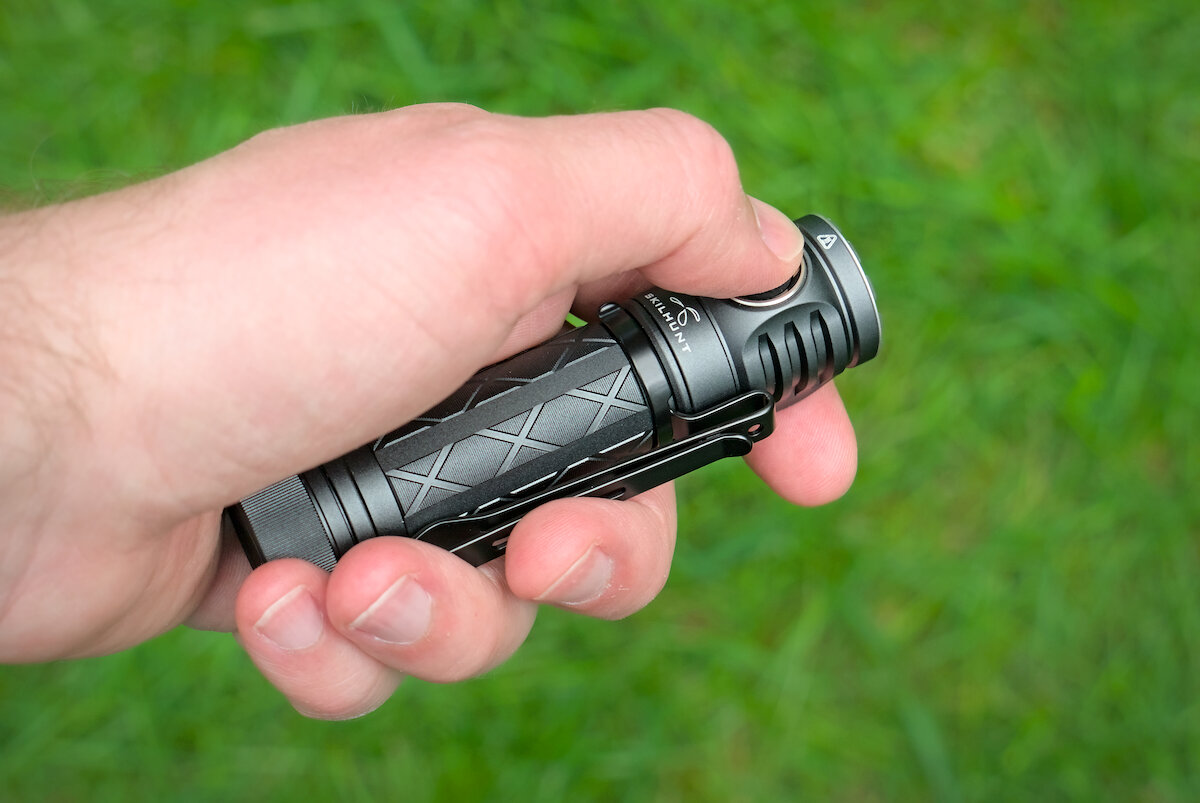
You can attach the dual-way clip at two positions, either front or back. A simple one direction clip would be sufficient and some people might prefer one as it adds less bulk in the pocket.
A hole in the tailcap allows you to attach a lanyard. The fine teeth on the tailcap let it cut like a saw. Short life for any lanyard. A little split-ring between hole and lanyard will help.
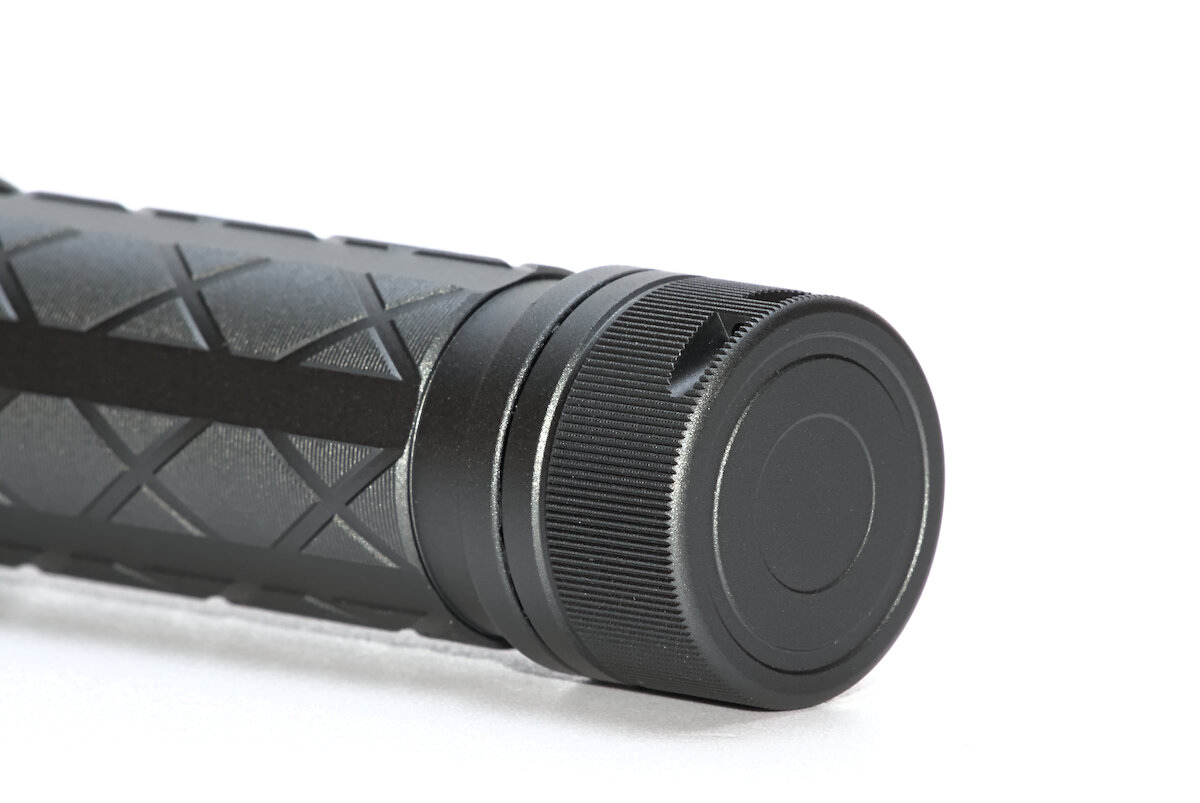
The strong magnet in the tailcap makes it possible to attach the EC200 to metal surfaces. It is easy to remove the magnet if you don’t like it. Due to the location of the lanyard at the side the tailcap will sit flush with the surface and tailstand works as expected.
Opposite of the switch there is a USB-C charging port. The opening is wide enough for most plugs. With a USB port you don’t need a special charging cable anymore as it was required for the magnetic charging system. Maybe a bit less convenient plugging it in, but more flexible.
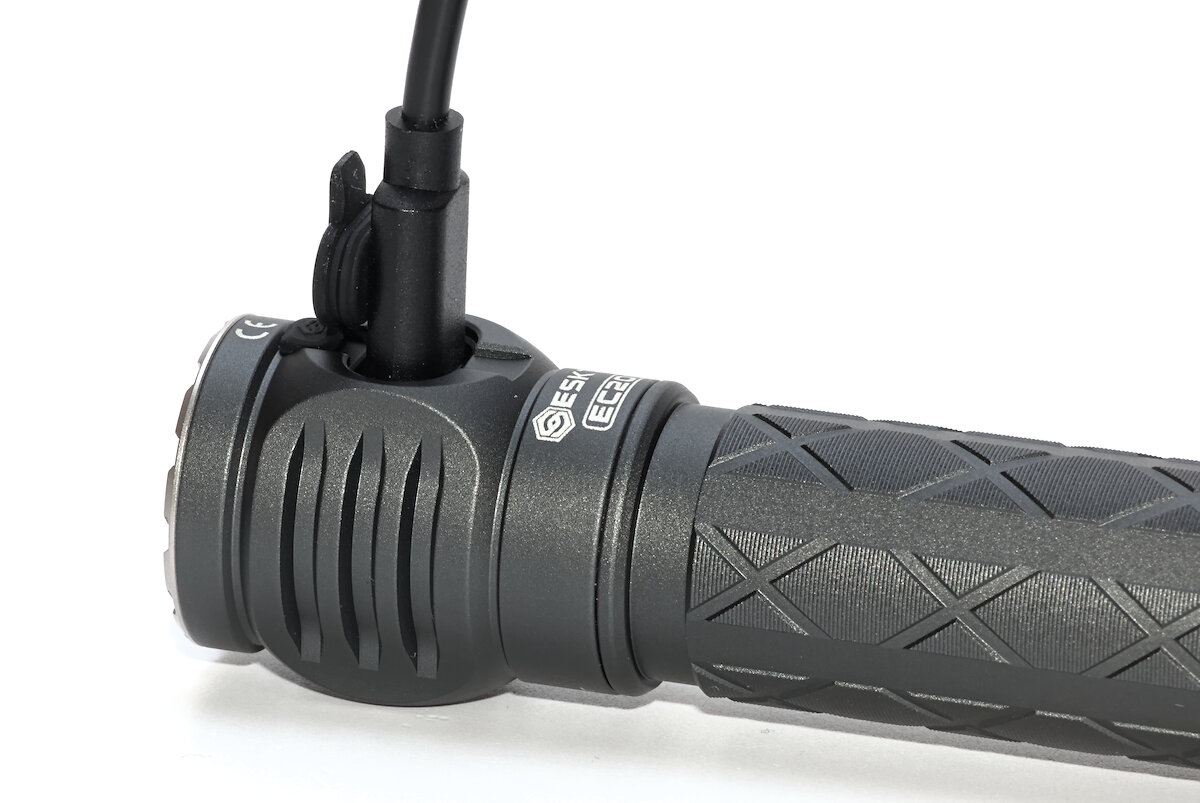
A silicone cover protects it from water and dirt. The little flap helps opening it, but also makes it a bit more likely to open it by accident. I’ve cut off the little flap and I think it stays closed more securely now.
For the full charging speed your USB power supply should be able to deliver at least 1.8 A at 5 V. During charging the status LED in the switch will show the approximate state of charge: breathing red, constant red and breathing blue. Once the battery is full, it switches to constant blue. During charging you can use the flashlight as usual.

The spring in the tailcap can be easily unhooked to remove the magnet. Then add the little rubber disc that came with the flashlight to fill the gap.
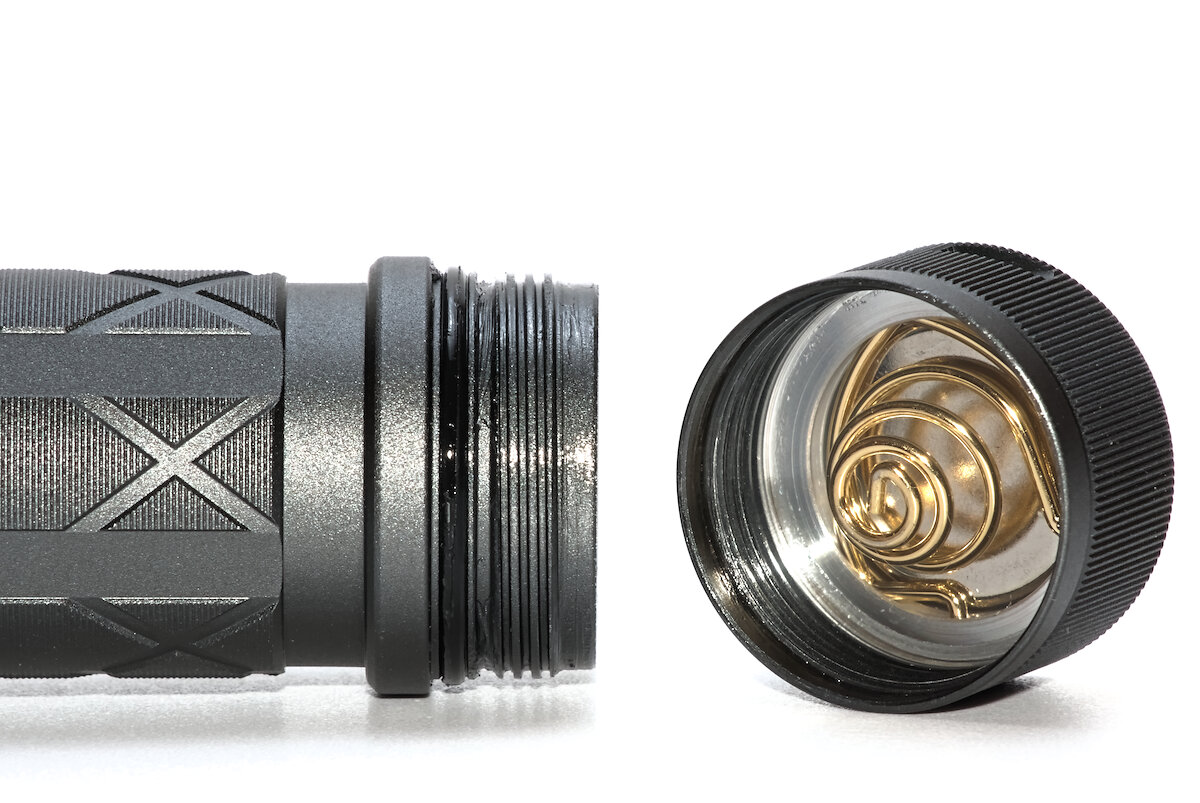
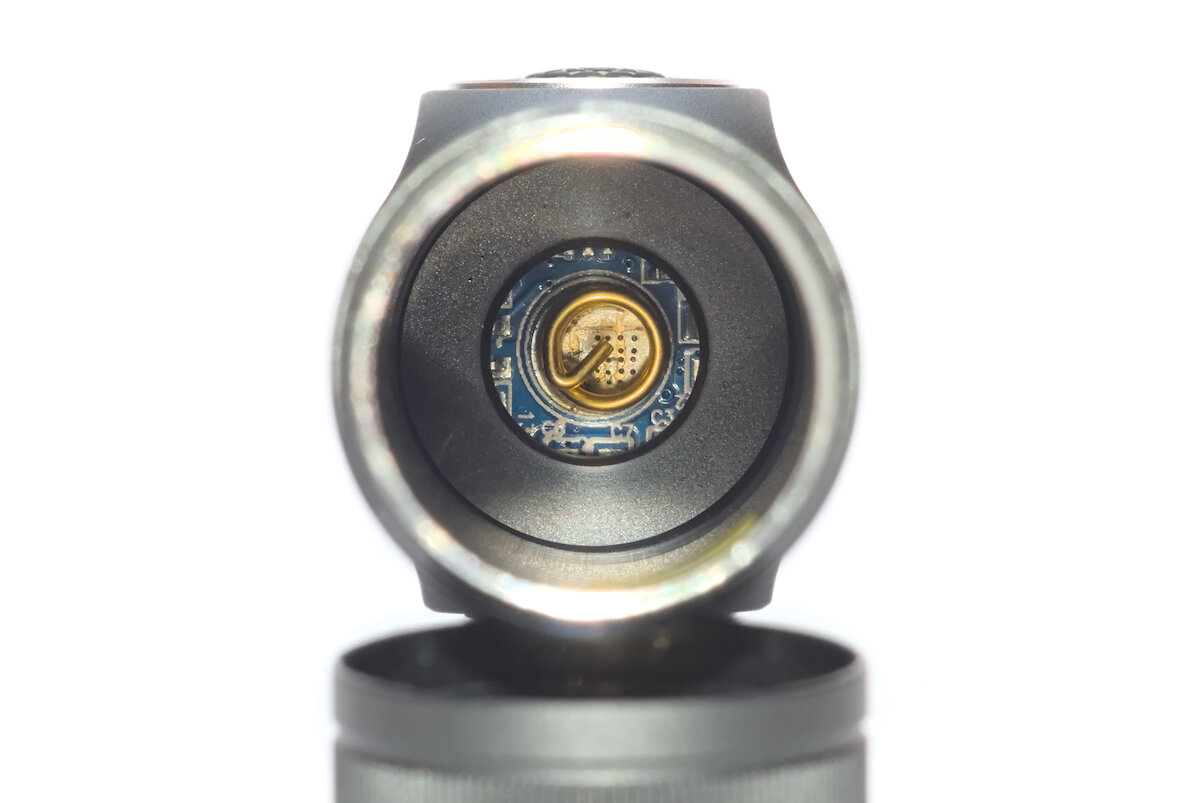
The driver has a spring as well. An insulating ring protects the components on the driver. The flashlight will fit protected and unprotected, button and flat top 18650 batteries with a length of up to 69 mm.
The EC200 is rated as IPX8 and impact up to 1 m height. Manufacturing quality is excellent, just the cooling fins and the lanyard hole are a little sharp.
User interface
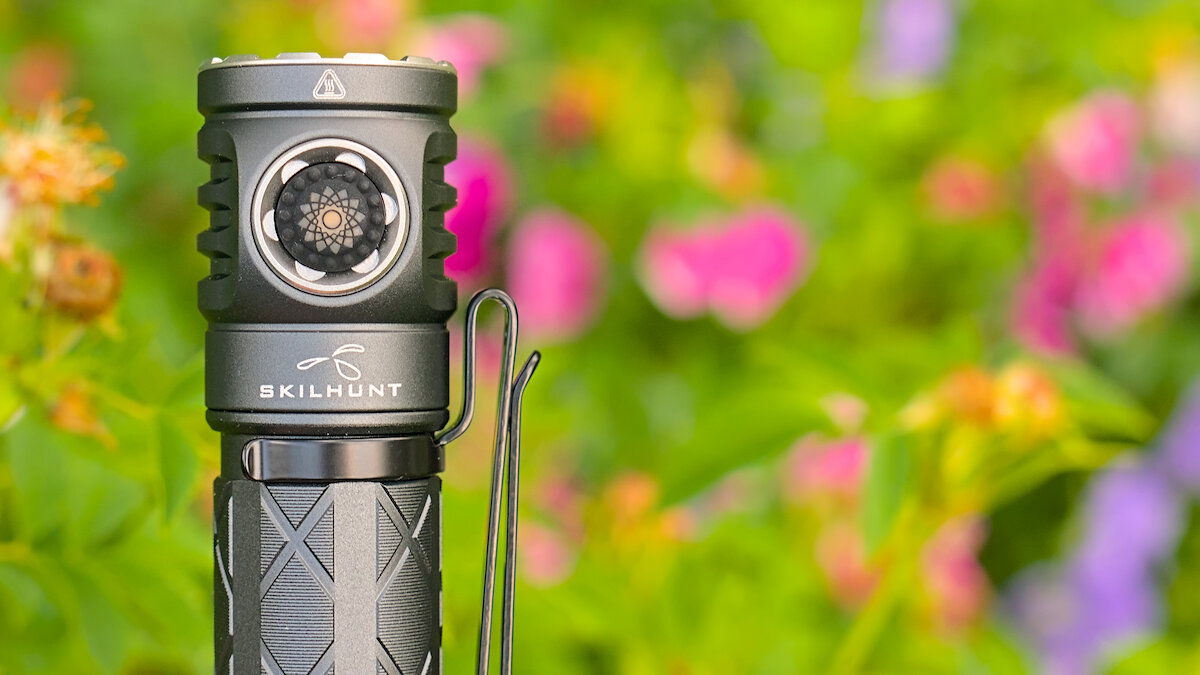
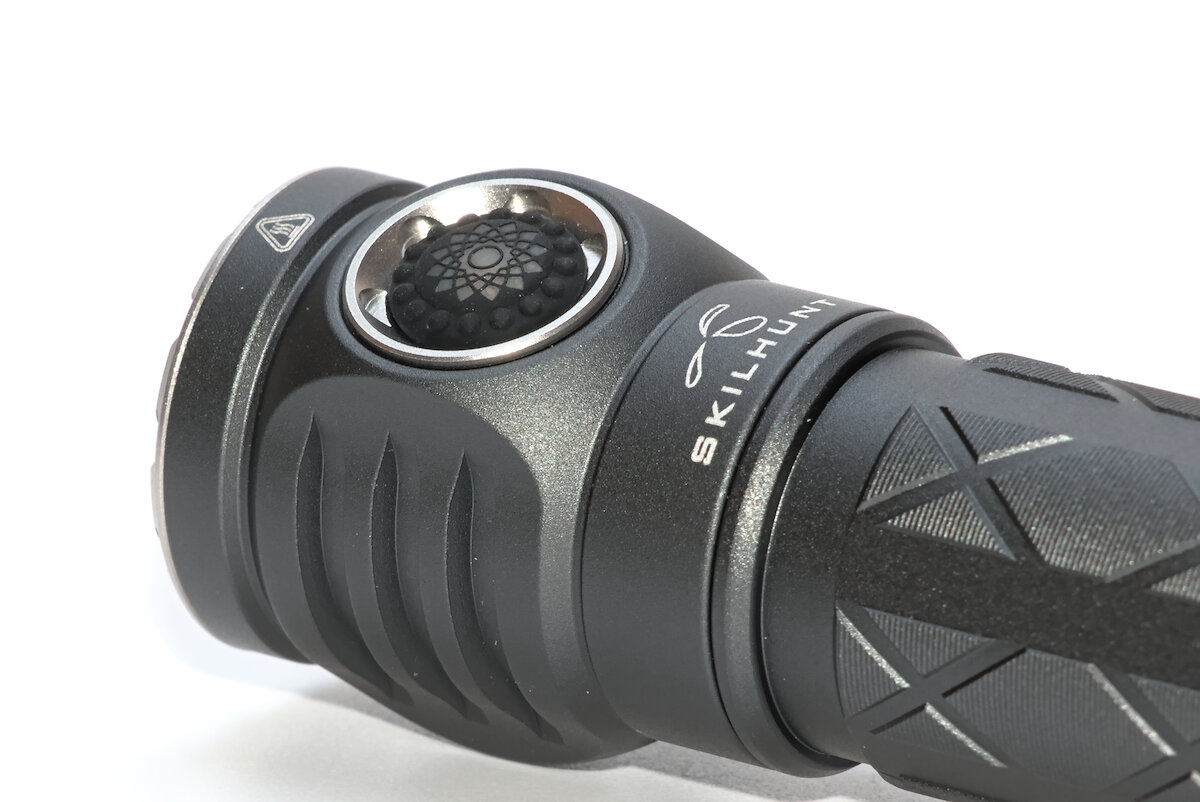
The EC200 is controlled via an electronic side switch. Its surface is rather firm and smooth, with little nubs around it. The middle of the switch shows the icon of a sun or light source. Pressing the button results in a nice audible and tactile click, with a short and precise actuation.
It will respond at around 650 g, a rather high value compared to other flashlights in my collection. This will make accidental activation less likely. On the other hand the button sits slightly above the bezel, so it might be better to lock the flashlight when not in use, either via 4C or by loosening the tailcap.
The UI is what we are used from Skilhunt: Groups for low, middle and high brightness and another one for blink modes. Each group has multiple levels, holding the button will switch between them. Each sub level is memorized per group.
| State | Action | Function |
|---|---|---|
| Off | 1C | Turn on (last used in H1/M1/M2) |
| Off | 2C | Turn on (last used in T1/T2) |
| Off | 3C | Turn on (last used in S1/S2/S3) |
| Off | 4C | Lockout |
| Off | 1H | Turn on (last used in L1/L2) |
| L1/L2 | 1C | Turn off |
| L1/L2 | 1H | Switch between L1/L2 |
| L1/L2 | 2H | Go to last used in H1/M1/M2 |
| H1/M1/M2 | 1C | Turn off |
| H1/M1/M2 | 2C | Go to last used in T1/T2 |
| H1/M1/M2 | 3C | Go to last used in S1/S2/S3 |
| H1/M1/M2 | 1H | Switch between M2 → M1 → H1 |
| H1/M1/M2 | 2H | Go to last used in L1/L2 |
| T1/T2 | 1C | Turn off |
| T1/T2 | 2C | Go to last used in H1/M1/M2 |
| T1/T2 | 3C | Go to last used in S1/S2/S3 |
| T1/T2 | 1H | Switch between T1/T2 |
| S1/S2/S3 | 1C | Turn off |
| S1/S2/S3 | 2C | Switch between S1 → S2 → S3 |
| S1/S2/S3 | 3C | Go to last used in T1/T2/H1/M1/M2 |
| Lockout | 2C | Turn button indicator on or off |
| Lockout | 4C | Unlock and turn on in L2 |
| Lockout | Hold | Momentary L1 |
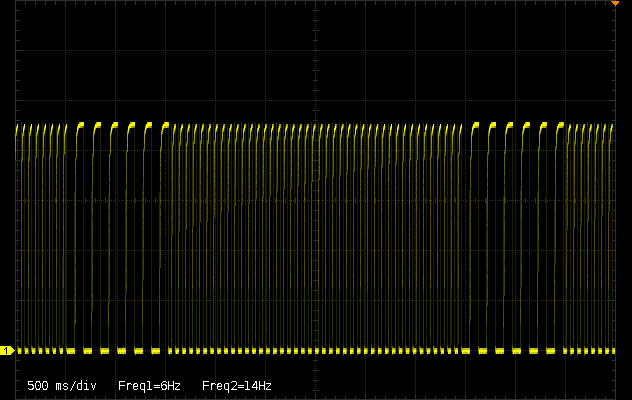
The blink group contains a strobe with alternating frequency of 6 and 14 Hz, an “SOS” mode (more like S-O-S) and a kind of beacon with a period of one second. I normal beacon with a short flash would have been nice.
S1: Strobe

S2: SOS
![]()
S3: Beacon
In lockout, the button flashes red. Of course, this increases power consumption. The indicator can be switched off and on with 2C, but it will automatically turn on again when you enter lockout the next time.
After turning on the flashlight, an indicator LED in the switch shows the approximate state of charge of the battery for five seconds. On very low voltage, the indicator will blink in red as long as the light is turned on.
| Color | State of charge |
|---|---|
| Blue | 80% – 100% |
| Blue blinking | 50% – 80% |
| Red | 20% – 50% |
| Red blinking | < 20% |
Unfortunately the symmetrical head makes it hard to distinguish between the switch and the charging port. That’s fine as long as you squeeze the head with two fingers to press the switch.
Illumination
As mentioned before, there are several variants of the EC200. The single color version has two LED models to choose from:
- Cree XP-G4: cool white (6500 K), max 2250 lm / 7700 cd / 175 m (3.4 cd/lm)
- Nichia 519A: neutral white (4500 K), high CRI, max 1550 lm / 3600 cd / 120 m (2.3 cd/lm)
So you have to decide whether you want the highest brightness of the Cree XP-G4 or maybe the much better color rendition of the Nichia 519A. That decision was easy for me: I really like high CRI and didn’t plan on using the EC200 as a search light. So Nichia 519A it was.
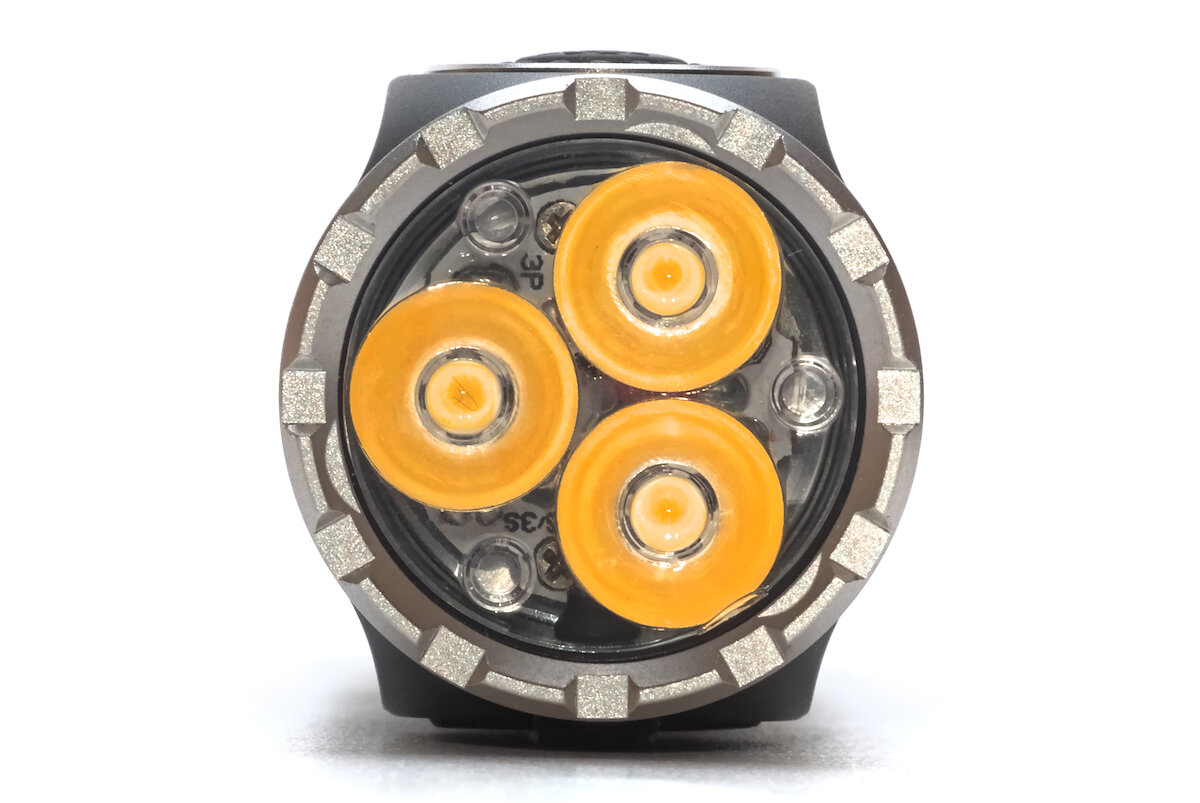
The three LEDs are behind a triple TIR optic. It is protected by a glass lens. Surprisingly the glass lens doesn’t appear to have an anti-reflective coating, but the plastic TIR optic has one (“green”). Head, TIR, lens and bezel are sealed with a single o-ring. The EC200 makes it really easy to disassemble the head and dedome the 519A LEDs because you can use the crenelation to your advantage to unscrew the bezel.

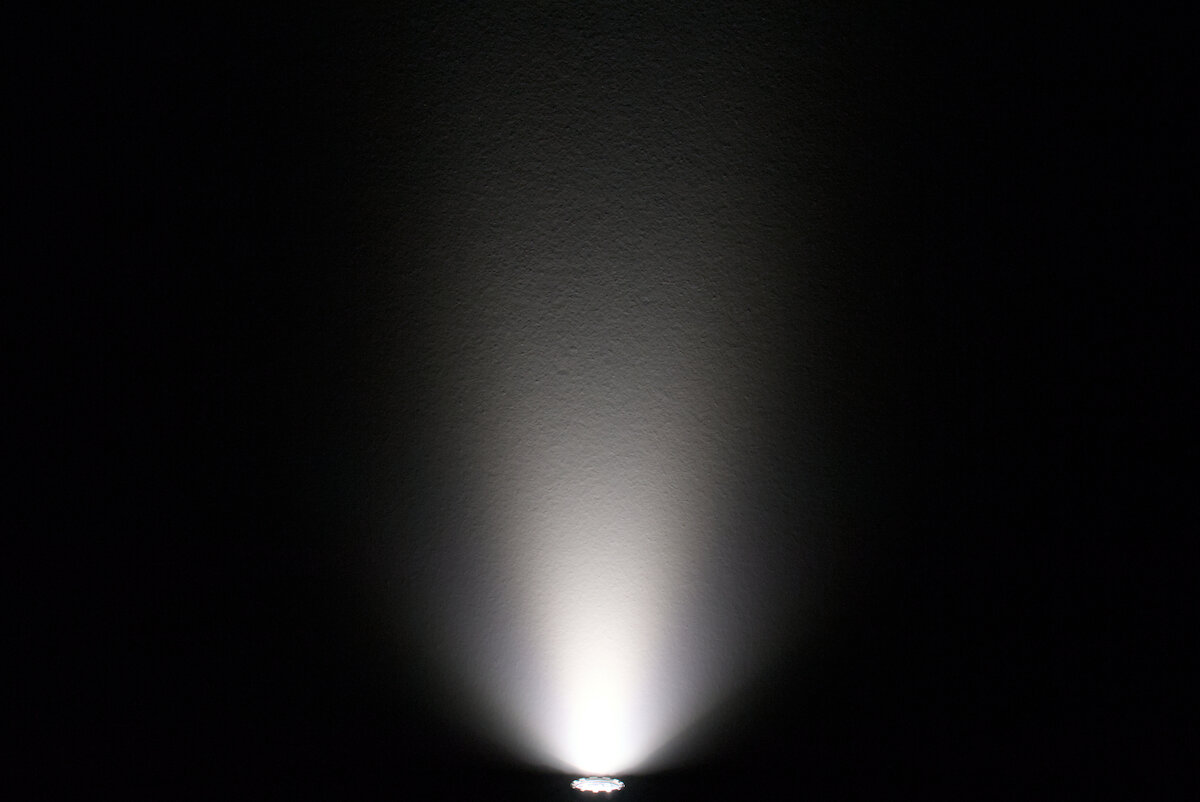
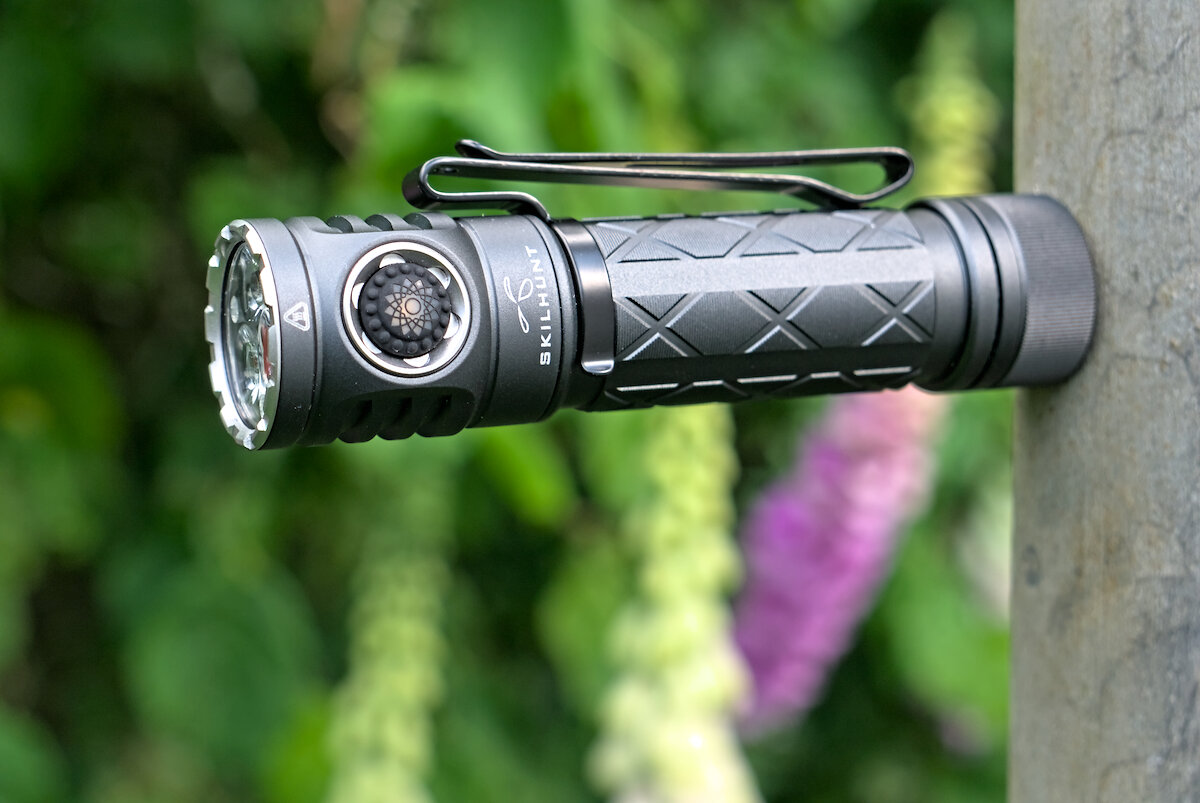
It is very floody! That can already be seen from the intensity to brightness ratio of only 2.3 cd/lm. Super for indoor, great for shorter distances outdoor. Because of the high CRI “stick or snake” is easy to answer. The EC200 will light up your path perfectly, at least for a couple of meters.

Driver and runtime
The EC200 uses a buck driver for constant output in most levels. Depending on the LEDs used in the flashlight, the brightness will be different, but the runtime stays the same.
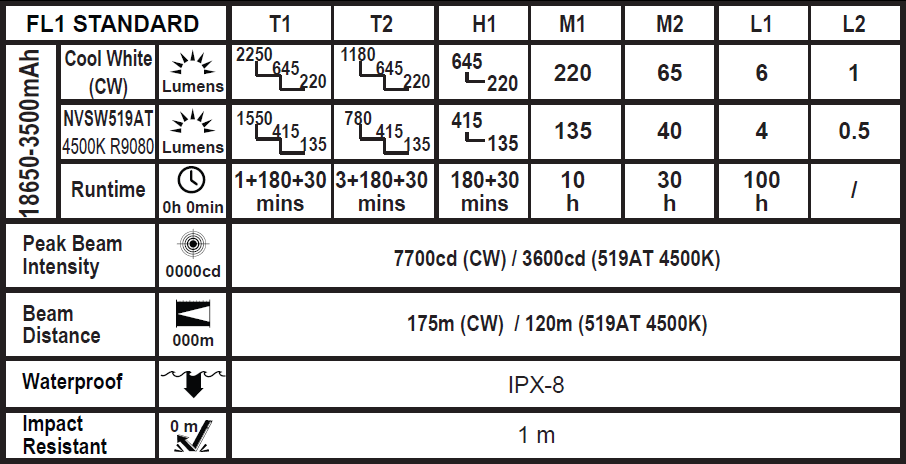
| Mode | Brightness¹ | Runtime¹ | Intensity¹ (Throw²) | Current³ |
|---|---|---|---|---|
| T1 | 1550 lm / 415 lm / 135 lm | 1 min + 180 min + 30 min | 3600 cd (120 m) | 5.52 A |
| T2 | 780 lm / 415 lm / 135 lm | 3 min + 180 min + 30 min | 1.94 A | |
| H1 | 415 lm / 135 lm | 180 min + 30 min | 0.93 A | |
| M1 | 135 lm | 10 h | 0.30 A | |
| M2 | 40 lm | 30 h | 0.13 A | |
| L1 | 4 lm | 100 h | 0.05 A | |
| L2 | 0.5 lm | 0.01 A | ||
| Aus | 53 µA |
¹ According to manufacturer ² ANSI FL1 ³ Measured
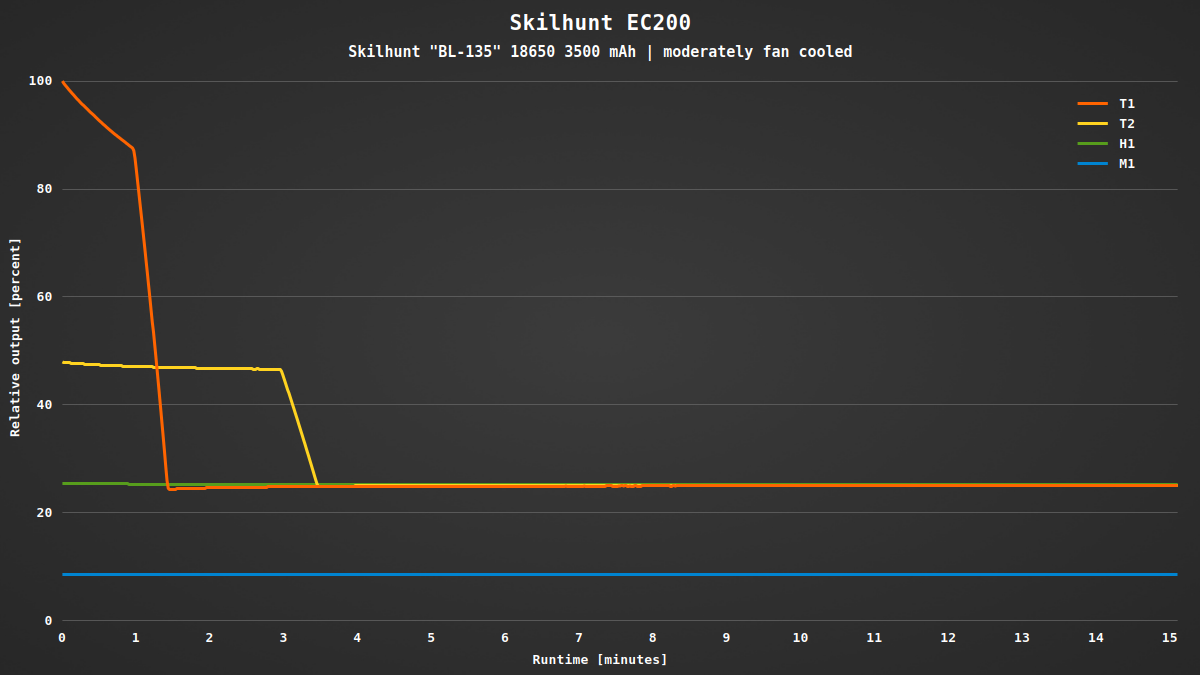
My runtime measurements are spot on with the specification. In T1 the head of the flashlight reaches 46 °C with slight cooling, in T2 only 35 °C. The stepdown is timed after one or three minutes. The manufacturer suggests to be careful with repeated activation of turbo to prevent overheating.
What I really like is that the EC200 is able to maintain H1 with a brightness of around 400 lm for three hours! Even M1 is enough for walking at night and would be able to provide constant output for ten hours – enough for the whole night.
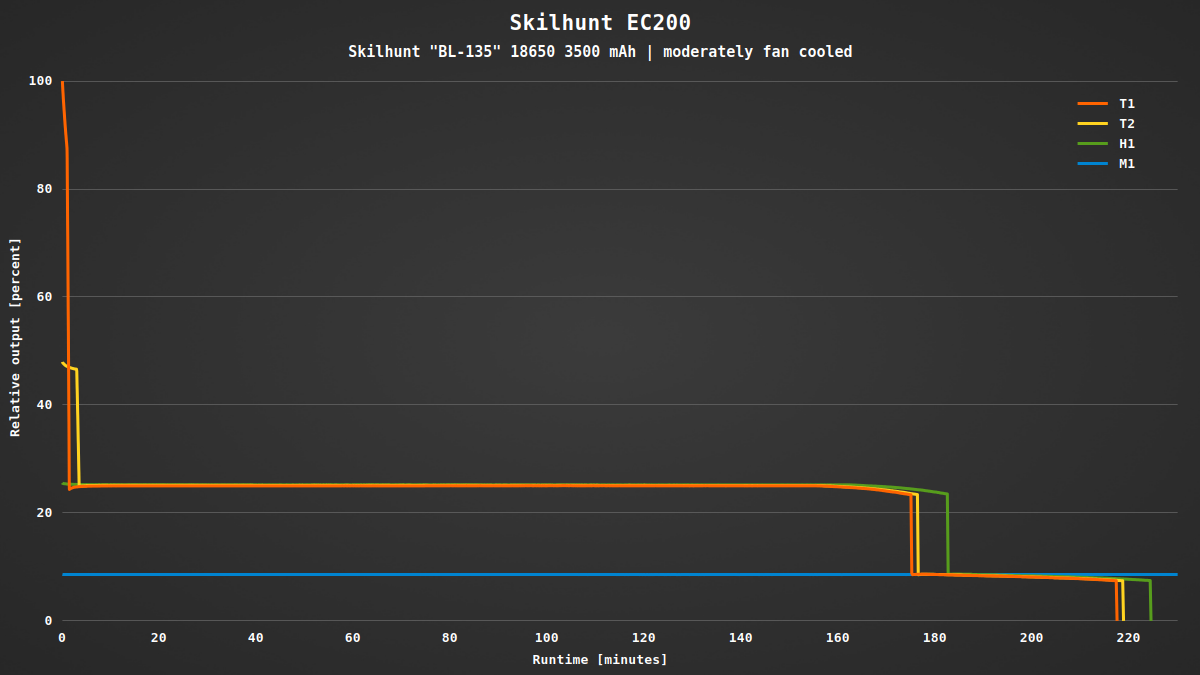
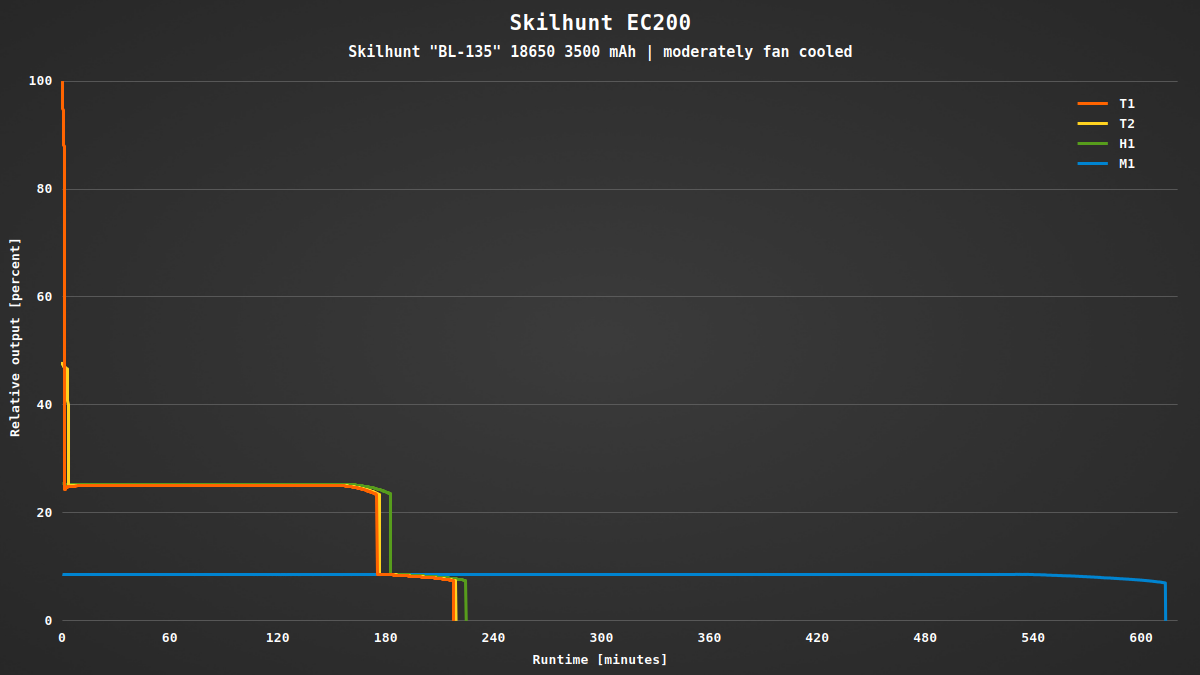
I couldn’t find any PWM with my oscilloscope, the constant current driver does its job very well. When the battery voltage reaches 3.00 V, the status LED in the switch starts to blink red continuously while the light is turned on. At 2.75 V the flashlight turns itself off to protect the battery from deep discharge.
Conclusion
Three powerful LEDs with a buttery smooth, floody beam and amazing color rendition, a USB-C charging port, magnetic tailcap and an easy UI. Skilhunt added several new models with USB charging port to their EC series. The single color EC200 shown in this review is a fantastic EDC flashlight at high standard.
Actually I can’t really find any major disadvantages. It would be nice if the head was less symmetrical to make it easier to find the switch. But otherwise it is close to being perfect and definitely a great recommendation for an EDC flashlight.
Got curious? Check out the Skilhunt EC200 at skilhunt.com.