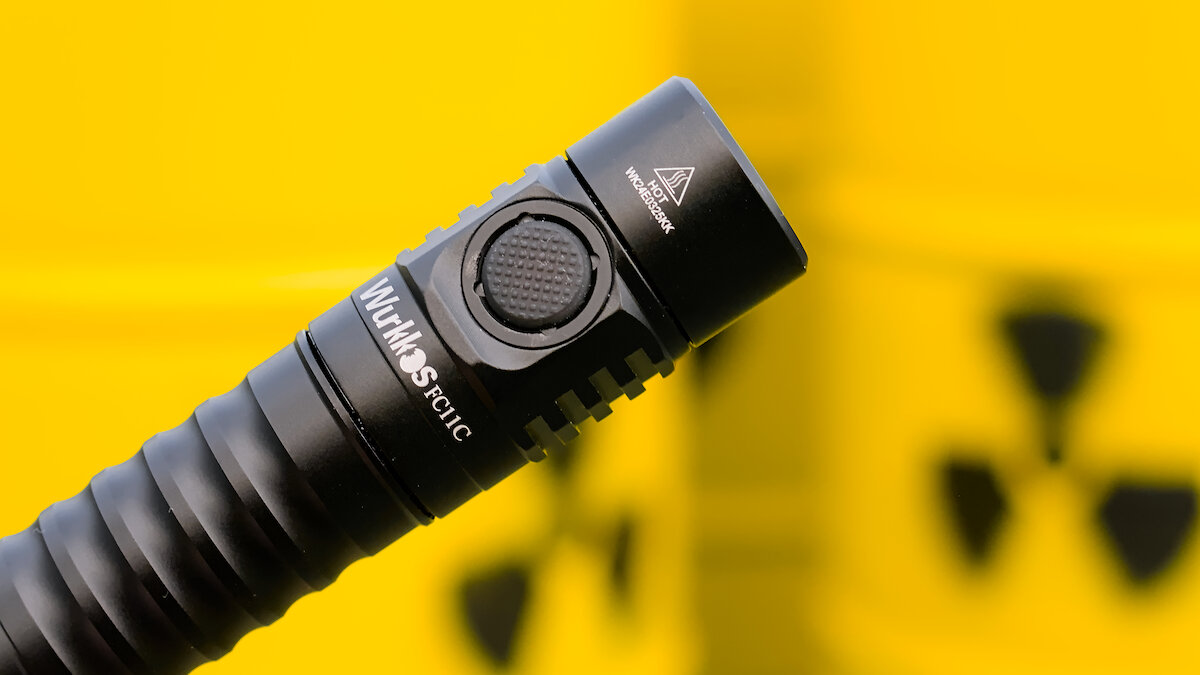
Wurkkos FC11 – one of the most recommended flashlights in the past four years. And now it got upgraded with a constant current buck driver and a Nichia 519A! Let’s take a look at the Wurkkos FC11C.
You can find the German version of this review on my website: SammysHP Blog › Wurkkos FC11C
The flashlight was provided by the manufacturer for this review. Thank you very much!
Overview of hardware
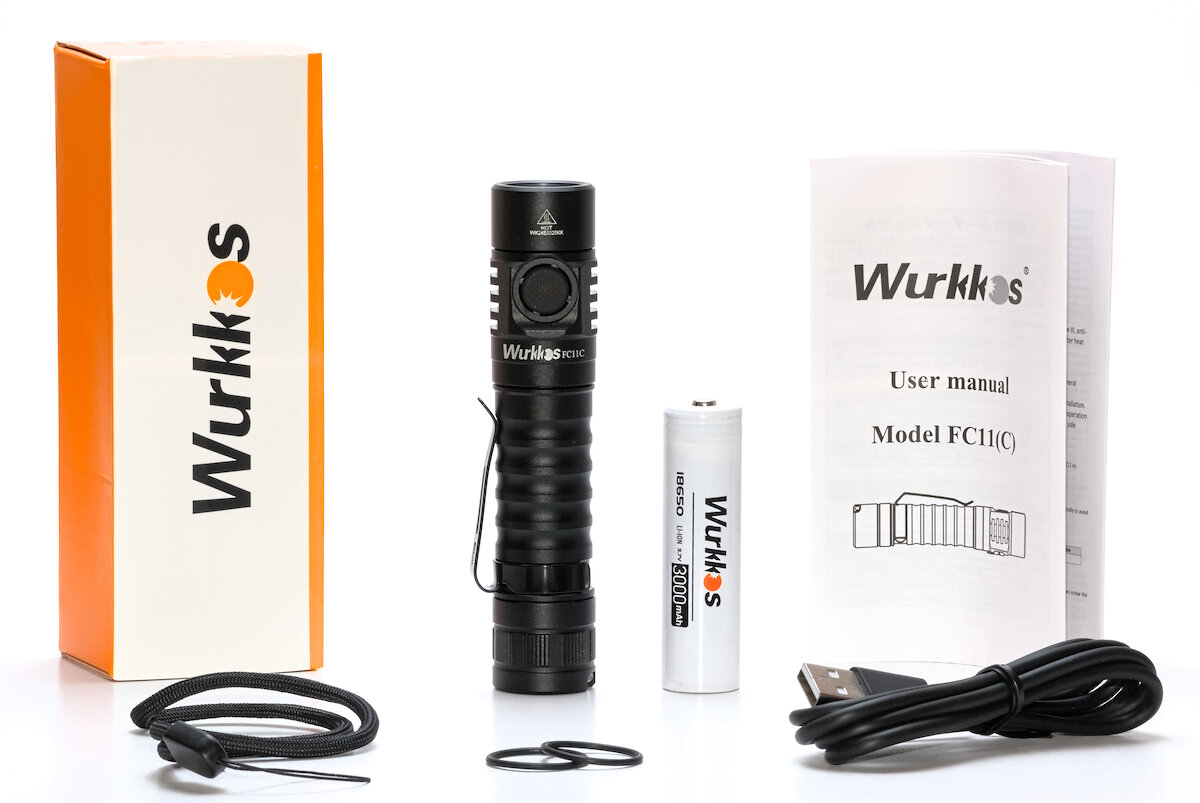
You get the same parts in the box as with the previous FC11:
- Wurkkos 18650 Li-ion battery with 3000 mAh (unprotected, button-top, 3.91 V at arrival)
- Lanyard
- Clip (already attached)
- 2x replacement o-ring
- USB-C charging cable
- Manual (EN, DE, FR, ES, JP, RU)
The manual includes descriptions for both the FC11 and the FC11C. They share the same user interface, just with different specifications regarding brightness and runtime.
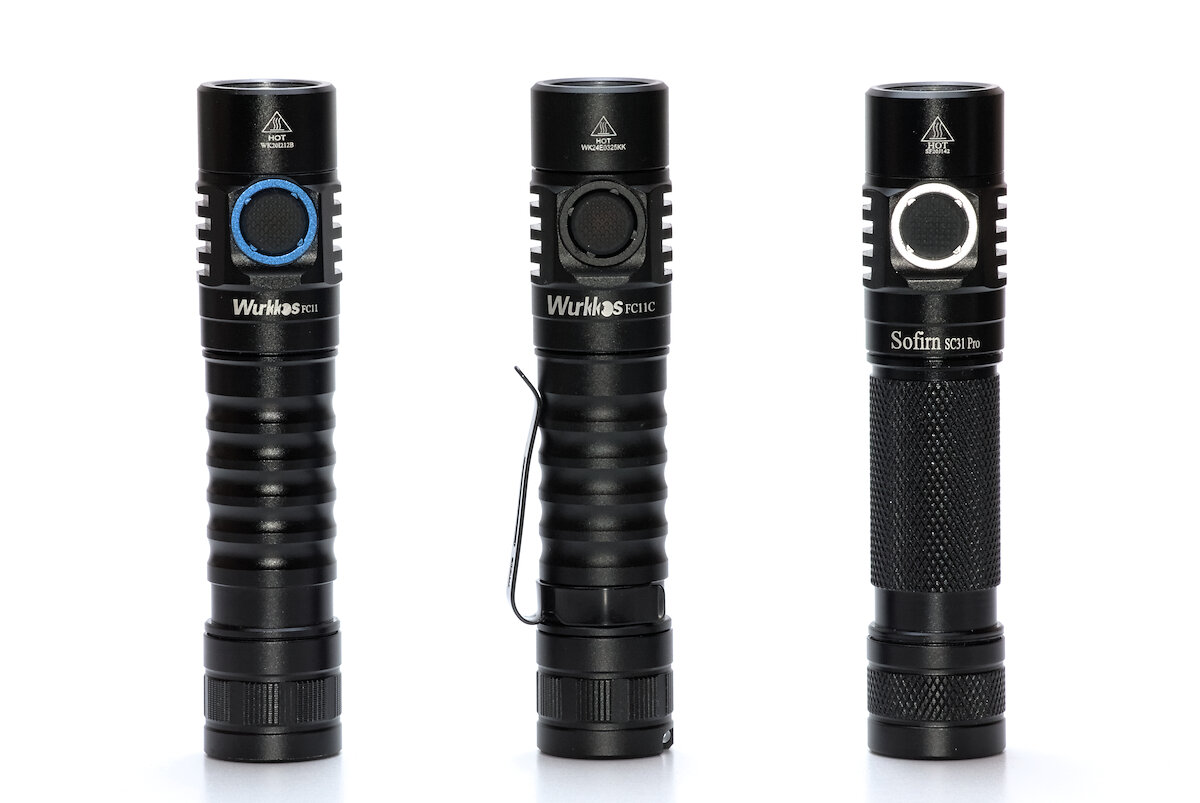
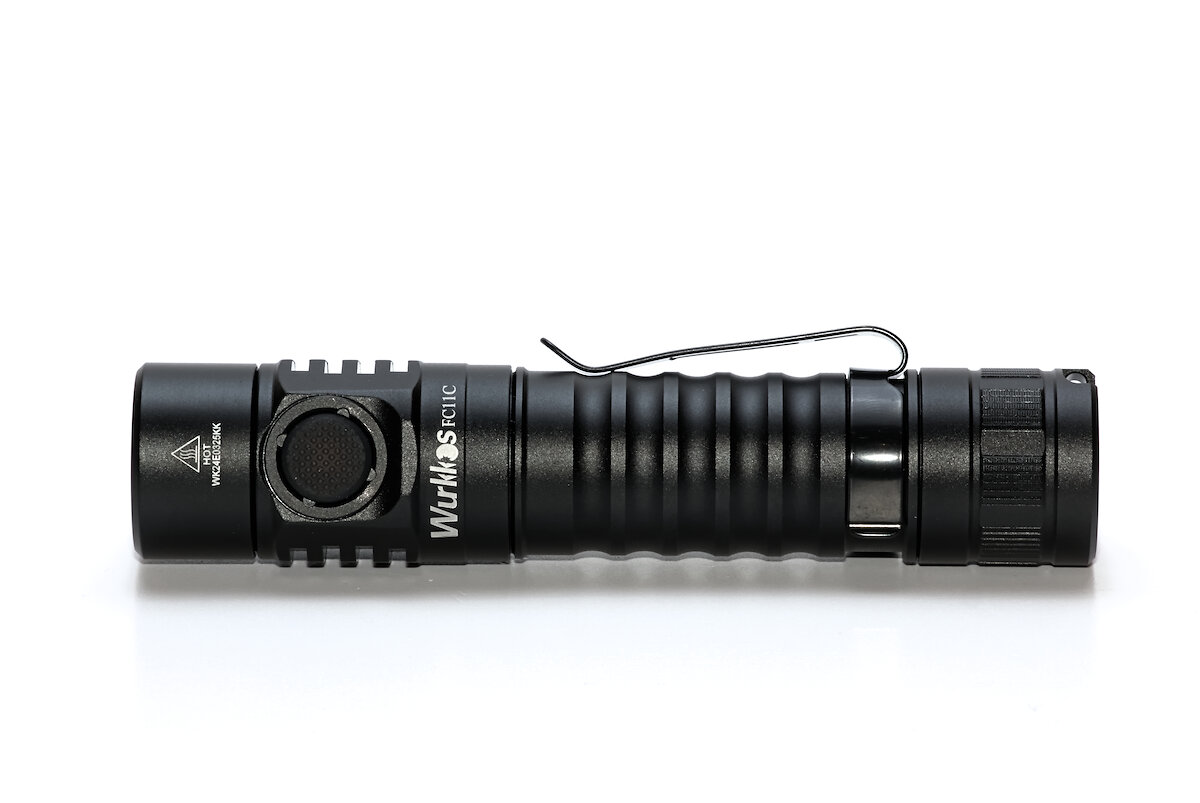
They also look almost identical. The anodization is slightly different and the switch bezel is now black, but otherwise they are exactly the same.
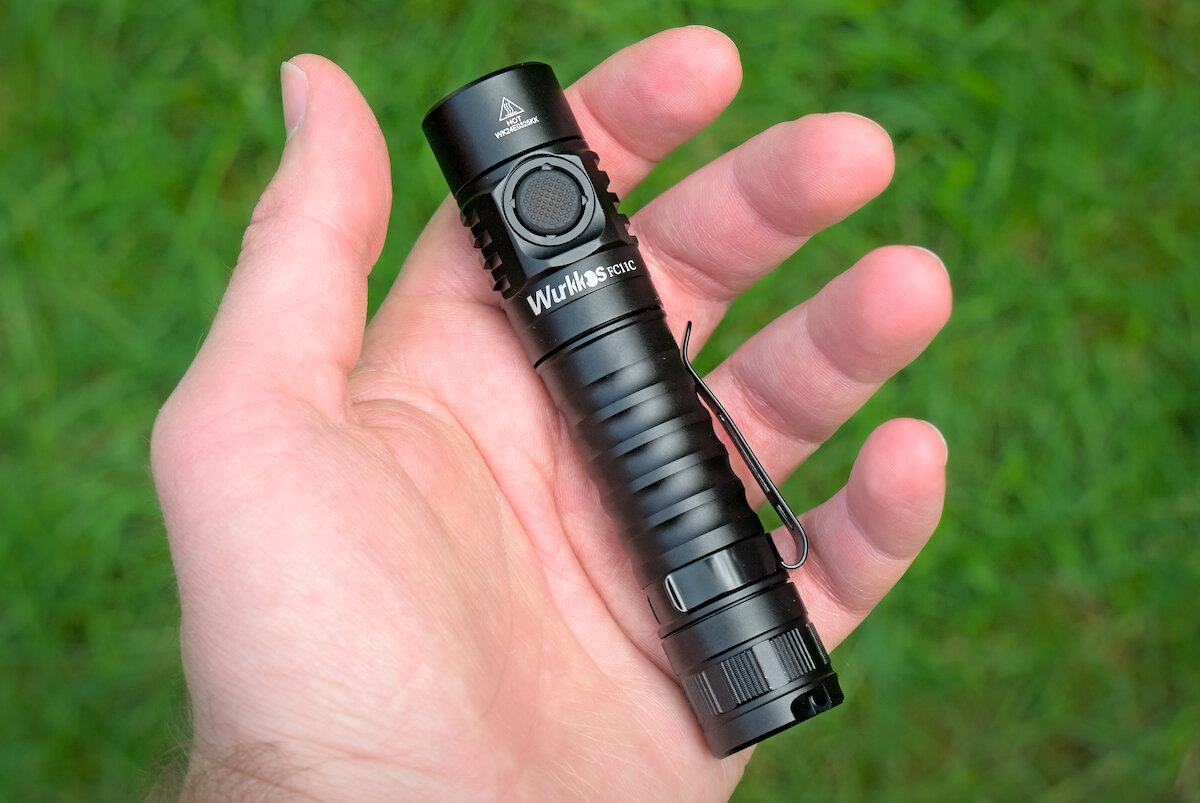
Length: 116.8 mm
Diameter (head): 25.5 mm
Diameter (battery tube): 22.6 mm
Diameter (tailcap): 24.0 mm
Weight (without battery): 65.3 g
Weight (18650 battery): 45.1 g
Weight (total): 110.4 g
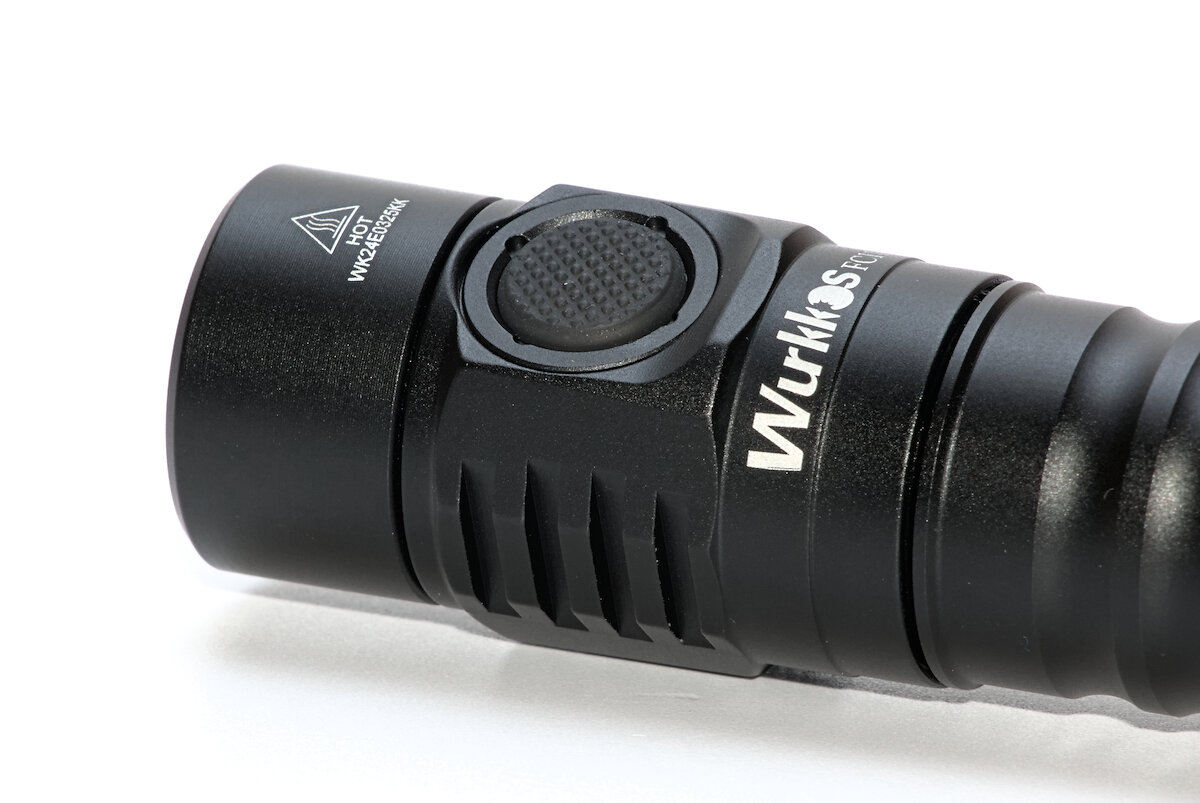
Simple aluminum bezel without crenelation:
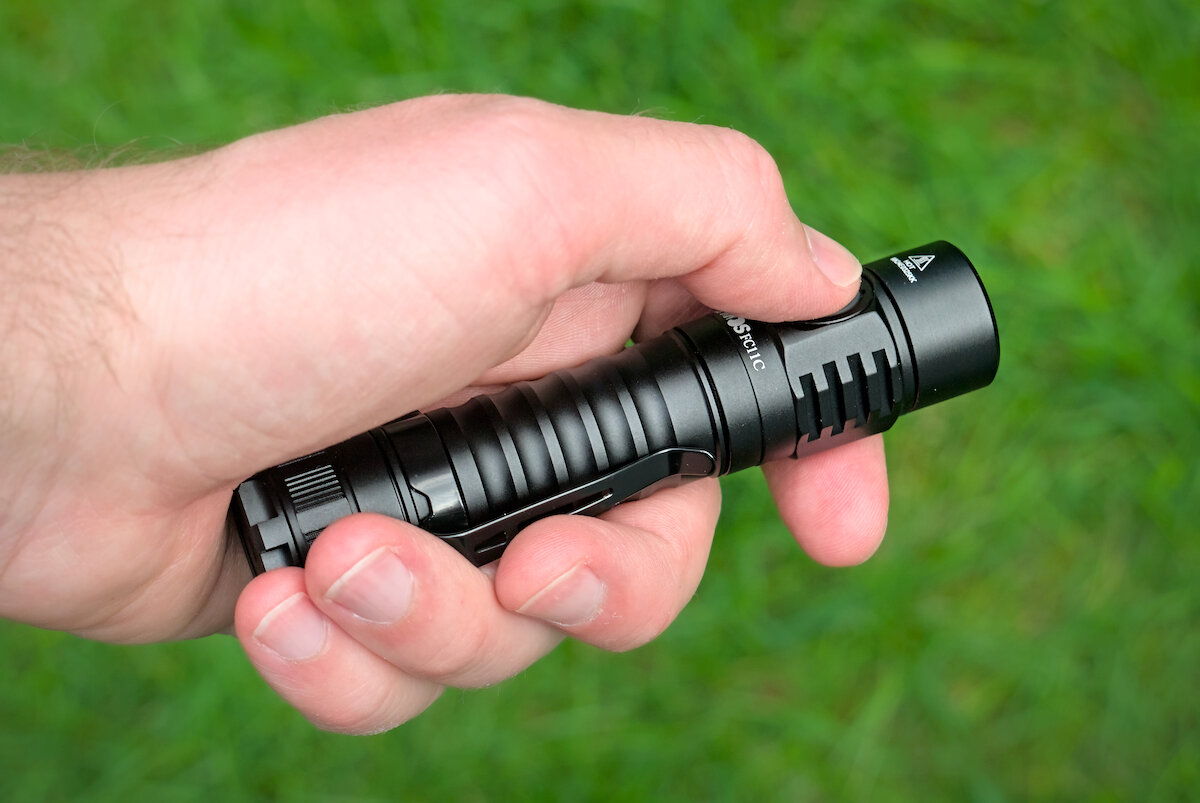
The ribbed battery tube feels nice and gives some positive feedback. Non-slip without aggressive knurling. The “cooling fins” on the head (unfortunately slightly sharp) will also help when holding the light.
It has a simple clip. Nothing special, but it works. The battery tube can be reversed, if you prefer to carry it the other way around.
A lanyard can be attached to the tailcap. This part is a little sharp as well. Tailstand works even with a lanyard attached.
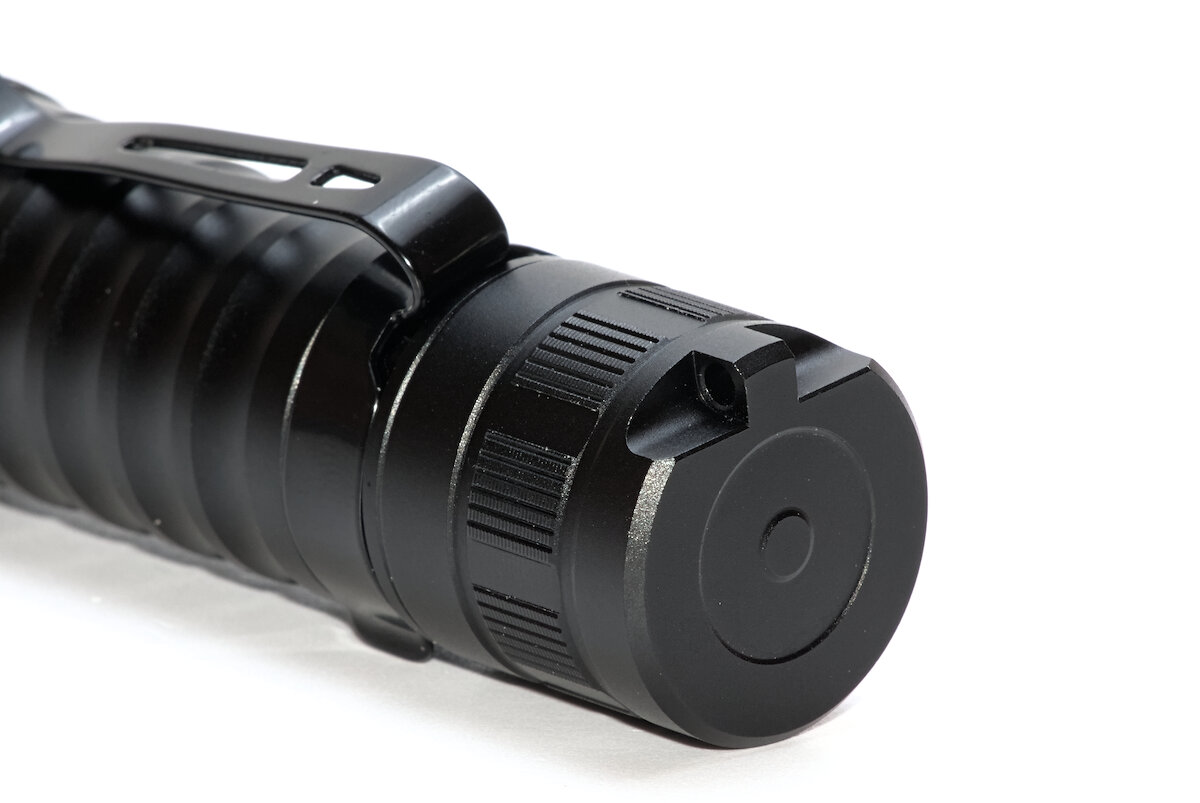
With the strong magnet in the tailcap it is possible to attach it to metal surfaces. It is strong enough to hold it in any orientation.
The USB-C port on the head is used the charge the battery. There should be enough space for most USB cables.
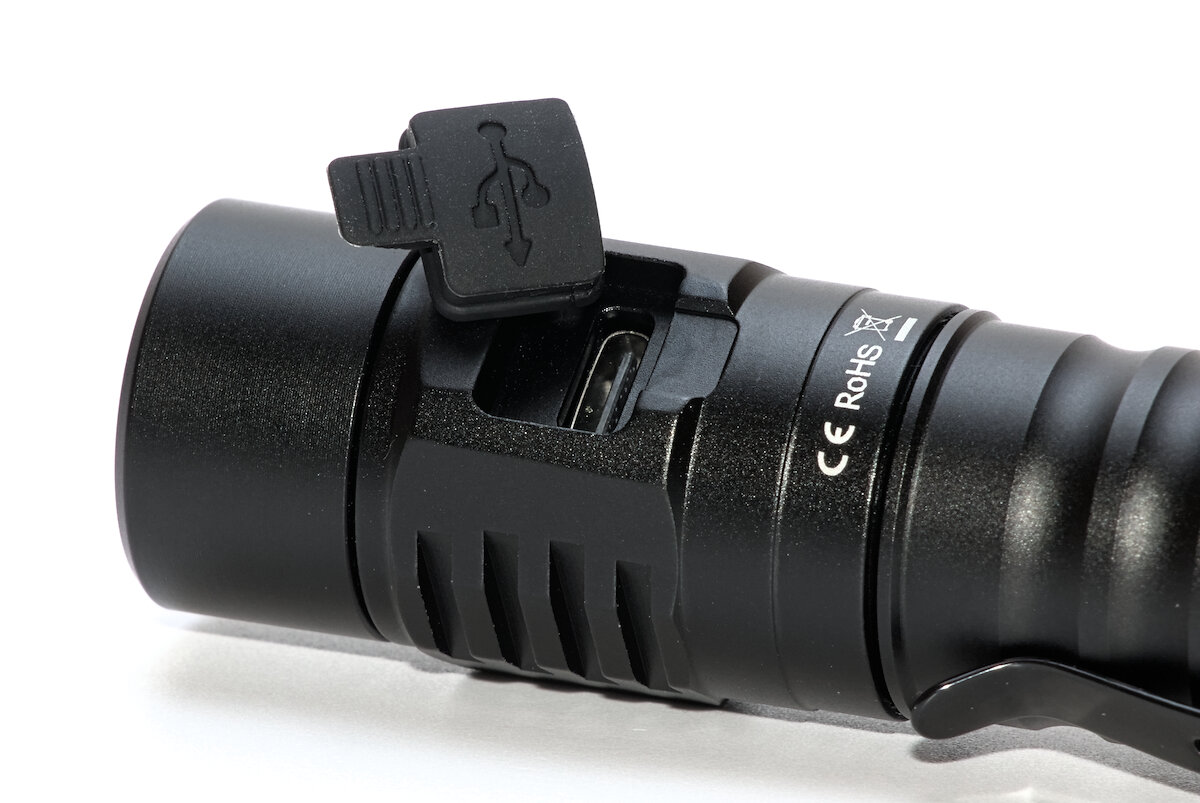
A silicone cover protects it from water and dirt. The little flap helps opening it, but also makes it a bit more likely to open it by accident. I’ve cut off the little flap and I think it stays closed more securely now.
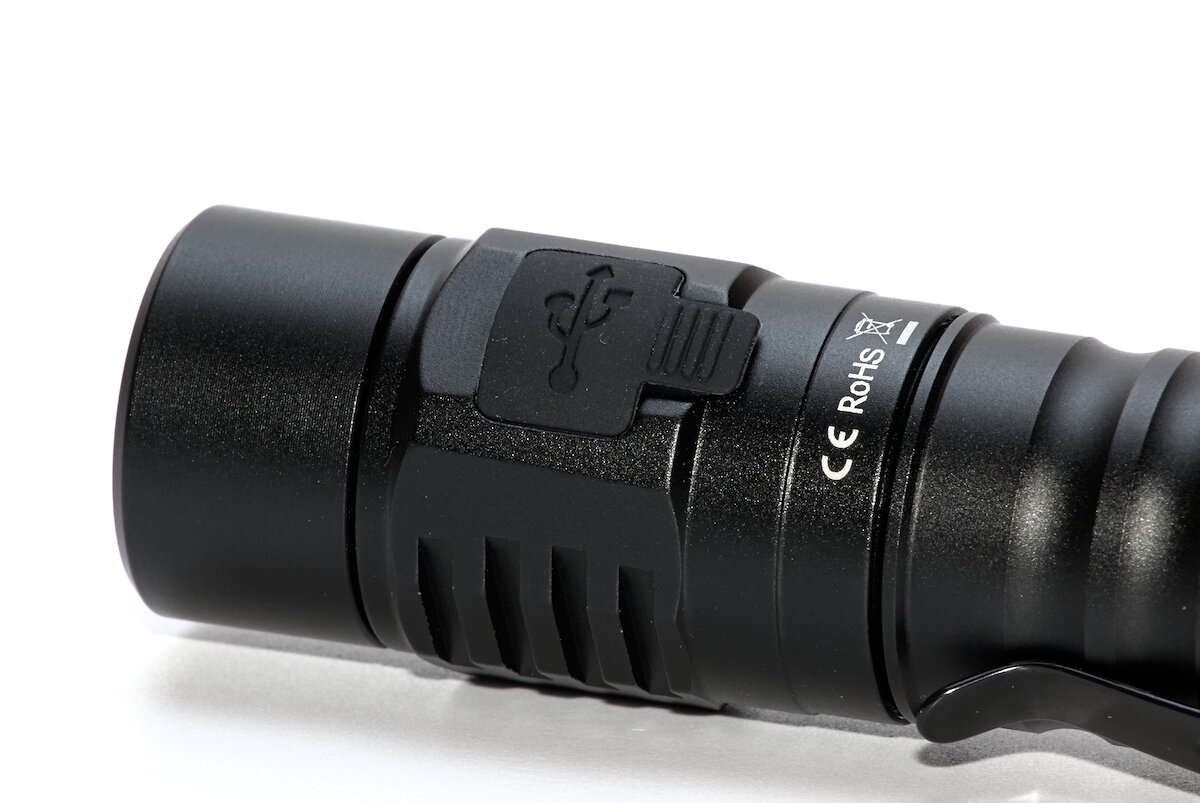
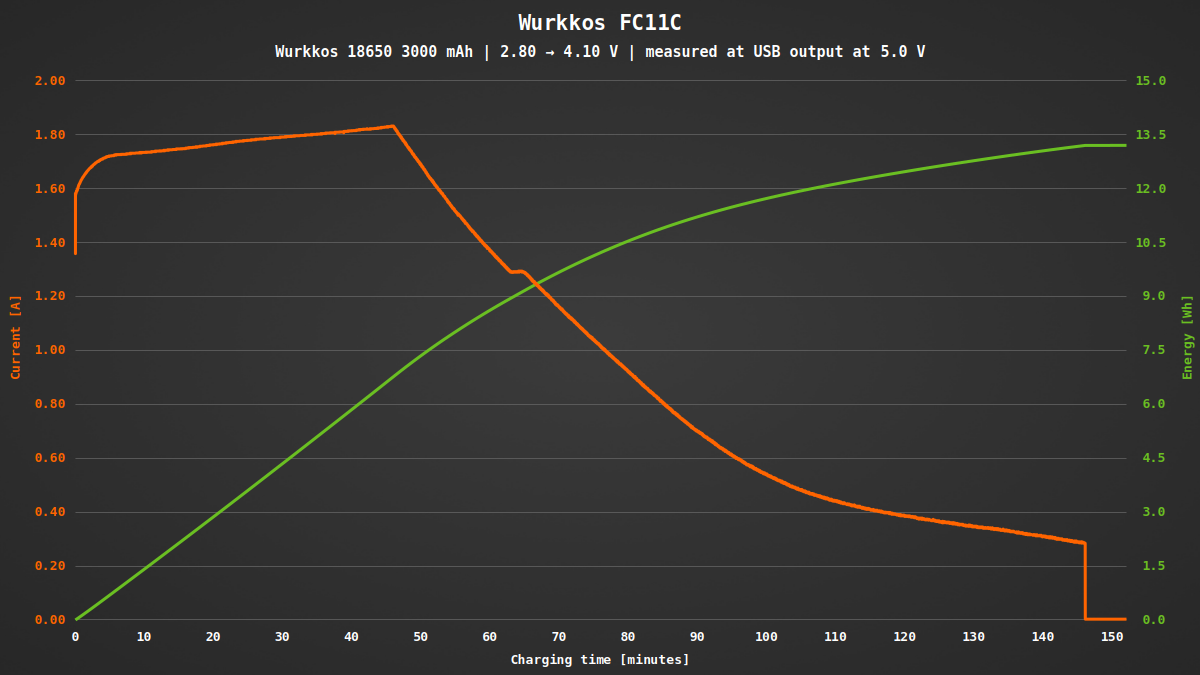
For the full charging speed a USB power supply able to deliver 2 A at 5 V is recommended. While charging the switch lights up in red, when finished it will be green. During charging the flashlight can be used in all modes.
Nice threads with an o-ring on both sides. The flashlight is rated as IPX8 (2m depth under water) and impact up to 2m as well.
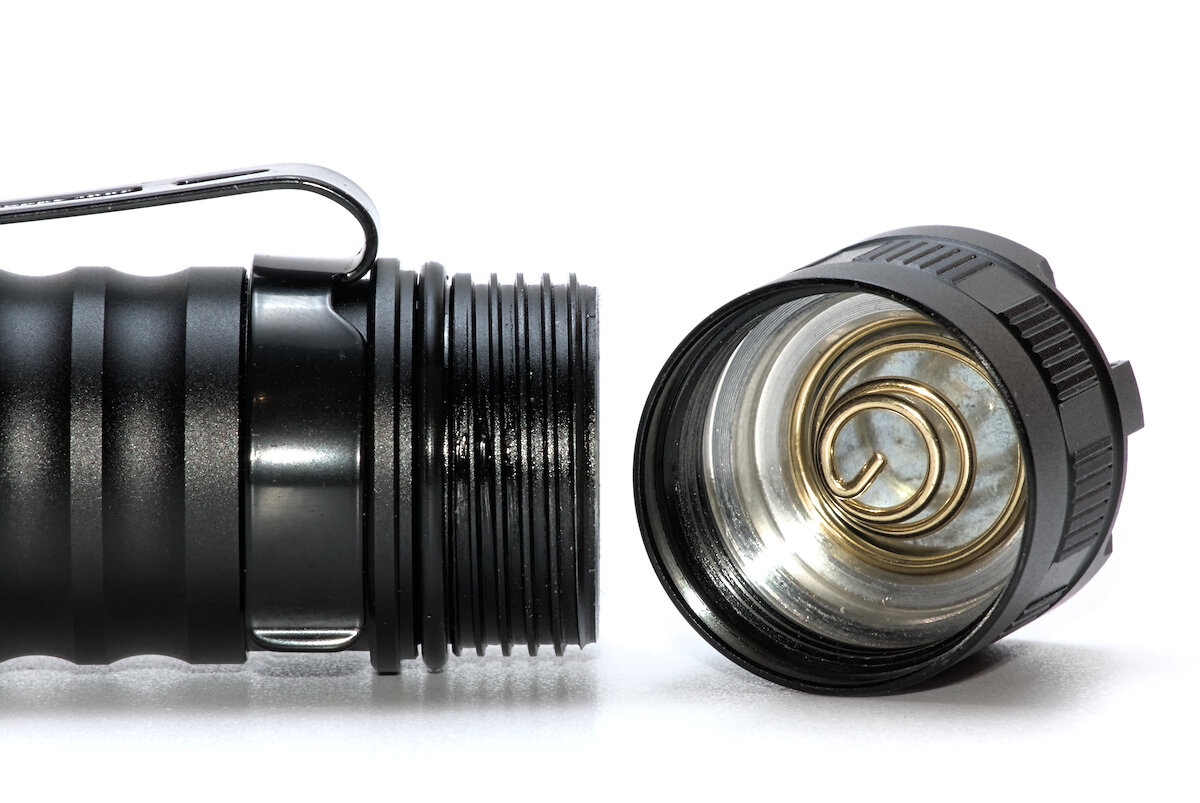
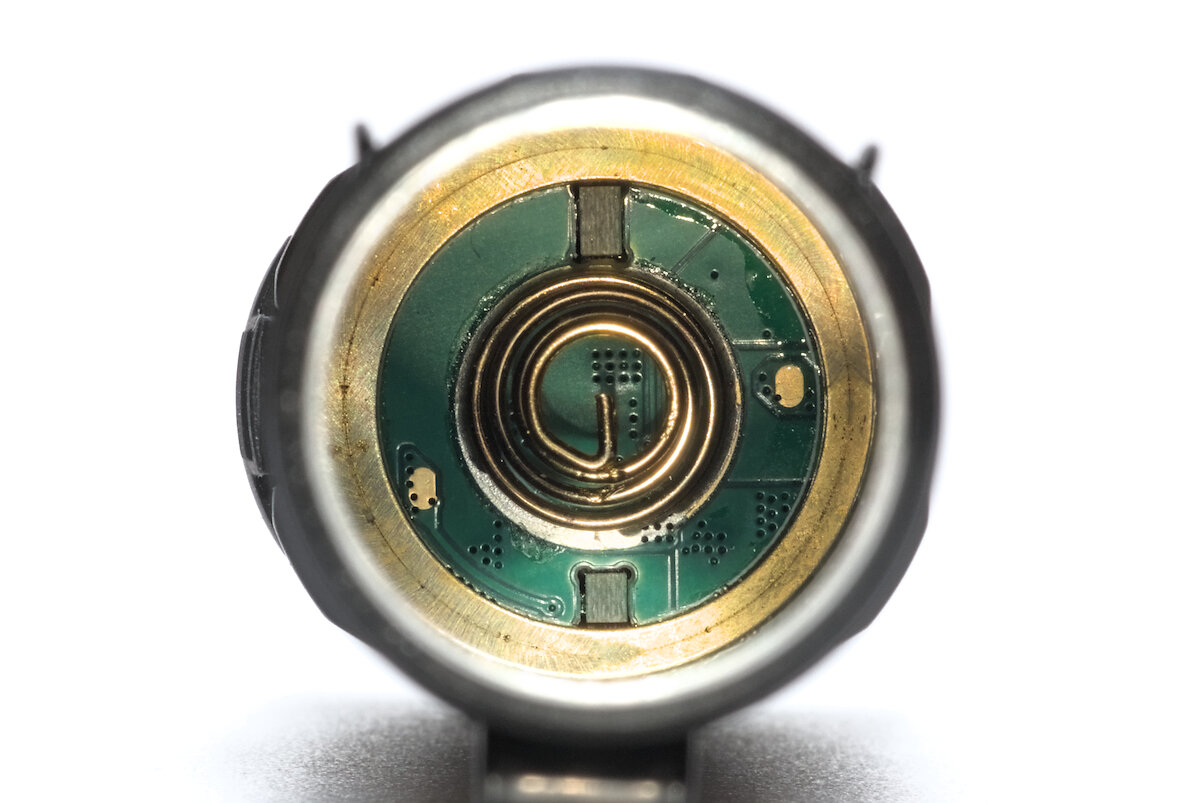
Thick and strong spring in the tailcap, slightly weaker spring in the head. Should be fine for this flashlight even without bypass. The two springs have enough flexibility to support most 18650 batteries (protected, unprotected, flat- and button top).
Manufacturing quality is excellent, just the cooling fins and the lanyard hole are a little sharp.
User interface
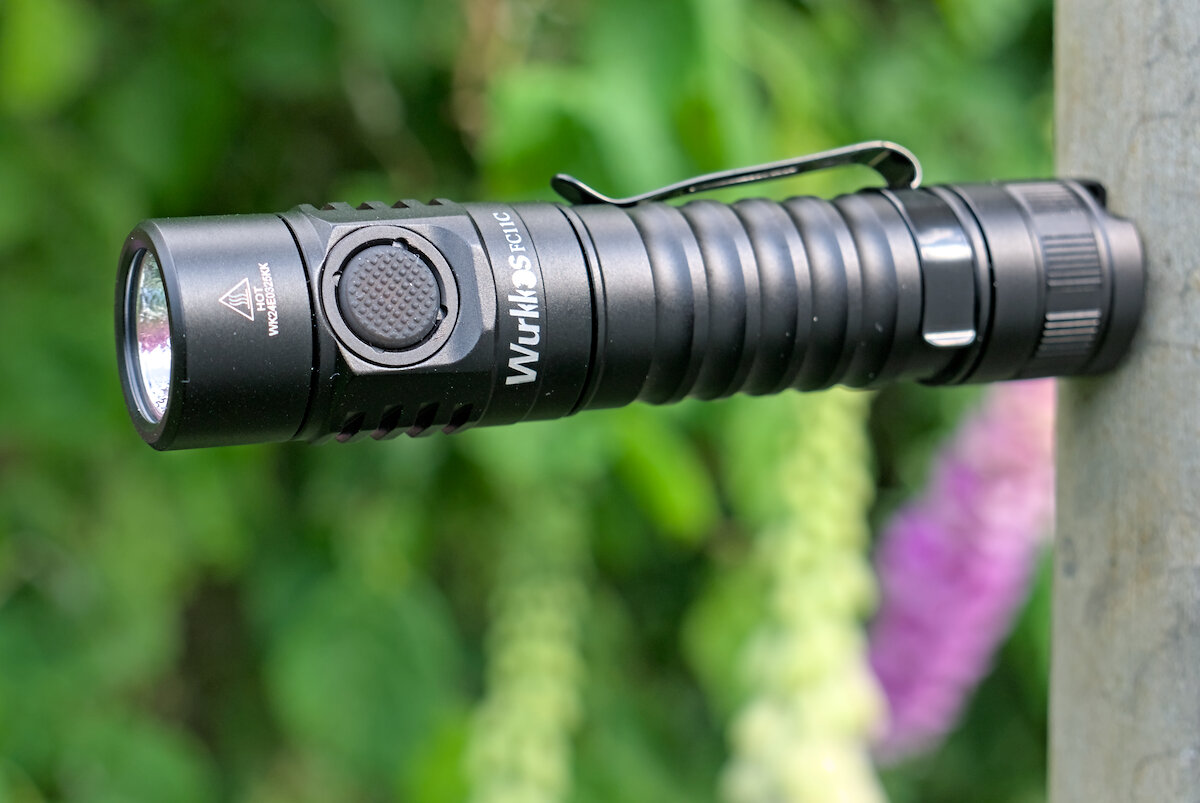
The FC11C is controlled with the large electronic switch at the head of the flashlight. It feels a bit soft and you can feel the actual switch underneath. But it doesn’t bother me. The surface is textured like diamond knurling.
UI is simple and should be easy to understand. Short press for on/off, hold to change brightness. There’s a shortcut for the lowest and the highest level. In smooth ramping mode you can adjust the brightness from the lowest to the highest level with an acceptable ramp shape.
| State | Action | Function |
|---|---|---|
| Off | 1 click | Turn on (last used brightness, except Eco and Turbo) |
| Off | 2 click | Turbo |
| Off | 3 click | Strobe |
| Off | 4 click | Lockout |
| Off | Hold | Eco |
| Off | Hold (> 3 s) | Switch between stepped/smooth ramping |
| On | 1 click | Turn off |
| On | 2 click | Turbo |
| On | 3 click | Strobe |
| On | Hold | Increase brightness (Low → Medium → High) or increase/decrease brightness in smooth ramping mode |
| Turbo | 1 click | Previous brightness or turn off |
| Turbo | 3 click | Strobe |
| Strobe | 1 click | Previous brightness or turn off |
| Strobe | 2 click | Switch between Strobe → SOS → Beacon (not memorized) |
| Lockout | 4 click | Unlock and turn on in last used brightness |
| Lockout | Hold | Momentary Eco |
A triple click enters the strobe group. It always starts with the strobe (alternating between 8 and 25 Hz). A double click advances to “SOS” and beacon (a short and bright flash every two seconds).
Strobe:

SOS:
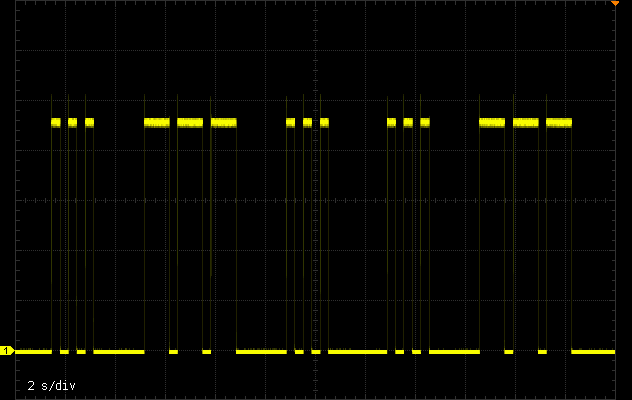
Beacon:
![]()
After turning on the flashlight, an indicator LED in the switch shows the approximate state of charge of the battery for five seconds. On very low voltage, the indicator will blink in red as long as the light is turned on.
| Color | State of charge |
|---|---|
| Green | good (> 30%) |
| Red | low (< 30%) |
| Red blinking | critical (< 3.0 V) |
The body of the flashlight is a little higher than the switch, which reduces the risk for accidental activation. It also needs some force to press it, which makes it even safer. But even if accidental activation is unlikely, you should better lock the flashlight when not in use (by 4C or by loosening the tailcap).
Illumination
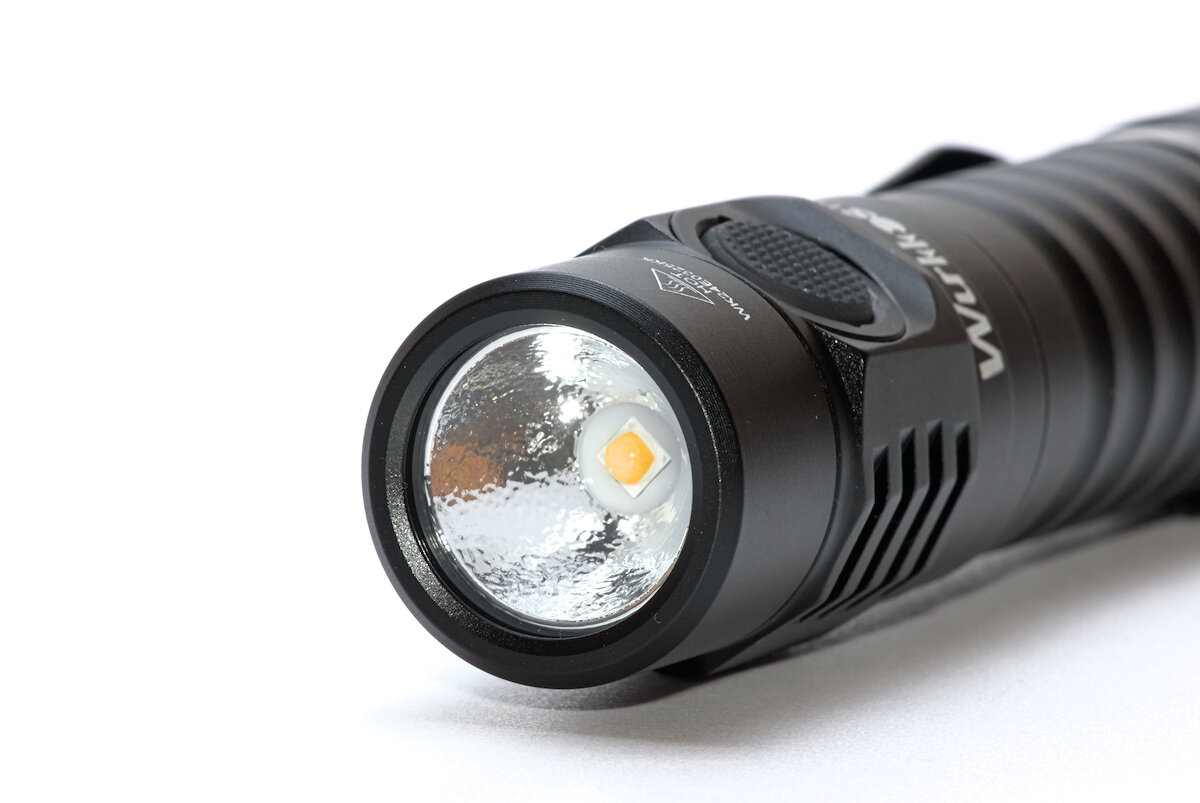
The old FC11 used a Samsung LH351D in various CCTs. Back then it was a great LED, and it still is. Good CRI, relatively high brightness. The FC11C now got a Nichia 519A, which has an even better tint and CRI. It is only available in 5000 K so far.
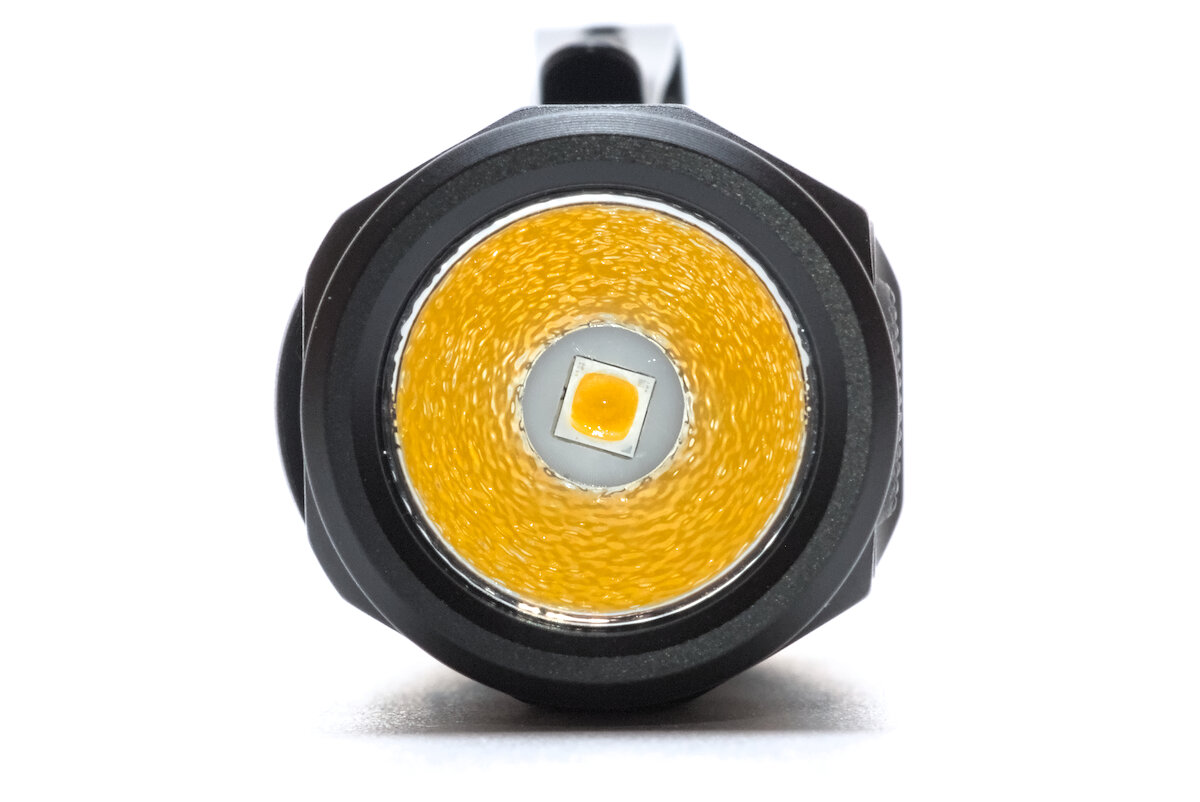
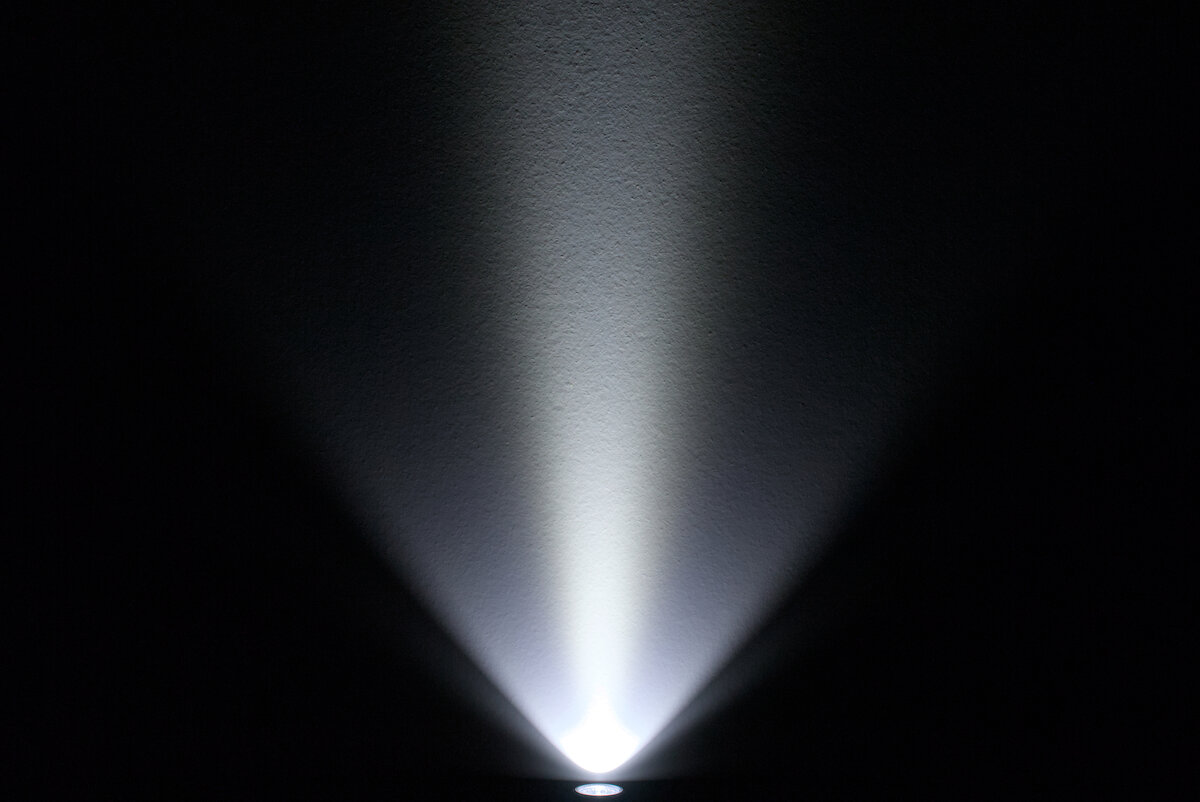
It has an orange peel reflector and a lens without AR coating. Compact spot with smooth transition into the spill. No rings, no artifacts. Tint is slightly different between spot and spill, but unnoticeable in most situations. Dedoming doesn’t improve it, but just adds star shaped patterns around the spot.

Driver and runtime
Not all improvements are immediately visible. The FC11C now comes with a buck driver for constant brightness (for most of the runtime). Overall the maximum brightness of the FC11C is a bit lower than the FC11, but again not really noticeable during normal use.
| Mode | Brightness¹ | Runtime¹ | Intensity¹ (Throw²) | Current³ |
|---|---|---|---|---|
| Turbo | 1200 lm | 2:30 h | 6008 cd (155 m) | 3.66 A |
| High | 600 lm | 2:42 h | 3154 cd (112 m) | 1.25 A |
| Medium | 250 lm | 7:30 h | 1338 cd (73 m) | 0.45 A |
| Low | 50 lm | 39 h | 210 cd (29 m) | 0.07 A |
| Eco | 1 lm | 500 h | 2.5 cd (3 m) | < 0.01 A |
| Off | 52 µA |
¹ According to manufacturer ² ANSI FL1 ³ Measured
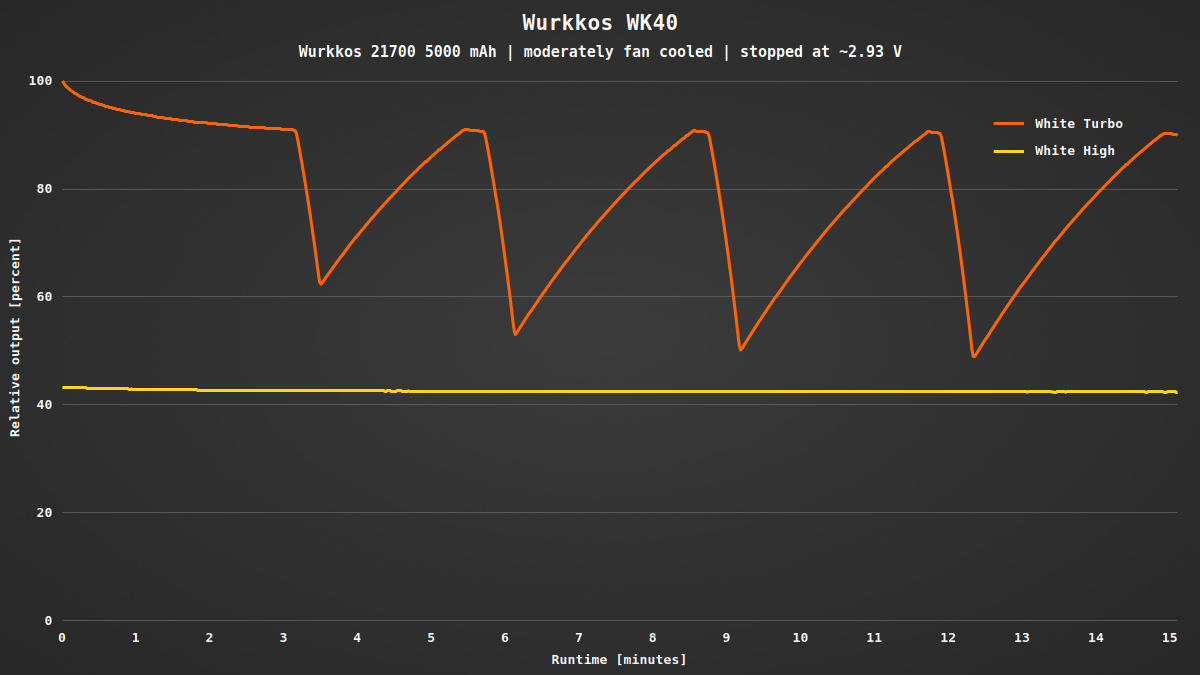
Here you can see how constant the brightness is (except for turbo, which was expected):
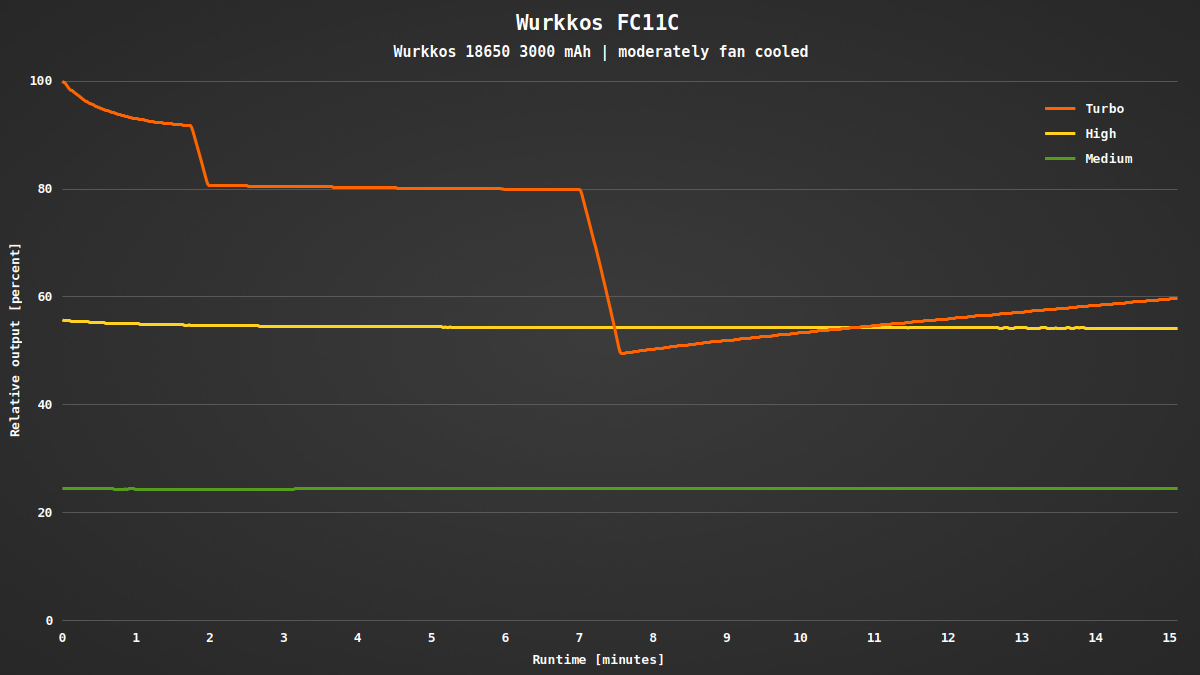
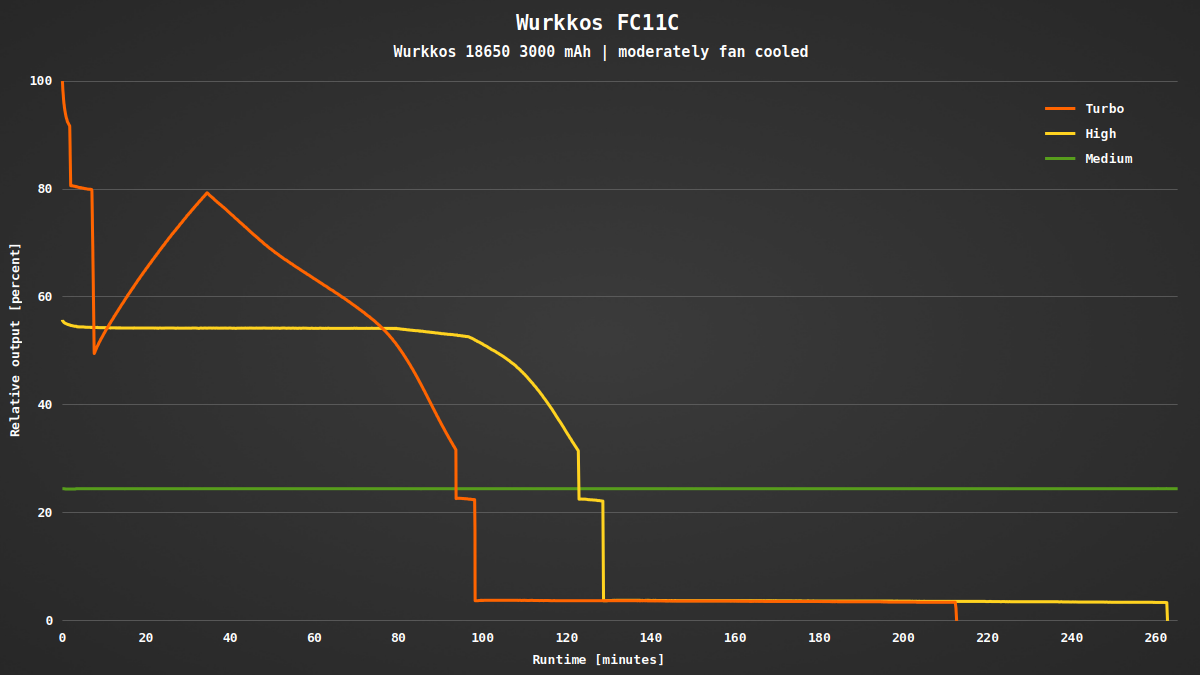
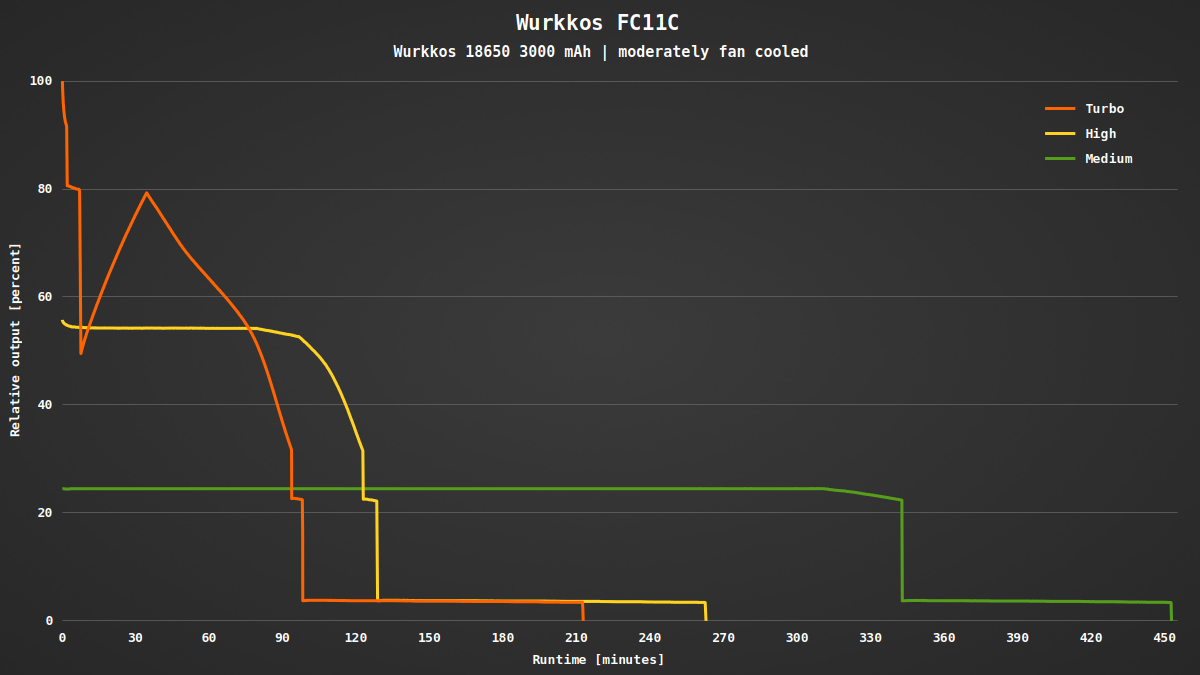
In turbo the output is reduced after 90 seconds to avoid overheating. The head reaches a temperature of 46 °C. Afterwards the driver starts a pretty weird regulation: It slowly increases the brightness, then decreases it again. It looks like the previously very aggressive regulation was just slowed down.
Uncooled it reaches 52 °C and doesn’t ramp up again, just a tiny spike.

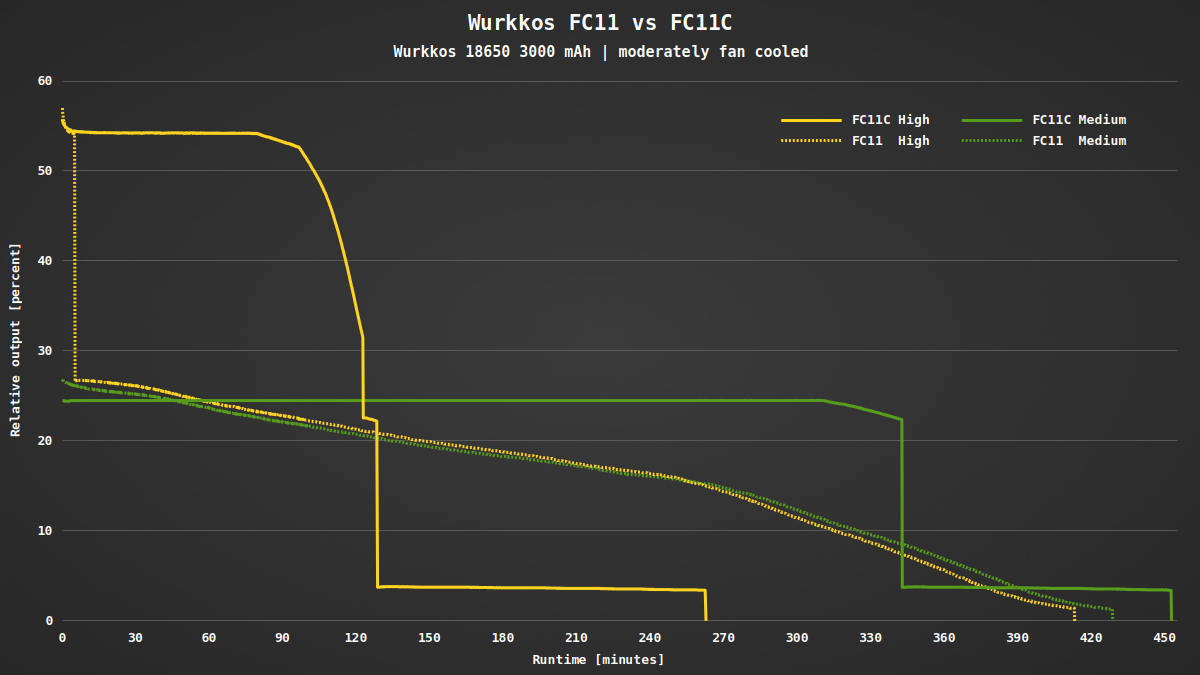
Direct comparison between the FC11 and FC11C (normalized to their maximum brightness). Now it should be obvious why the buck driver is so much better.
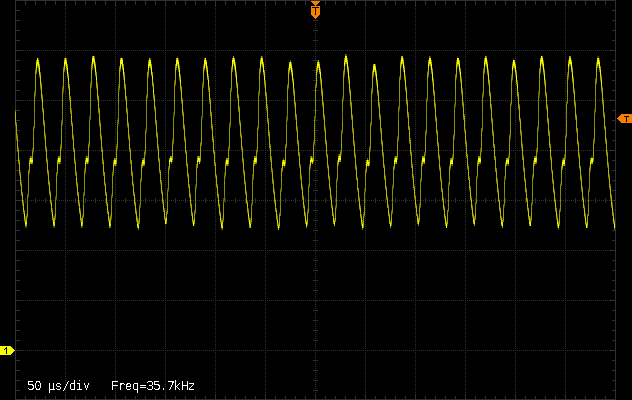
In the old FC11 the brightness was regulated with high frequency PWM. The constant current driver of the FC11C works without PWM. Just the “low” level has a rather strong (but very fast 35 kHz) modulation (invisible to the eye).
When the battery voltage reaches 3.00 V, the status LED in the switch starts to blink red continuously while the light is turned on. At 2.83 V the flashlight turns itself off to protect the battery from deep discharge.
Conclusion
The Wurkkos FC11C is a nice upgrade of the FC11: The light quality has been further improved by using a Nichia 519A and the buck driver keeps the brightness constant for most of the runtime. Combined with the easy UI and the integrated charging function, the FC11C is a really great flashlight for everyday use.
I can’t really think of any negative aspects. Perhaps it could be a bit shorter. Basically, Wurkkos has done everything right. While I have often recommended the FC11 as an entry-level flashlight, the FC11C will take its place in the future.