Thanks for the clarification  .
.
Thank you for the new torture test (very real no doubt), for the photos of the beamshots and other data.
Regarding to the clip, I think that the strong tension of the clip is what prevents from a good hugging the body of the light; even the arm of the clip looks too curved. With less tension, the clip would probably attach better to the flashlight, without the need to modify its dimensions.
I asked Barry to either make a dedicated clip for this light that fits right, or skip the idea of adding the clip standard to the light and leave it to the buyer to separately buy this non-ideal clip or not. I said we prefer the first. How Sofirn is going to handle this I don’t know yet.
If still available, can I sign up for 2x 5600k plz
Kindly sign me up for one of each. Thanks!
I opened the heads of my two samples, the potting was sticky toffee anyway, and I wanted to see if the leds could be lifted a bit for more light coming out of the front. It seems like the potting did mostly fill the cavity after all, if only it was hardened it would do a proper job.
Left the cool white head, right the warm head.
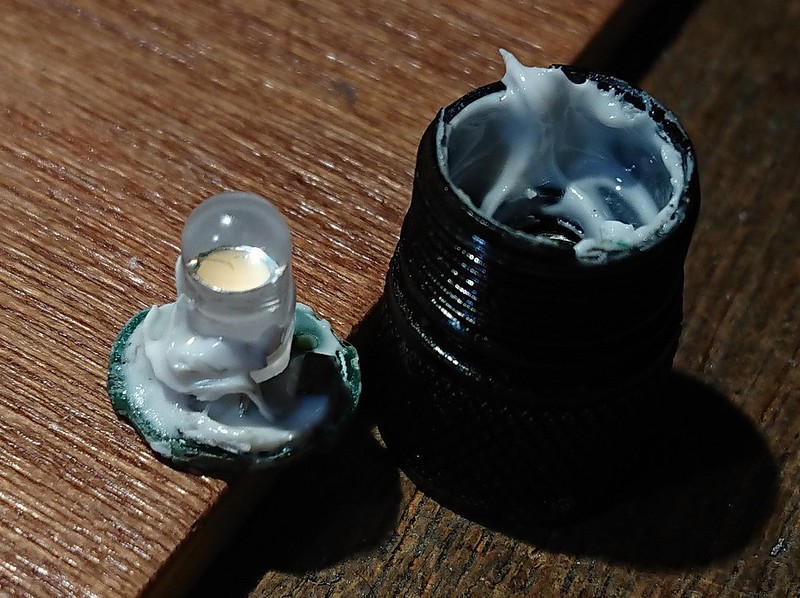
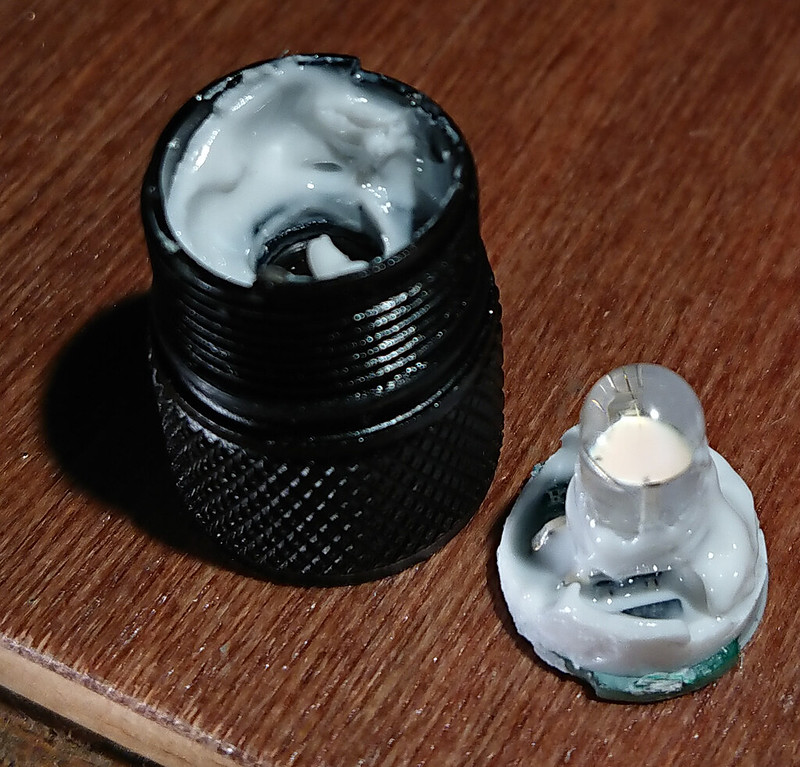
The driver is really simple, just a few components which is good. The thoroid is very small and shallow, so should be very impact resistent. I will cleanna driver later and make a good pic.
Under the leds I placed pieces of wooden tootpicks so that when pushing the led in place through the o-ring (the o-ring seal looks very good) it will not bend backwards and sit as high in the reflector as possible.
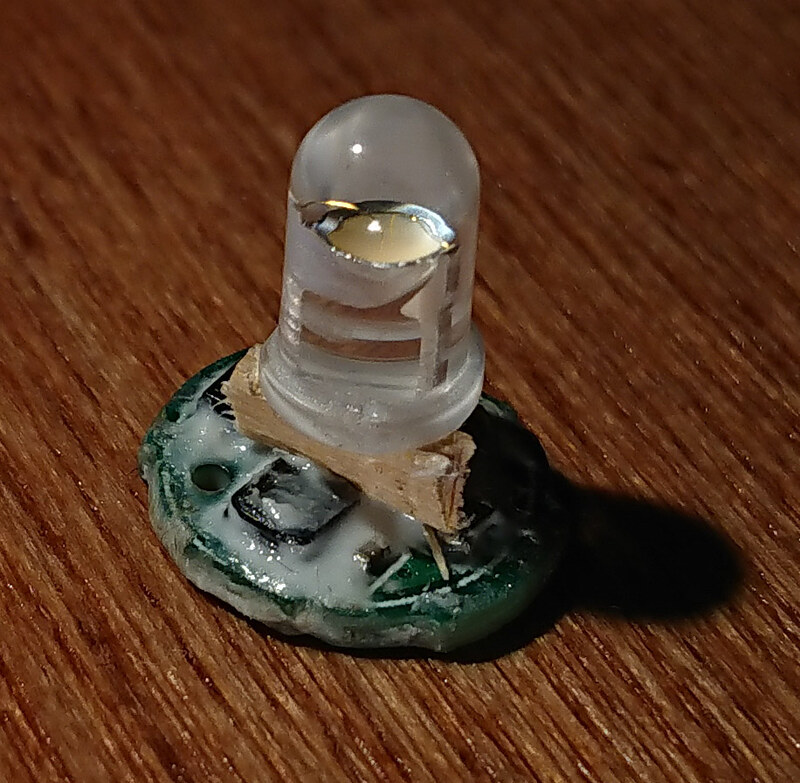
By doing this and closing the lights up again, there was indeed some gain, cool white went up from 7.2 lumen to 7.7 lumen, warm white went up from 4.9 lumen to 5.1 lumen. It is not a shocking difference but the way the construction is I would not be surprised if lights leave the factory with leds deeper than I got. I will ask Barry if there is a way to ensure that the leds will not be bended backwards when assembling the head.
I wonder if that is just silicone caulk. I found out myself that silicone caulk won’t cure if it can’t get exposure to air (or moisture actually) because that’s how it’s activated.
One way to find out. Djozz, can you leave just a bit of the silicone caulk outside and see does it cure. If not, Sofirn is using the wrong potting material. If it does, they are assembling it way too soon, need time for it to cure first.
^ I don’t know what it is, white sticky toffee comes closest.
Btw, Barry replied to my objection to using the clip of my samples as standard clip for the C01:
“The sample is from 1st round, we are sure the clip issue is resolved since it’s easy to figure out.”
A bit mysterious answer but it will have to do ![]()
Silicone caulk wouldn’t work at all, because the potting compound on this style of light is injected through a hole in the driver PCB after the head has been assembled, so the silicone caulk would never cure.
It’s not really practical to put any kind of potting compound on before assembling the head, because you’d be almost guaranteed to get some on the visible part of the LED package, which would look bad and mess up the beam profile.
A two-part potting compound (resin + hardener, mix just before use) really is the best option for this sort of work.
/\ … +1 . . :+1:
I can not test the magnet hole because it is a fraction too small for a 5mm magnet, but I did check the trit hole lasat night. I reckoned that to get more light out, the inside of the hole should be bare aluminium instead of black ano, so I removed the anodisation there with caustic soda. I’m not 100% convinced about the result, you can probably see the trit a bit better, but when not in the dark, it probably looks better if the trit hole is black.
About the video, I removed a section of 2 minutes in which I was removing bubbles in the glue with a toothpick, in order to crop the video to within 15 minutes, otherwise I have to surrender my phone number to google.

The result is ok but not great, I’m clearly not a trit expert. I see that I could have cleaned out the hole better, and remove more bubbles (should have waited for them to float to the top longer).But it works fine ![]()
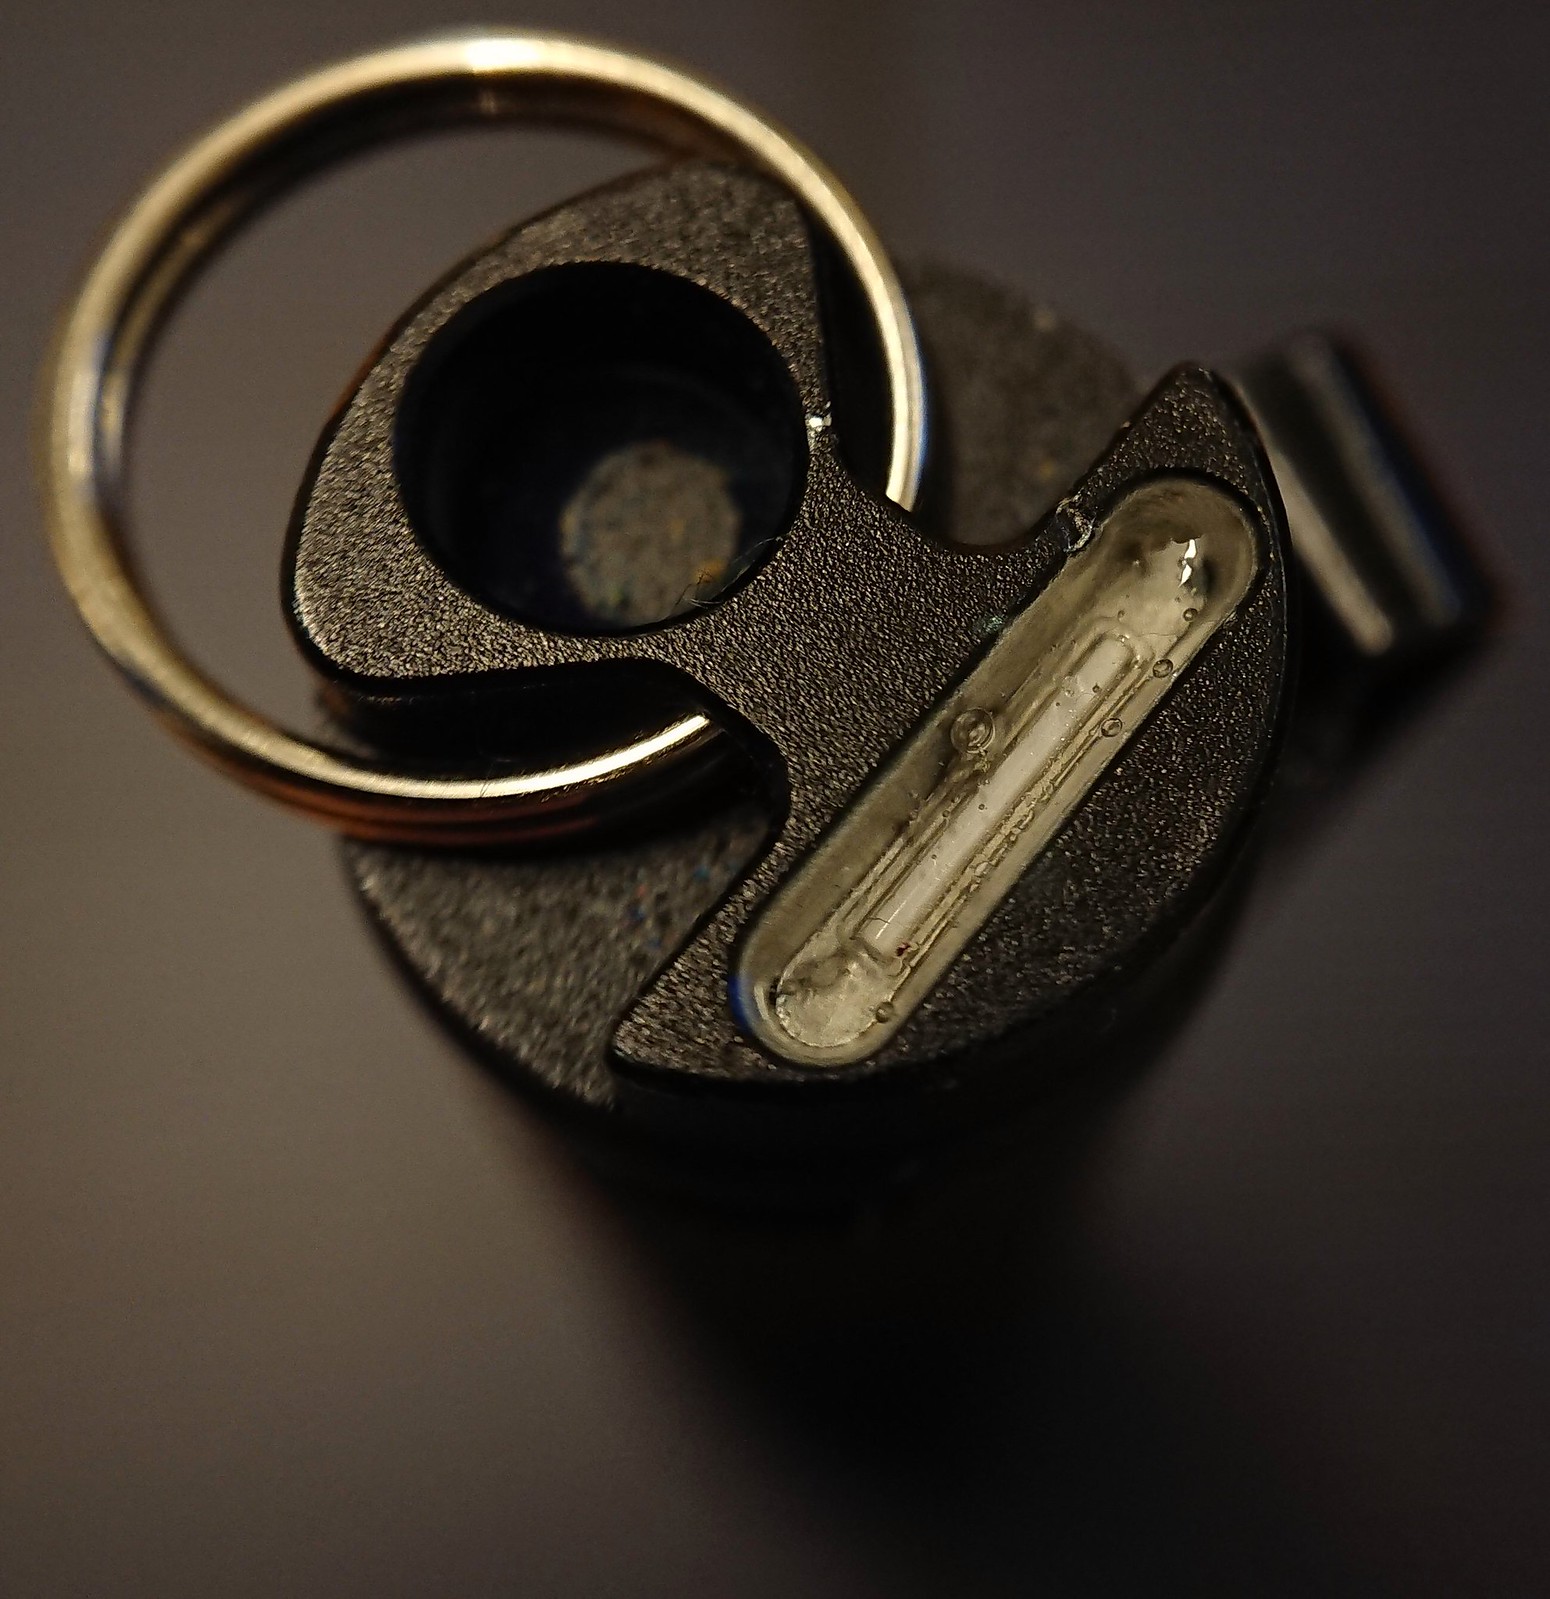
What size trit did you use?
the smallest size, 1.5 x 6mm. The hole is quite spacy for that trit, should i ask Sofirn to make it a bit smaller? Or is that not important at all?
Yes. Please make it smaller. To fit the general 1,5 X 6.
Yes, please
Thanks for the work and sharing it; yes, I prefer the tightest hole possible.
Smaller hole please. That is huge
I’m guessing the width is based on the cutter size they want to use for the full tail, but it looks like they can at least shorten the slot without having to do a tool change.
I don’t think I’m going to splurge on trits for any of mine, but I might melt some glow in the dark material into the tail.