I’ve been reading quite a bit about Parasitic drain with both lights,
I’m actually interested in the rook, but I really don’t like the fact that it will drain the battery in a matter of days, or weeks.
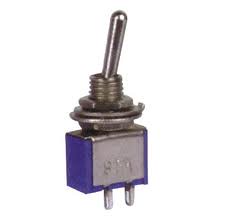
What kind of switch is used in these lights?
Are there any mods to get rid of the parasitic drain?
Does anybody know how hard it is to change the switch?
Changing the original switch doesn’t change anything.
It’s a simple clicky like used in millions of other gadgets that only tells the
(always running microcontroller) to give more or less or no power to the led.
The parasitic drain is the power that the mcu needs to run permanently
and check if and how you are pushing the button.
IMHO the best way would be to isolate the spring-plate in the bottom of the
batery-compartment from the host and integrate a realy flat turning switch.
Unfortunatly that will be a real complicated mod that i don’t think i am able to do
without ruining the light.
At the moment i’m not even getting the da&$%§ driver out of the head.
There is a thread somewhere here at BLF about modifying/reprogramming
the driver for ROOK’s big brother the SRV King. Have to check that thread again for inspiration.
I, too, would be interested to know what modification is necessary. It's my understanding that if the threads were anodized (like on the King), the parasitic drain would not be an issue (to electrically isolate the head from the body?), but I'm probably over-simplifying.
I think there is no easy mod in this case.
Lately i was thinking the easiest would be to implement a double-function-switch.
Something like half-press for same actions as now and full-press for completly shutting the driver of.
But i wasn’t able to find any switch with that double-function so i didn’t investigated more how to implement it.
I saw in an other thread that DrJones has a reprogrammed driver with better modes and free mode-adjustment for use with electronic-switch operation that i liked very much but using it alone would mean loosing the possibility to use eneloops or alkalines wich is a pretty cool option of this light.
Until now I wasn’t able to find any point on the driver after/behind the boosting stage where i could connect the DrJones driver so i don’t loose the eneloop option. So still completly unresolved.
@darkness
I didn’t knew the King’s threads where anodized, if they are than you’re rigth. Screwing the head of just a bit would isolate the head from the body and prevent any parasitic drain. Unfortunatly the threads of my ROOKs aren’t anodized.
It may be worth getting a Rook and attempting to isolate the head from the body by putting something non-conductive on the threads. If the unit can be easily disassembled, it might not be too difficult to anodize the threads.
I have converted my code to use one pin for the electronic switch and it works!
at least on my DIY driver. The current drain is around 800uA (standby mode).
I plan to use this on my rooks in addition for my Kapton Disc solution for no parasitic drain.
the easiest and cheapest solution is put isolator on contact board may be in form of clear tape or clear nail polish. there’s thread about that by last katun.
 :
: