I had forgotten that I have a purple S2+ that’s been waiting for my teenage daughter to have time for us to put it together. I just checked the pill shelf and it was totally flat. 
I decided to make another triple - this time from a 2 year old black S2+. When I took it apart and checked the pill for flatness, guess what? Not as bad of cupping as the pill in the OP, but still not good.


Rather than sanding the pill, I took moderator007’s suggestion to try to hammer the pill to make it flat. I used a small metal rod and carefully hammered the bottom of the pill. It required several hard hits, but it worked!


I then drilled a hole in the pill for the triple MCPCB wires, chamfered all 3 holes, and checked to make sure the pill remained flat.


Would be better if manufacture made S2+ pill like s21a.
Flat without border,mbpcb hold with 2 screws
Amazing, what LEDs can survive. Such cavities more or less isolate the MCPCBs.
I think the S2+ pill design is good, but somehow I got some where the machining or something wasn’t right. The border on the pill helps with centering the LED, but not really necessary since the reflector does the same thing. But for a triple, it seems the border helps to center optic.
I do like the design of the S21A pill. And the screws for the MCPCB is nice since it forces it against the pill, but that’s not necessary either since again the reflector does the same thing when the pill is screwed into place. But for a triple, perhaps the screws would again help to center the optic.
screws are also good to avoid mbpcb rotation
and possible wire breaks
S2+ with s21a pill style would be better in my opinion.
You can check or sand shelf easy if not perfect flat,(but often are perfect)
and support 20mm mbpcb
Good point about the screws preventing the MCPCB from rotating. 
Usually for a single 20mm MCPCB, the notches for the screws are on the perimeter. So in an S2+, there wouldn’t be room for the screws. Here’s the 20mm Notigon in my C8:

But for a 20mm triple, the Kaidomain MCPCB has screw holes on the inside: TRIPLE LUMINUS SST-20 LED EMITTER WITH 20MM X 1.5MM COPPER PCB. So that would work in an S2+.

I was wondering if anyone complains about slight unscrewing of the pill on stock s2+ during the use and consequent bad contact pill / mcpcb as there are no screws that fix it.
I am thinking of hunters or bike riders where the stresses are greater
1 Thank
Probably a good idea to retighten the driver retaining ring, which will also retighten the pill, at some point after the S2+ was put together. The O-ring may compress a little which could make the pill not be as tight. I haven’t noticed this being a problem, but if you have a flickering issue, that could be the cause.
Also, as an update, 2 out of the last 3 S2+s I’ve gotten have had flat shelves. Here’s the pic of the S2+ shorty where the pill was not flat. This time the shelf was bowed. Not that bad, but hammering the pill made it flat.
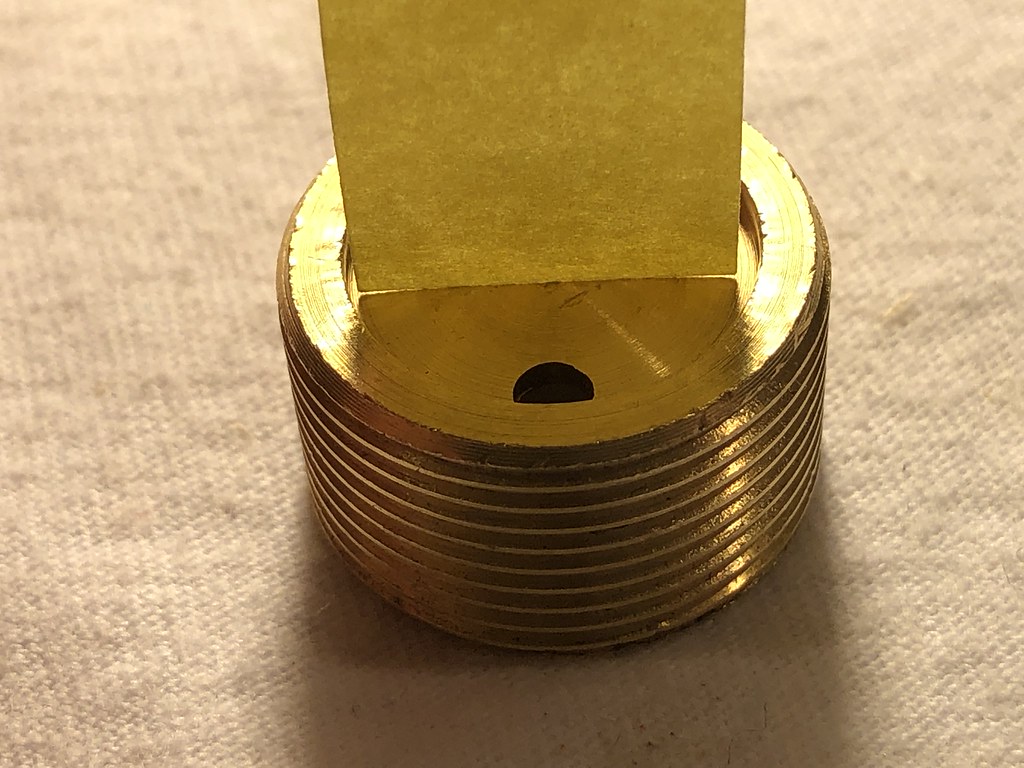
This “issue” has not gone away unfortunately. Here’s the latest S2/S6/S7/S8/S10 pill that I got which has a concave surface:
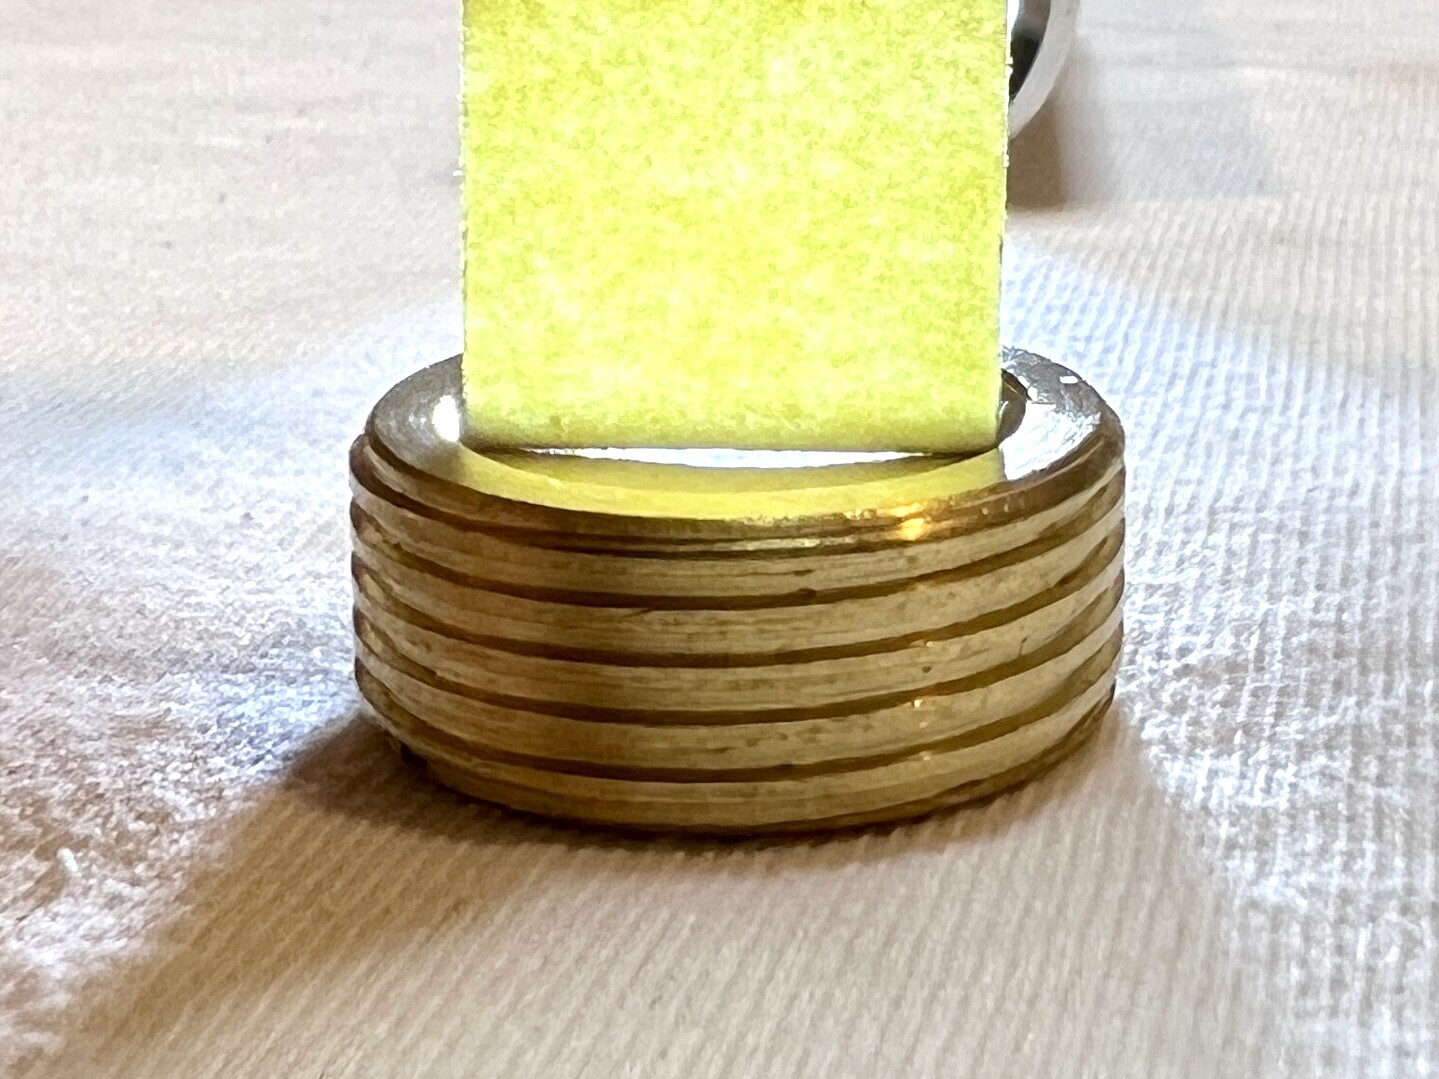
Some quick taps with a metal rod and it became much flatter.
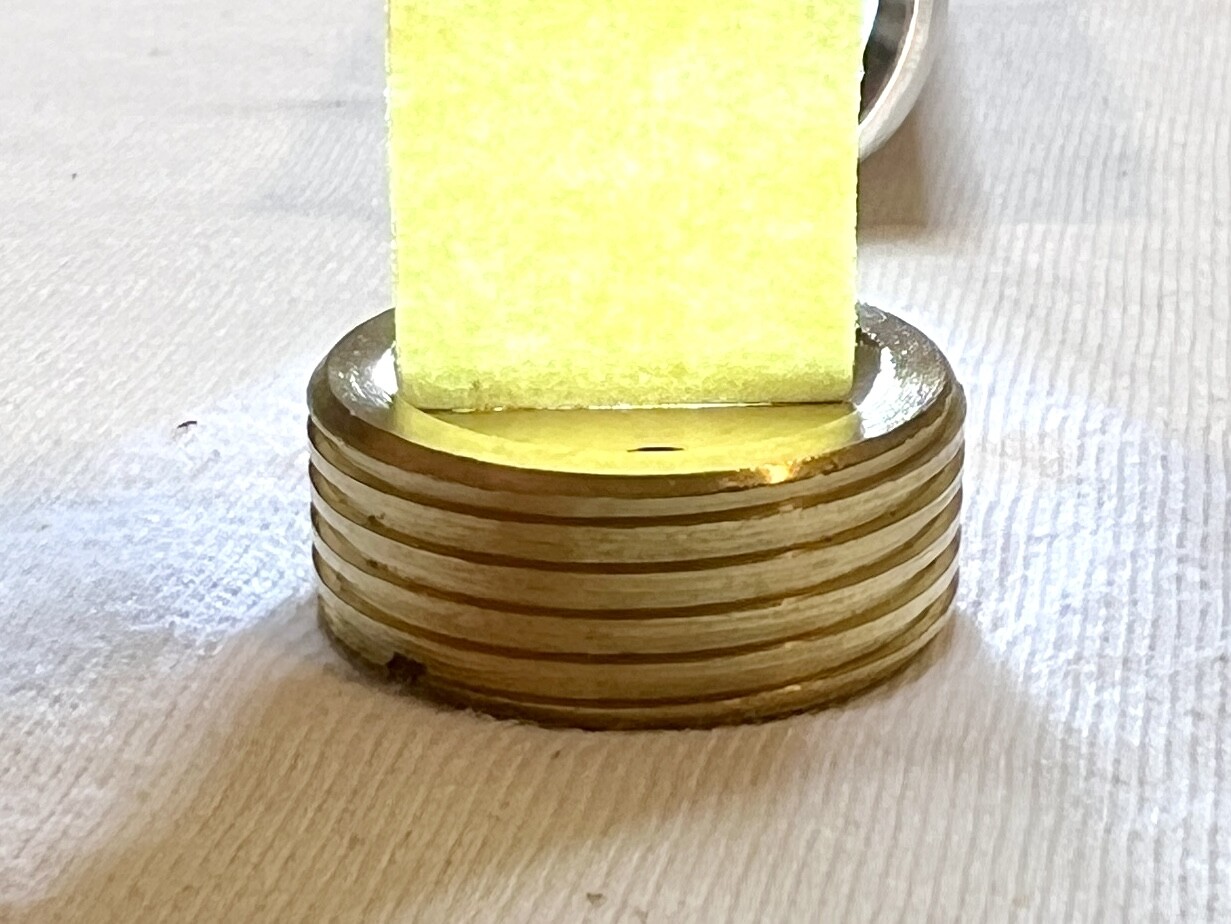
Fortunately though it seems this has not been an issue with flashlights failing. Ideally a flat MCPCB against a flat pill surface is best, but thermal paste also works to fill in the gaps. And there is still plenty of metal to metal contact even with a gap.
And who am I to be critical about this since the pill is for a stainless steel S6 which is terrible at dissipating heat. 
2 Thanks
Quite disappointing to hear. How did you do the tap with the metal rod? Did you hit it so hard from the bottom that the resulting bulge from the top fixed the concavity?
I’ve had a very bad case of this from many years ago, and ended up filling the whole cavity with solder and then sanding it smooth. It matters less now that I’ve converted it into a triple with a spacer that distances the defect from the LED.
1 Thank
Yes, that’s exactly what I did. I put some tape on the end of the rod to spread out the impact (and to prevent any dents) and hit it with a hammer until it became flat. I checked after every tap or so to make sure I didn’t go too far.
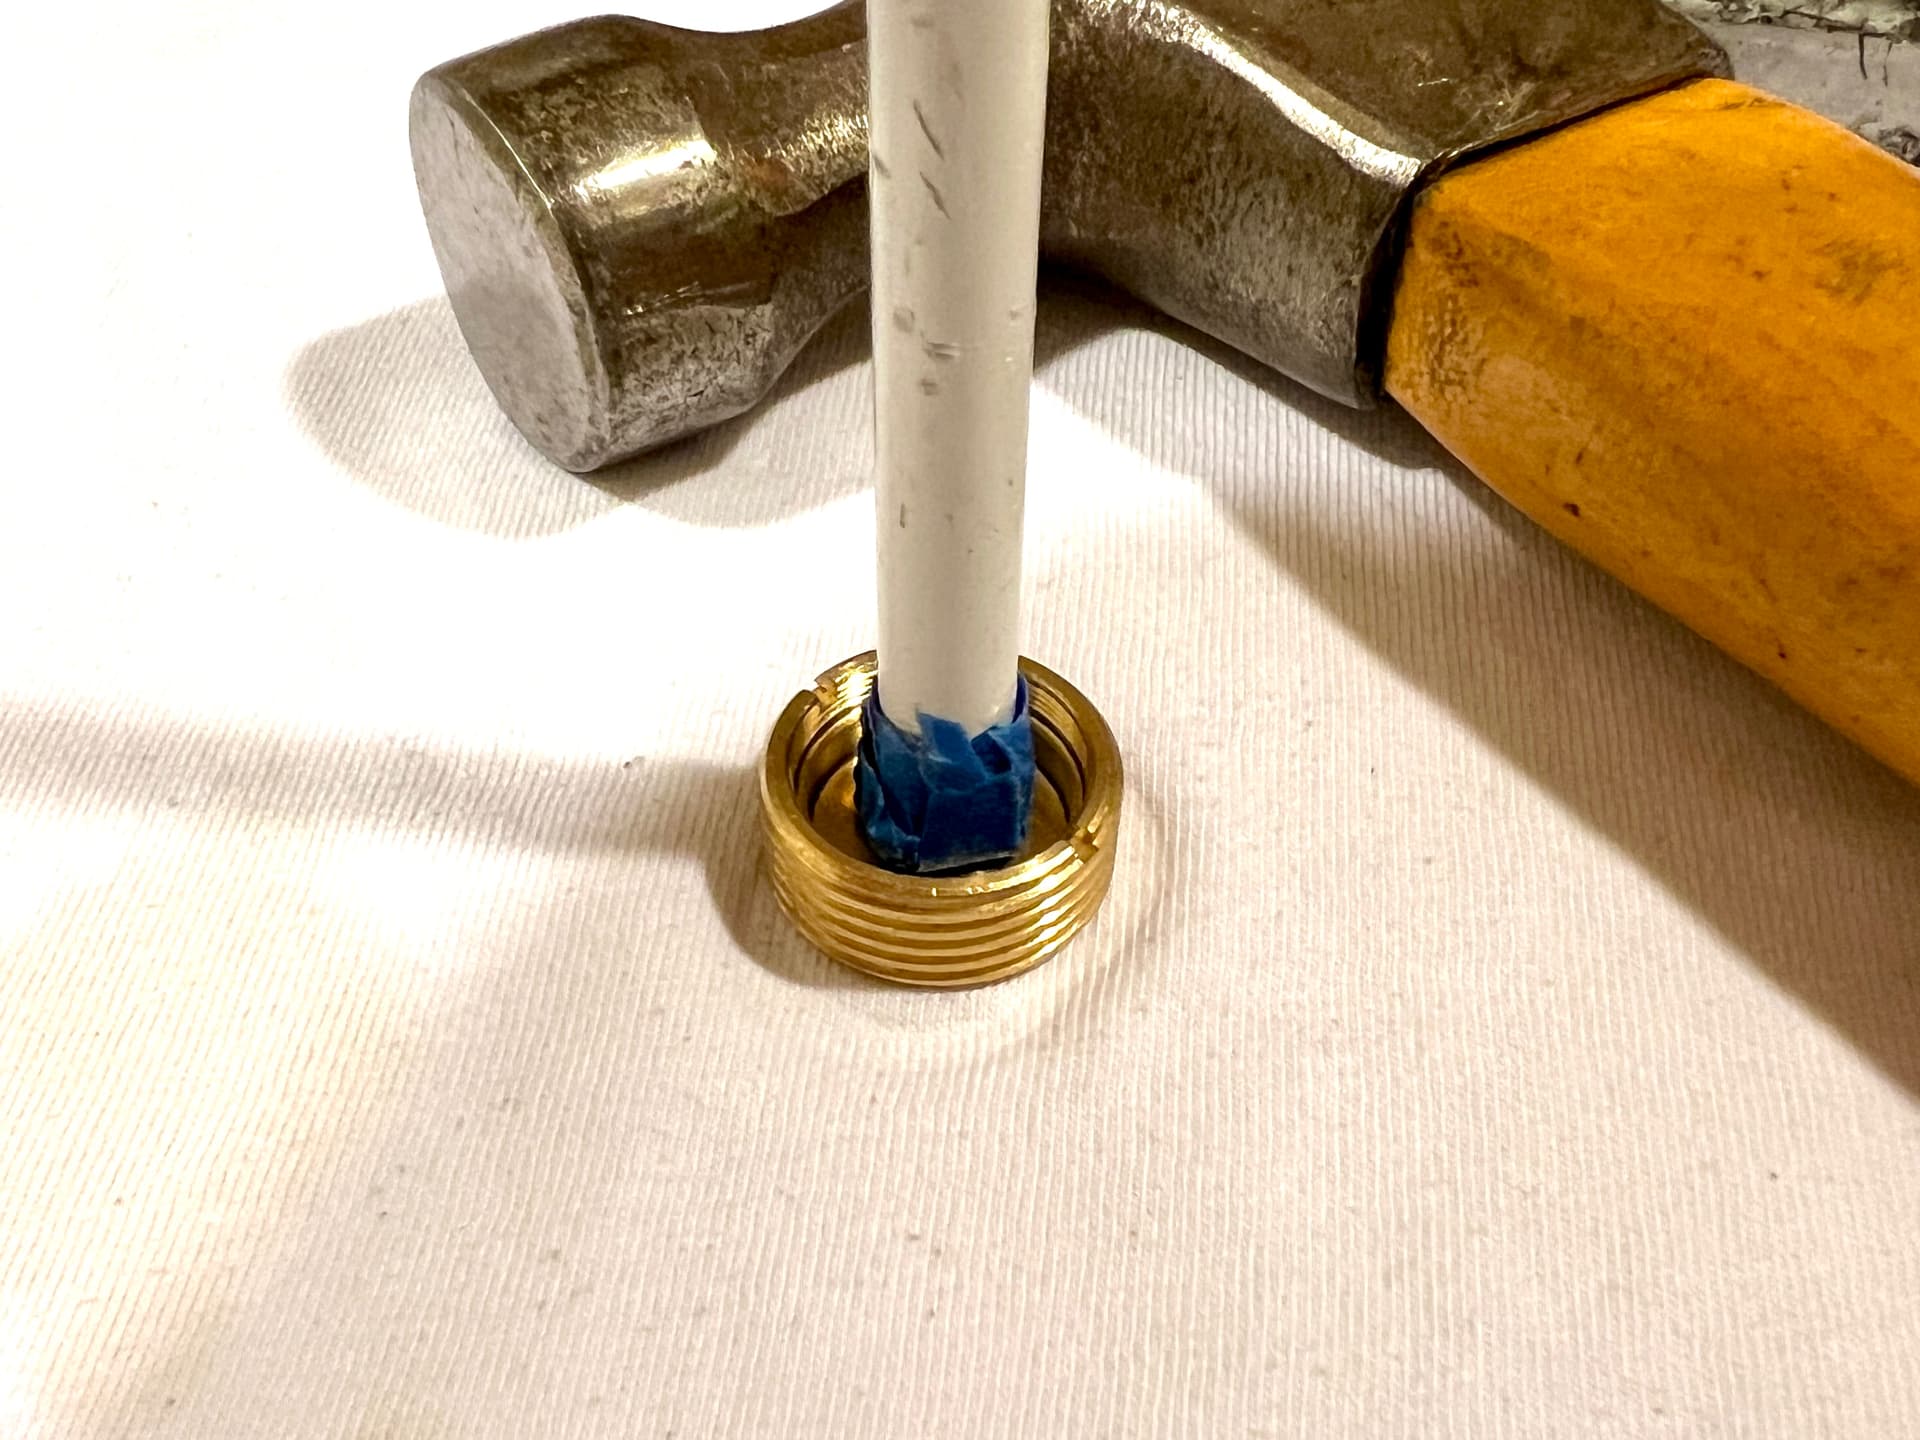
3 Thanks
Oeuf. I remember sanding the backs of mcpcbs with sandpaper on glass, but forgot that pills and shelves also might not be flat.
Hammer down, cover with a magic marker, then sand with sandpaper on a cylindrical rod until the ink is just gone.
That’s how I’ve done it for years, but I use a small circular mirror - a very flat surface. 
Every MCPCB that I install I sand just in case. Most of the time they are good which you can tell with the initial sanding marks, but sometime they need some more sanding.