Same here, outdoor shots are far more important for me than indoor.
1 Thank
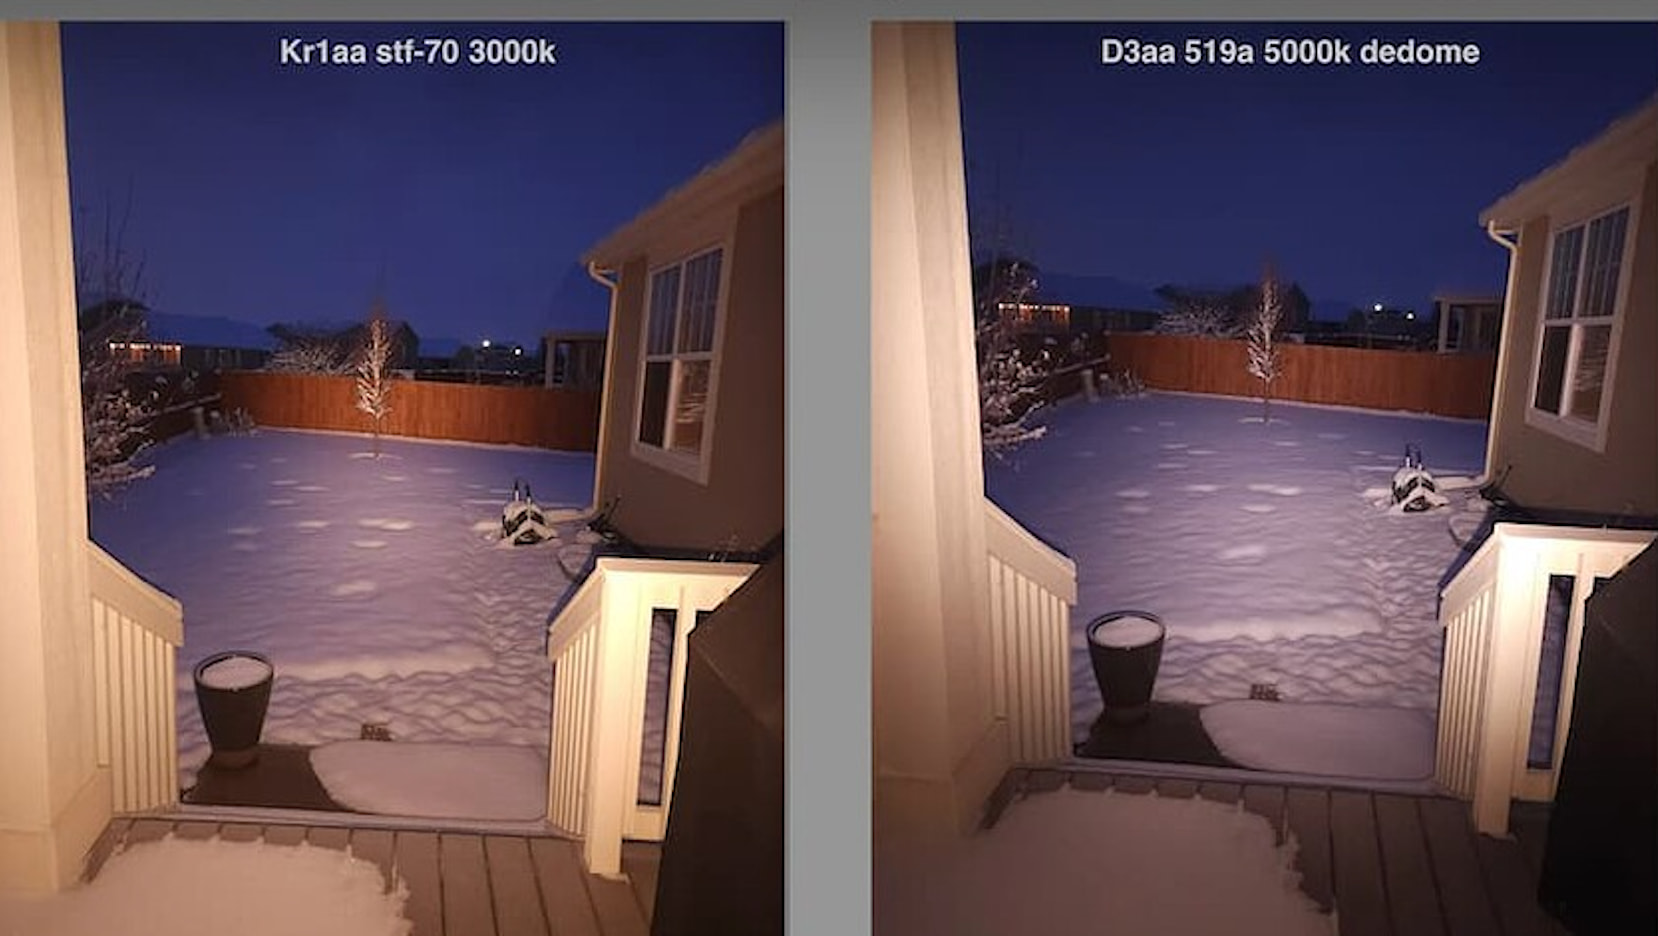
Yeah, it’s great to see the outdoor shots too, even if that’s not a light’s primary purpose. Most of the torches people would bother reviewing are going to work pretty well outside even if they’ve got entirely the wrong beam shape, simply because most of our lights around here are so bright.
Like, the KR1AA isn’t very throwy (only about 3 to 6 cd/lm), but it makes so much light that the usable beam distance can be measured on a map when running at full power. So it’s not exactly going to stop at your feet. I find it works great for night-time walks, even at pretty low brightness levels. I only really need a 5-meter beam, while it can easily do 50.
But I like to stay at low levels and gently sip power, instead of draining a battery quickly. When shining bright enough for longer range use, the battery won’t last anywhere near as long as a light with a throwier beam. Double the cd/lm, and you double the amount of time it can maintain the same distance, because it only needs half as much power. At least, assuming everything else is the same*.
So if I’m going out for more than a few minutes, I’ll usually bring something with a throwier beam. In part so I can use less power to see farther, and in part to make the hotspot smaller and reduce the chance of blinding someone by accident… but also because I just have too many lights.  It gives me a reason to use long-range lights which would otherwise sit unused. I almost never need a thrower, but it sure is nice having an excuse to use one.
(*) This may be one case where everything else isn’t the same though. The KR1AA, D3AA, and DW3AA get weirdly high efficiency, so they tend to run brighter and longer than most other lights with the same battery type… even when using a really nice-looking high CRI LED with a non-green tint. Thefreeman put a lot of work into optimizing the driver’s efficiency, and he did a great job with it. Zak measured about 150 lm/W, which makes it one of the most efficient torches on the market.
4 Thanks
To be clear, the KR1AA is an excellent inspection light with its: “infinitely” adjustable brightness, high CRI, smooth beam profile, intrinsically safe operation, and non-conductive anodization. It’s small enough to fit into or between tight spaces. To top it all off, the battery life is long enough to easily last an entire shift.
3 Thanks
IIRC, when the FW lights first came out, a tail switch mod to reduce the possibility of pocket actuation was to attach a flat washer with a hole just big enough for a fingertip / thumb tip to the tail cap. Crude, but probably effective.
slmjim
an external washer would need to be glued to the tailcap and would look pretty tacky.. imo there are better options:
- I plan to try Hanks new switch:
“Yes, we now have the option to choose the tailcap with 2 times higher activation resistance.”
- the internal O ring mod is another option.
3 Thanks
Hank sent me the new switch. It’s much stiffer and I carried it for one week with no accidental activations. I’ve updated the review accordingly. Here’s a comparison between the old and new switches:
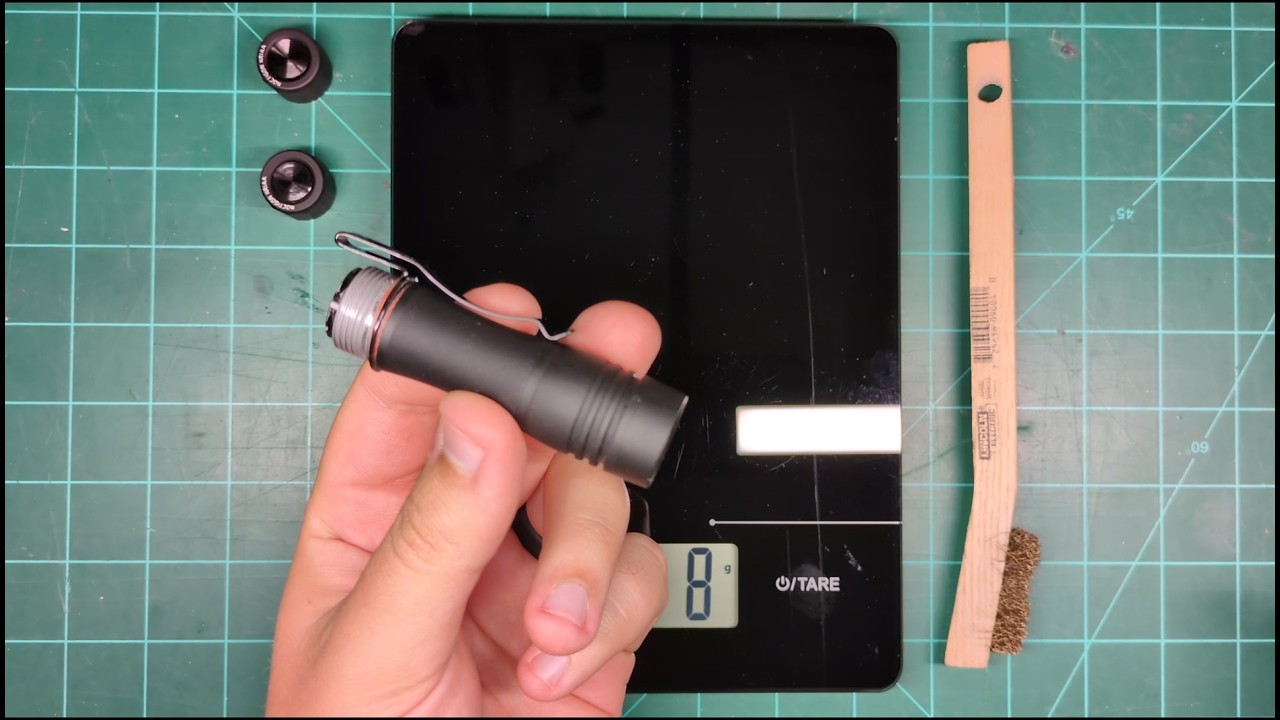
7 Thanks
that seems substantially firmer. Thanks for the video demo!
Looking forward to picking one of these up. Wish the new shipment of DA1K hosts would hurry up and arrive 

1 Thank
Thanks! looks like Hank’s new KR1AA switch has 980 grams pressure on center, and 650 grams pressure on edge.
fwiw it is also possible to do an O ring mod to original switches.. the pressure is higher than Hanks new switch:

Switch Pressure Summary:
OG KR1AA switch about 1 pound pressure
New Hank switch about 2 pounds pressure
O ring mod to OG switch, about 3 pounds pressure.
2 Thanks
Got my KR1AA, love the NTG50 2700K. I asked for the lighter switch, as I prefer it, and the feel is really good. The only issue is that the switch sometimes doesn’t register when pressed off-center. I figured I could do what I do with Convoy metal switches and add a few layers of tape, but I tried to unscrew the retaining ring and it won’t budge. Is it glued?
Very glued.
Some of us have used CA debonder to break the seal. Beware, the switch has parts and it may not be as simple as just putting some tape in.
There is a mod using an o-ring, and a switch rebuild by me in the KR1AA Beam is Looking Good thread. I will link later tomorrow if nobody has helped you out by then, can’t easily do it just now. @jon_slider might have links to hand, he’s pretty good at it 
Edit: here’s the switch rebuild. There are all sorts of reasons not to take it apart, it’s glued for good reason.
Thanks, I have some nail polish remover with acetone. I keep it around for when I inevitably end up with CA glue on my fingers. But wouldn’t that damage the boot?
Is the CA in the retaining ring thread?
I’m also surprised to see that the popper is held in place by just a piece of Kapton.
I’m not sure I understand which part is in contact with which, but I’m thinking button is touching the boot at all time and the brass part of the boot only touches the popper when we press.
I found this link on the thread you shared, it’s what I’m trying to do.
So in this case the additional layers of tape would go between the popper and the boot.
I like the force and sound of the switch, but just now I tried to turn on Moonlight and ended up at Ceiling. Sometimes a press doesn’t register at all, and other times it registers multiple presses.
Edit: BTW, it’s a V3 Silver, so the tailcap isn’t glued, it’s the retaining ring that’s stuck.
Acetone won’t work, and yes the retaining ring thread is glued.
Just ask Hank for a new tailcap.
thanks for linking, no the tape does not go there.. that link says:
"stick it to the back of the rubber piece behind the nub. "
iow, the goal of the tape is to fill the gap between rubber switch cover and the exterior switch button..
good luck w your switch mod.. it helps to have a strong tool to get the retaining ring to turn… I did it without using debonder
sorry you did not realize you could ask Hank not to glue the switch retaining ring.. you could order a new tailcap with an unglued switch retaining ring if all else fails
but bear in mind this introduces another challenge.. if the unglued retaining ring turns when unscrewing the tailcap, you will end up with a wobbly switch that wont have good contact and the light will give triple blink errors.
also, if the retaining ring is too tight, it might not make contact with the inner body tube and it will need to be loosened slightly.. which leads to the potential for triple blink error
not trying to discourage your efforts.. just pointing out some details required to get a switch retaining ring tuned to the right ring tighness, to avoid triple blink errors
It may help to clean and lube the light. I’ve found that significantly decreased electrical noise on mine, which made the button work a lot more reliably. Basically, clean all the threads and contact surfaces, then put lube on the threads and try to keep it off the contact surfaces. Maybe wipe off the contacts once more at the end.
This doesn’t resolve the “switch doesn’t register if pressed at the edge” issue, but for me it helped with everything else… and it’s not hard to press closer to the middle.
1 Thank