As President of the Mutual RBD Admiration Society I do hereby nominate Chibi for Secretary, so we can keep track of the accomplishments and not ooh and ahhh over the same stuff over and over.
All in favor say
As President of the Mutual RBD Admiration Society I do hereby nominate Chibi for Secretary, so we can keep track of the accomplishments and not ooh and ahhh over the same stuff over and over.
All in favor say
So you’re it Chibi. Make sure Steve has the links to the Google sheets so we can all be on the same page. ![]()
MRBDASS, an acronym for Mutual Rufus B Duck Association of Secret Sociopath’s
I’ll get to work on our MRBDASS badges and TShirts
Which page is the right page? Theres three of them left after the cat ate the rest. They are page numbers 867, 70856 and 3. I'm having a panic attack as I cant work it out. Please don't sack me from this groupie club. Also the cat does not appear well at all. Normally I can read her like a book but this time theres nothing.
See if you can make out the other pages
![]()
Edit: Hint, page 425 had this on it…
Is this page 425?
https://budgetlightforum.com/t/-/18148#node-21036
Now I'm really lost if it is. Life was so much simpler before this groupie club was created. RBD. Why do you have to be so creative? Be like the rest of us so we can disband this group and get on with life. I think the cat has got page balls.
Glad your cat isn’t anal retentive! ![]()
Someone said “looks utilitarian” and sent mad Rufus back to the lab.
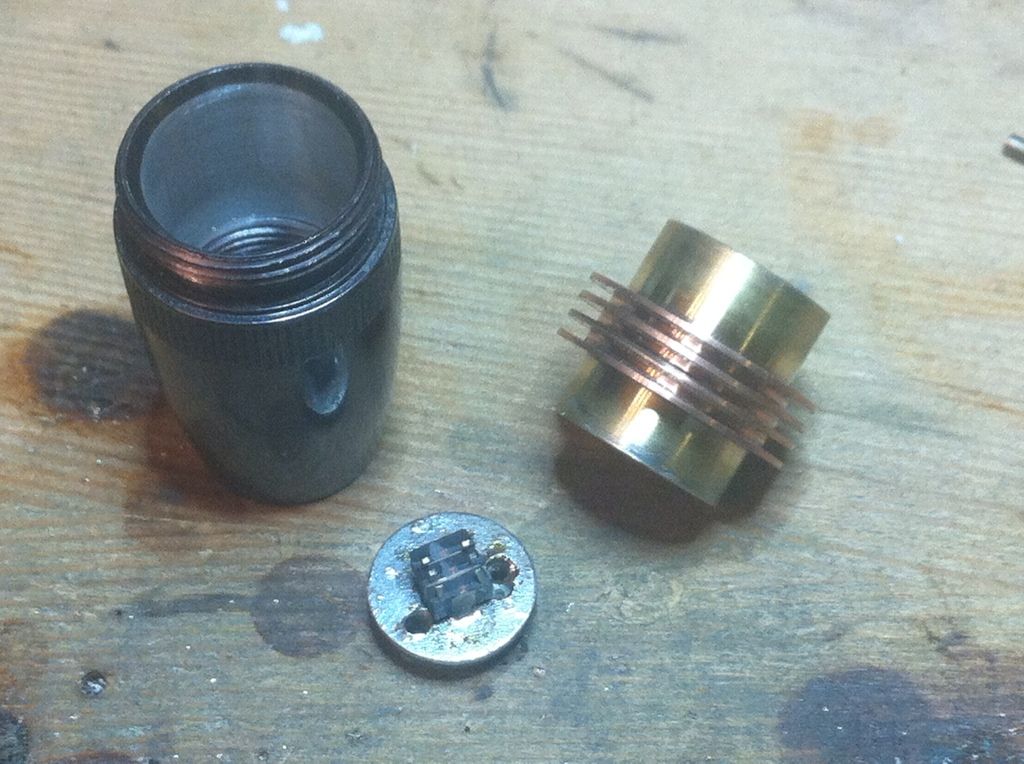
I realize it’s been awhile. I’ve been gathering a few bits and pieces and experimenting with a new product for removing brazing flux residue. Called Fuze Clean FS it dissolves the glass like substance as well as the heat scale that forms leaving a surface that only needs some buffing with a soft grit buffing wheel. This is the battery tube after one of the brazing operations.
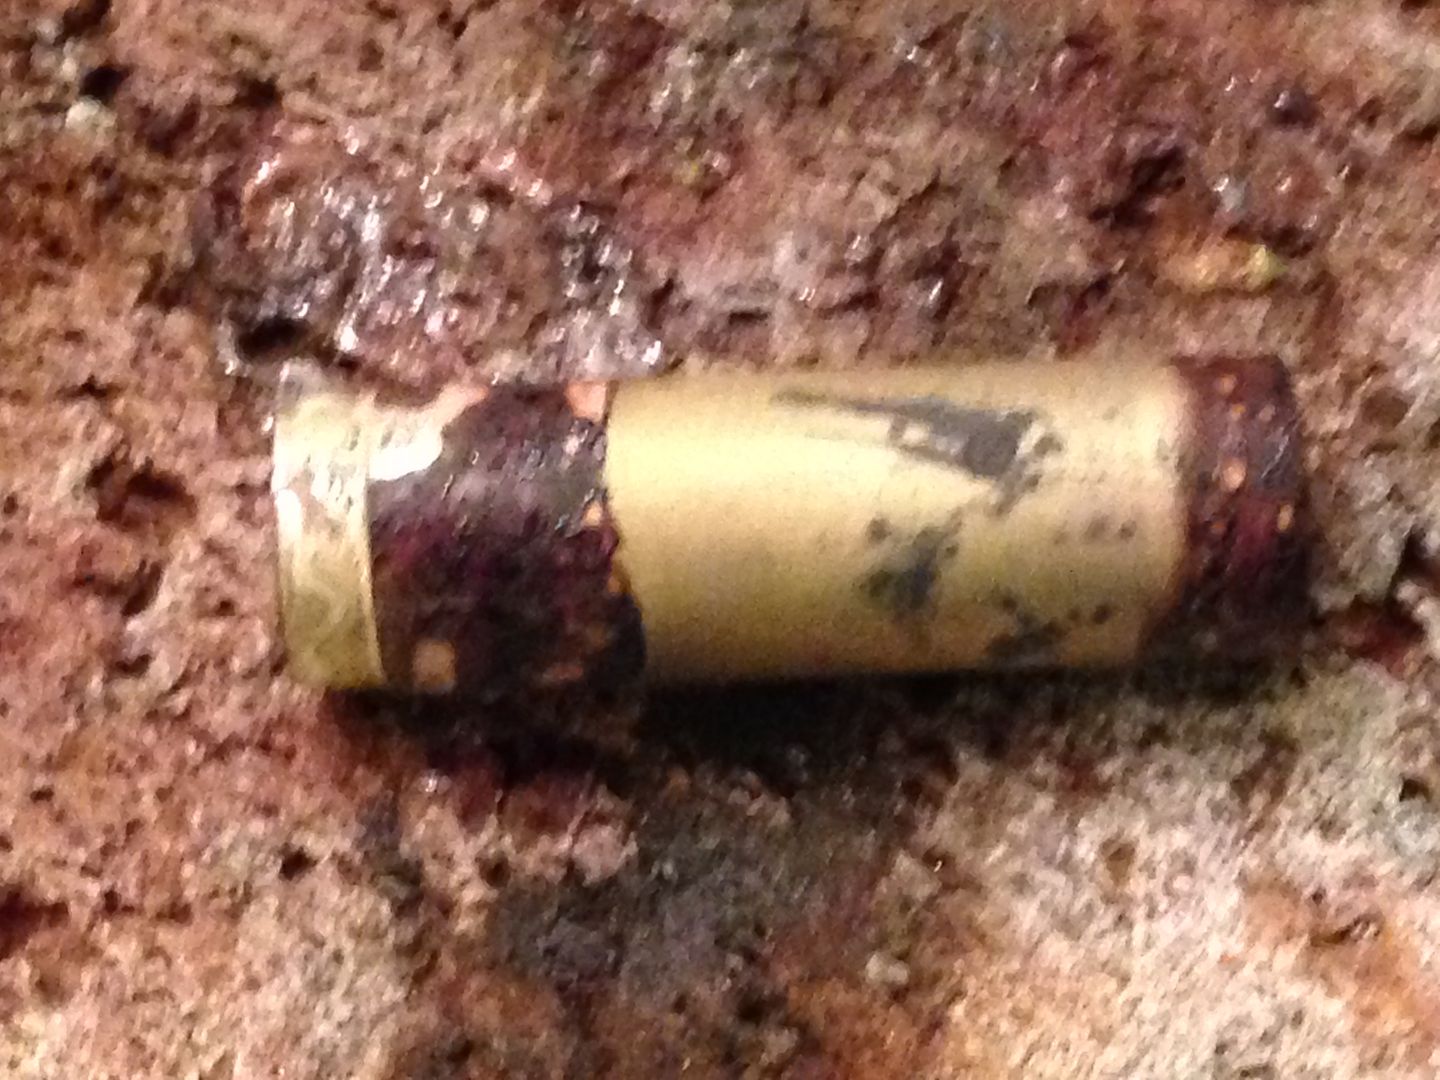
and again after about 3 minutes in the heated solution.
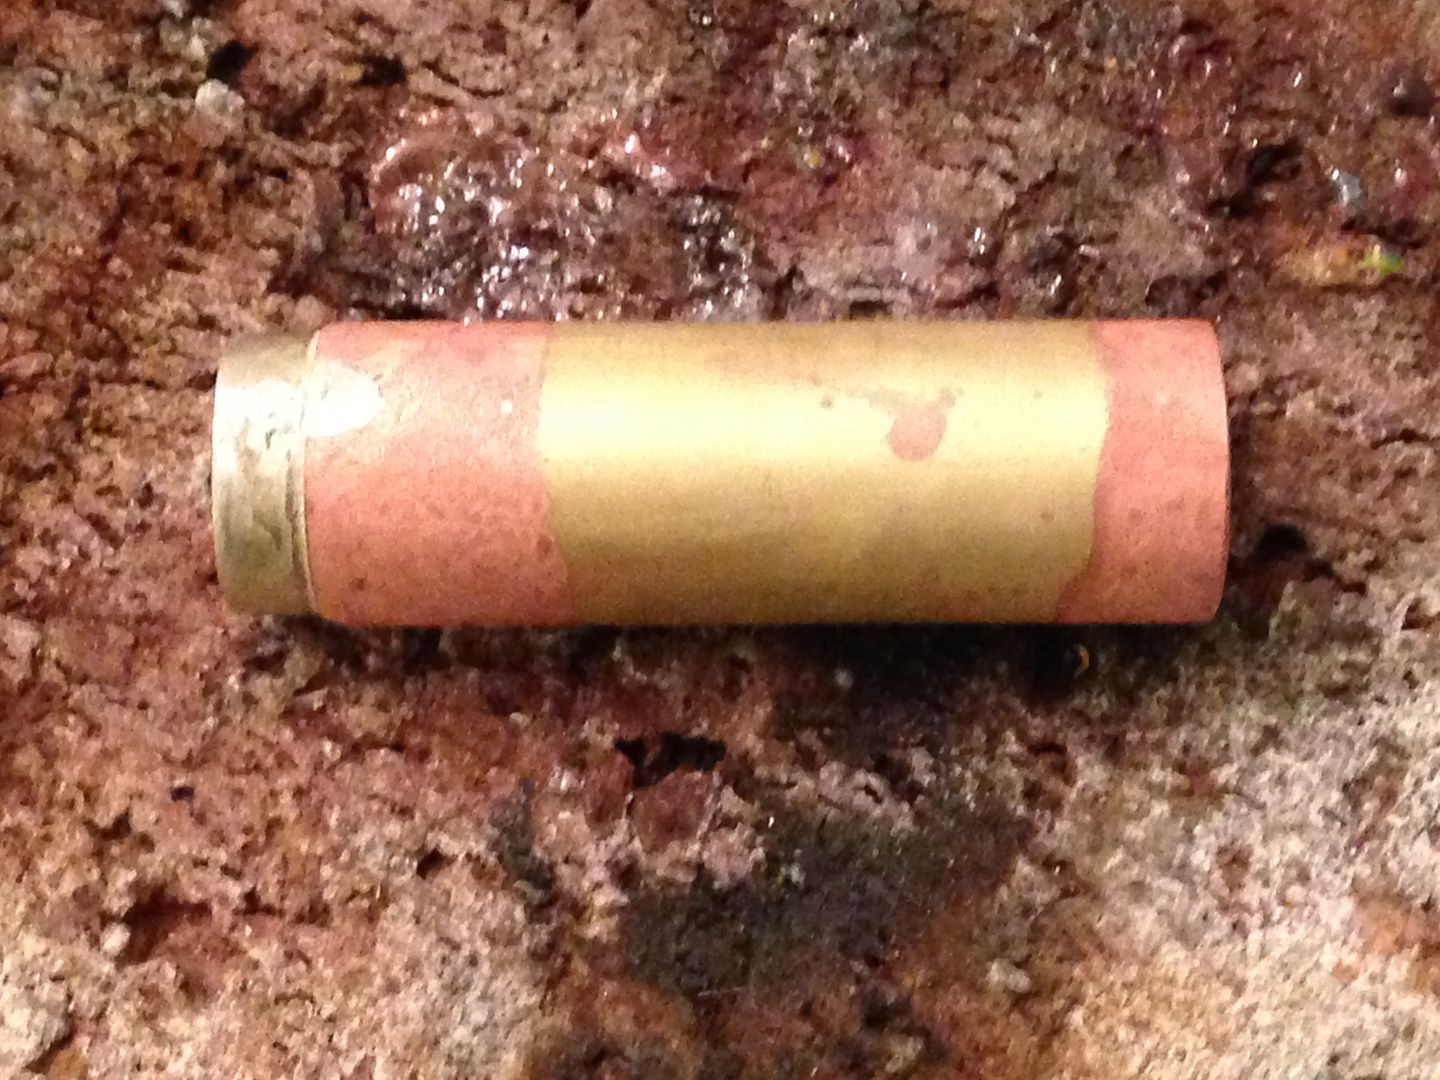
In the past it would have taken about 1/2 an hour of sanding to remove the flux and would have resulted in a fairly rough surface needing even more work to smooth. Complex surfaces like those fins were rediculously hard to clean and led me to search for an alternative.
I know this reads like a commercial but I don’t really care if anyone else gets this stuff I’m just pleased with it and look forward to using it on more intricate parts.
I have the parts for the drivers and now that I also have a new magnifying lamp will begin assembly of those soon.
Anything to make life easier is a good thing. Thanks for the info. With the new magnifying glass does that mean everything will be super miniature now instead of just miniature? I gather you are brazing with silver solder.
Might be a bit big , but been drooling over 18350 S2+. It’s key chain ish ![]()
That tube’s for a 10440 and I’ve since also added the threaded piece for it to screw into the head. Yes, silver solder so the part glows bright orange before the solder flows. Wasn’t paying attention to keeping the flame moving and melted the first try. It’s much, much stronger than just using lead free mechanical solder though and I can do multiple steps with machining in between and not break the joints.
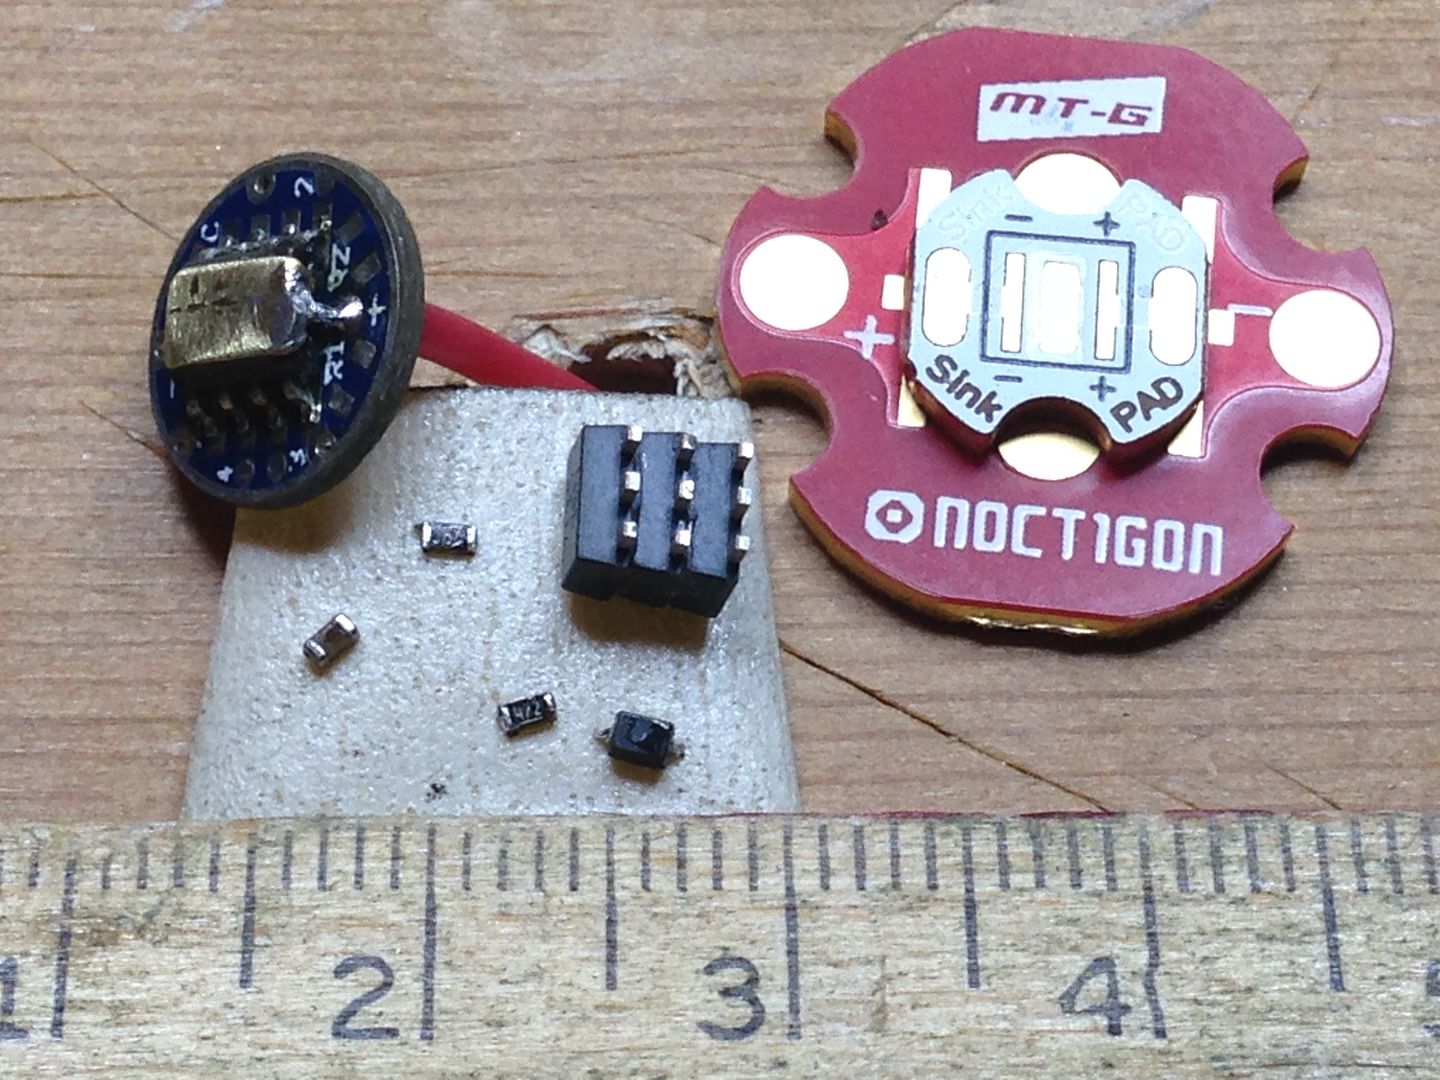
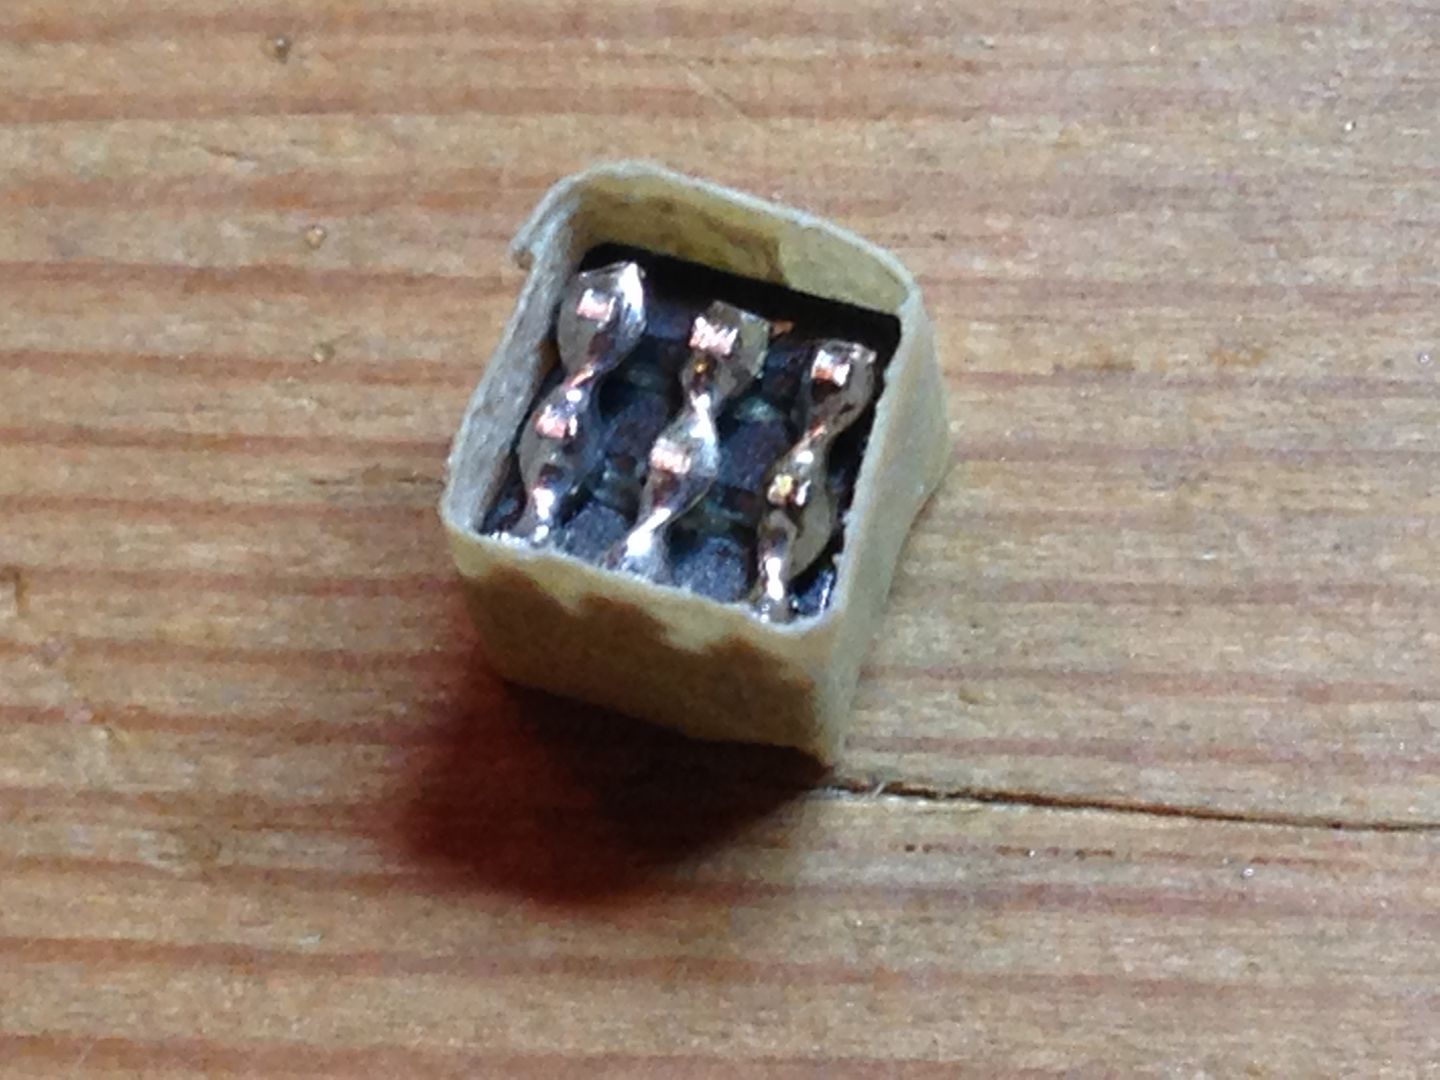
It’s Tiny time. I’ve started working up the Tiny 10 drivers. The 1st will have 3 x 380mA chips stacked with semi custom star firmware UI (4modes + moon) and the second will have just 1 x 380mA chip stepped down to 80% max (2 modes no moon). Because the B+ contact sits on top of the mcu I put a small dab of JB under it for support then a thin brass contact plate on top. The 3 x stack is also pre assembled as a stack before I load it on the Tiny10. The mcu’s were programmed by RMM.
Not home much but here’s where it’s been. With the brass contact epoxied to the top of the Attiny mcu and the Led/B+ wire in place. Input cap is on board but not visible. The MT-G2 Noctogon is just for scale.
Going to make a 1A super(well maybe just a sidekick) 7135 so I wrapped some masking tape around the stack after winding and soldering some .24mm copper wire around the sets of pins, then filled the voids with Epoxy. Right now the JB Weld is curing.
BTW , this is all hand soldering, no reflow guns or ovens. Work is still crazy but I’ll do what I can when I can.

What magnifier do you use RBD? I'm sure thats a metric ruler above.
That was my iPhone 5C at full mag but I finally replaced my Magnifying lamp with a 3x but the downside is very short focal length so not a lot of room for the soldering iron. I’m thinking that to really show the size I need to take pics at laptop distance without zoom. This stuff is just eentsy.
I think the photo don’t do justice how small this parts are, and how difficult is to work with them. I for myself would consider a big success just soldering and making work those tiny AMC, but looking how well you put them together and the attention you put at everything is astonishing.
Really like the look of that lens and IMHO it fits very well with the rest of the design. Unique and cool i must say.
Adding here the complexity of the whole project and the big amount of work and ingenuity it require, make this an great work of art. Thank you for doing this and sharing with us. ![]()
Thanks Ervin. They’re not turning out as pretty as I had hoped but in the end I will be satisfied if they work well enough. The ones that do turn out well like Dale’s are that much more special by comparison. I’m somewhat jaded by staring at them through a magnifying lens for hours at a time seeing every flaw that is harder to see with the naked eye. Not being satisfied does help me come up with ideas for improvement and isn’t that true for all of us?
Exceptional! ![]()
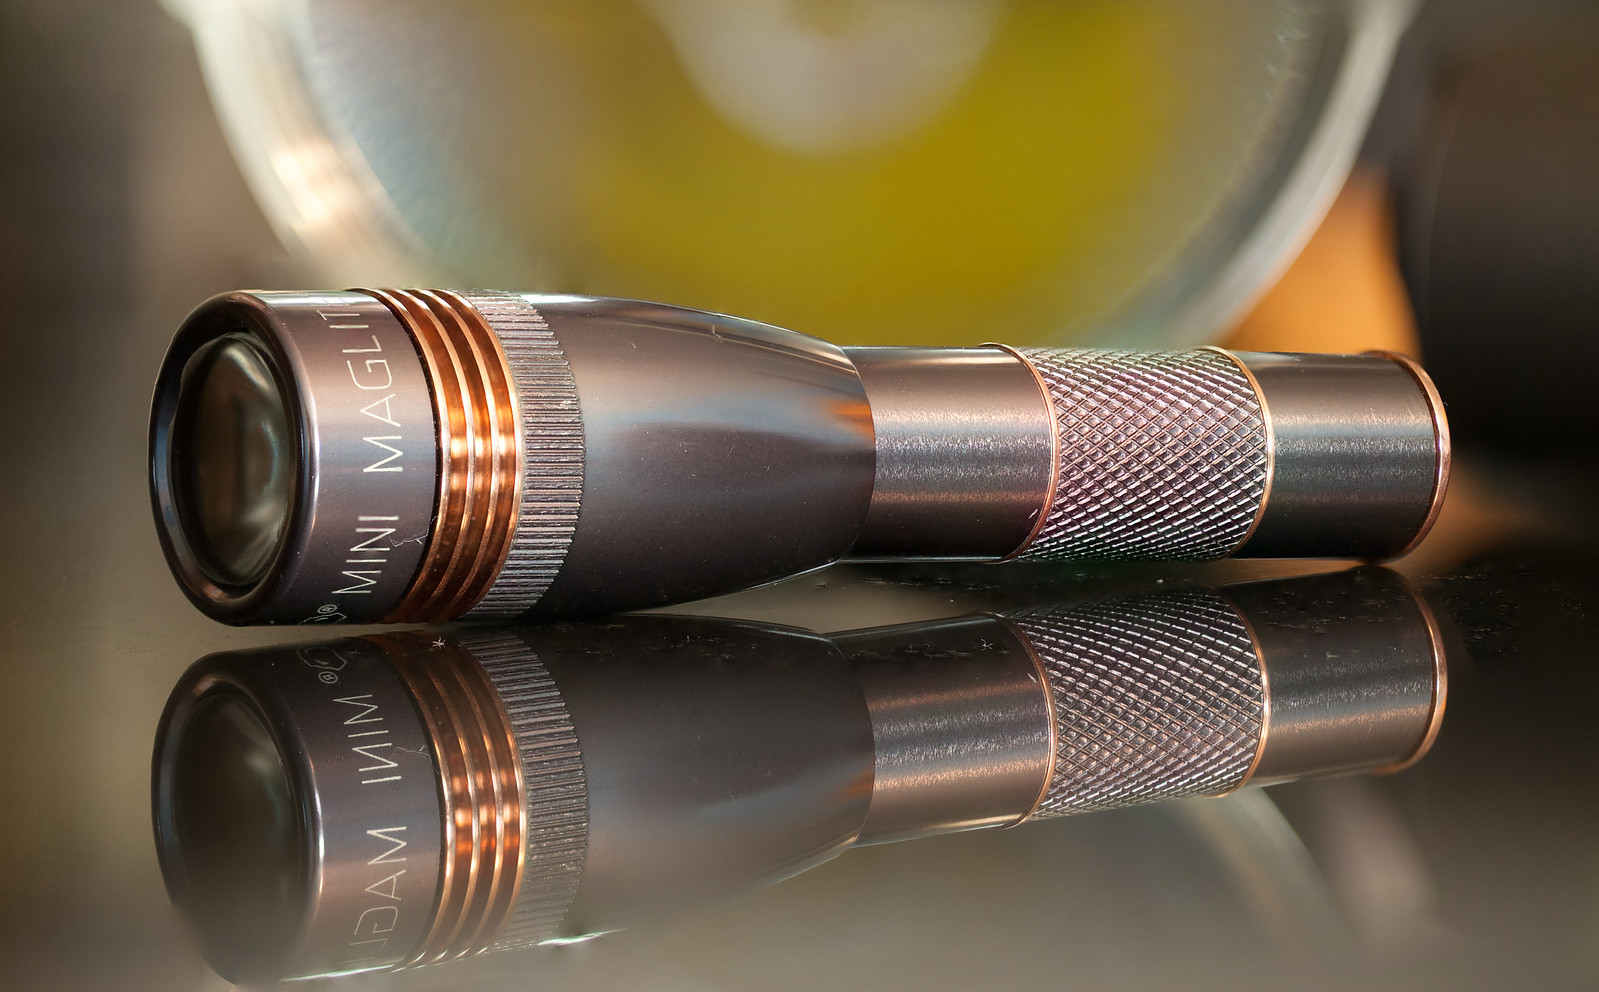
This is a single AAA MiniMag chop, with copper accents and fully customized 1.1A driver. 261 lumens in TexasPyro’s lumisphere…the BBC 261L