As Tom Tom said the best way to handle short power loss is to provide a power buffer to the MCU with an appropriate capacitor. This will make the driver more ‘chock proof’ in general. I will probably not really care about it, but i feel somewhat uncomfortable with a device that can shut down just because it went through a bump or some mishandling. I wouldn’t want my phone to reboot that easily.
The addition of a 100 uF cap causes 1A spike through the diode on every turn on. The proper 100 uF cap is costly - a quality one, properly spec'd would cost more then the FET or MCU. I dunno if 100 uF is the min requirement though, so if a lower value one works, all the better for the spike and cost.
I re-tested 3 Q8's - stock, bypassed, and better/stiffer spring replacement - stock was worse, bypass better, stiff spring the best, but with hard enough bangs, I could get all of them to fail, but it takes a pretty hard tap to make it happen.
With old flashlights, one drop just right and the bulb was busted. With this if you dropped it just right, the light turns off -- hhmm. Guess our expectations have changed. I have other lights that do the same thing - any single spring single cell, or parallel cell lights are prone to this.
The relatively new UltraFire L2 SRK style light also fails on the hard tap test, does better than the stock Q8, about the same as with bypasses.
The SupFire M6 seems to do well - it doesn't have large springs, but very stiff springs, so that helps. I could not get it to fail.
The busted light bulb analogy is unfair. There is a good reason a hot light bulb will fail and it’s probably costly to prevent it. Such light will more likely just flicker and come back on. Whatever the argument, there is no good reason not to consider this issue in future design. Stiffer springs and an additional capacitor sound like promising options.
But what is the use case for this? Do you go throwing your lights around and require them to stay on? It’s not like you won’t be able to find it if you drop it in pitch dark, with the indicator LED. Besides, nobody here goes out in the dark with just one flashlight. ![]()
It certainly is worth thinking about but if the fixes have downsides it’s hard to argue for them.
It is always possible you put pennies or a proper plate on top of the springs to compress em more
The springs have to fit also protected cells for compatibility, if you don’t like it you can modify it
you will find tons of flashlight from big manufactures which go off when you bump them that way on a table
The springs were an issue we knew about in the last round of prototypes. I spent hours on tests, measurements, etc. They were supposed to fix it by using stiffer springs, but suddenly ThorFire got in a big rush, and not even one unit could be sent out to check it, and no pictures or detailed info on what they ended up using. So it turned out they were not stiff enough, big enough, or combo of both.
To me the springs fell short in 2 areas - high resistance and not stiff enough, but of course I consider the high resistance as more important. Sure, we exceeded our target of 4,000 lumens: some lights test at 4,700, some at 5,300 stock, but better springs could have brought that up considerably, like by 300 to 500 lumens.
According to preliminary drawings from ThorFire, the spring design did change, so I'm hopeful it's improved in both areas, but we'll see.
This is what I wrote up a while back:
BLF Q8 Springs (2017-09-17)
Production spring dims (all in mm’s):
- Height: 11.8
- Wire thickness: ~0.82, inner: ~0.5
- Width at top: ~6.0
- Width at bottom: ~10
Proto round 2 spring dims (all in mm’s):
- Height: 10.2 (was 10.5 ??)
- Wire thickness: 0.8
- Width at top: 7.0
- Width at bottom: ~9.8
Proto round 3 spring dims:
- Height: 10.0
- Wire thickness: 0.7
- Width at top: 5.6
- Width at bottom: ~9.2
Spaces for batteries (round 3):
- total space, surface of tail board to edge of tube that makes contact: 75.0
- height of brass contact plate: 1.35 (before measured 1.4)
- space for cell and spring: 73.65
- Using Round 2 tail PCB in round 3, space for cell: 63.45
Cell lengths:
- Bare GA: 65.3
- VTC6 Solder Top: 65.8
- 30Q BT: 66.75/67.0
- GA Prot: 69.7
Spring compressions:
- Inner springs engages at: 1.7 mm compression
- Bare GA: 1.85
- VTC6 Solder Top: 2.35
- 30Q BT: 3.3
- GA Prot: 69.7
Jolt Test w/round 2 springs (striking the light down moderately on a bench surface on it’s tail cap with it ON):
- VTC6 Solder Top: shuts off easily, mostly on the first strike
- GA Prot: can’t get it to fail
- 30Q BT @70.0: can get it to shut off but takes a few times
Note: if light is OFF (standby w/Ind LED on), no loss of power on any cell (not sure I can explain this…)
SupFire M6:
- Spring height: 10.9, width at top: ~5.6, at bottom: ~10.0
- Wire thickness: ~0.82
- total space, surface of tail board to edge of tube that makes contact: 70.4
- from top edge of outer ring to brass contact plate: 3.0
- space for cell and spring: 73.4
- Using Round 2 tail PCB in round 3, space for cell: 62.5
SupFire M6 cells, testing:
- GA Prot fit, no problem
- Jolt Test: never fails, not once, with VTC6 ST’s
** production units still failing on bench jolt test with solder top and 30Q BT’s.
In the Q8 w/round 2 springs, VTC6 ST’s easily fails Jolt Test, 30Q BT’s also fail. M6 is rock solid with VTC6 ST’s.
In other issues:
I think I'm running out of options. No matter how good of a bind I could get a tool in there, I could not budge it. I know the PCMCB is now warped to some extent. Last attempt was with a screw extractor thing here: https://www.banggood.com/Drillpro-4PCS-Double-Side-Damaged-Screw-Extractor-Out-Remover-Bolt-Stud-Tool-p-961913.html?rmmds=search
Maybe a $2 kit wasn't the best idea? :FACEPALM:
are you my dentist?
Bicycling
BAHAHAHA!!
My wafer head screws came in. Maybe 2mm longer than the stock flat heads and they come with a dab of blue loctite agent.

I used one of my dremel tools that was slightly larger than the hole to ream it open and it worked perfectly. With the screws tightened down and a few test twists I can already tell that the battery tube is making more even contact. I will sand the tube down a little more in the future because the flat spots are so close to lining up now.
Not going to bump the rear unless you’re using it to light the sky or get rear ended by a car. The Q8 is not sensitive to side bumps as far as I can tell.
I’m not sure if it would work but I’d try a small set of good quality vice grips on the outside of the head.
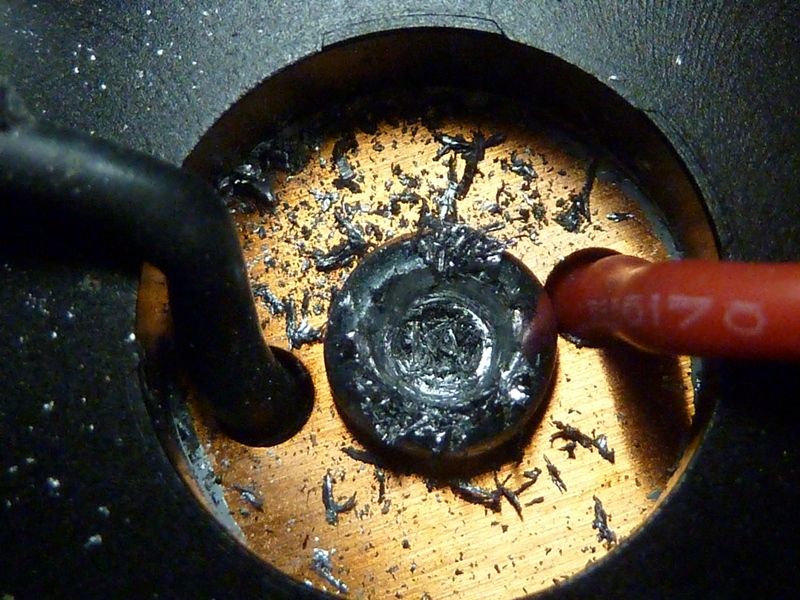
The simplest way to remove the screw is to drill of the head
Then you can also heat the screw without the MCPCB absorbing the heat
When you use a small gas burner you can easily melt the glue
my 2 cents for the battery shaking problem
actually its 16 cents solder blobbed and soldered together
to get the 2 stacks together I better use glue
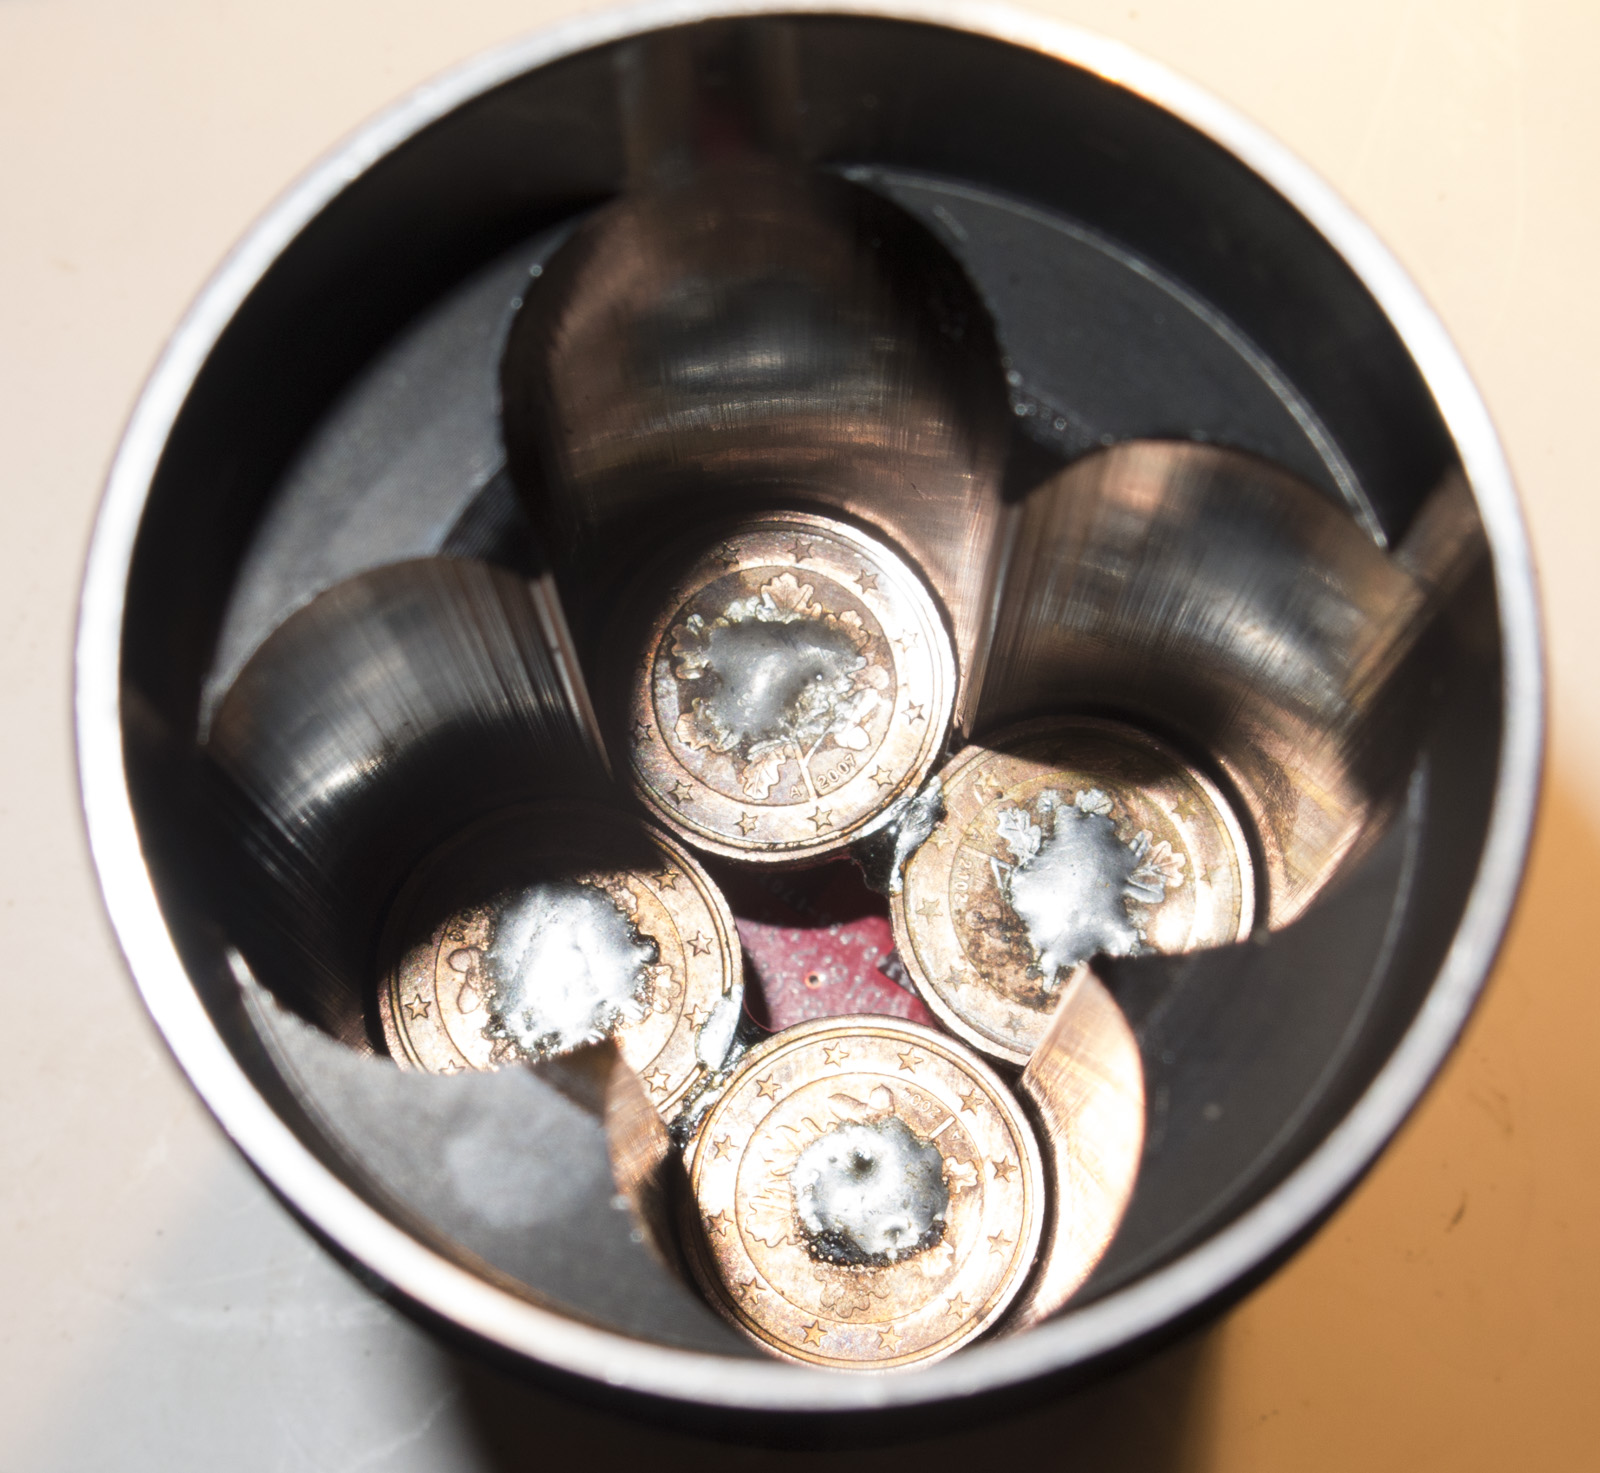
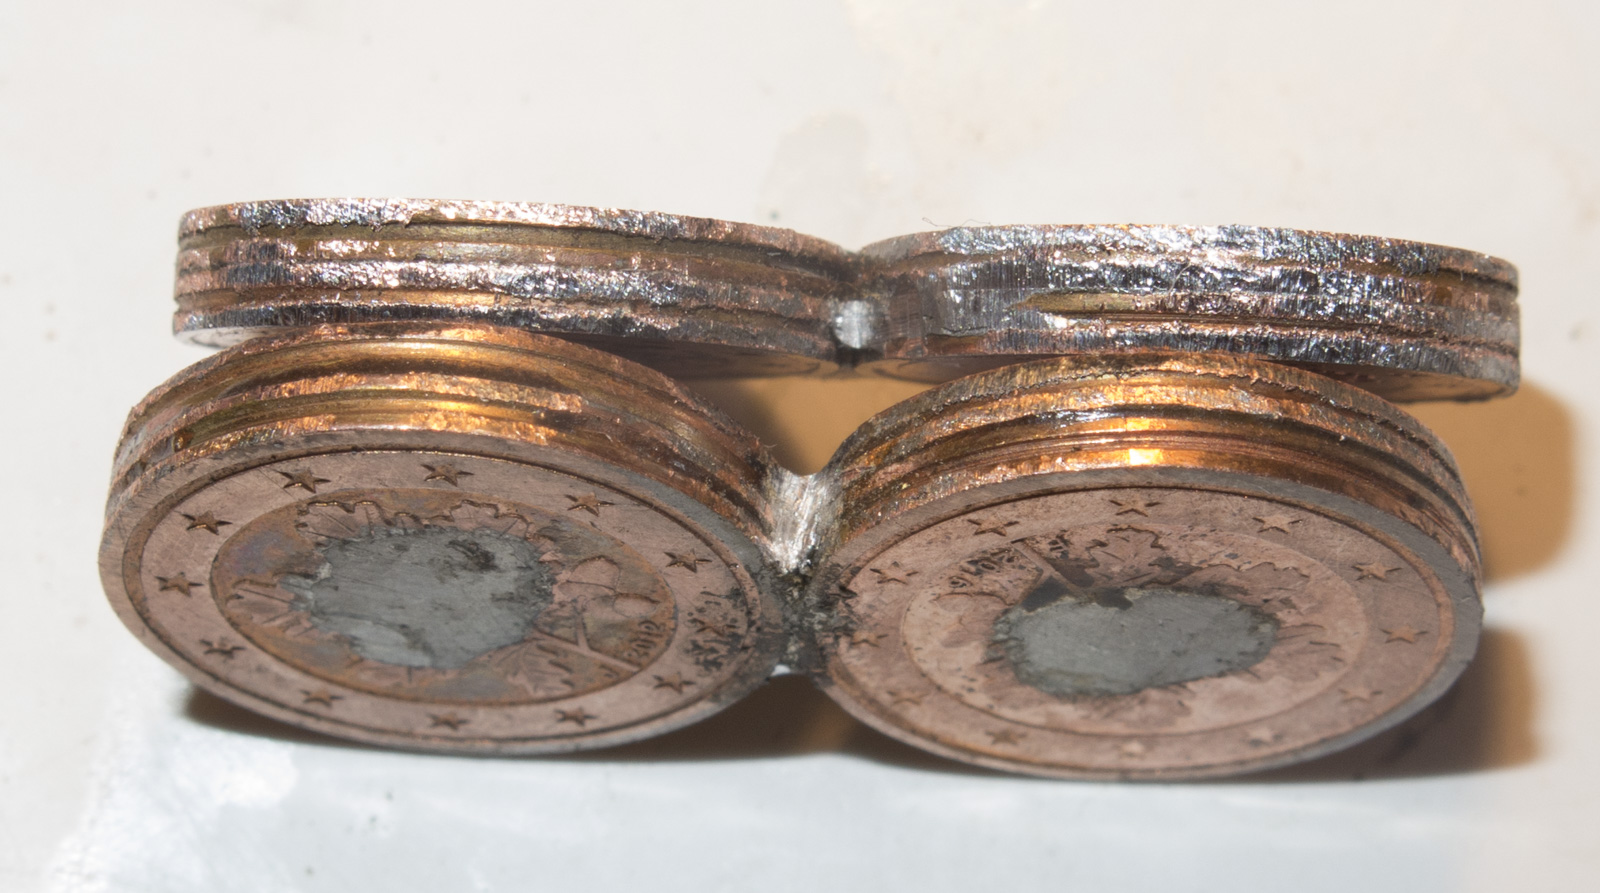
the loose 2 cent fit perfectly, but its hard to solder them 100% fitting to another without a shape that hold them
so I had to file some of the rim
How much heat do you get in those when current flows through them?
That’s exactly what mine also looks like… :person_facepalming:
Pff tat screw looks so bad
sigh
Lucky me Lexel cheered me up with his sixteen cents ![]()
Thorfire did really use glue for this screw?
It seems some assembly workers have een using practices not required for the Q8, and were not wanted, like it is so common itis part of their workflow.
Others haven’t.
So some switch assemblies are glued, some with a mcro dab, others really thoroughly, and others not at all.
Some screws have some sort of lock lite on them, others haven’t
I am guesstimating there are two or even 3 lines of assembly and so 2 or 3 workers at one step (or several steps) at a time, in shifts, so say 6 to 8 different styles of doing it, at least 3.