6.77A out of this little light. ![]()
Hi Dale, I noticed you got 80kcd from this little light with a dedomed XML2. Ever tried dedomed XPG2? I am debating whether to get it done with XML2 or XPG2, since changing from XML2 to XPG2 in a smaller reflector should make a bigger difference in throw I suspect (in comparison to larger reflector lights like HD2010 or even TN31 size). Thanks!
The de-domed XP-G2 might have a tighter beam, but would produce considerably less lumens. For whatever reason, they just won’t take high amperage so you can only push em just so hard. For me, some spill is a good thing as I use mine most of the time in flat open areas. Because of that, I don’t really take to pencil beams.
Try one, see what you can get out of it…you just might be surprised! (I do have some de-domed XP-G2’s and they throw very well.)
80kcd from a light this size is pretty darn good, did you have to add/remove material from the emitter shelf to focus it properly after the dedome or just mess with it some?
I wasnt planning on dedoming this cause its my only 3C emitter but I might just swap in a 1A / 1D dedomed for that much of a boost.
The reflector sits in the light in such a way that it just works. Piece of cake. I’m not using a centering ring or insulation disk of any kind.
here’s my newest beamshot thread with 100m and 150m shots of my X6 (dome intact NW emitter on noctigon @ 3.8A)
We don't tell you everything. 
Hey guys got the 17dd back in my X6, its running at 5.8A now for 1322Lm (Havent measured lux now, I plan to swap to a U2 1D and dedome tho and hoping for 80kCd)
Just wanted to show how I had to move components around to fit with no dremil work to the retaining ring. The cap down at the bottom is the normal C1, its where comfy figured out it needed to be (between batt+ and GND) on these older boards then the reverse polarity diode can be moved to its pad (in stock location the output side of it hit the retaining ring and grounded out). Also built the GND pads up slightly with solder.
It’s not running 3 mode off time L-H (206Lm, 456Lm, 1322Lm) with a 120sec turbo RAMP down to 866Lm, the ramp is actually so subtle you really cant see it in use (you can see it on a white wall if you’re timing it) but to someone that didnt know it was there they wouldnt be able to notice it at all.

I am trying to avoid botching the GB thread for the X6 so I thought I would ask here, if it is appropriate.
I am planning on purchasing at least 3 of these and probably more for gifts. The light is a fantastic unit with the exception that forward clicky switches serve my needs best. I am not a modder (yet) and hoping that the manufacturer will offer optional tailcaps with forward switches. If not I will try to do it myself but would rather not butcher one of these.
Question 1: With the stock driver, can anybody tell me how a forward clicky switch would react? Specifically, for every momentary press to shine some light (during an inspection) will this driver advance to the next mode. If so that would be undesirable and I will have to learn how to replace the driver or commission someone to change them (any takers?)
Question 2: If I have to change the switch should I just go to the McClicky and be done with it or is there another?
Question 3: Can anybody direct me to any threads that show in detail how to change a switch with tips (like ground wire) and specifically explains the switches (if they exist)? I have looked but I do not seem to be able to find any that don’t just say the switch was replaced.
I completely understand that to most this is considered simple and most likely is but I want to gather as much info as possible. Just as an FYI, even though I am a mechanic and can weld my soldering skills are minimal at best and need considerable work. Any help is greatly appreciated. Never in a million years until I started looking for a replacement light did I ever think that I would become interested in these things.
Thanks in advance!
The forward clicky acts as a momentary with most drivers, but with mode memory usually being in the 2 second range the light will change modes if you engage twice inside of that 2 seconds. So if you use the light under momentary for more than 2 seconds the mode will be remembered and you’ll still be in that mode next time you engage. Full clicking yields the same result of course.
You could have the driver MCU flashed with STAR firmware and program it to not utilize memory. Or many variants on the theme. You could change the time it takes to set memory or how the memory is affected.
Replacing a switch is really one of the easiest things to do in the flashlight modding world. In most cases it’s a drop-in proposition, but not always. There is no soldering involved most of the time as the ground connection is made through the retaining ring that holds the switch into the tailcap.
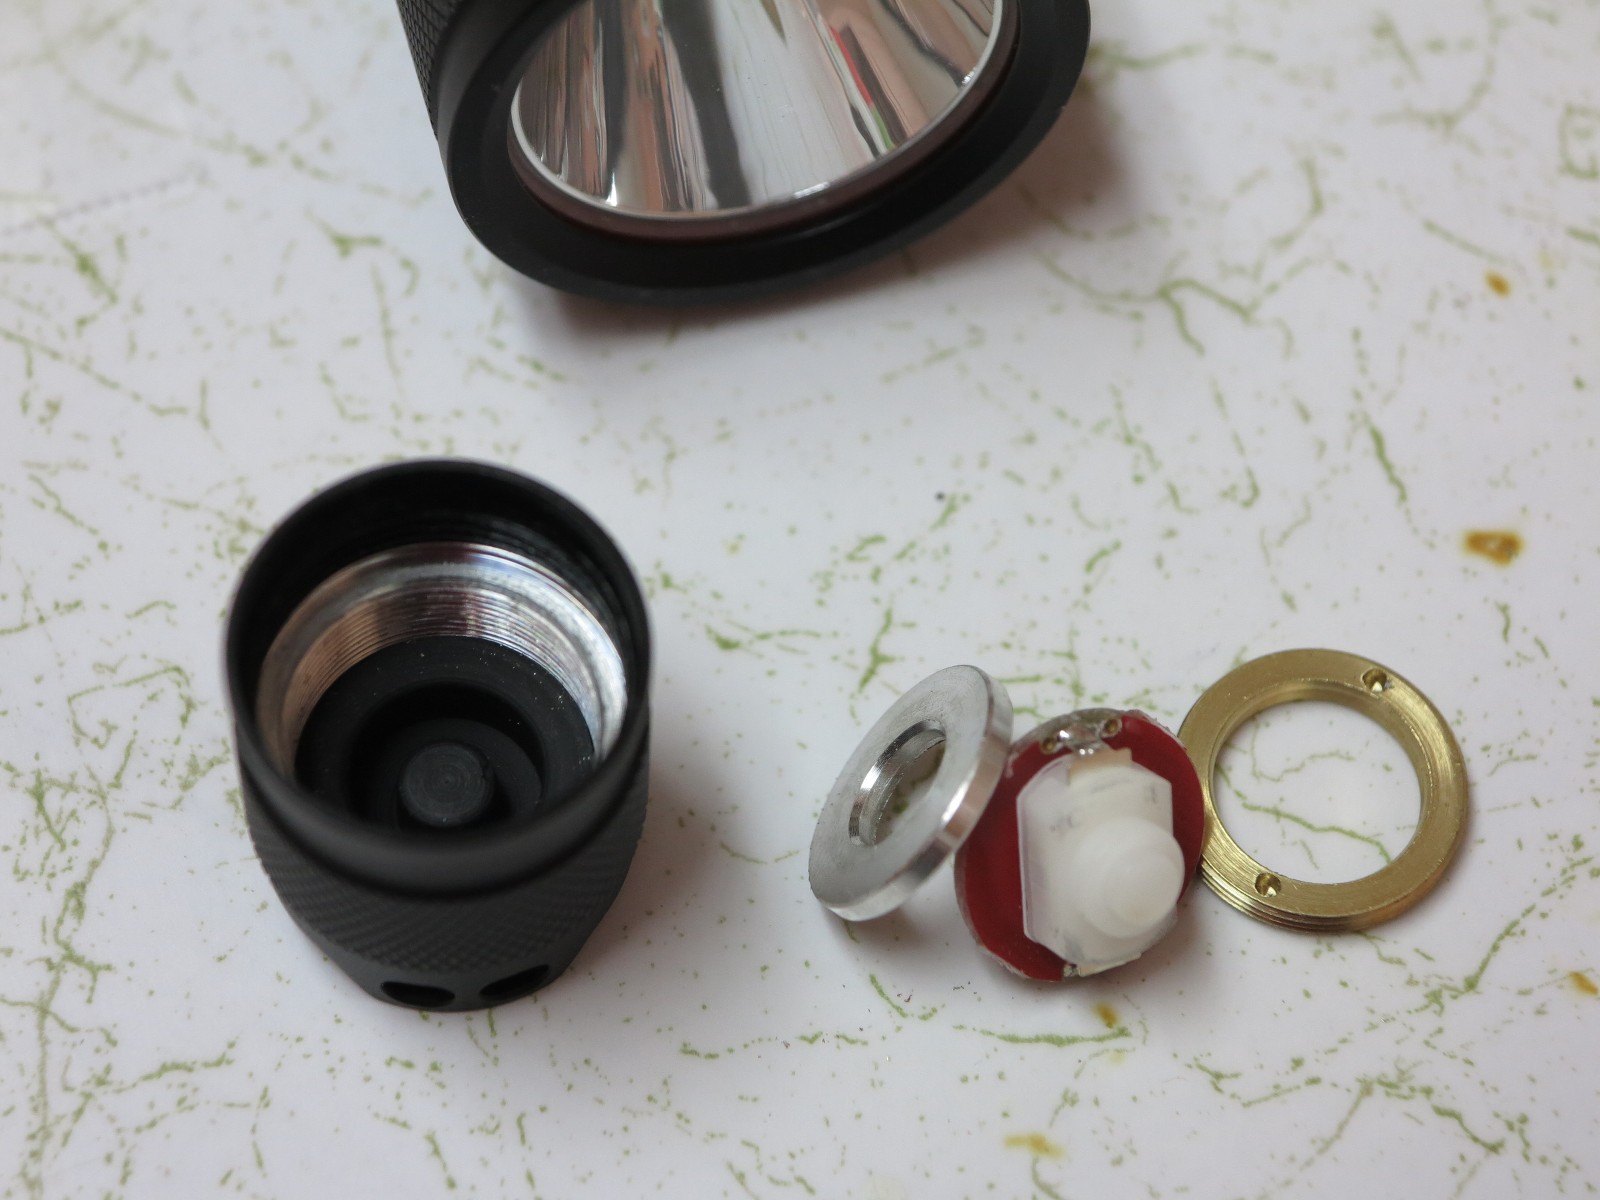
I’ll get some pics of the tailcap and switch/spring/retaining ring in this X6 so you can see what it is you’re dealing with. Be back shortly.
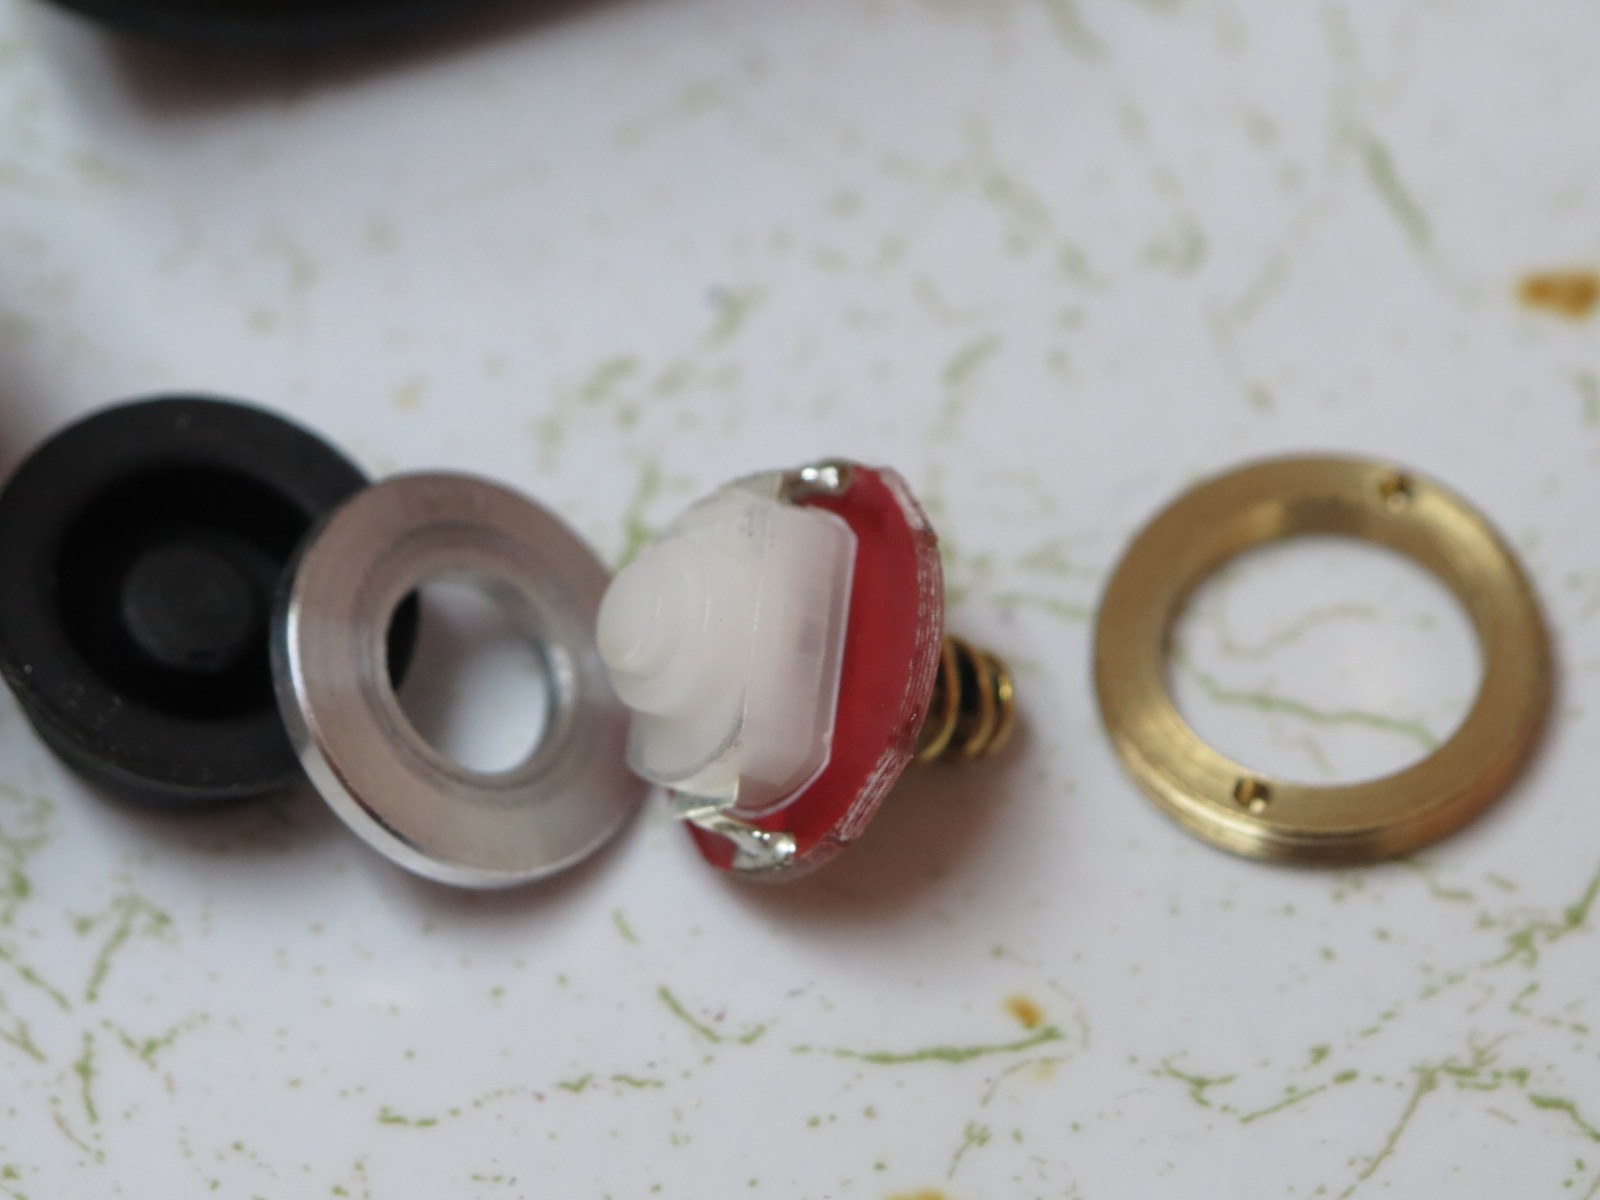
The actual switch used is the smaller Omten with rounded ends. These can be found for cheap in a set of 5 at places like FastTech I believe. Someone here can probably confirm that, I haven’t bought any but intend to. These pics are 1200 px on the long side, click to view in a new window if you want to see closer.
The aluminum washer between the rubber boot and the switch is to allow the switch to sit properly so the button on the boot will engage the switch mechanism. I need to look at this and see if the McClicky is a drop-in here or not, sometimes these take a bit of modding to work properly.
The hole in the aluminum washer would have to be reamed out slightly 1-2mm. And the post in the rubber clicky will probably have to be reduced in height as the button on the McClicky is taller than the Omten. Fairly easy mod though.
Thank you! You confirmed what I assumed but when one is unfamiliar and assumes on top that…it is a recipe for disaster.
For the mode memory, 2 seconds of inspecting with momentary should be fine (at least for me…the older I get the longer it takes to focus on the object and I believe I am above that threshold. LOL.
Thank you again!
Looks like a good light the strobe / blinky modes put me off i do really hate them, if they are hidden like D40A fine no problems. A version with 2 switches like the fenix E40 or PD35 and L-M-H with hidden strobe and “moon” mode and it would be perfect IMHO I would even pay abit more for it.
Absolutely!
Well then great news, thats the plan for the group buy version and it will be EVEN LESS!
Check the group buy / deal alert sub forum for info, its not active just yet, plans are still being finalized but check in there and post that your interested.
This looks like a good driver but one thing I have not seen mentioned or tested:
At what battery voltage does it start to drop out of regulation?
…or what is the voltage overhead above Vf for this driver?
There is no current regulation in this driver, it is direct drive with the current limited by resistors, the low modes are produced by switching at high frequency (PWM). So the current (and output) shows dependance on what battery you use and what state the battery is in. (If you bridge the resistors, the current goes up to almost 5A using a fresh battery.)
That would not make it a “constant current’ driver and the .14 ohm resistors would not drop current to the stock levels. Are they not used to sense (voltage drop) and regulate the LED current?
I guess the only way to get this kind of data is if HKJ puts it through a detailed test:
http://lygte-info.dk/info/indexLedDrivers%20UK.html
We can ASSUME (?), …if it is a well behaved linear driver, it will have the typical efficiency curve, (depending on 100% current level), dropping out of regulation when Vbatt is .1-.2 volt above Vf.


