Not what I expected…
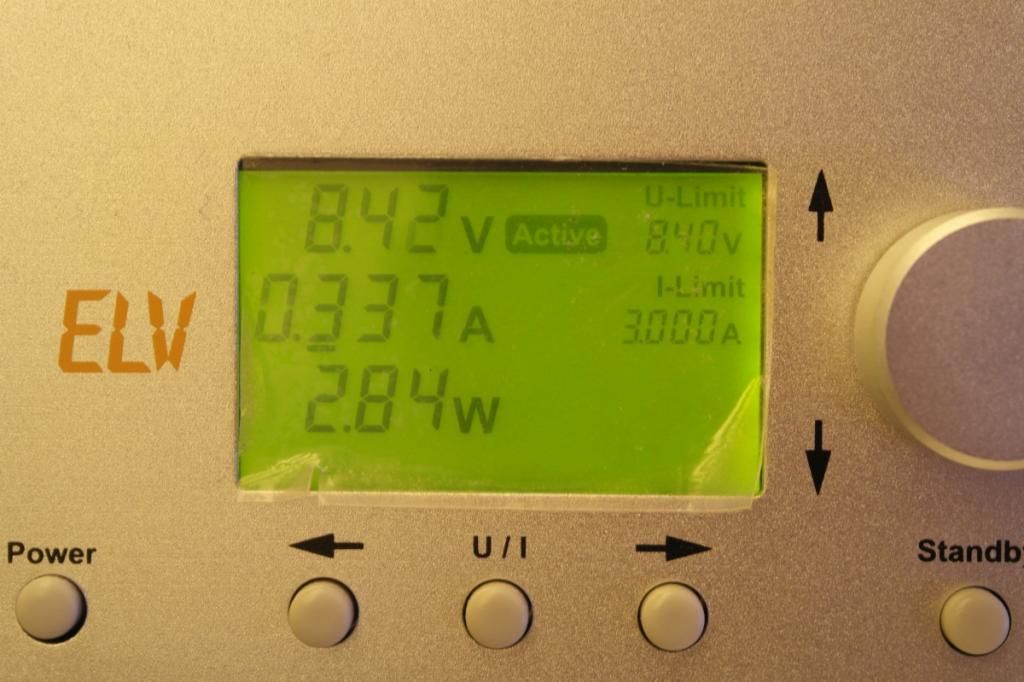
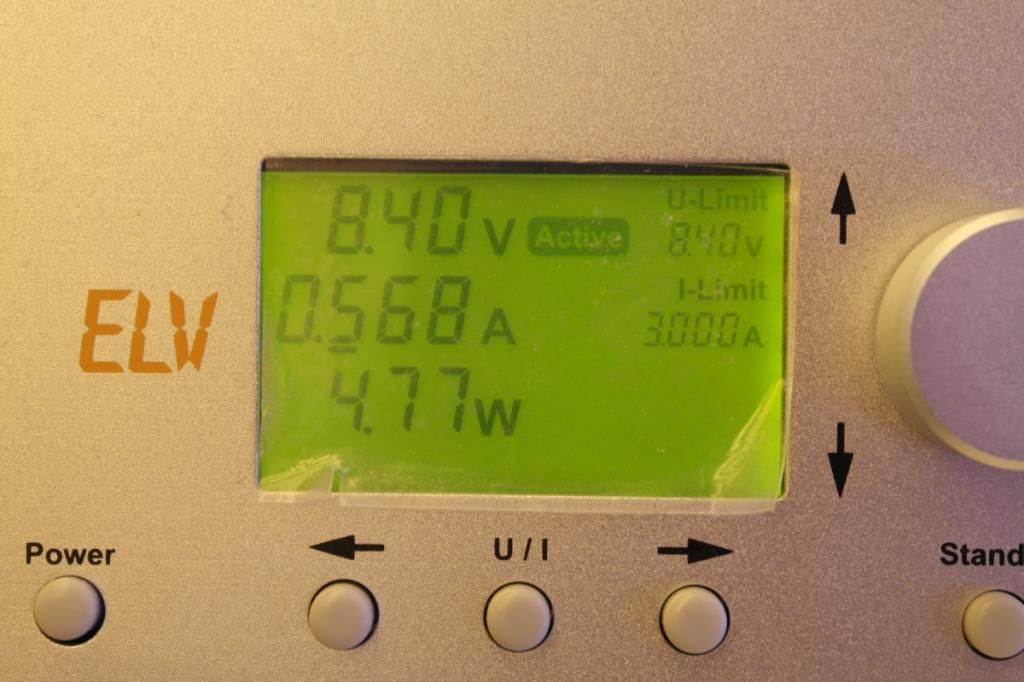
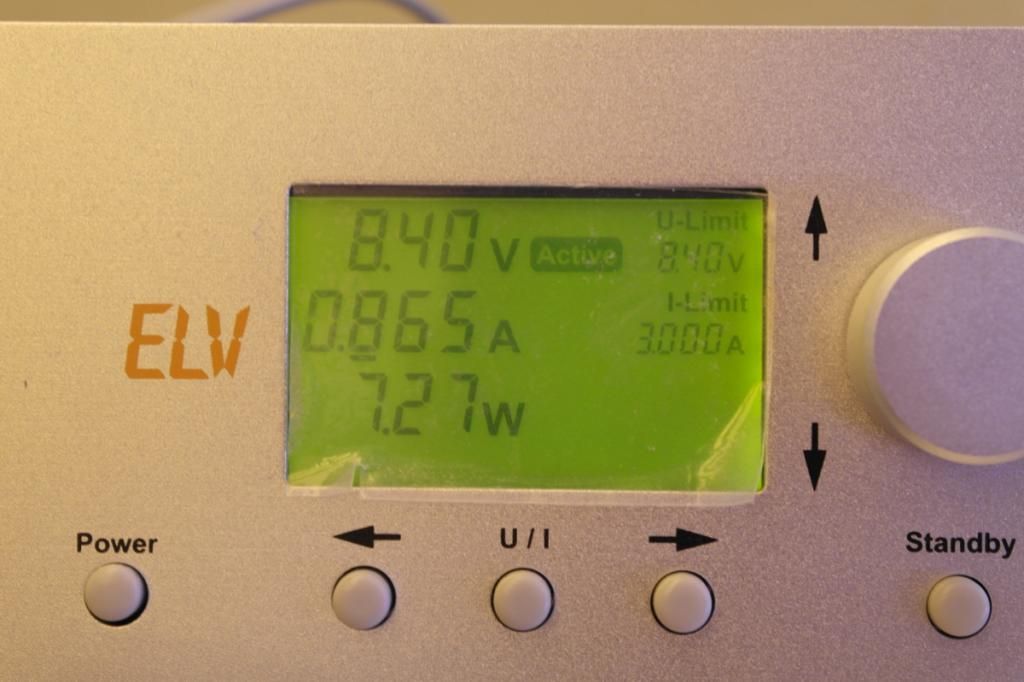
The driver works pretty good in it’s voltage range. 7-9V always ~7,35W
Bad workmanship
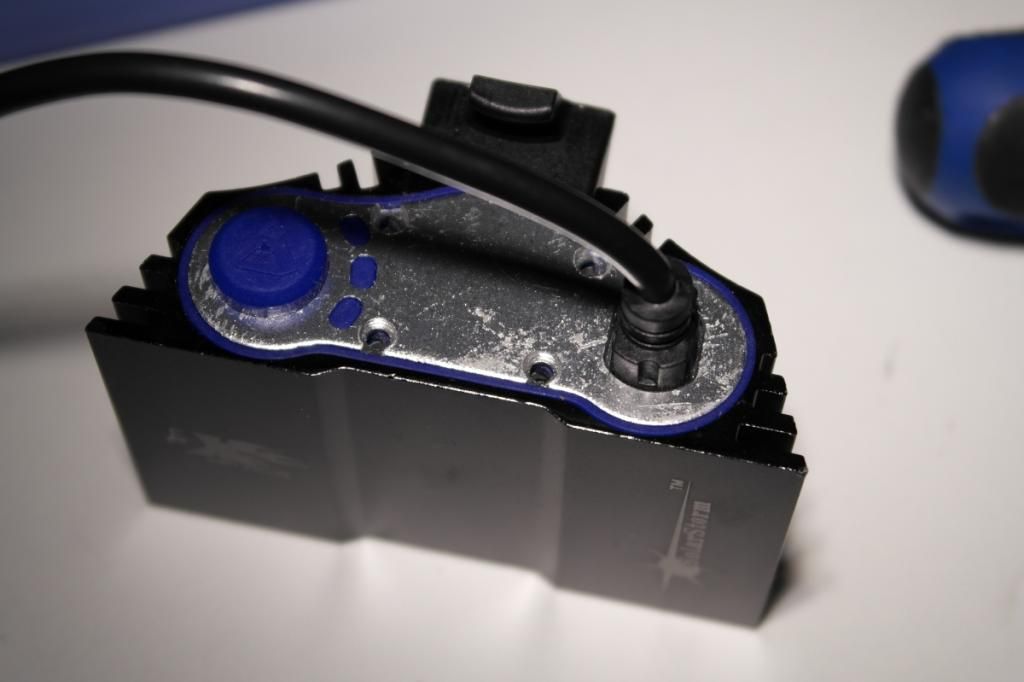
Driver is easy to remove
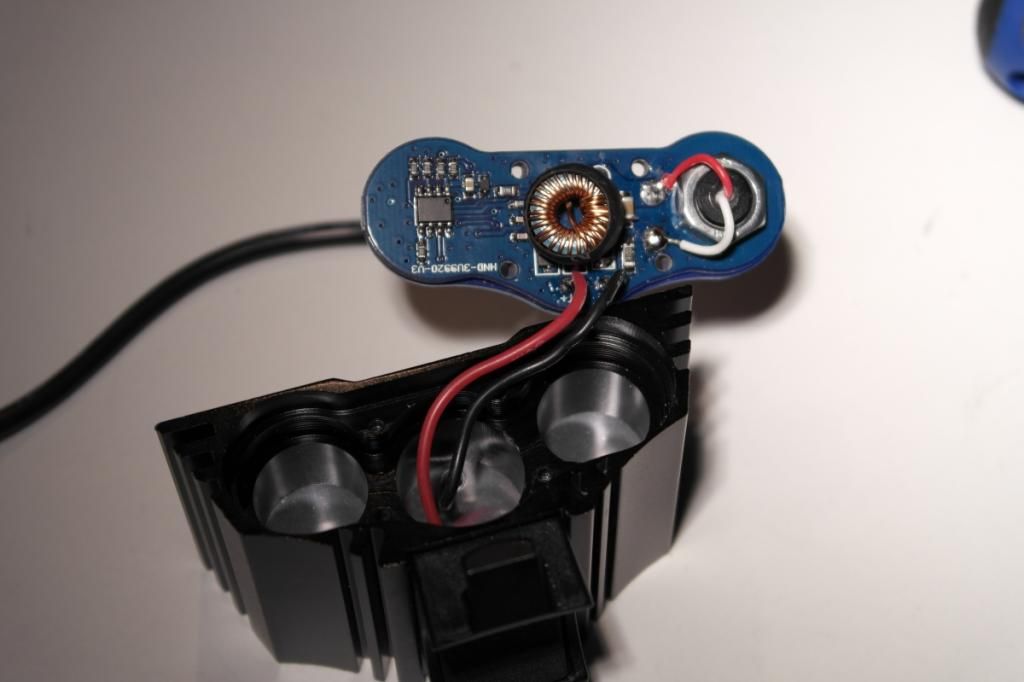
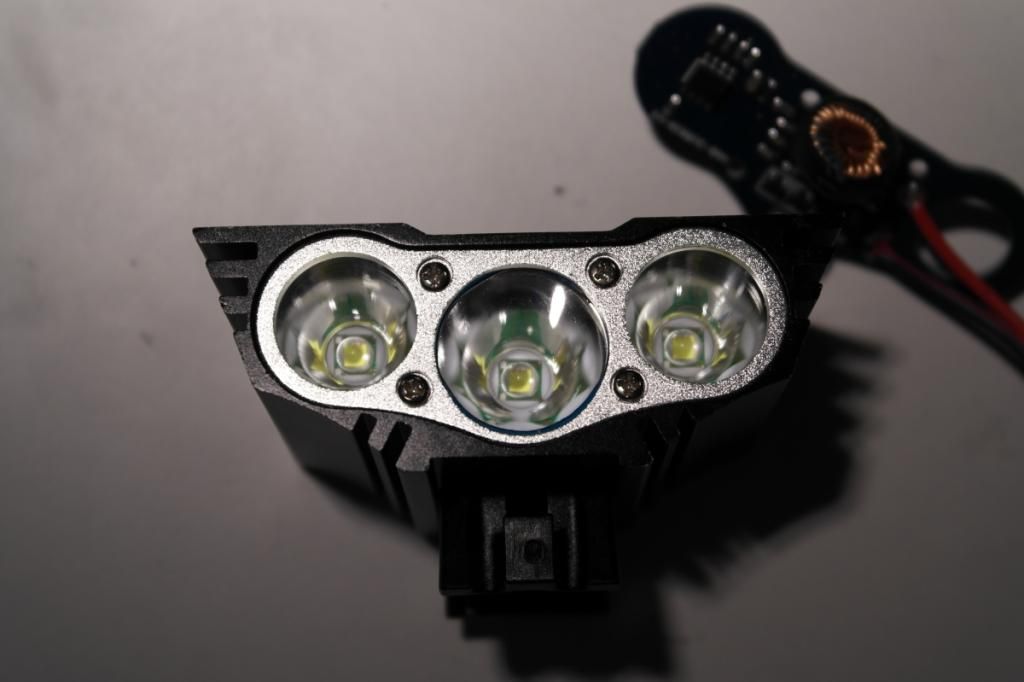
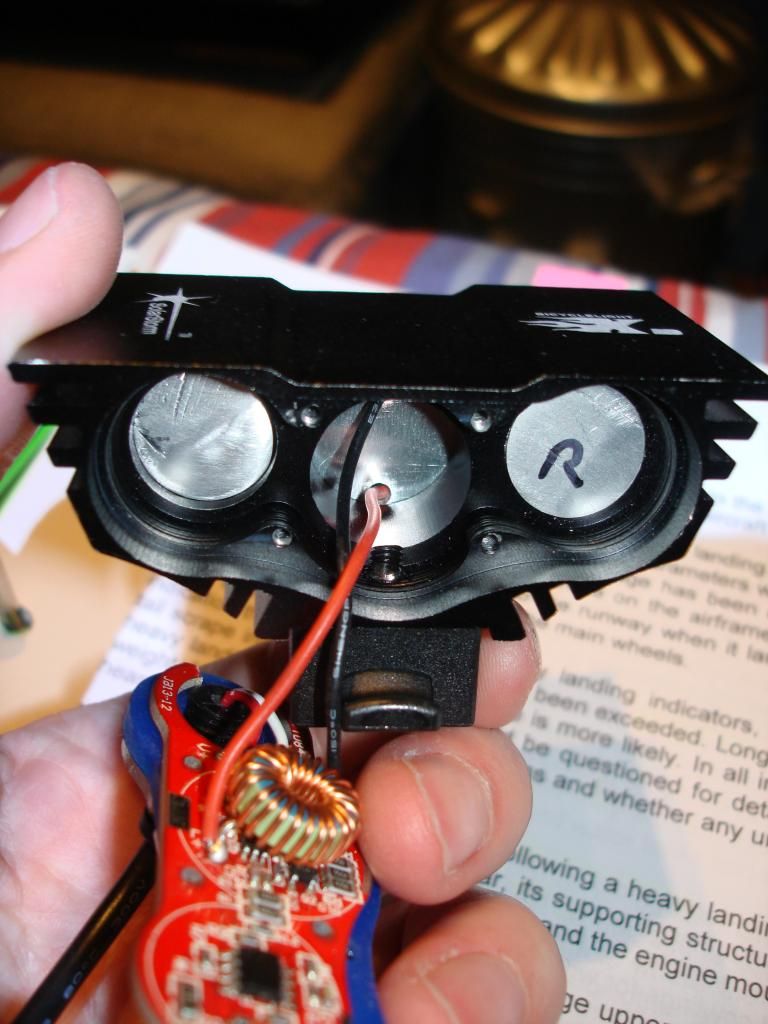
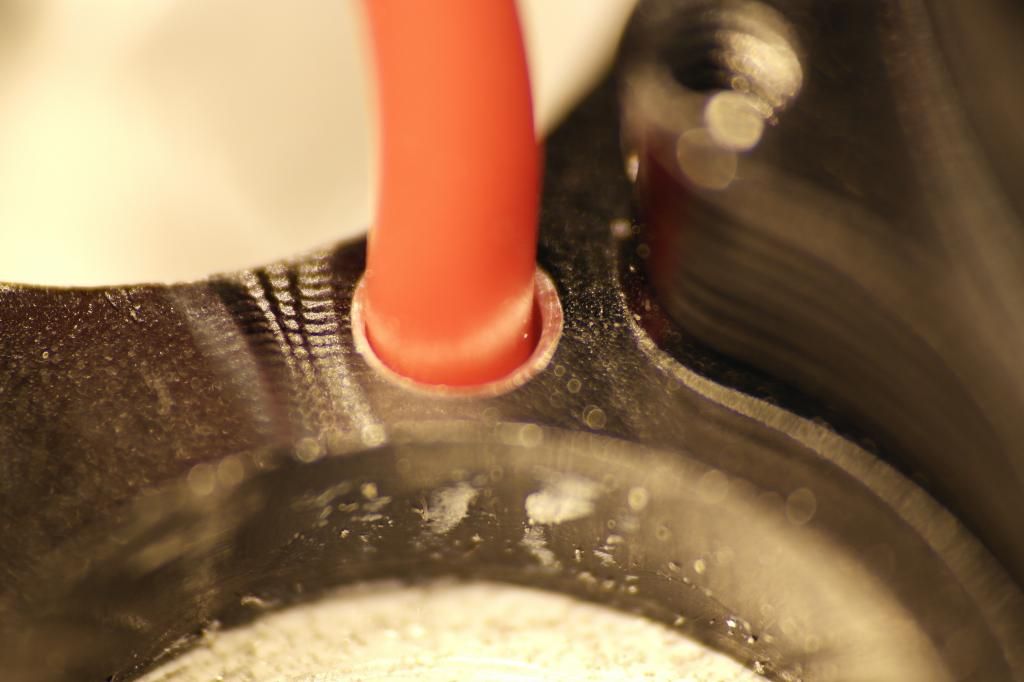
a closer look:
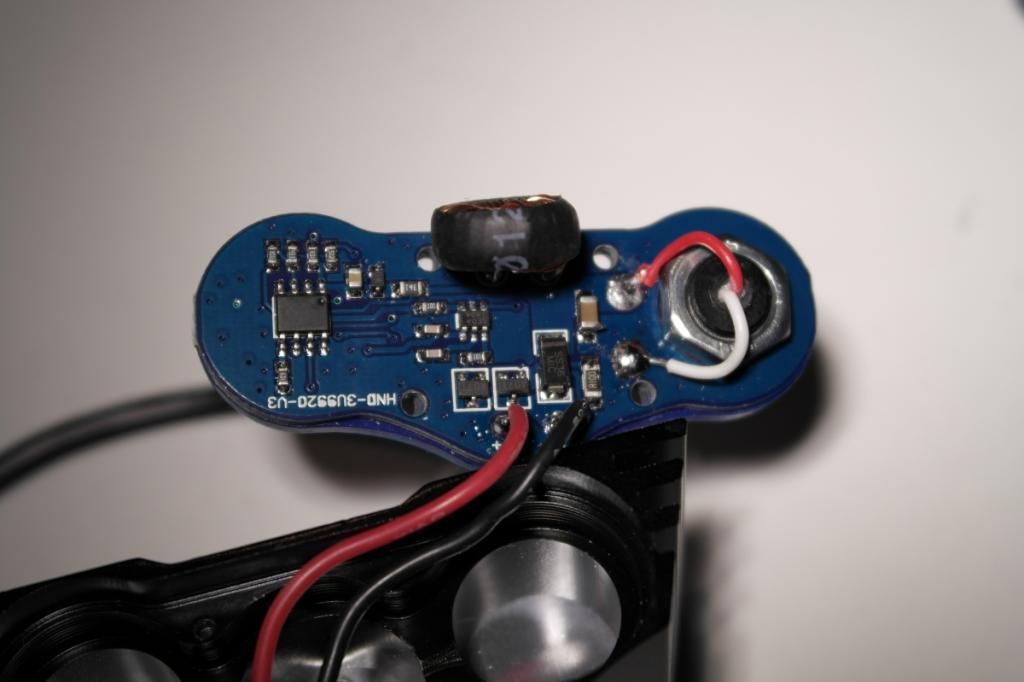
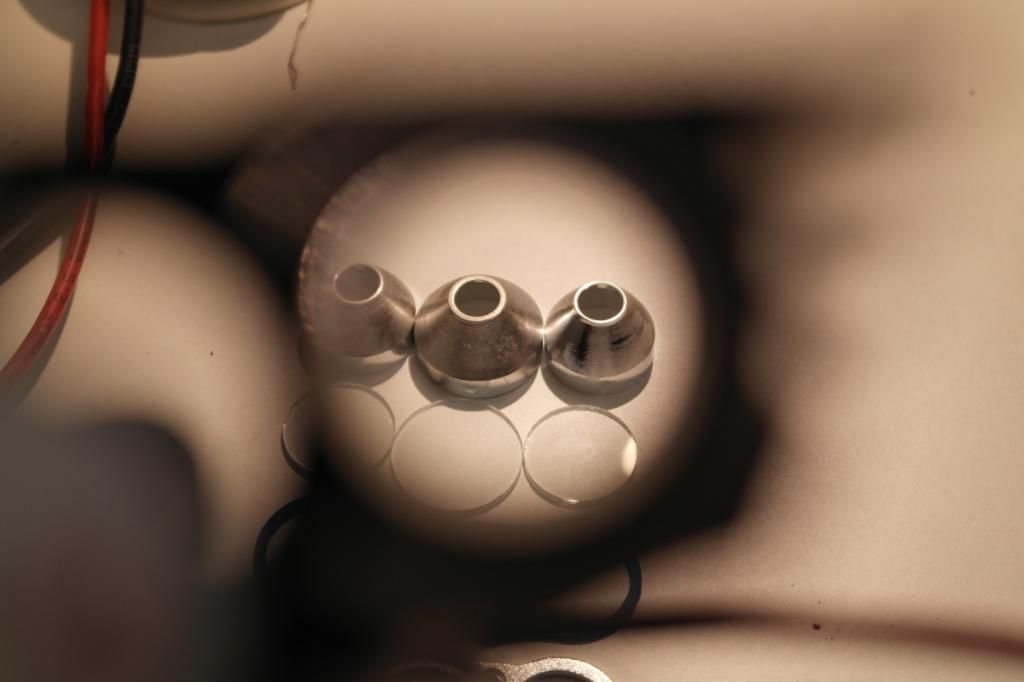
other side:
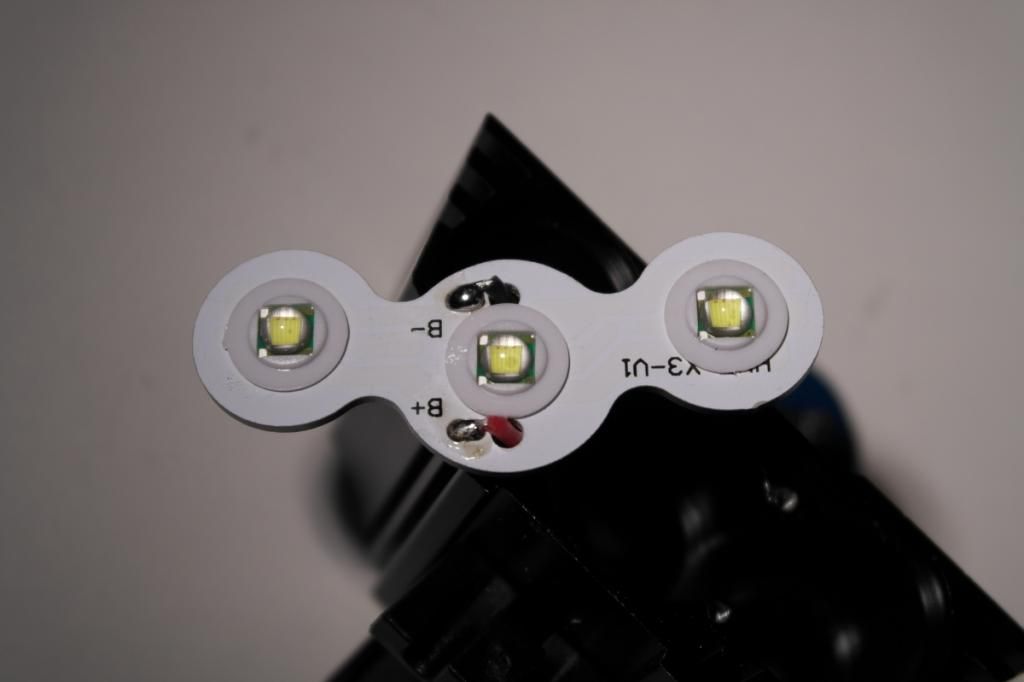
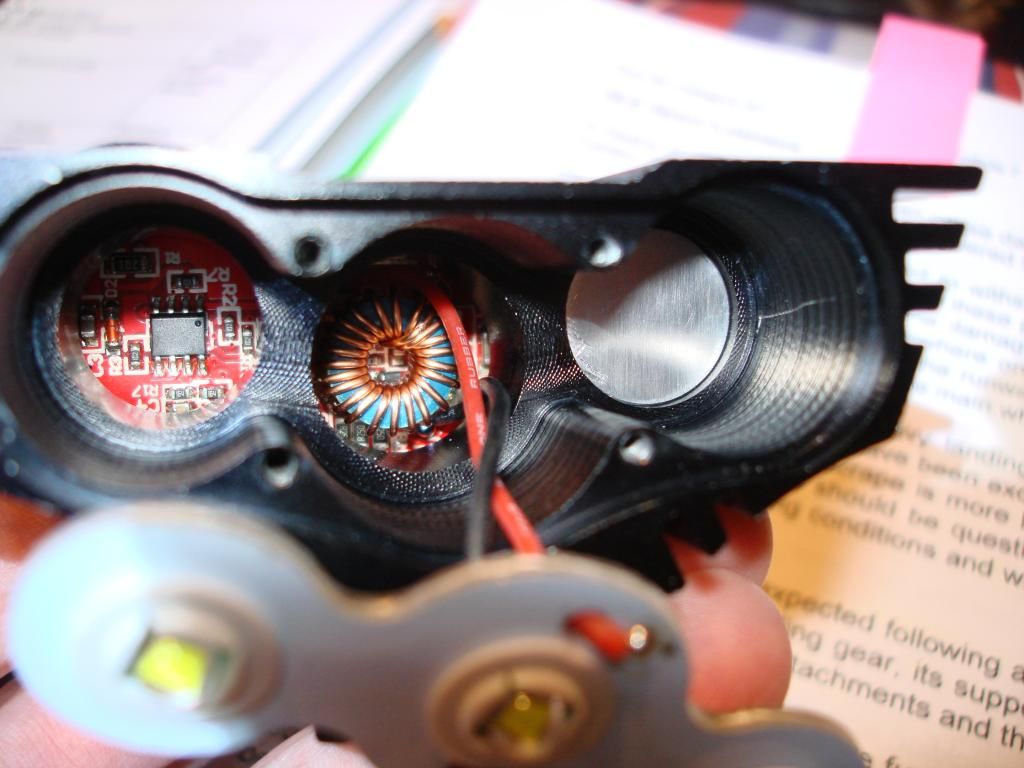
The downside of the LED-PCB:
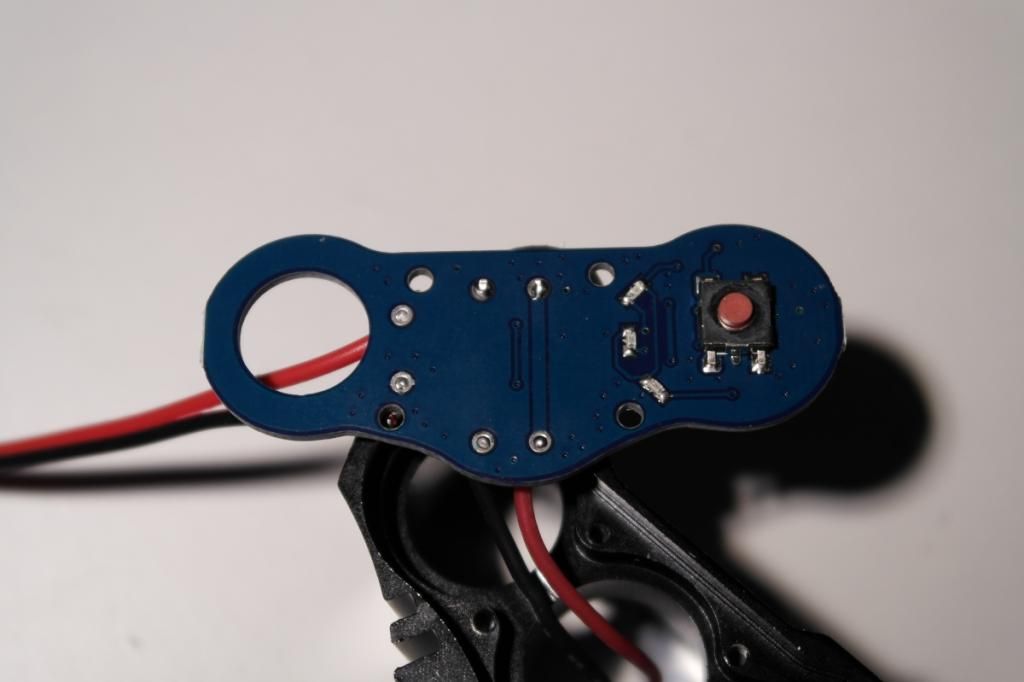
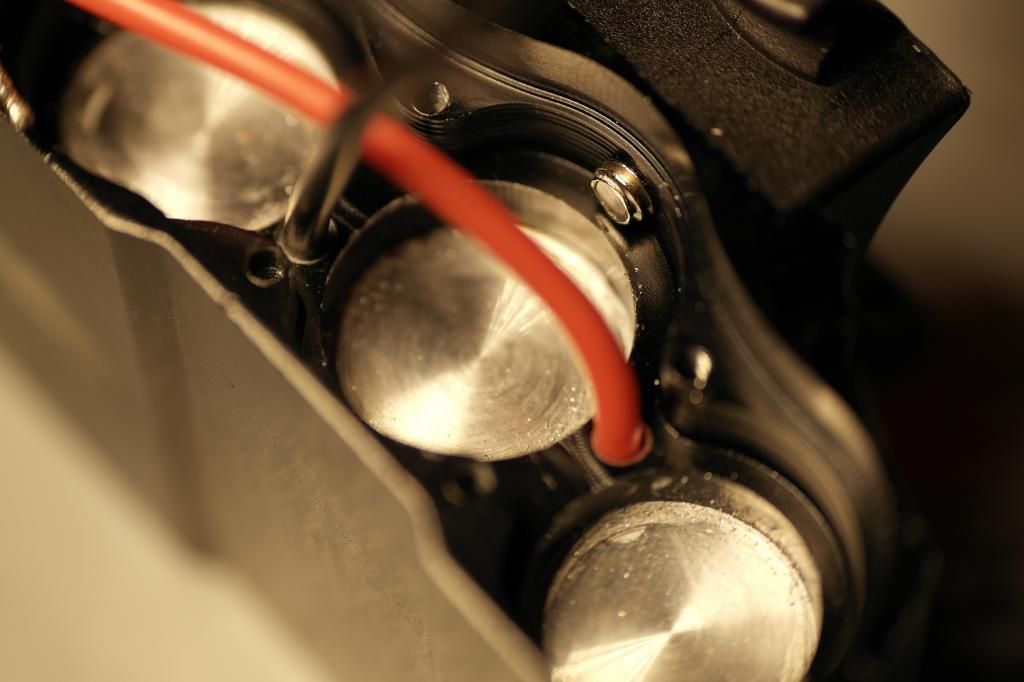
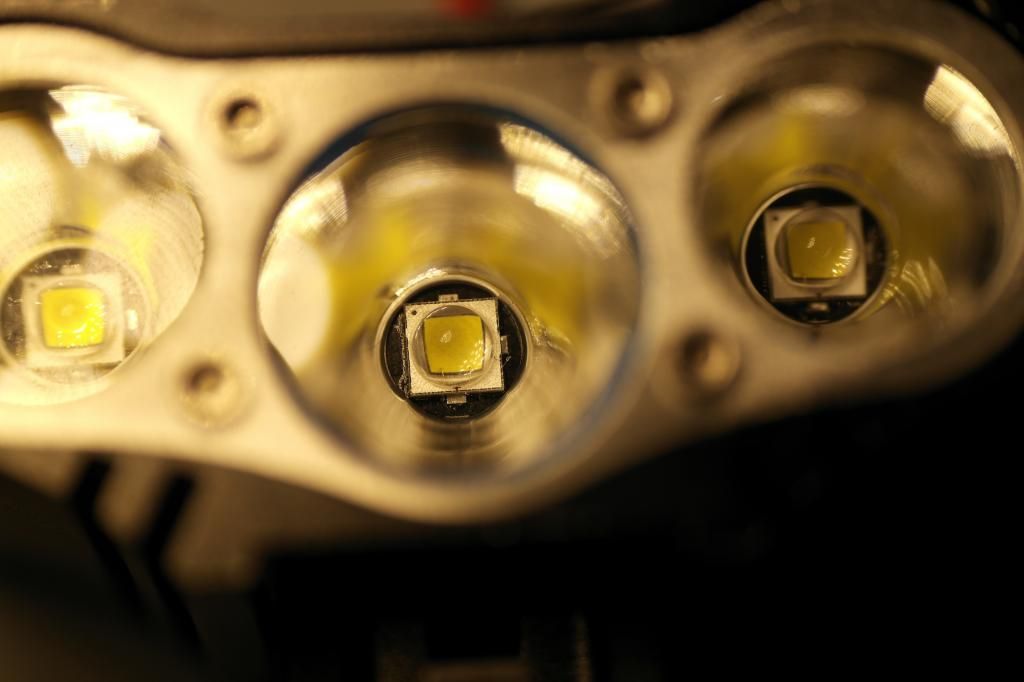
Front view
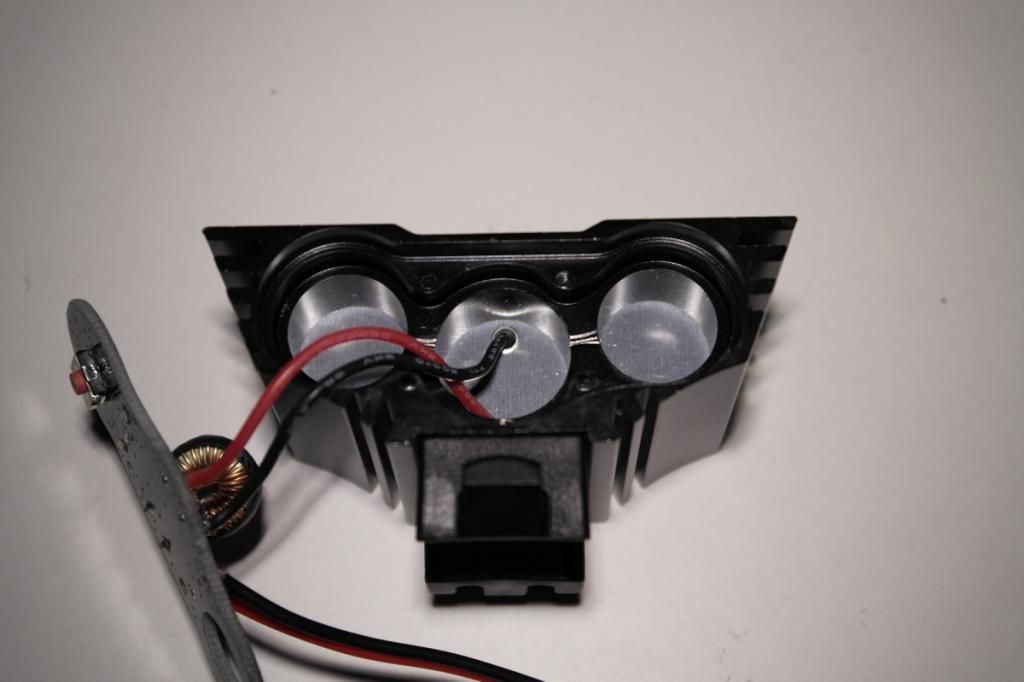
And the ultra secret special cooling holes under the LED-PCB:
Voltage-Check-LEDs:
3 LEDs: 7.5V up
2 LEDs : 7.4V - 5.4V (down to 2.7V per cell…)
1 LED: 5.3V down
So - worthless for me. If you have protected cells, you will never see less than 2 LEDs glowing.
Conclusion:
If you are willing to mod this light: you can buy it.
All others: Spend a little more money and buy something good
I will mod this with 3 NW XM-L2, will try to get the driver to give me at least 20W and will add some aluminum unter the XM-Ls.
If the driver can’t give me what i want: There are plenty of good drivers out there.
I changed the big R100 resistor with a piece of copper.
Now the modes are:
Low: 10W
Mid: 20W
High: Can’t show, because my power supply just goes up to 3Amps - but low and mid let me hope for 30W
Now I need a bigger lathe. And that’s a bit of a problem I think. I only have a very, very small one (0,5-8mm material) - but this will be solved sometime…
Whole lotta space for some potting behind that funky weird star (well minus that honkering huge coil)…wonder if a conversion to stinkpad and then some potting compound behind the star would help w/ wicking the heat away better
Do all 3 lights come on at the same time or are there different options?
My X2 had the nice press in pills, but it was getting a good amount of thermal sag even at stock current. The thermal sag was internal as the exterior body wasn't getting hot enough to be saturated. So to me the lack of pills is probably doing you a favor if you want to soup it up. Would be nice to have the better drivers though. The post linked in the below pic might have a couple ideas you can use.
Hey, new to the forums as I found this thread on doing research on the Solarstorm x3.
Really nice breakdown/reviews guys.
I just bought an X3 recently and decided to strip it down hoping to find something similar to garrybunk’s as I’d already run a current draw test and I matched his figures. On removing the rear panel + driver I though I was in luck as my driver PCB seemed very similar (including the ID numbers on the board) to the driver Garry found in his. Unfortunately I looked down to the back of the LEDs and got the same view L4M4 has, no heat sinking at all. Stripping the front end down confirms I have the same inferior LED PCB and reflectors as L4M4 with pretty much no heat sinking.
So it seems there are many versions/copies/fakes of this light around.
I have since modded the light unit by fitting two aluminum plugs behind the two outer LEDs. Using 15mm aluminum bar which I sanded down to exactly 15.01mm from 15.25mm. At 15.01mm it lets you put a smear of thermal compound in between the surfaces. Perhaps 15.03 or 15.04mm would have fitted even tighter but it’d make fitting with thermal compound pretty difficult. Of course I put TIM on the back of the LED board before pushing it back onto the new heatsink. These aluminum plugs are such a close fit and with the tension of the TIM they don’t move at all once fitted without any further mechanical fixing. They are both slightly different in length as the power input cable on the driver PCB intrudes into the left side hole. The right side plug is 14mm long and the left side is a couple mm shorter if I remember correctly. I have yet to fit anything behind the middle LED as the wires get in the way, the coil is in the way and the centre hole is larger.
The TIM I used is Artic Cooling MX-4 paste, designed for computers but it’s got good conductivity, easy to work with and is not electrically conductive as it’s silicon based.
The unit now seems more efficient at transmitting heat to the outer housing/heatsink as that thing really warms up after less than a minute on high.
Just ignore the rough finish on end of the aluminum plugs facing the driver. The end in contact with the LED PCB was finished a bit better with multiple grades of wet & dry paper, finishing in 1200 grit paper. If I ever find myself with access to a milling machine I’ll make a thin 17mm heatsink for the middle (if that was the correct diameter of the middle hole) with two slots milled out for the wires to the LEDs. I can’t be bothered to create that by hand and the coil on the driver intrudes so much into that hole anyways that you can’t fit much in there.
15.01mm:
Front end with one plug fitted, it was hard to hold the thing and take a decent picture but when fitted correctly the plug sits perfectly flush with the current lip and back of the LED PCB:
I run this with a 2s2p battery I made with Panasonic 3.4Ah cells, external protection IC and battery voltage readout.
Sorry for the long post, hope someone finds it useful in some way.
I have a lathe, so I made 2 15mm and one 17mm aluminum parts - pressed and glued them in with Fujik.
Now the light gets warm quite well.
Changed the LEDs with 3 XM-L2 in 4C and 2*3B (4C in the middle).
I drilled the holes for the wires into the original body - the black parts between the original holes are perfect for that.
But the driver coil heats up very fast - I bridged the 0.1Ohm resistor …
0.05Ohm Resistor is on it’s way. It will be bright enough with that - that’s for sure.
Even the Lowest mode is 5 times brighter than a normal bike lamp
Edit:
7.00 Amps @ 3.15V from the driver to the LEDs
That’s not too much for the case, but too much for the driver…
But I got this Battery-case: Hooray! New Solarstorm BC-2 4x18650 battery (2S2P) case for bike lamps which has a 3-led display built in, so it would be no problem, if I change the driver to a better one without LEDs…
L4M4 - That’s great to hear, it would have been so much easier if I still had access to a lathe. I had to make do with sticking the bar in a drill chuck.
Fujik isn’t the best thermal conductor but it’ll be good that your parts are secured well. I like the sounds of your tweak to fit the middle 17mm heatsink in, I shall do that if I make a 17mm heatsink.
Would you mind me asking which XM-L2 LEDs did you use to get the 3B and 4C? I’m gonna guess a neutral T6 for the 4C?
I considered swapping the emitters out for XM-L2 but I wasn’t sure what colour temperature to go for. I like the colour temperature of LEDs currently in my X3 and similarly in my old Magicshine MJ-808 (Seoul P7 iirc) so I didn’t want to go to anything cooler and only a little warmer. If you did it again would you use the same LEDs in the same arrangement?
I’d appreciate your feedback and I’d love to see some pictures of your finished product if you have any. Really nice work by the sounds of it.
Thanks for the heads up on the BC-2 battery holder, I was really disappointed I couldn’t get my hands on the old BC-1 holder and I must have missed the newer version. I’ve just ordered one now. I wouldn’t have bothered building my battery pack if I’d already had the BC-2. The only advantage I’ve currently got is I have an little voltage readout (7 seg displays) giving me an accurate voltage reading when I use the light.
I like the light color. Only 4C would be a little bit too warm in my opinion, so the 2 3Bs are a very good addition.
And yes, I would use the same arrangement agagin and again and again
The LEDs aren’t expensive, so you could just try them out
Some photos I made just seconds ago…
It’s 10pm here, so no light - and I had my macro lens on the camera, so one picture got a bit wiggly
I love this macro lens (Raynox DCR-250 + 50-200 objective)
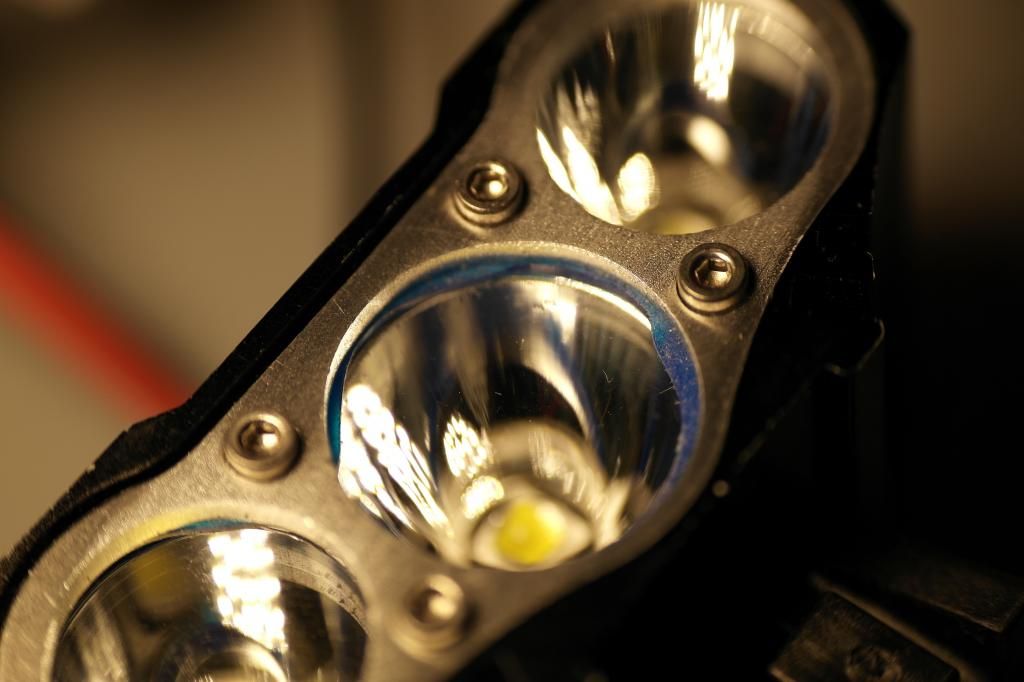
Took me a while and a lot of soldering to get all LEDs facing the same direction
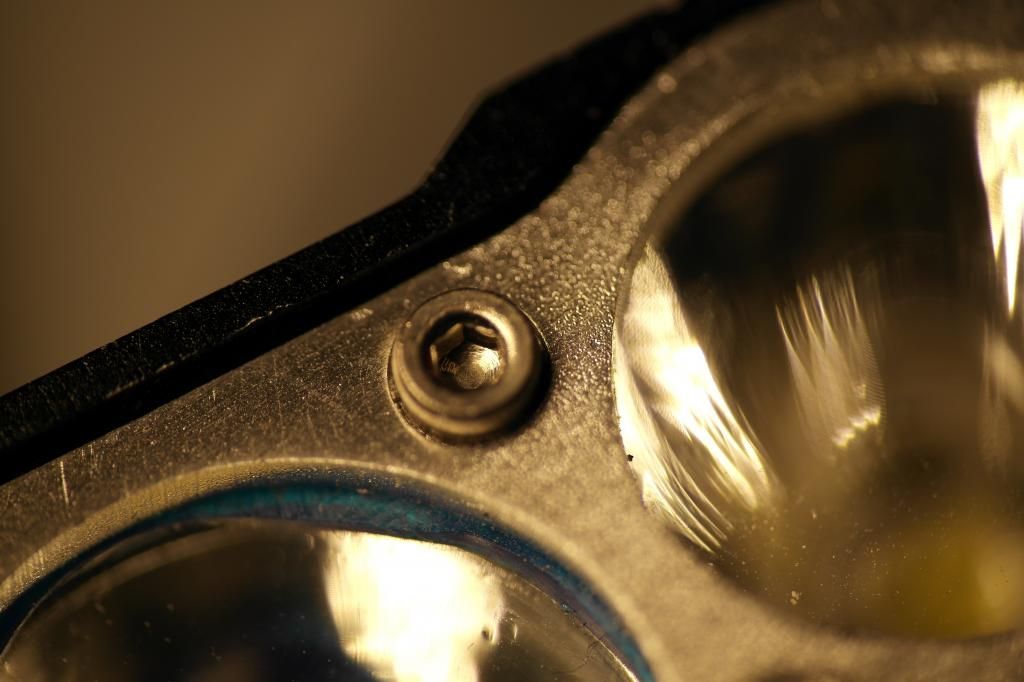
I also changed the screws - mainly, because I couldn’t find the original ones
As you can see, the seal is squished out, so the led is well pressed against the heatsink.
Wow those prices on Fasttech are great, and free WW shipping! I’d only previously looked at EU suppliers at much higher price. I think I’ll order myself a bunch of 3Bs and maybe a couple 4C, that way I can decide later what to do. I’m very tempted to copy your design though, thanks for sharing.
Very neat drilling of those holes too.
The hex screws are a lot better than the original ones, it’s too easy to strip the heads on those.
How much room did you have between the coil on the driver and the 17mm heatsink/plug?
oh, and one final question. What LEDs did your X3 originally have.? I see some ebay X3 listings quoting the T6 and others the U2. Both of which are only available in a cool white afaik (min 5000k)
so do you find your 2*3B + 4C arrangement considerably warmer overall compared to the original?
I got the 0.05Ohm resistors - with one of them, the light gets only ~3Amps on full, so 10 Watts for all 3 LEDs.
I soldered 2 in it, and the light now goes up to 15W and the coil is getting hot. Without being outside and any wind, the light itself also gets pretty hot.
I think I will use this thing as it is now but look around for some better driver for that.