(This post is pretty boring and nothing revolutionary is going on, so I tried to lighten () it up a bit with some stereo pairs, that is, for the privileged ones who can do parallel vision.)
While pulling out the micro-USB cable from the charger (did nothing brutal there), the socket twisted and stopped working, then it went inside:
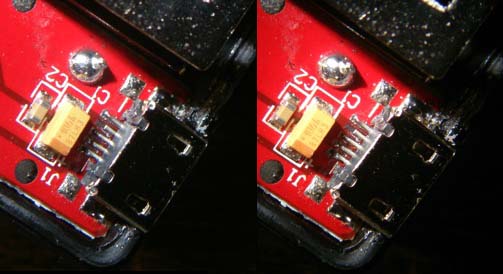
And before I knew it, I had cracked the thing open (the plastic base plate was glued) to have a look at what was going on. Only then I realised that I had bought the charger locally (nkon.nl) and only a week ago, so it would have been easy enough to claim a new one. Well, no turning back now.. It appeared that the socket was soldered on the circuit board and that it was ripped off (the loose broken off socket is at the top of the picture):
There are two lips on the side of the socket that should have fixed it on the circuit board tight and it wasn't tight at all. The lips are part of the shell of the socket and I think that during the soldering the socket was not hot enough, or too little flux was used, so that the solder did not attach to it well enough.
I bended the five tiny output lips straight again (only the two outer lips are used by the way), applied some solder paste on the solder pads on the circuit board (more for the flux than for the extra solder) and some more solder paste to the pads that hold the side lips of the socket. With the solder iron I attached it all again (with enough heat this time, it is attached solid now):
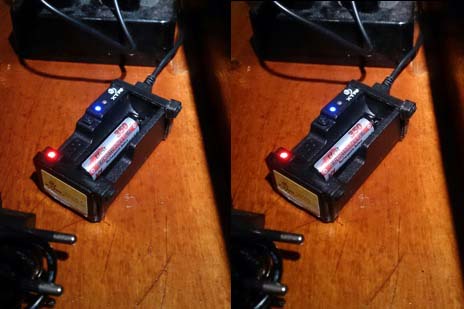
..and assembled the charger. Unfortunately I could not find a good way (exept glueing but I wanted to wait for it to work well before doing that) to fix the baseplate to the charger again so I made do with two tie-raps. The nice charger has lost a bit of its good looks now :-(
Morale of the story: if you own a MC0, be careful with the micro-USB socket, my specimen may not be the only one that is badly attached.
Thanks, nr. 1,2 and 4 were made with my phone camera, making two a bit wider than needed pictures of the same subject with the phone carefully slided sideways a bit, afterwards two cut-outs were made of the same area. The 3rd picture was made through the left and the right eyepiece of my stereo microscope.
This happens too often with micro usb ports that use surface mount shield tabs. I hate them. I’ve added epoxy around some.
They could have at least used a four tab surface mount version. For actual reliability through hole shield tabs are needed.
I reported this same problem as a part of my review of the MC0 from the Xtar drawing. Also sent them an email link to my review - they replied that they were sending the info to their technical department. (They were also nice enough to send a replacement without my even asking for one.)
A friend who is a retired aircraft mechanic opened the broken original and thought that there possibly should have been contact at the center under the body as my sample had none - possibly missing flux during the assembly?
I missed your review, so this is a major issue for this charger, how silly! If this happened to two blf members in the first week of use, it will happen to everyone! And be careful with your new unit too.
I see what you mean about the center solder pad under the socket. I did not pay attention to it, I would not have been able to resolder that one easily anyway.
Look at something a few meters away, e.g. Your TV, holding the IPad with the stereo picture in reading distance so it blocks the lower half of the TV picture. Then look at the IPad fast without turning your eyes sideways. The trick is to keep your eyes aligned to the far distance, looking "through" the picture while the eye lens focuses on the short distance.
This takes some practice. I had that before and can see Djozz' pictures clearly in 3D in less than a second.
I just did it, look at one picture then cross your eyes until one of the images comes in clear and in quite nice 3d....very interesting, and neat once you hit that focal point and the 3d just pops out at you!
Another trick is to place a piece (1 foot) of cardboard from between the two pictures on the screen to between your eyes so each eye only sees one picture. It is important to keep the line between the pictures strictly parallel to the line between your eyes, so experiment by tilting the screen a very little bit.
 ) it up a bit with some stereo pairs, that is, for the privileged ones who can do parallel vision.)