YuvalS’s Hand Made Class, 12th Annual BLF/OL contest entry topic

oh smart, it probably wouldnt stick to the metal threads and the screw could be cooled water

2 Thanks

Yeah, it should work. Its relatively easy to get solder to stick to copper.

1 Thank

The silver color of solder will stick out like a sore thumb though against the warm copper color.

1 Thank

Solder paste can be applied evenly and in minimal amounts. YuvalS double wrap strategy should hide it well. Without the double wrap I still think it could look good, the uniformity of the solder application mattering the most, aesthetically.

3 Thanks

Last year I have tried soldering. The problem is thar the screw is a huge heatsink and absorbing all the heat so I am not able to solder the wire while it is wrapped on the screw.

I am also can not add glue on the inside since:

  1. I first ha e to remove it from the screw
  2. The scew need to fit inside the wire wrapping to enable battery replacement.

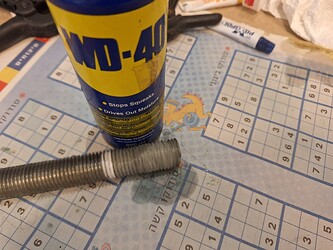
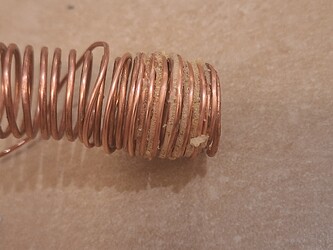
For the 2nd try I have added lubrication. First I had to remove all the Epoxy from the wires, then I renewed the Teflon tape and sprayed it with WD40.

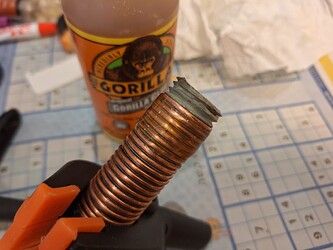
I have also changed the glue for a bit more flexible gorilla glue so it will not break so easily while unscrewing.

I will not let you wait and tell you that it broke apart just like on the previous tries :frowning:

1 Thank

to solder it could you not use a stove/blowtorch to get the screw and copper super hot and melt the solder on instead of a iron

2 Thanks

I feel your pain YuvalS! :face_with_spiral_eyes:

1 Thank

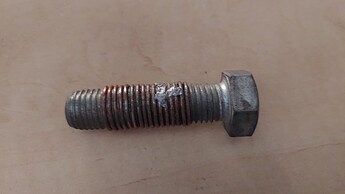
This is after the stove

1 Thank

For the last few days I have tried several times to glue the wire but all methods too weak and broke while unscrewing or too strong so I was not able to remove it from the screw.

I have decided to abandon my dream of a torch build entirely from copper wire and to add some sheet of metal to make it stronger.

Took an old tin broom stick and cut a short piece.

Removed the plastic coating and use metal scissors to cut it along.

Glued the wire “screw” to the inner side.

What about setting it up on the bolt, running something like kapton tape down the length of it in a few strips, enough to hold it. Remove the bolt because the tape is holding it. Then soldering down the length in the open spaces between the tape. Then remove a strip, solder that section. Remove another strip, solder that section. Etc, etc, until finished

it might work on different set of bolt-wire but with the dimensions I have selected It is needed to keep some gap for the tread and fill it with the 2nd wrap

anyway, I have already taken another path. Maybe next year someone will try to build it according to my original vision

It seems that Epoxy caused me a lot of trouble during this year build.
After the inner thread cured, I was able to unscrew the bolt (finally) but then whey I have tried to solder the wire thread to the metal pipe in order to achieve good electrical conductivity, the heat destroyed the glue, and the threads become loose, so I have decided to use soldering as some of you guys suggested.

I cut a short piece of the bolt, so it absorbs less heat. covered it with high temperature tape to prevent soldering the wire to it and wrapped the wire on the bolt.

than I have cut some slots in the pipe using Dremel to allow me soldering the wire to the inner side of the pipe

After soldering I have removed the bolt, improved the soldering and sand it

Next step is wrapping the pipe with the wire…

4 Thanks

Looks promising YuvalS! :+1:

1 Thank

Here’s to hoping it works!

1 Thank

im rooting for you, this is really looking good

1 Thank

I’m glad to see you made it over that hurdle

1 Thank

Rooting for you too!

Am really interested to see if you make this work. I’ve obviously not been happy for the results, but have thoroughly enjoyed the journey on this light, I even followed along last year…

Good luck!

1 Thank

Thanks guys,
Unfortunately, I have to take a flight so will only be able to continue working on this project next week.

1 Thank