Not interested in simple swaps though your welcome to post a how to for any given host(can’t hardly stop you can I?). More interested in ripping the little suckers open to make ’em tolerate more abuse and/or lower resistance. For reference I’ll remind you of Modding a Judco switch by OL.
If you pry open the housing you will find that the main current limiting factor in this switch is that all current flows through the spring and it doesn’t take much to overheat and weaken the spring. There is a plastic pin that locates the spring and prevents it from moving and accidentally shorting out the switch. My solution is to remove the bottom plate and drill a hole where the pin was then replace the pin with a wire that is soldered at one end into the rivet shaped piece that makes the connection and to a spring at the other. Sort of a springandswitch bypass in one. Before this mod this type of switch was reported to fail above .5A and while I doubt that it’s up to driving a triple Noctogon at 10A it should be fine for 3-4A but still needs some testing to find it’s actual failure point.
A spring with a base 10mm or less can be soldered to the base plate of the switch and with a feed hole in the base for the wire that doesn’t pass the spring you should be gtg.
Please post any mods to switches or hosts you feel relevant.
I posted it elsewhere some time ago, but for this thread once more :
The first batch of the Uniquefire UF-1406 (and 1405 as well) came with a terrible quality switch/mounting (the current batch has a very ok Omten switch that is mounted well), in an impossible cavity that fitted none of the standard switches. I modified a 6A switch (this one) to fit it in there.
The leads of the switch came from the side and sticked out too far to fit the cavity. One of the leads was bended flat along the side and a short way onto the back of the switch, the switch retaining ring will be screwed against it for electrical contact. The other lead had to be bended even more to the middle, to avoid touching the side. I opened the switch, removed the lead, filed 1.5mm off the bottom plastic so that the lead could be bended down even flatter along the side so that it fitted in the cavity and not short against the side, it was bend to the back of the switch and a phosfor-bronze spring was soldered to it. Two red cardboard-like rings from a plumbing spares box were used as spacer/insulator on top and on the bottom of the switch, a piece of Kapton tape was used to ensure that there was no electrical contact from the 'spring'-lead to the side.
This is interesting thread but it seems that very few people do switch modding since most of them are dirt cheap and if you have expensive one you don't want to modd anything...
I would be interested in creating silent mod switch but my head is to dumb for such projects so I hope some will appear with similar or any kind of switch mode like for example fitting tall forward clicky switch into omten switch flashlight.
Edit: we all do spring bypass but maybe there is some way to improve internal parts of switch.
The point of threads like this is to show that many switches can be altered to fit when you don’t have exactly the right one or don’t want to wait for it. Especially helpful in DIY builds.
Replacing reverse switch with forward clicky and swapping spring for brass stud for lockout mod on xeno cube.
Original switch and larger F/C replacement
Original switch boot and replacement to maintain water resistance
The steel switch plunger had to be filed down due to the much larger switch
Switch casing parts, very well made but i had to leave out the two inner cores
New forward clicky with one contact directly soldered onto copper plate which is epoxied in place, the other tab soldered onto some copper braid
Switch screwed into housing (the corners catch the internal threading)
The copper braiding is jammed into the side space with some solder paste then very quicky melted and pushed in some more to try and make a good contact with the steel threads
Soldered a brass stud onto the pre-tinned copper plate, filled other side gaps with silicone cubes and cut & drilled a kydex cover epoxied in place semi permanently
The stud was longer than required so it could be fine tuned to the correct length with a file, then lightly polished
Thanks, i had been thinking about how to get a good forward clicky in there for a while.
I ordered a couple of likely candidates a while ago then they arrived today.
This 6A one is a F/C but it is huge, even bigger than the square based one i used
This 3A one is the right size but it is a reverse switch! :weary:
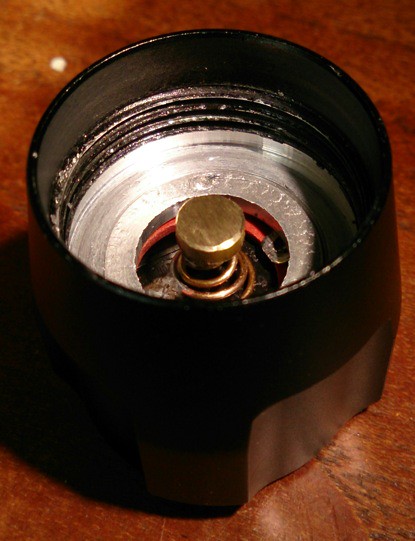
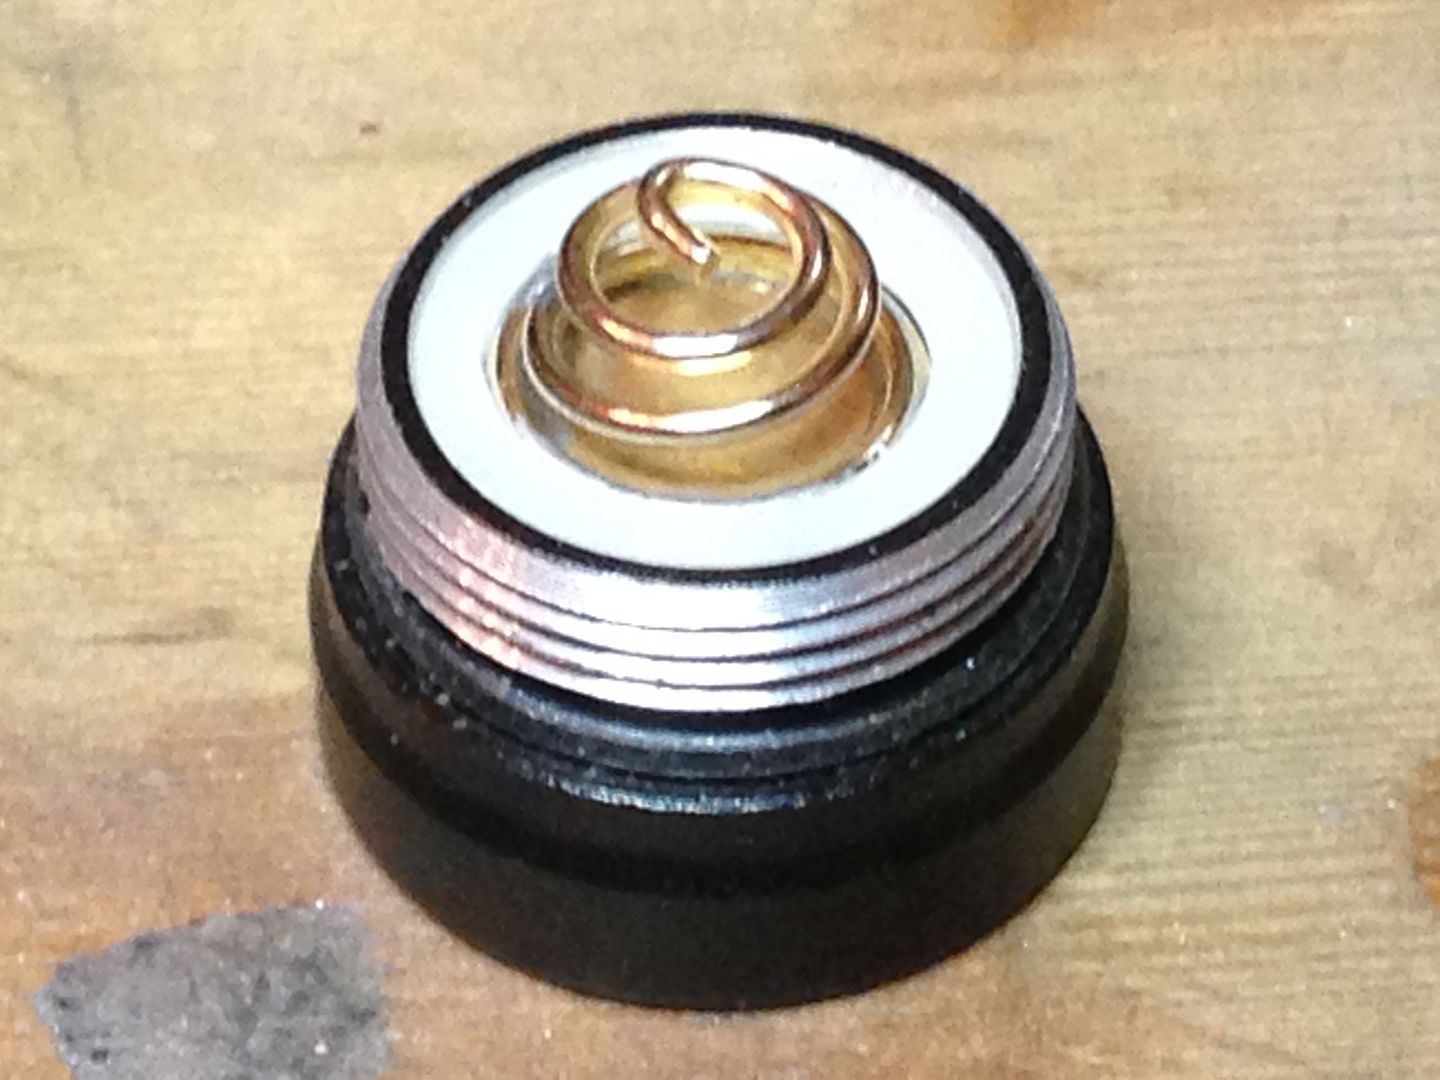
My sk68 croaked so it’s getting a major ovehaul(read:polishing the t**d), upgrade to the pill, bore and stretch the tube for 16650, and while I’m in there I’ll diddle with the switch. Just the switch mod will go in this thread. The switch is an Omten1288 variant with one contact extending around to the bottom of the switch where the holder keeps it and the spring aligned. I’ll be changing the spring to a shorter, thicker one and soldering it in place. Here are the parts after cracking open the holder and switch. The brass disc just makes it easier to center the parts for soldering. The spring base is a bit wider than the stock spring so I had to open up the hole with a Dremel but after finagling the switch back together it all fit just fine. One last touch, the switch button is recessed a bit too much for my chubbies so I used an 1/8” carbide bit in the drill press to lower the shelf a tad. Much better! It still tail stands but it’s still mushy so I’ll add a drop of JB weld to the button to take up the slop and give it a better hair trigger since the driver will get a multi mode upgrade as well.
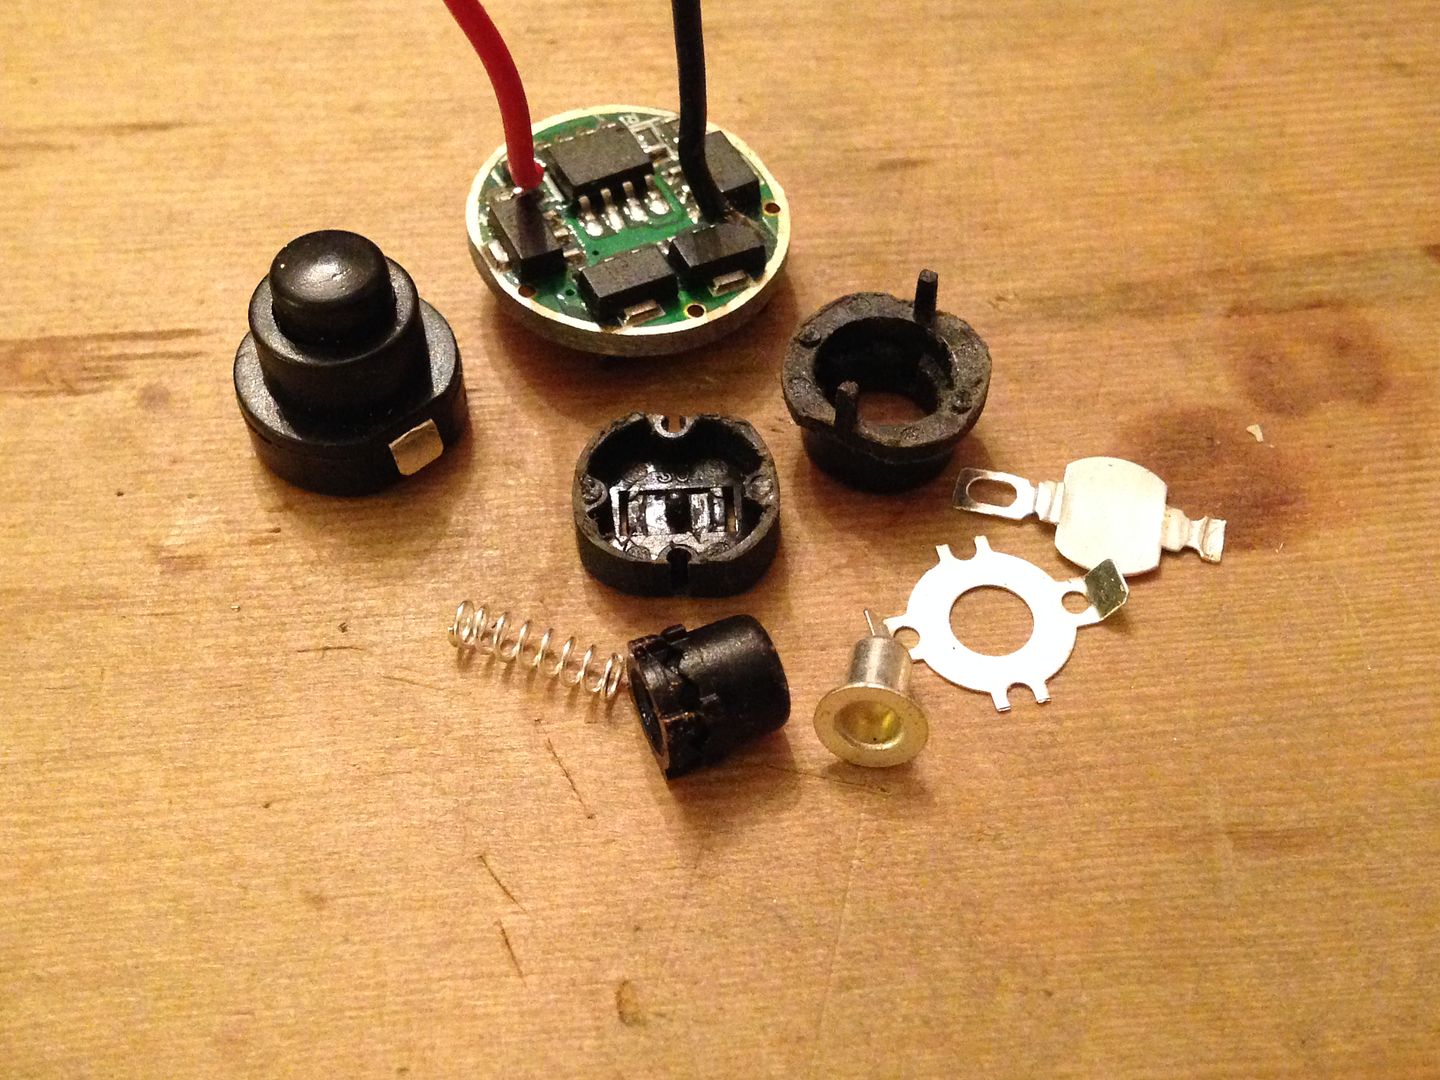

 :
: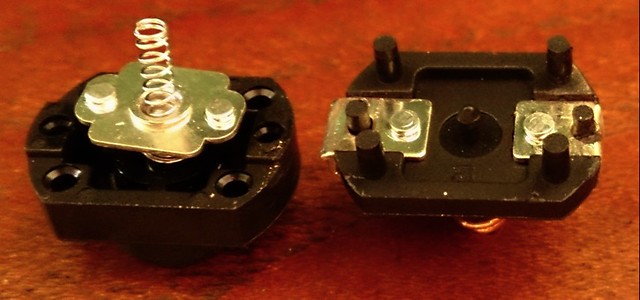
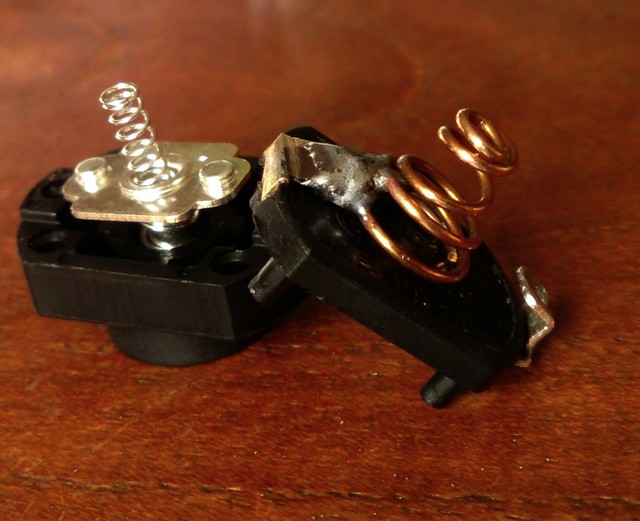
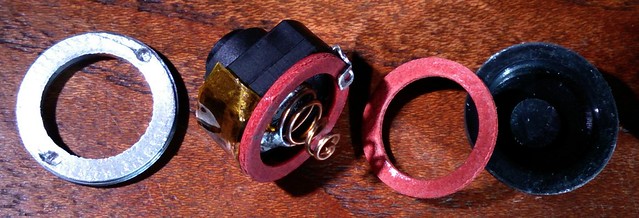


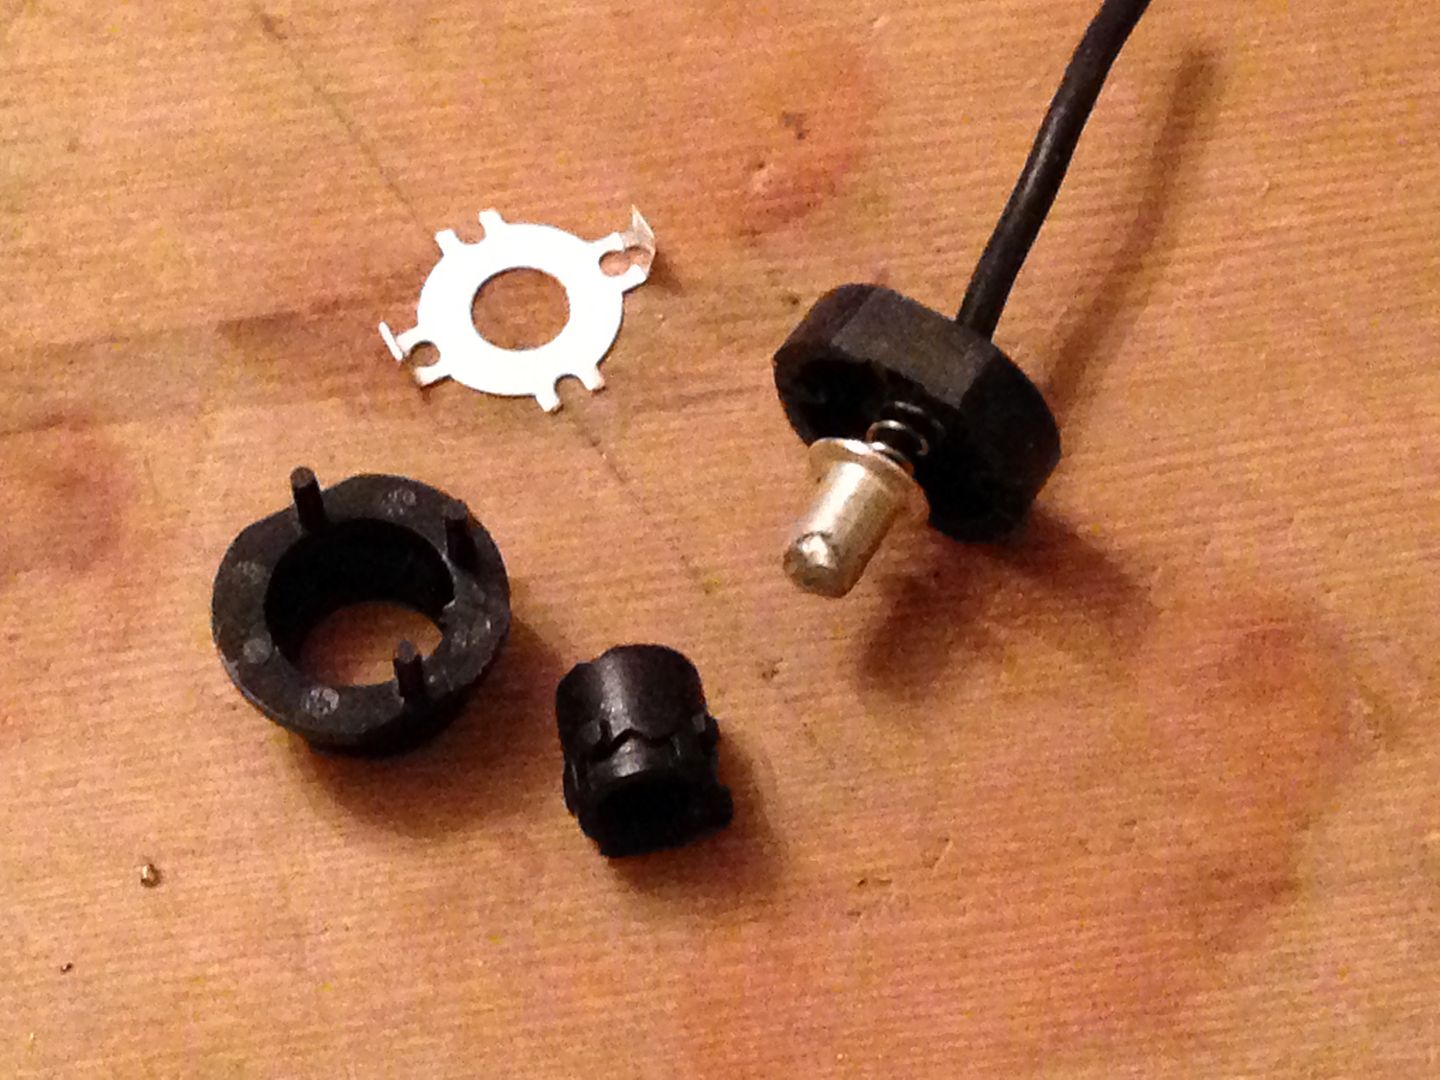
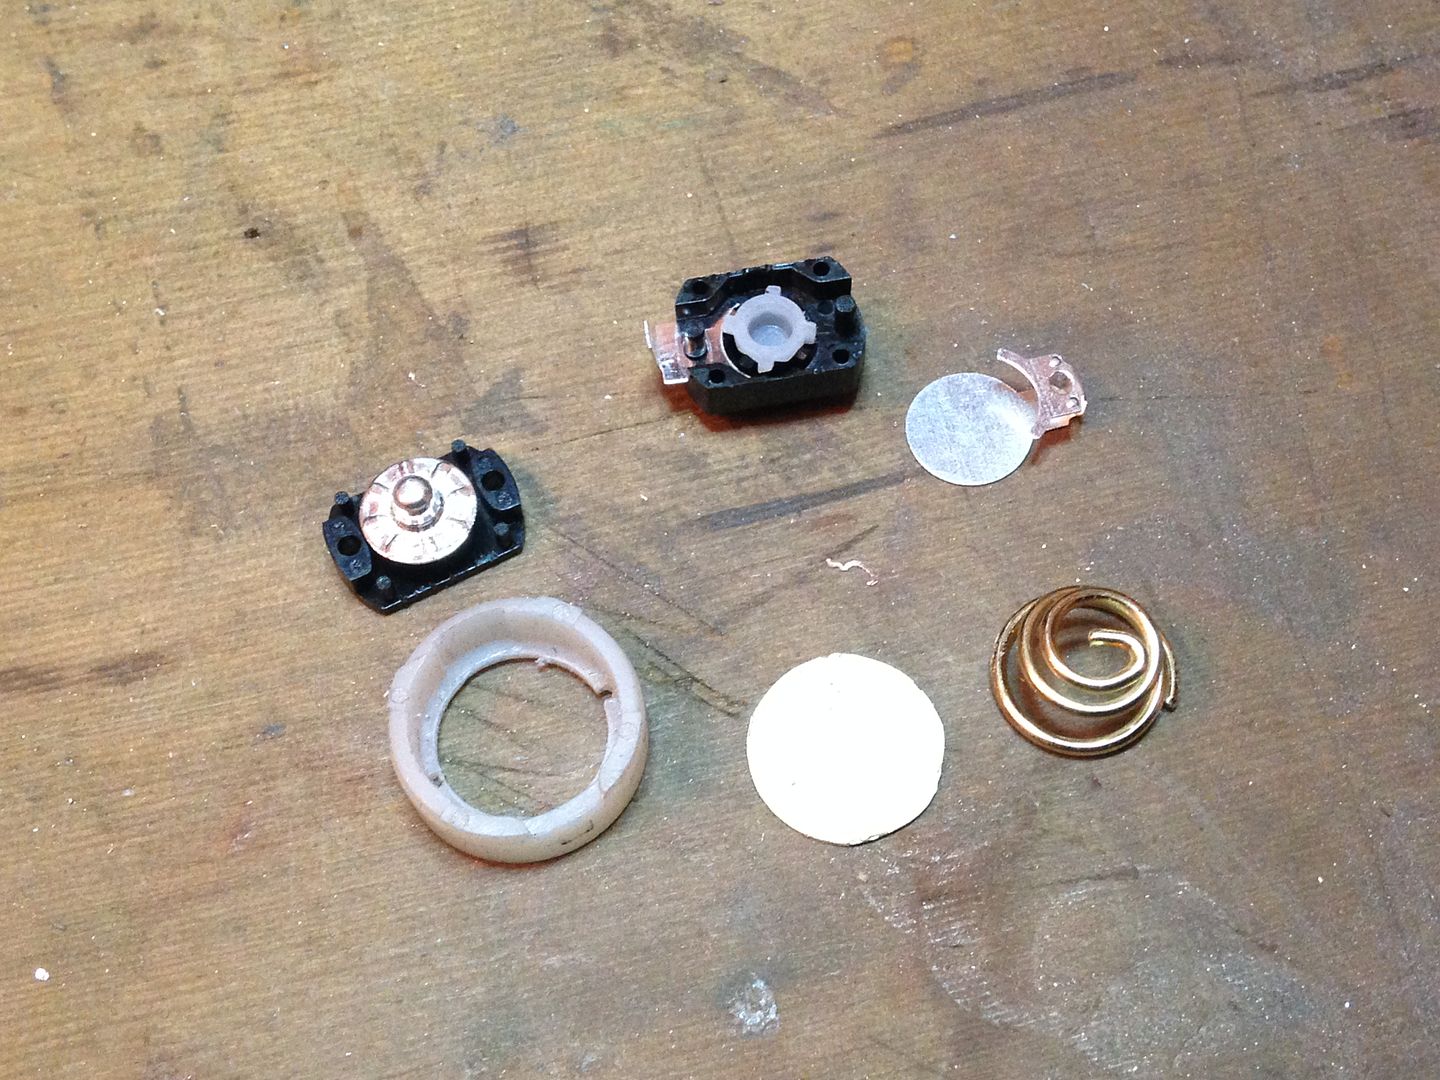 The brass disc just makes it easier to center the parts for soldering.
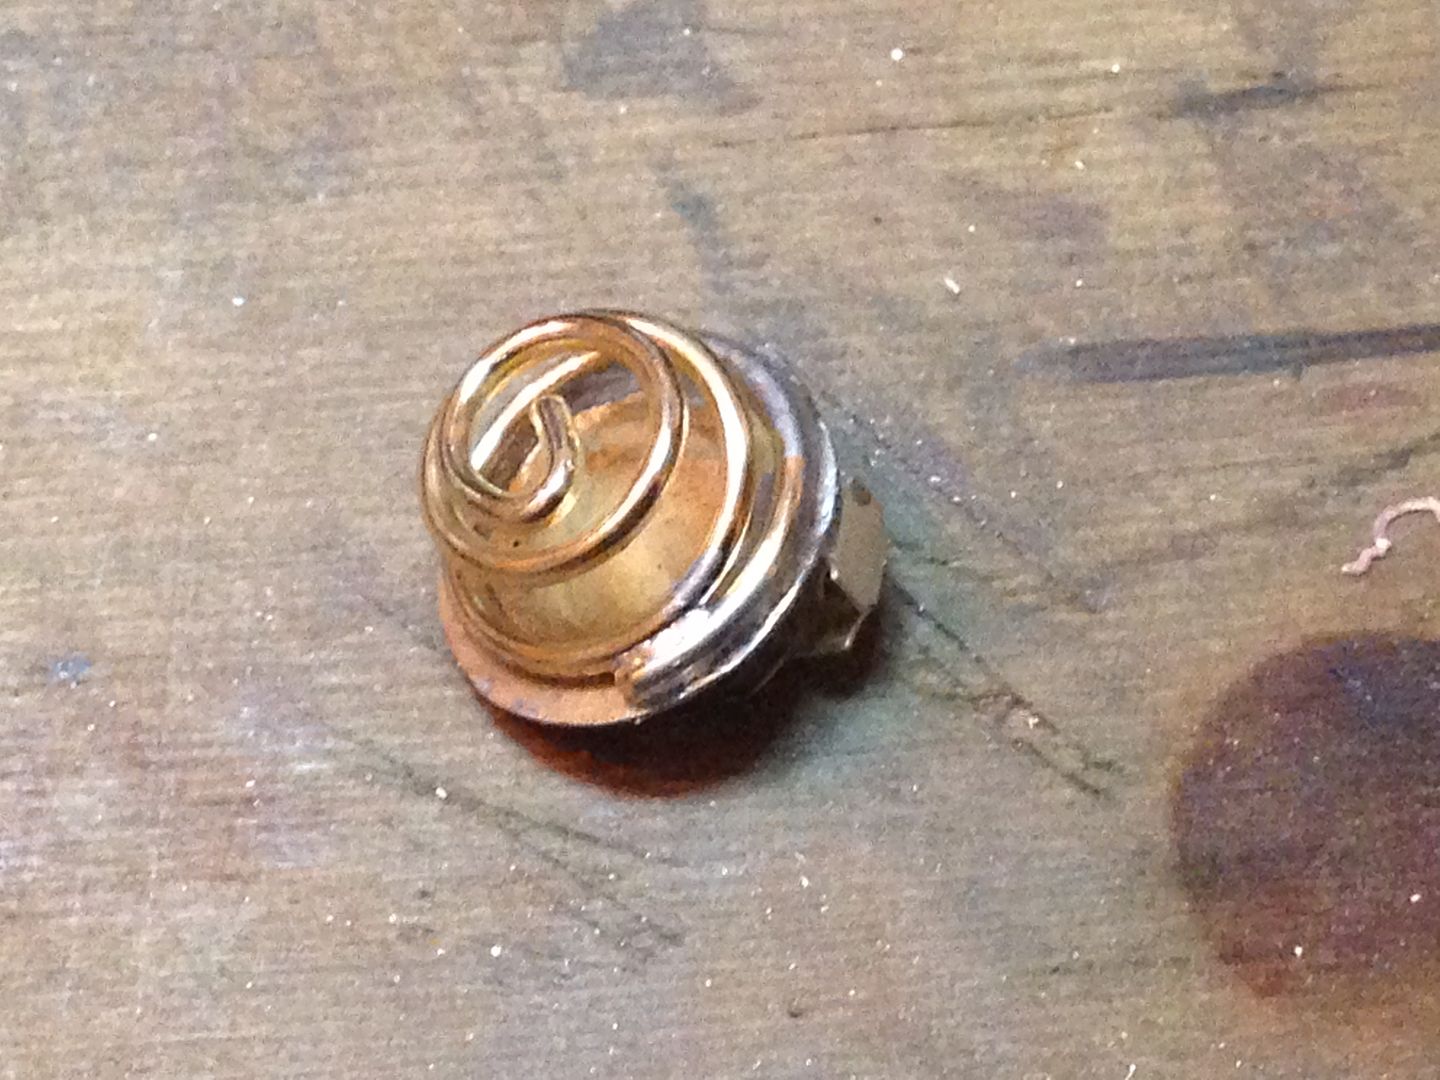 The spring base is a bit wider than the stock spring so I had to open up the hole with a Dremel but after finagling the switch back together it all fit just fine.
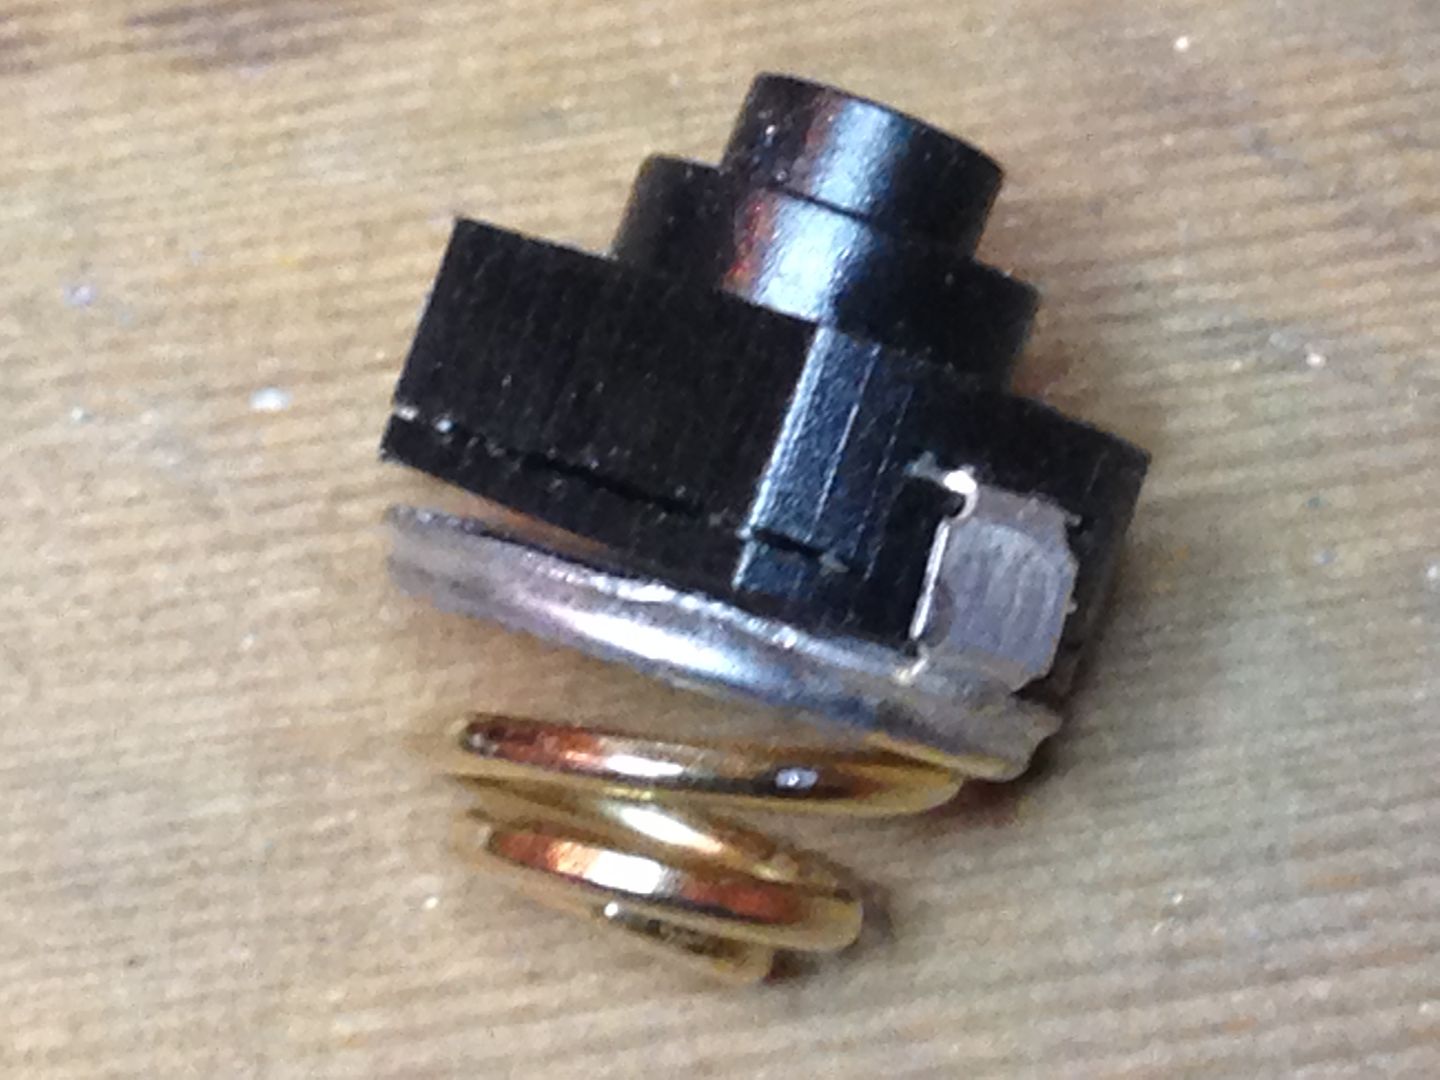
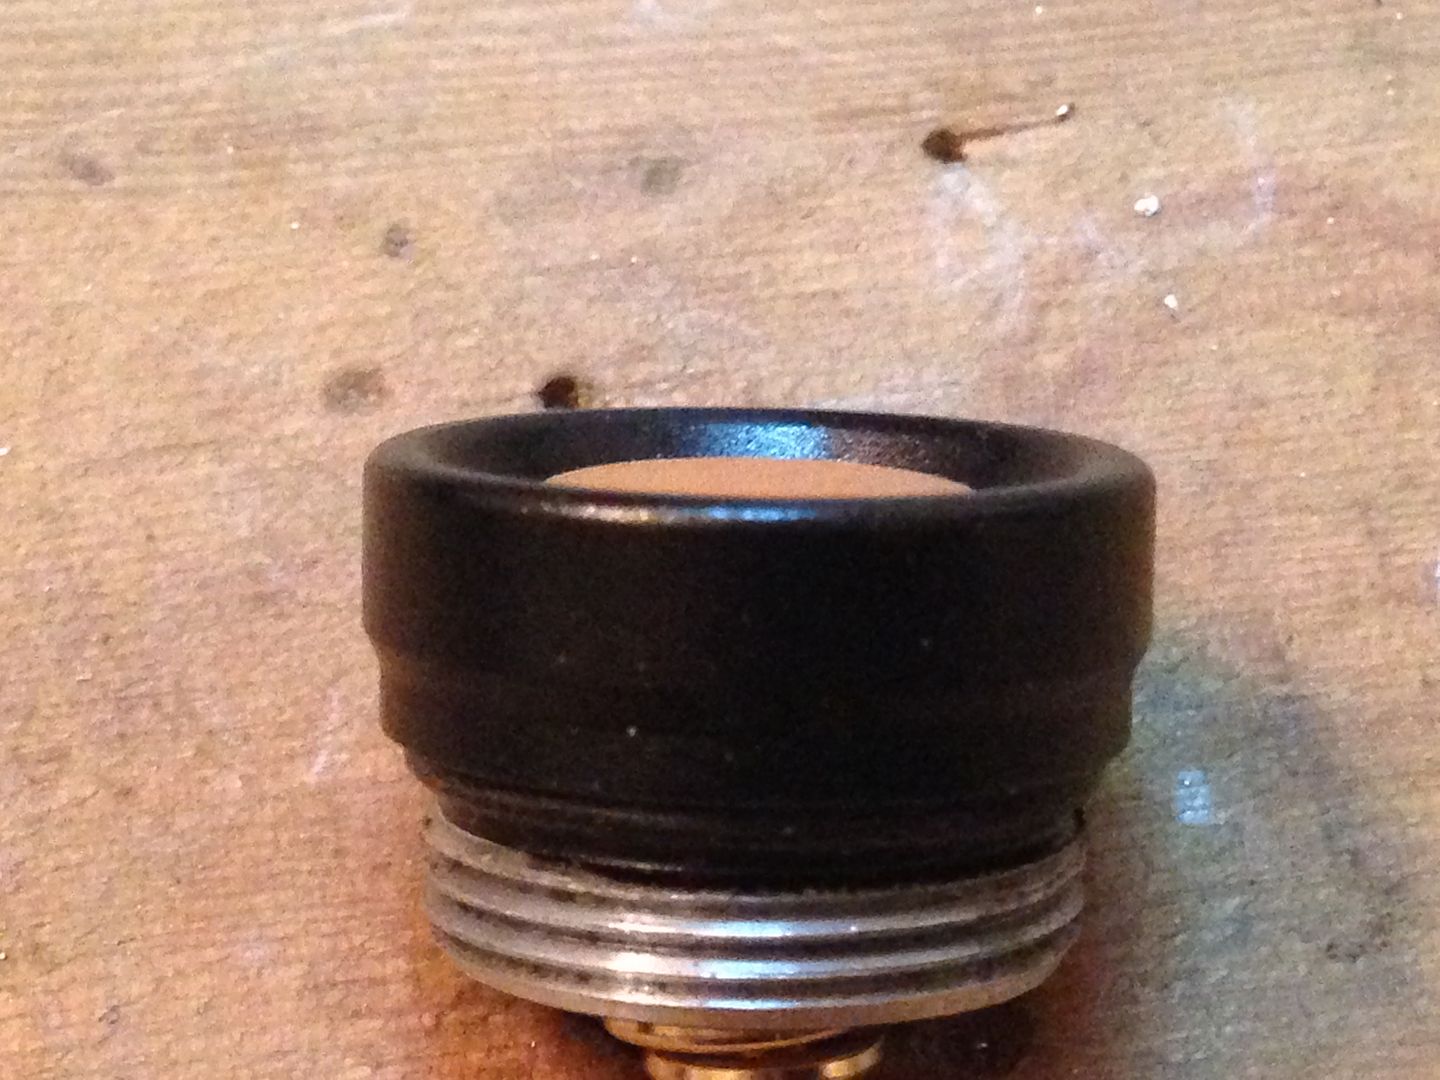
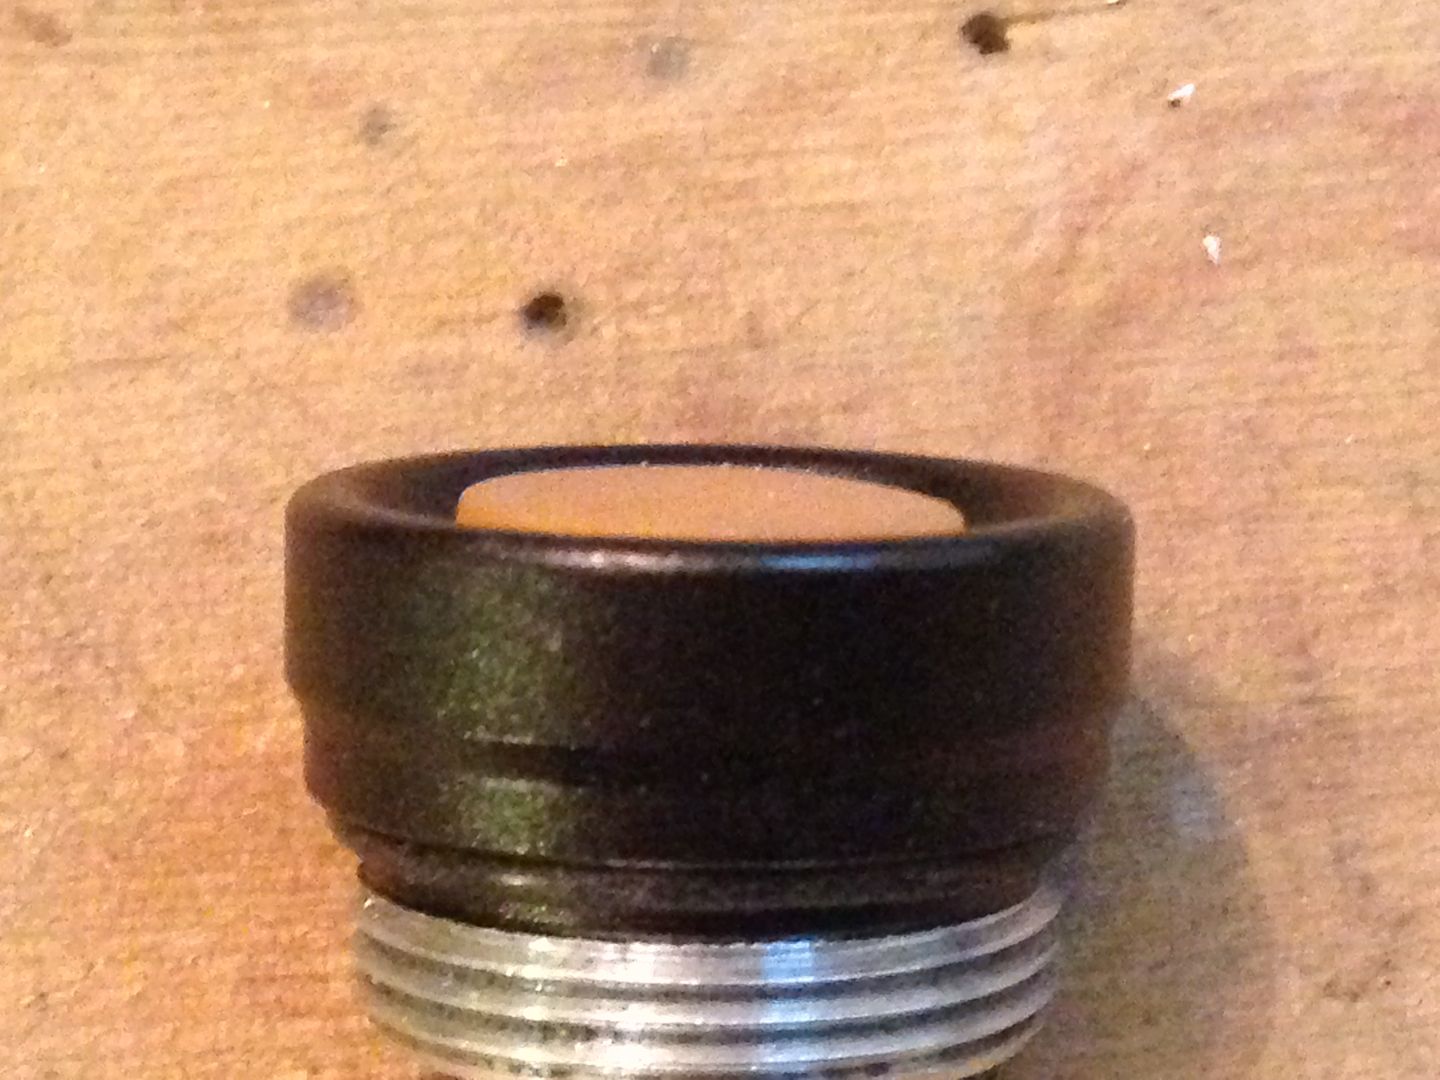 Much better! It still tail stands but it’s still mushy so I’ll add a drop of JB weld to the button to take up the slop and give it a better hair trigger since the driver will get a multi mode upgrade as well.