The spring is fine. It’s the switch itself that got a little funky.
I went ahead and messaged banggood. Hopefully they can help me.
Thanks. If I can’t get an actual OEM one, i’ll put an order in for this one.
About that driver that was not center, like Kenji said, if in place, the driver is in a slot, so it must be caught above the slot to the side, the retaining ring must be well out, and indeed the battery space must have been shortened, by 2mm.
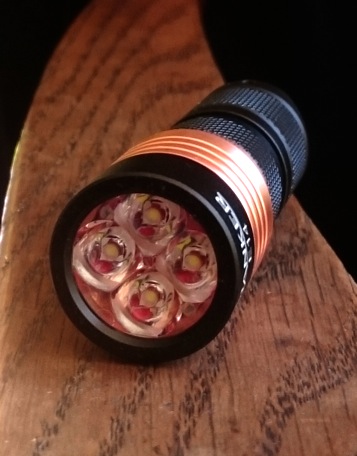
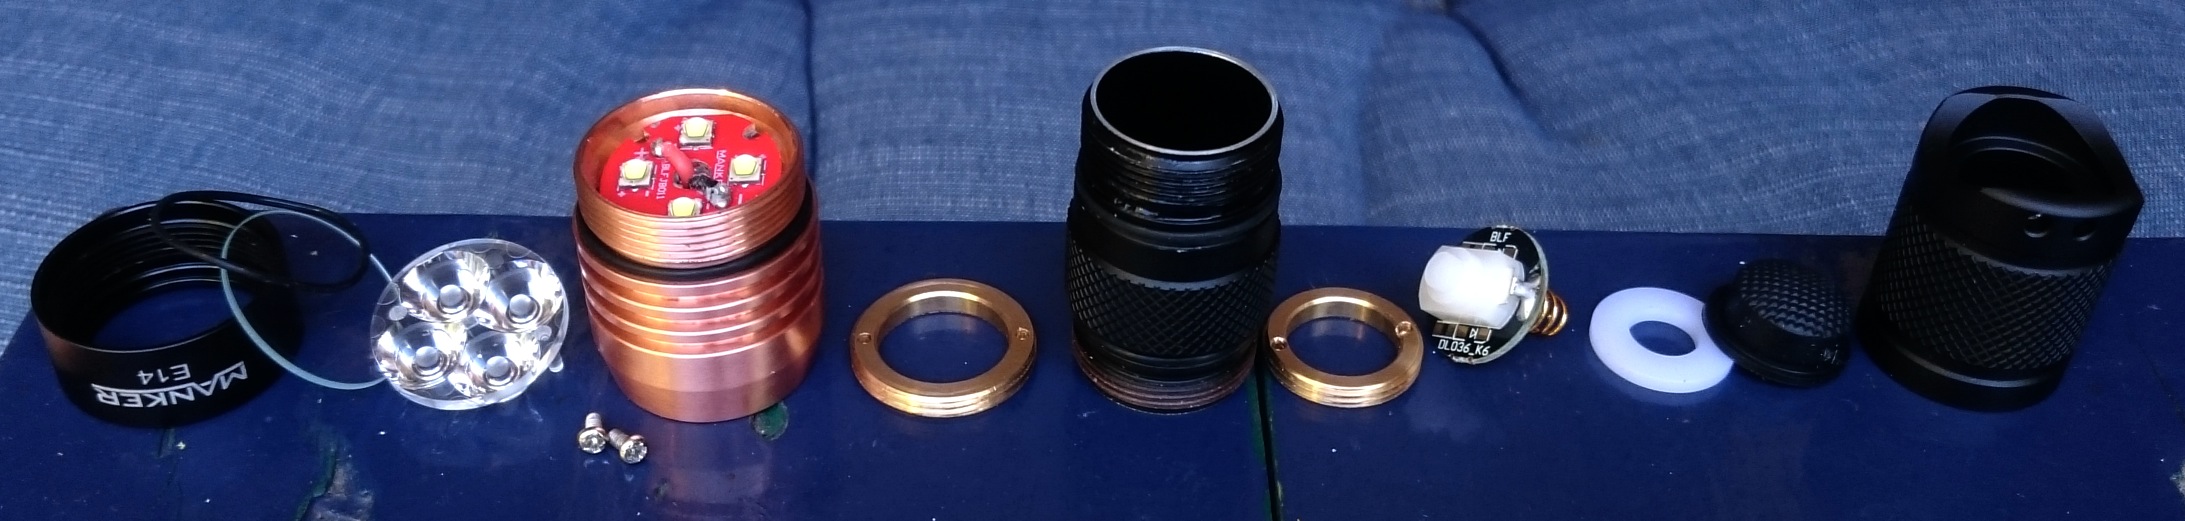
I had some time to have a look at the Manker E14 (with XP-G2 leds). A side-by-side comparison to the Astrolux E41 I can't show because I have not received it yet. But I doubt there is much difference between the two. Have a look for yourself :-) (the red tail-button from KD is my own doing):
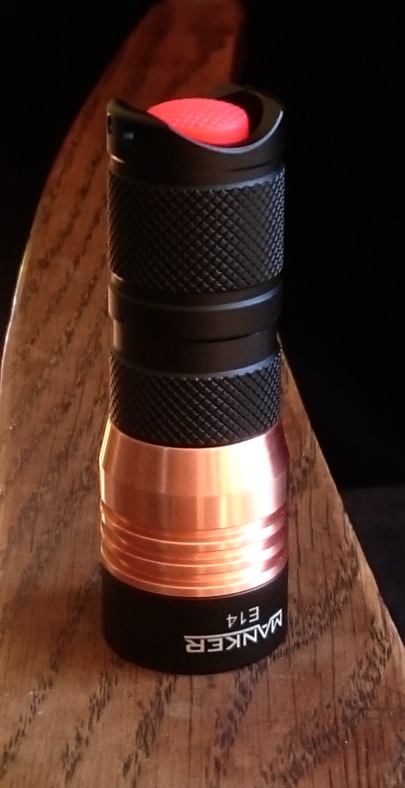
Both the head and the tail do not close fully, there's a gap that is a bit too large for my liking (you can just see both o-rings), but at least that ensures that the battery section makes good electric contact with both head and tail :-)
I was lucky with the ledboard, the led+ pour clears all 4 cut-outs (one by just a hair, but that is enough). One of the 2 screws was not tight, but I did not measure a performance difference after tightening it.
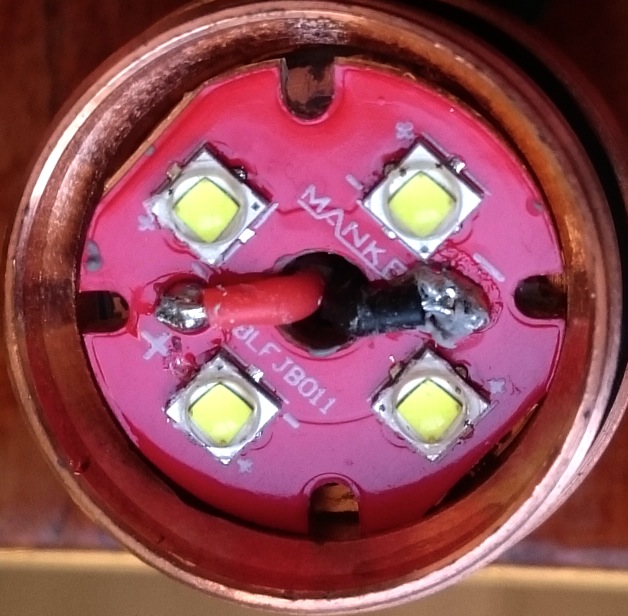
A bit weird design feature is that the switch-minus just has contact with the inner tail-spring, the outer tailspring seems to be soldered to a ring-shaped trace that has no electric contact with anything. The springs will touch each other when a battery is in the light so all is well in the end, but I do not understand it. Is this the same in the X5/X6? I have to look that up.
I re-measured the output on a now completely fully charged lila Efest 18350 and got 1805 lumen after 3 seconds, dropping to 1635 lumen after 30 seconds.
I removed the double spring and put in a (single) phosfor-bronze 'djozz-spring' that has three times less resistance than a steel spring. I did not by-pass the driver spring yet. The output did not increase significantly (1%), so the double spring apparently does the job fine.
That's it for now.
Will this light ever be produced with the Bistro driver?
I don’t have the skills or knowledge to do this myself, but hope it might be in later releases of this light. As well as any internal issues well and truly ironed out.
Kinda hope this happens to the Cometa too lol…
I modified mine :sunglasses:
x4 XPL HI U6 3A 5000K
Powder coated in candy blue
I think the metal quality is lower than convoy or other makes due to the chrome layer ‘fish eyeing’ underneath the candy, usually due to contaminants in the metal, or the quality of the metal. Although it still looks cool, like mini bubbles!
! !
!
! !
!
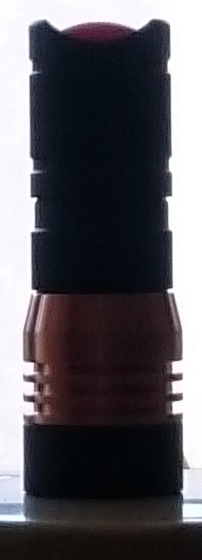
That does look good. Why does your bezel not sit all the way on the copper head?
I noticed that too when I did my first attempt at a spring bypass.I finally took one spring off and am using that with the copper braid.
Can you put a photo of one of the screws please?I want to see it so as to find a new one to replace the one missing,but I don’t want to unscrew the other,because I am afraid that I damage the leds.You see,I have already damaged the Cometa’s led. ![]()
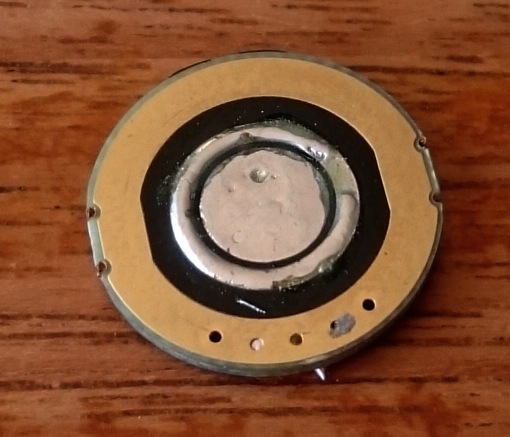
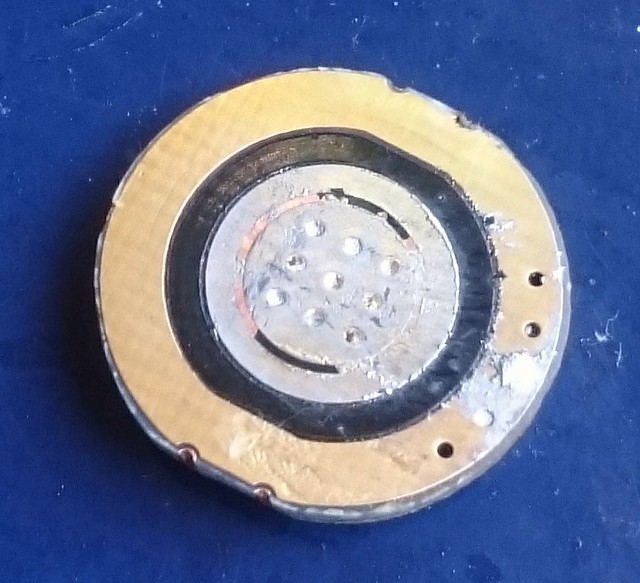
That tail switch pcb is the same in all the X6/X5 lights.
Ah thanks, I would have thought so. And since I re-assembled the light without measuring it: does that outer spring trace make electric contact with anything?
Whichever is the case, it just worked fine enough ![]()
Not much excitement needed: as I pointed out, the construction works fine as it is stock, and 1000+ X5/X6 were delivered and no-one ever complained about it.
But to answer the question, after a fast visual inspection I did not see any via’s from the outer spring trace going to the other side, but I was not really focused at it and also did not measure continuity between trace and switch- . To check it now, I would have remove the new spring, the giant solder layer connecting the spring traces and the switch to find the via’s. Anyone else? If not, I will check my KronosX6.
And to completely end the excitement (sorry, it could really not be seen before): I disassembled the tailboard of my copper X5, and while wiping off the solder, the rather loose solder mask between the two rings was wiped off too, and can be seen that it is one continuous copper round.
My Astrolux S41 and extension tube arrived today.
Initial impression:
- Very small
- Copper heatsink feels like it has some mass to it… much more so than a typical triple.
- minor scuff mark on side of the copper heatsink.
- spare 18650 tube had a few minor scuffs in the anodizing and did not come with o-rings.
I haven’t yet put batteries in the light. I’ll hold off till I have a chance to disassemble and inspect the traces near the screws in the head, and the seating of the driver.
For initial check, (first see if the driver is in the middle ![]() ) you can just check with your DMM for continuity between driver spring and pill. If there isn’t continuity, I would not be afraid to put in a battery and have a nice go and check later how narrow your escape was!
) you can just check with your DMM for continuity between driver spring and pill. If there isn’t continuity, I would not be afraid to put in a battery and have a nice go and check later how narrow your escape was! ![]()
My driver looks slightly uncentered. When I get home later today I’ll check it with a DMM and also unscrew and inspect the traces on the star. I figure it shouldn’t take more than 10 minutes for a thorough inspection. Don’t have a DMM at work though so can’t check it here.
My light works with 18350, but if I use the S1 18650 tube, it doesn’t turn on. So weird, I can’t figure it out.
More or less the same thing here: my S41 does not turn on when using the long tube or when using the short tube of the BLF SE A6. Though both fit well, the threads match. So I dropped in a makeshift washer I made out of a piece of copper wire and presto: fiat lux.
Both the long and the short tube of the BLF SE A6 are a fraction too short to make contact to the retainer ring of the driver in the Astrolux S41. With other lights this would not matter because in general the threads on the bezel side are bare and make contact “sideways”. But the threads of the A6 tubes are anodised on both sides. Except for the far ends, of course.
Got mine today, ordered 5/16, so 21 days total, not bad for a “backordered” light. Upon dis-assembly, mine seems to have had the pill dremeled to provide a bit of relief for the large screw heads. Light performs perfectly. Very pleased with it, sure is a pocket rocket! No washer added as someone way back in the thread said would happen on later lights, but I don’t care. It works fine. Mask on mine looks fine and no signs of closeness of positive ring to screw cutouts. Thanks Max for another awesome find!
Try turning the tube around. I found that one out the hardway. The tubes only work one direction, one end is longer than the other.
I can't get my Astrolux S41 to work with the 18650 tube no matter what. 