Did you try to center the switch? Evidently it can come off-centered causing issues like the one you’re experiencing. It’s covered in this thread. This is the fix per post #518.
————— snipped from post #518 ————————
T18
Offline
Last seen: 9 hours 5 min ago
Joined: 02/14/2016 - 12:29
Posts: 737
Send PM
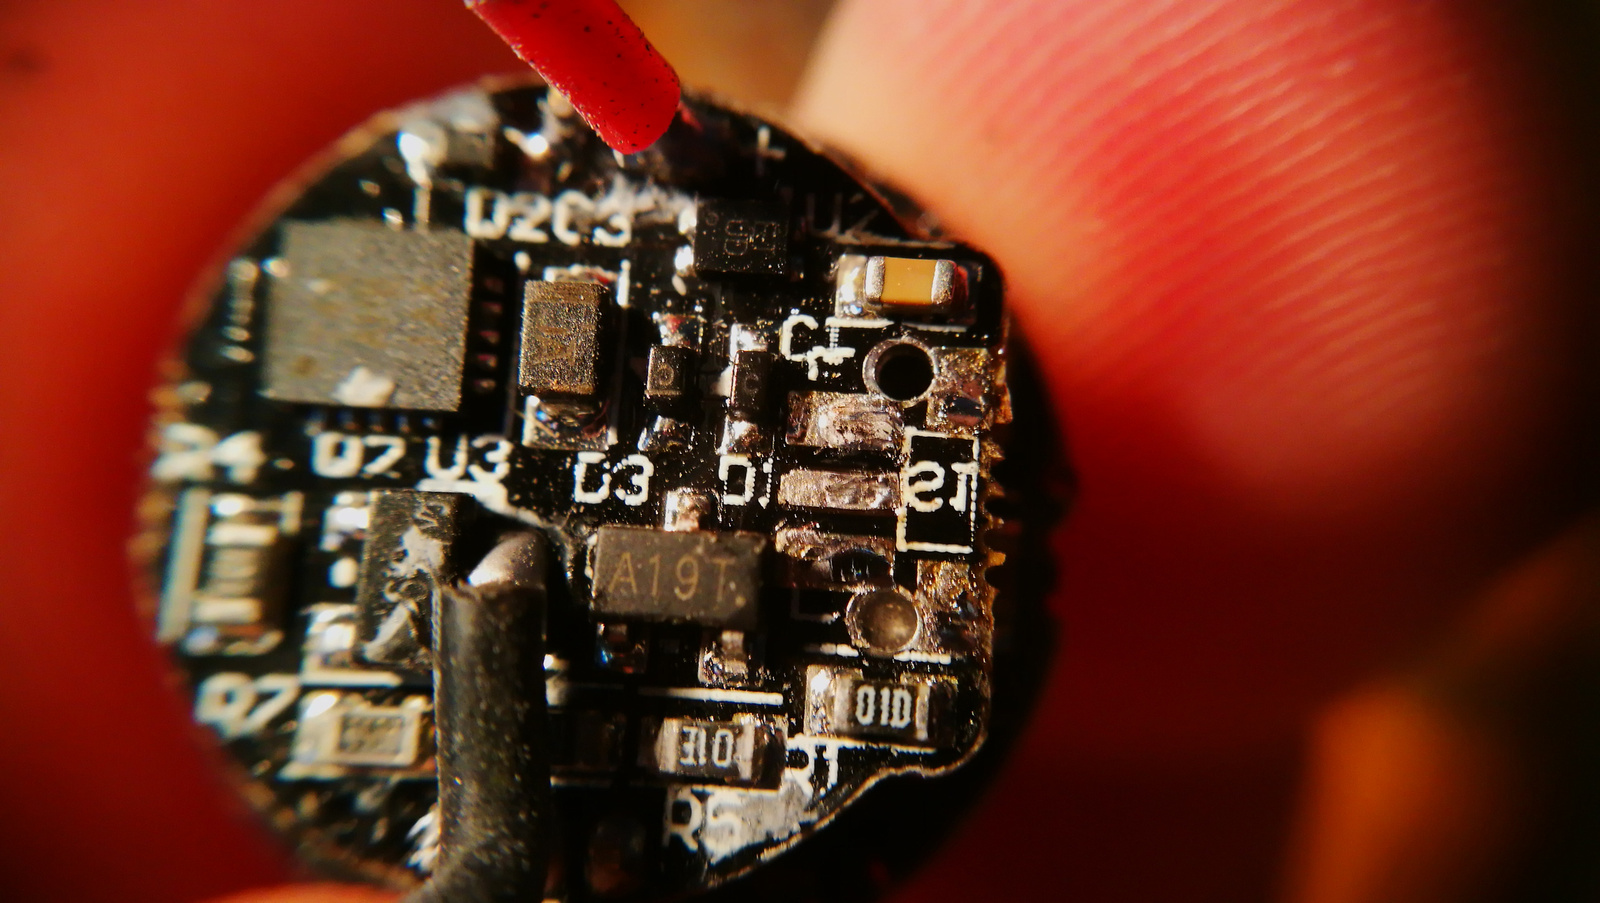
OK, fixed my switch issue.
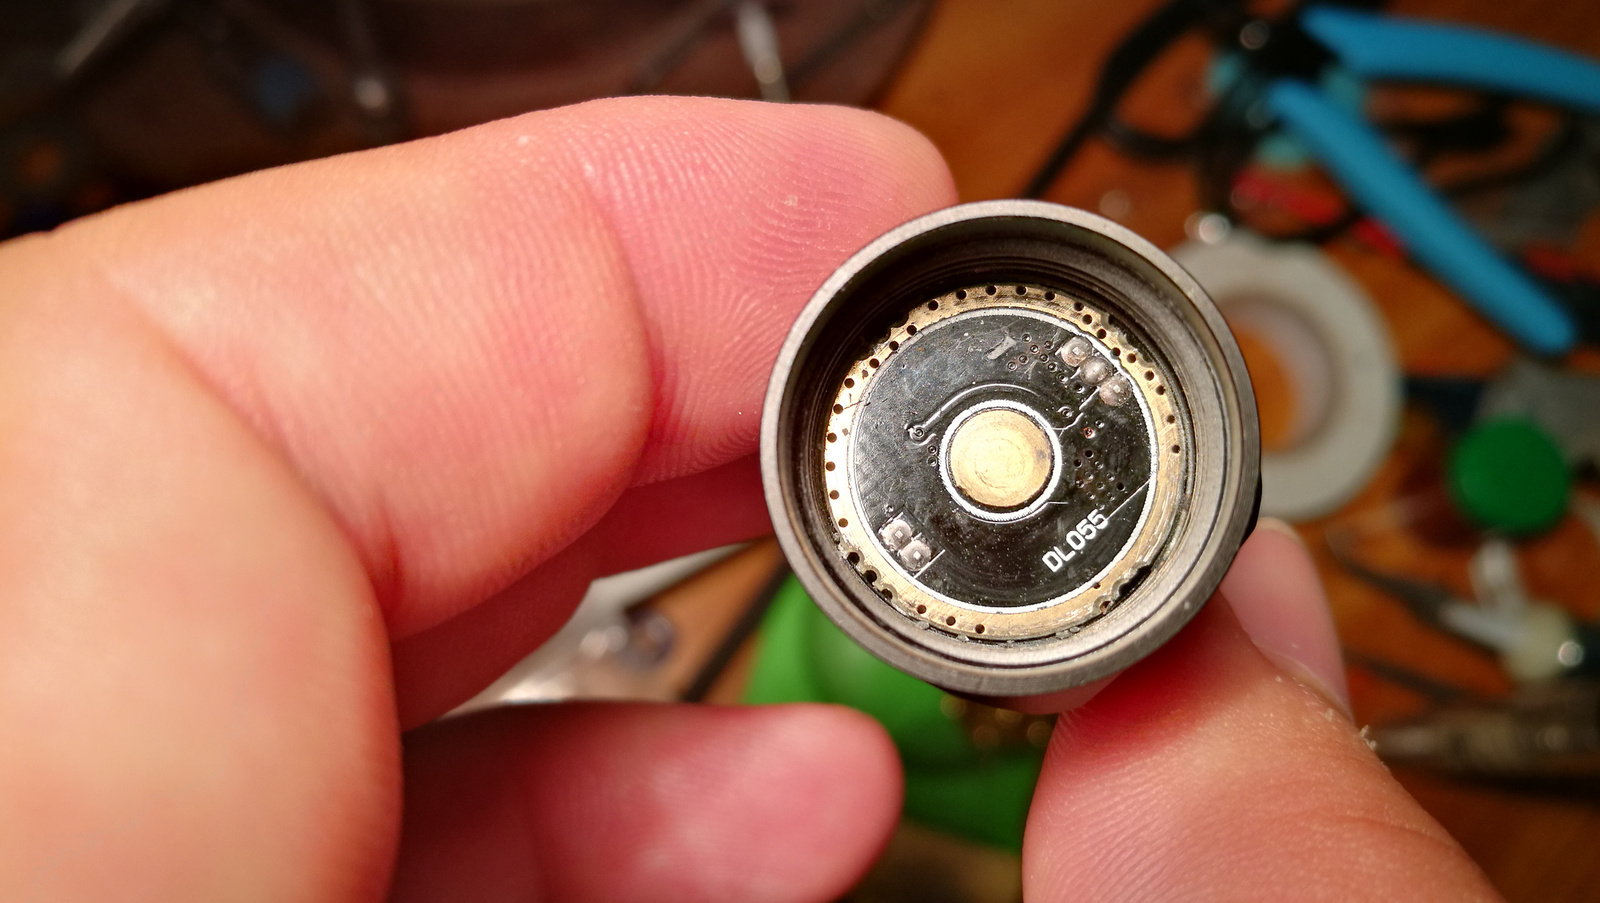
What was happening was the switch boot nub was catching on that flat ledge around the switch contact pad.
So all you have to do is remove the switch boot, very easy to do.
Check the switch by directly pressing on the switch contact and go through all your modes and on/off, check double click, check everything and if all your modes are working fine then it’s probably not centered and catching on that ledge, you should be able to notice easy enough.
So being that the driver, switch and MCPCB are all one piece, just get some very fine tweezers and inside the positive end of the driver take the tweezers like you where going to remove a regular retainer ring, and just slightly turn the complete driver assembly one way or the other until it looks centered and put the boot back in, it’s very easy to put in since that retainer isn’t really pressed down hard onto the lip of the boot.
And done,
Hope that helps someone, these are really great lights no matter what.
Thank You George, what’s next ??
Edit: By the way the reflector is threaded and mine had a small dap of glue on it, might be wise to remove reflector prior to twisting on the driver end…
There was also speculation that, even with a well centered switch, the material the switch boot was made of was too soft to make consistent contact. This really made me curious about how the “bead fix” might pan out.
So far so good. I’m playing around with it throughout the day to put some ‘reps’ on it. May just be the ticket I hope. Just had to find the right sized object to fit between the switch button and the boot.
Yeah. I bought a ~25buk green laser from FT. DOA. Reported it, “take video”, got replacement (my choice, vs refund). Another DOA. Same dealy, video, but refunded no problem. Sent back both, got credited the postage both times. Yay, FT! No grief, no haggling, no “how’bout 5bux and you keep the DOA laser”, nothing. Full refund for the cost and 2× postage.
I’m thinking now that some lasers require the cell to be installed backwards, ie, pointy end of the cell towards the tail, not towards the head. Never described anywhere, didn’t want to pop the driver (or cell) if something would short out if reverse-polarised, so never tried that. But never even knew of that possibility back when I bought it.
Anyhoo, the video showed me (one-handed!) dropping an 18350 into the tube, thumb’n’forefinger trying to screw on the tailcap, then aiming the laser at a white napkin and repeatedly clicking it to show no output. 30sec or so.
(One-handed ’cause I had to hold the phone-camera with my other hand. )
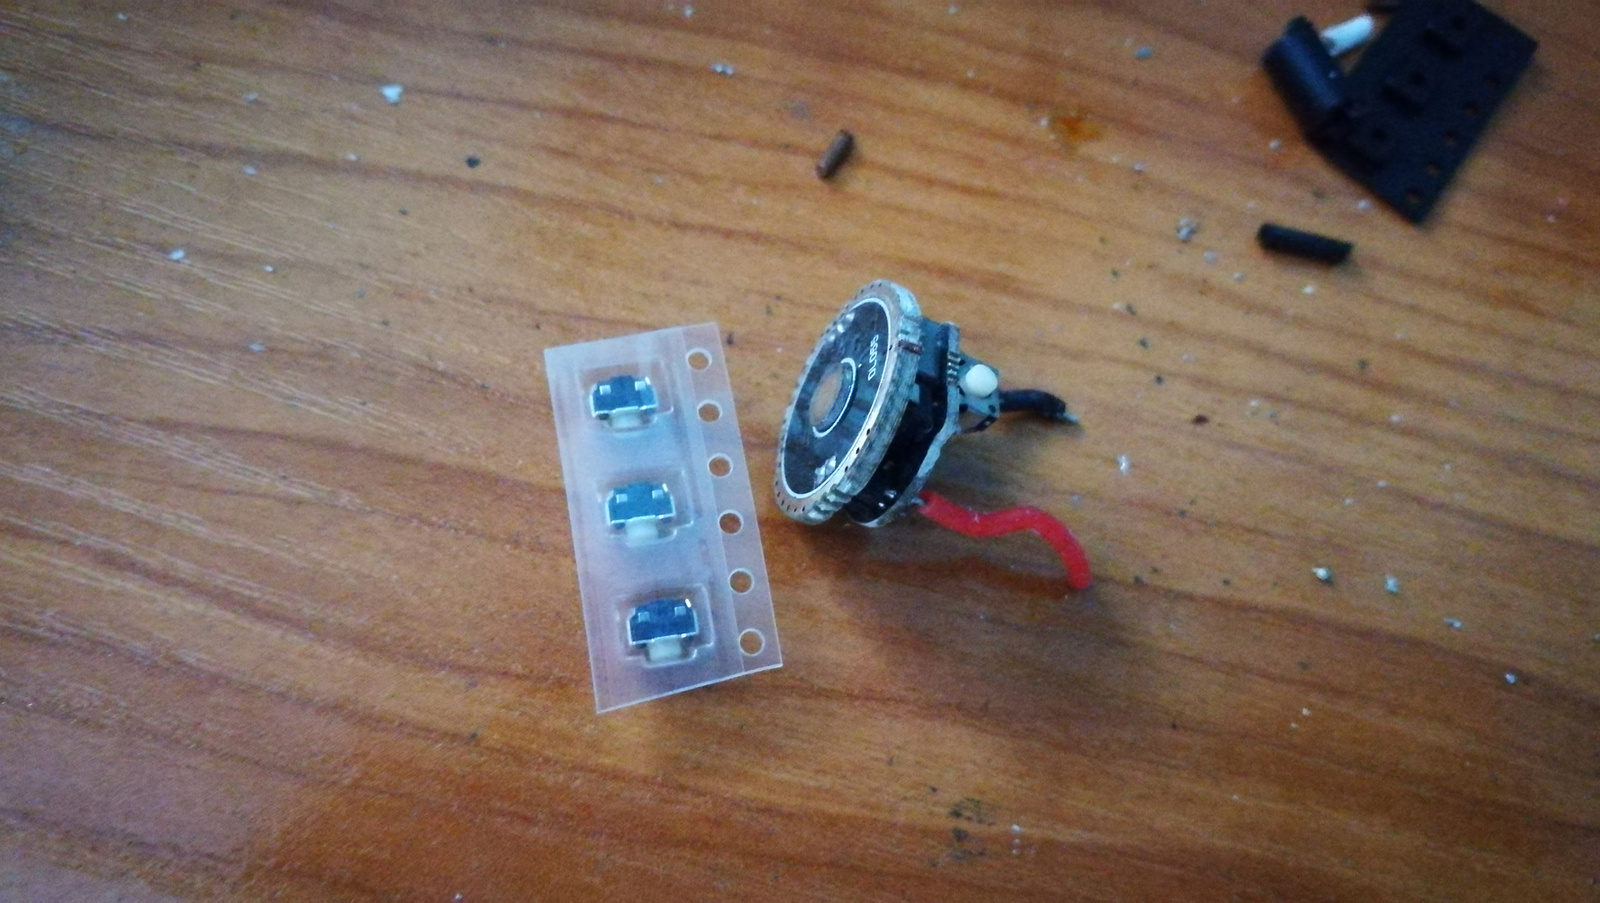
I got the new switches from aliexpress and also got full refund from gearbest.
Now I write down the switch replacement. This is the switch I used.
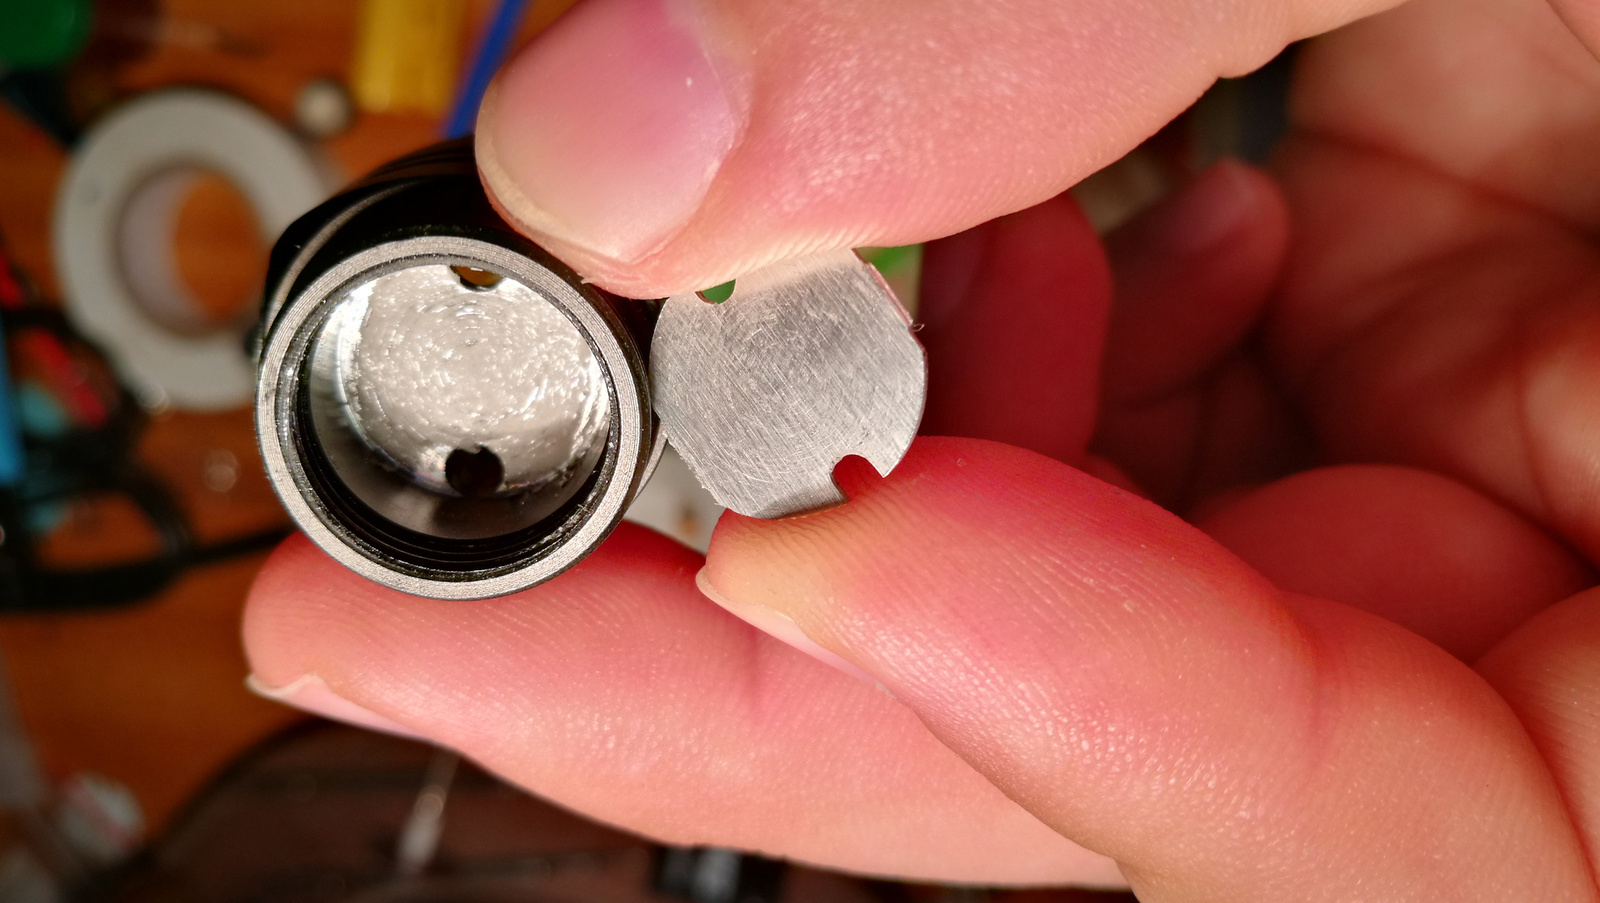
First you need to remove the battery tube.
After that remove the bezel. No glue anywhere.
The reflector has a thread to twist in the head. It may came off with bezel.
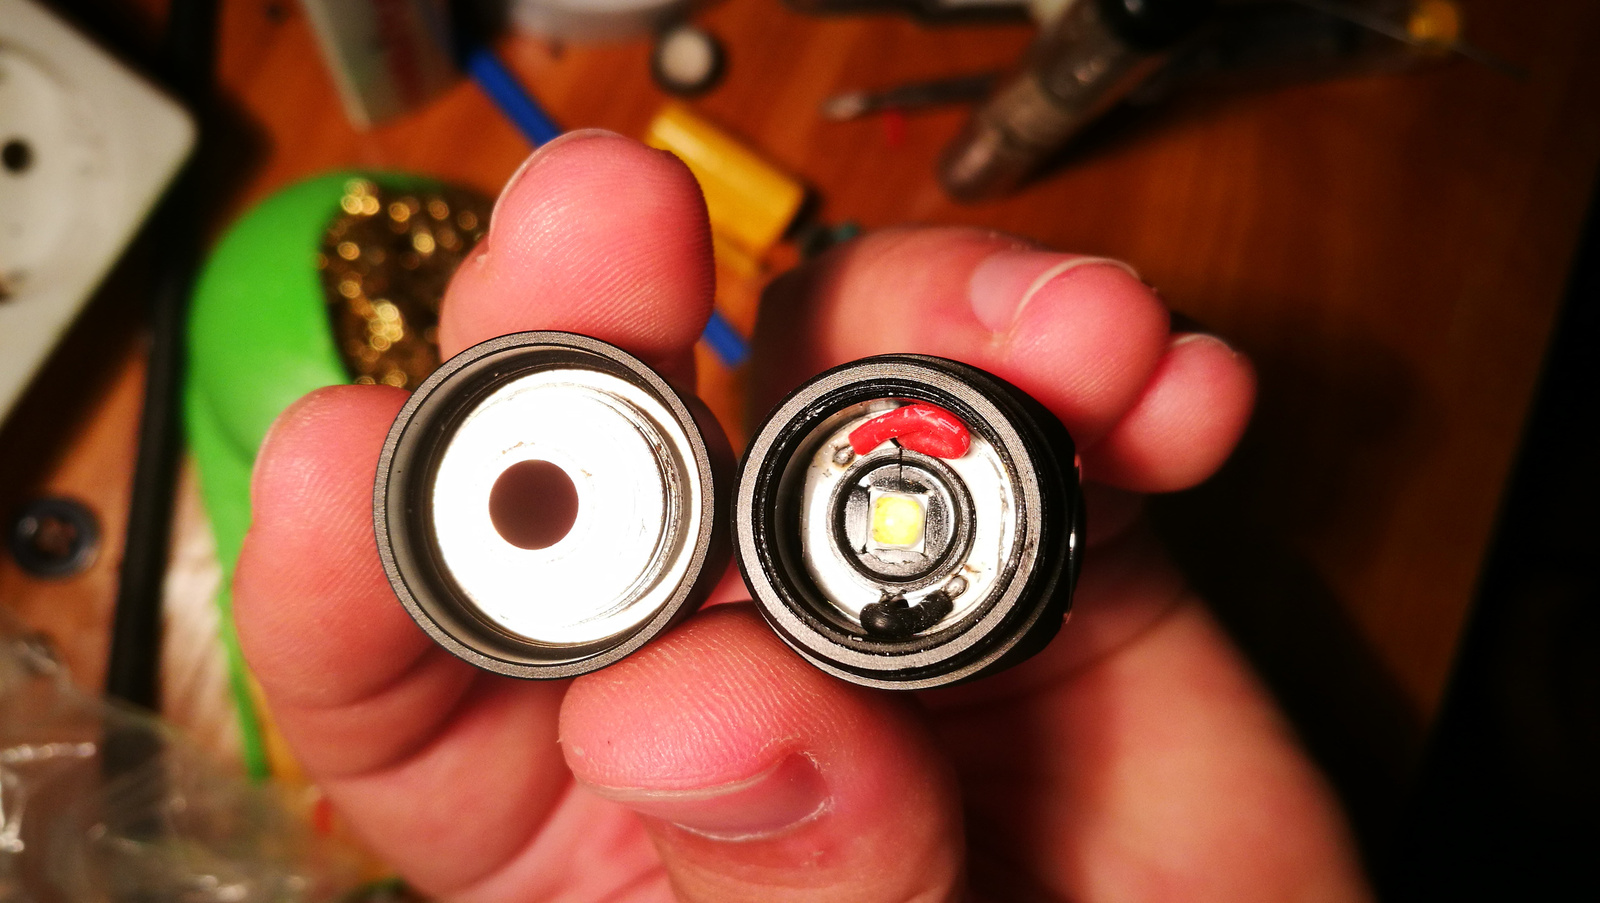
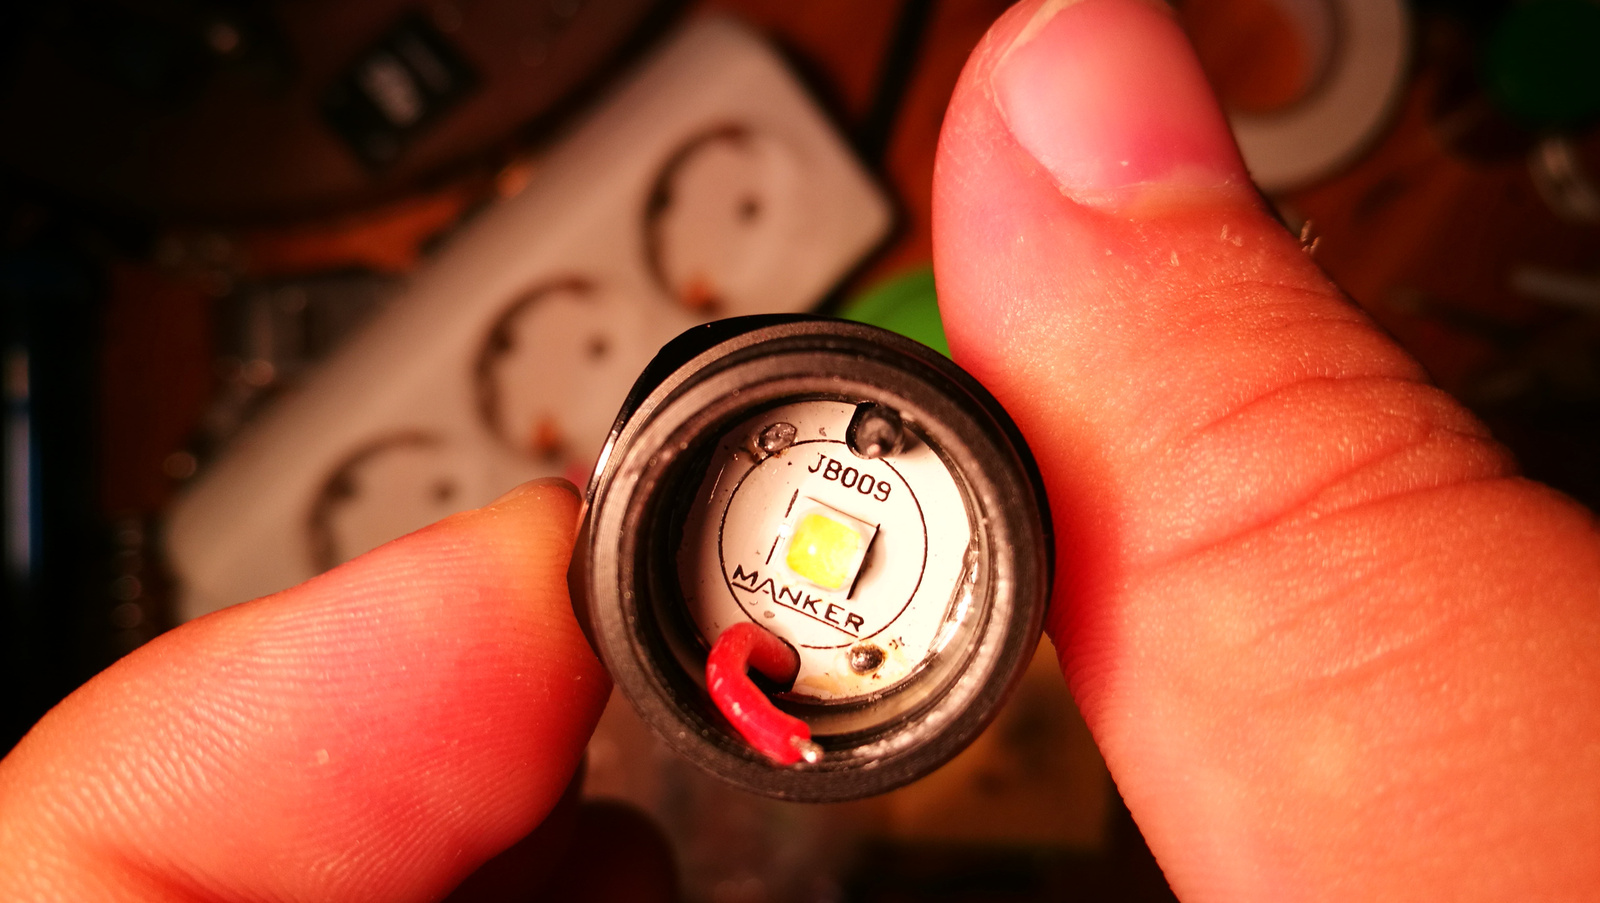
Then remove centering ring. Mine was cracked. And unsolder led wires with a pointy soldering iron.
The thermal paste was completely dry and the led MCPCB does not has any so the shelf does not touched the MCPCB.
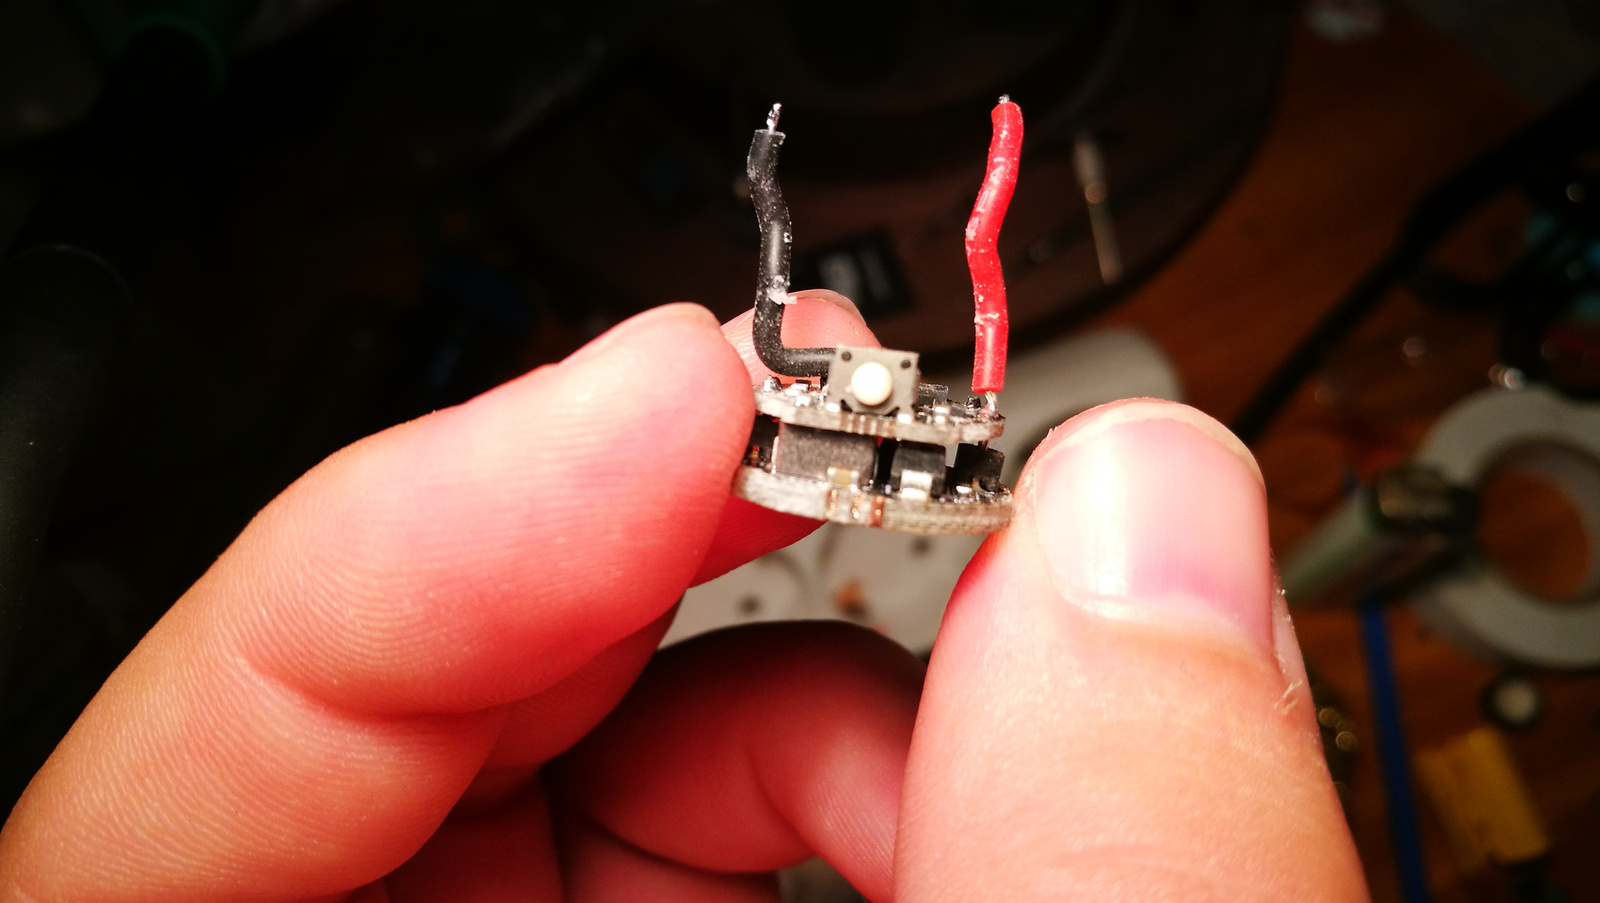
The driver came out towards battery. and you can see the switch.
I was worked in a Nokia factory as a product technican and we used this type of switch as volume buttons in Nokia 6120 Classics.
It is easy to melt and because there are 3 bottom pads it can easily peel off pads from PCB. So one way is to use hot air soldering to remove and not care about melting the bad one or I used soldering wick to remove solder and cutted the front legs with pliers. Then it came off but almost peeled off the center pad from board.
You can see the removed switch place on the right. One bottom leg is very hard to unsolder or resolder because a component is too close to reach wirt soldering tip.
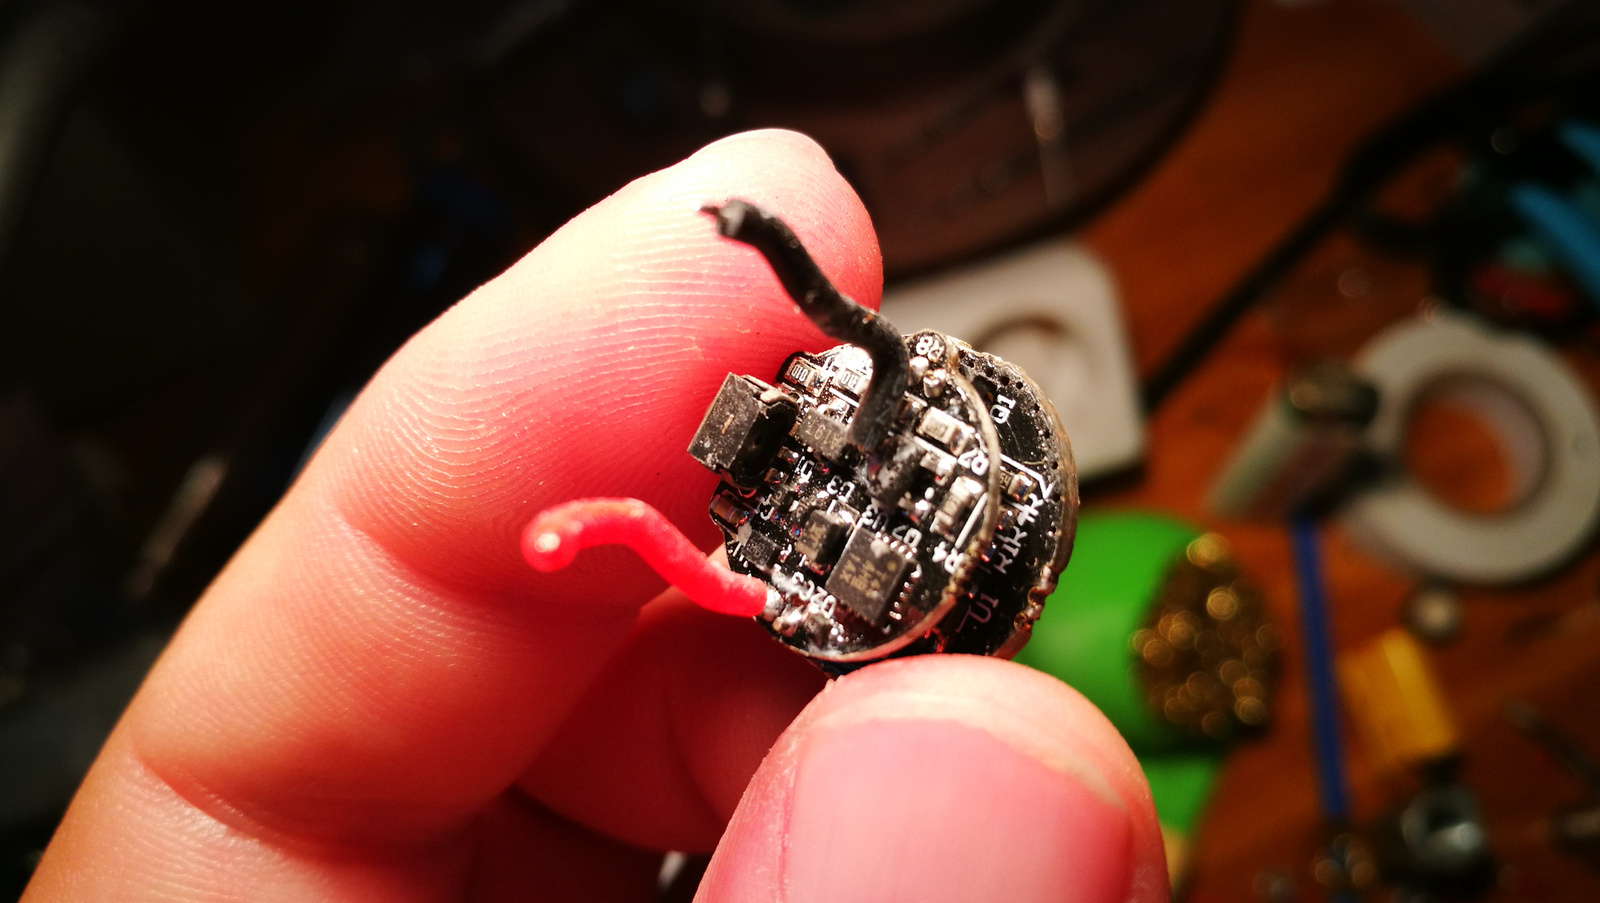
Two of the bottom pads are connected together. The first with the third one. So I soldered the fromt support legs more and the bottom third pad I left unsoldered. It works that way too and strong enough. Then reassembled and added a good amount of thermal paste. Now it is perfect.
If somebody want to replace and not sure in his soldering skills try something else first. This is not the easiest job.