Flash went off
its light green
I got two in today. Same thing - got the bezel off with grippy gloves - no luck on the pill yet. Glue is rubbery - nothing like a thread lock type.
Output Measurements on a SANYO GA cell @4.18V:
Hi: 371 lumens (@30 secs), Med: 119 lumens, Lo: 19 lumens, throw: 7.1 kcd
Tint is true blue cool, but doesn't look bad with a zoomie.
If you flash the 13A, just be aware of the R1 resistor value for LVP - not sure what R1 value is. Could add a cap for OTC, or use brownout detection.
Driver replacement is tricky - spring is Batt- and the ring around the spring is Batt+. Best to mod up the stock driver. A FET is not so good in this light because all the extra runs of battery leads, like Batt+ coming from the tail to the driver, but looks like a decent copper strip in the carrier.
HKJ's tests on the 30B cell shows about 2500 mAh charged to 4.2V, so not bad even at 4.2V. At 4.35V it does about 2900 mAh.
It's a quality light, I believe worth $10 easily for the light alone - real nice SS switch, looks like a decent plastic lens, small flood, not quite round, but not much in artifacts zoomed or not, also a battery worth another few bucks - quality Samsung cell. I'd definitely add maybe 2 7135's or so to give it more power, and re-flash with brownout detection - might replace R1, not sure, and worth look'n at swapping the LED - certainly for something neutral and/or something more throwy.
Is this a XM-L2 led? Might have to get a couple.
Yes.
Thanks,
I ordered 2, and they have already shipped. Gotta love Prime.
These are the glove I used to break open the bezel:


This is what I used to get the pill out:


Driver prys out easy:


This white retainer was maybe the most difficult thing to get out - poked it out from a LED wire hole from the driver side, then pryed off with a thin screwdriver tool. Very hard plastic, a pain to pry out - some damage to the aluminum ridge that I can sand out:

Lot of thermal grease:


Cleaned up:

The R2 resistor is 19K, wired after the diode. The cap is also after the diode. The clearance over the driver is tight but think piggyback 7135's should fit. The pinout wiring is standard - voltage dividers on pin #7, 7135's on pin #6, outer ground ring connected to the spring for Batt-.
Standard 16mm PCMCB, thin though - think it's 1.0 mm.
Got my 4 today, will be great Christmas presents! All four work properly.
Just noticed - R1 and R2 are reversed between image in post #19 and mine in post #26 - interesting... Gotta check if mine is wired up correctly. Both might be, one goes to grnd one goes to power - forget which.
Mine came in today… Does not work! ![]() The battery carrier and switch work, but the driver does not. It will not charge either since it appears to need the driver present to do so. It does not want to come apart with 1 strap wrench and a hand, so I guess it is going back!
The battery carrier and switch work, but the driver does not. It will not charge either since it appears to need the driver present to do so. It does not want to come apart with 1 strap wrench and a hand, so I guess it is going back!
Really bummed by this.
I confirmed my R1/R2 are reversed - interesting...
Bad news on that, mattlward. Is it the bezel you can't get off or the pill from the tube?
I can’t get the bezel off, I would take pliers to the pill and it would come out. But, looking at the driver… i am not sure what would cause the failure. I assume that there is no continuity through the driver.
I got it working… dumb**S attack. I had the battery in backwards. Now to get it apart and get a better led in it and beef up the driver!
Same thing happened to me. It’s kinda counter intuitive to put the b+ up like that. Otherwise great value , nice battery that checks in at 2530mah (@4.2v) and built in charger does 4.23v checked with my fluke (4.35v Samsung so it’s ok). My bezel came off easy with just a touch of glue. Great value if you plan to give away, quality battery, built in charger, decent output for $10.
I have the BD03 and should have known better!
I'm going with a dedomed XPL V6 0D, and will try 4 more 7135's. The driver is not so simple to replace. Batt- at the spring, and the batt+ ring around the spring...
despite being repeatedly instructed to take the paper off the positive terminal, it took me a while. the paper was cut to the exact dimension of the terminal and actually looked like nothing was on it. after looking more closely, a duh moment. works great now.
Make sure to clean off the adhesive slime also that is left on the contact for the best connection.
I tested mine today and it charged to 4.21 volts, so I’m a happy camper:)
This is one of the best deals of the year.
Later,
Keith
Man, my bezel is really tight. Strap wrench and 8” channel locks with rubber in the jaws and it will not budge! I guess next I will try some heat on it from the hot air gun. Gotta reprogram that driver, change LED’s and up the drive current.
I do like the body, it has good feel and seems solid as well.
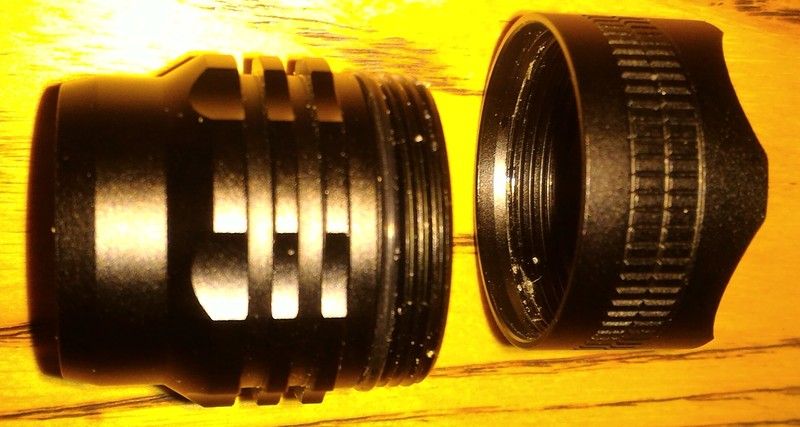
Matt,
here is a pic of the bezel off. Shows where the head and bezel separation is. May help with hold or where to hold.
Did everyone see Keepitsharp's method for cracking open anything?
OMG! Best yet: https://budgetlightforum.com/t/-/42267/42
His pictures here: https://photos.google.com Keepitsharp cracking open lights method