WOW.
Really incredible results everyone. I almost want to throw my cheap zoomy in the oven to give it a go, or at least try the bezel real quick.
There’s no damage caused to the metal or oven(or subsequent food cooked in said oven) right?
WOW.
Really incredible results everyone. I almost want to throw my cheap zoomy in the oven to give it a go, or at least try the bezel real quick.
There’s no damage caused to the metal or oven(or subsequent food cooked in said oven) right?
Is there a learning curve? Or can you jump right in with your favorite light? ![]()
So has anyone tried doing this while leaving the light assembled? Of course I mean after you take out all the innards. Does it give a move even effect? I’m now tempted to try this on one of my SK68 clones or something.
I think it would be even more variation as far as the color goes. You would have the overlapping threads, and still the thin metal on the center of the battery tube.
Its a bad idea since the metal will expand with heat and will damage the screw-in thread. I’ve done that and the tailcap got stuck and I had to use brute force to get it open while damaging the thread .
I’ve not tried to take an SK68 tail switch apart and if pressed in it could be a pain. Pulling the pill and lens and o-rings is too easy to not do.
I got the tail switch apart. You just have to press it out by using something flat like a big screw and press on the rubber boot/button. Then it should pop out. I broke the plastic ring, but glued it back together with some CA glue I use for fixing RC planes and stuff. Now I am trying to figure out how to separate the glass lens from the bezel.
EDIT: I found out that you just have to tap the lens with a piece of wood sitting over it and a hammer. Came right out. Time to clean it up and pop it in the oven.
This is crazy cool, I have a couple 502bs sitting here that are starting to look a little undercooked to me! ![]()
Might give this a go.
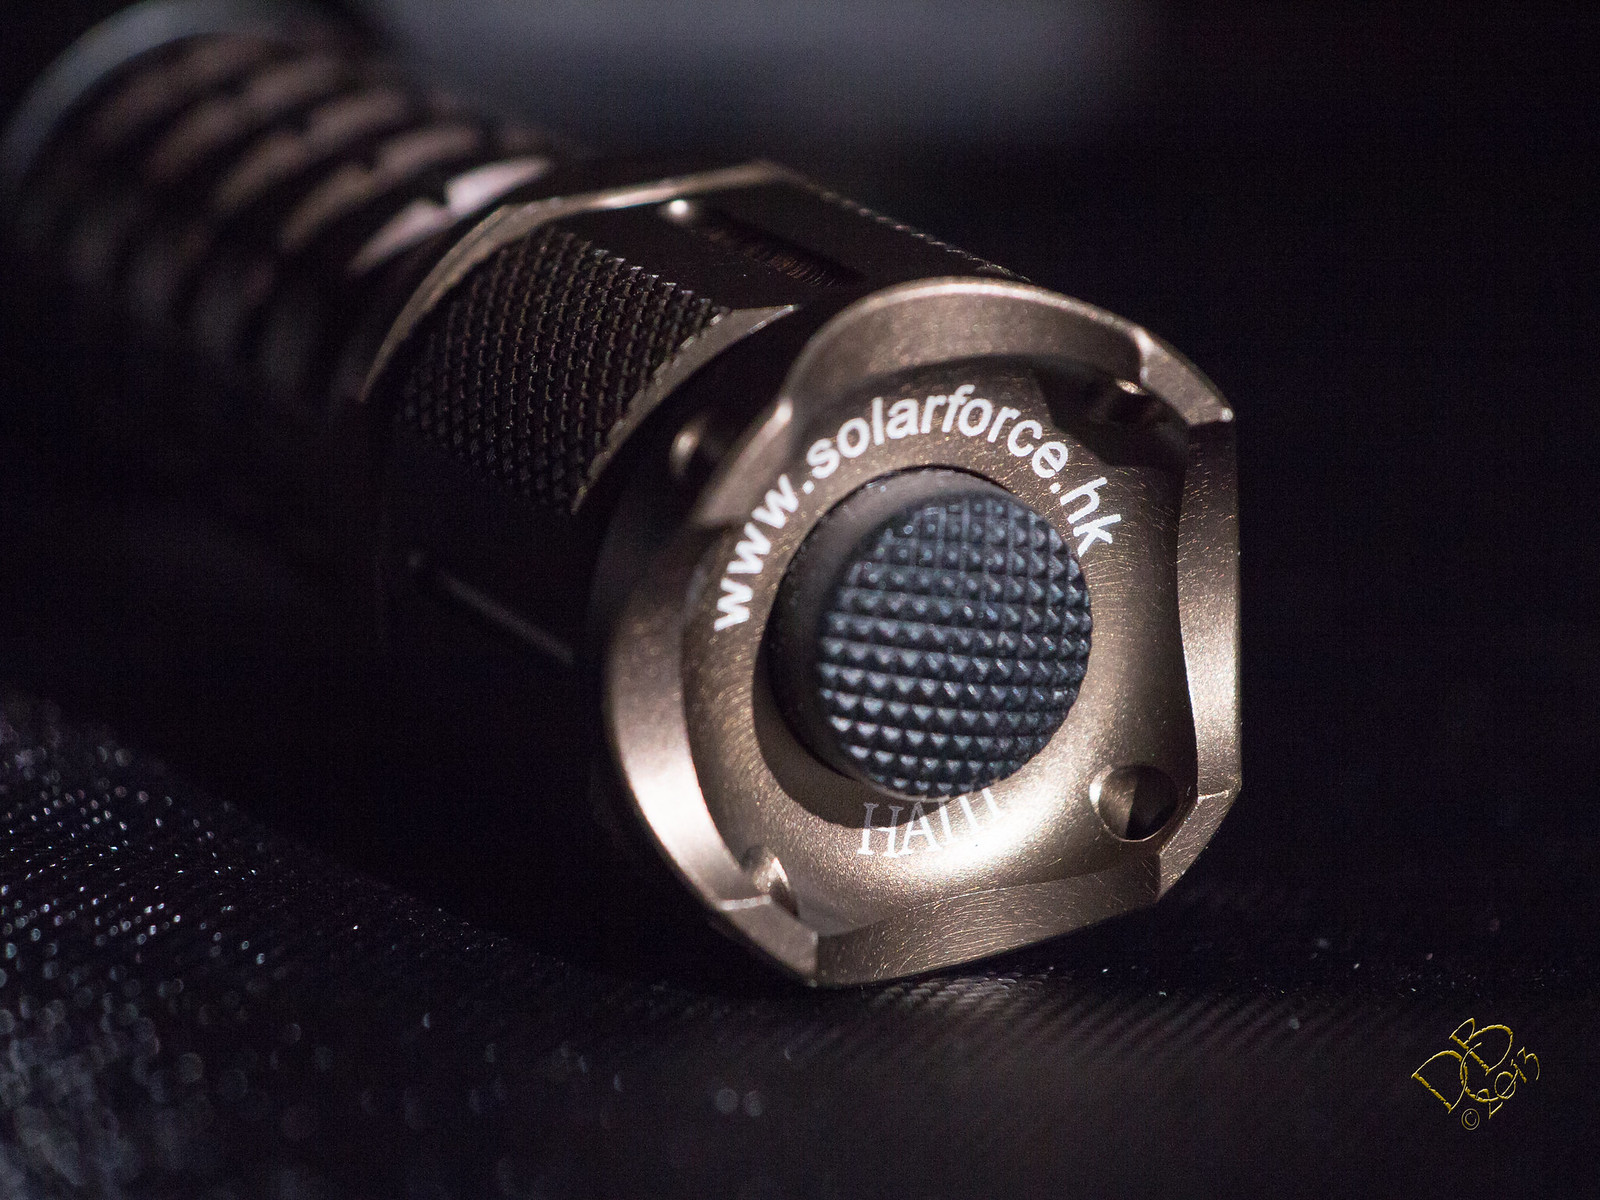
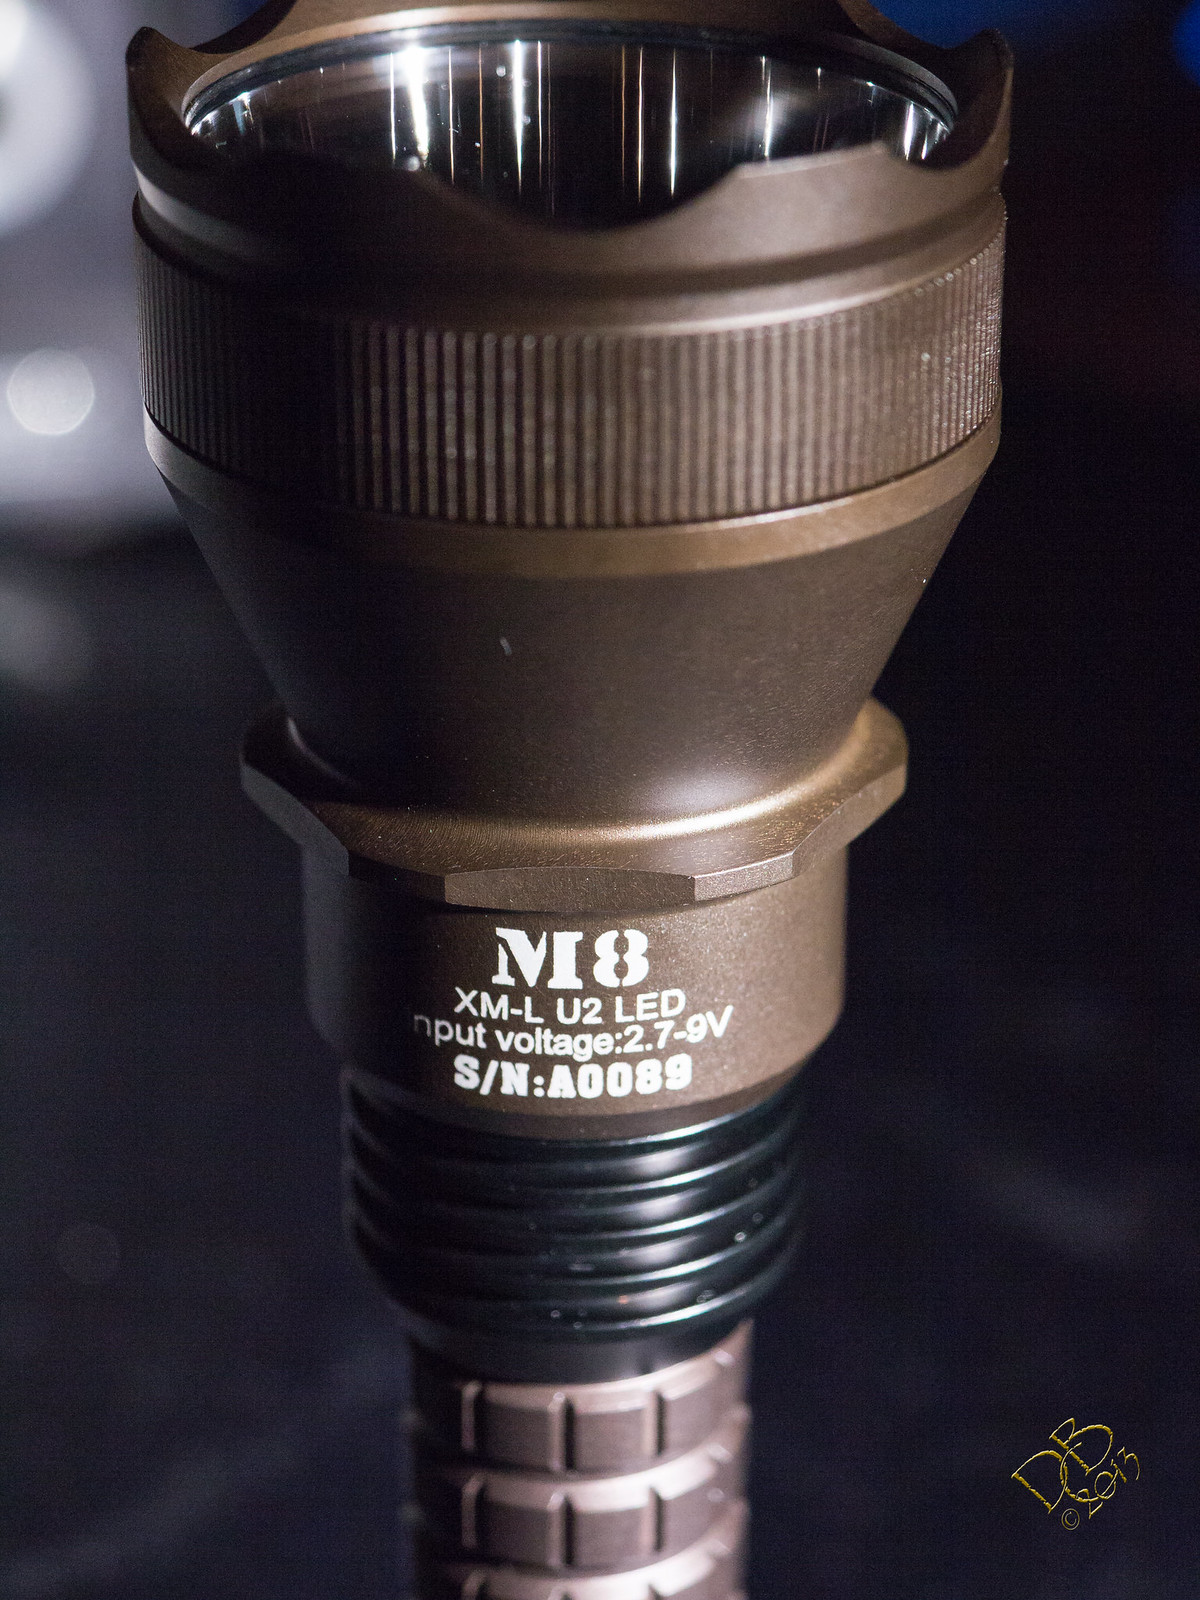
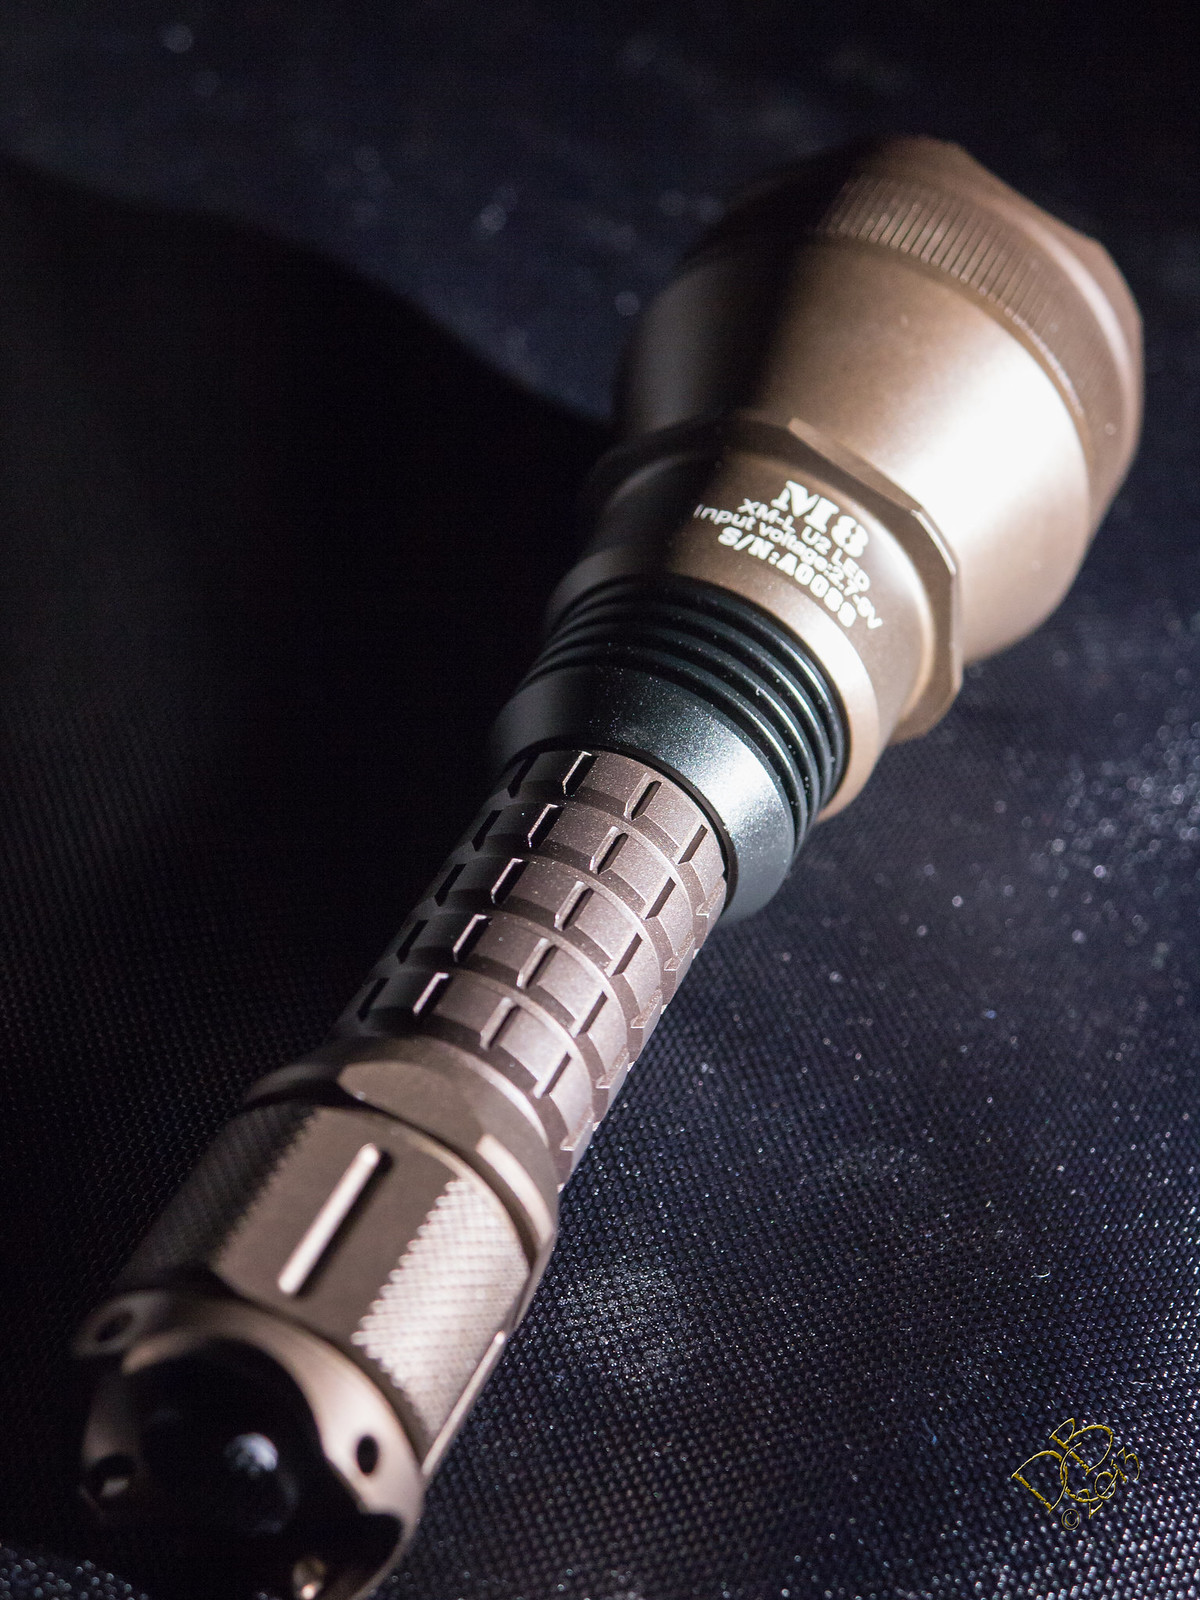
Not being one to play it safe, I tried this for the very first time with one of my favorite lights, The Solarforce M8. I didn’t want to take the emitter and driver out…again…so I just baked the tube, tail and head/bezel. I set the oven at 550º and the battery tube with tailcap on top was a favorable color in about 50 minutes. The head/bezel stayed in about 25 minutes longer and now everything but the finned pill midsection is a nice golden bronze color. There’s tiny haze cracks all over, like it’s fractured, lol. When the head cools down I’ll get it all put back together and snap a pic or two. ![]()
This actually looks pretty cool, it’s got an olive drab green look to it under normal room lighting. The M8 is etched into the light with a military style block letter, so it looks very fitting. The battery tube is a bit darker, odd as it was attached to the bulkier tail cap. I had the head with bezel attached face down (bezel in contact) and the battery tube with tail cap on it with the threads down both pieces sitting on an old aluminum teflon coated grille. The heavy piece of aluminum under them served to equalize the heat, I was thinking, and it all came out quite well.
New silicone grease on everything and we’re good to go! I’ll get some pics after supper.
Edit: Pics added


It does look like a military-like olive-brown-ish color, nice!
Here is how my UltraFire SK68 clone came out. The front is darker than the body and tail and I left the body and tail in about 20-30 mins longer than the front and it wouldn’t darken up so I just decided to be done.
I took it apart. I tapped the lens out by putting a piece of wood over the lens and then tapping it out with a hammer. To disassemble the tail cap, take a screw with a flat end about the size of the rubber boot and tap it out from the end the boot is at and it should come out of the side where the spring is. To remove the pill/zoom tube just stick a pair of needle nose pliers or something like that in the two grooves and unscrew. Make sure to separate the pill from the zoom tube. Make sure to remove the o-ring on the tail cap and possibly the zoom tube that the lens/bezel screws onto if it has one. Then take all the parts and clean them with soap and warm/hot water. I left the clip on it, but the clip appeared to be painted as it did not change color like the rest of the light did.
I put it in the oven while it was still heating up. It was at about 350 when I started, but had it set to 500. I have an old gas oven. I put it on the middle rack of the oven on a pizza pan. After about 10-15 mins the front bezel and zoom tube had turned a dark brown/copper so I suggest checking on it after about 5 minutes if this is the color you are after. I took the bezel and zoom tube out and left the tail cap and body in for another 20-40 minutes checking on them every 10 minutes. They got a little darker, but not much. They came out a lighter copper/orange color than the bezel and zoom tube did. After that I was done and let them cool. If you want it to be a more red color, then check on the parts and pull them while they are red as they change. I noticed the body was turning a red color after about 15-20 minutes in.
To get the lens back in, just tap it with a piece of wood over it like you did to remove it. To put the tail cap back together, just take a socket or something and tap the switch assembly with spring and all back into the tail cap from the end that screws into the back of the light towards the end you push to turn the light on. After that, you should be able to do the rest easily. Make sure to remember to re-install the o-rings.

That is fantastic. I’m thinking about doing that to my sk68 already, and it’s still in the mail!
I was wondering if anyone knew what would happen to a Fandyfire UV-S5 in an oven? I’m not too fond of the “desert yellow” but I love the copper color on that sk68.
Love that shiny red-bronze color! :heart_eyes: Sorry, I’m not good in coloring terminologies.
sk68s come out really nice imo
I also did a sk58 and it turned gold and ugly brassy very fast because it;s so thin
the sk 68 I left the ft bezel and tail black and it looked pretty cool
I baked the tailcap and tube for almost an hour, the head/bezel for about an hour and a half.
Wow! That’s M8 looks fantastic! That’s one of my favorite lights too by the way. Not sure if yours is modded but Vinh did a number on mine and it’s INSANE now. XML2 dedomed ~5amps, it has some serious throw. ![]()
Thanks for all the pics and discussions folks. All the lights look great!! Keep em coming!!
Now I feel to do some baking. 8)
edeekeos, yes I modded it myself for similar performance. I put 1/2” thick copper heat sink inside the pill and it’s re-flowed to the brass sleeve inside, Noctigon pcb with XM-L2 T6 @ 5000K. I really don’t like the tint on a de-domed, so it’s domed still. Seeing over 5A on a fresh Samsung 20R.
Used a Qlite with 8 stacked chips, and made a copper “washer” to fit the Qlite to the pill so it’s got heat sinking to the pill area of it’s own.
Throws around 600 yds, or I should say it puts visible light on a barn 610 yds from my test site.
One of my favorites for it’s heavy build and design. I’m probably going to have a new pill made out of solid copper, and put an MT-G2 in it. The reflector works quite well with an MT-G2 and by making a duplicate pill a little wider in diameter and about 6mm longer with thinner fins and a solid core I should be able to drive an MT-G2 in the 6-7A range for well over 3000 lumens. ![]()
A vice, a strap of leather on the threaded end, and a cork from a bottle of wine stuck into a 12mm socket on the lens are the easier way and more gentle on the surface of the lens. Then again, could be just my opinion - I prefer controlled power at a slow rate over punches and brute force.