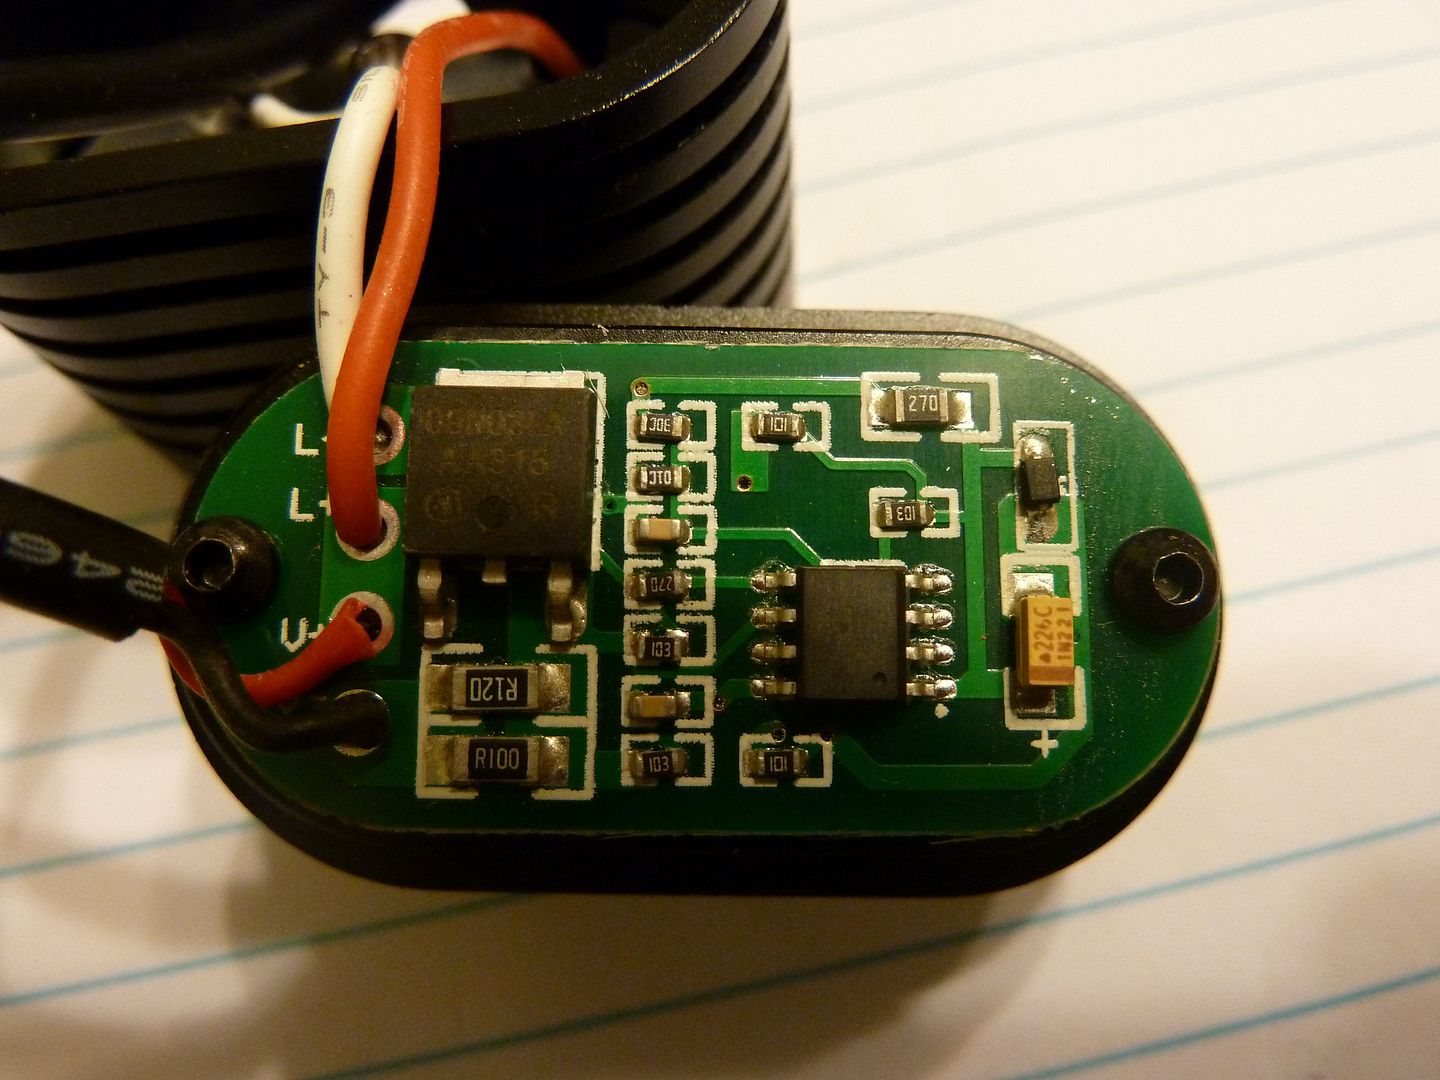
I bought this bike light, which runs on 4.2v (and does not run on 8.4v). The driver looks like so:
So the R100 & R120 are the current sense resistors, right? In stock form I am getting 1.8A pulled from the battery (voltage @ 4.06v) - so about 0.9A to each LED. What value resistor(s) would I add (or replace with) to bump current up to about 3.0A @ the battery for approx. 1.5A per LED?
You could stack the same value resistors over the top of each of them putting them in parallel (effectively 1/2ing the resistance/doubing the current) or replace those resistors with 1/2 the resistance (R060 and R050 resistors)
Either way you will need to replace them, just bridging them will make it more or less direct drive
With no buck capabilities the driver can run the led’s w/ 4.2vdc
Ok, I was assuming stacking the same values would give me double the current. That's at least a start. I don't think I have R100's, but I know I have R120's. Using 2 R120's would get me a little less than double, correct?
I definitely do NOT want direct drive in this light.
Are those sense resistors or limit resistors? Is that driver even regulated? What is the current at 4.15V, 3.8 V? It just looks more like a DD driver with modes to me.
It looks like to me a dd driver with those 2 resistors going from ground to the source on the fet. Limiting like that.
hmm, I’d probably take the .100 off and put in a .120- then lay a couple of .120s on top of that, if that’s all you have. Should give you ~3.2-3.3a or so.
Aiming at .032 for 3a from my math anyways, at 4.06v.
Try the four .120’s and see where it’s at… If you have a .180 that, stick that in over a .120 and it should be right at 3 according to my calculator least.
Like RBD and FFT said, they appear to be current limiting. If they are, their resistance in and of itself is limiting current flow. Are there any components on the other side of the driver (Other than the switch)? Also, I can't follow some of the traces due to part of the board being in shadows.
The use of the resistors would still be the same but the values might be different since those resistors just add to the total of the circuit. In other words halving the resistance probably won’t double the current. Also, if it’s DD then it’s not regulated across the battery charge so output will start to dim from the moment you turn it on. Don’t know if you care about that.
I’m no EE and could well be wrong but if not you might be better off just replacing it with a 3A Qlite or whatever firmware 105C floats your boat. Then you would have better efficiency and consistent output over most of the charge cycle. Better still would be a Led4power LD-01 which is even more efficient in the low modes than a nanjg type and doesn’t have pwm. It’s not as cheap and has fewer firmware options but I can’t wait to try one out for myself. If the board has an integral switch then another option would be to pull the resistors and the FET and replace them with an 8x7135 slave board and keep the existing mcu and firmware.
As it is that driver seems to be running with one foot on the gas and the other on the brakes.
Hmm . . . interesting idea, but I'd need my hand held the entire time as that is well beyond my ability to handle. Can you sketch up a diagram on how I'd wire it up?
I would just bridge it if it was me garry. I mean think your pushing 4s in parallel into two xml2 u2 emitters in parallel from the looks of it. You can run in medium, low modes and have the high for when you need it. Maybe reflow onto a couple of noctigons and redo the tim. You should have plenty of light in the lower modes.
Or put in the 120s you already have and see where high takes you. That’s the cheapest way right now. Those u2 aren’t going to blow up on dd- just keep it in the lower modes until you can get the noctigons and tim mailed out to you
Just my 2 cents anyways… * disclaimer I take no responsibility if those emitters are mounted badly or have no pill and go blue on high
But seriously the four 120s should be good even with crappy sinks, that’s less than half what those leds can take… You can then add more resistance or take away after playing around.