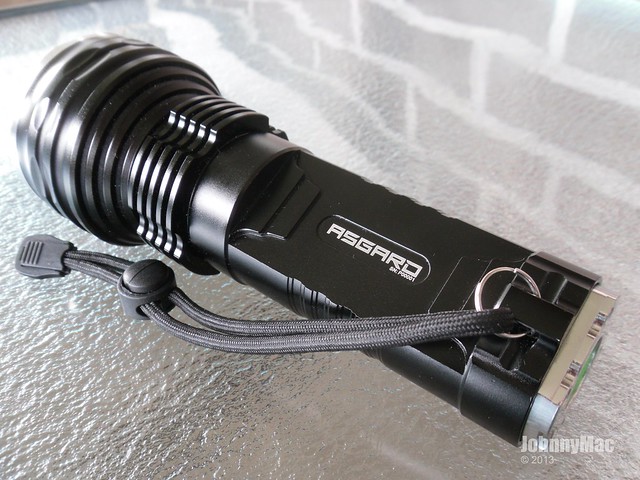
FLEXcandles Asgard Bluetooth Programmable (2x18650)

The FLEXcandles Asgard is the first of 3 planned models which use the world's first Bluetooth enabled flashlight driver. It is available in CW tint or in NW tint. Fasttech has developed this revolutionary new driver in house and has patented it. The Asgard was released as the first model in order to showcase the technology of their new Bluetooth programmable driver. many will recognize the host used as that used by Small Sun under the model ZY-T08 which I have reviewed in the past. While not an exceptional host as far as build quality, it has a great reputation as a superb budget thrower with great runtime due to it's parallel 18650 format and large, well designed reflector coupled with great heat sinking. When modded with overdriven, dedomed XM-L2 emitters on copper MCPCBs this light can easily exceed 150kcd.
PROS
- Ability to program the driver using your Android mobile device or Windows computer via BT wireless.
- Fully customizable mode profiles.
- Super low output up to maximum and most levels in between.
- 31.25KHz PWM for zero visible flicker in the lower PWM controlled output levels.
- From 1 to 30 modes and up to 32 programmable steps in each mode. The possibilities are nearly limited by your imagination!
- Ability to enable or disable memory mode and battery voltage protection.
- Thermal protection.
- Voltage and temperature monitoring via the easy to use FLEX application.
- Choice of either XM-L2 T6 1C or XM-L2 T6 3c emitters.
- Parallel 18650 cell arrangement. Fits all brands, protected or unprotected.
- Proven performance host.
- Secure BT pairing between light and Android/Windows device.
- Excellent throw and OTF output along with great modding possibilities.
- Tailstands solidly.
- Stainless steel bezel and tailcap.
CONS
- Press-fit driver contact PCB
- Average quality budget host. Machining marks on various parts of the outside of the host.
- Only Type2 anodization.
- A bump to the rear of the light can cause mode changes.
- Future models promise a much better quality hosts.
As I said in the beginning of this review, the Asgard is the first of three models to be released. The next two models will feature the same BT enhanced driver technology but will be entirely new hosts designed and built exclusively by FLEXcandles and, between the 3 models planned so far, they should cover most of the needs of flashaholics everywhere. The Asgard as a capable thrower, the Beowulf (next to be released) will be a compact EDC style, and the third as yet unofficially named model promises to be a multi-emitter powerhouse. Additional features will also be built into the driver programmability.
Since the Asgard was released with the sole purpose as a host to showcase this great new driver system I will be focusing on the driver itself more so than the host. If anyone wishes to get all the details on this capable host I urge to to look up reviews that have been done on it in the past. I will give a brief overview on subtle changes, mostly cosmetic, made by FLEXcandles for those not familiar with the ZY-T08.
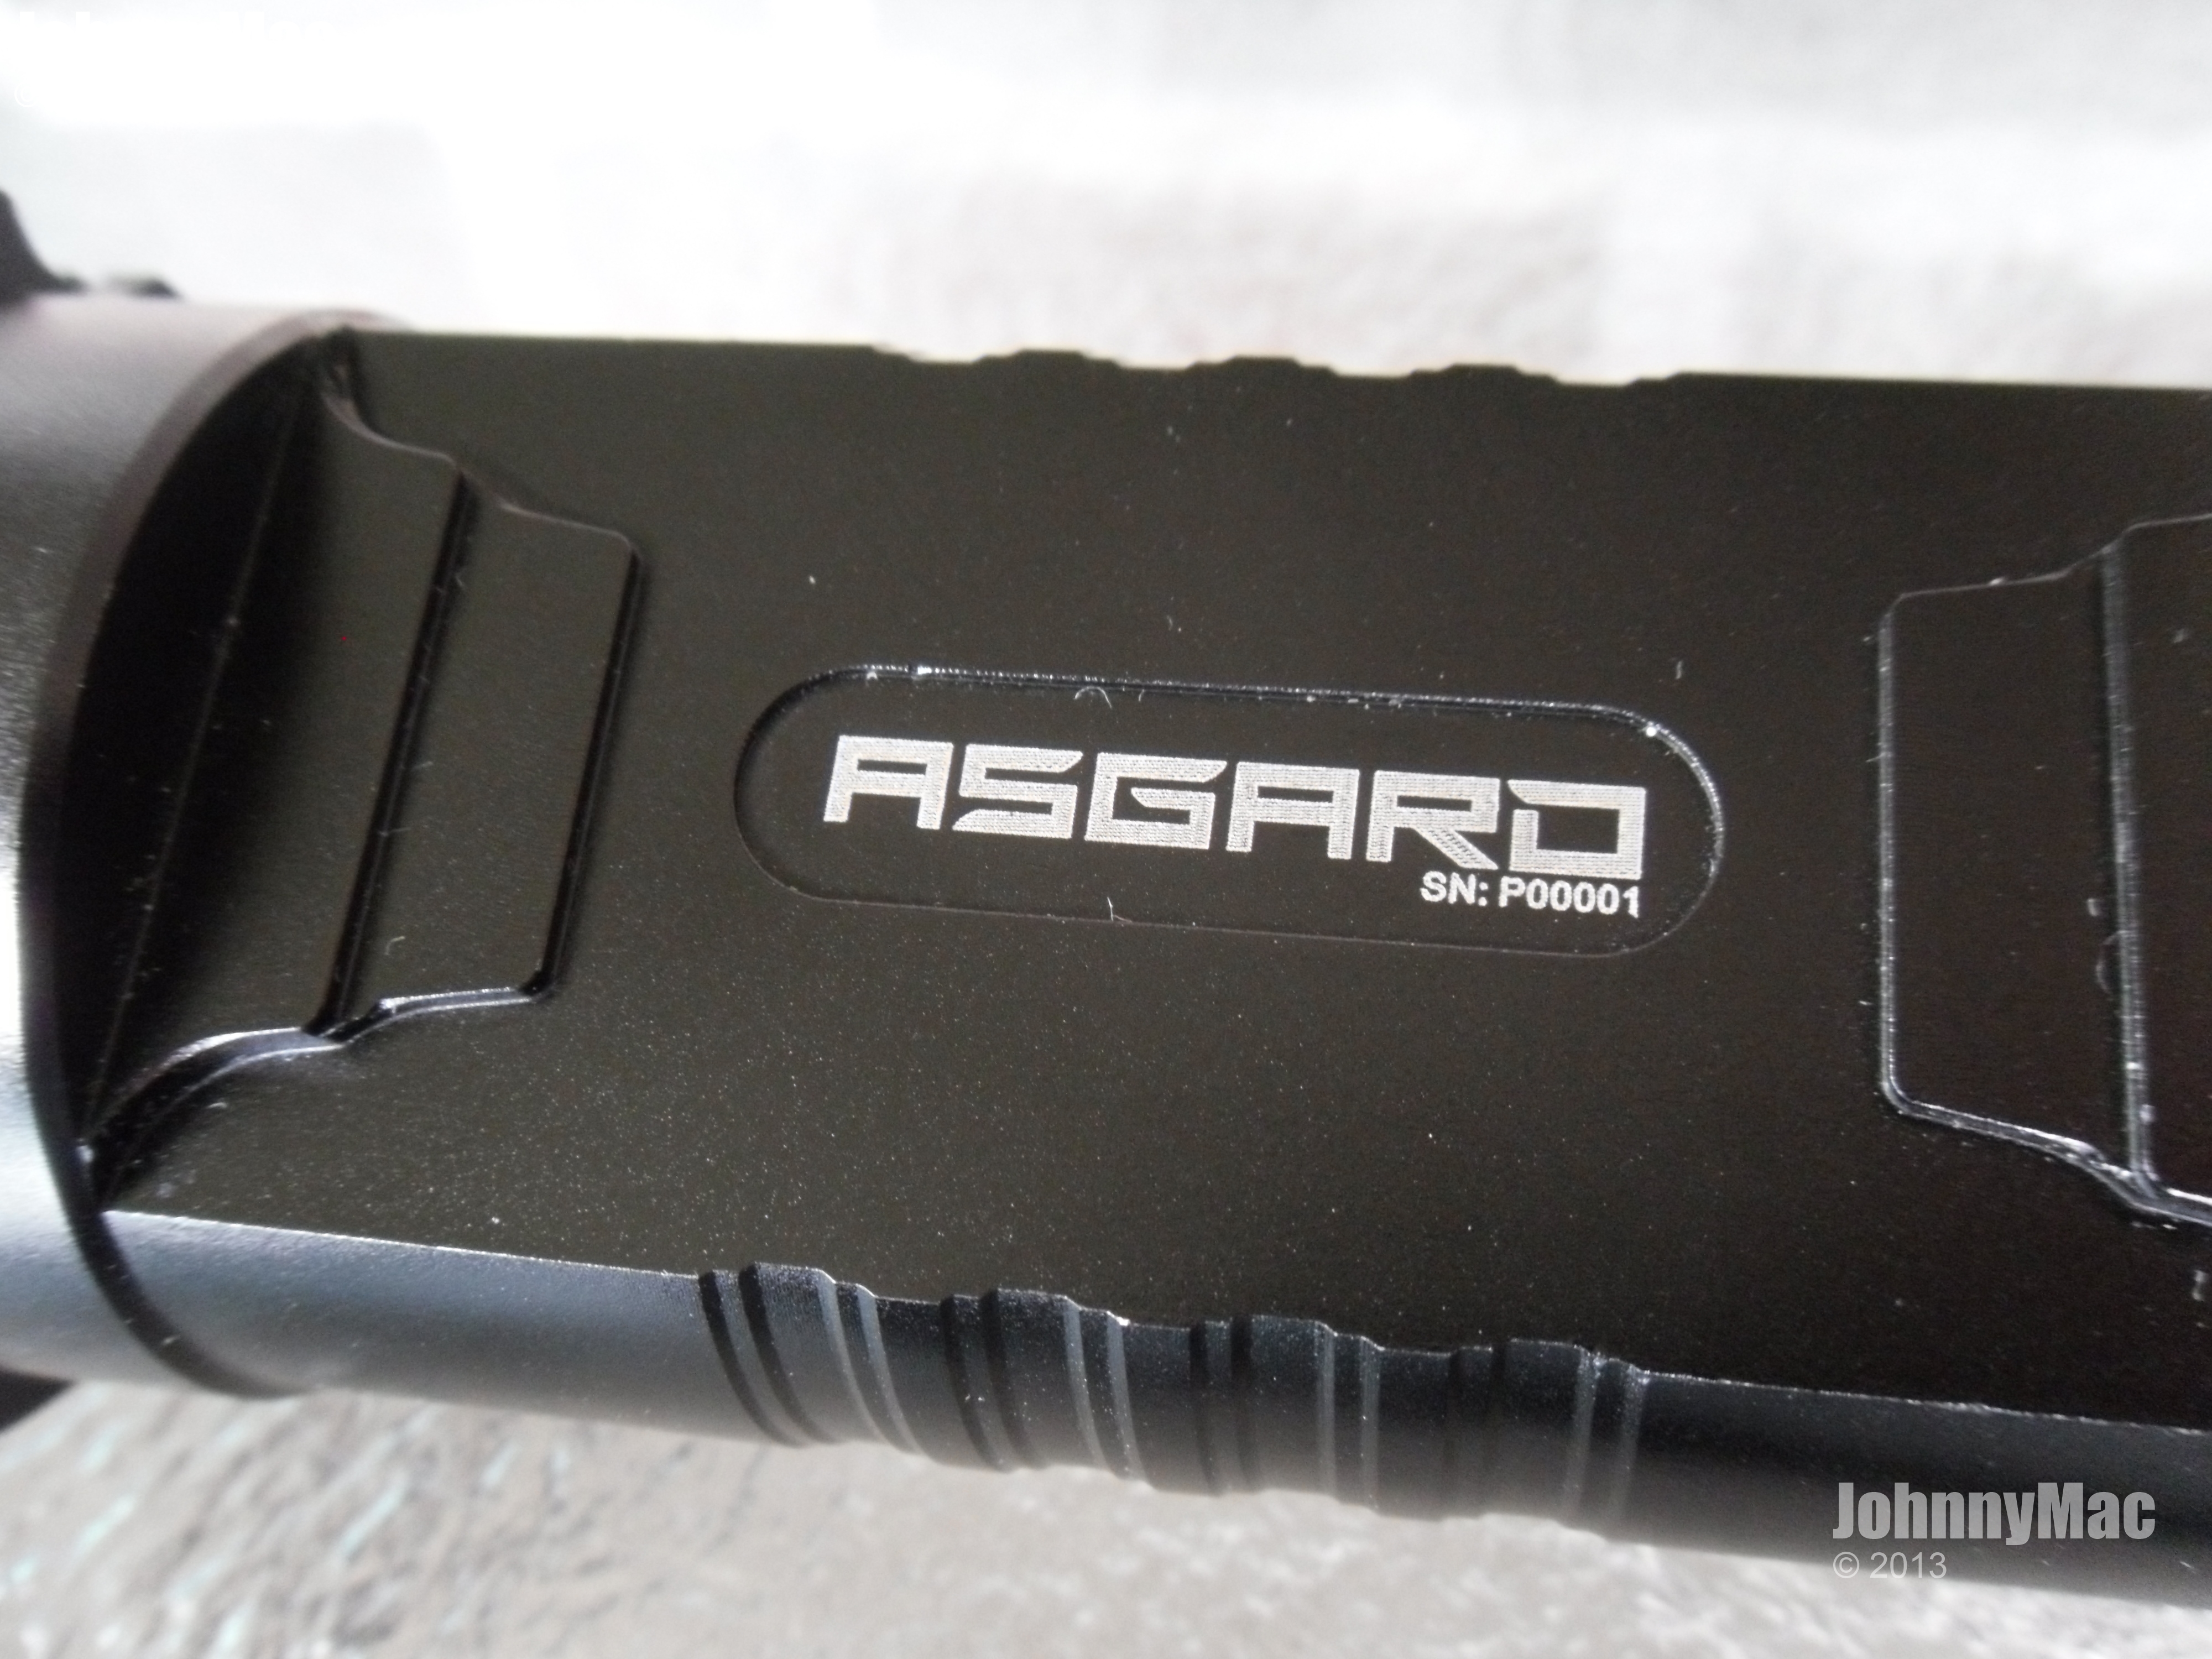
The Asgard logo along with the serial number of the light is laser etched into one side of the body while the FLEX log is etched onto the opposite side. All laser etching is deep and clean.

Here are some physical specs from the Asgard:
Material Aluminum alloy
Emitter Brand CREE
Number of Emitters 1
Color BIN White
Emitter Type XM-L2
Emitter BIN T6 1C or optional T6 3C
Voltage Input 3.7V
Battery Configuration 2 x 18650 (not included)
Circuitry 3020mA
Reflector (Diam x Depth) 57.7mm x 38.92
Switch Type Reverse clicky
Switch Location Tailcap
Lens Glass
Reflector SMO (plastic)
Strap Included Yes
Clip Included No
Packing List: 1 x Flashlight, 1 x Lanyard
Let's take a further look at the host...
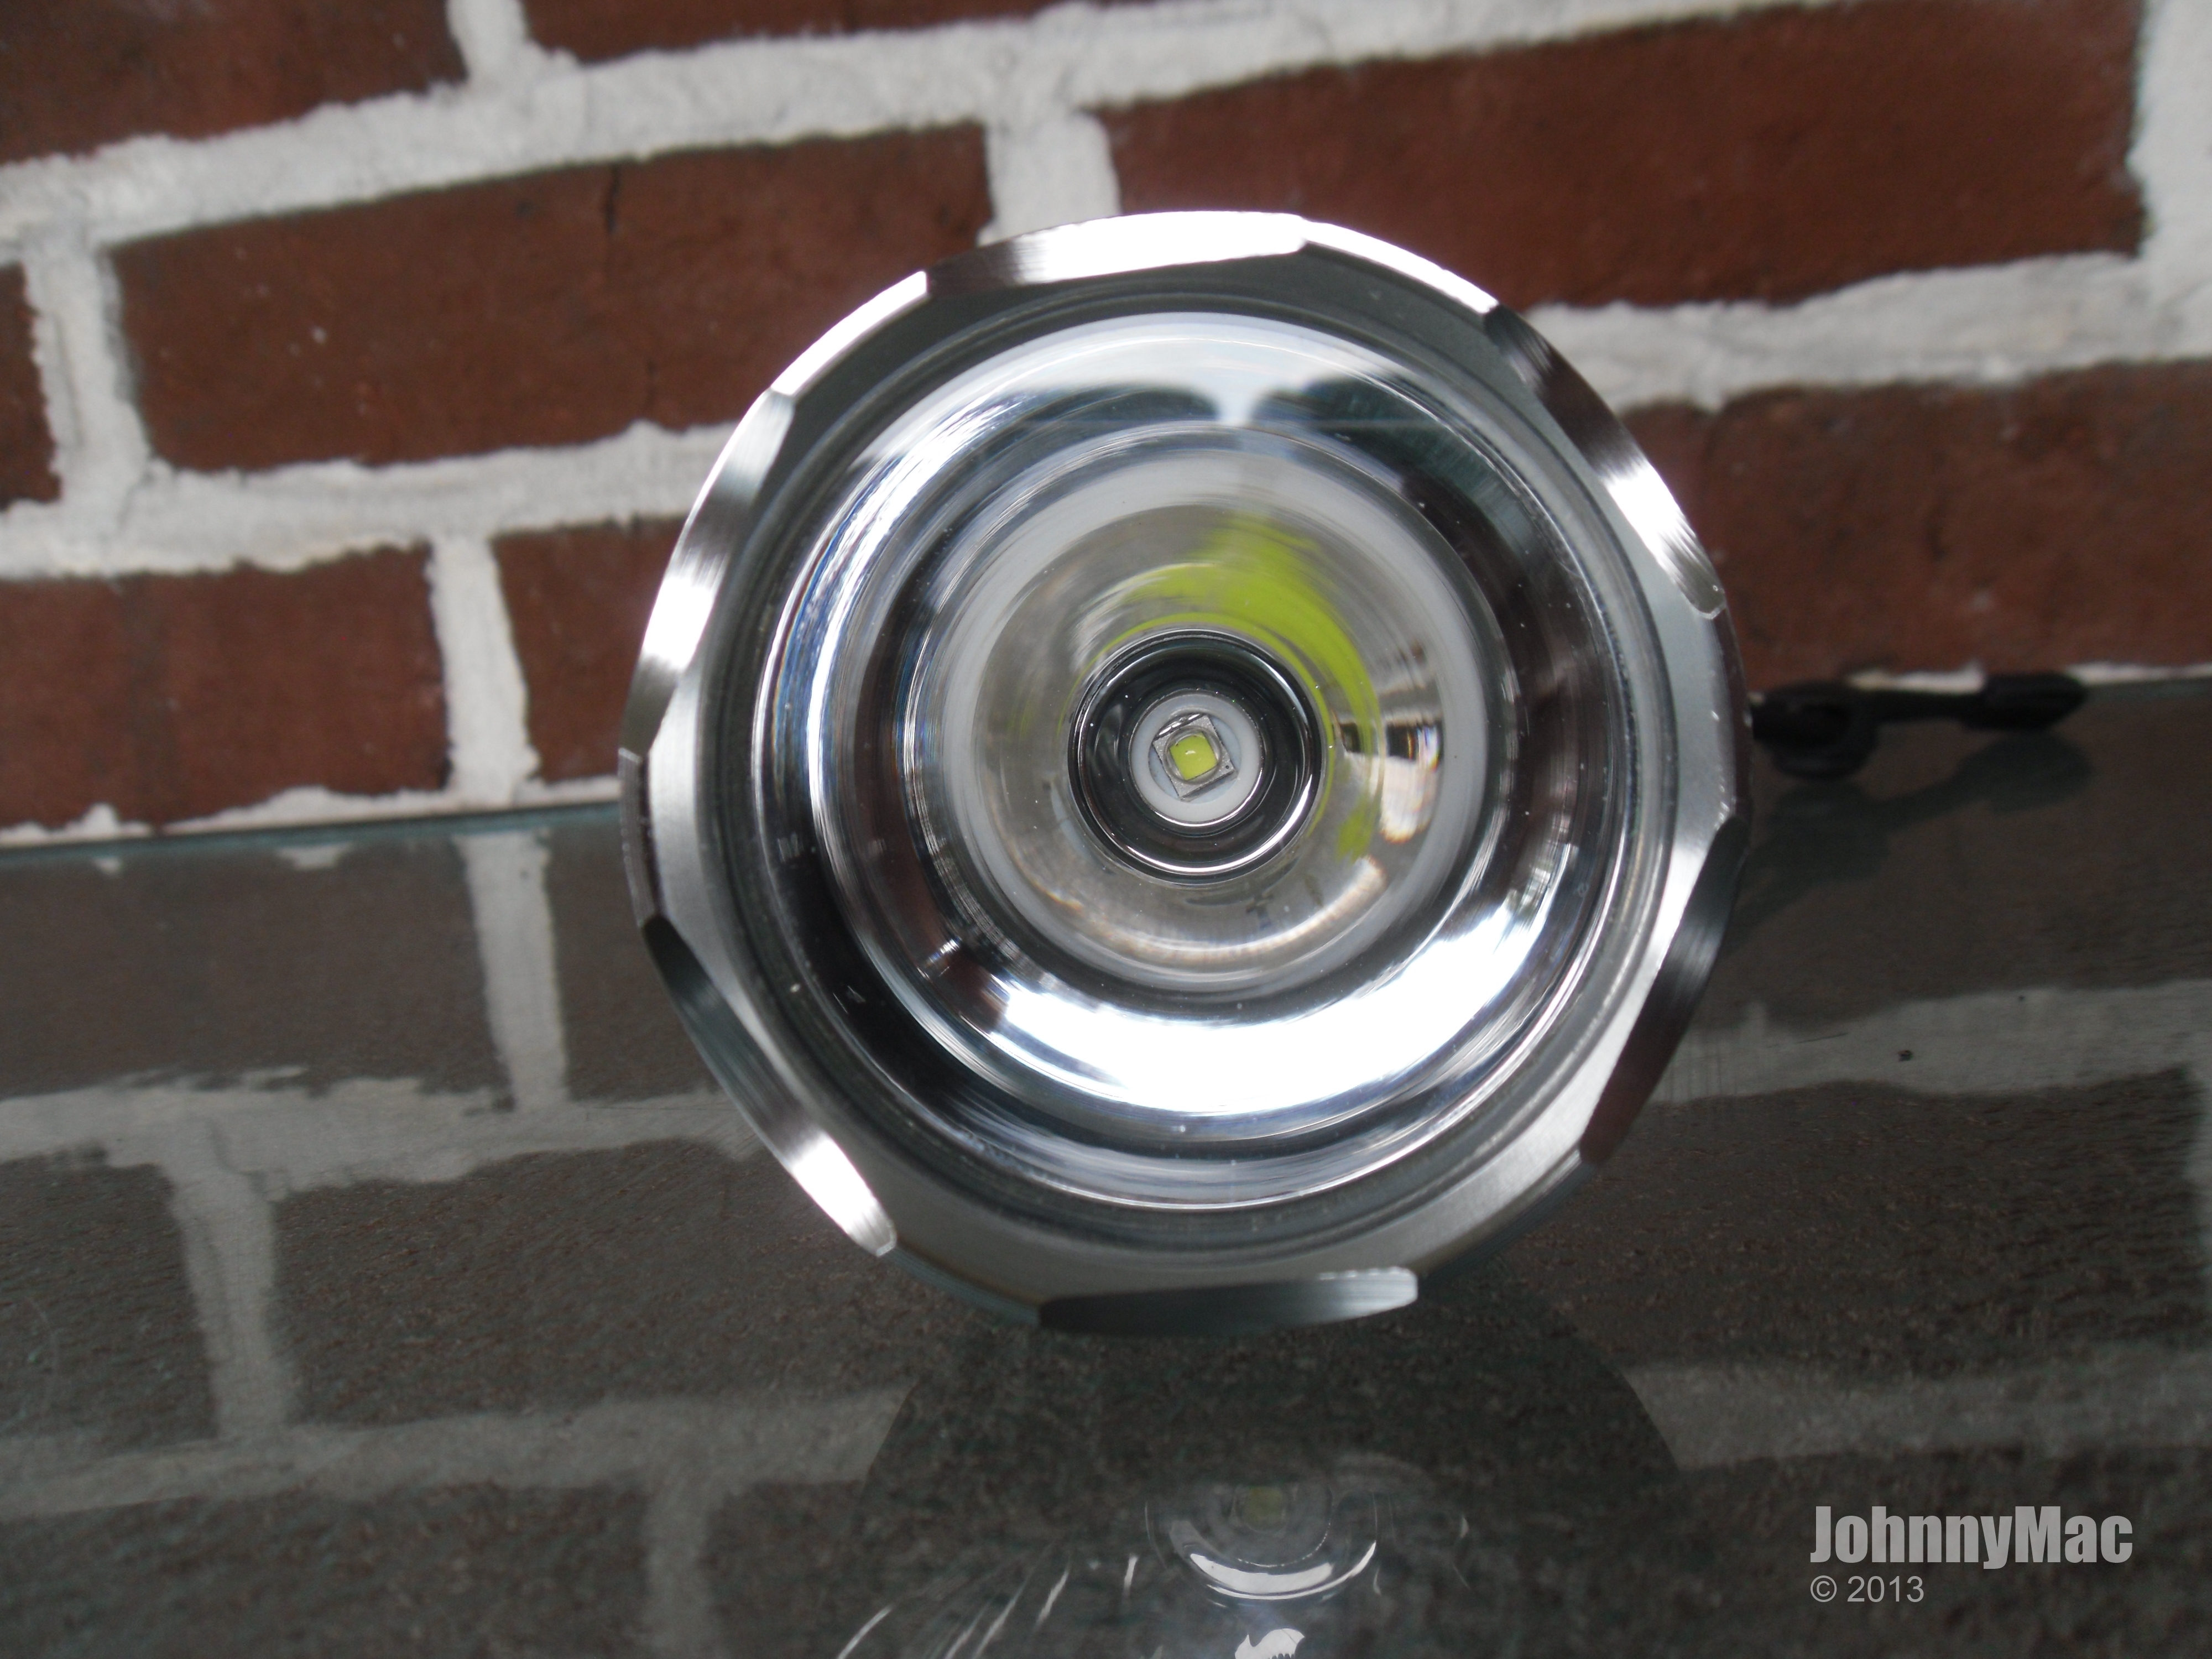
One of the main reasons this particular host was chosen is due it's excellent plastic reflector. The engineers designing the driver found that an aluminum reflector, along with an AR coated lens, acts like a small Faraday cage and restricts transmission and reception of the Bluetooth wireless needed to program and read the driver configuration. Only a plastic reflector and uncoated lens allow the wireless radio signal to escape the enclosed housing.

The body of the host is very solid and well finned for excellent and proven thermal transfer. Modders have found that this host can easily handle being driven at 5A so the stock 3A driver in the Asgard will have no problem surviving in this host.
The host tail stands solidly due to it's flat SS base.
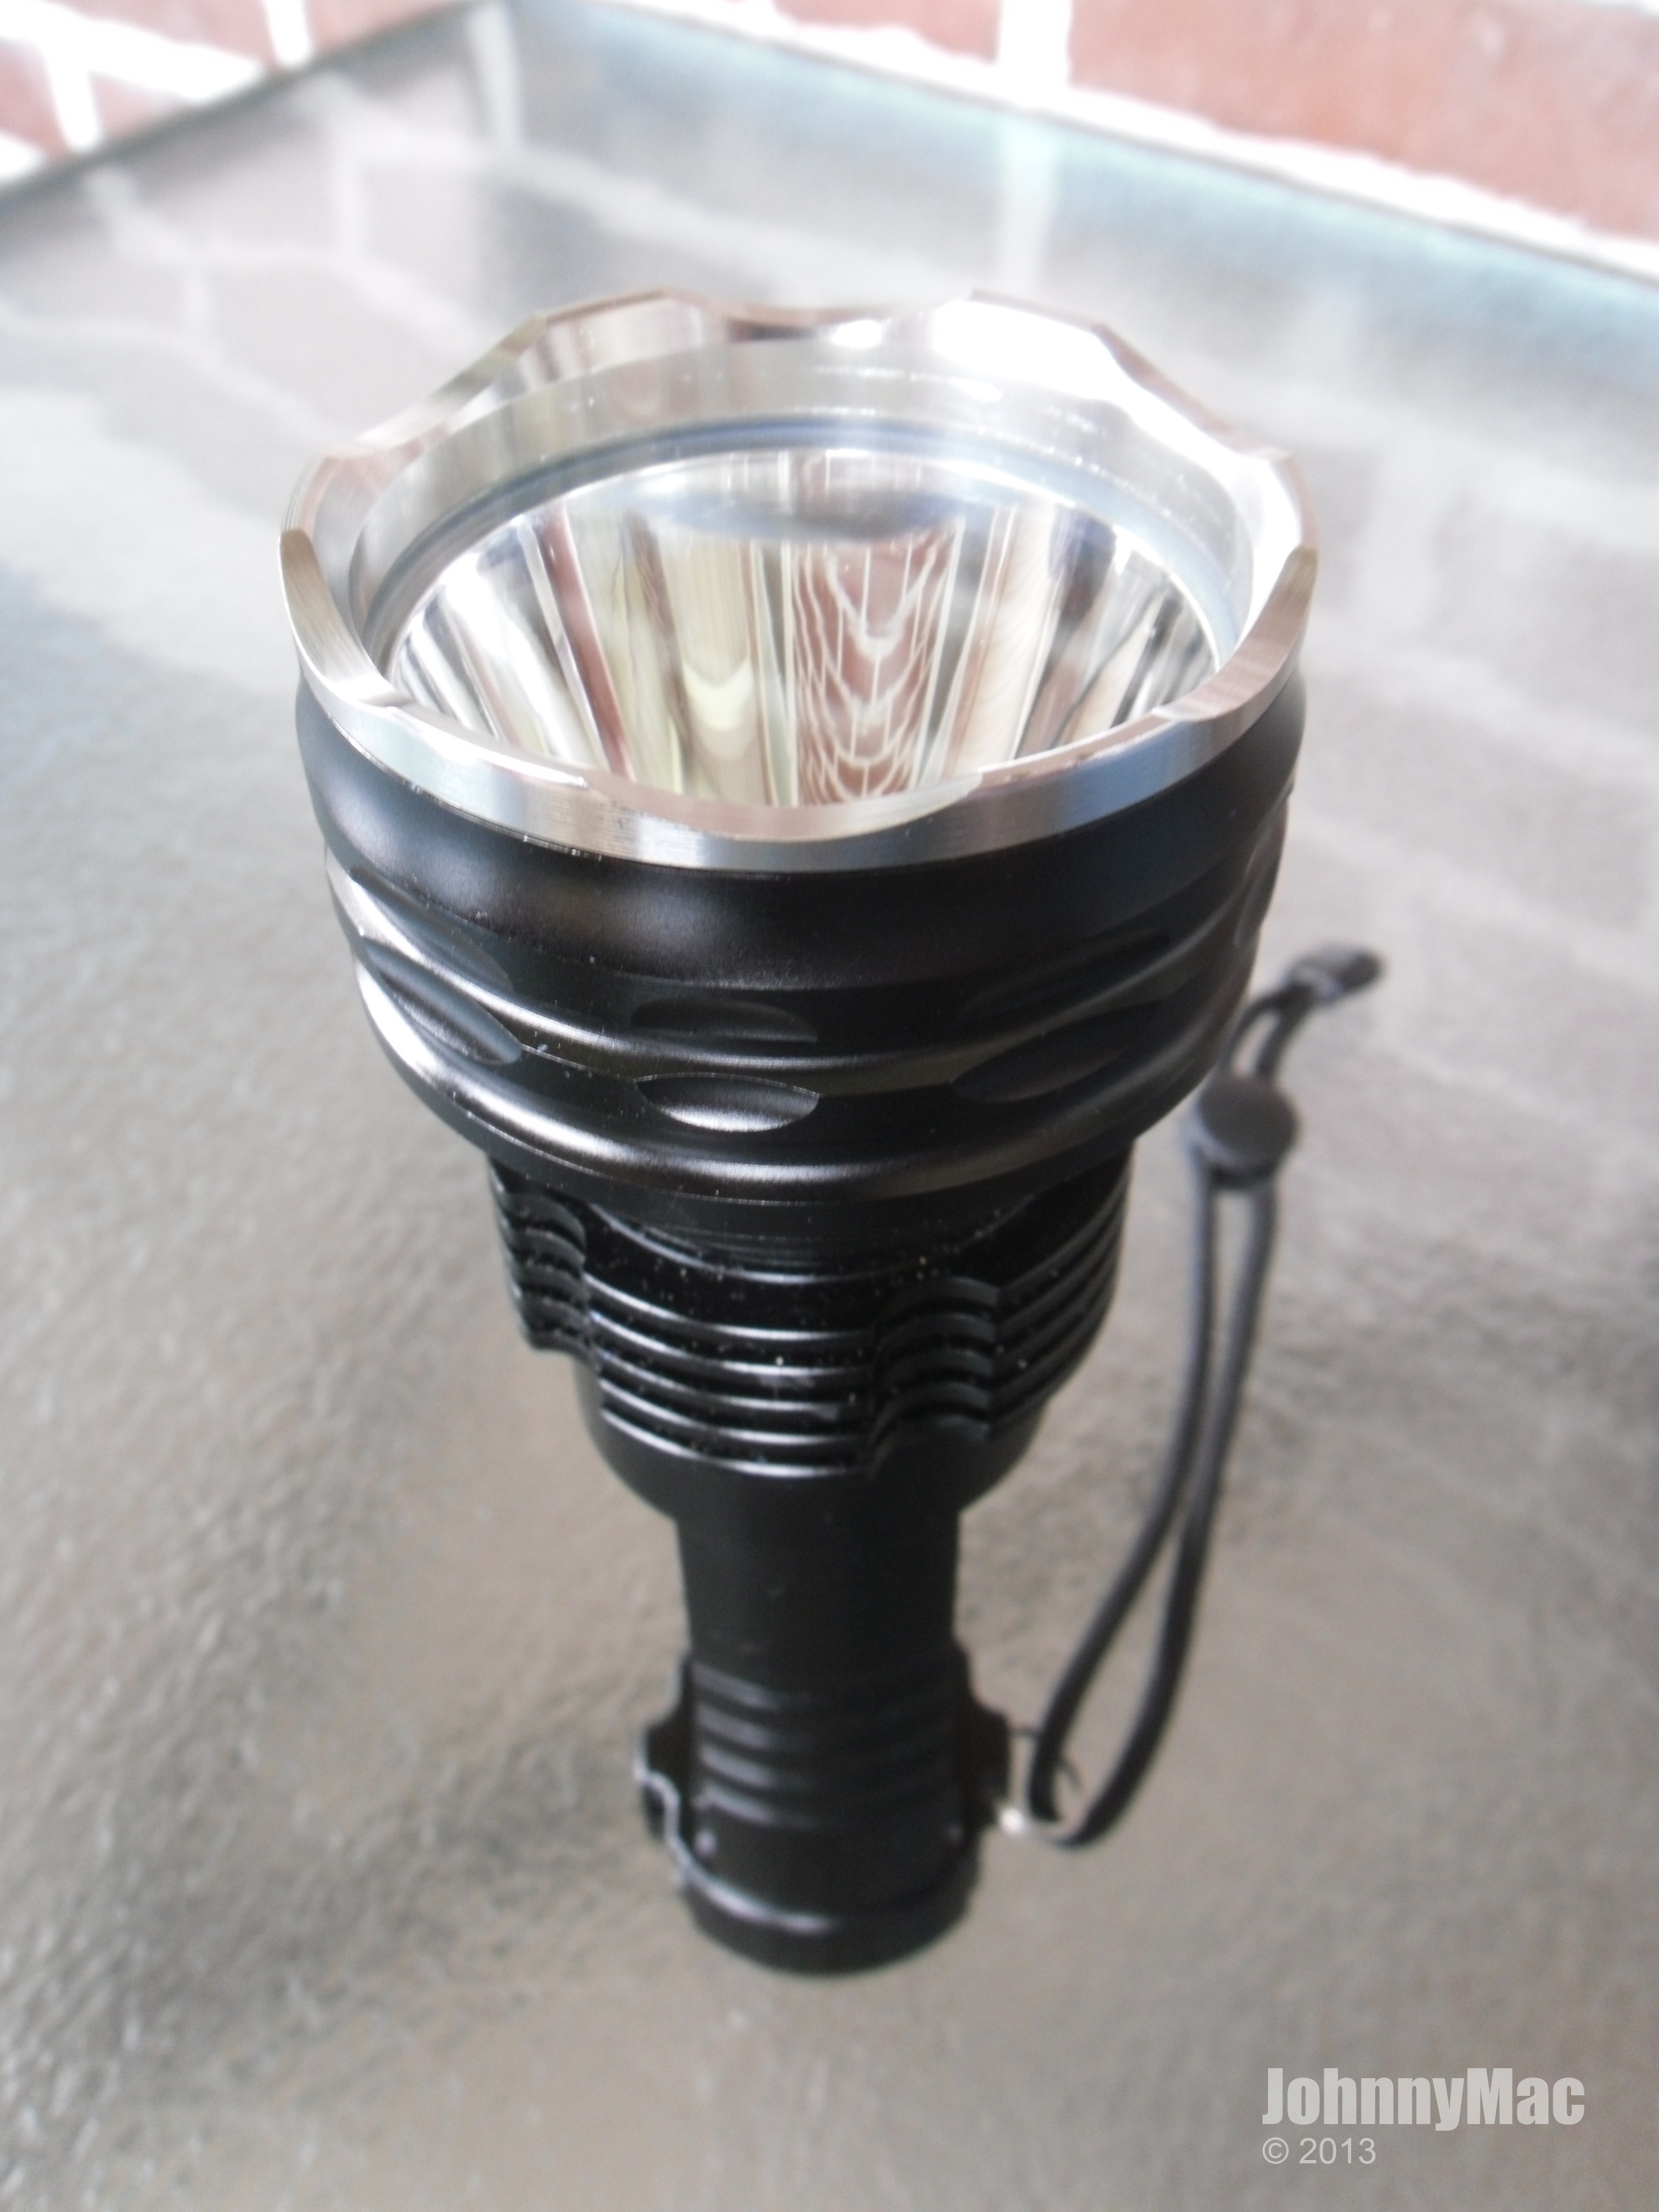
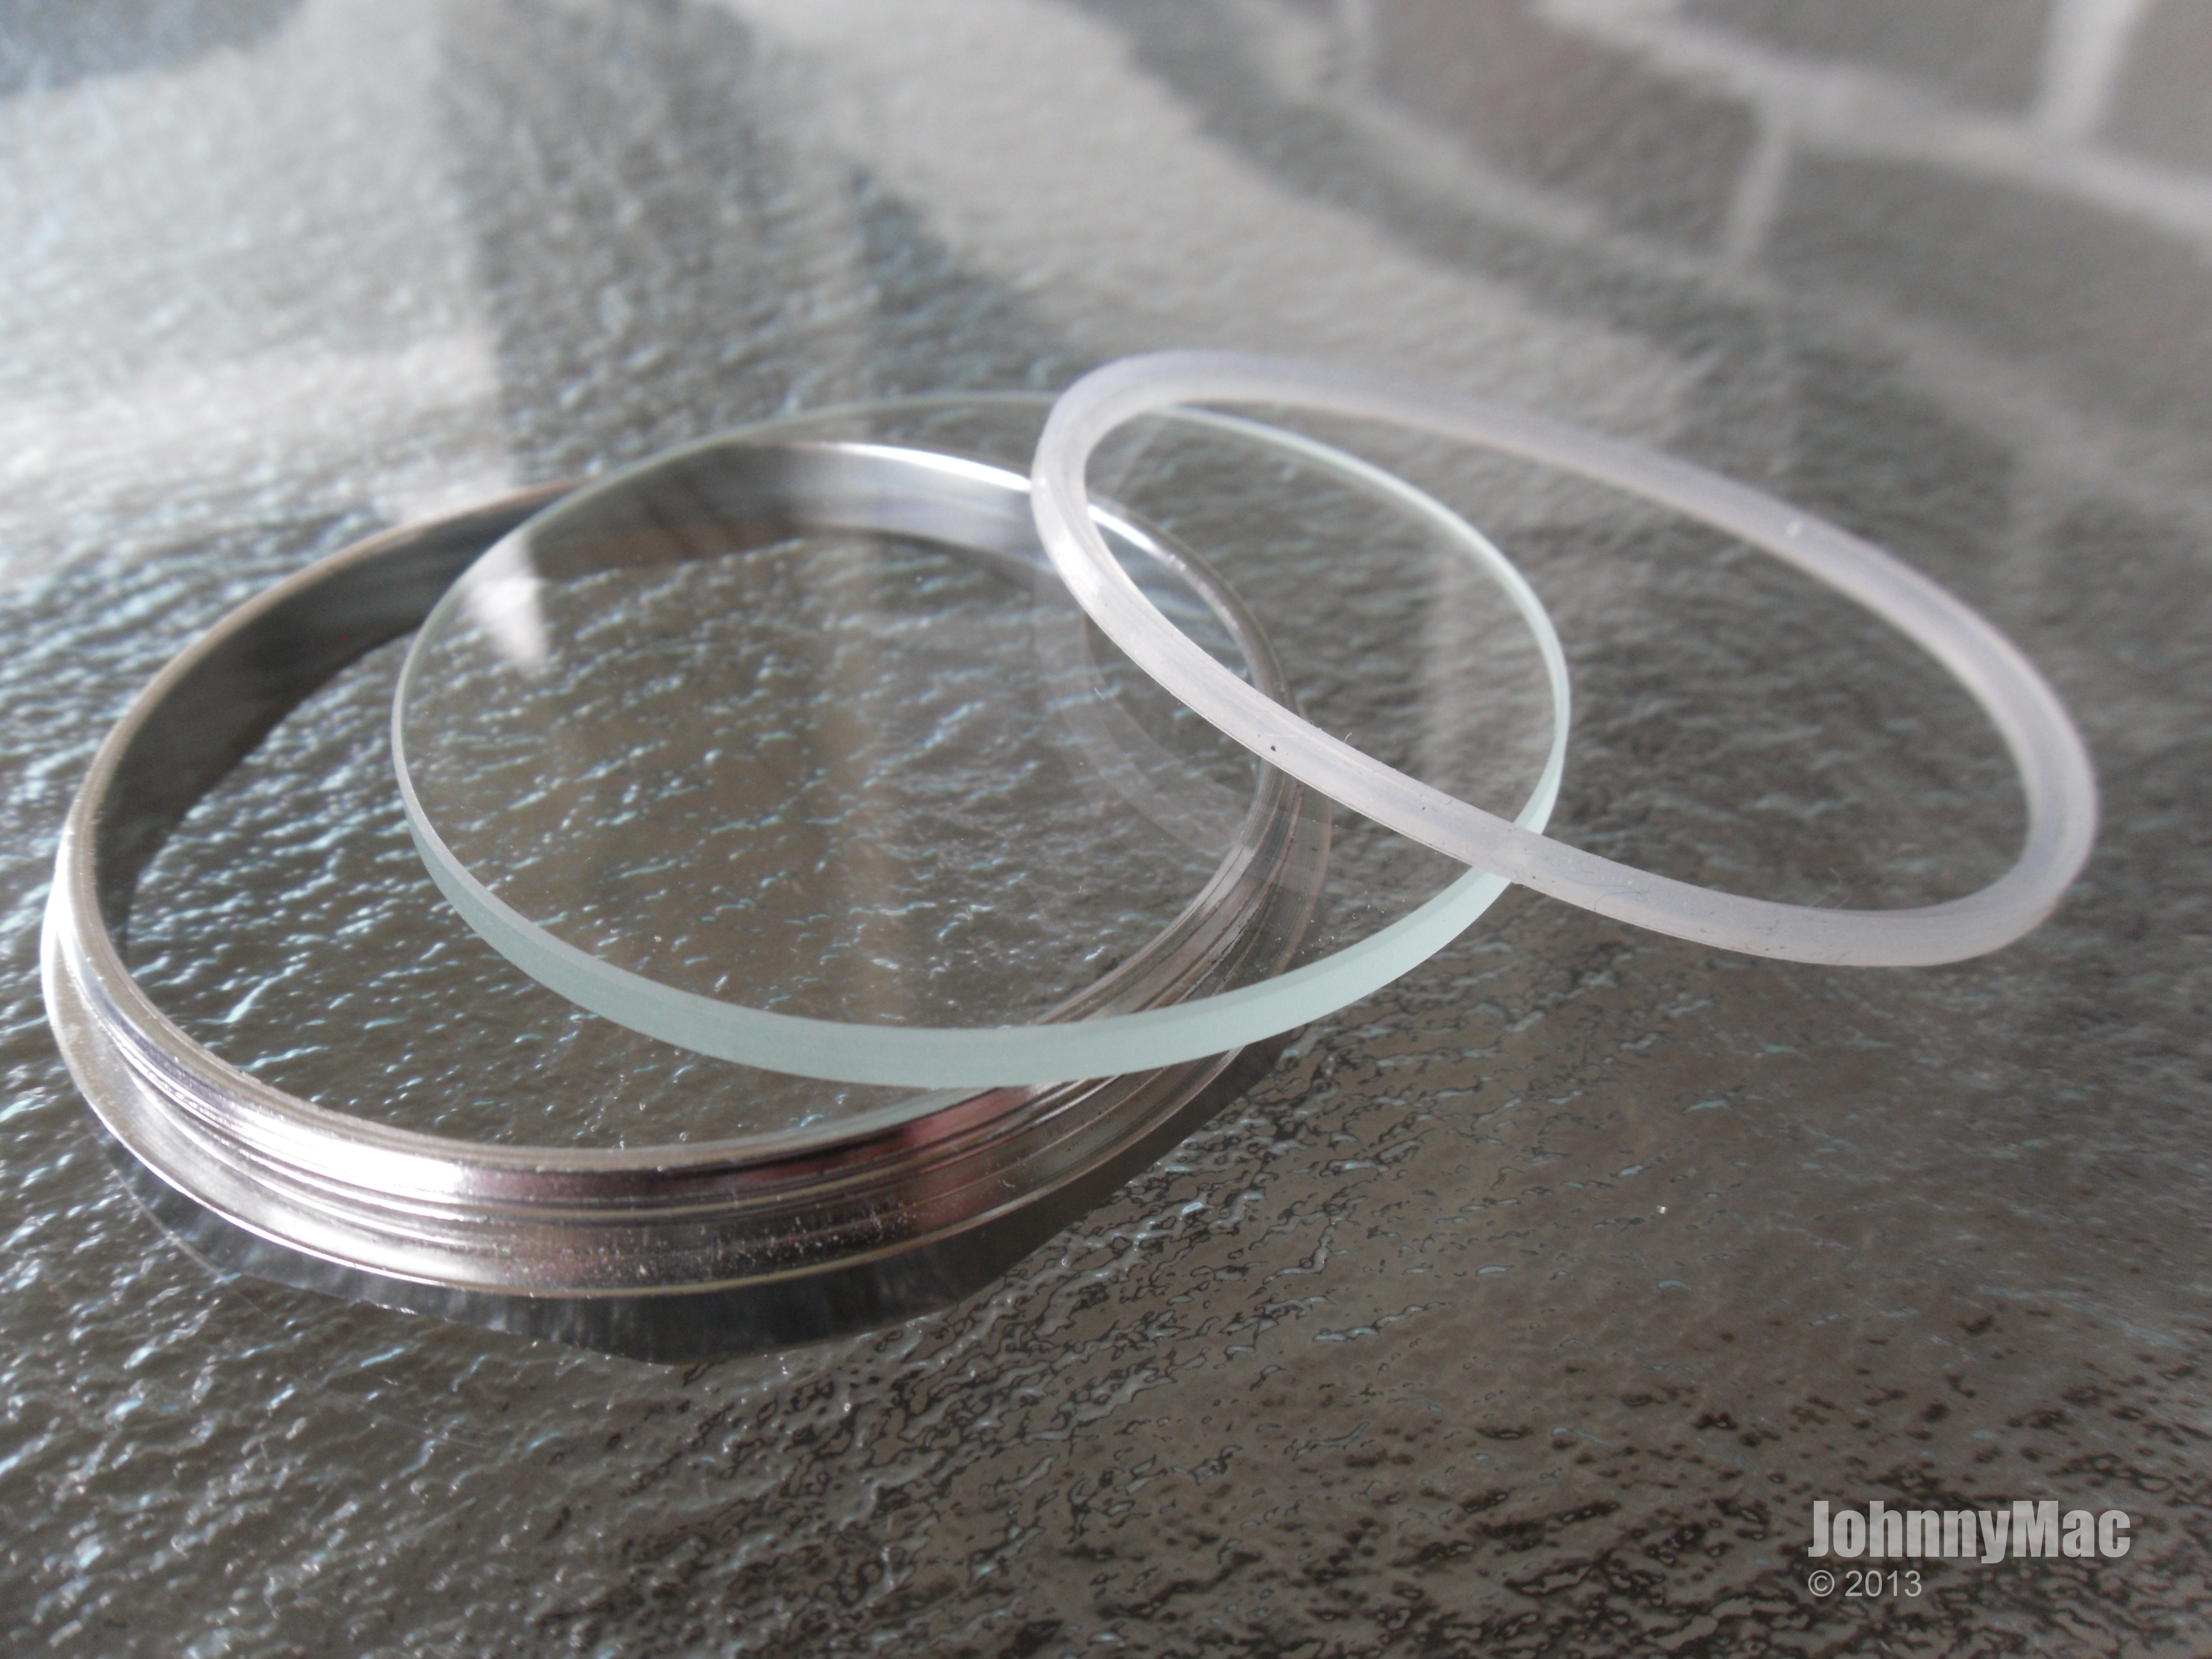
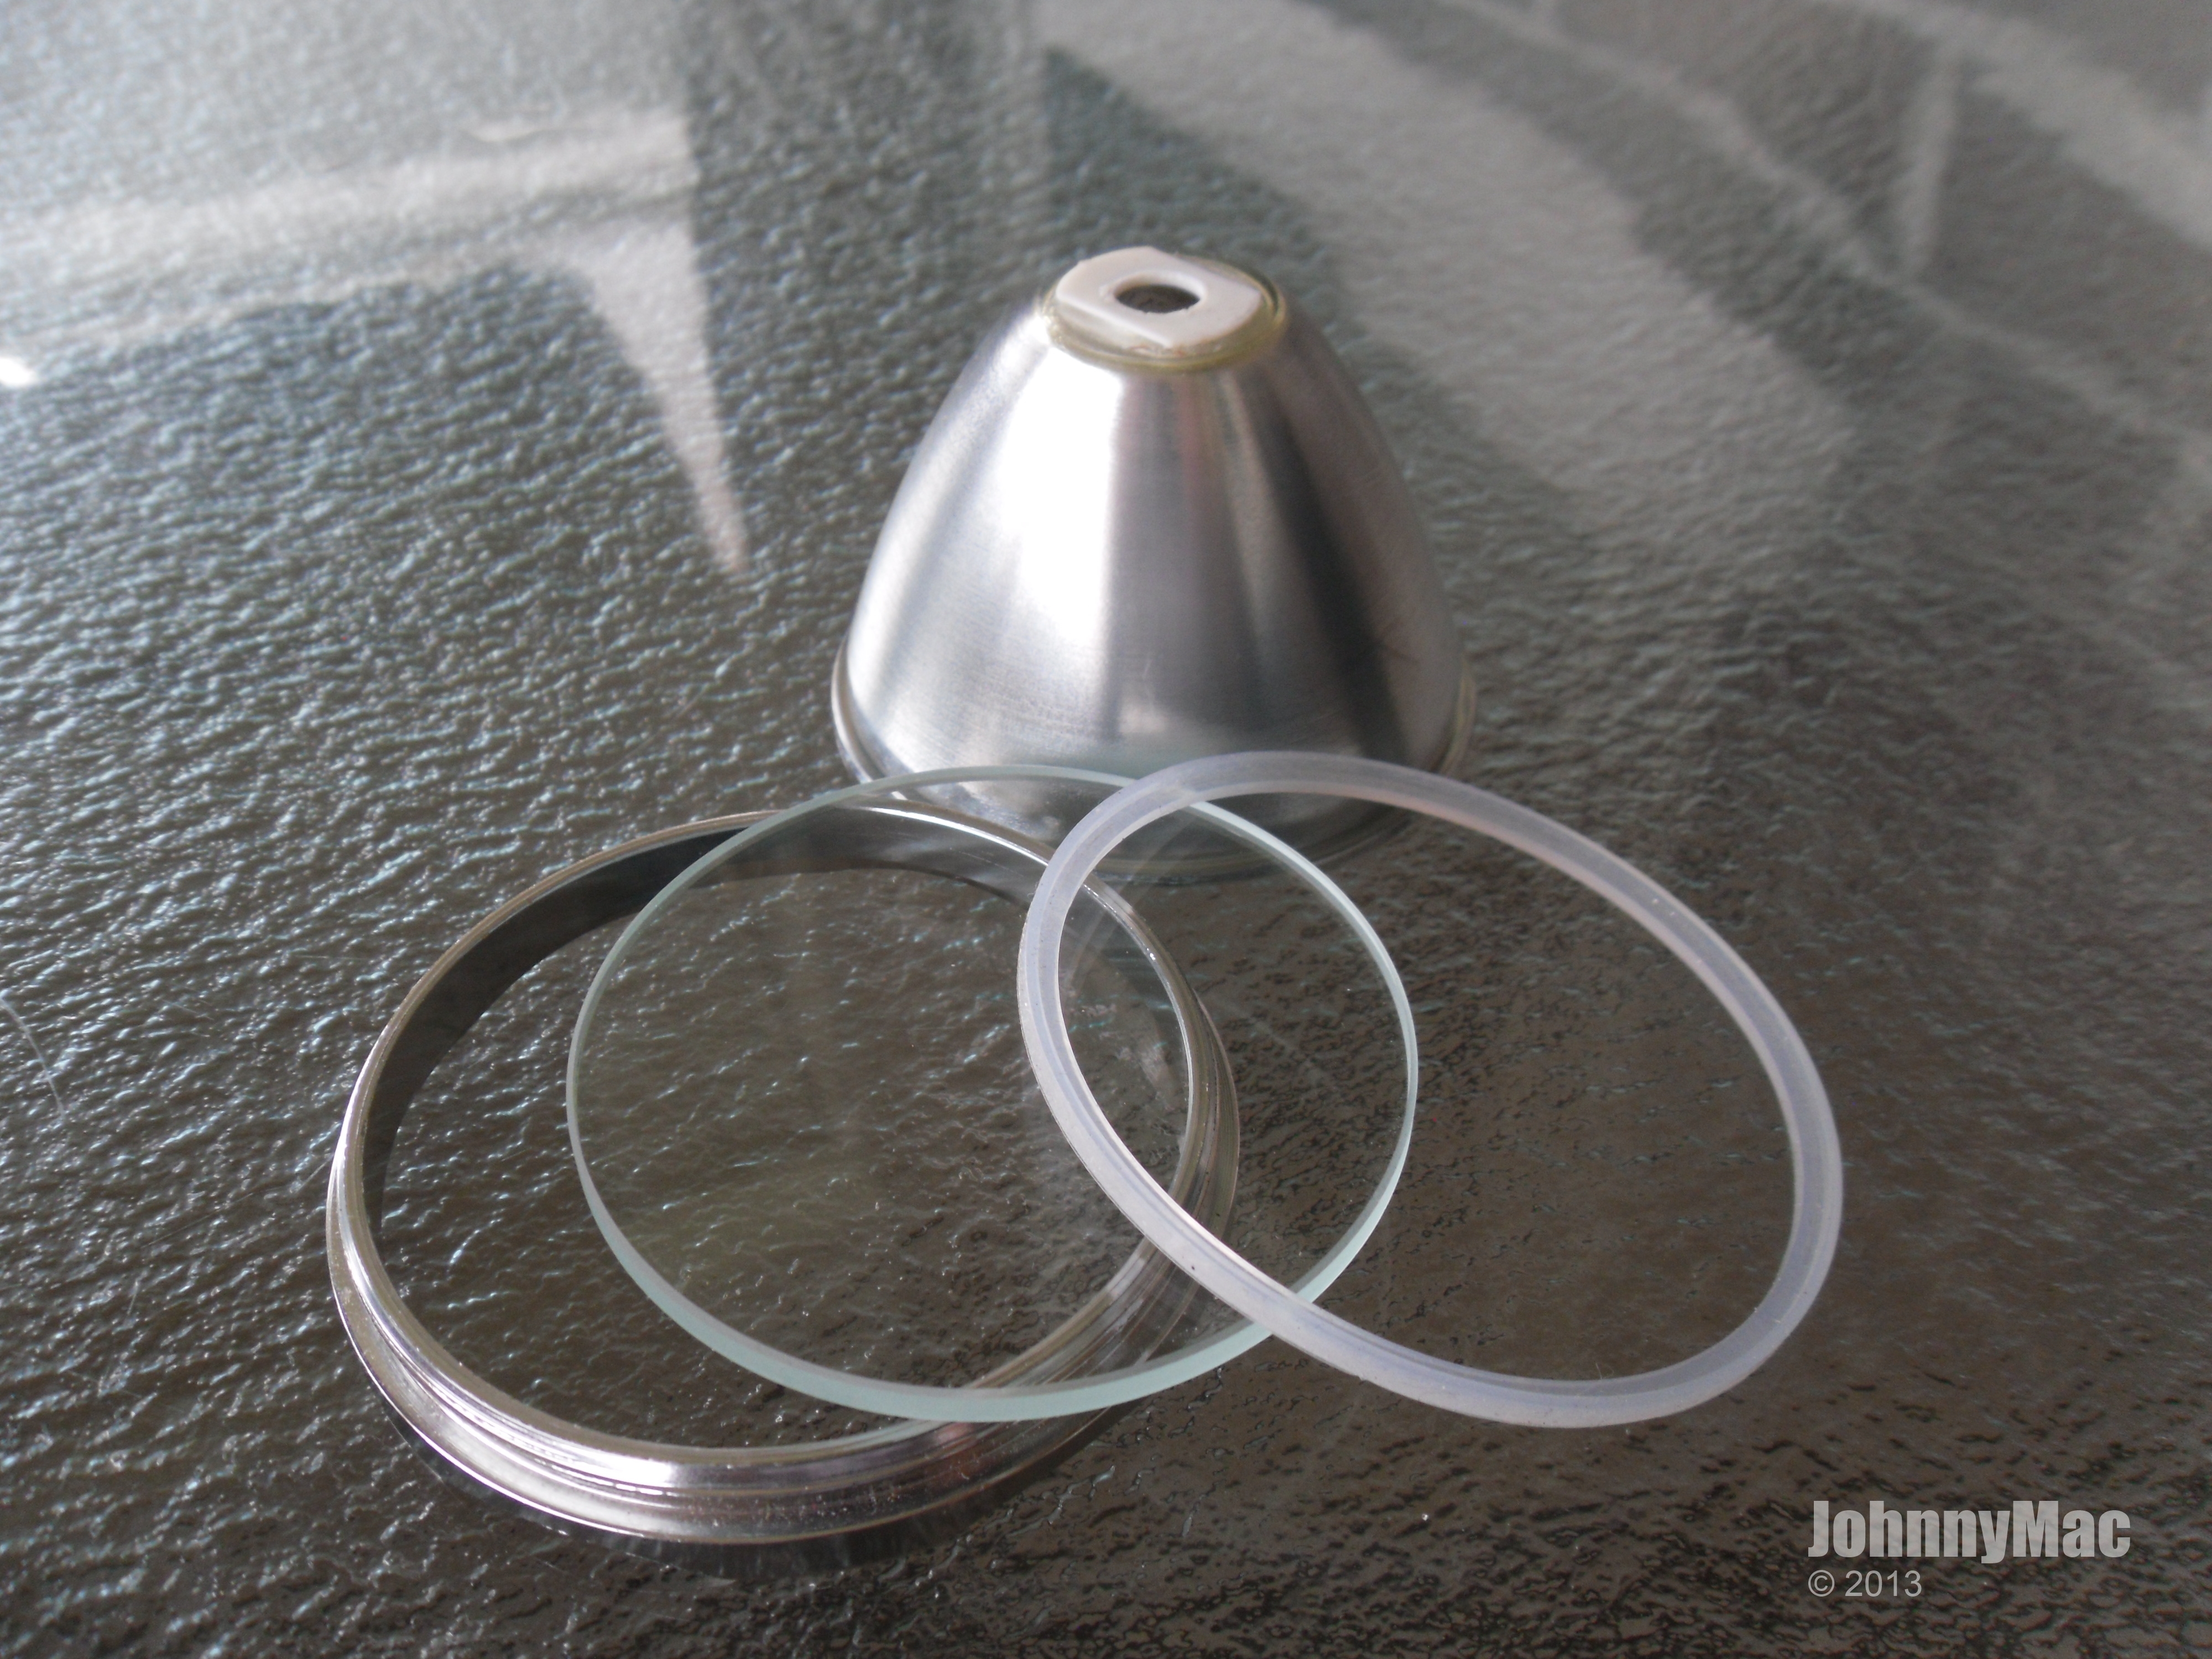
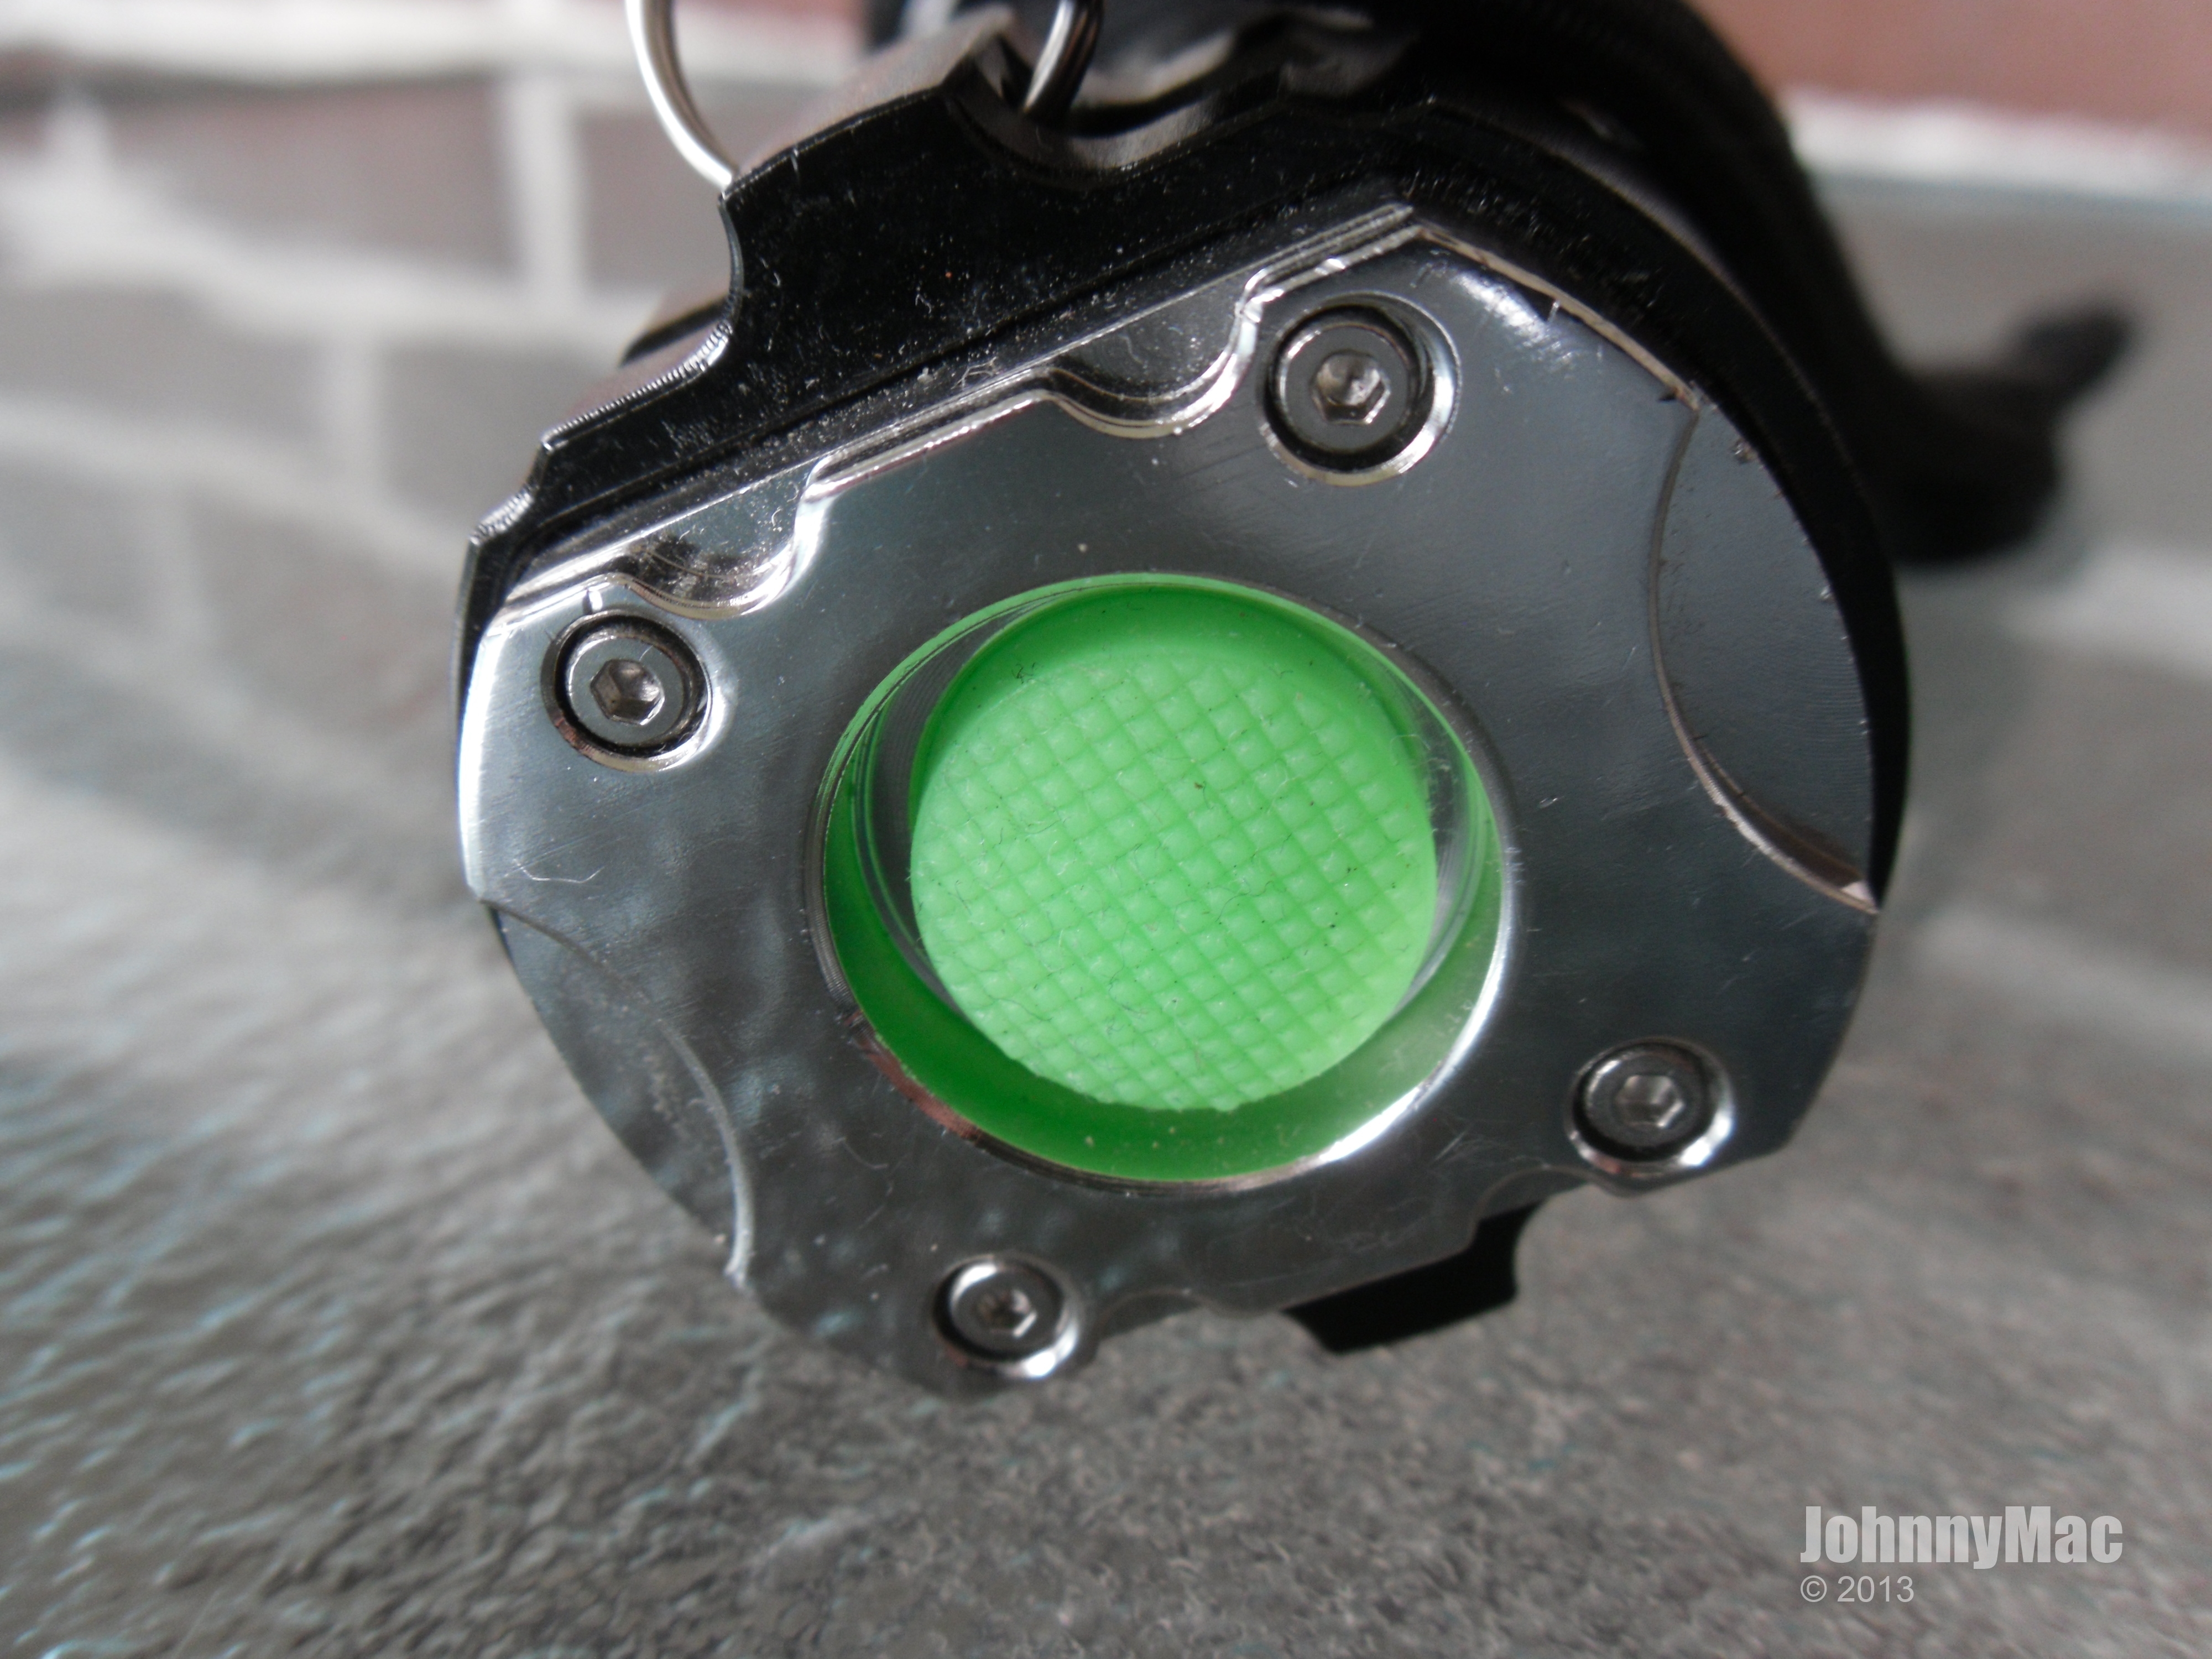
With the Stainless steel bezel removed we can see the thick glass lens seated into a silicon "L"-ring that separates the lens form the reflector.

Threading on the bezel is smooth and cleanly machined.

All threads are fully anodized and clean.
Here is a shot of the bezel, lens and "L"-ring.
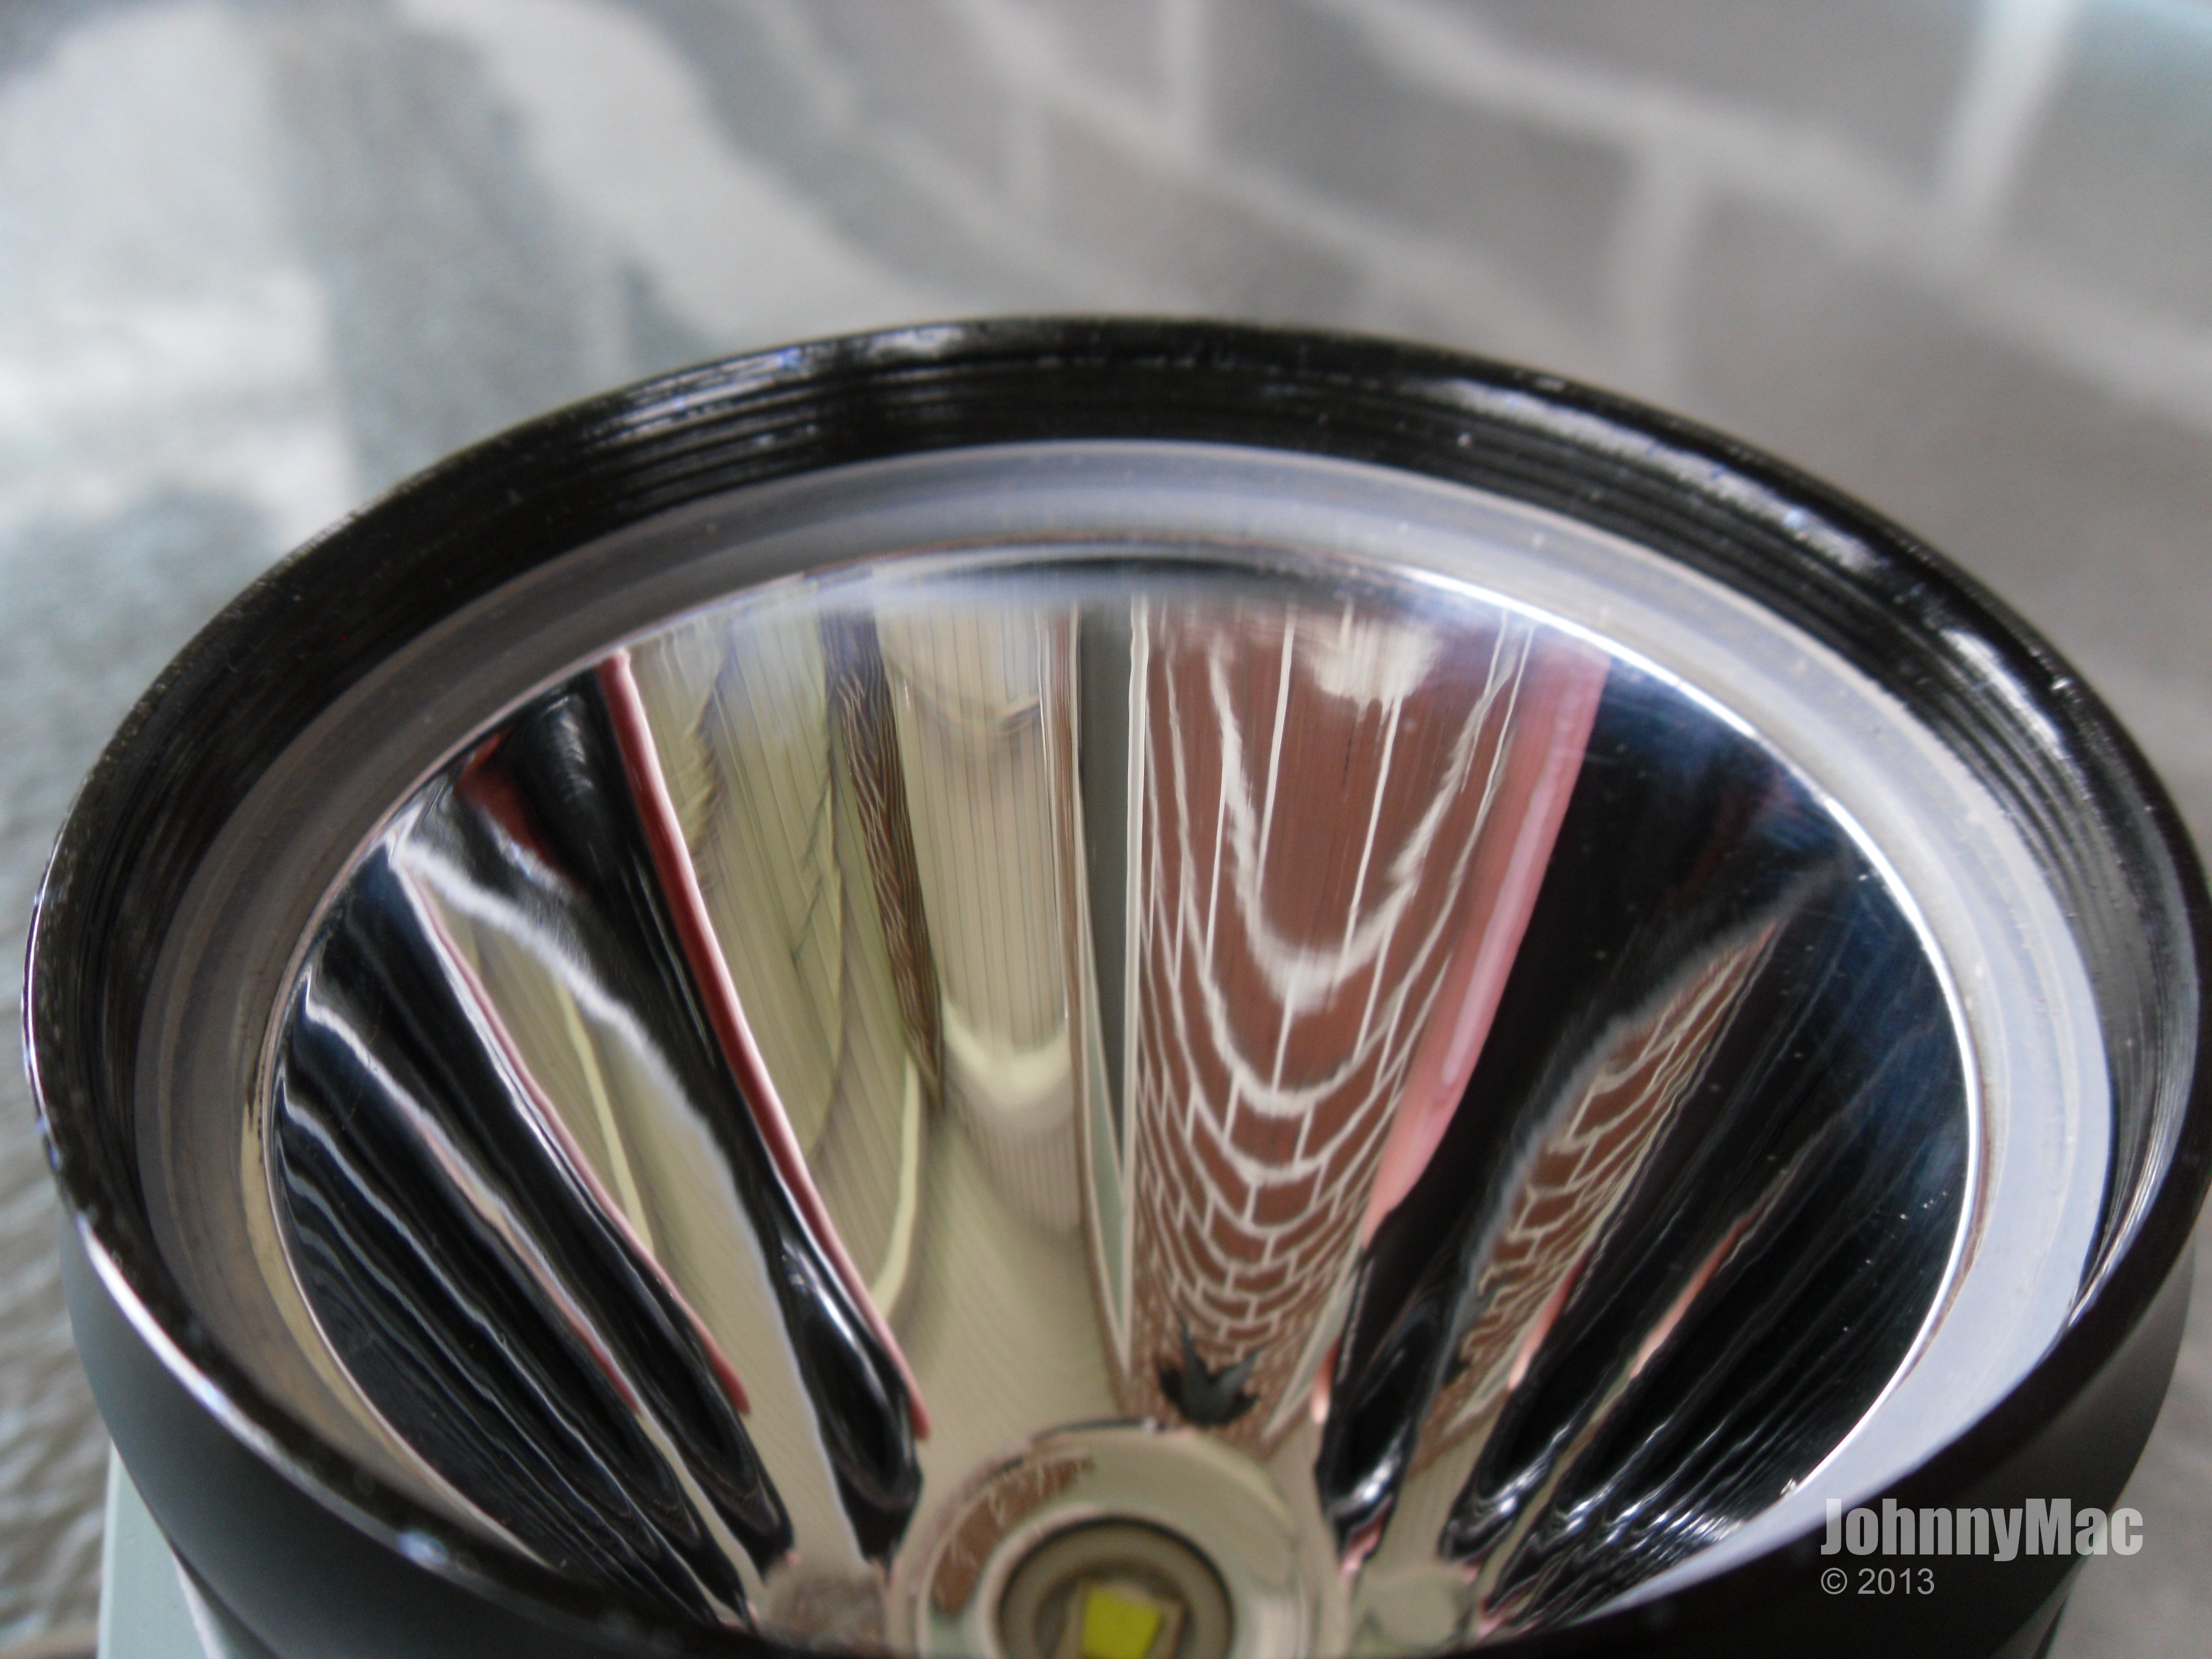
Here we can see the wide, deep reflector and centering insulator.
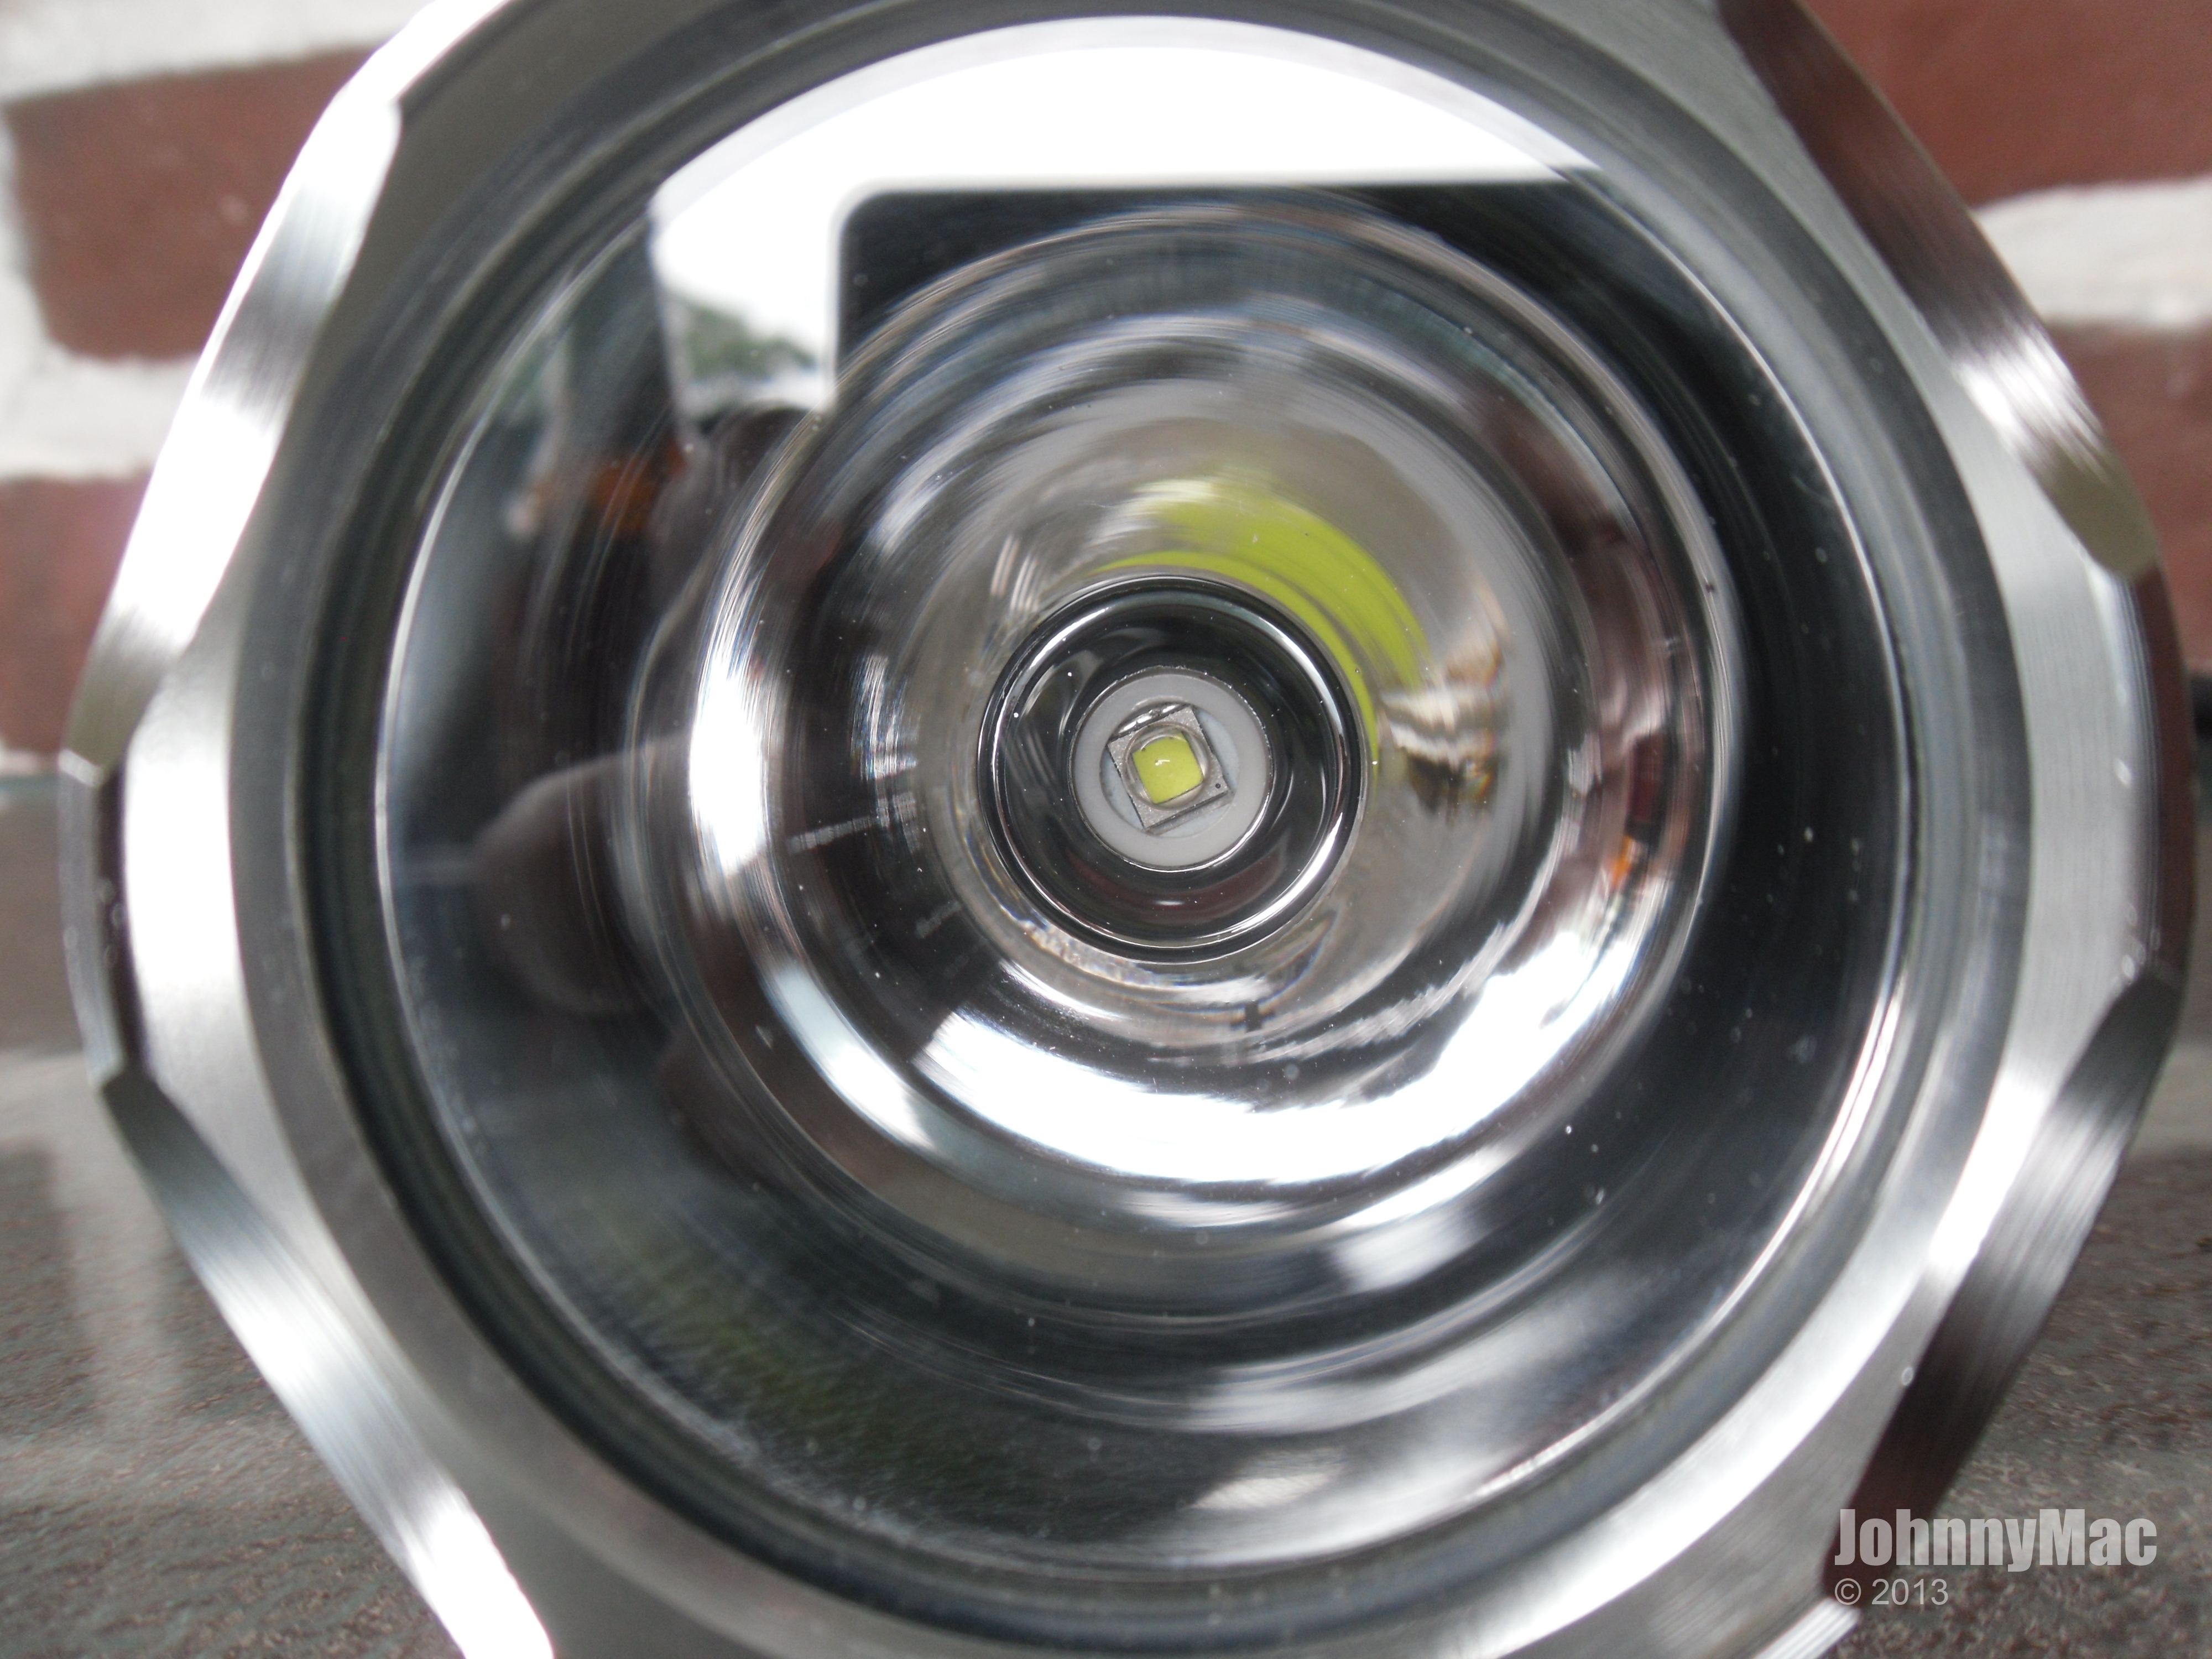
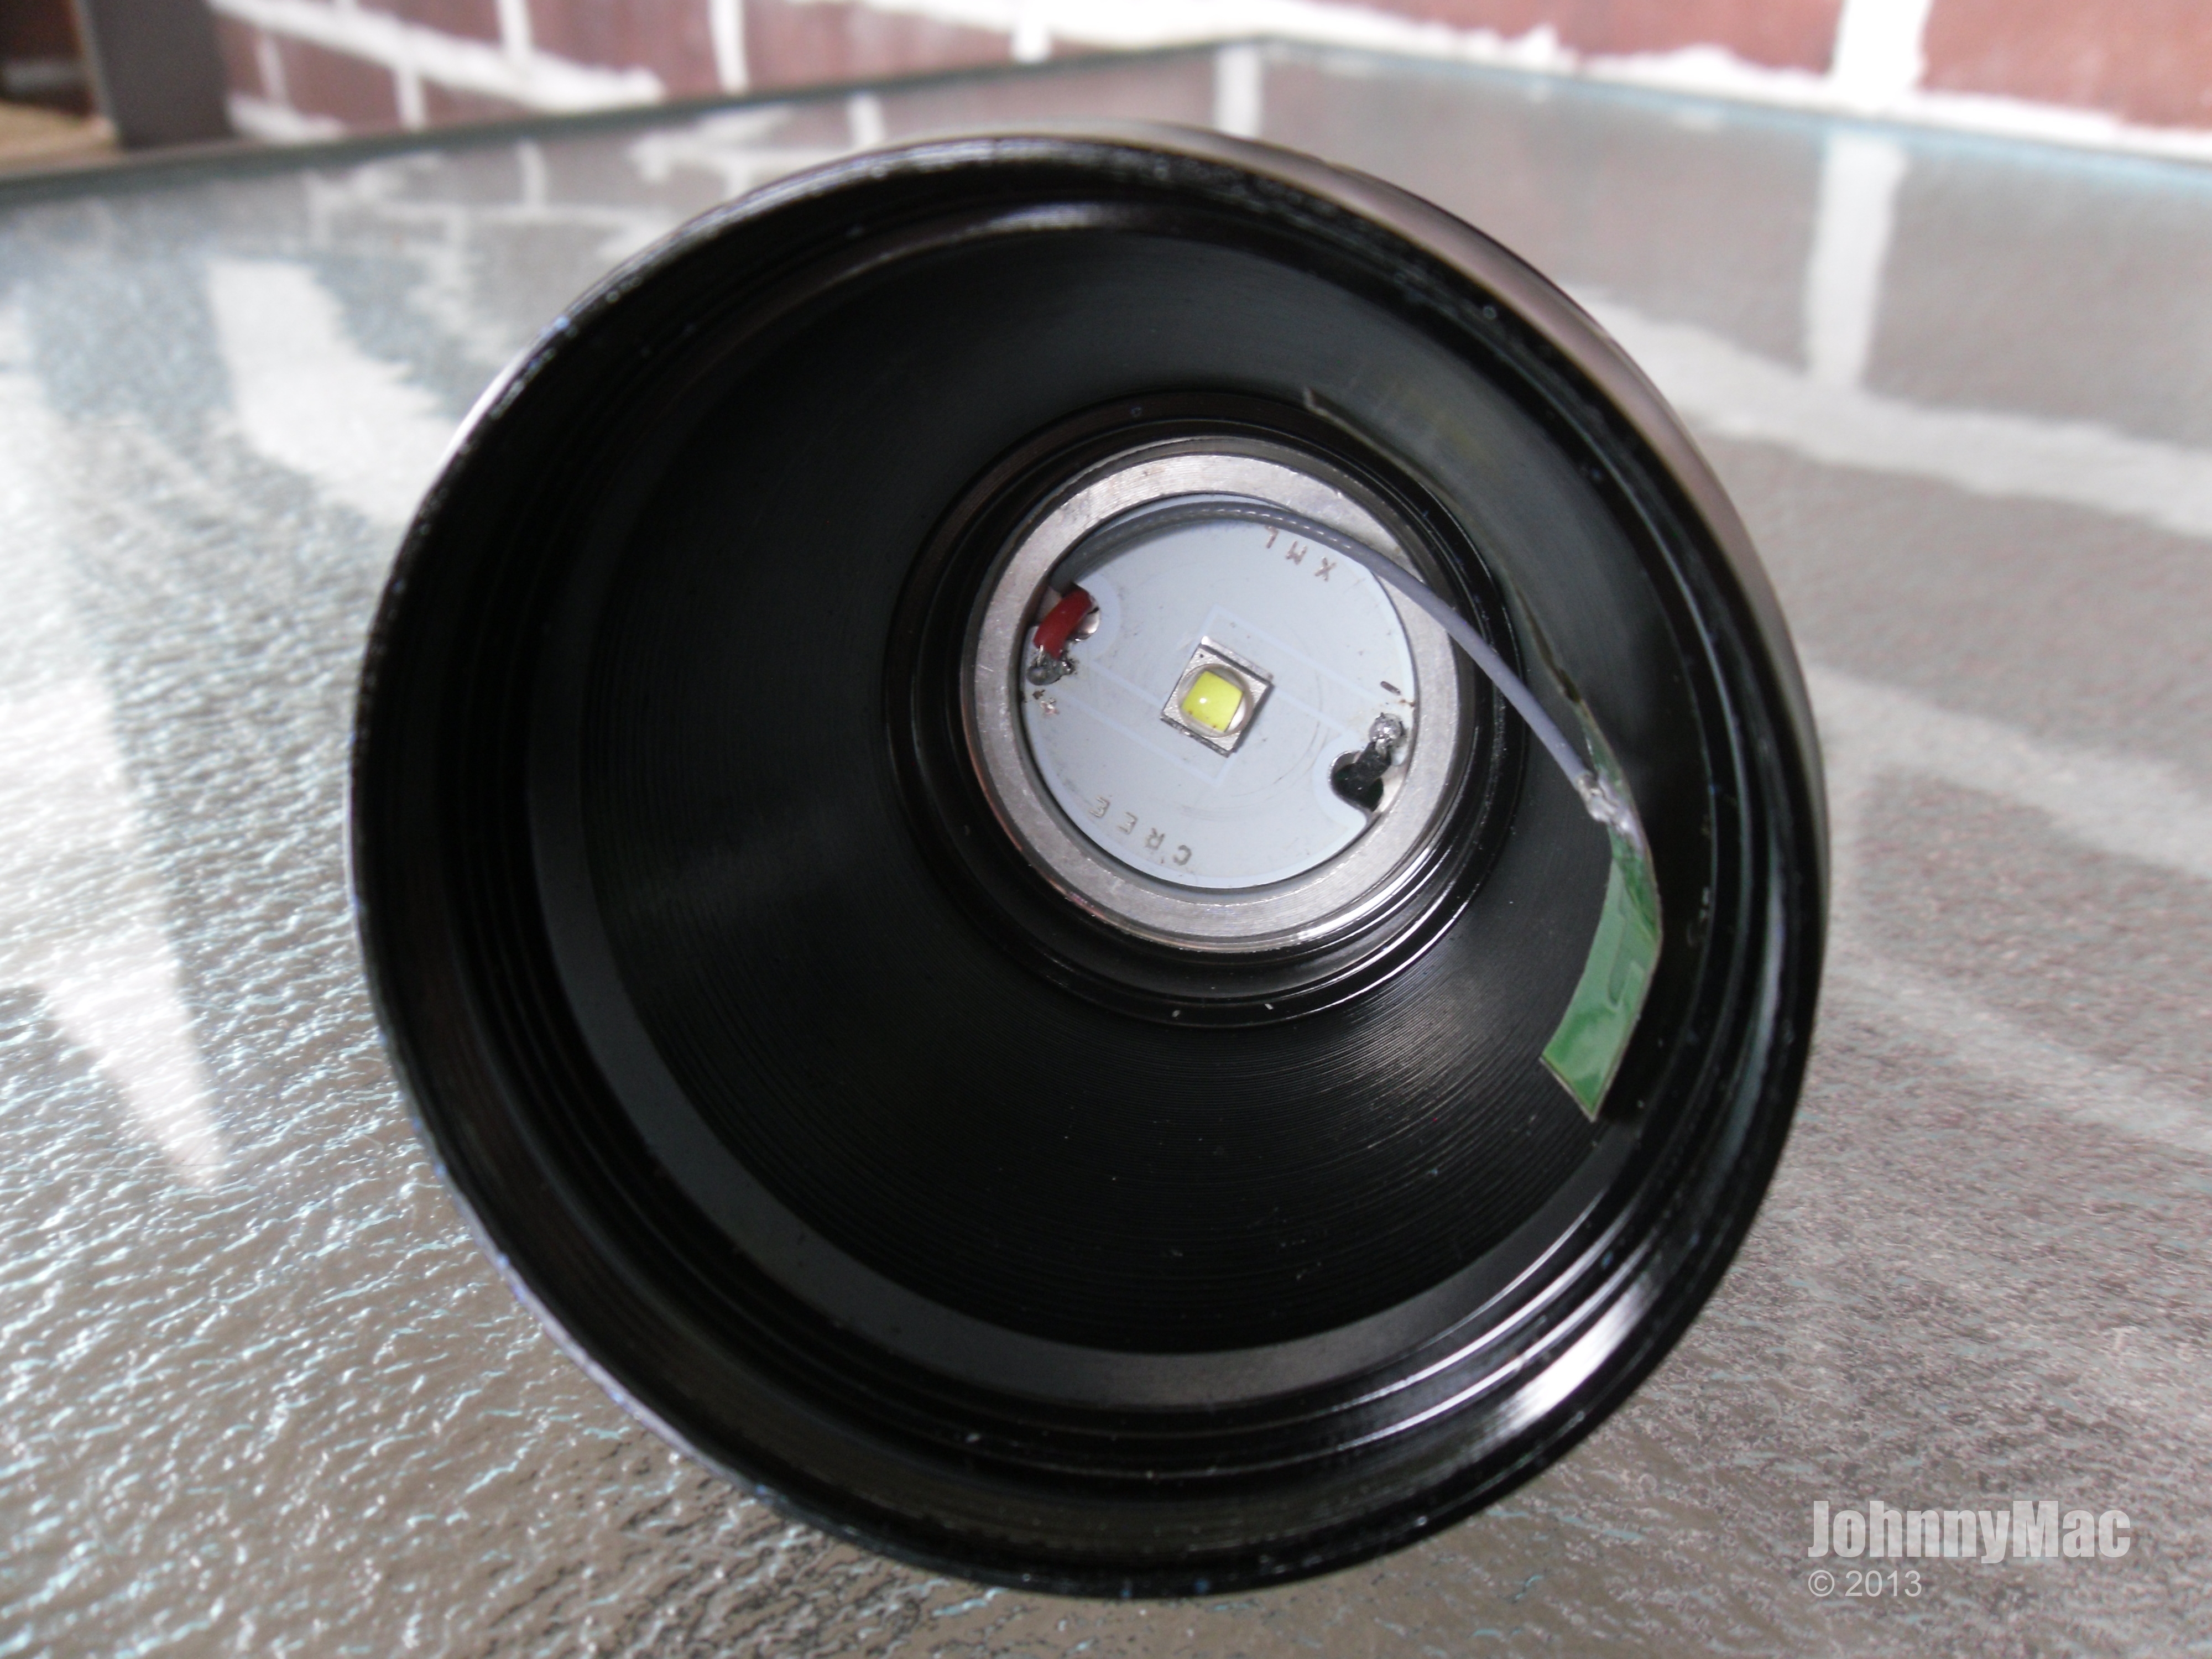
Looking into the head with the reflector removed we can see the external BT antenna. XM-L2 emitter, and 25mm MCPCB.
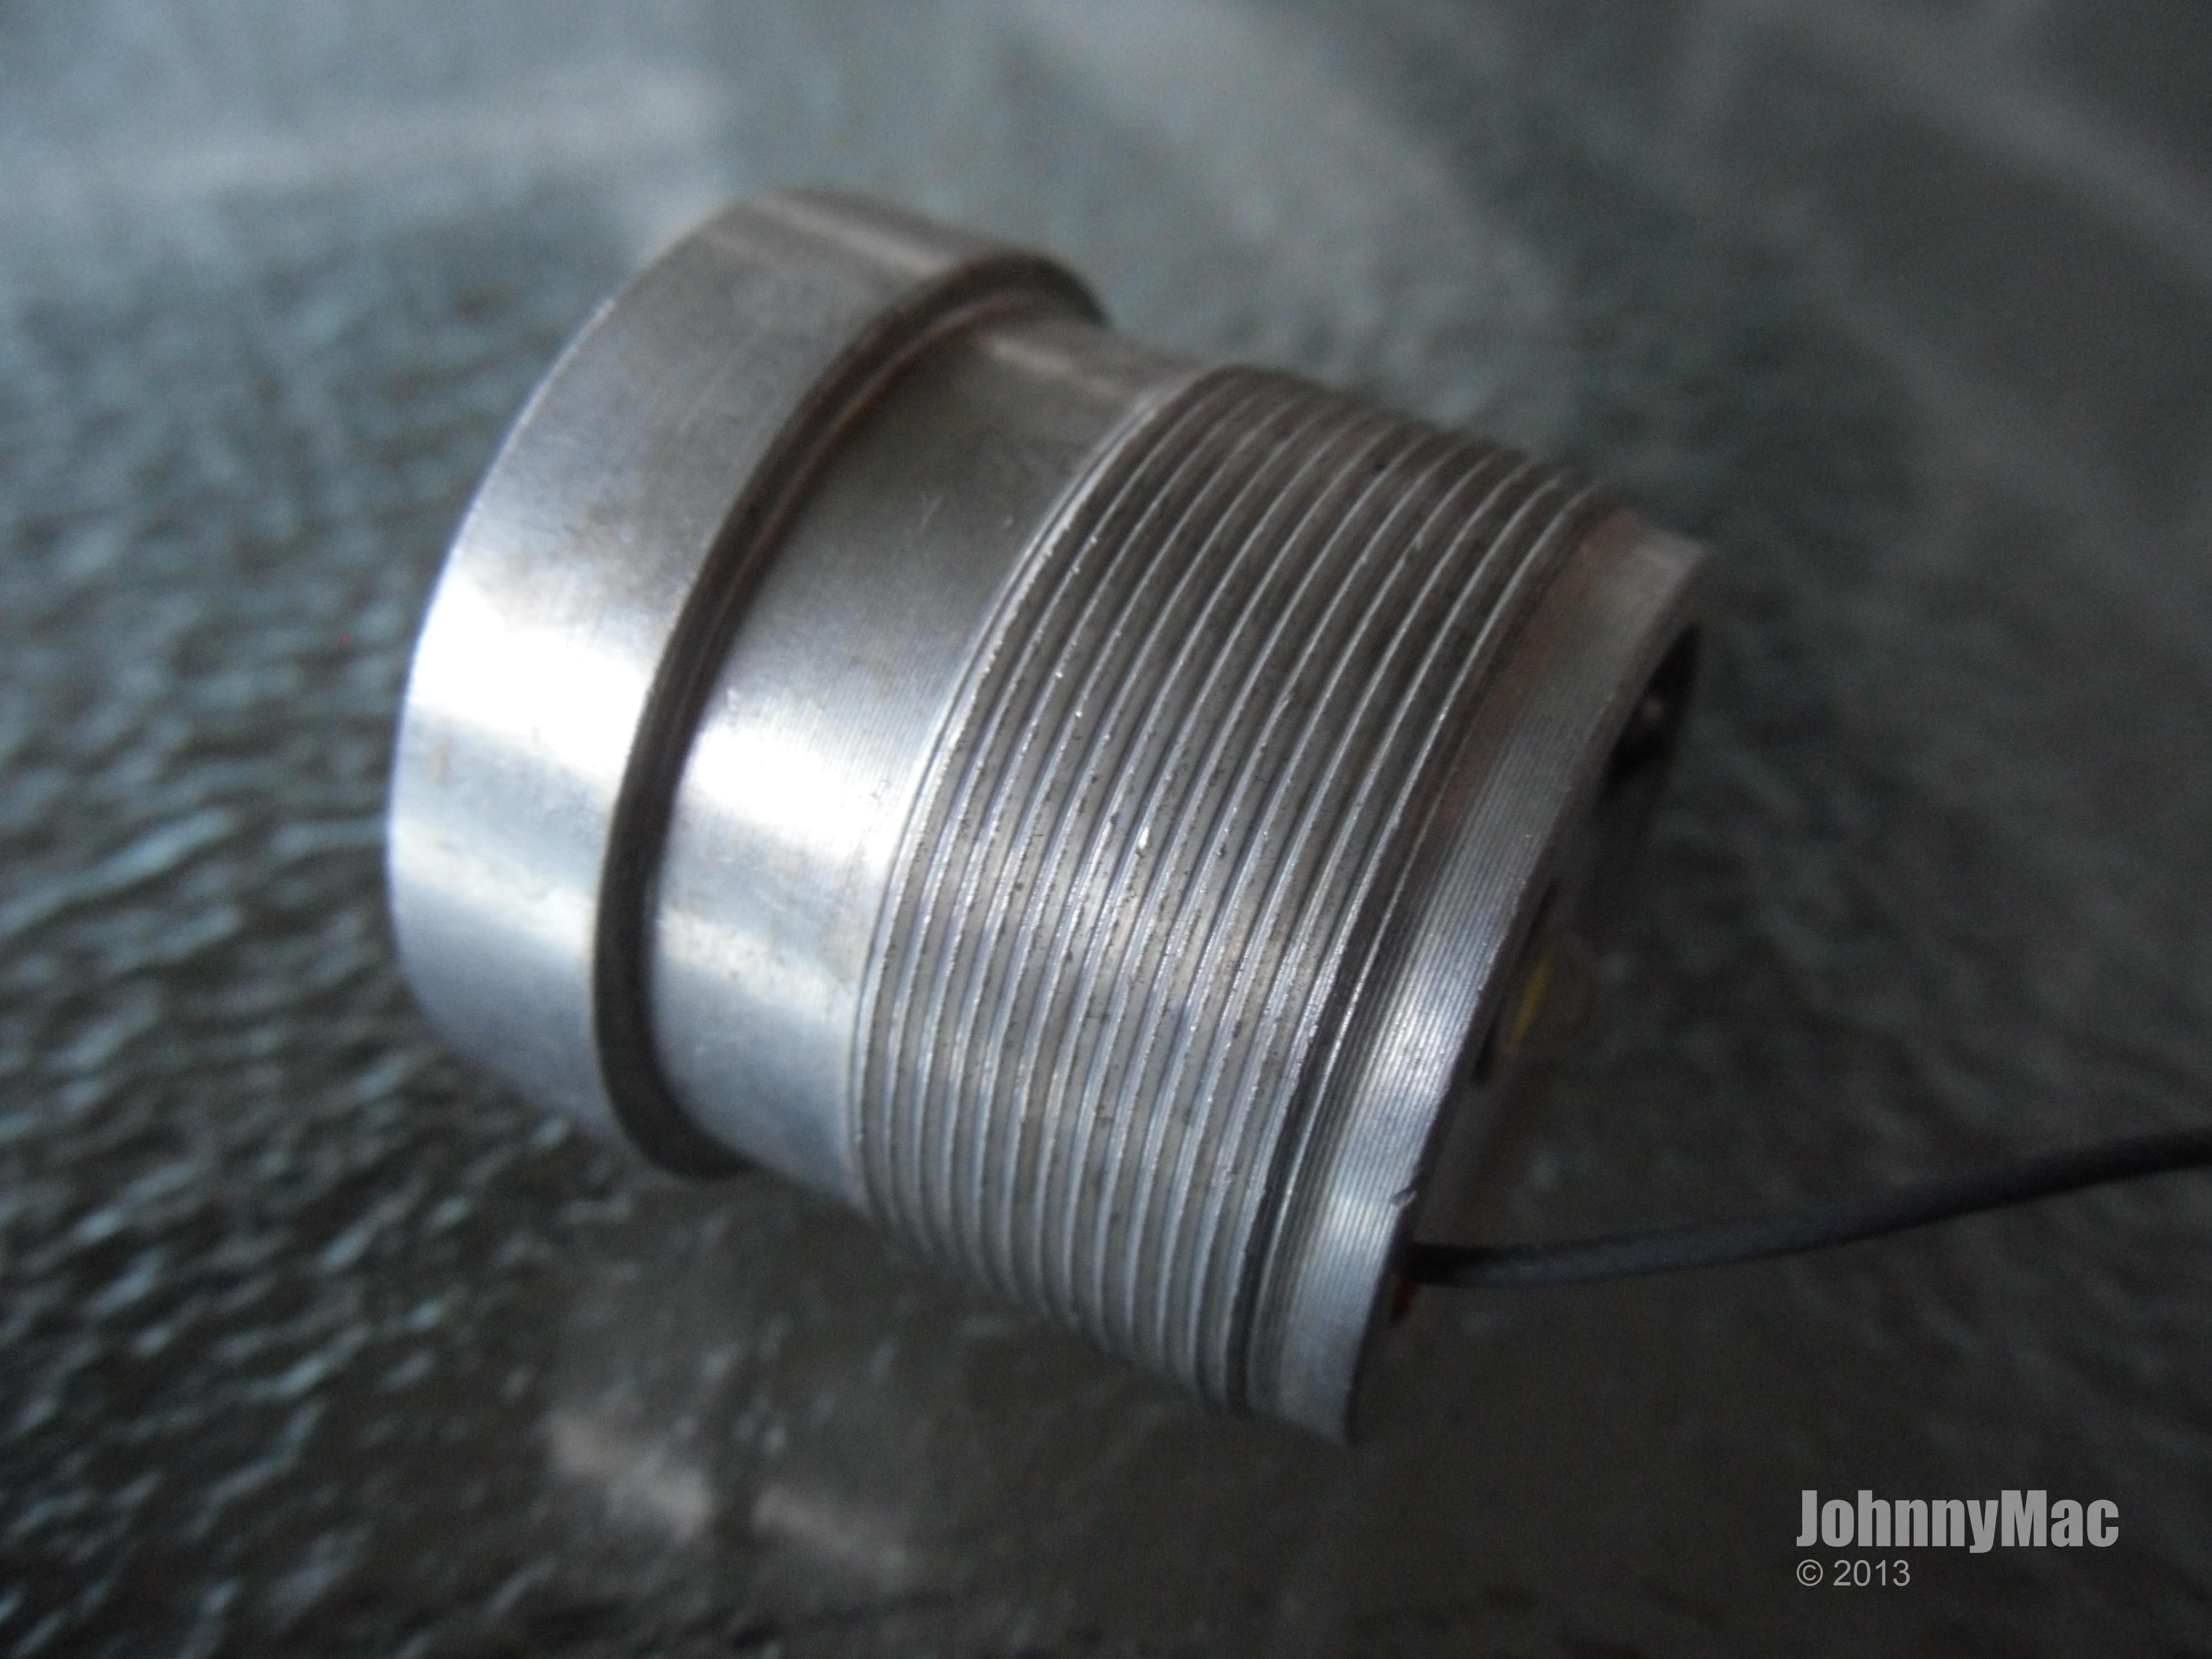
Ample fins for heat transfer to the air along with deep, cleanly machined anodized threads. An O-ring helps seal out moisture from the interior of the light.

The pill removed from the head.
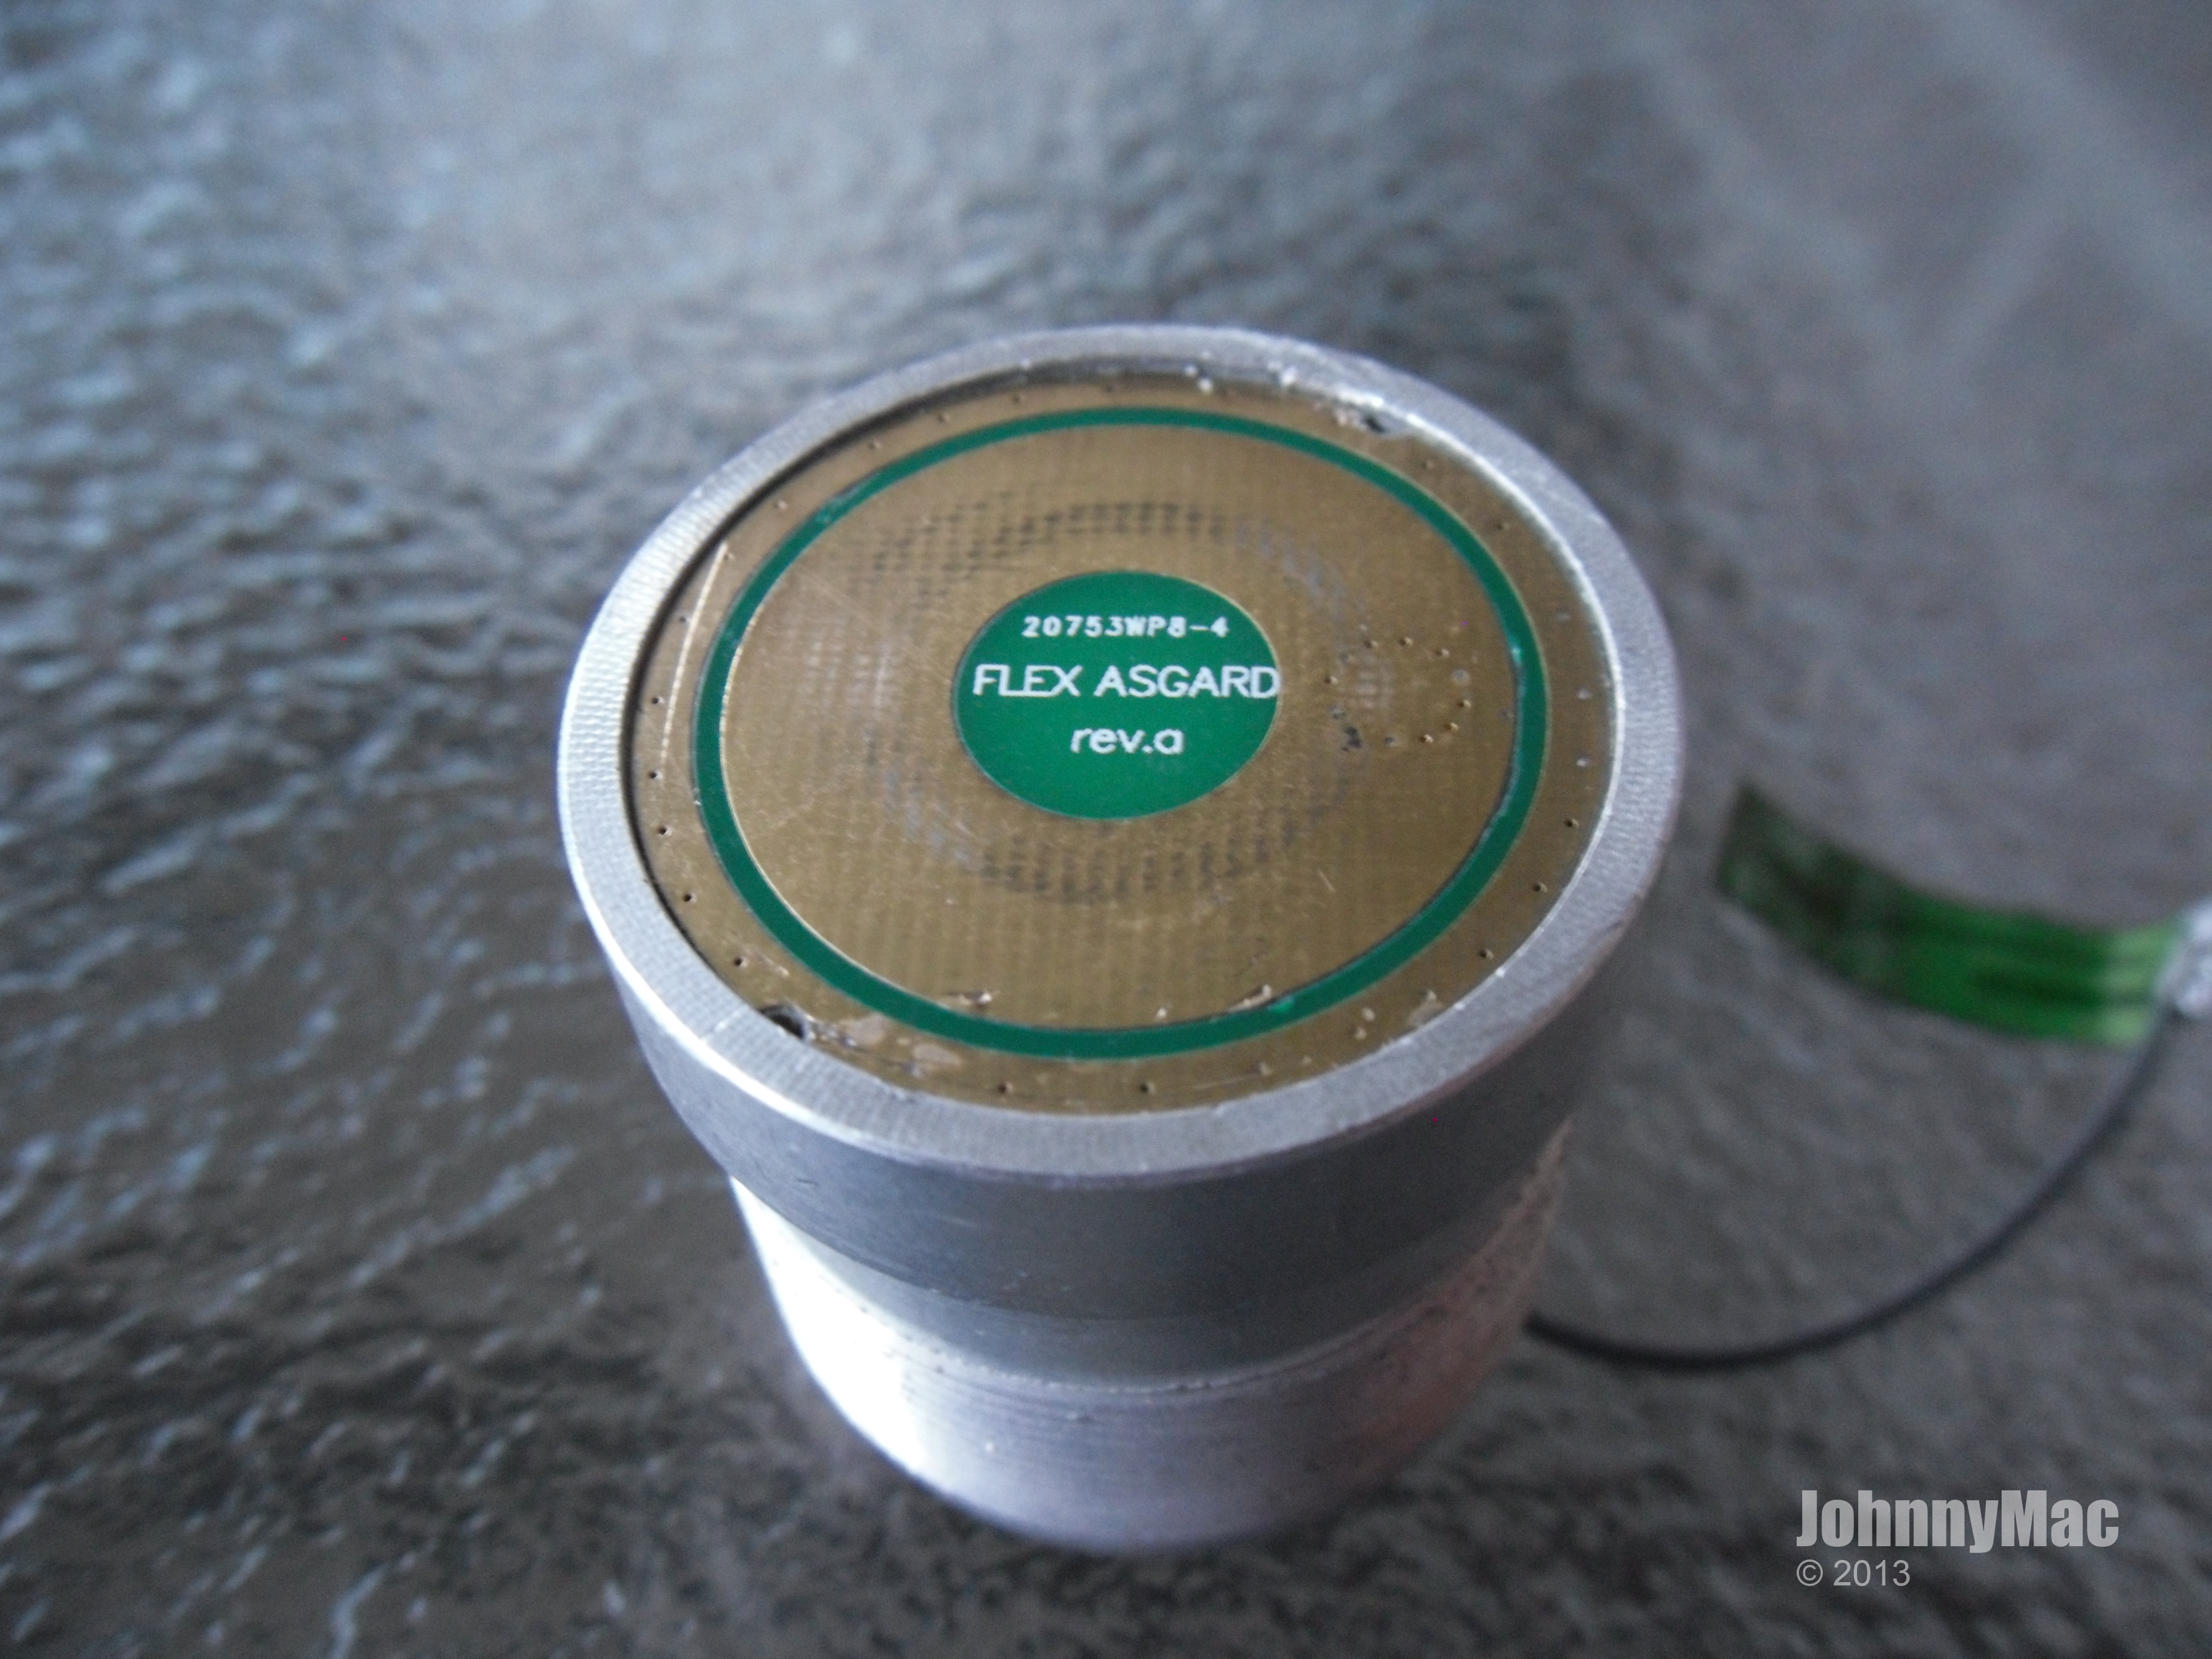
Here you can see the entire pill along with the external BT antenna.

The main pill is huge and has lots of threading to help in transferring heat away from the pill and into the body of the head.
The 25mm MCPCB onto which the Cree XM-L2 T61C emitter is mounted. An optional model with am XM-L2 T6 3C is also available for those who care about tint more than maximum output.

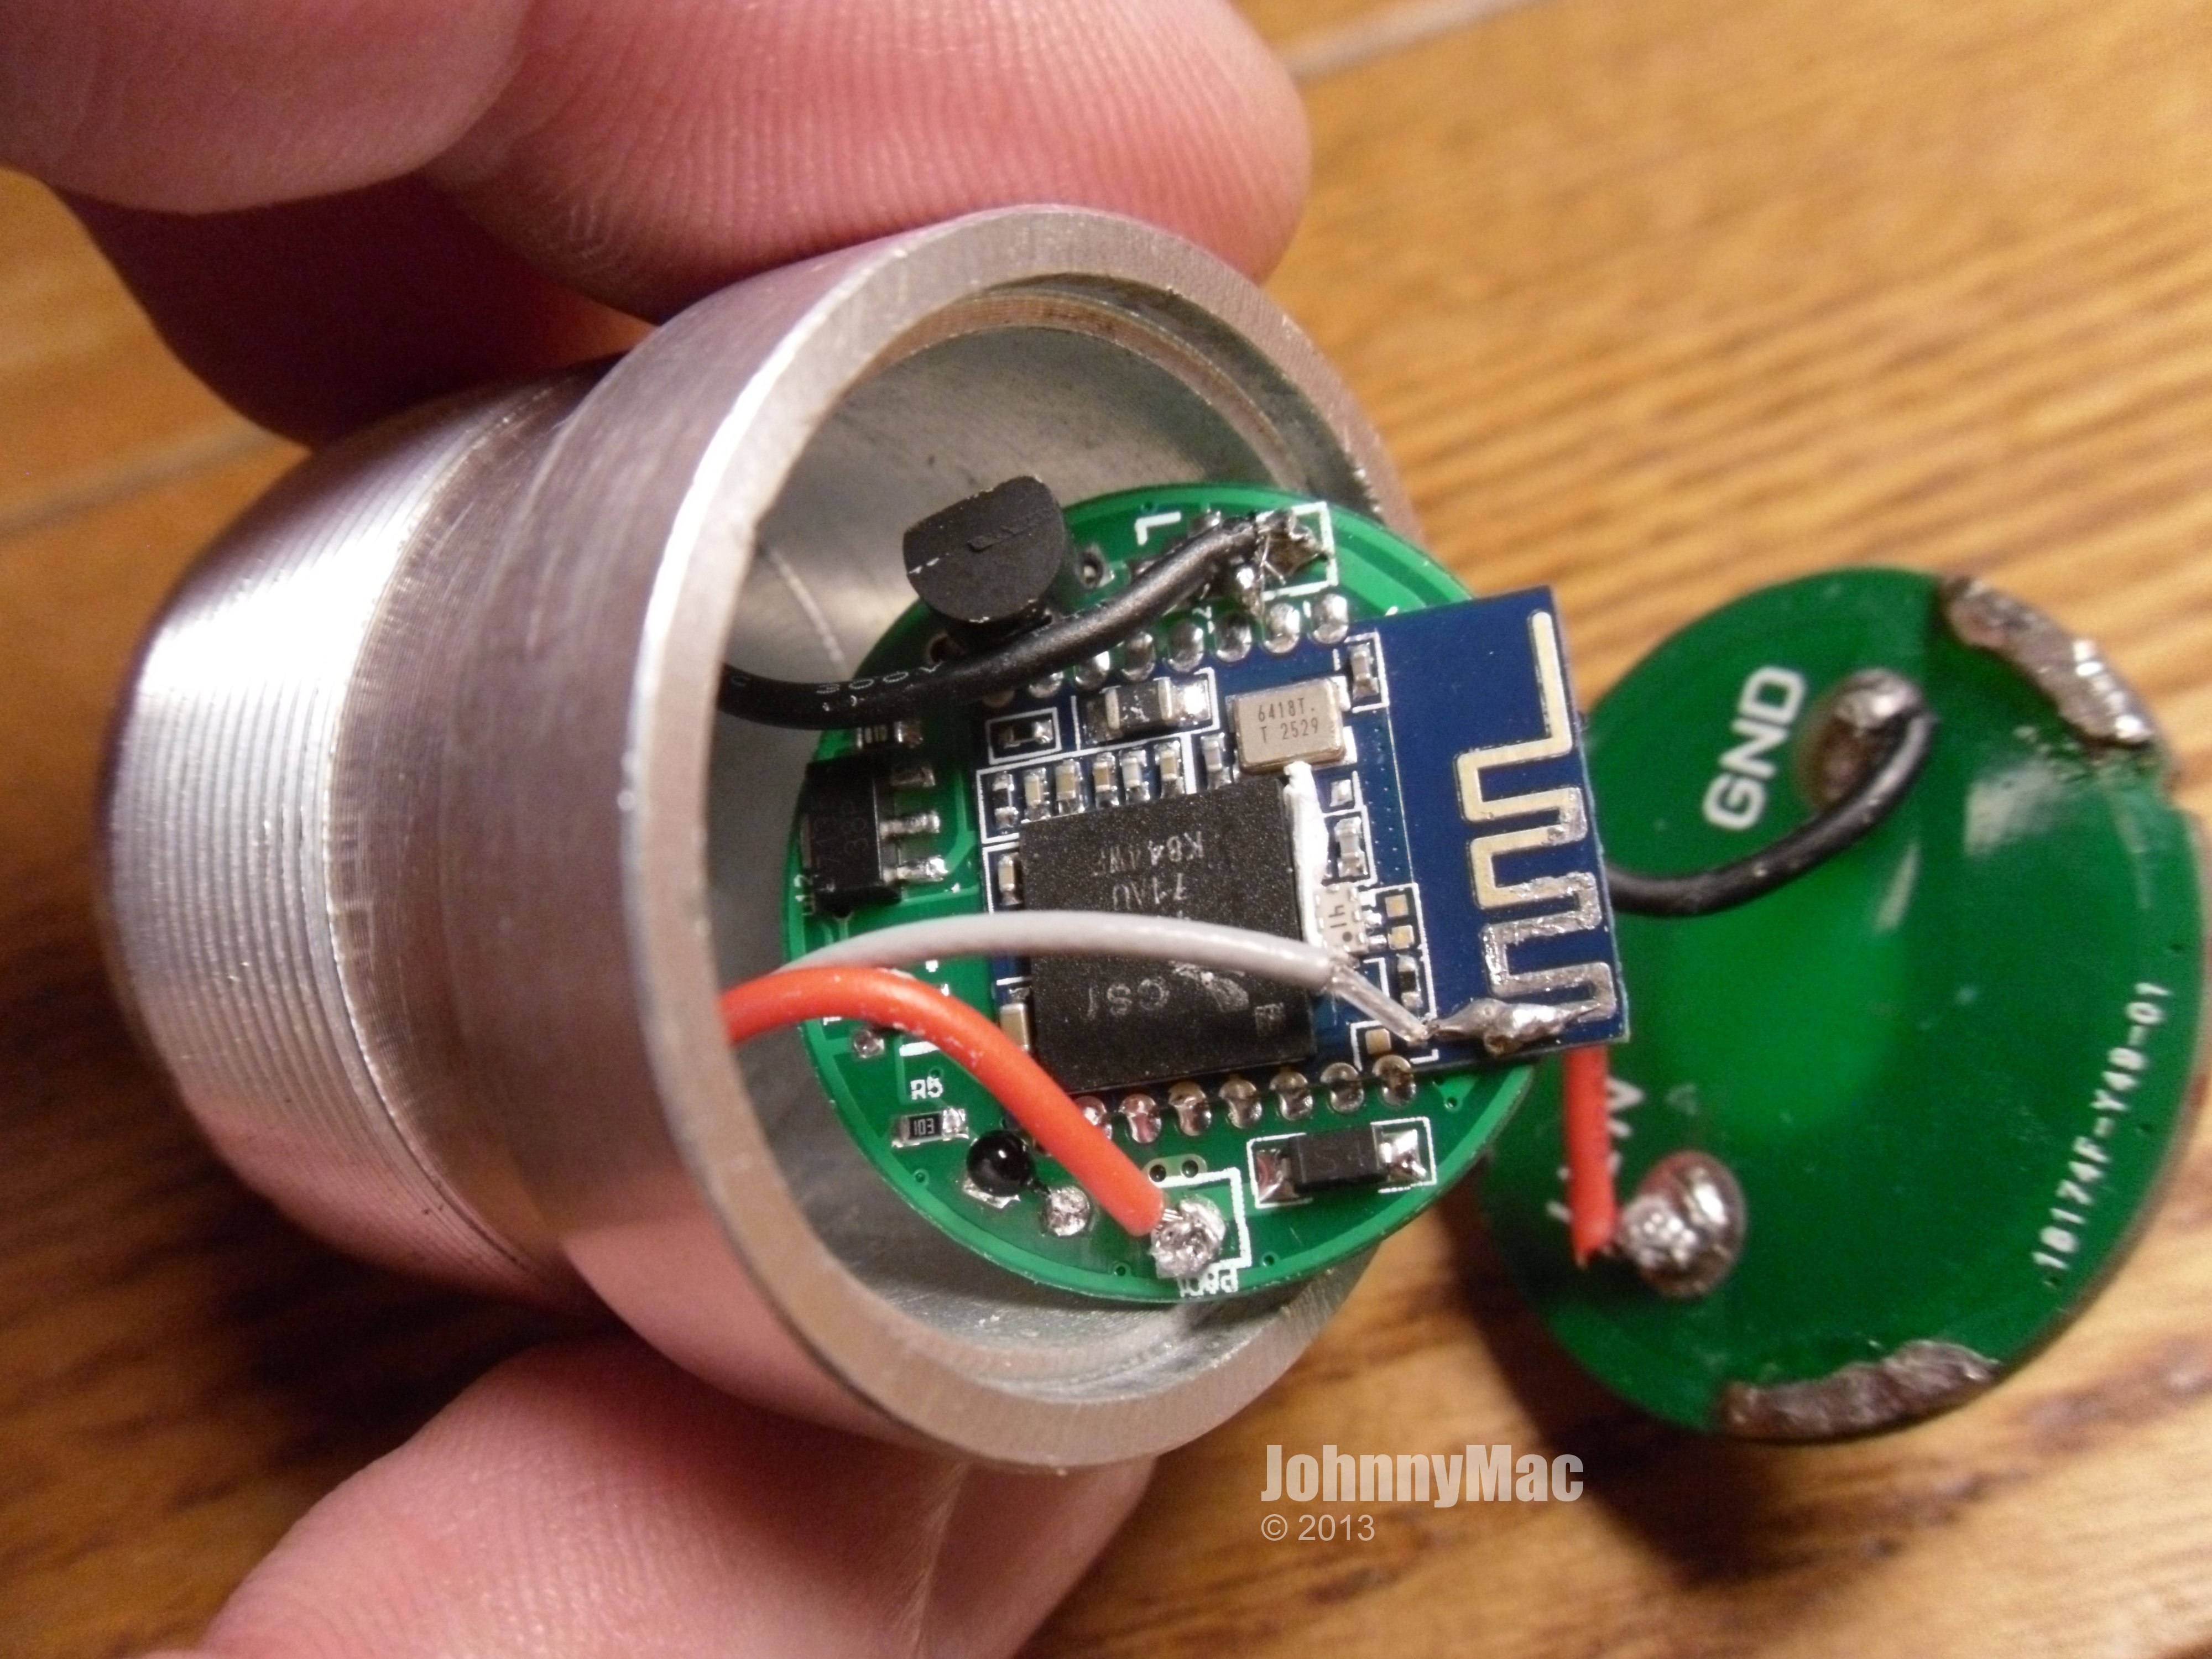
Removing the press-fit driver contact plate exposes the main driver board with it's 8*AMC7135 format. 7 of the chips are mounted on one side.
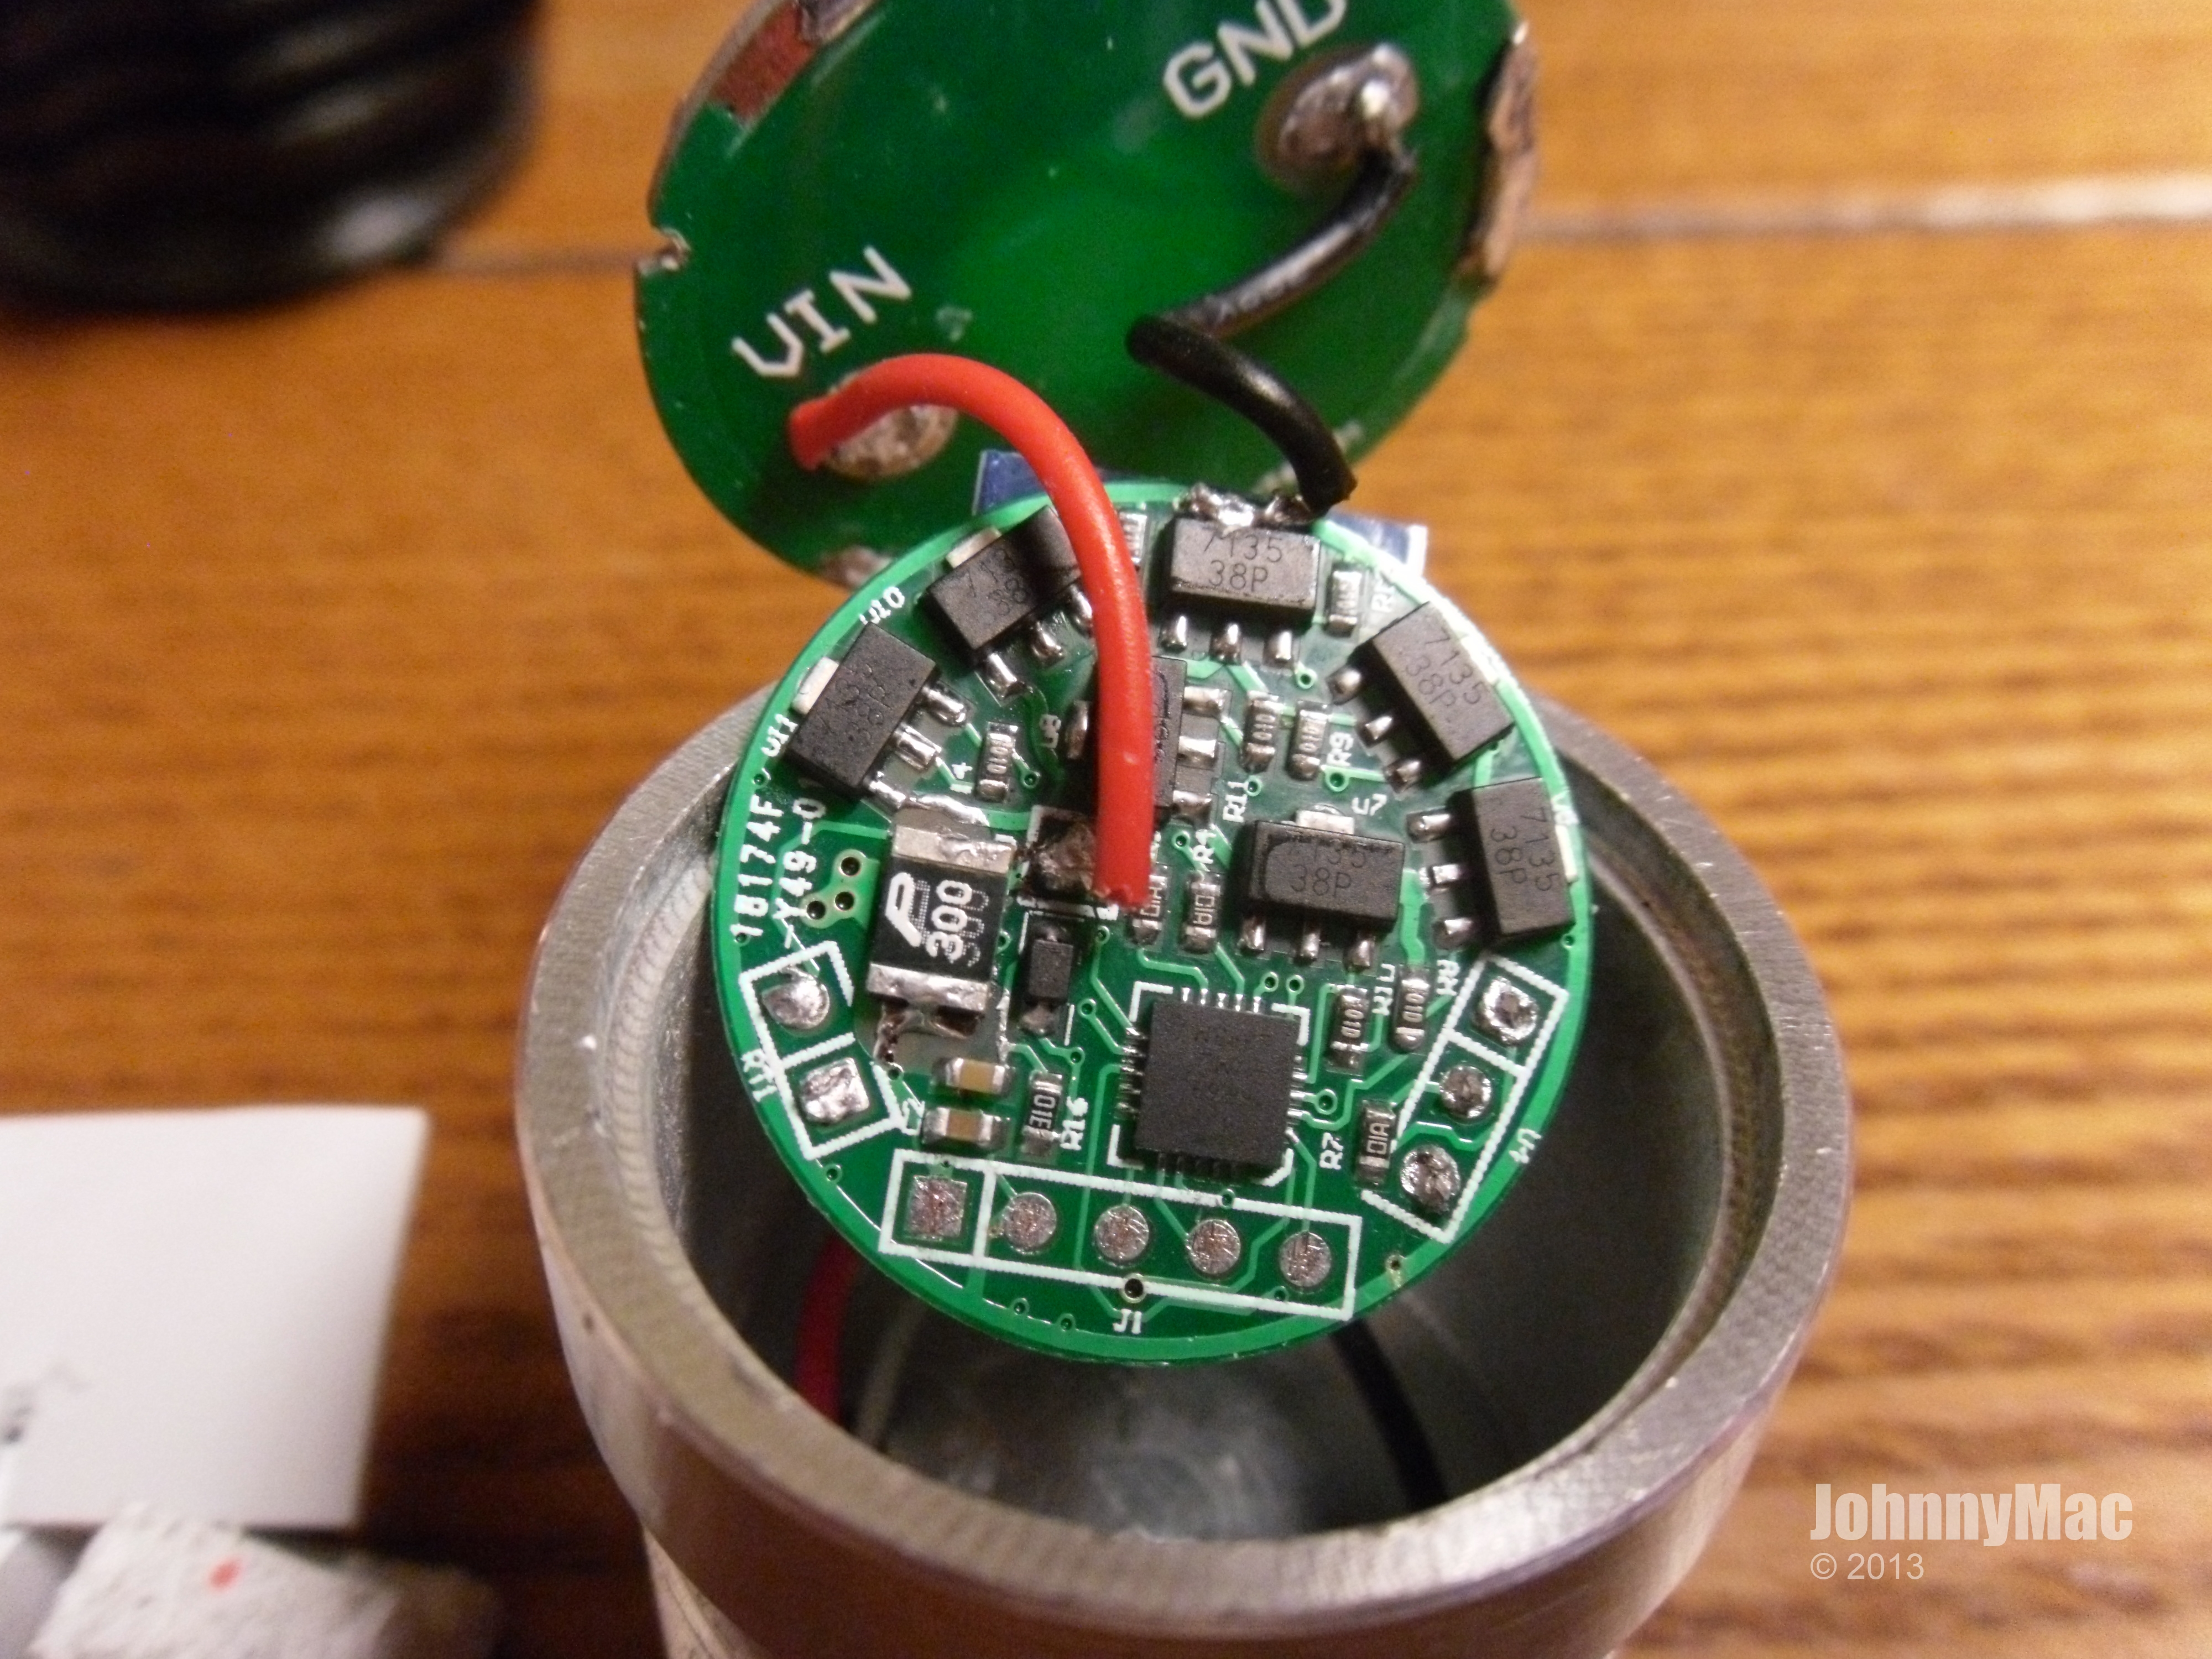
While the 8th AMC7135, the MCU, and the Bluetooth board are mounted on the other side along with the rest of the components. The external BT antenna is wired onto the main BT board via the gray wire.
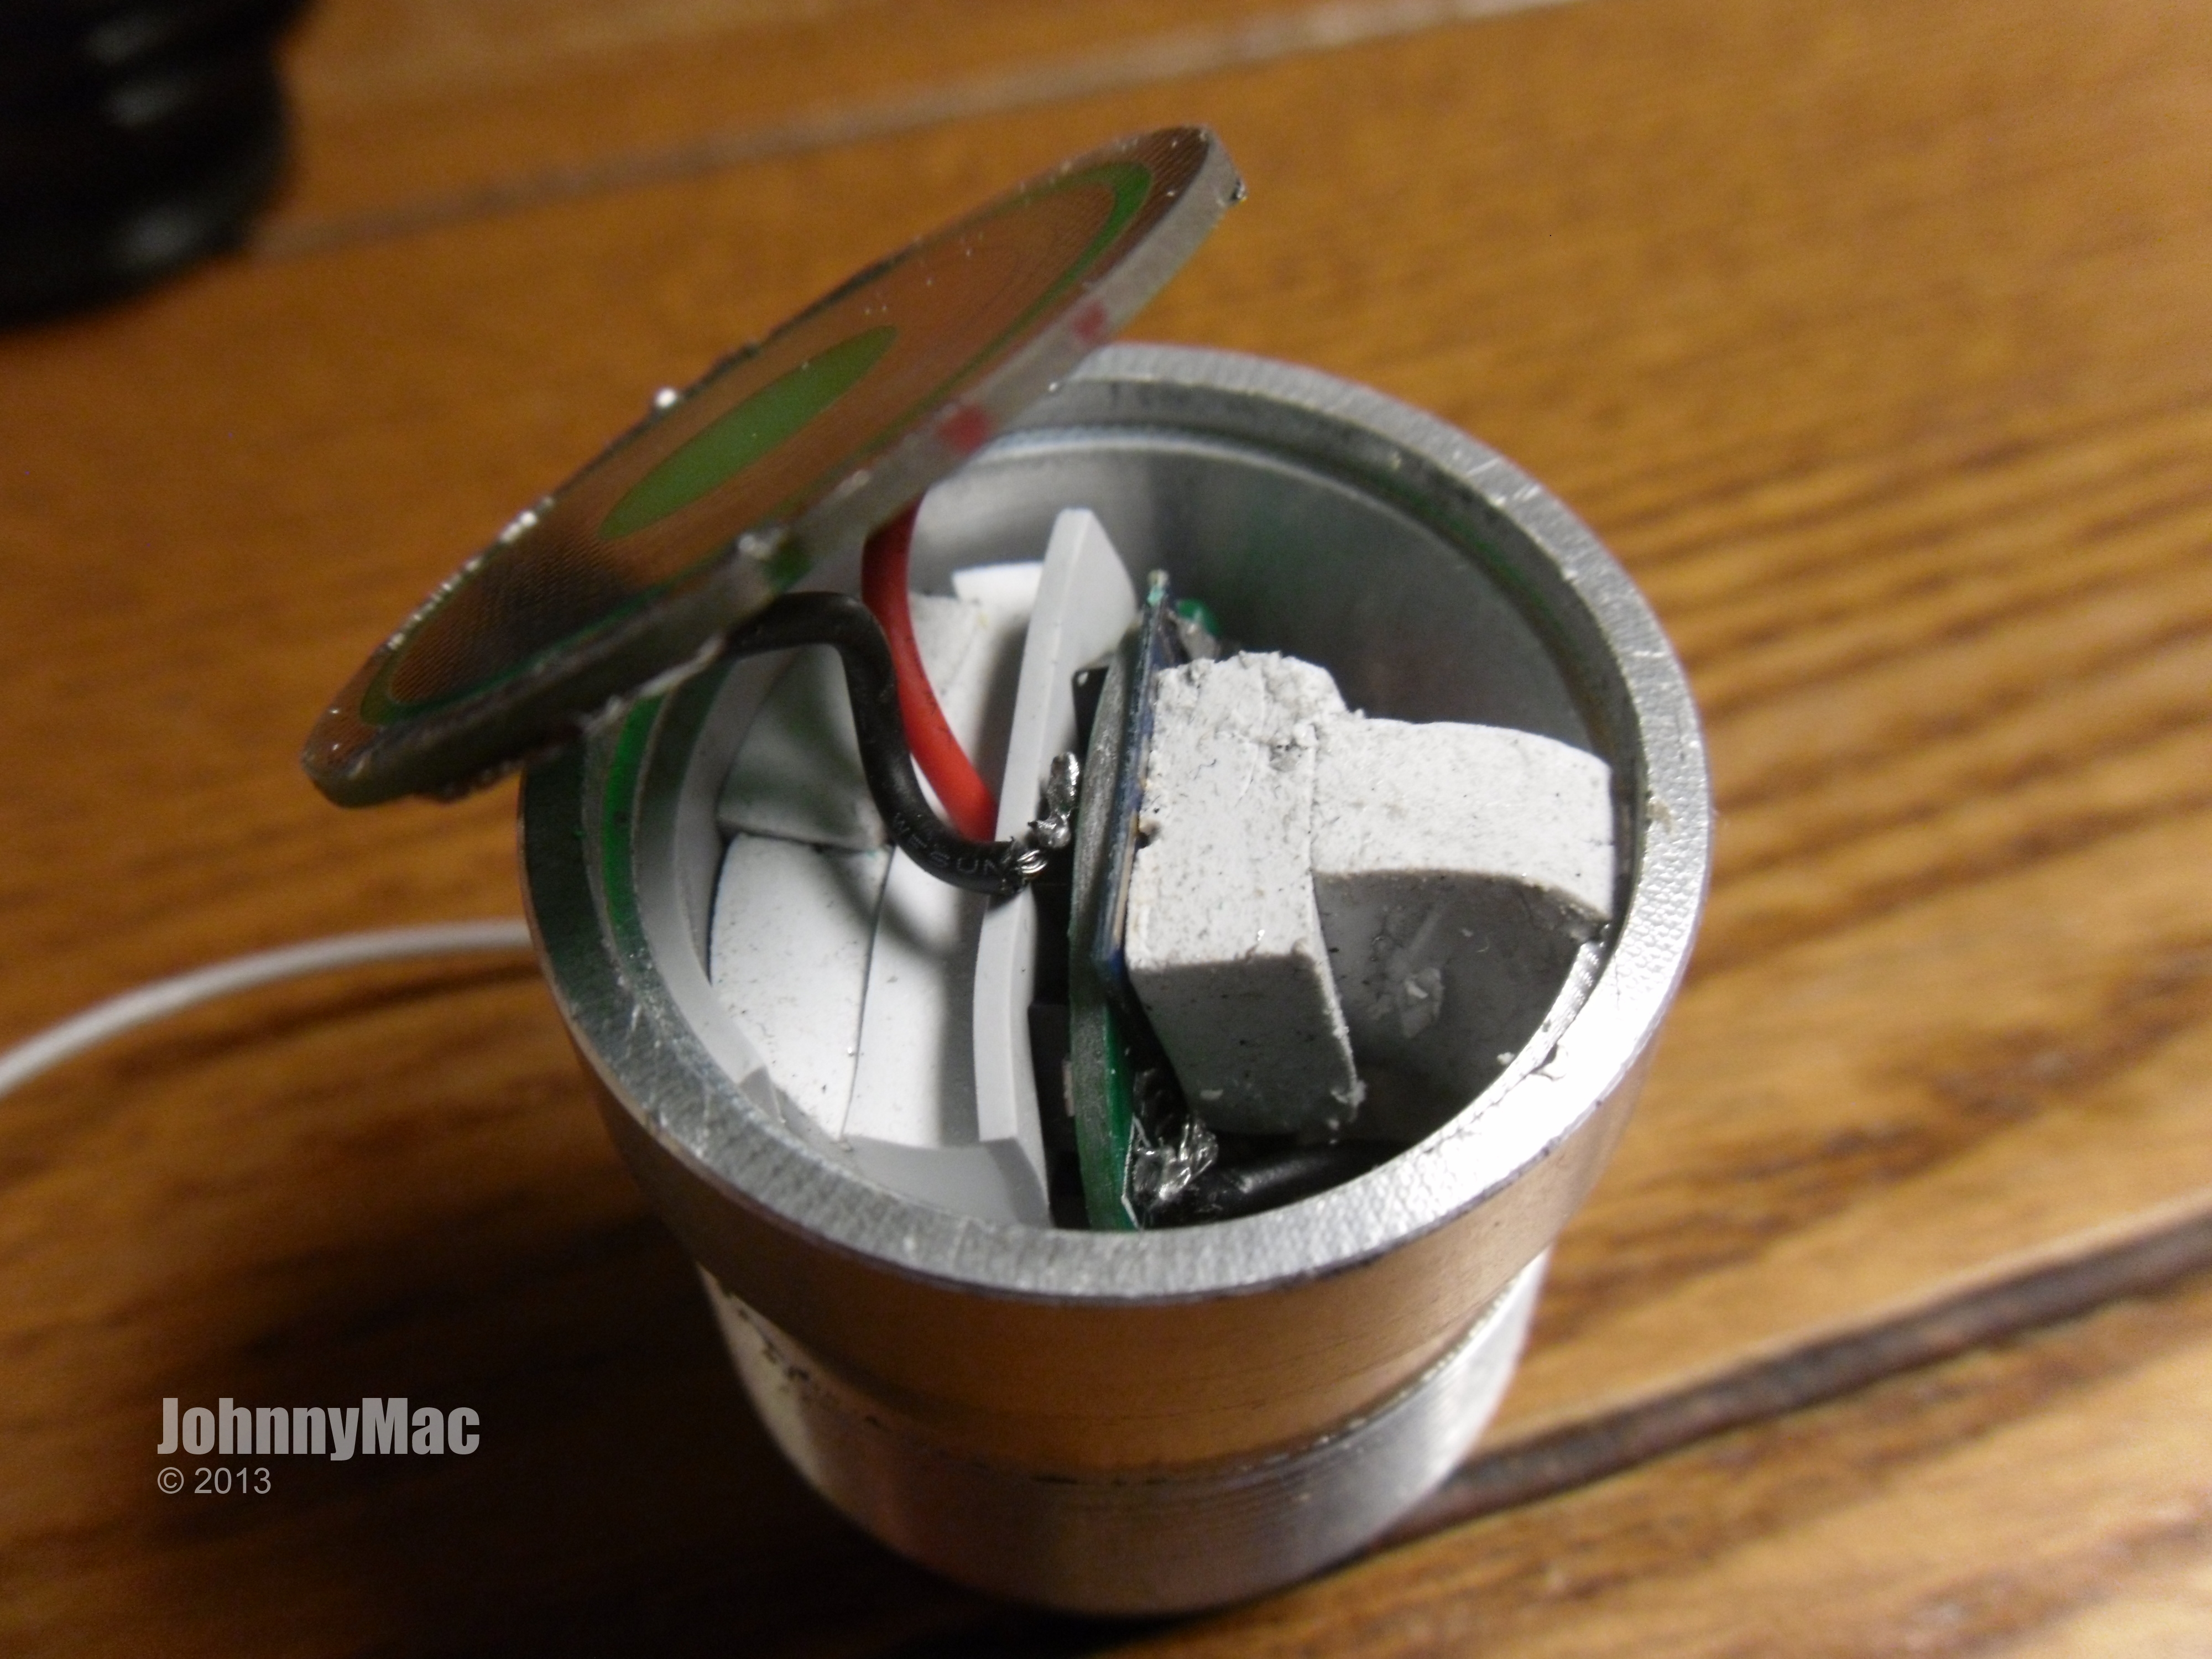
This is what the driver looks like with it's thermal foam holding the driver safely in place.
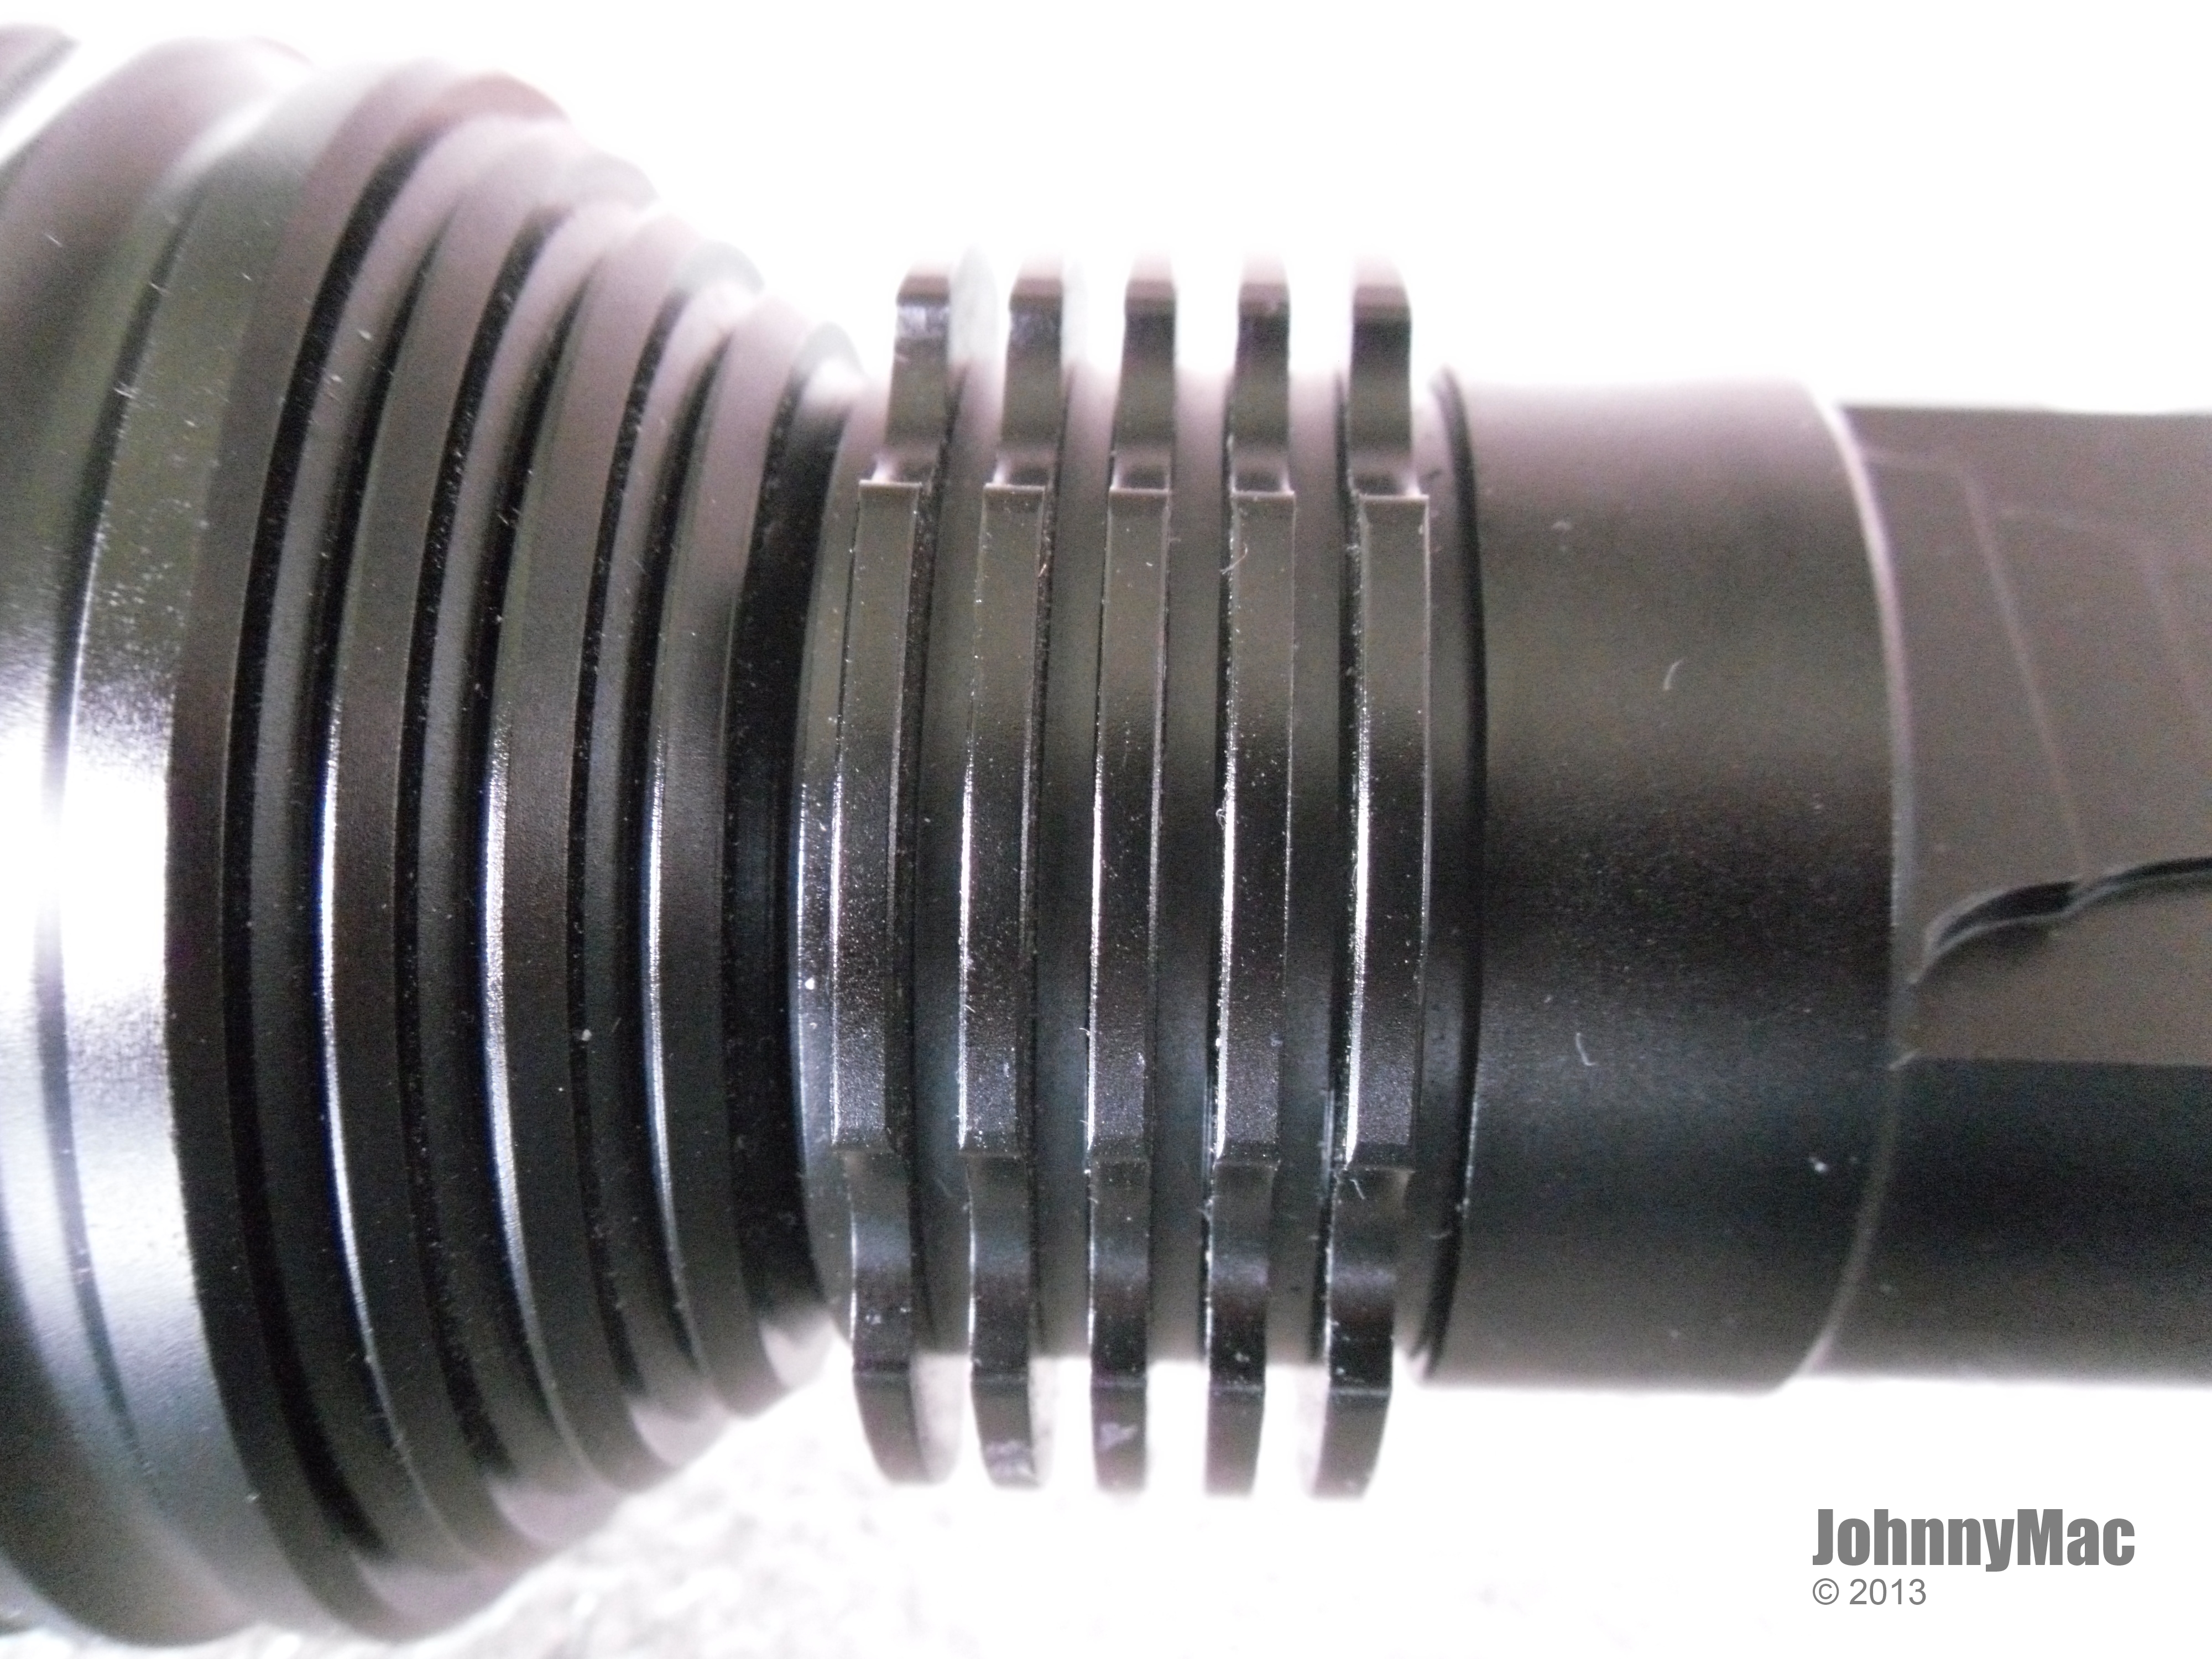
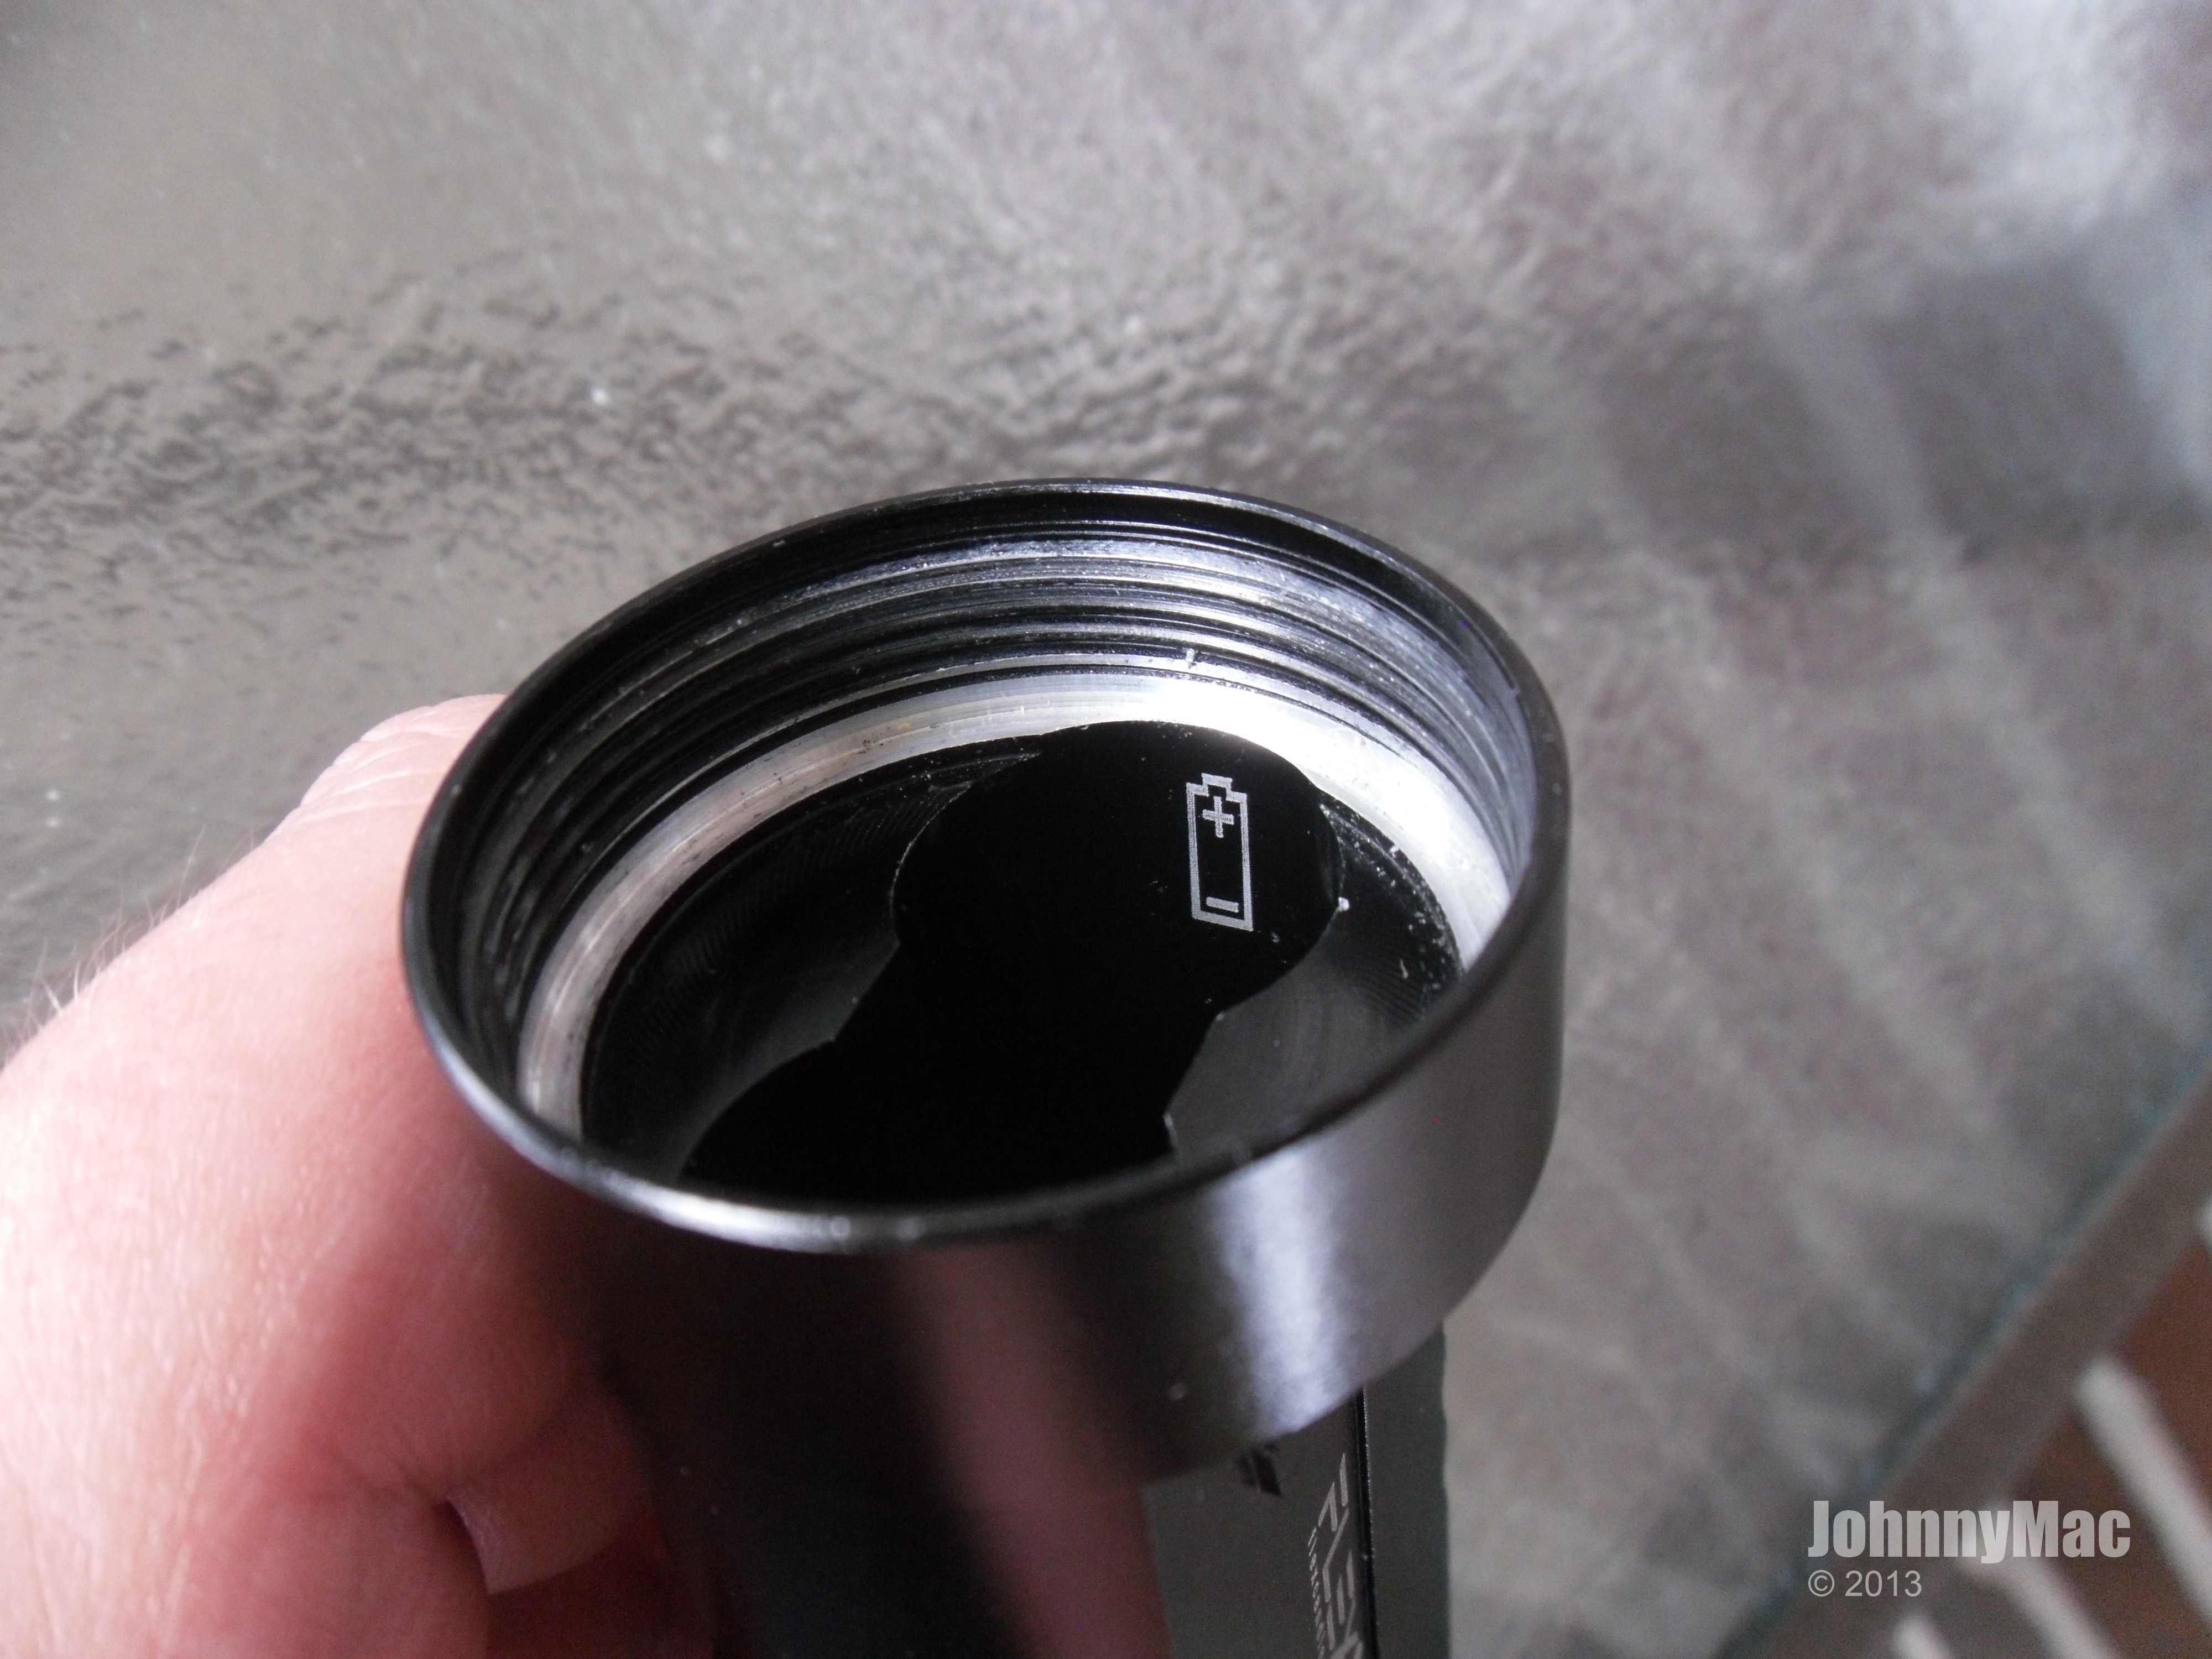
Clean, smooth anodized threads on the body thread onto the head. Battery orientation graphics etched into the cell tubes.
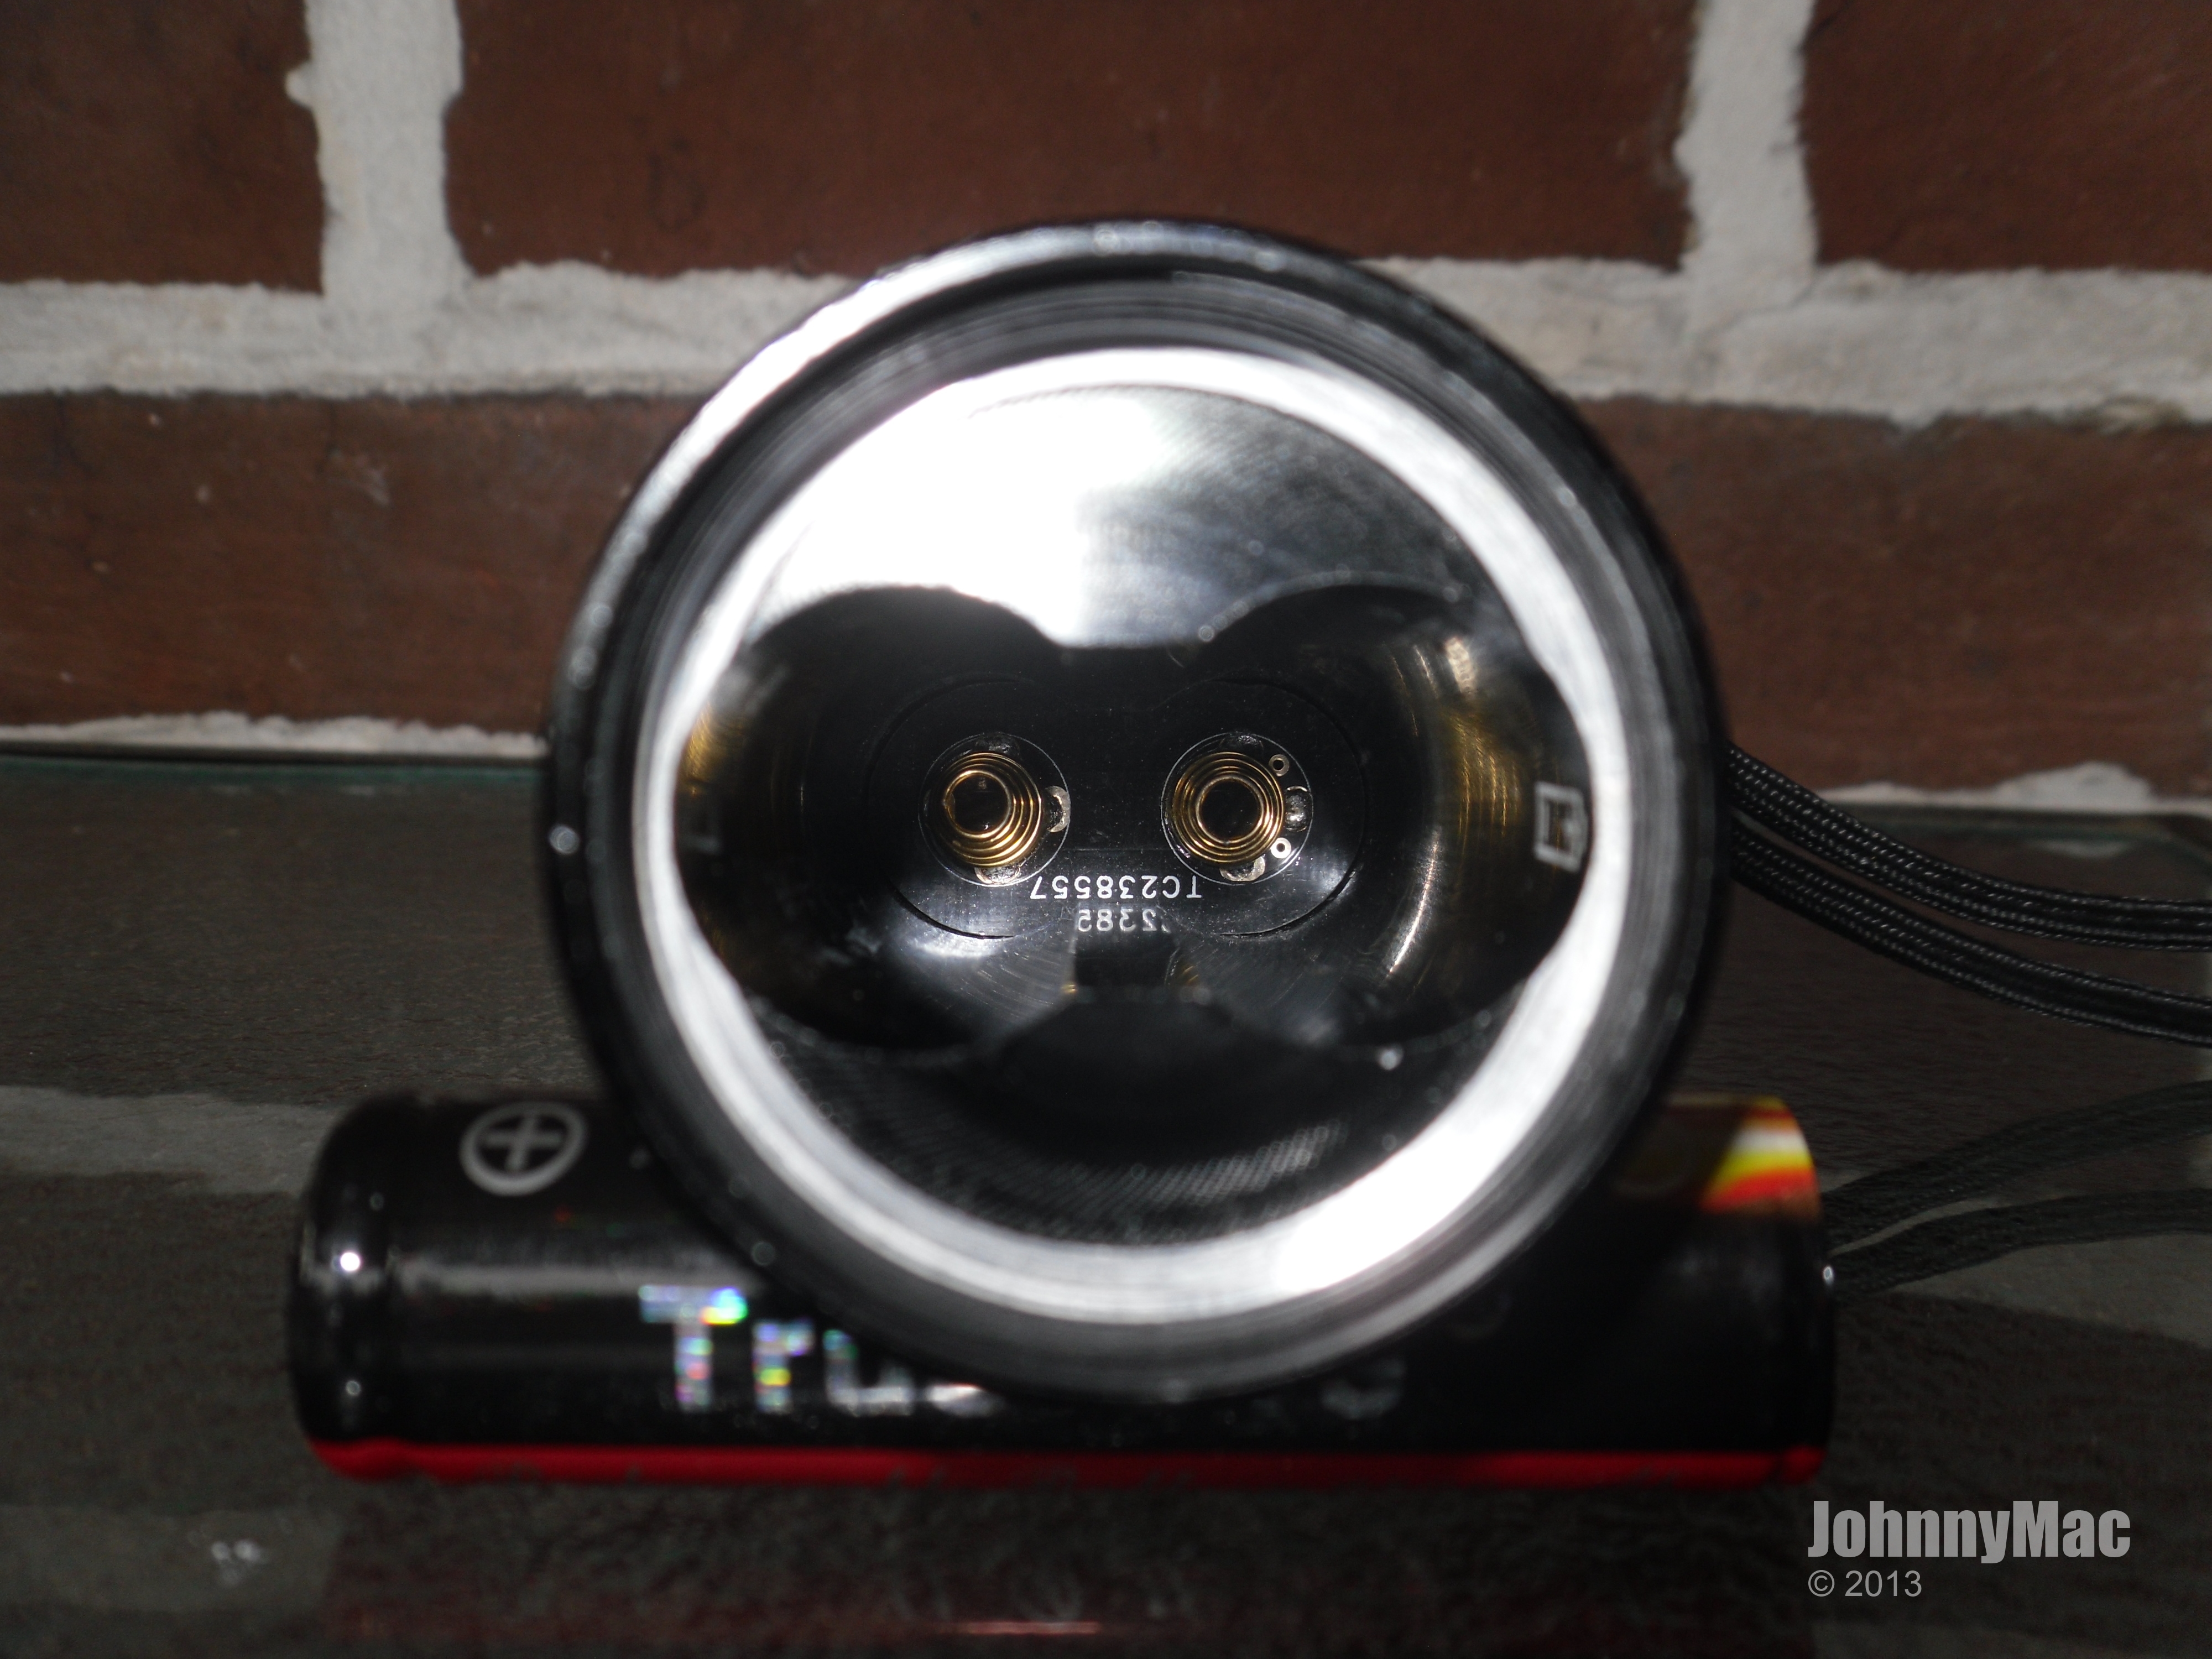
Parallel cell tubes machined into the one-piece body.
Stainless steel base over the spring/switch PCB. GITD boot covers the reverse clicky switch.
Now onto the best part of the Asgard...the driver feature set!
Interfacing with driver and making it all possible is a fantastic little Android application developed by Fasttech/FLEXcandles engineers. There is also a Windows application that is in development that offers the same feature set as the Android version. At this time there are no plans for an IOS version of the application but that could change in time.
With the FLEX application one can create numerous profiles that are saved on your mobile device. You can also enable or disable mode memory based on your personal preference. You can also enable/disable voltage protection in addition to seeing the battery voltage and temperature of the light thanks to the sensors built into the driver that transmit this data from the light to the application. The light comes preprogrammed with 3 modes (Low, Medium, and High) but can be custom programmed with any combination of the following output and time increments. This is what makes the FLEX technology so much fun to use and truly versatile since it can literally be all things to all people.
PROGRAMMABLE OPTIONS
| OUTPUT LEVELS | TIME INCREMENTS | |
| Off | Forever | |
| 18mA (non-PWM) | 30ms | |
| 0.6% (PWM) | 50ms | |
| 0.9% (PWM) | 0.1 second | |
| 1.25% (PWM) | 0.2 second | |
| 1.9% (PWM) | 0.3 second | |
| 2.5% (PWM) | 0.4 second | |
| 4.3% (PWM) | 0.5 second | |
| 6.3% (PWM) | 0.6 second | |
| 9.4% (PWM) | 0.7 second | |
| 12.5% (non-PWM) | 0.8 second | |
| 25% (non-PWM) | 0.9 second | |
| 37.5% (non-PWM) | 1 second | |
| 50% (non-PWM) | 1.5 seconds | |
| 62.5% (non-PWM) | 2 seconds | |
| 75% (non-PWM) | 2.5 seconds | |
| 87.5% (non-PWM) | 3 seconds | |
| 100% % (non-PWM) | 4 seconds | |
| 5 seconds | ||
| 6 seconds | ||
| 7 seconds | ||
| *PWM Frequency | 8 seconds | |
| 31.25KHz | 9 seconds | |
| 10 seconds | ||
| 15 seconds | ||
| 20 seconds | ||
| 30 seconds |
| Maximum number of modes: | 30 |
Maximum number of steps per mode: |
32 |
In addition to the standard programming, there is advanced programming that generates Morse code modes based on what you want it to say. It is limited to just 6 characters due to the large amount of individual steps that need to be generated and stored in the lights flash memory. One of the most fun features is that once you upload the new mode profile you create, you can control the light's modes from your Android/Windows device. Here is a video I created that demonstrates this fun little feature.

How to program your new FLEXcandles Asgard
Pair your Asgard by turning it on in any mode then, after 5-7 seconds have passed give a quick half press to enter BT mode. Once in BT mode the emitter will flash 3 times in a row in low. Pair with your phone then open the FLEXcandles app. Click "Connect".
The FLEX app can also store profiles for more than one FLEX enabled flashlight. Once paired, the Model # and MAC address of the flashlight is displayed at the top. If you have more than one FLEX enabled light you can select from a dropdown list which one you are working with.

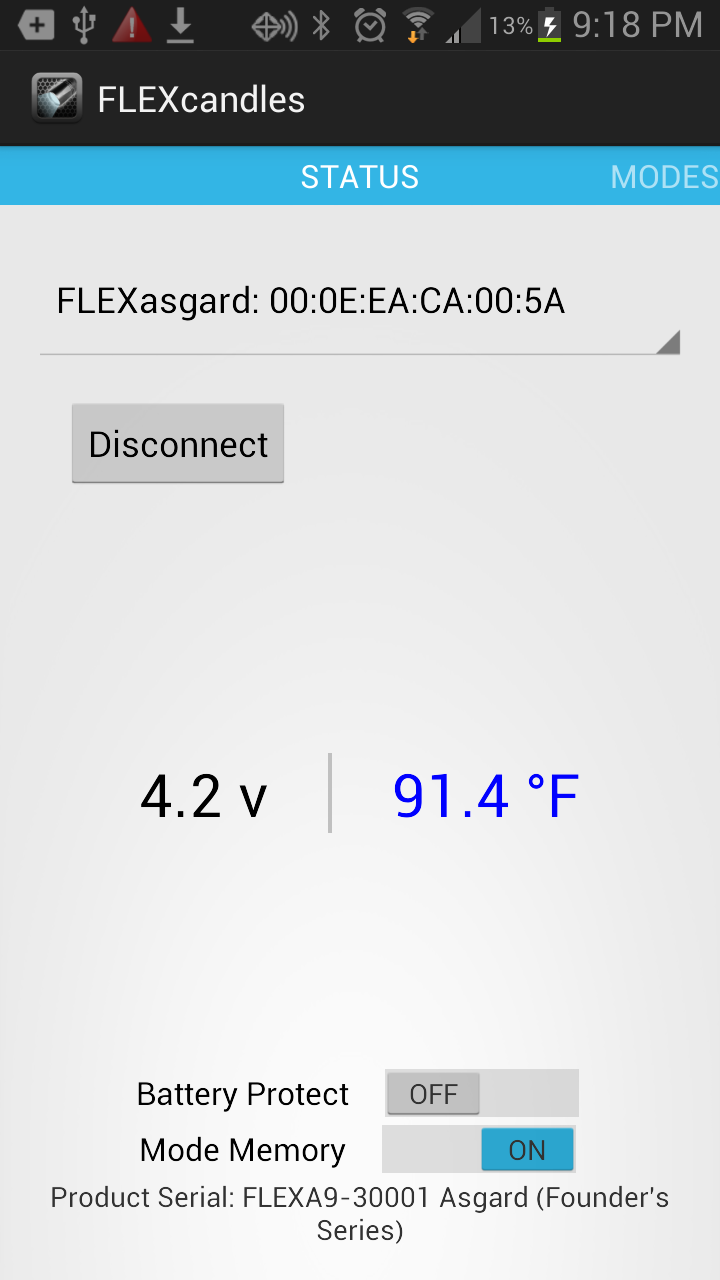
Once your Asgard has connected with the FLEXcandles program you will see the battery voltage and temperature of the light. You can alternate between Fahrenheit and Celsius by touching the temperature display.
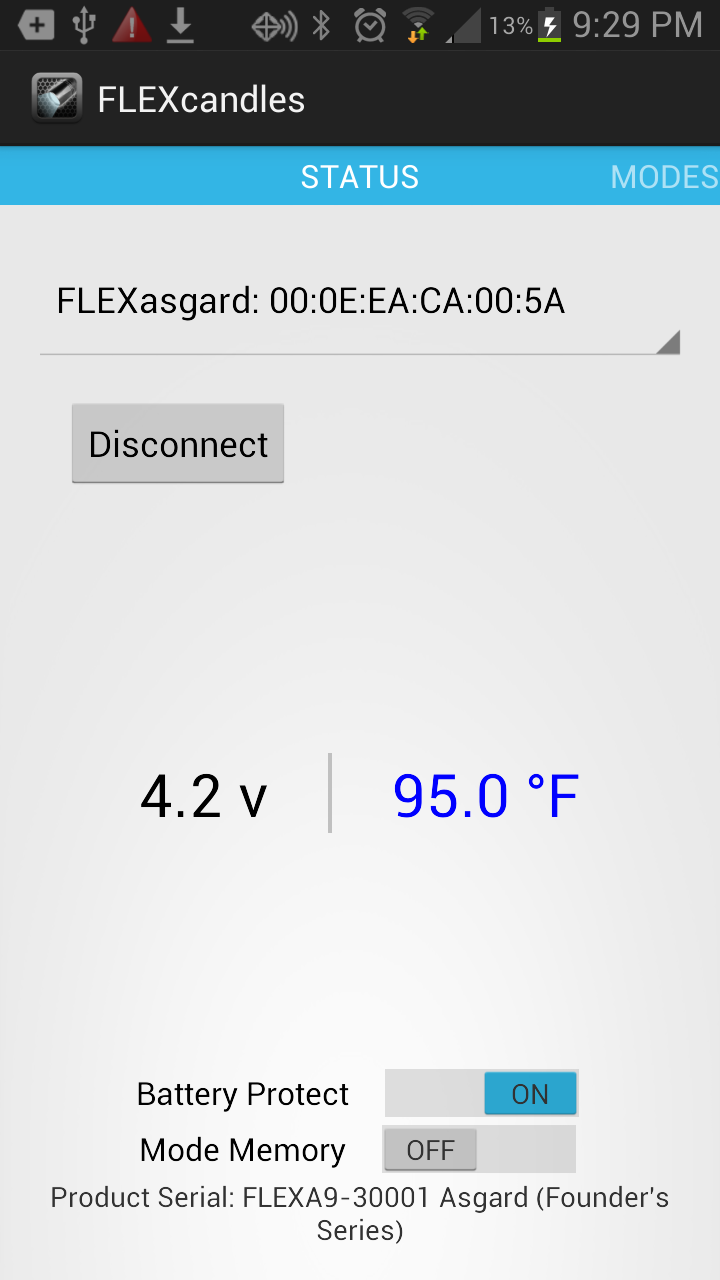
You can also enable or disable battery protection and mode memory from this screen by toggling the switches at the bottom of the screen.
At the very bottom of the screen you will see the Serial Number of your FLEX enabled light which is hard coded into the driver itself. My particular example happens to be the very first FLEXcandles light produced.
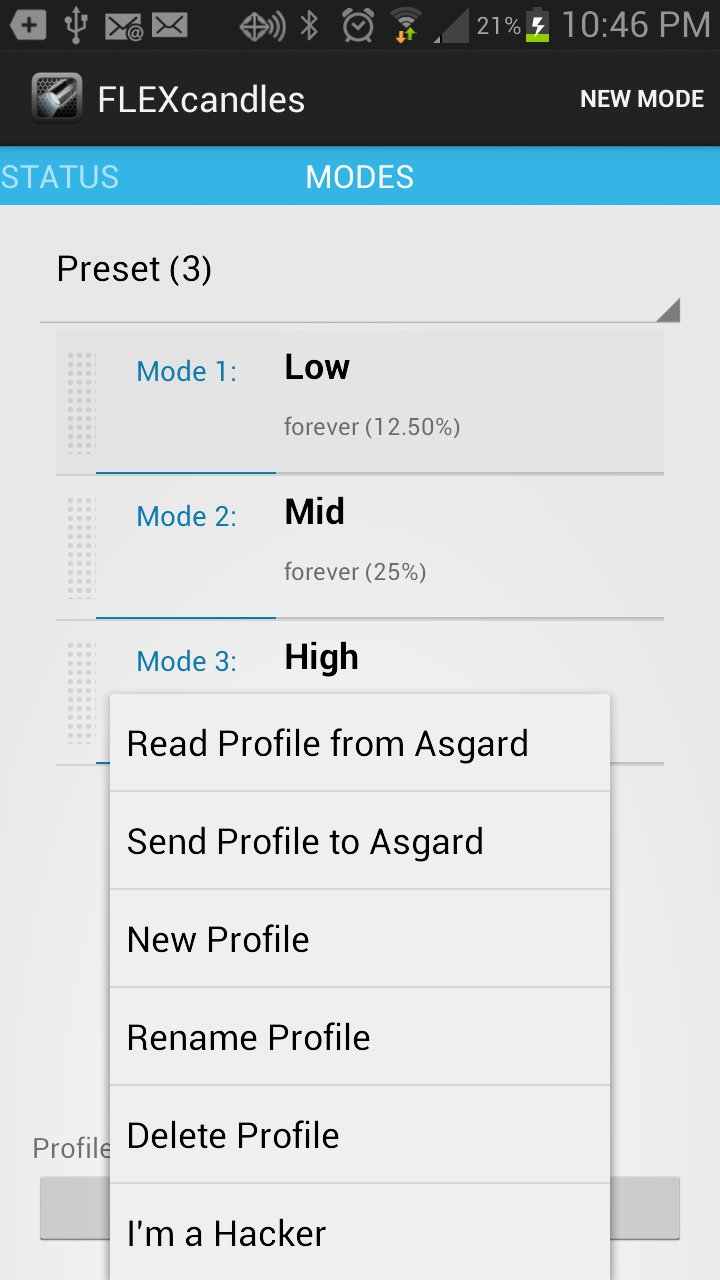
If you swipe the main screen to the right you will see the default profile that comes preprogrammed into your FLEXcandles light. The small drop-down arrow at the lower right corner of the profile box allows you to select from among your stored profiles. Right now we don't have any aside from the Preset profile. Let's create one now.

Press the Menu button on your Android device and select "New Profile" from the menu.
You will be prompted to enter a name for your new Profile.
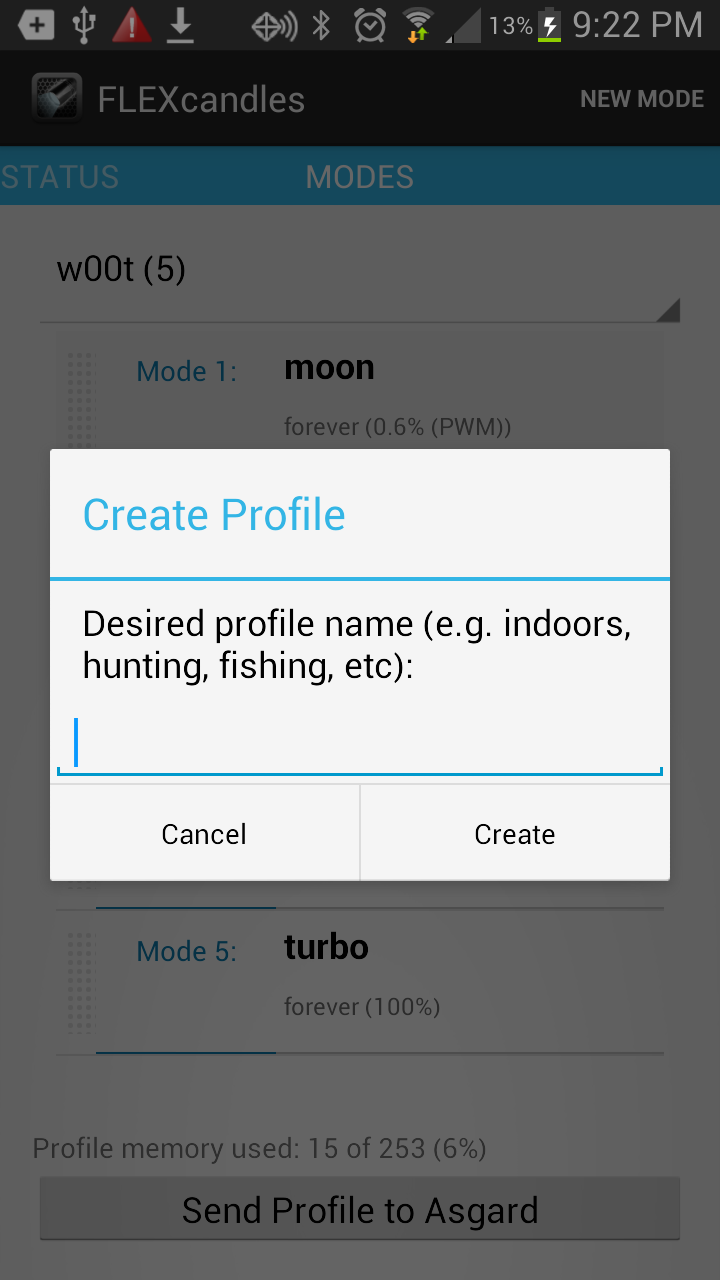
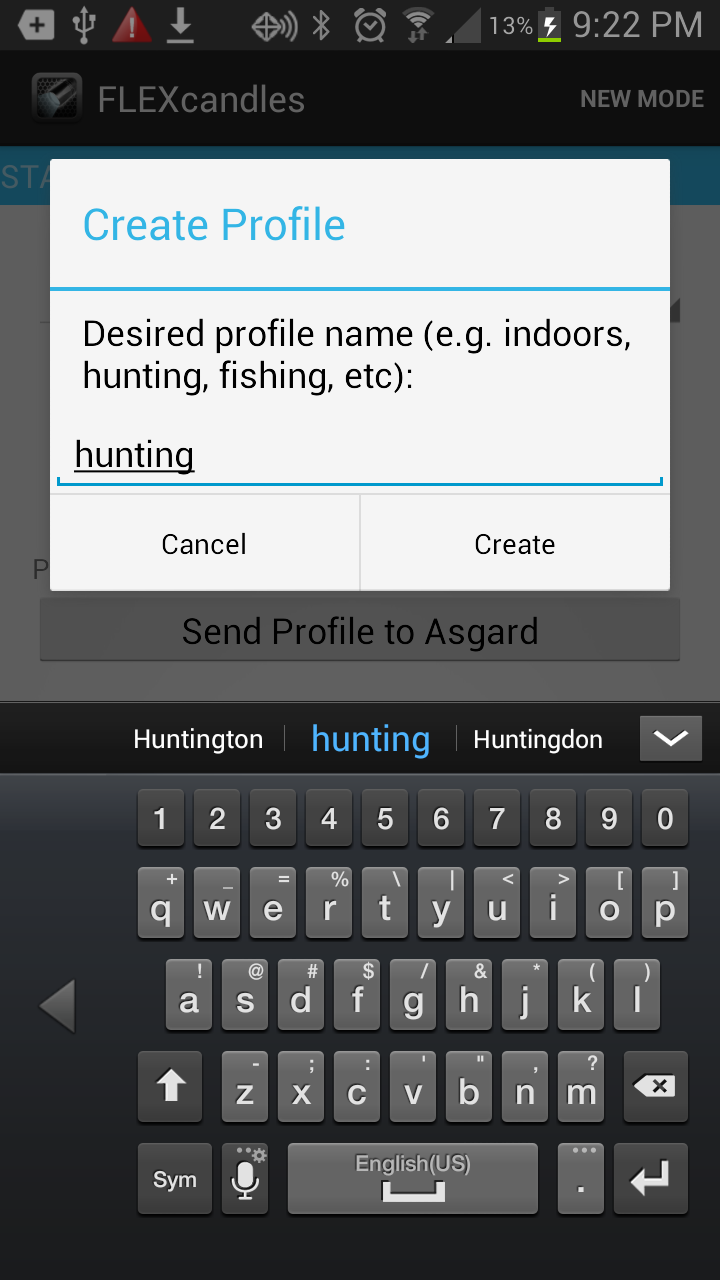
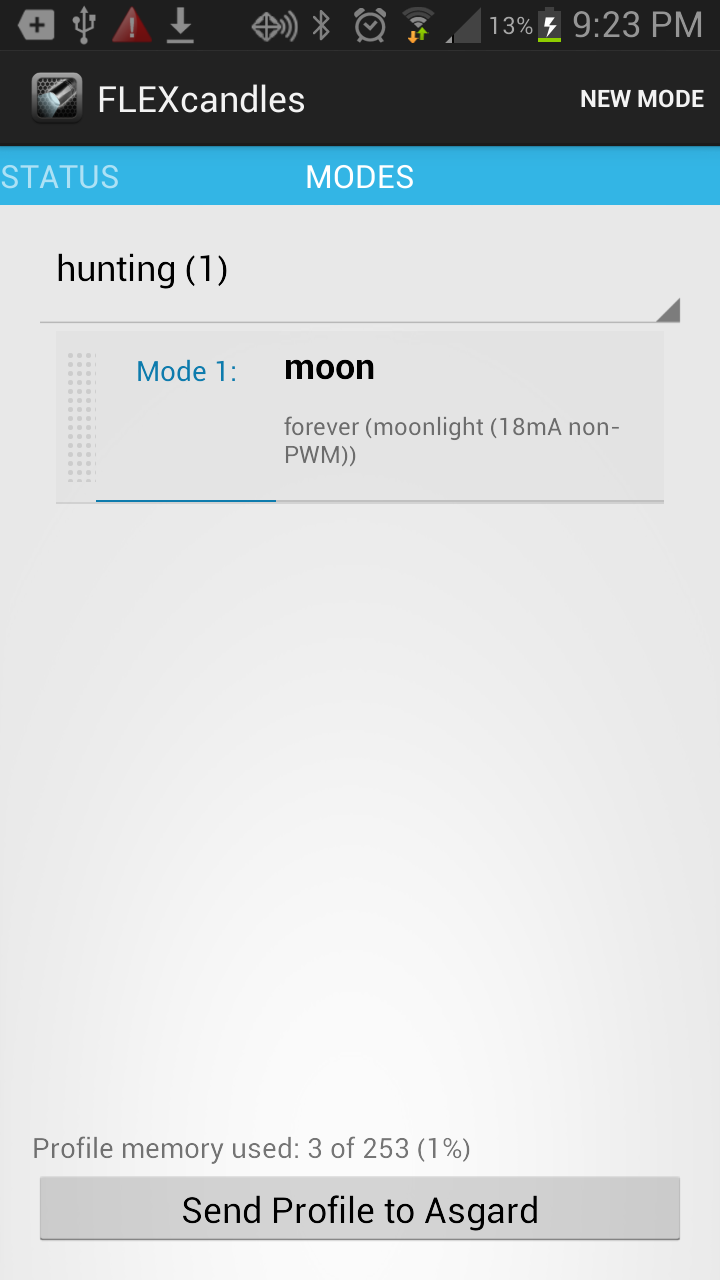
I will name this one "hunting". Press the text box and the keyboard will open. Enter the name you want then press "Create".
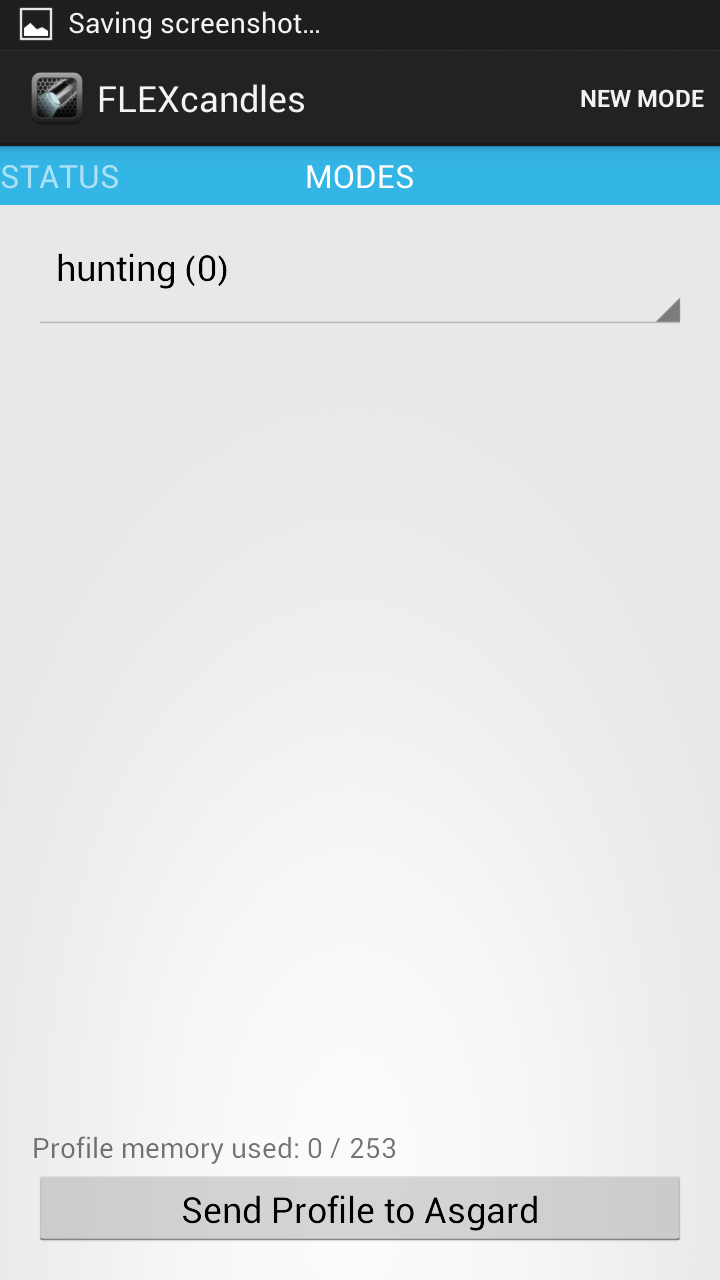
You will be returned to the Profile screen where you will now see your new profile listed in the Profile box. All we need to do now is add some modes to it. Press "New Mode" in the top right of the screen.
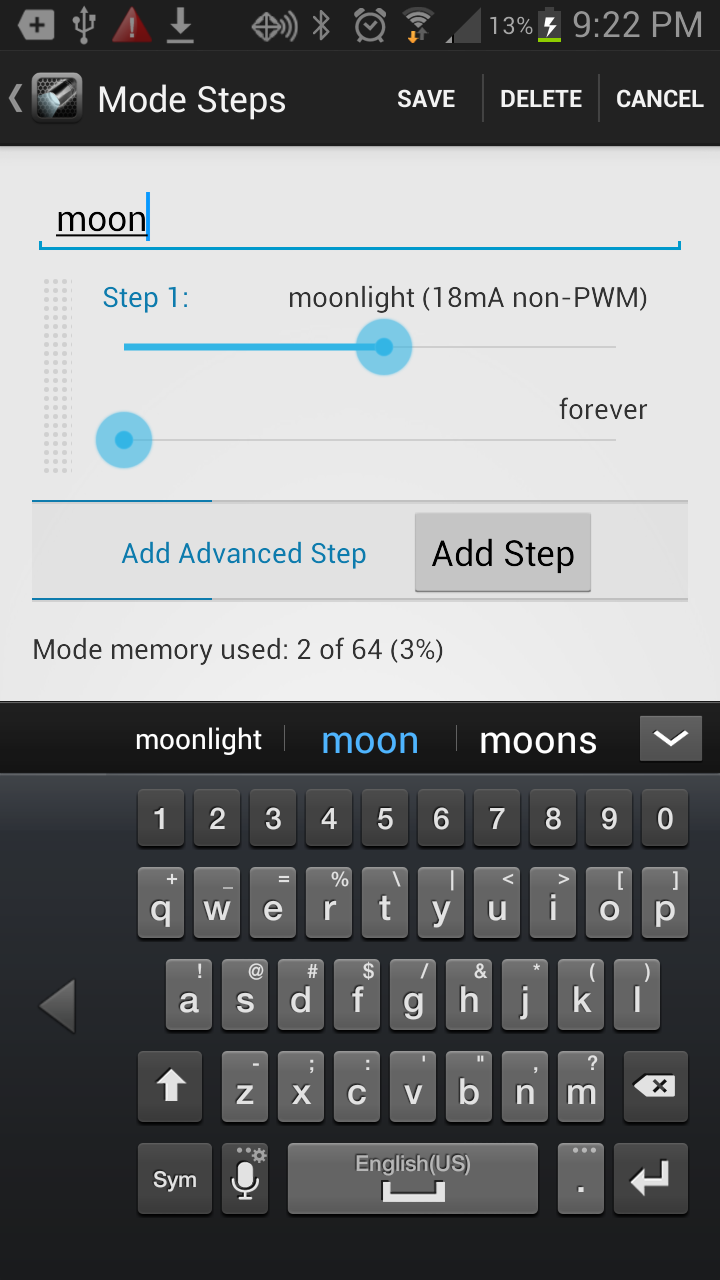
When the Mode screen opens type in a name for your new mode then press the "Add Step" button.

I named this first one "moon". Below the name field you will see two slider controls. The upper one controls the output level and the lower one controls time increments. Since I want this mode to be my moon low I will set the output slider to "moonlight (18mAh non-PWM)". I will leave the time increment set to "forever" since I want the light to stay lit in this mode without any blinking or flashing. Once I'm satisfied with the output and timing I will press "Save" at the top of the screen.
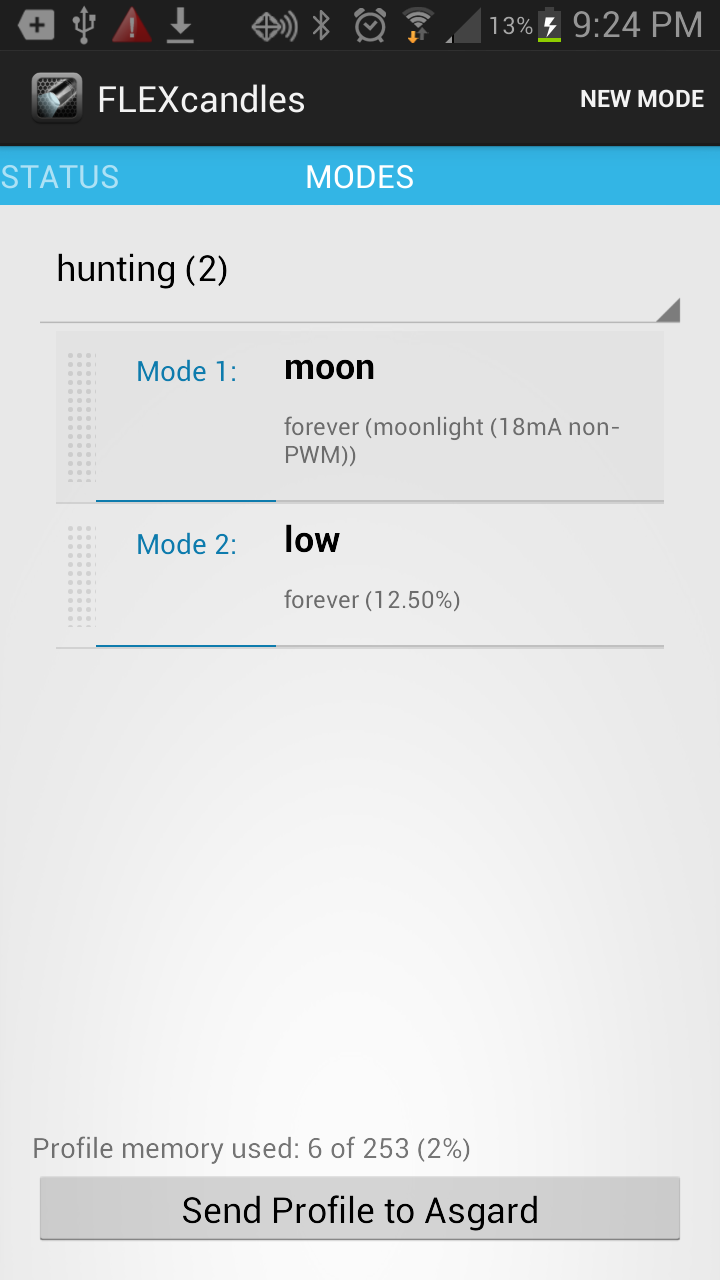
Once our first mode is saved we can see it listed on the Profile screen. We want more modes so we will click on "New Mode" again.
This next mode I want to be a regular low mode so I will name it "low" and move the output slider to 12.5%. This is the lowest increment (aside from the 18mA moonlight mode) that does not use any PWM. It is a constant current at this increment. I also don't want it to flash in this mode so I will leave the time set to 'Forever". Once satisfied all is in order I hit "Save" again.

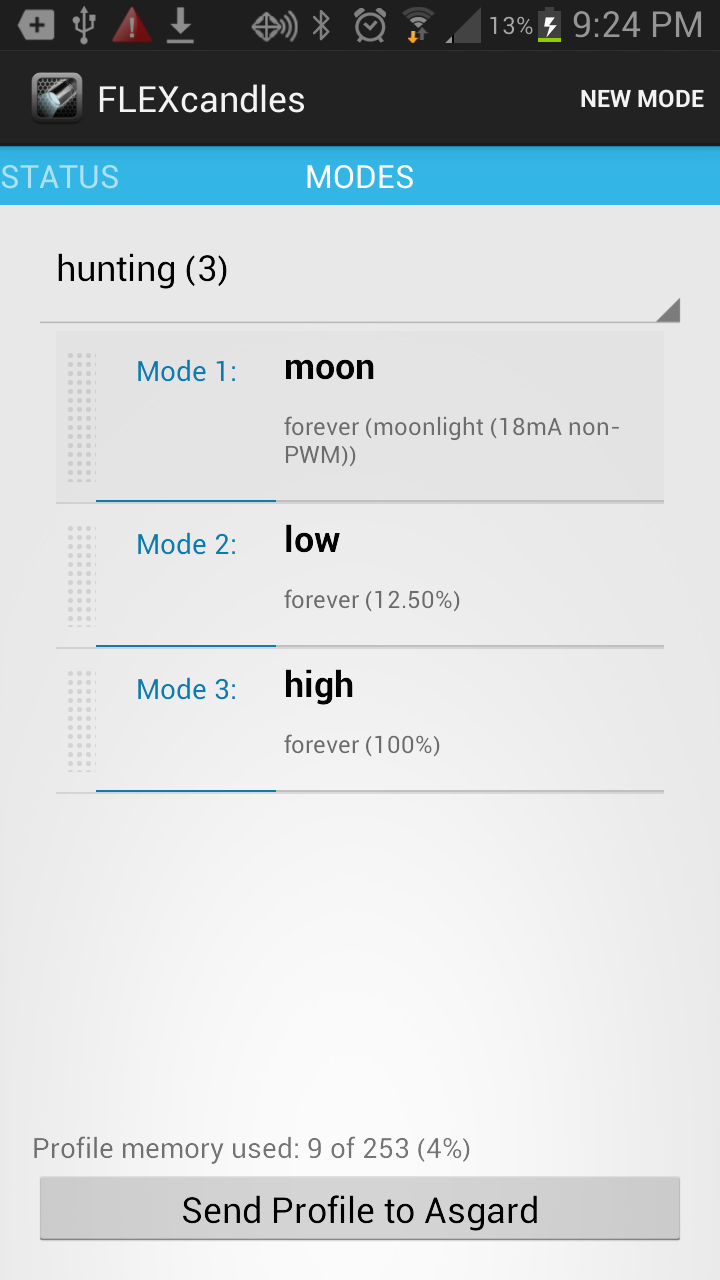
Back at the Profile screen we now see the "low" mode we created added to the list. Still not finished yet so let's press "New Mode" and make another one.
I want a high mode this time so I will name it as such and leave the output at 100% and time set to forever. Press "Save" to add it to our list.

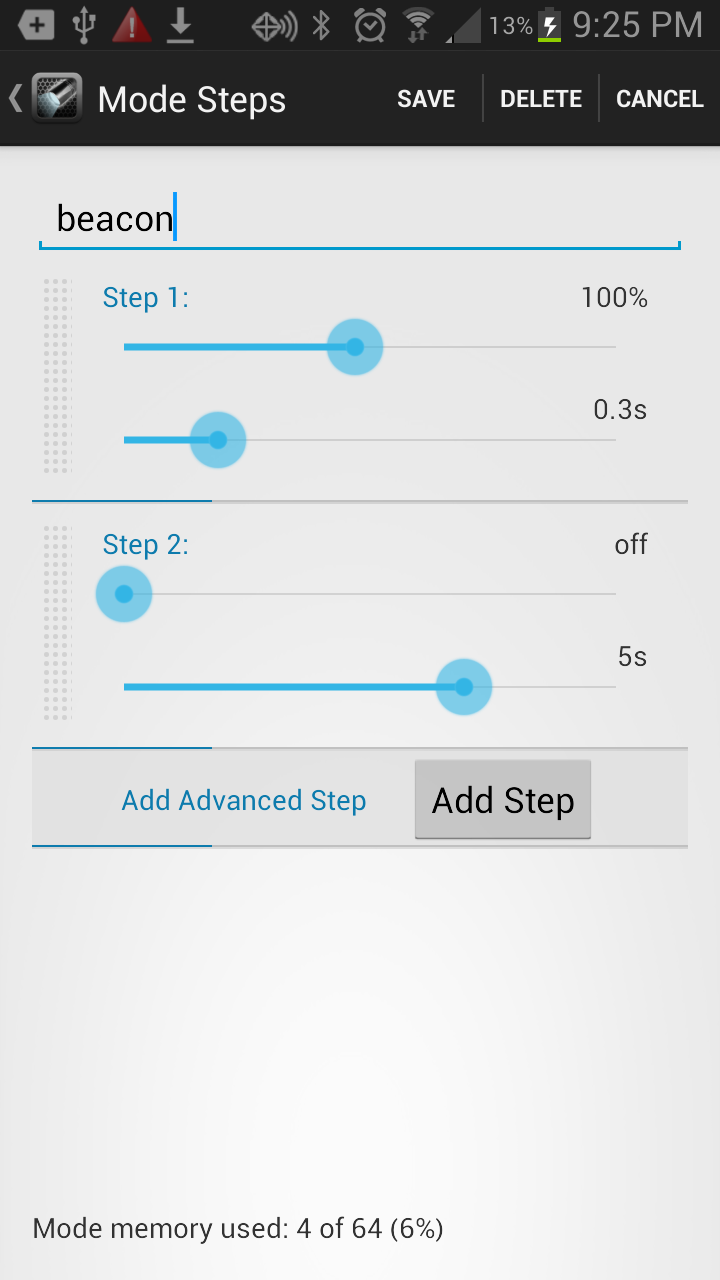
With a high mode added to our light we could upload the profile to the Asgard but in case I should get lost or injured in the woods I want to have a beacon mode so I can signal for help even if I'm injured and pass out. Let's click "New Mode" again.
We name this one beacon. I want it to flash for 0.3 seconds every 5 seconds. This mode will require more than one step to create. We leave the output at the first step to 100% and set the time slider to 0.3s. Then we click the "Add Step" button and add a second step for the 5 second pause. To create this I'll set my output slider all the way to the left to "off". The time increment slider I slide over to the 5s mark. The mode will automatically cycle between these two steps. Press the "Save" button.
There we have our 4 modes for this particular profile. We needn't do anything further to keep this profile in the FLEXcandles app. It is saved automatically. If we are happy with it we press the "Send Profile to Asgard" button at the bottom and start using our light with our very own custom modes.

If we wanted to add a strobe mode to our FLEXcandles light we can do so by creating a new mode with several steps. We can have up to 32 steps which allows us the ability to make a strobe with as many differently timed outputs and pulses as we want. I made the one on the right with a fast strobe.

Want to impress your old Navy buddies with some cool Morse code? The FLEXcandles app has a Morse code generator. Start by adding a new mode. Next press the menu button on your Android device to bring up the "Morse Code Generator" button from the menu.
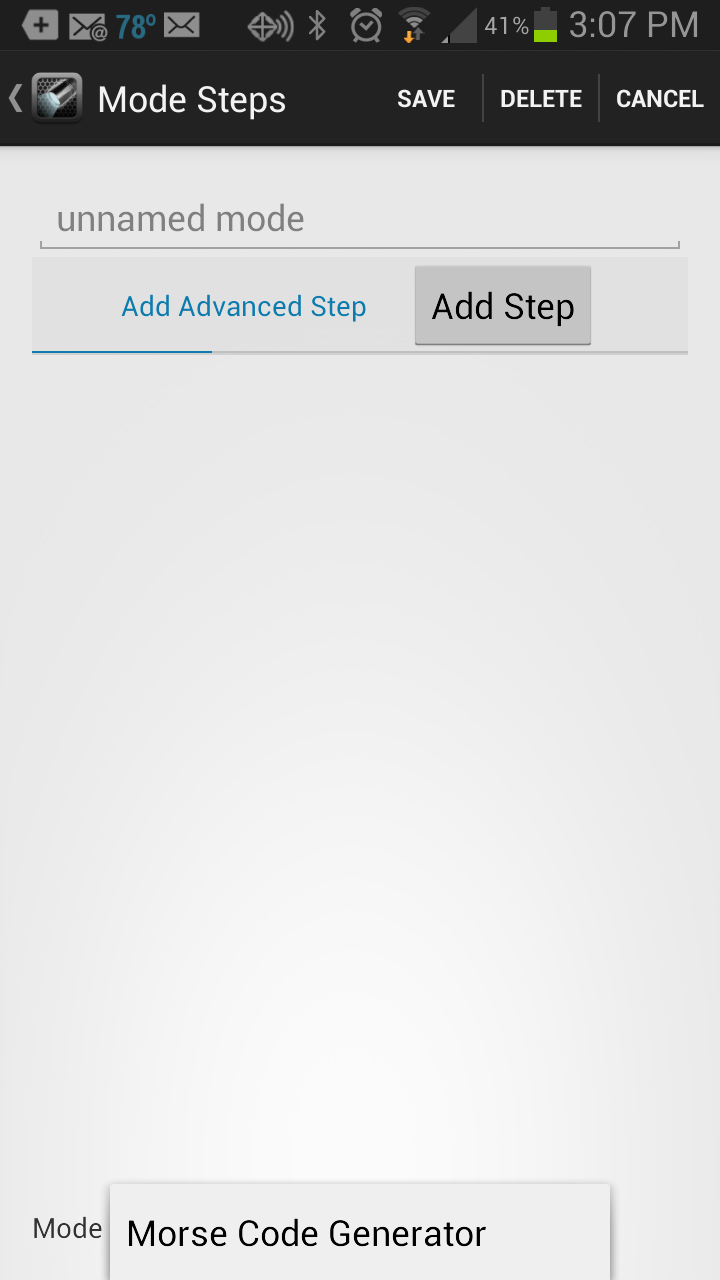
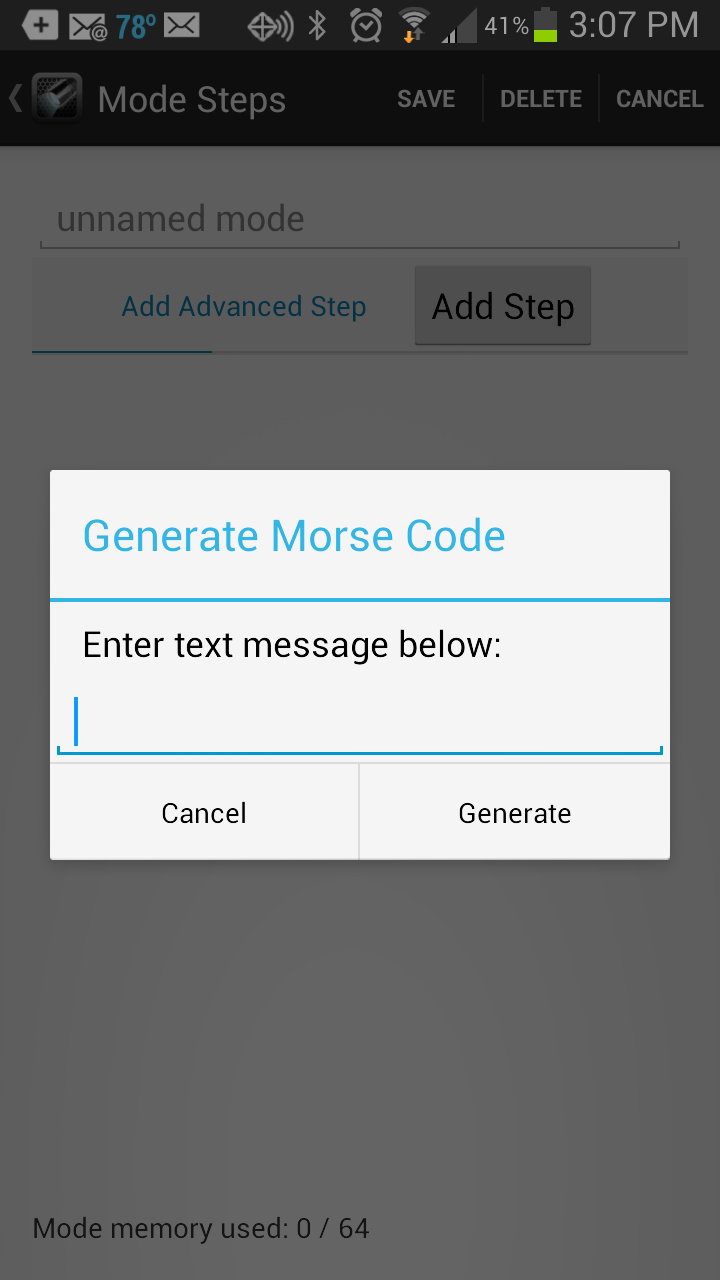
You will be asked what message you want to generate. Due to the massive amounts of steps involved in creating the characters, the message is limited to just 6 characters (remember the 32 step limit in each mode?). I will generate Morse Code to say "ASGARD". Enter your word and press "Generate".
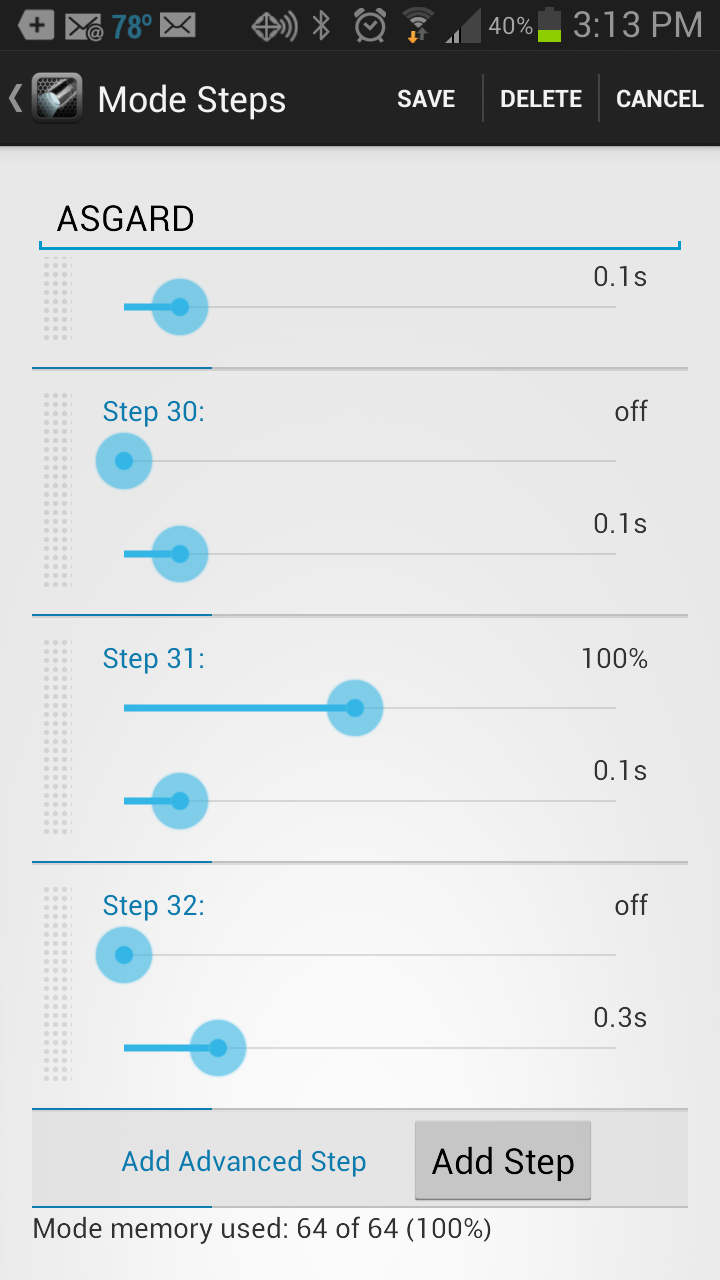
This used all 32 steps. Instead of showing you each step I will show you the beginning of the step list...

...all the way to the end of the step list. Note at the bottom it tells us that we have used 100% of this mode's available memory. Press the "Save" button at the top to save your new Morse-code mode to your profile.
The possibilities are nearly endless with what you can do. FLEXcandles is planning to add a ramping mode feature into future models. Granted once you've found your perfect modes you probably won't play with your new programming powers all that often but that's ok because just getting those perfect modes in a light is what we all want and it's priceless. We really can have the perfect output and modes without having to learn how to program MCU chips.
PERFORMANCE
Excellent output combined with great runtime make this host a budget classic. Combined with the FLEXcandles technology it ascends into a much higher bracket. The XM-L2 T6 emitter trumps a stock ZY-T08 on which it's based in both OTF output and throw. Excellent thermal management and compact size allows the light to be carried in a jacket pocket or even the cargo pocket in a pair of pants or shorts.
The only problem I have with it is with the design of the battery contacts. The exposed copper tracing for the anode contact can wear over time. It would be better if it had a thicker brass or copper ring bonded to the PCB. Due to the fact that the cells are sprung on only one end (cathode) a bump on the rear of the light can easily cause the light to temporarily break contact on the anode end and cause a change in mode. This can easily be compensated for with proper adjustments in the driver programming and I will be working with the engineers to make this happen.
Integrated Sphere and Lux test results
| Mode | OTF Lumens |
| High (Initial) | 796 |
| High @ 30 seconds | 758 |
| 18mA* low | 0.08 |
| Lux & Throw | |
| Lux @ 2m | 14,510 |
| Corrected for 1m | 57,600 |
| Throw distance | 480 meters |
CONCLUSION
For under $60 we can have the ability to program any modes we want into our flashlights easily and intuitively. Sure some lights allow us to program custom modes but to do so requires memorizing crazy combinations of switch button pushes and/or head twists. This gives us an easy, graphical, intuitive way to get 'er done. Sure the host on this first model is not as high quality as we'd like to see but it's not horrible either. I've seen worse. The nice thing is what we can do with it and for that alone it's worth the price of entry. Future models promise to be even better! I've worked closely with Fasttech/FLEXcandles through the developement process of this light and it's features and software. They are enthusiastic, quick to enable changes, and able to make the software and driver do things I never dreamed of. The folks creating this magic are a talented crew and it gives me a greater appreciation for what's gone into creating this truly unique interface. All things considered I have to give the Asgard a solid "Mac Approved!"
*The FLEXcandles Asgard was provided for review by Fasttech.com
