I recently got an Alonefire SV83. It’s a familiar shape, a side button 21700 flashlight with UV LEDs installed.
I don’t have an easy lockout for it, and I’d like something so I don’t have to worry throwing it in my bag.
What I checked to find if there is a lockout already:
Fast button clicks just cycle the typical modes: off-high-low
Holding the button goes into turbo after a moment. Tried holding for over 10 seconds but it just stays in turbo. Same thing happens starting from any mode
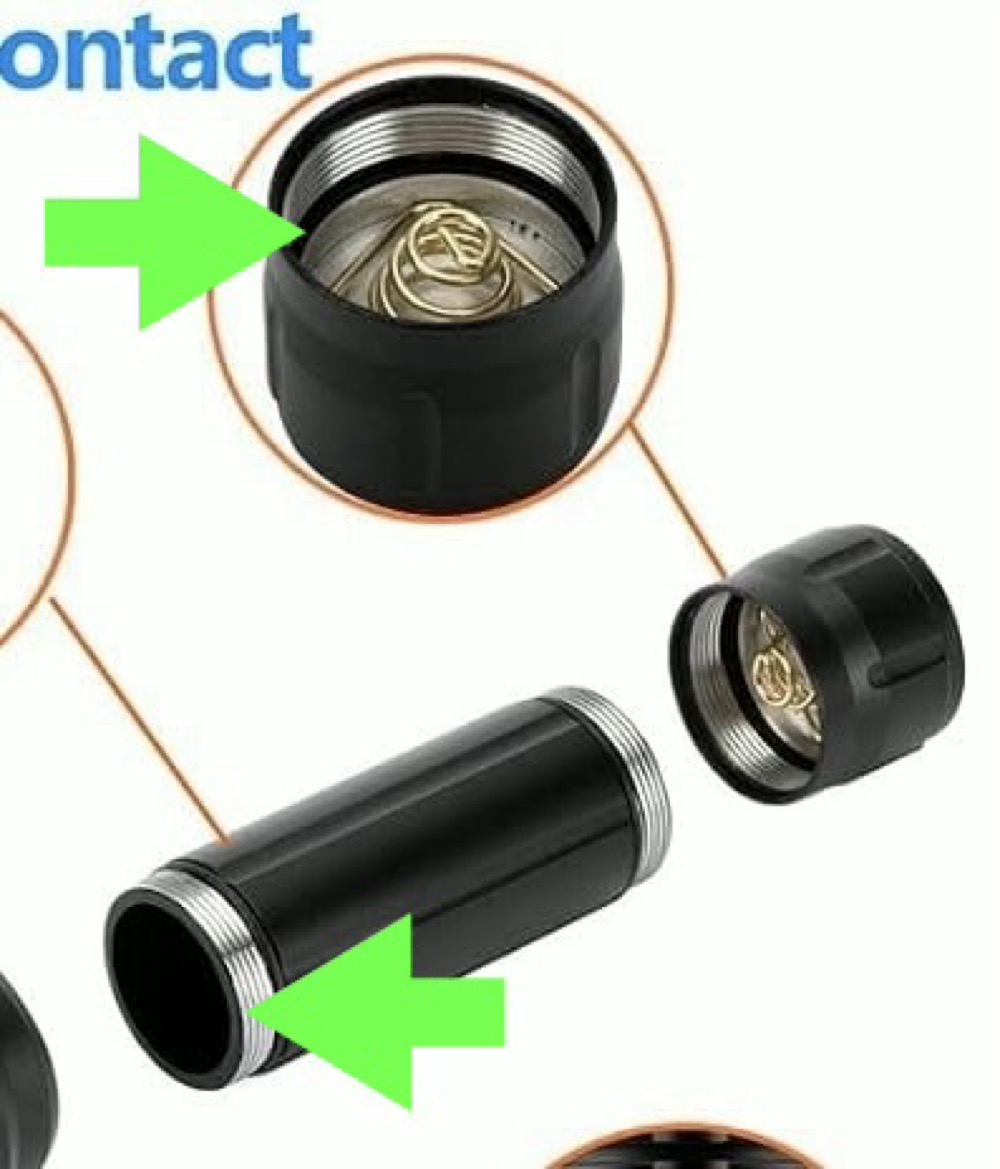
Threads have anodizing removed at both head and tail… partial unscrew doesn’t work
I’m guessing even nail polish wouldn’t be durable enough to insulate the threads and would interfere fit. I could ask a friend with an airbrush if anyone has positive experience with that.
How else do you add a lockout? Some questions for the ideas I’ve had:
Are there places to buy a tail switch that is very recessed, will fit this tube and won’t cost a bunch? Or a tube that still has anodized threads? I didn’t see any 3d printable models for a cover for this particular button, but maybe there’s a more popular model with the same shape I should be searching for?
Welcome to BLF! Good question, I recall kapton tape being discussed for this purpose, assuming a standard construction where the back of the tail cap contacts the end of the tube to carry current, you can wrap the tube threads in kapton to try and insulate them.
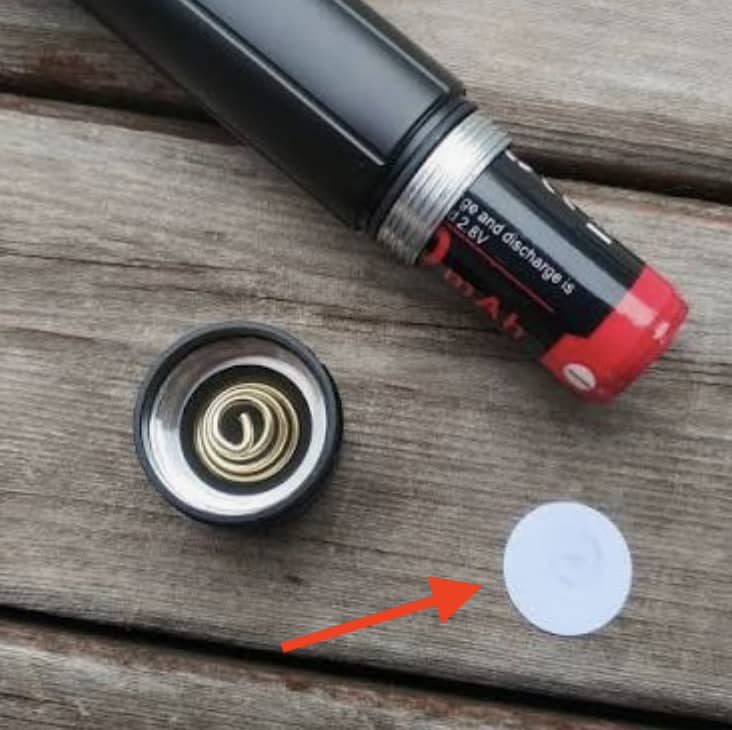
For a slower unlock/lock solution, a thin disc of plastic on one end of the cell would also work, this is how many lights with cells are shipped.
You also could consider carrying the light in a vessel that prevents accidental activation. I carry my FW3A in a small holster with a coin sewed in the flap covering the button in order to make it impossible to press the button while the light is sitting in the holster.
You should be able to modify or replace the tailcap spring to add a tailcap lockout.
The goal is to use a much shorter spring so that when you partially unscrew the tail, the spring is no longer long enough to reach the battery. The effect is the same as a typical tailcap lockout, but without the need for anodized threads.
Best results would be achieved using a fairly rigid, but short spring. The spring doesn’t need to be exact. They’re pretty easy to bend into shape with couple long-nosed pliers. You want it short enough to break contact when you partially unscrew the tailcap, but not so short or floppy that your battery loses connection when you’re using the light if you bump it.
If you don’t want to buy a new spring and feel comfortable potentially breaking the stock spring, you could just pull out the stock spring (from the picture it is removable with pliers), then flatten it with pliers and reinsert.
Note that if there is also a spring in the head, you might need to modify or remove it as well, which may require desoldering it.
Or maybe hang on to those thin plastic disks like those that come with about every light that I get with an included battery. I have a stack of them. Thin, durable, and many even have a little tab to help in removing them.
Do you mean the ends of the tube are anodised? Mad that this then means the tube was machined, anodosied then machined a second time to cut the threads!
From the photo it seems like the head end of the tube has anodising, good observation. I think some fine abrasive paper/cloth on a flat surface should be able to remove this without too much issue.
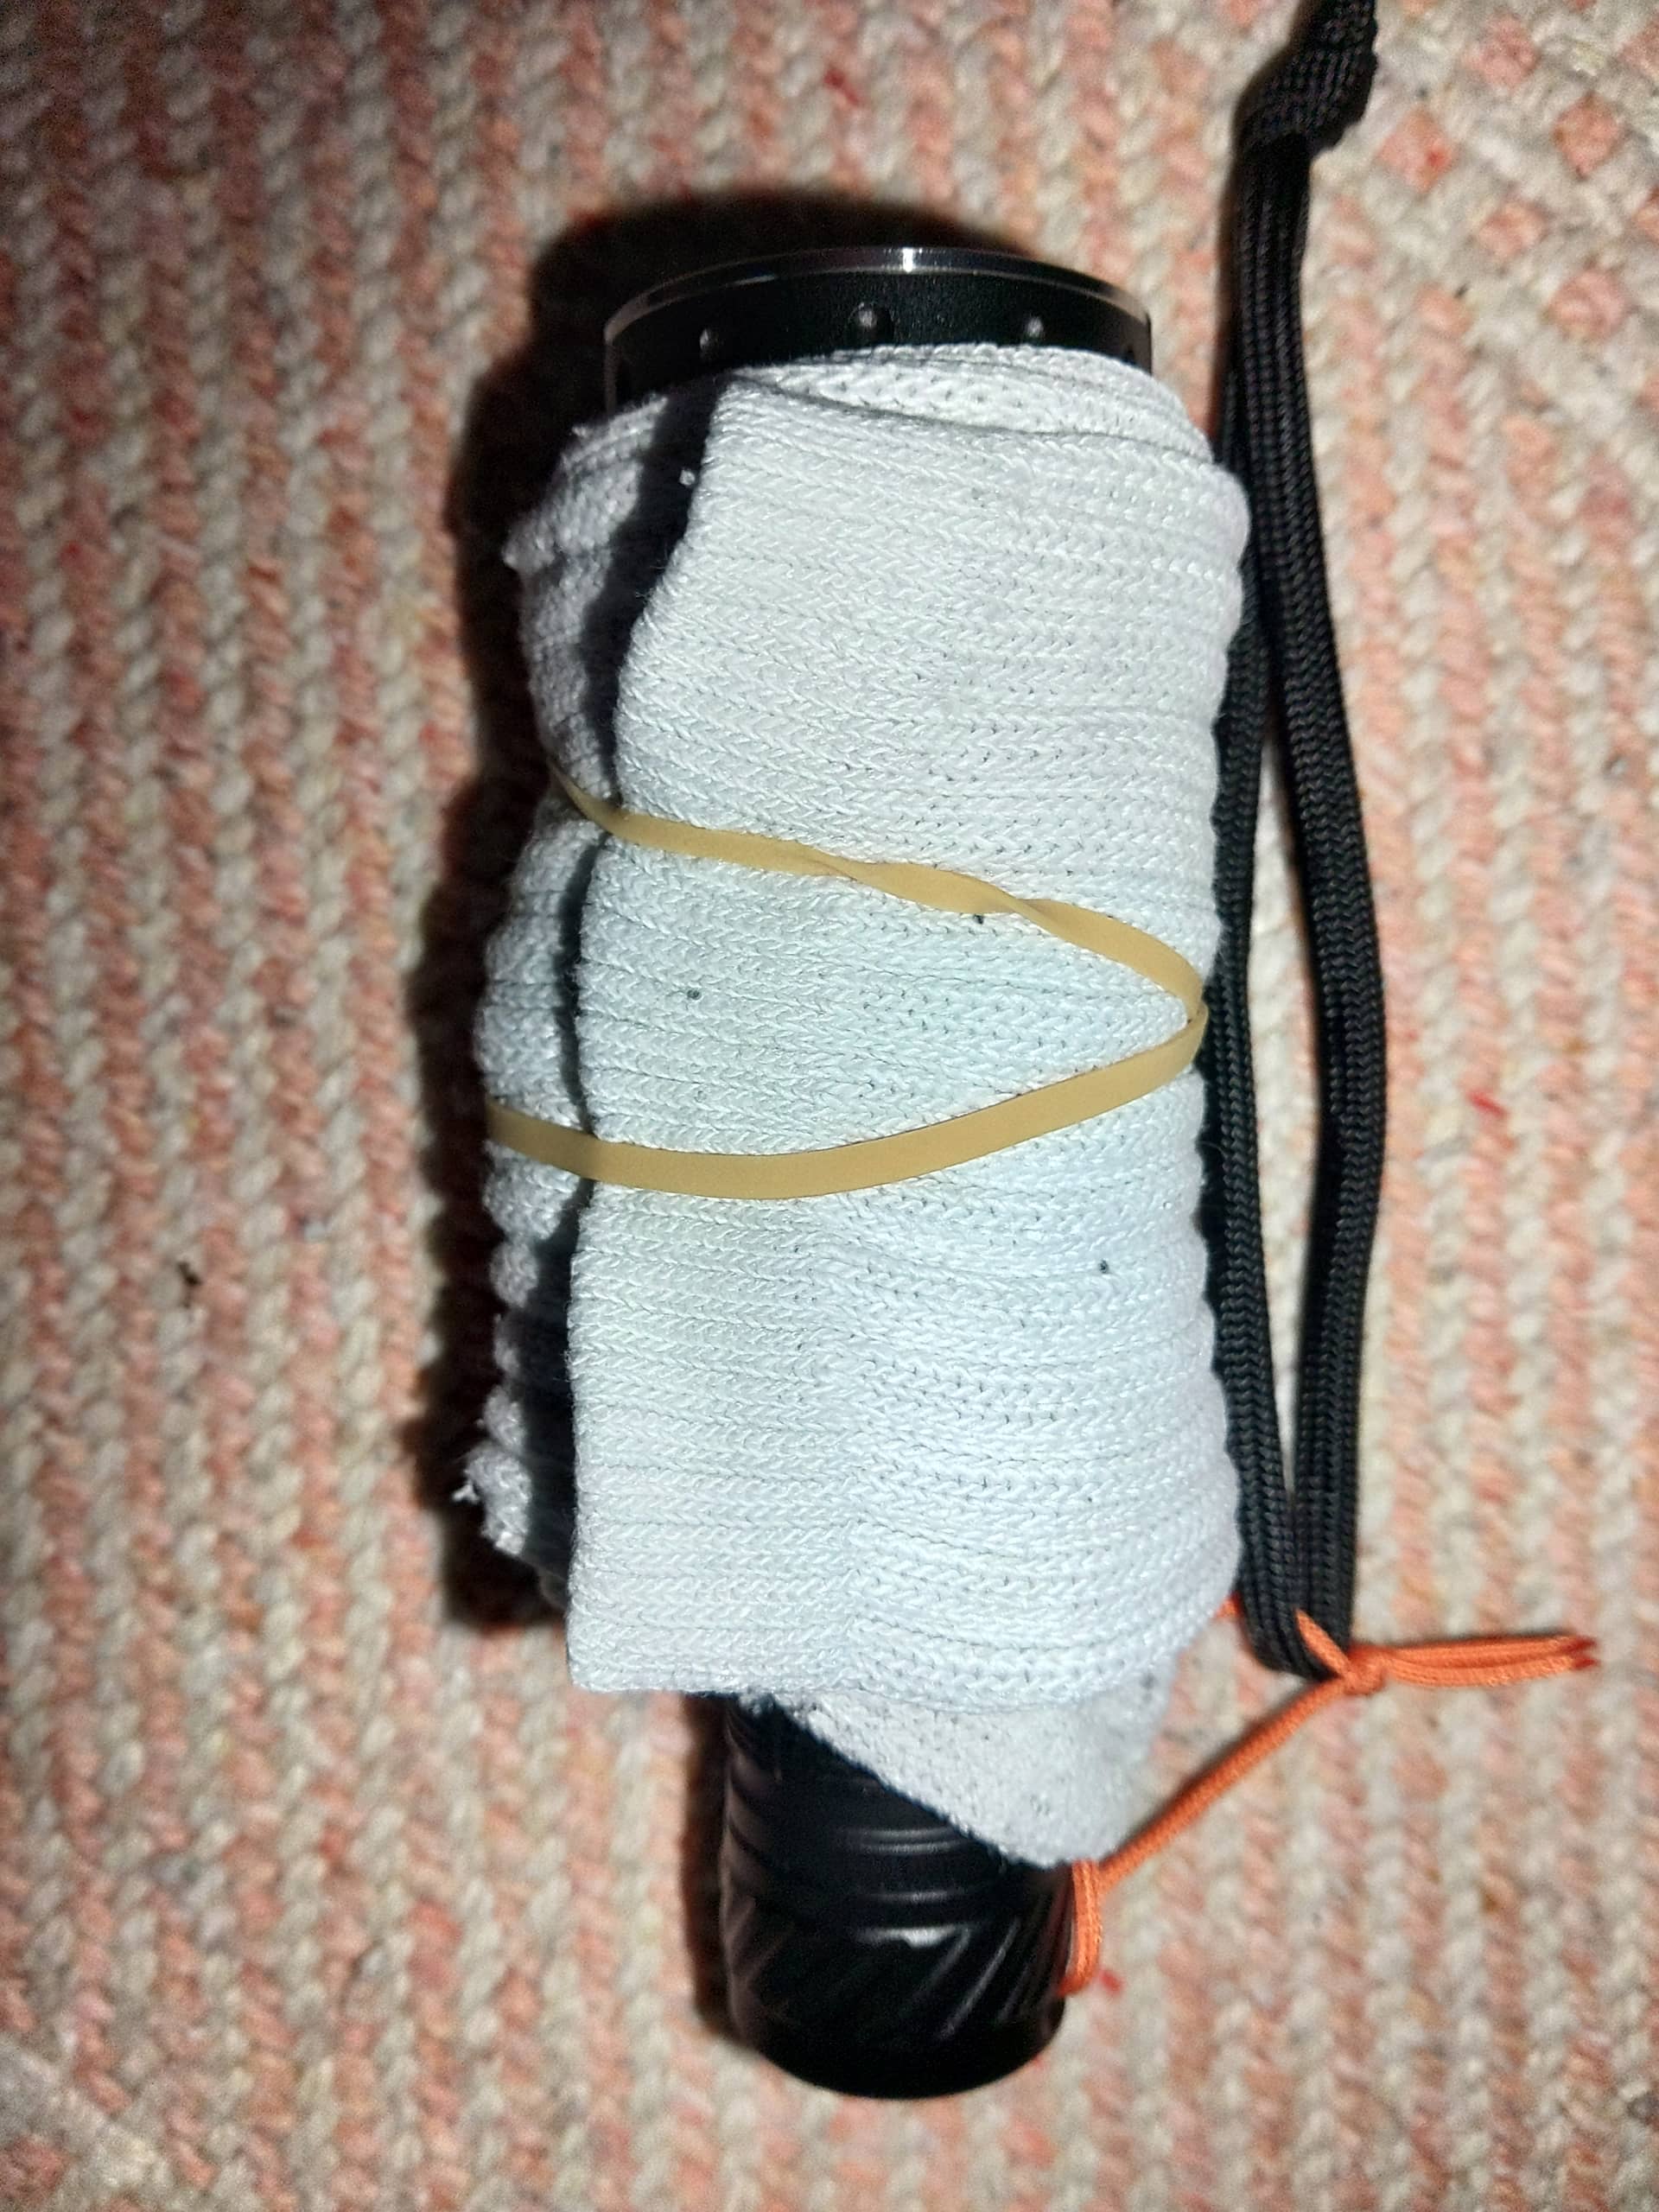
I started thinking there’s got to be some simple way to wrap something around this while it’s in a bag so the switch can’t come on.
Took one of my wife’s thin cotton ankle high socks and a rubber band.
This is on a convoy m21h with a pretty proud switch. Once you wrap it it’s going to be very difficult for that switch to get pressed accidentally. The more fluffy or thicker the sock, the more protection you’d have.
Takes about 5 seconds. You could go up higher to protect the head a little more also.
And now you have a spare sock in your bag.
I appreciate all these ideas, team. Super helpful, saved me from going down the wrong paths. I was going to try kapton tape first as it seemed like the most convenient lockout, had already figured I’d need to sand where that second arrow is in @INeedMoreLumens ’ recent picture, but the first arrow anodizing hadn’t occurred to me. Mine is indeed anodized there. That seems a bit more pain than it’s worth, maybe if I had easy access to a lathe things would look different.
Well… I kind of regret not getting the UV S12 which I had considered, the unregulated driver didn’t matter to me but I didn’t think about the lack of simple lockout. It seemed like I was saving some dollars.
Has anyone seen a 3D print design for a button guard on this head shape? Maybe I should just stick with the insulated disk approach, and every time I fully un+re-screw the cap I can reflect on unknown unknowns.
Ahhh I hadn’t posted this draft and now I see the sock idea