Helios, I think those products work because they contain sodium hydroxide which is highly corrosive.
I think people just use that stuff because it more readily available then straight up lye (NaOH).
Drain cleaners work. They contain mostly lye too.
Btw Chole, I’m sure you’ve heard it before but… your a geek. 
Not meant as an insult.
Ding ding. I’ve stripped several Al parts (lights and other) with NaOH, works well and super easy, way easier than sanding it off. Let it soak about 25 minutes then just brush it off wh a steel or brass brush, works flawless and gives an amazing brushed finished look.
Greased lightning sounds like the easiest, least toxic method by far.
MSDS for Greased Lightning indicates its active ingredient is sodium hydroxide / lye. No fumes, no pitting though.
Seems like the options for stripping anodizing is lye, lye, sodium hydroxide, lye, NaOH, lye & sanding. 
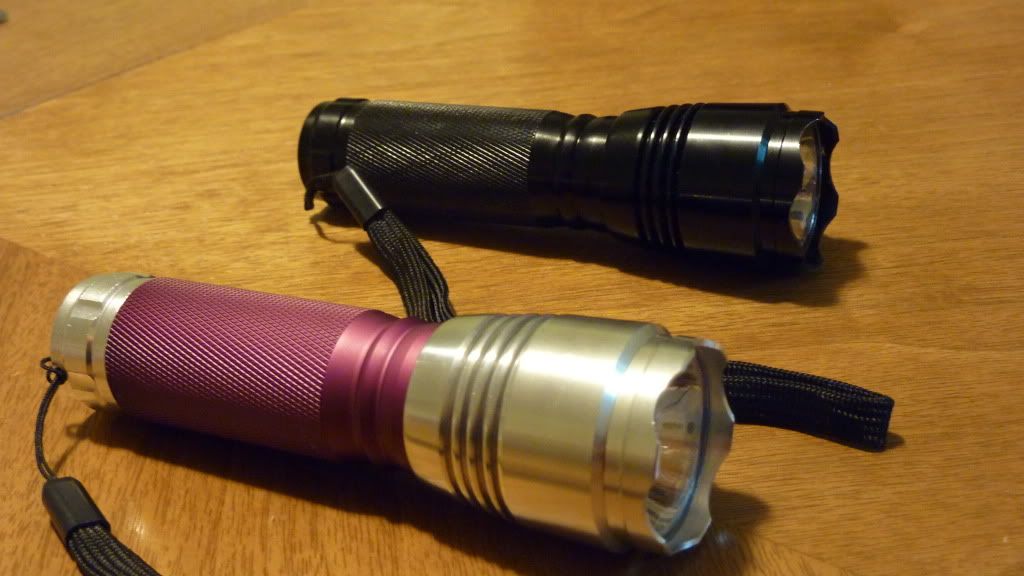
Yeah, I’m not sure what explains the pattern. The tail gets quite a bit of wear / contact, and is still perfect. The label is curiously faded though… In any case, I think I might prefer to remove the anodization rather than sealing it myself (but if I get another one, I might seal it myself just in case). Brushed aluminum is a nice look.
I noticed the faded colors about two or three weeks after I got the light, but didn’t take pics to share until about four or five weeks. It faded pretty fast at first, but seems to have mostly stabilized.
I may have to try this. I’m fond of brushed-metal finishes, and it would look far better than the sickly uneven greenish finish it has now. I’ve already broken the loc-tite, so it’ll be easy to get all the sensitive parts out first.
Any tips on protecting my skin from the NaOH while brushing the anodizing off? (or, for that matter, any recommended type of container to soak it in?)
Gloves, goggles, … Tychem bunnie suit
NaOH burns are nasty. NaOH ‘Tissue digestion’ 
I actually have a bunnie suit.
edit
In your case a tux suit! Love the Ruri-tux. :party:
Visually a little difficult to tell but there are actually dedicated coating testers like Extech's CG204 which I picked up a while back but just never got around to using it. I have a few lights in so perhaps it's time.
EDIT: This will by no means tell you whether a coating is HA II vs III, however, based on the thickness it can tell you whether or not it's within specs for each.
Use all the safety precautions, gloves, goggles, vented area, plenty of rinsing water available etc.
I used a dilute solution of Lye, and warm water. First though it is important to clean it to remove any oils that may be present. What you want to be sure of is that there is no “protective” coatings on the light that will retard the action of the lye in that particular area. A mild solution of soapy water is sufficient. A little ammonia is very effective in removing body oils.
Soak the light in the lye mixture and gently stir the solution during the soak. For even results, it is better to use a dilute solution over a longer period of time so that you can have more control over the process. If you go too far during this process, you can cause the surface to become pitted, which of course is unattractive. If what you are really intending by doing this, it is actually possible to remove all the stain while still leaving a very thin layer of the oxidized aluminum. This may be the most desired result if all you want to do is remove the color.
An old piece of tupperware makes a good container.
Here is a before and after pic of a light I did. The tube was re-anodized and stained purple.
I will have to try your methods…
Someone mentioned sandblasting?
Well maybe sandblasting in combination with tenifer?
Tenifer is still an illegal substance in the United States. Also a propriety compound owned by Glock the last time I checked. Not sure it’d be any good for aluminum, as it get’s pretty dang deep into hardened steel!
Would love to hear if any of this has changed.
Yes. Glock and Croatian(HS-Product) that are making worlds finest SA pistols like Springfield XDM.
I also tried aluminium Birchwood bluing for small aluminium surfaces and not to happy with it… It has rather blueish than true black color.
It could be that the colored solution (dye) is either fading from sunlight or just naturally fading. It could have been colored with a low quality colored solution. Its also possible that it wasn’t sealed properly causing it to leech out. Boiling it for 30 min will seal it properly as mentioned.
.
Anodizing formations look exactly like a bee hive wax honey cone. Colored anodizing is simply the same thing the honey bees do with the wax cone, they fill it full of honey and cap it off. If you have ever seen bee honey still in the cone, it takes on the golden color of the honey inside the cone. We fill the anodizing cone formations with a colored solution and seal it in. Anodizing is grown with the same shape as the wax cone in bee hives.
https://www.bluebuddhaboutique.com/blog/tag/anodized-aluminum-101/
Once anodized the aluminum is dipped in a colored solution. The solution fills in the tiny cone formations. The longer you leave it in the solution the darker it will become until all the cones are saturated with the original color of the solution. If you dip it in the colored solution for just a few seconds the color comes out much lighter than the solution. Very little solution has entered the anodized cone formations. Once the desired color is reached, you submerge in hot water or it can be steamed. I prefer to stem for a few minutes locking in the color then put it into the hot water to insure complete sealing. This seals the tops of the anodized cone formations, locking the color inside the cone. If you dip directly in the hot water after coloring I have noticed that it seems that a lot of the color leaches out before the anodizing cones are sealed. The hot water starts to turn the color of the colored solution. Steaming first seems to lock more of the color in for me. The thickness depends on how the anodized formations are grown as already mentioned by PilotPTK, which he covered.
.
The texture or shine of the anodizing really doesn’t have much to do with anodizing. Anodizing does dull the shine just a little, but not much. It really depends on the finish the aluminum had before you anodized it and what was done to achieve the anodizing. What color is used will make a difference on the finish also, darker colors hides a lot of imperfections. Lighter colors where you can almost see into the aluminum, will show almost any imperfections. I suppose that’s why most flashlights are black, hides tooling marks well. A lot of people (including me) use a caustic soda solution to clean the aluminum right before dipping in the acid bath. I leave it in for about one to two minutes, as this removes any residue or oxidization. If left too long in the solution it will dull polished aluminum. If you want to achieve a matte finish, leaving it in a caustic soda solution longer than a few minutes will do it. Type II anodizing is not that hard to achieve from home. But Type III would be quite difficult without spending some coins. Type III takes a lot of variables being just right, not easy to do with out the proper equipment.
.
Rit Dye from walmart Sunshine orange.
I do it outdoors on out patio. I use about 2qts of NaOH in a small mouth 1gal glass mason jar (so its only 1/2 full), I also keep a 3 gal bucket of plain water next to it. I wear gloves and a pair of safety glasses and I put the pieces in and out using a pair of 12” stainless steel medical tweezers. After a good clean/degrease I let it soak 20 minutes in the full strength NaCL then agitate it and then I babysit it watching for the first sign of bubbles (which mean the NaCl is reacting with the now bare Al, usually around 5 more minutes after the agitating). At that point I remove the pieces and give them a really good once over scrub and drop it in the water afterwards.
It doesn’t get hot, it doesn’t bubble up (the bubbles you watch for are just tiny ones forming on the metal parts, not bubbling up to the surface), the small mouth glass mason jar acts as an effective splash guard if you slip and drop the parts in and make a splash. It can be dangerous and it can hurt you but its also a very simple, slow and forgiving process, its not anything to be scared of. It is afterall one of the most widely avaliable chemical I know of sold totally uncontrolled OTC.
I don’t use any more protection than that, I do be careful when brushing and usually only pull the brush away from my body, maybe I’m just lucky but in the few times I’ve done it Ive never had a close call and I’ve always got the desired effect. I to do it cause I like the brushed look and if hides wear very well.
No brainer response removed ![]()
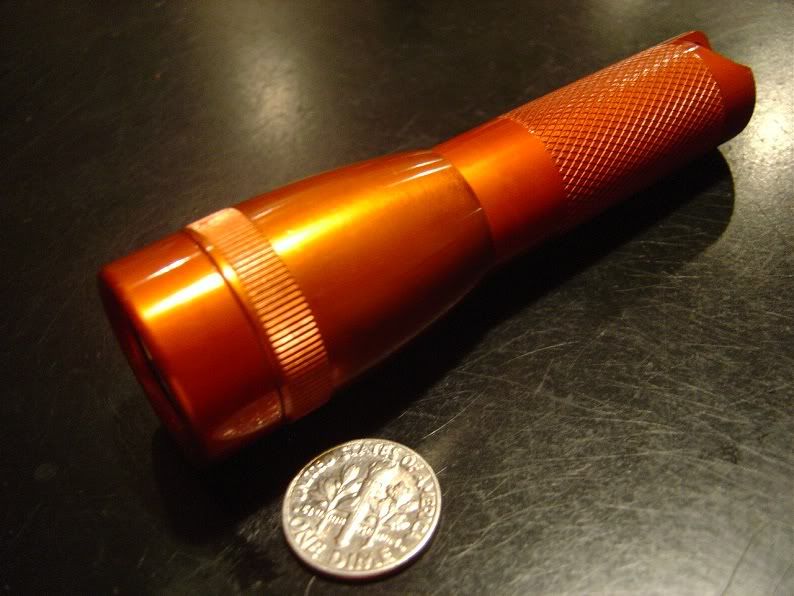
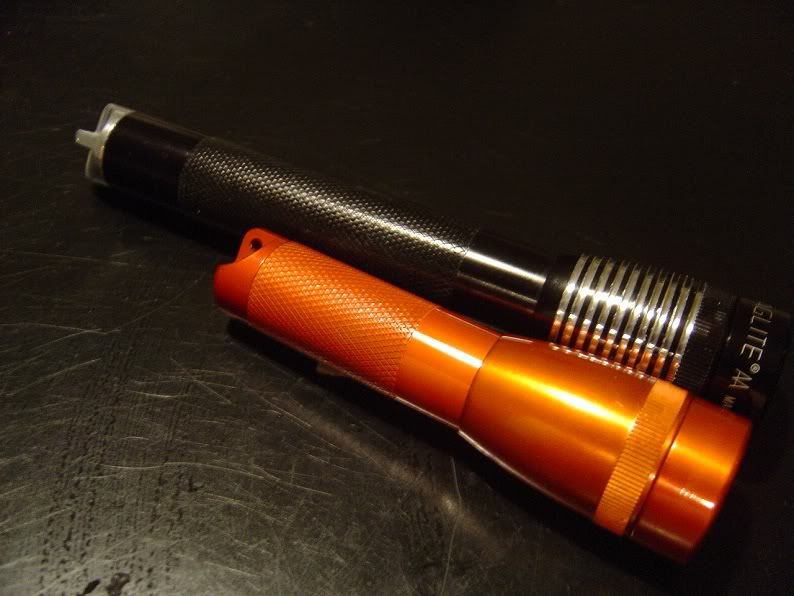
Here’s two and a half months of wear. Mind you, very light pocket wear. This is placed in a loose interior suit jacket pocket, and taken out a few times a day. It’s not abused or scraped on anything. This is HA-III. Or so claimed. The only thing that touches the light are my hands and smooth fabric.


Is this about what others experience?
This is precisely why I prefer Titanium in an EDC.
Other than not being as pretty as new, the wear isn’t going to hurt anything. I mean, think about it, the light can’t possibly corrode if there’s enough wear and tear do be the demise of “HAIII”!
I too prefer Ti for a EDC for that very reason. But not everyone can spend that amount of coin just for a flashlight.
.
@mhanlen
I would assume its probably just type I anodizing. I do have a XO but it hasn’t seen much use. Usually if the light is not easily scratched, takes some effort its type II. If it scratches quite easily, but not as easily as raw aluminum its type I. If it scratches really easily its painted or some other type of coloring. Type III is very hard to scratch, its the most durable and is harder to achieve than the other types. It takes some coin for the proper equipment to do type III and has to have someone who knows about anodizing to achieve it. You have to have almost perfect conditions and at just the right amount of anodizing time to grow type III anodizing.
.
I have grooved or finned many a Maglite and I can tell you that the anodizing is of good quality probably type II. I have had certain spots on a Maglite that where very difficult for a carbide insert to cut off. It will cut it but it really doesn’t like it. I assumed this is probably from Maglite’s anodizing process. Which I know they have spent some coins to try and get consistent results in a timely manner. The equipment they probably use is approaching Type III, they just don’t grow the anodizing to that thickness because of time. They probably are shooting for type II but sometimes in some spots of the light they achieve close to type III. This is all just speculation of coarse. I have finned or grooved several different types of flashlights, and none so far has been as hard as Maglite’s anodizing (never tried on a quality flashlight type III). It comes of the carbide cutter like cutting through rock and smokes like cutting dry rock. Its like trying to turn down sandpaper which is aluminum oxide. A lot of common sandpapers are made with aluminum oxide, almost the same stuff I’m cutting off the Maglite with a carbide insert. Pretty hard stuff but it can be scratched as we all know.
Great thread. I enjoy reading about materials. Also interesting are the photos of lights that have suspect anodizing. I have had good luck with my Gerber Firecracker and my Thrunite Ti (pink), but my Fenix e01 (purple) is showing mostly bare aluminum at this point.
I don’t know if materials have changed, but the pictured flashlight is the convoy S6 (XO clone). It says HAIII, but you’re right, I’ll bet it’s not. What you see isn’t the result of scratches, just things touching it in the same spot. I’m not upset about it or anything, because it add character. But it’s still not very durable.