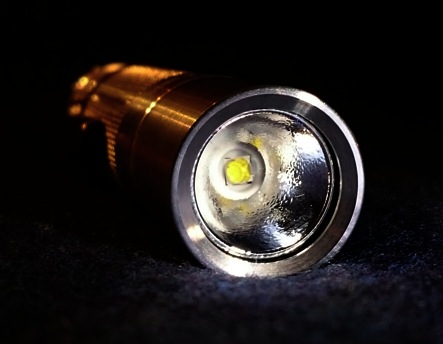
FWIW, this is a properly-centered emitter. In the cases where the opening is slightly bigger than the emitter base, the twist actually helps it be centered better:

FWIW, titanium is generally not as hard as steel. Lighter than steel, and stronger by mass… but not as hard. So, not as good at minimizing scratches. Still typically harder than aluminum though. ![]()
Hello TK
Thanks for battery info and advice.
I ordered the Sanyo/Panasonic NCR18650GA Protected 3500mAh
from MtnElectronics.
These batteries got great reviews from users on their website btw.
Good batteries, but the extra runtime on low/med modes costs some lumens and runtime at the high end. It’s likely to drop from ~1400 to ~1200 lumens, with less runtime on turbo than what a high-amp cell would get. The difference won’t be as noticeable without the springs bypassed though, and personally I use mostly the low/med modes so if you’re like me it’s probably a win.
Basically, high-mAh cells run longer at low-to-medium levels… high-amperage cells produce brighter output and run longer at high levels. And the protection circuit increases resistance a bit and thus reduces maximum brightness in exchange for an extra layer of risk reduction.
When I tried to close up my head, I noticed that the reflector snugged up to the LED while I was screwing it down. This was okay for the first few turns, while the head freely turned without the reflector spinning. However, once the head screwed down sufficiently for the reflector to start squeezing the o-ring, I noticed that the reflector seemed to be putting a lot of pressure on the led as I kept screwing the head in. I became alarmed that the pressure might be sufficient to either shear the LED emitter off the pill or cause the white “square opening” portion of the reflector to ride up and over the led, de-doming it. So, I used a razor blade to make a hole sufficiently large enough to allow the reflector to freely spin without putting any side pressure on the emitter.
Was I right to be alarmed? Or did I overreact? :quest:
Here’s the results of what I did:

I have opened and closed (carefully) the head of the bare A6 a bunch of times and so far it hasn’t hurt the led and i don’t think it will.
BUT i am not worried about it because i know how to reflow a led, and i have plenty of XP-L V6 3D’s if something would happen like an accidental dedome, if i didn’t know how to fix it i would probably be more worried when closing and opening the bezel.
So opening up the plastic reflector center thingy is probably not a bad idea if someone want to lessen the risk of damaging the led ![]()
hey mate if you can. i would like a coupon please? i already brought the standard version i want this one so i can polish it up make it all shiny
No problem there as far as I can see. Same thing happened to my Convoy L4. The square opening was so tight that when I opened the bezel up the reflector pulled the led right off the MCPCB
Hi ToyKeeper,
I am interested in the un anodized version. Could I please get a code? Thank you.
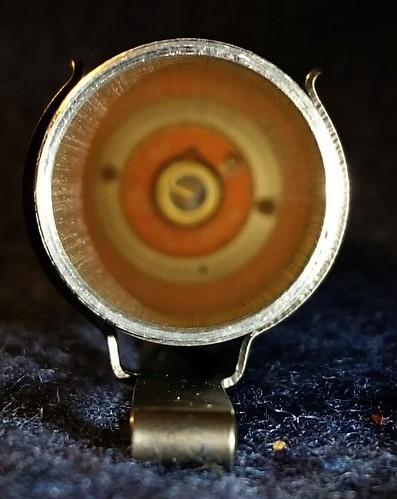
Tints colours i dont know but this looks strange to me sure there are variations of the same tint but thats seems far out of any scheme.
i got 3 bare each tint and 3 ano each tint but only 3d match a littel all others far away from each other has anyone any idea and how i can explain that to BG how to fix it ?? ?
its in this order 1A 5A 3D
!


!
That looks correct. However, your first two pictures look like the tints were not the right bins.
It might help to know what white balance the photos used. At a “daylight” or 5000K white balance, the 3D should look pretty much white, the 1A should look blue, and the 5A should look a bit yellow.
ye si agree this pic look to be right this are the ano ones but the bare ones look like onyl the 3D is correct the 1A is greeen and 5A is red or pink
all pics where done with same white balance
request for the coupon ![]()
Jackisback, the 1A & 5A do look weird in the bare A6 beamshots.
I wonder if they have been dedomed when they assembled them?
all domes on i jsut check with a UV light the 3D and 5A look ve3ry orange under UV light and the 1A looks very white in UV light
i dont knwo whats wrong but i am sure something is wrong with this 2 LED 1A and 5D
A de-domed 1A might look about how your picture shows… but a de-domed 5A would look VERY YELLOW. There’s no way that “5A” is actually a 5A.
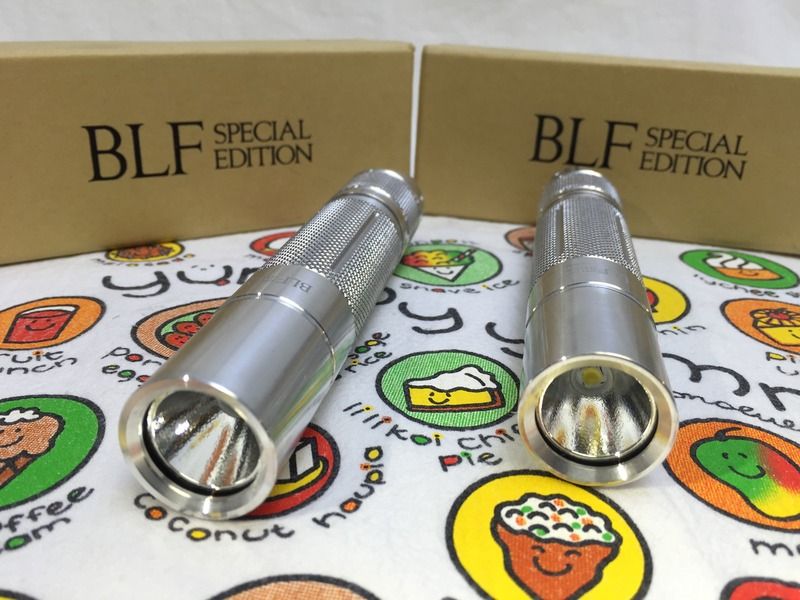
I finally got around to taking a picture of my BLF A6 Special Editions, Bare Finish, Options 1A and 5A, that arrived earlier this week. These complement my initial purchase of the regular anodized version with a 3D tint.
Comments:
- One had dirt/dust on the inside of the window.
- One barrel was bored off-center.
- Both clips were of the newer variety (short wings). Both clips showed signs of rust (uggh). One clip was very firm (good!), The other clip was a little loose (worrisome). And both clips failed to match the bare aluminum ambiance of the flashlights. So, the first order of business was their removal!
- Both UI’s worked perfectly.

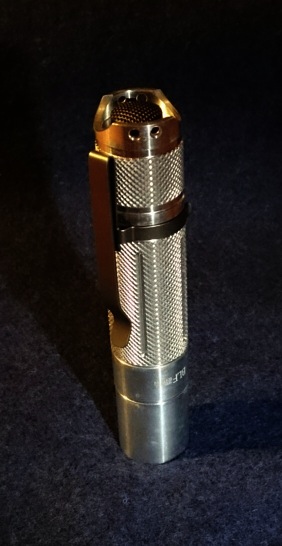
- Both knurling finishes were rather sharp. Grippy, but it gave me the impression of holding onto a grater. Other edges on the flashlights were also not rounded. For example, the lanyard holes in the tailcap. I’ll definitely want to files those down before installing lanyards, otherwise the lanyards would be cut in no time.
- The 1A tint was spot on for me - clean white with a hint of blue. Also, this shone the brightest of the three tints.
- The 5A tint also met my expectations. Golden white with the barest nuance of rose and the least bright of the three tints.
- Both lenses were AR-coated. :weary:
- Use caution when opening up and closing the head to avoid de-doming the LED! :exmark:
My overall impression of all three flashlights:
I like the bling factor of the bare aluminum models. As to fit and finish details, I actually prefer the quality of the original anodized version. The range of tints are great - each can and will serve their own separate purpose. If I had to pick just one, I would go with the 3D (with the 5A coming in just behind the 3D).
My bare BLF-A6 (3D) arrived today. Worked out of the box. Comments:
*nice like it is, with no finish and black details (tailcap,clip,o-ring), when the 18350 tubes are there it will be a shorty. And it will be a beater :-)
*3D is too cool for me, but the plan was dedoming in the first place.
*very slight purple AR-coating, won't do much, won't disturb much
*battery tube boring is centered well this time
*pillar in silicon tailcap is too high, it engages the mode-switching too easy, needs slicing a bit off
*clip fits very well around the body, never knew this was a quality before I got my two black BLF-A6 lights
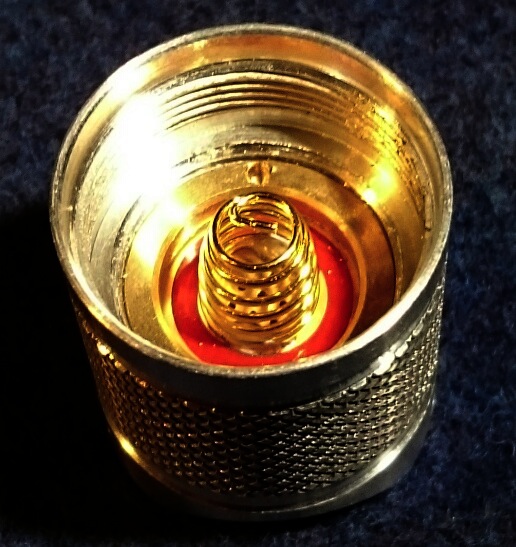
*they used thinner and weaker springs than in my black ones, feels nice enough but: longer path through thinner steel = more resistance. Perhaps they got scared of the stock current of the BLF-A6 and this measure gets the current down a little. Not a bad idea, and for the flashlight buff easily overcome with the spring-bypass
Thanks Toykeeper for organising this bare version, I'm really happy with it! 

I see about the same thing as you. Thanks Toykeeper for organizing!
… they did?
*checks a few units*
Yes, they did.
Dangit. Adding this to the checklist.