My first review, didn’t see anyone posting pics of this light’s internals and I kinda like it so…here goes. ![]()
I ordered this light a few weeks ago from Banggood and it arrived yesterday, to my surprise. It seems after the package had been opened and inspected the tracking data was never updated and until yesterday I was under the impression it was still in a warehouse in Hong Kong. Ah well, no matter, it was a delightful surprise. I did not save the packaging but the light was wrapped in foam in it’s thin-wall box which was tossed in an envelope. Both arrived heavily distressed, but the foam protected the light well enough to arrive with no visible marring.
Quick breakdown
Good:
-Consistent anodizing
-Cleanly cut threads
-Tolerates the longest of protected 18650
-Driver is a true constant-wattage-output circuit
Bad
-visibly cheap machining
-the aluminum feels light
-the driver is not as advertised and underpowered
-came absent adequate waterproofing
-absurdly sensitive tailcap switch
3.5 rejoicing Tachikomas out of 5.

As copied from the description on Banggood:
Product name: Small Sun T620 LED Flashlight
Model: T620
Emitter Brand/Type: CREE T6
Color BIN: white
Material: aluminium alloy
Total Emitters: 1
Mode: Hi > Mid > Fast strobe
Battery Configurations: 2x18650(not included)
Switch: Tail switch
Brightness: 800lm(manufacturer rated)
Range: 500m(manufacturer rated)
Weight: 286.3g flashlight weight
Size: 254.7mm lenght
Waterproof: Yes
And here is what the light looks like disassembled fully.
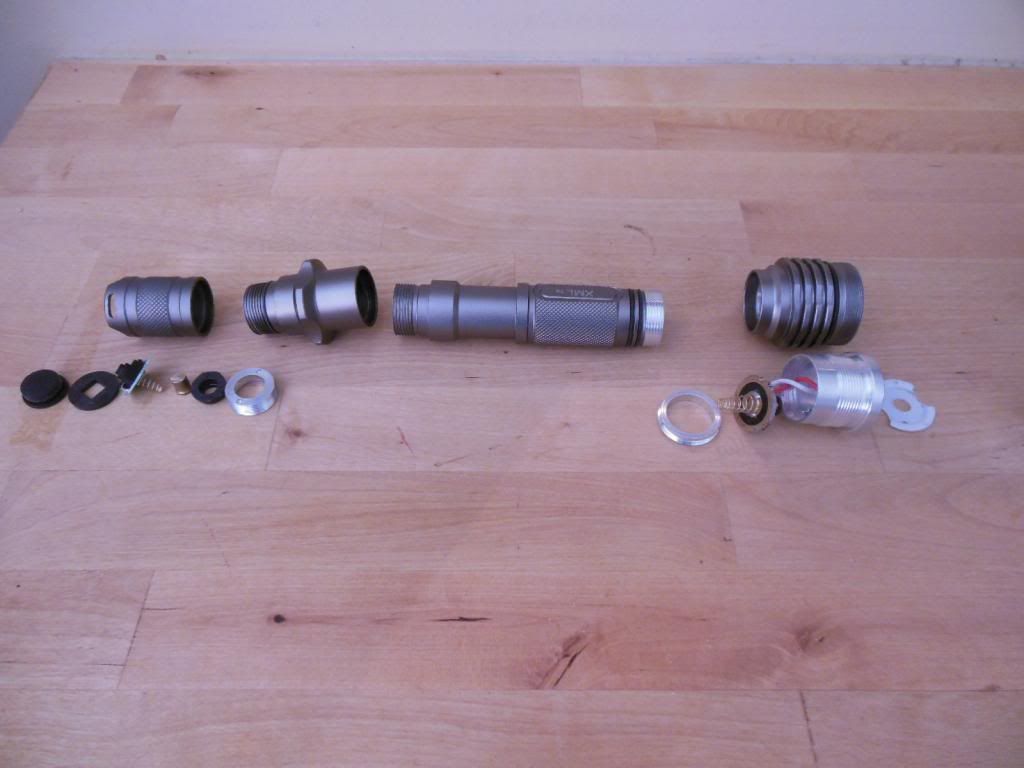
Right off the bat I have an issue with ‘waterproof’. There are missing O-rings from the body and what O-rings are there do not really make contact with the inner walls of the receptacle tube of the next component. The threading everywhere is smooth though, albeit none of it is square-cut. There is a little bit of flash where the tube screws into the pill. I do like the anodizing on the threads, it enables tailcap-lockout, which is a good idea as the tailcap button is ridiculously sensitive. It also appears that the light may be run in with 3 CR123’s, though I have not nor will test this as I’m not buying primaries ever again.
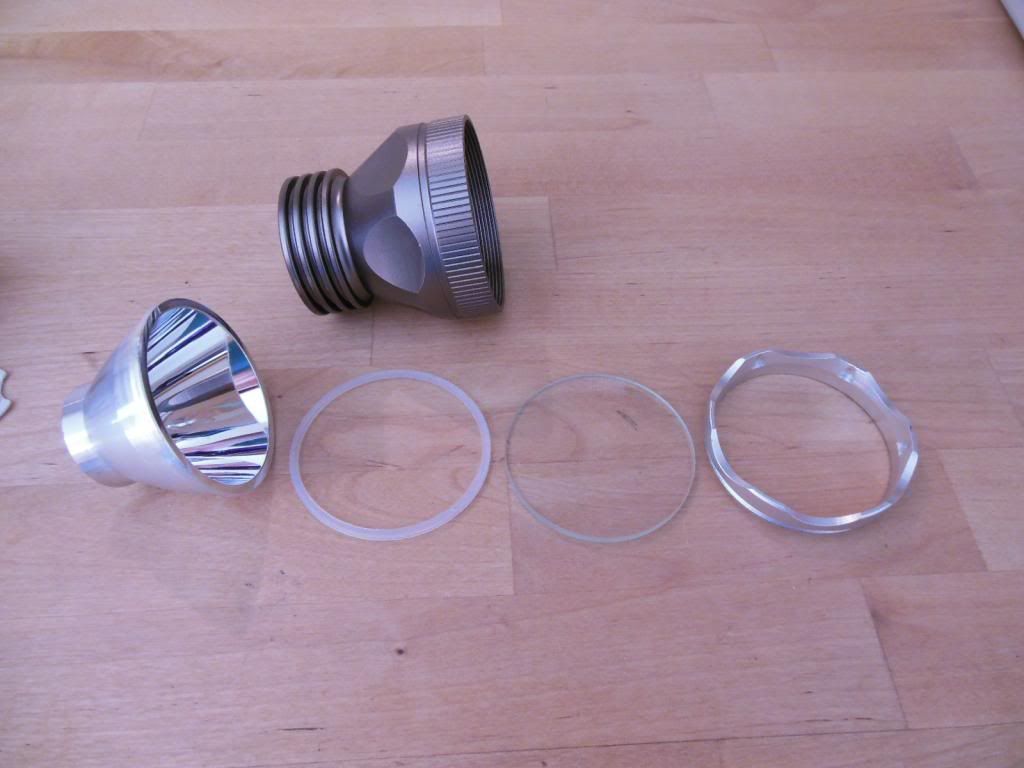
Here is the disassembly of the head. Again, I take some issue with the claim of waterproofing though it’s more valid here than the body. That O-ring sandwiches between the reflector and the lens and presses nicely into the sides of the head, providing a decent seal against the elements at the head-end. The lens is a normal circle of uncoated, very clear glass that is slightly undersized and may leave a gap in the bezel if not centered carefully, though even out-of-center it should still press the o-ring down.
It is on the head that the inexpensive metallurgy and machining are most apparent, with lines visible in the scalloping on the slope. The metal also just feels cheap. It feels light, like there’s alot of air in the aluminum if that makes sense. My 3T6 and X9 feel more solid in the quality of aluminum. The anodizing is also not type-III as it scratches relatively easily, but the anno is at least consistent through all the light’s components.
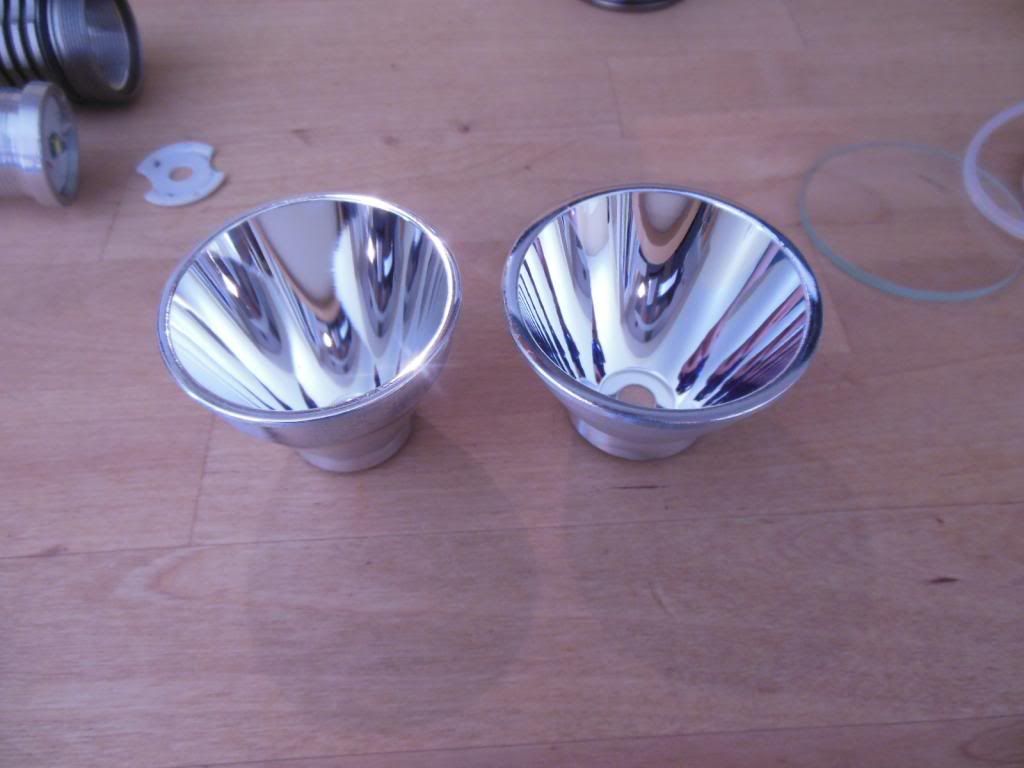
Here is a comparison between the T620’s reflector and the reflector of the only other thrower I have, my Trustfire X9. The X-9 reflector is on the left. The T620’s reflector is a little shallower and a little wider than the X9’s. This has the resultant effect of a slightly tighter hotspot, but a greater visible spill area. At least, that’s how it appears to my eye. It’s aluminum and almost flawlessly polished.
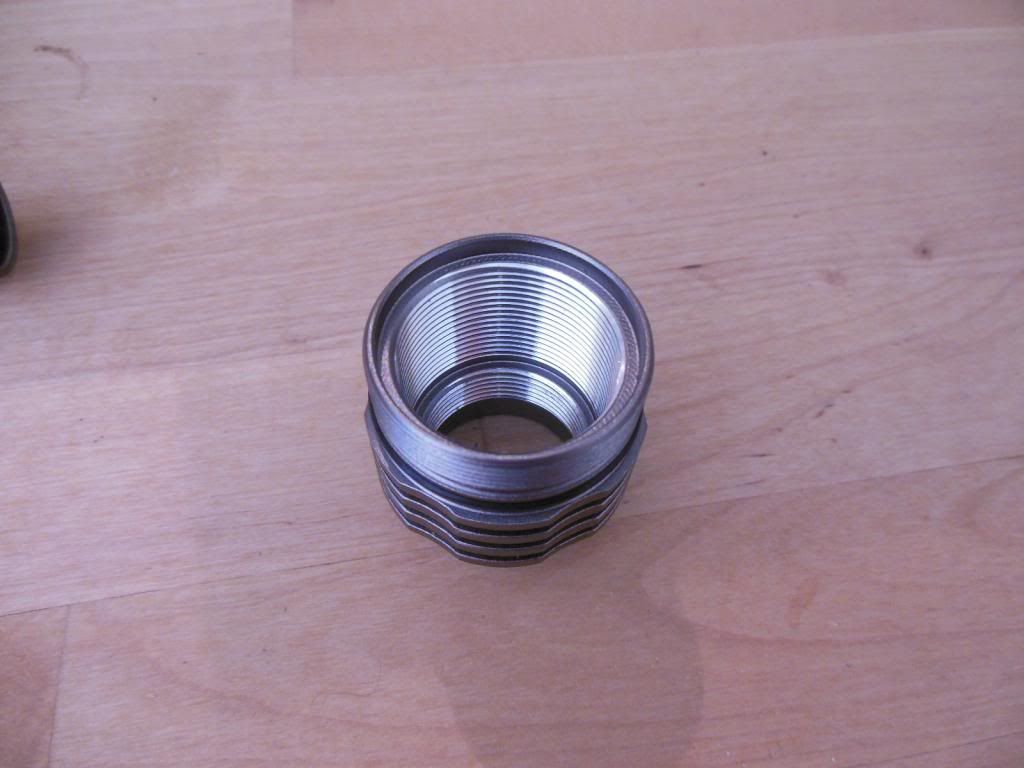
Here we have the outer-pill. The Pill is two separate pieces, or perhaps more accurately the head is two pieces, an upper-piece and lower-piece. The pill screws in from the top and the body tube screws in from the bottom. The threading again is not square-cut but very clean and the absence of anodizing makes heat transfer good, though the anno on the exterior will not transmit as much heat into the cooling fins on the head. This isn’t an issue because of the relatively low factory current draw.
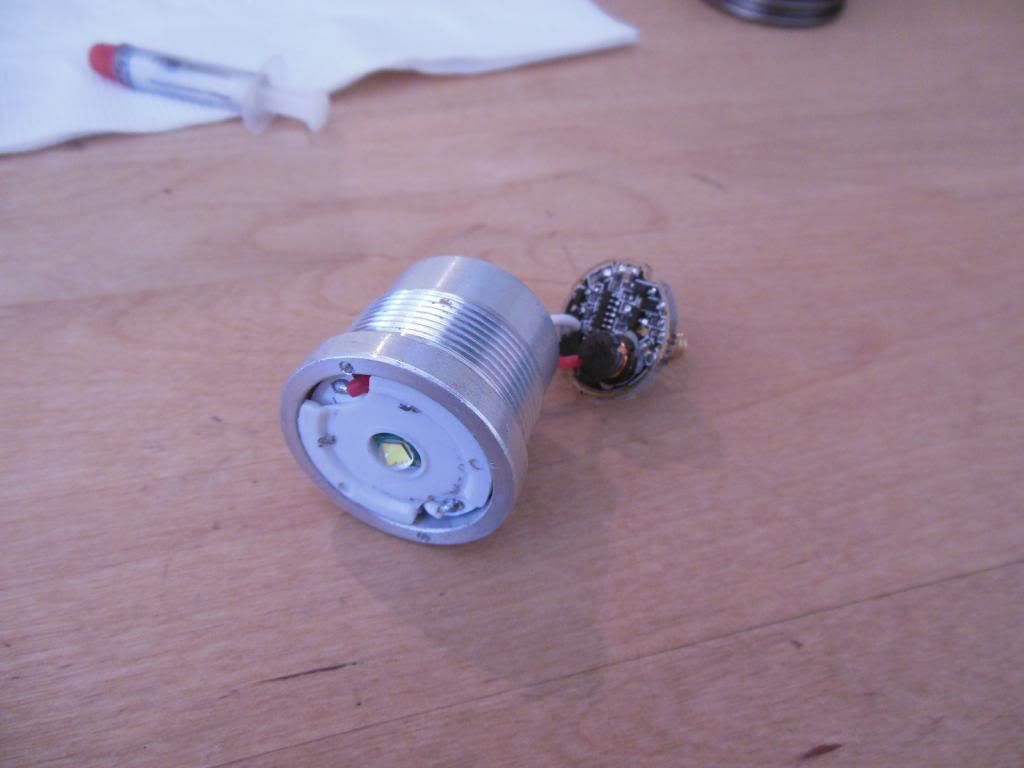
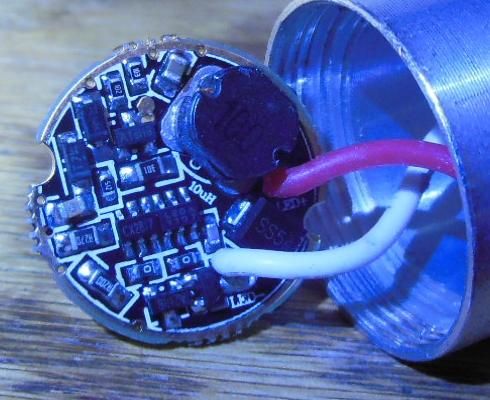
Here is the pill itself with the driver out. The driver is retained by a blank (no divots to use pliers as a wrench) retaining ring. The star is held in the top of the pill by the plastic centering ring as shown.
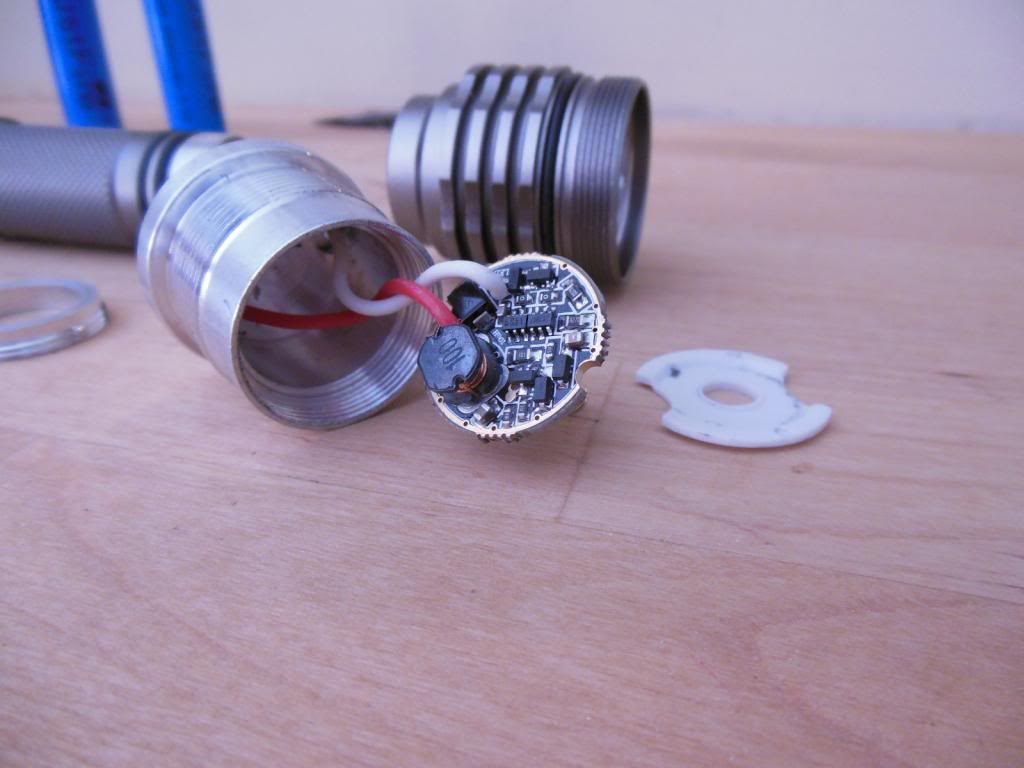
Here is the driver in closer detail. It’s your normal 5-mode driver, though this one has a comically and uselessly fast SOS pattern that will not look like SOS to anyone not specifically looking for it. I’m disappointed as Banggood advertised this light as coming with the 3-mode driver reputed to have the variable-high mode, one of the main reasons I bought this light in particular. Not enough to make me want to return it as the toroid on the driver gives me hope as the modding capability even if I’m not sure exactly what it does :party: . Modding is pretty much a requirement as as usual with Chinese lights, this one is under-driven. I tried Trustfire blue 1900mAh and Sansung pack-pull-purple 2800mAh, charged to 4.15v it pulled about 1.9A after a few seconds on one battery. With two batteries it drew 0.72A. This should equate to about 600 lumens out the front of the light (AKA, wild guess. :bigsmile: )
I left the light on high for 60 minutes, and took cell voltage and current draw after the hour transpired. Voltage was 3.58V in both cells (down from 4.15v). At that cell voltage, it drew .88A (up from .72A), meaning the driver increased draw to compensate for the reduced voltage. I really like this light now. ![]() Over the course of the hour, the light never got warmer than a hot shower, so it is dissipating the heat nicely.
Over the course of the hour, the light never got warmer than a hot shower, so it is dissipating the heat nicely.

My other main bone to pick is the way the star is compounded to the pill, with a solitary drop of white paste. The paste isn’t hard to clean off, and at least there’s aluminum all the way under the star. The aluminum of the pill isn’t much thicker than the star but it works. This was rectified promptly with some silver paste. Another little plus is the wires, which are quite more substantial in both insulation and wire gauge than my Trustfire X9. It’s another pointer urging me to add resistors.
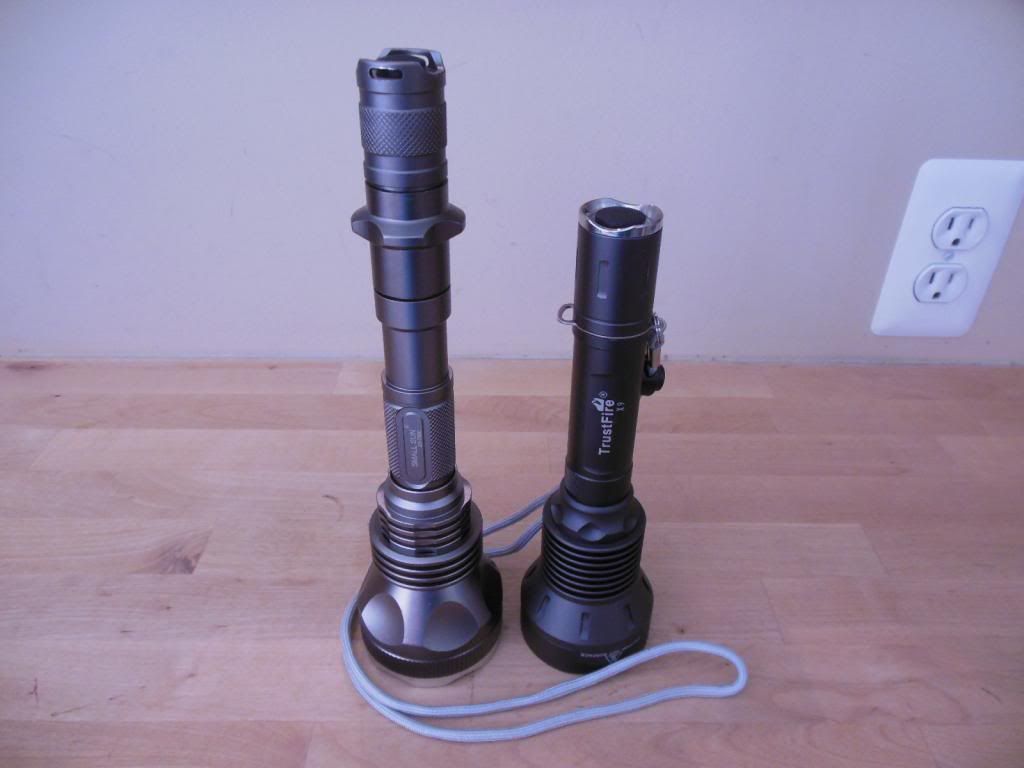
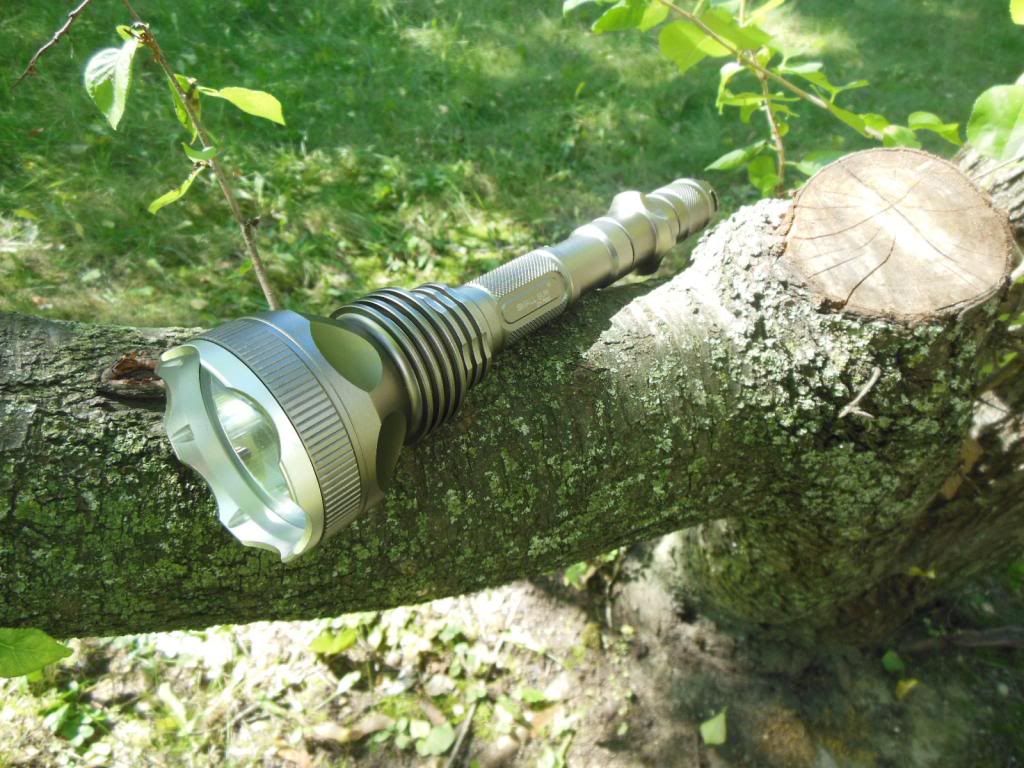
Here is a height comparison between the two lights. For having an extra 70mm+ of battery tube the T620 is (supposedly) only 50mm longer than the X9. Twice the battery life for not much bigger a light. It really is an ideal size, it will fit in my jeans pocket with just the right amount of the head sticking out. I’ll take this opporunity to discuss battery compatibility. This light was designed for protected cells. Using two of my Samsung pack-pull-purples, light jostling was sufficient to break contact inside the tube and change modes. It will comfortably swallow a pair of Panasonic protected 3400mAh cells however.
In regard to beamshots, I’m afraid I do not have a high-end camera with adjustable exposure to accurately show the profile of the beams, so the close-ups will be overexposed. Against the wall of my current residential domicile they look the same. I’ll show the pictures just at reduced size.
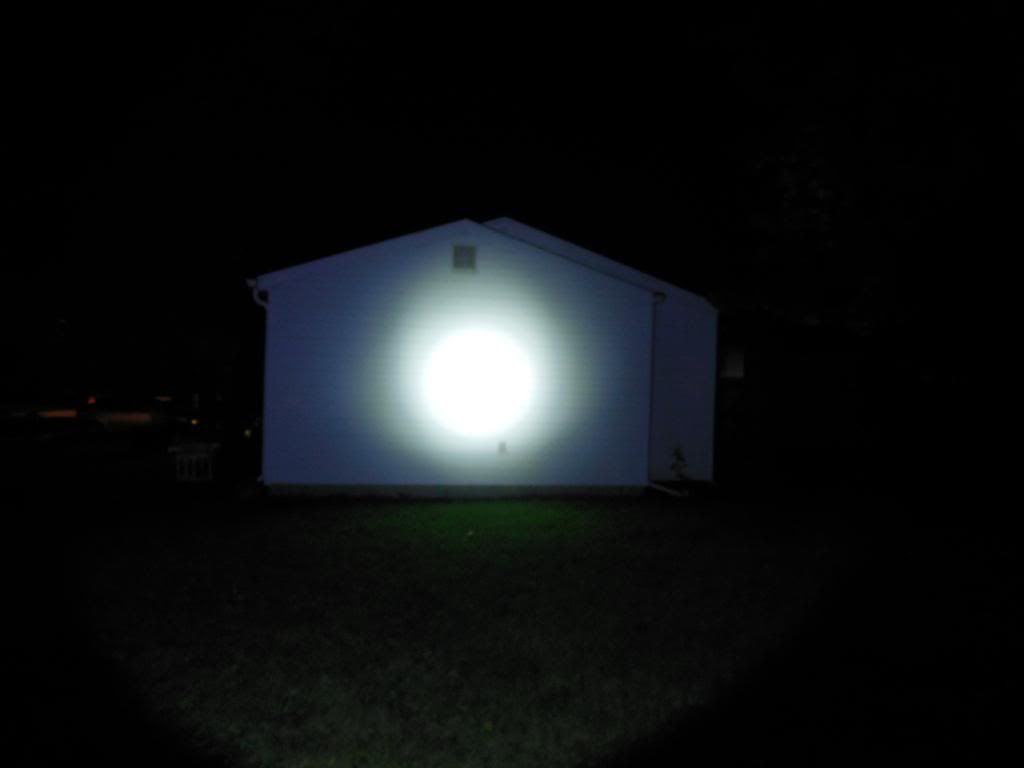

The Trustfire is on top, the Small Sun is on the bottom. The beams do look different in person, but again, they are overexposed with the digital camera I have.

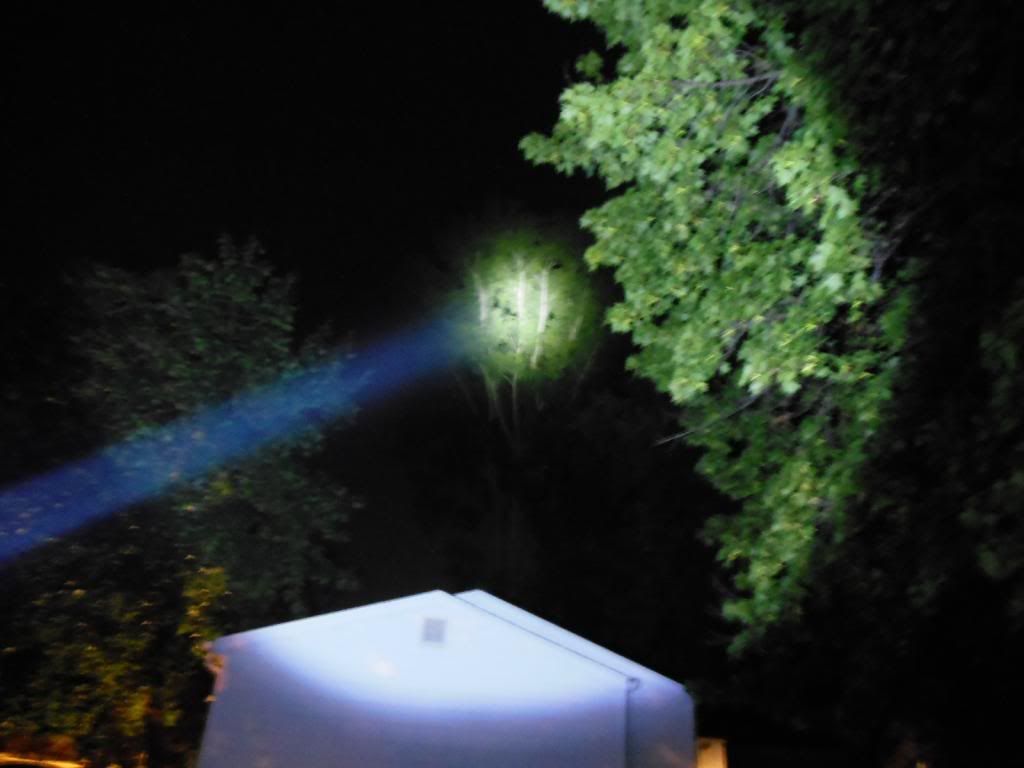
As before the X9 is top, the T620 is bottom. The longer-distance beamshots show an observable difference in beam profile. The Small Sun has a slightly tighter hotspot than the X9, which confuses me given the wider, shallower reflector. My theory is the emitter is focused better in the reflector. Driven properly this light might be able to throw further than the X9, a theory I intend to test down the road.
I like the light. I was dissapointed by the absence of the advertised driver and the light-weight feeling of the aluminum used, but the light has good potential for modding. Even without any mods it’s still serviceable with a nice hotspot, wide spill, and a warm tint to the light [and the driver maintains light output until the cells die]. The light weight also means a cigar hold is not unreasonable, though the tail switch is way too sensitive.
I paid $27 shipped for the light from Banggood and I feel that the value is fair for what I received. Overall I’ll give it 3-1/2 rejoicing Tachikomas out of 5. Because the confirmation of the driver’s nature I’ll up it to 4 rejoicing Tachikomas out of 5. I think that drivers like this aren’t as common as I first thought, and I like them. Just MHO. ![]()
I’m reverting to my original opinion. While the Trustfires that normally reside in her battery tube charged I put in my Panny 3400’s, and when I took them out the tape covering the protection circuit’s power strap had been cut almost through on the upper cell because there was a previously-unrealized discrepancy between the long and short body tube segments, and coupled with the slight flash on the edges almost caused an interesting situation. It is a budget light but there are some standards and this cuts it back down to original. I still like the light but this was one of those places to spend one’s QC budget, and here it wasn’t.