Copper ahoy! ![]()
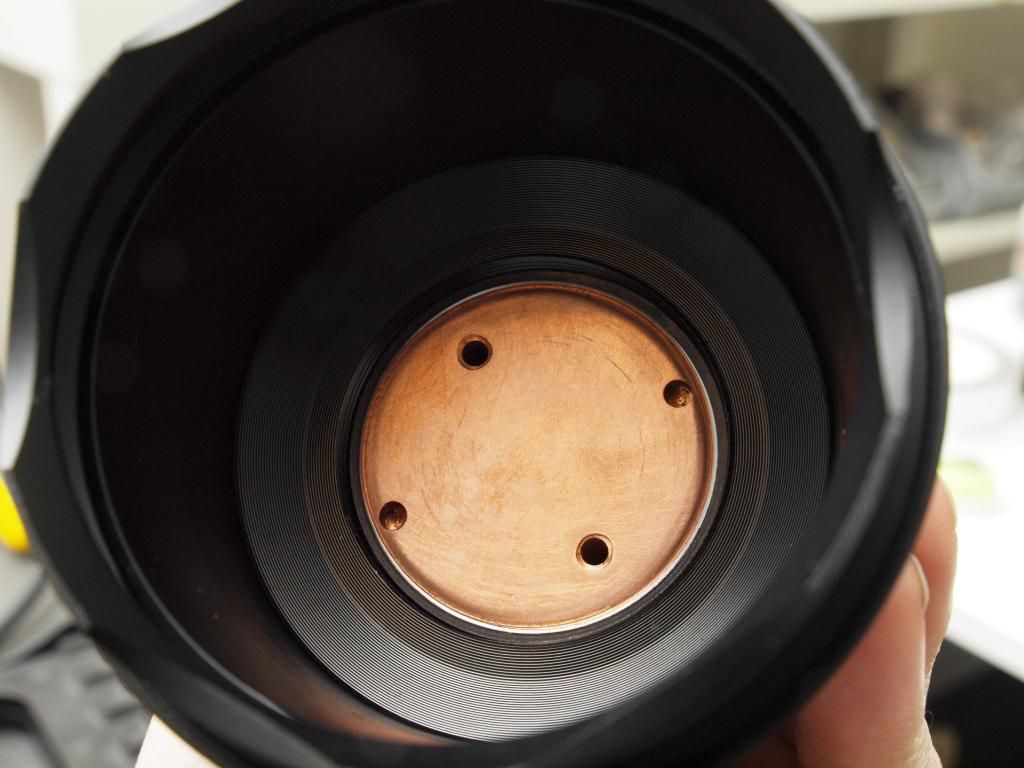
150grams of solid copper, should help keep temps under control at the die. ![]()
Thanks again Nikola, awesome work!
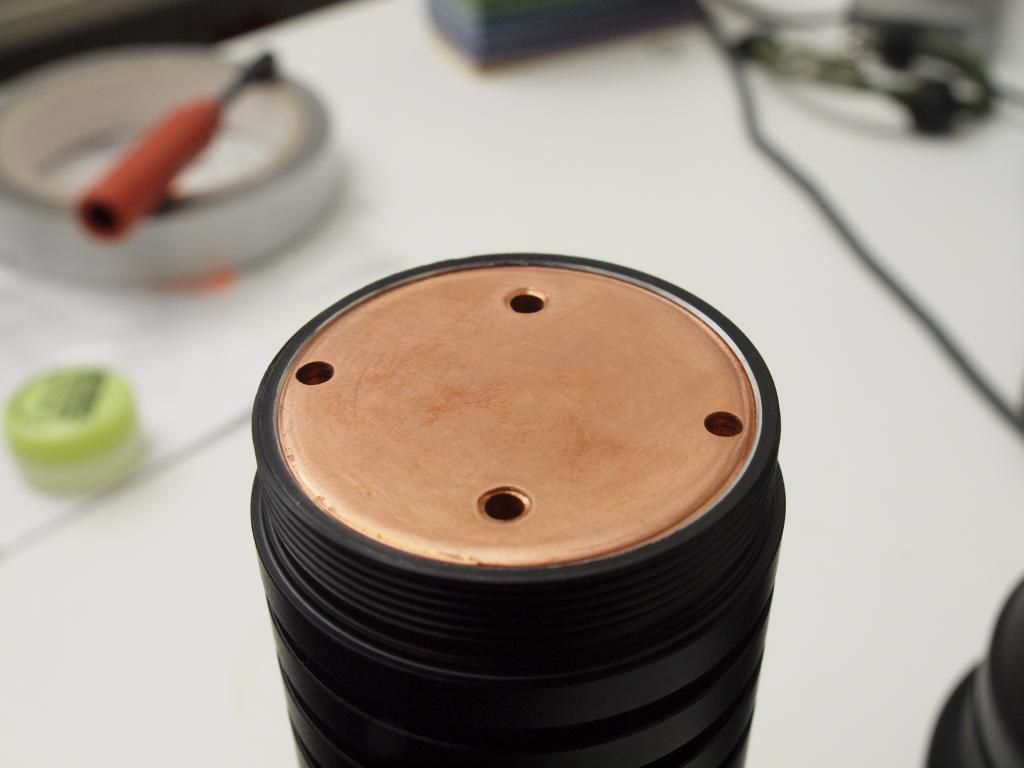
Copper ahoy! ![]()
150grams of solid copper, should help keep temps under control at the die. ![]()
Thanks again Nikola, awesome work!
Nicely done!
Nice tight fit!
Difficult to see how big it actually is.
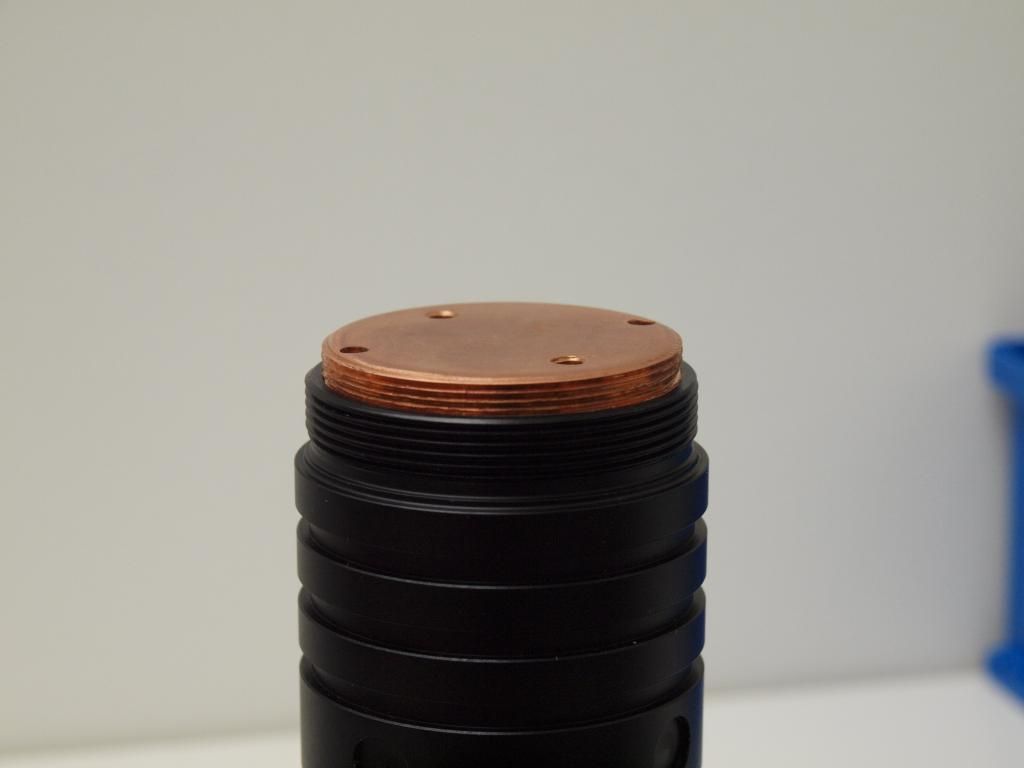
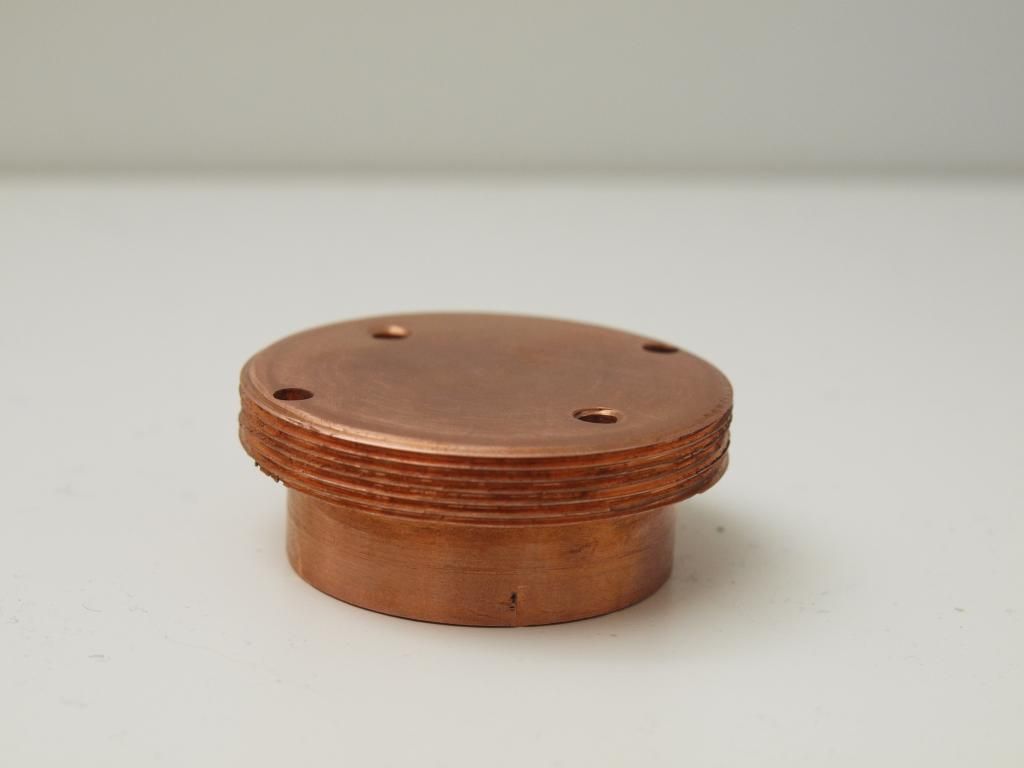
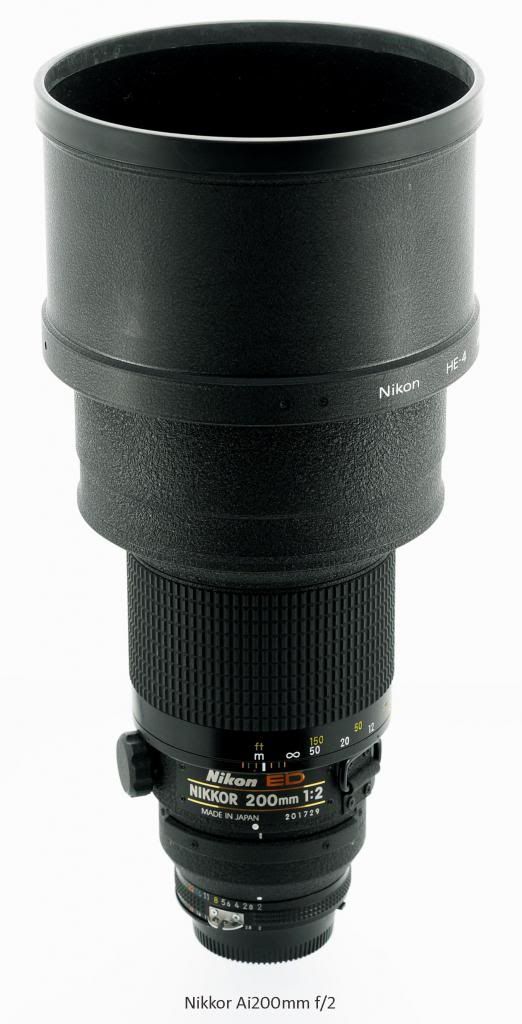
Just a tiny bit smaller than the I/D of a courui! ![]()
42mm across at the threads and 16.5mm deep.
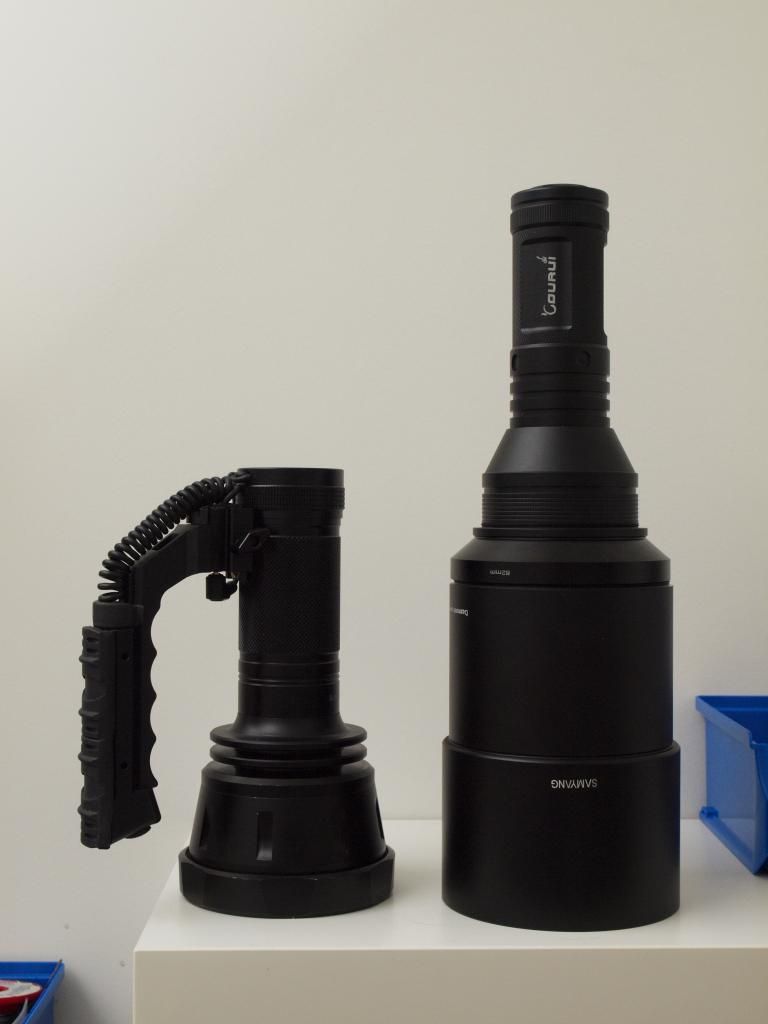
Another part came in, the coupling bit with the widening hood. This one is a slight disappointment. It’s the right size but it doesn’t have a thread on the front side that would allow it to screw neatly together with the 105mm front segments.
Too bad, will have to permanently attach it to the extension tube that’s yet to arrive.
Still it’s nice to see it start coming together, now just waiting on the last extension and of course the lens.
Impressive as it comes together isn’t it?
Wish I could get the new Canon camera to take pics of these things. lol It’s only a few hundred, that I don’t have.
Well, ok, a few dozen hundred and then a few. But 50MP? Mewantsobadithurts! ![]()
Are you getting a lens from Edmunds? Can’t wait to see it come together in it’s entirety, be a fun beastie to play with for sure!
Wow, Linus! Really Nice concept ![]()
I have something quite similar, but it doesn’t use 18650’s… or light up anything.
Really nice stack.
What lens did you use?
Doesn’t light up anything…Yet! ![]()
I used the Canon EF 100mm Macro 2.8L IS Hybrid. With the macro slide rail from Really Right Stuff it’s super precise to get focus points at whatever interval necessary. I think I used approx 1/2mm between shots on that one.
The knob works really well on the slide rail, but I managed to build a “pawn” shaped aluminum attachment for it that makes it so easy to do a controlled 1/4 turn or 1/2 turn, one finger easy. So the stack goes well virtually every time.
For those that aren’t into photography, when shooting a 1:1 ratio macro the depth of focus is extremely thin, capturing only a slim line across the sensor plane in focus. So the camera is set to 1:1 focus, then moved forward or backward on a slide rail to capture each slice of the subject in focus, whether that’s 8 pictures in a row or 80. Then the computer is used to stack the focused slices into one image. With a 21MP camera, this can be a MASSIVE amount of file space! And I WANT the 50MP new camera! ![]()
There is what they call a Bayer filter in front of the sensor that is used to prevent patterns that are similar in size to the layout of the sensor from making contrast issues. This softens the image slightly, so all digital images need sharpening to bring the image back into focus. A few manufacturers of high end camera’s are beginning to offer a model with this Bayer filter removed, giving substantially sharper images without additional sharpening. They like to charge a couple hundred dollars for leaving this filter out! Imagine that! “Oh, we forgot to add an expensive lens in front of your sensor, that’ll be $200 please!” Shouldn’t it be that much cheaper? The new 50MP camera recently announced has a model with this option, for a measely $3899! Seems expensive? Medium format camera’s with that resolution cost upwards of $30,000!!!
Oh, by the way, get something like that 50MP camera as an up-grade and suddenly your old lenses are out-resolved making a selection of up-graded lenses a must as well….at a cool thousand dollars apiece and more, some MUCH more!
And we hem and haw about a $50 flashlight…
Oops! My camera itch is coming back… shhhhh, don’t tell Mary!
A stacked image of a AAA MiniMag from RBD
A single image from the stack…

The macro focus rail and home made assist knob. This entire rail clamps into a quick release plate and in turn the camera clamps into the quick release plate on this rail for a fast and easy system.

Gotta be passionate about Something! ![]()
Haha… I meant my lens doesn’t light up anything at all. The best I can do is shine a light through it :bigsmile:
Your images are just beautiful, DBCstm.
You obviously have a talent (and know-how) for producing terrific images :bigsmile:
Thank you sir! Always on a learning curve, looking for new and better……vaguely familiar in other areas wouldn’t you say? lol
Hey Linus? On that junction that will have to be hard fixed, JB Weld 2 part epoxy is pretty incredible stuff. It’s a dark grey by nature so even if some shows it won’t be a bad contrast. If you put it together with the thought in mind that it’ll be removable, it’ll never come apart! It’s really really strong when you have to separate two pieces. lol
Edit: Perhaps you can epoxy a threaded adapter to one of the two parts, so that you could break it down if/when necessary?
Yep I had the same thought process on both those points. Already have some JBweld ready to go.
I tried looking for a 105mm-105mm filter extender ring but couldn’t find anything low priced enough to be worth it.
I’ll just remove the male threads on the back half of the extension tube giving me the clearance to slide it onto the collar and then JBweld it permanently into place.
Would have been nice to have a completely modular setup but, you can’t have everything. ![]()
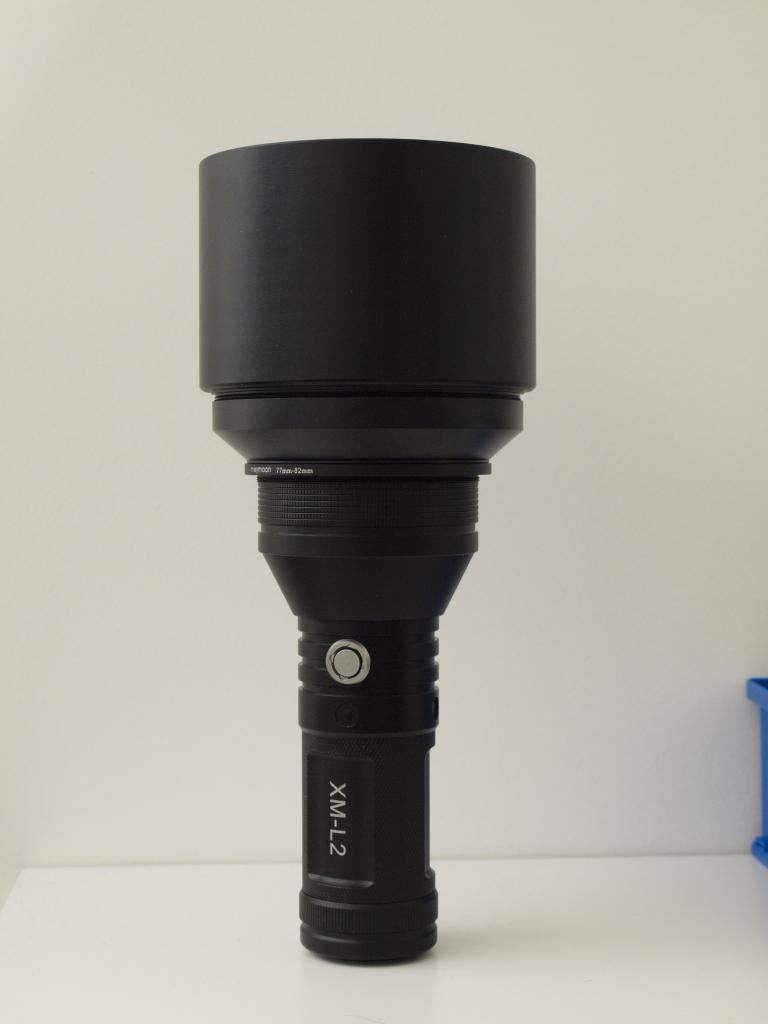
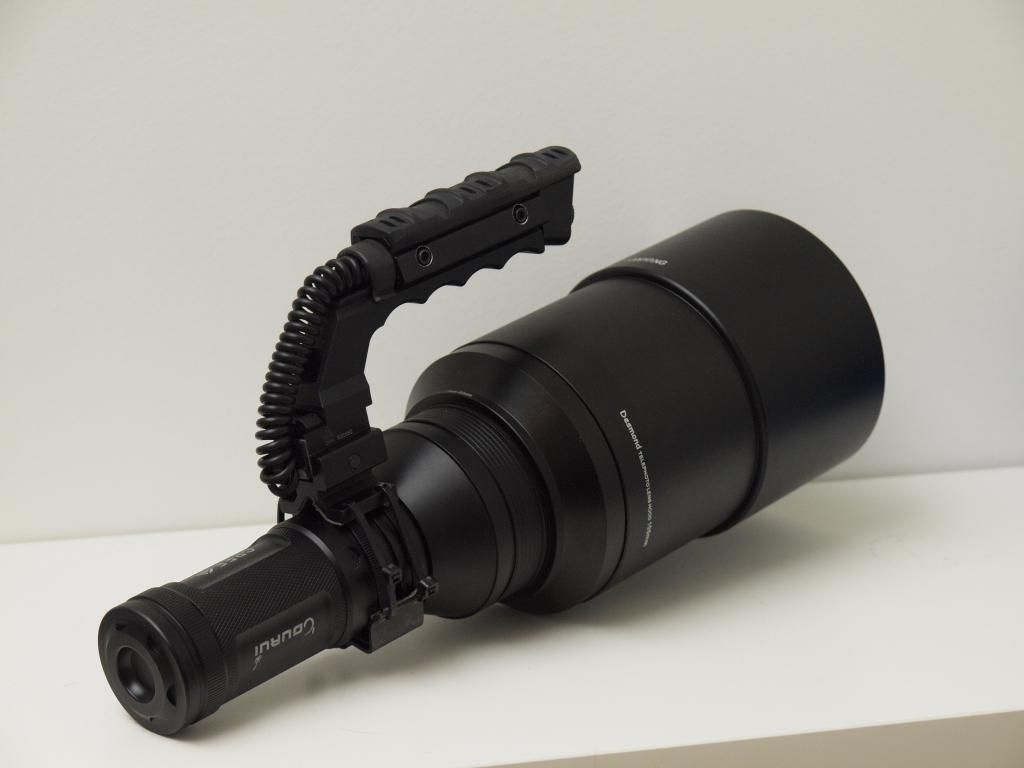
The final puzzle piece landed on my doormat just now.
Tis a bit of a beast in it’s fully assembled form! :bigsmile:
Any estimate on how soon you’ll have it up and running? Nice beastie it is, looks great.
Can't wait to see the handle on it, nice work
Waiting on the lenses from Edmunds and a hot air gun for reflowing. I’m hoping the lenses will get here monday.
Beyond that I need to make some kind of a lens retainer and of course grind down the OD of the lens to make it fit the hood. That could take awhile ![]()
Not much more to it than that really. The electronics are fairly straight forward.
Can’t wait to see what kind of a beam it projects.
Still working on finishing up the BTU though so it’ll probably take a couple of weeks to get it up and running fully.
—
Oh and I don’t think the JBweld will be needed after all, I manged to file down the threads enough on the extension tube to make it a tight interference fit on the collar. Had to pretty much stand on it to force it in so it’s not going anywhere in a hurry. ![]()


PS. Balance wise it’s probably going to be pretty close to spot on with the hefty lens up the front. Batteries and Copper pill really weigh down the rear. If it doesn’t balance out I can always fill the tailcap with lead ![]()
really sick!
ai laik! ![]()