I'm sure it wont be my last my secret host will be here tomorrow or Friday so ill make a thread on my set up ;)
Linus, are you putting one in the Courui? I can’t wait to see the tint on this one.
I’ve been working to get a new optic to try with this, but it’s a Fresnel lens that will completely hide the emitter! ![]() Not sure I want to use it with this emitter, this thing is too pretty to cover up even if the promise IS 1200M. I guess fitment will be the deciding factor and I’ll do what I gotta do.
Not sure I want to use it with this emitter, this thing is too pretty to cover up even if the promise IS 1200M. I guess fitment will be the deciding factor and I’ll do what I gotta do.
Edit: That almost looks like a coarse graphite putty or something. Wonder why they couldn’t have trimmed it or something? Looks odd, such a creation on the die and bond wires, brick mortar underneath it. ![]()
Not sure yet, I don’t have my usual setup here with me so I want to make sure I have e a good reflow setup going again before I risk these emitters. Need to get a hot-air gun and an a chunky aluminium heatsink to do the reflows on first.
Looks awesome!
I’ve been reading your Btu Shocker thread also. So cool when a projects manages to go from concept to “real life”.
what 3d program are you using? I’ve worked as a 3d artist for 5 years myself.
Also it would be fun to see your workplace -for us mere mortals to see what tools you use for creating your “monsters”
Thanks ![]()
For most of my 3d modelling and “sketching” I default to using Silo3D, mainly because it’s simple, intuitive and fast.
Everything that Maya isn’t :P, which is what I use as my 3d app for basically everything else.
Never used Silo, but it looks perfekt for “concepting”.
Started in Maya waaay back when it was owned by AliasWavefront. Switched to 3dsMax in 2005, and used it along with Autocad till I stopped in 2011.
Looking forward to more of your concepting ![]()
little question…. why to use abt-70 and not an mt-g2 ?
Just look there and admire the beauty! ![]()
That’s most of the reason why I picked this emitter tbh. It’s just damn purdy!
But also, crucially, the emitter is a very unique thing in that it has a gorgeous perfectly circular die. It’s a speciality emitter designed for just this kind of thing, ie spotlight / projection.
And since lights with aspheric lenses project an exact image of the die shape it becomes pretty interesting in a light like this.
Square beams are not really my thing…
Why not a dedomed mt-g2? Well it wouldn’t be the worst choice if looking at it strictly in terms of die shape. The Semi rounded nature of the array seems to work quite well in an aspheric, certainly I’d take it over a straight square. But it’s also going to be a wider beam and the variation in the die surface because of the array will be more apparent.
Pros would be a whole lot more output and cheaper price.
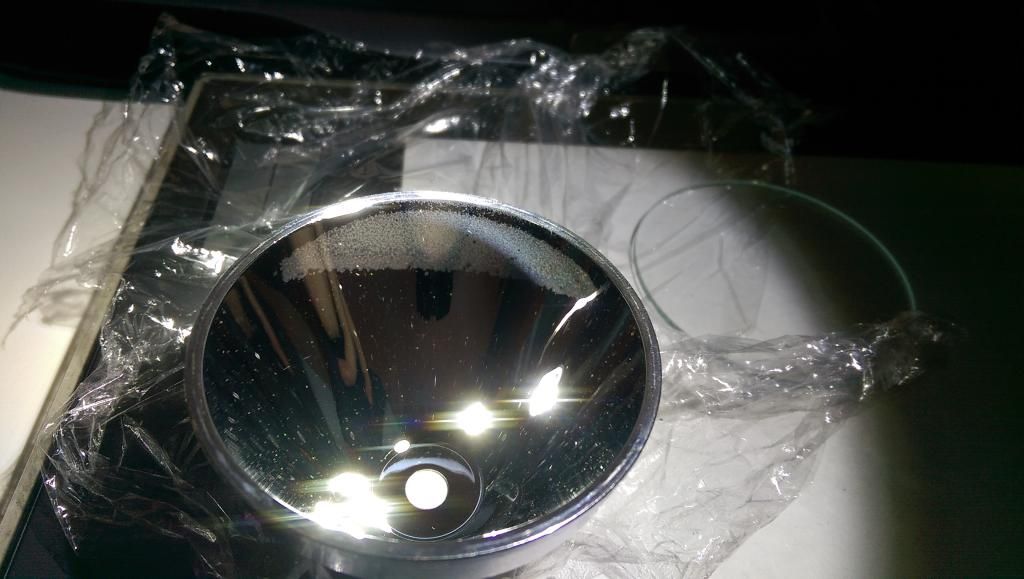
Got my black Courui in and frankly I’m glad I won’t be needing the lens or reflector. Both of which are not exactly pristine… ![]()
The lens has marks and scratches on it and the reflector has a large segment with a strange haze on it…nothing like the first generation gray unbranded light I have…shame that quality finds a way of falling off a cliff with these lights. Oh and I couldn’t believe it but they actually managed to put an even thinner wire in the tailcap! Incredible!
Anyway, neither the lens nor the reflector will be used here so it doesn’t matter, but it’s still really disappointing to see.
As you are good at using 3d programs, did you ever consider using 3d printing for some of your custom work?
Crap with the marks and scratches. :Sp
It’s definitely a cool thought, though most of the custom parts I require tend to be made out of aluminium so I’m a little stuck with what’s available or what I can modify. ![]()
Maybe in terms of printing a holder for the lens or something along those lines it might not be a bad idea at all. Will look into it, thanks ![]()
I know a member called Tofty designed a high amperage switch and used 3d printing to make the case, so that was pretty cool to see.
—
The hazing on the reflector is really quite bad on my Courui. Never seen anything like this before. At first I thought it was just some condensation from being in the cold postbox and bringing it inside. But it’s permanent and very distracting with the light on.

Wash your hands good with dish soap, then use a mild dish soap and warm water and scrub it clean with your finger while keeping it under the running water. Blow the water droplets out and Voila!
Nice project! I like what's going based on the 3D renders.
A member of the German flashlightforum used shaving FOAM on Maxabeam reflectors, with excellent results:
Its all in German of course, but the video speaks for itself.
Greetz
Nico
Thanks for the reflector cleaning tips guys.
I’m wary with cleaning reflectors and associate any touching of the reflector at all with scratches so I try to avoid that. But the shaving foam is an interesting idea, combined with some slightly pressurized water, then maybe rinse with distilled water at the end.
Did anyone ever try one of those ultrasonic jewelery cleaners with reflectors? Seems like that might be a good method.
—
Anyway no actual need for this reflector here. ![]()
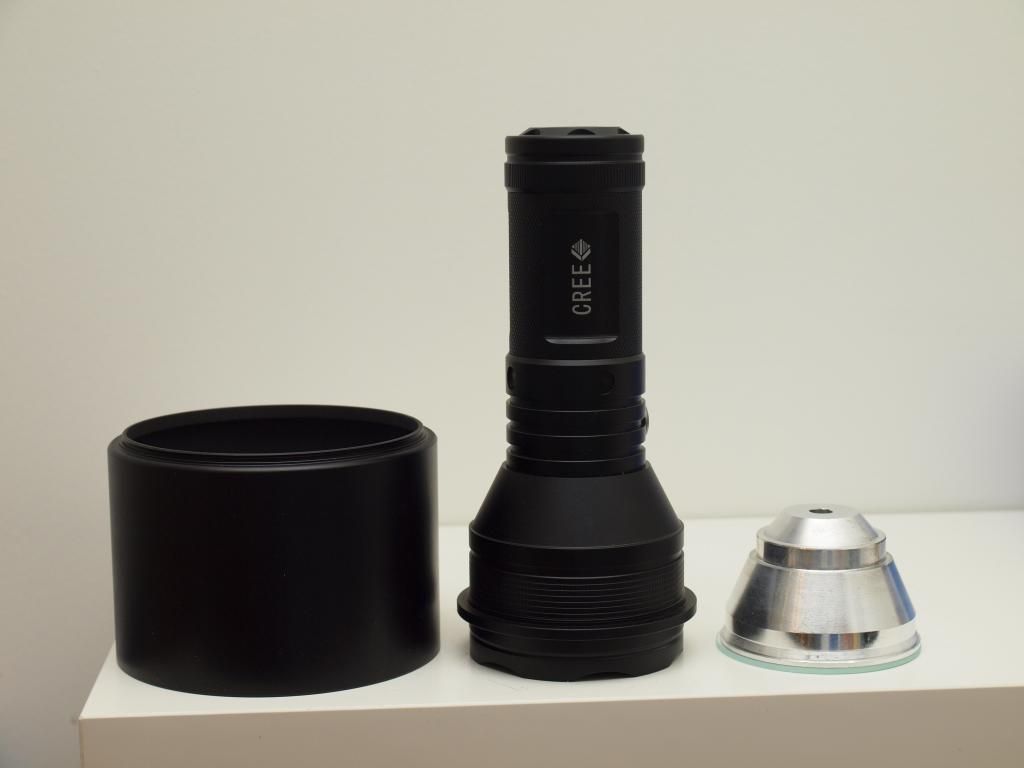
I received the front hood element today. It’s quite a beast, and a little thicker than I expected.
Makes it nice and sturdy but I’ll need to grind down the OD of the main lens a bit to make it fit. Annoyingly no one really lists all the dimensions for these things on the ebay listings so I had to take some educated guesses. Was already very close tolerance but if the actual OD of the lens doesn’t come in well below the expected 113mm, it will require some work.

The nice thing about these lens hoods as hosts for aspherics is that the inside is already treated to cut down on reflections. It’s finished in very matte black anodizing and covered in tiny concentric ridges to further reduce any specular reflections. I’m hopeful that will minimize any unwanted rings or artefacts around the hotspot.
On the courui I’ve already installed the 77mm filter ring adapter that is going to be the foundation for attaching all the other hood components.
Was delighted to find that it fits like a glove, even pressurizing the stock o-ring nicely! Also the front bezel of the light can be screwed down on top of it to clamp it firmly in place. Awesome ![]()
I’ll probably cut the bezel down a bit for the final light leaving only the threaded section to act as a retainer.
Imight of not read it but are u using the stovk switch for 10A ?
Neat how the parts can come together from such different sources and original specs.
Mine is taking a turn, seems the reflector does NOT like ANY de-domed emitter, and the SBT-70 fits in that category. I’ve got an SST-90 in it now, with the dome removed such that it is very much like it’s brother, and the big Ledil doesn’t care for it much. So it would seem that I will need to use a domed Cree in this. Perhaps even an XP-G2 or smaller.
I can still use the SBT-70 in the Courui, not sure what I’ll do with it now. Might use it as a mule in my Cypreus so it can easily be seen. ![]()
It’s an e-switch in the courui so no current actually going across it. But yes I’ll probably just use the stock switch.
That’s strange isn’t it? Didn’t the datasheet specifically use the sbt-70 as an example?
I’m not sure I understand that reflector/lens properly but is it maybe a matter of getting the emitter into the opening a little further. The dome does have a habit of “lifting” the edges of the emitter placing them further forward optically. Maybe you could emulate that by putting the dedomed emitters on a pedestal to get it right in the focal point of that first stage TIR?
Sounds like it’s quite a tight tolerance thing.
How does the beam look in general?
Thanks for the reply i did not no a Eswitch can handle 10a
That’s my point, the e-switch doesn’t carry any actual led drive current. It’s on a separate circuit entirely and only tells the driver when to turn on and off.
The driver itself is what acts as the switch delivering or interrupting all the power to the led.