DIY Soda Bottle Preform waterproof LED 18650 lanterns

So my family has been enjoying Kayaking lately and a lake near our home has a strict rule of navigation lights needed after the sun goes down.

Of course I could have gone on Amazon and bought inexpensive boat flashlights but where is the fun in that. Instead I spent way more than I could have bought those substandard lights for on materials to make ones of my own design.
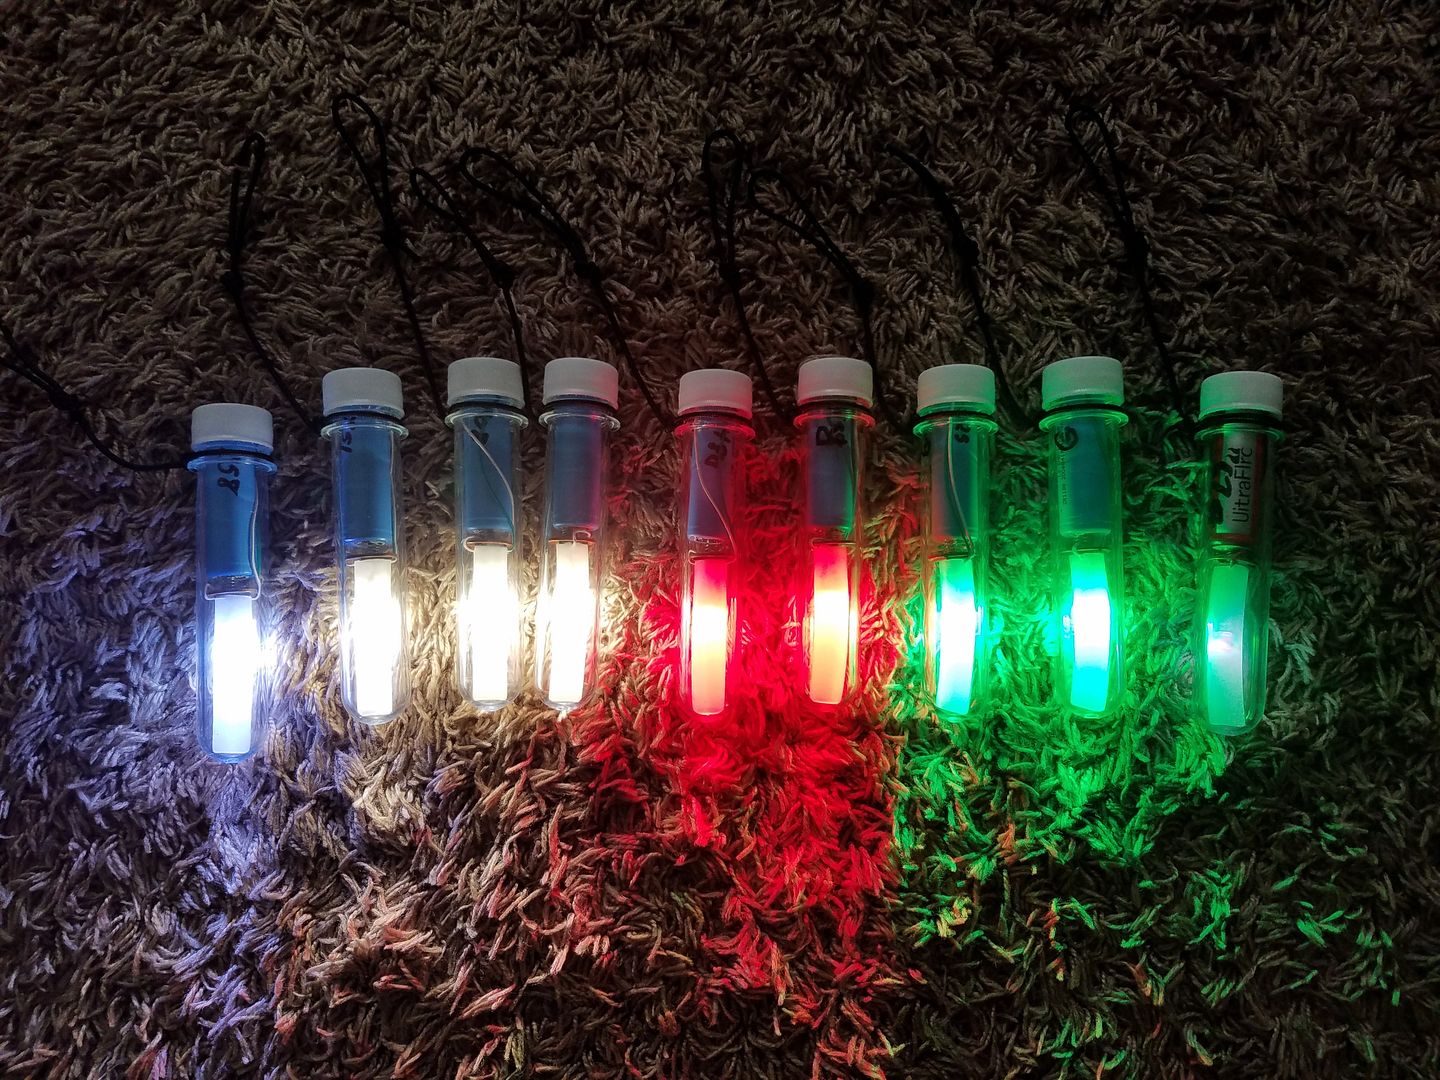
It starts with a Soda Bottle Preform as the housing. For those who do not know this is how a 2 liter bottle starts it’s life out. It is then heated and blown up in to the shape and size of a 2 litter. The preforms are very ridged, tough and big enough to fit 2 unprotected 18650s in. As you can see I made them with some different color LEDs. The design is very simple. It is a 1W Asian LED that is a packaging clone of the original 1W Luxeon LEDs. I have some more info on them here, but in short they are actually decent LEDs at insanely low prices.

I soldered a spring to a penny for contacting the positive side of the 18650 and then ran that through a 15 ohm resistor to the Anode of the LED, the cathode has a white wire and a 300 ohm resistor soldered to it. The other side of the 300ohm resistor goes to a green wire the same length as the white wire.
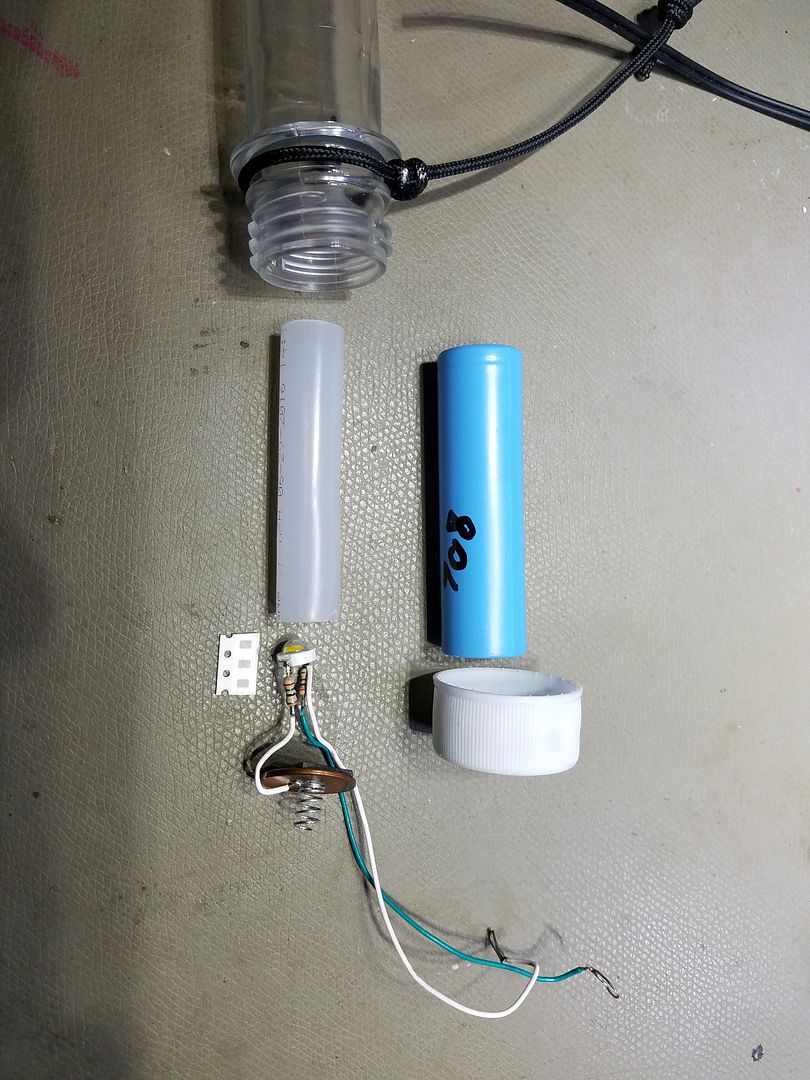
For a diffuse I found some Polyethylene 1/2”OD 3/8” ID at Home Depot. The ID is the perfect size to cram the bare 1W led in with the leads folded down. I cut my piece of pipe about 60mm long. I put a piece of card paper between the Resistors to keep them from touching. Cut some v notches in the bottom of the pipe for the wires to escape and using some double sided foam tape on the back of the penny I stick on the pipe.
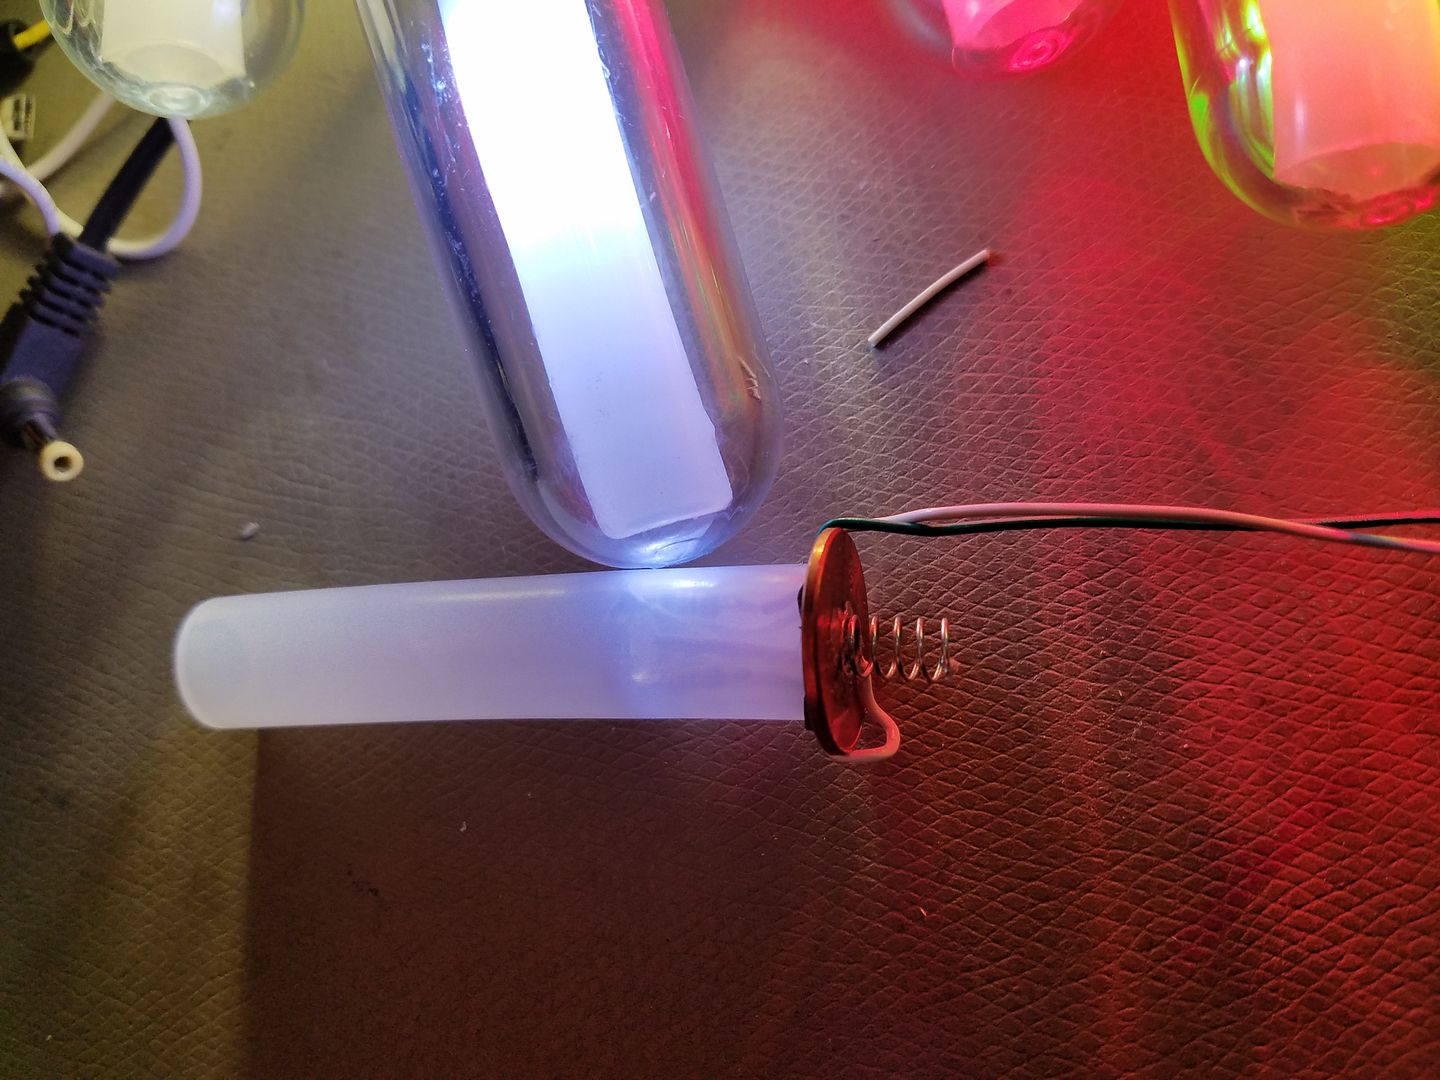
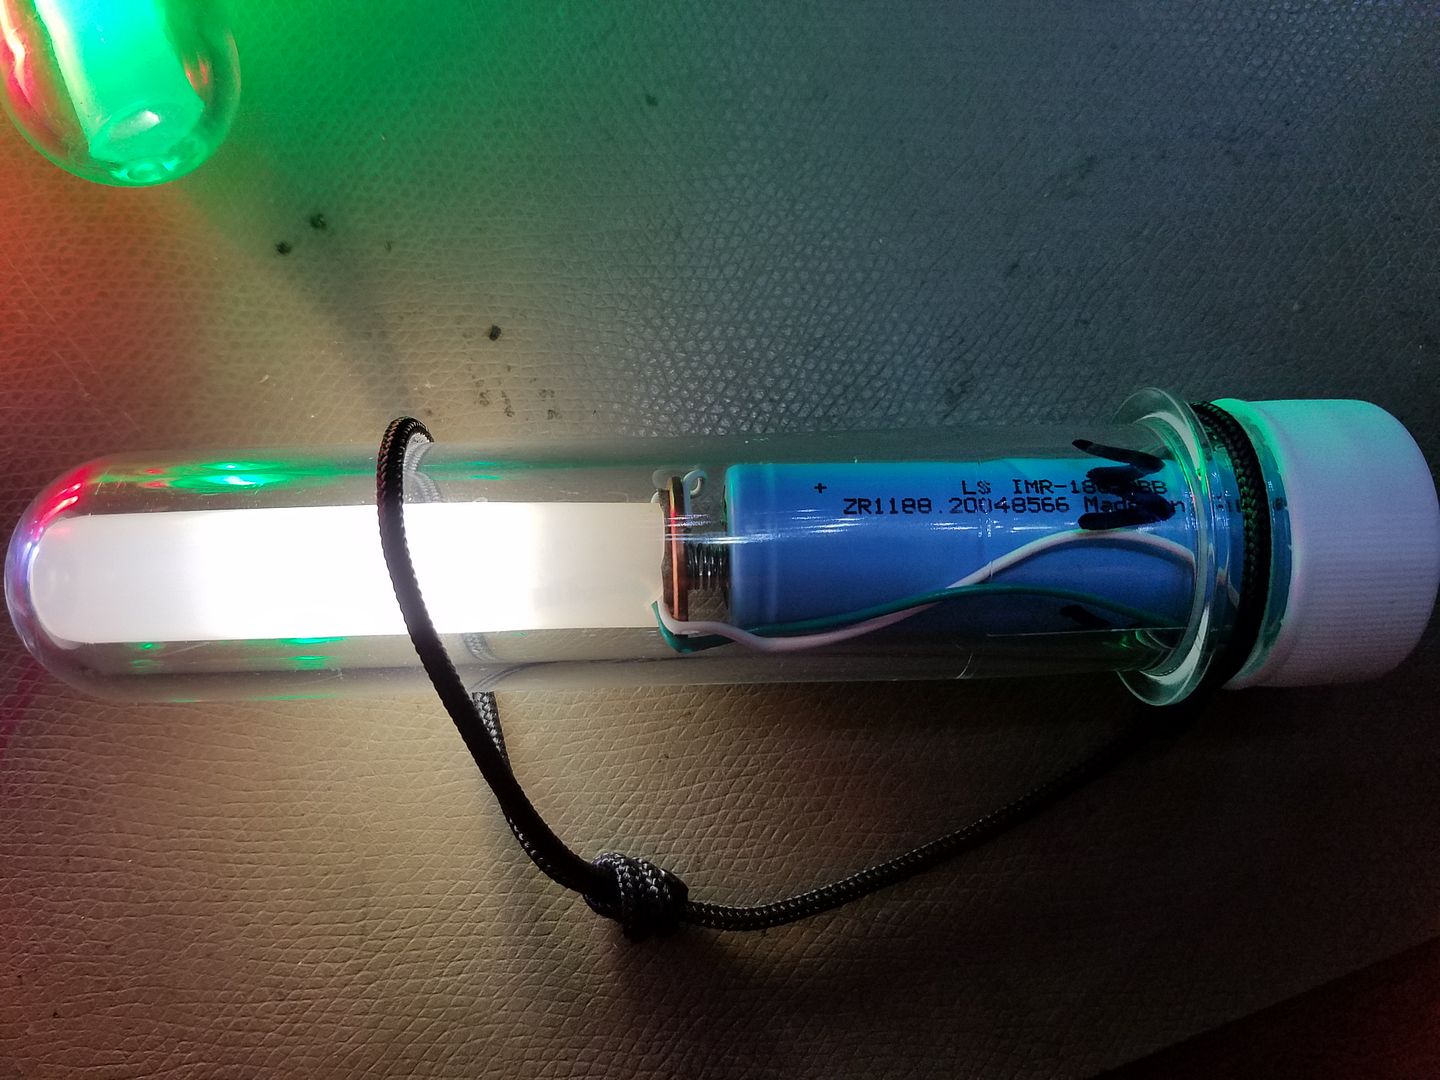
When sliding the assembly and battery in the tube I cut my 2 wires so that the insulation can be trimmed just passed the neg side of the 18650 battery and still provide enough exposed wire to coil up and solder in to a ring. This forms my switch. I just place whichever ring of wire I want on the negative battery terminal and slide the unused one down the side of the battery and screw the bottle cap on. Slide both down the side and screw the cap on when I don’t want it on.

The 2 wires provide 2 drive levels. In my case the white wire directly the cathode is the high mode and is regulated by the 15 ohm on the anode. I see typically about 70mA with a freshly charged battery. In my experience this is about the maximum I feel comfortable driving these LEDs long term with no heat sinking. When I touch the pad on the bottom of the LED it is warm but not uncomfortably hot. The Green wire goes through the 300 ohm resistor and typically drives about 5mA.

With unprotected cells I am taking a slight risk but with the VF of white LEDs I find it very hard to drastically discharge a Li-Ion cell in direct drive. The current draw is very low and provides many hours of runtime. The preforms are very waterproof and durable, They do sink with the weight they are holding. It is kind of fun using them as a portable pool light when swimming in night. The low is a nice indicator lantern, while the High mode provides a usefull amount of light.

I took some thin cord and tied it tightly to the base of the preform and then made a loop that the front of the preform fits through. This is how I attach it to things without having to use a carabiner or anything.
Here is one I made with a 5mm RGB LED. It is on the front of my Kayak as the sun is setting on the river.

I love these cheap diy project, really cool. Where do you find the preforms?

I love it! Very simple and nicely done. The lights look great. :+1:
I bet with a smaller cell they would even float!

These are incredible! Very well executed. I would love to build some of these to use as mountain bike tail marker lights.

ebay has some sellers of preforms.

Very neat! Maybe next step is to add a clicky switch with rubber boot :+1:

Thanks for the comments guys. I really am happy with how they came out. They are super simple low cost build especially considered the switch mechanism but really functional and do what I needed them to do.

You can get the preforms from amazon or ebay. But most I was finding were for packs of 25 at about $1 each and they looked slightly tinted. The one I got was a 10 pack for about $1 each and they are nice and clear. Here is the ebay item I got.

You could use them for other purposes and they look like they would just barley hold 2 flat top unprotected 18650s

As for batteries for this build it used up a lot of 18650s but did not need a lot of battery performance. I had an old Ryobi big lithium 18v battery that was getting week after like 8 years of use so I cannibalized it for 10 IMR cells. They were testing out in the 400-700mah range which is pitiful for most uses but run these lights just fine.

The seller I have been getting my Chinese LEDs form is li198598. ebay links suck because they are no good to someone viewing this a year form now but here is the link to the white ones and here is a link to the colored ones.

Cool!
And practical too, nice.

I cut a longer plastic tube to work with 500 length batteries and a 18500 is just barley not buoyant in fresh water. It is so close I bet it would barley float in salt water.

A 14500 (AA size) cell does make it float in fresh water.

In all cases floating or sinking the tube is standing up with the battery at the bottom and the light at the top.

You have made some wonderful lights. Very inventive. :+1:

Nice DIY work, those lights look great and have incredible runtime!

I too can imagine adding a switch with silicon boot in the cap somehow.

Innovative, practical, but most importantly fun! :+1:

Phil

Very cool project.

Love it. Thank you for sharing Brlux and welcome to the forum.

Good info on these 1w & 3w emitters you have at your CPF link. I have to go look at my emitters now.

Do you a good source (that anyone can buy from) for those preforms your using?

The link for the preforms and LEDs are in post 7.

I am really impressed with the LEDs and have been using them for all sorts of projects around the house. The die is very efficient and they have a great repeatable tint quality. I really enjoy the light out of the neutral white ones. No Idea of CRI but it feel quite good. When put in a reflector there is some tint variation in the beam.
I actually really enjoy the light out of the 1W warm tint ones as well but for some reason the 3W warm looks bad to me, kind of a brown light. The 1 and 3W neutrals look exactly the same tint wise.
The down side it the bond wires suck and can easily be vaporized when over driving above 1.8A, I am sure they are significantly adding to the VF at high drive. Also the heat sink slug on the white ones is electrically isolated from the anode and cathode, so you can glue multiple down to a bare piece of aluminum with out issue. I found out when rebuilding my motorcycle tail light that the color ones don’t have an isolated thermal slug.

^
Thank you. Missed that post.

I agree they are not impressive LED’s based solely on performance. I have a good number of them from years back. One, a warm white (not sure if 1w or 3w), I use pretty much every night. It’s my main get around the pitch dark house with dark adjusted eyes light these days. I’ve had it for many years, but recently fell in love with it. It’s just a very pleasant tint and even beam pattern. I’m sure a much more efficient emitter with better CRI/tint could be put in its place, but it’s working fine the way it is.

I started playing with the Cree HXG as a small general lighting LED that is efficient and good light quality. While I really like The HXG and have used it in several applications I find these Chinese LEDs nearly as efficient and good for light quality. I dug up some old flashlight that originally came with Luxeon star boards in them, some of them had been upgraded years ago with SSC P4 leds. These Chinese LEDs dropped in easily and made a substantial improvement in brightness and tint.

For reference I have received products with similar looking Chinese bead LEDs in them like my Ryobi 18V 1+ lantern but these LEDs are noticably better than those ones I received in other products.

For reference you can also get them mounted (poorly) to star bards. I find mounted to star boards I can drive them up to about 250mA comfortably when attached to a non thermal conductive surface.

And to clarify the bare LED drive currents, in the piping which is some what thermally insulating I chose 70mA as my max desired drive. Out in free air I feel like I can go up to 125mA. The color ones with lower VF can handle more current as there is less voltage drop to generate heat. I use the same resistor drives between the white and color preform glow sticks.