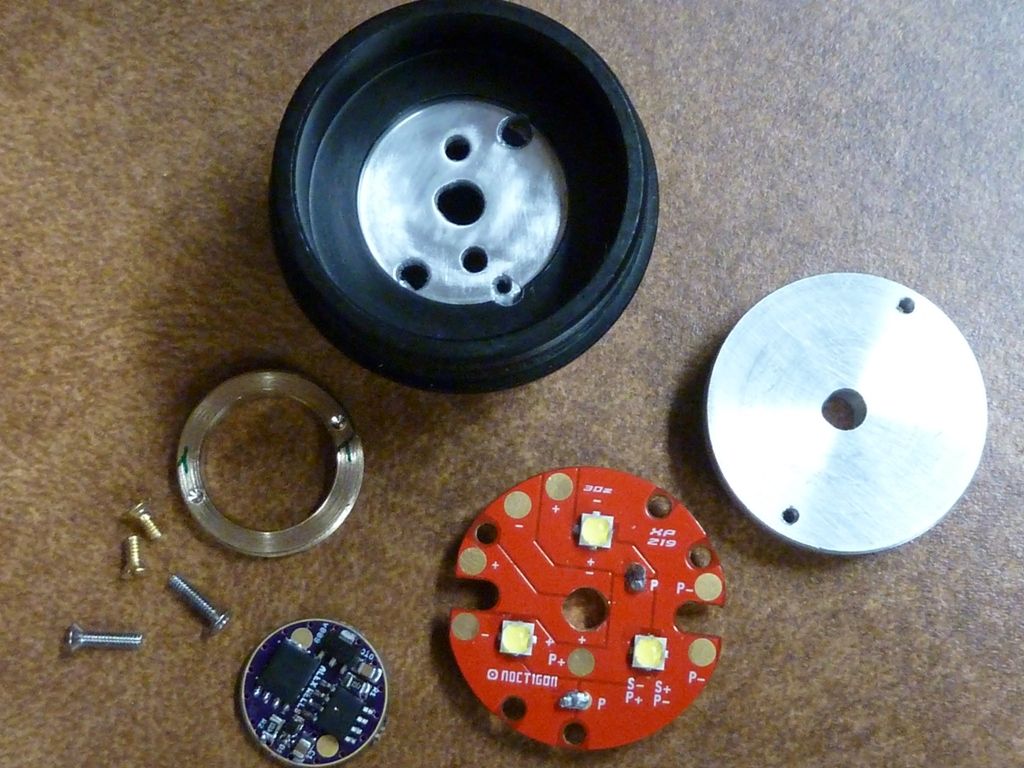
So I got all the parts in but I can’t find a “build thread” could someone give me a good link. I know a lot of people have build triples so there has to be some good infos around.
Do I need to drill a center hole in the xp32 or should I drill cable holes in the heatsink? Just heatsink grease or should I glue the heatsink in?
I don't have any left as of now but i might have another 50pcs made when I get going on a heatsink design for the SS X6, as for the build help I drilled a hole in the middle of the XP32 and did not use glue the optic will press it down in place
I just build one up…amazing bright, very nice beam and again very bright.
I used the oring between optic and flashlight and the height was good, unsure if it is compressed enough to be watertight but I won’t try that…
The heatsink fitted perfectly, thanks for supplying me one.
I had to grind the xp32 a bit because it was half a millimeter to big for my first special edition x6…
If there is really no build thread I will make a short one tomorrow so that everyone can find it with the search.
Yeah, I ended up having to grind my xp32 down a bit too. I used thermal adhesive between the copper spacer and the body and between the spacer and the xp32. I didn’t feel like the optic was compressed enough by itself so I used the lens too. The bezel doesn’t screw down completely tight but she’s got a good seal.
Subscribed, would love to make my X6 a triple.
Hi, can I have a copper triple (the new version)? How can I pay? Thanks!
Received everything, looks good thanks Nitro
Im all out guys, maybe when I do the SS x6 sinks I'll have more done, beamO let me no how those drivers works out for you
I just need it for the x6, so don't worry about making these ones for me.
My neighbour came back after the christmas break today.The postman had put it in his mailbox by mistake.I don’t know how long it has been there.Thanks Nitro,it’s looking good.
Nitro - still haven't rcv'd my aluminum heat sink from Jan 29th. I pm'ed you but I really dunno if pm's are working on the new BLF site. Could you check on it? Thanks! I got in my other parts so, when I get time, I can build up an X6R (hopefully) using the copper heat sink.
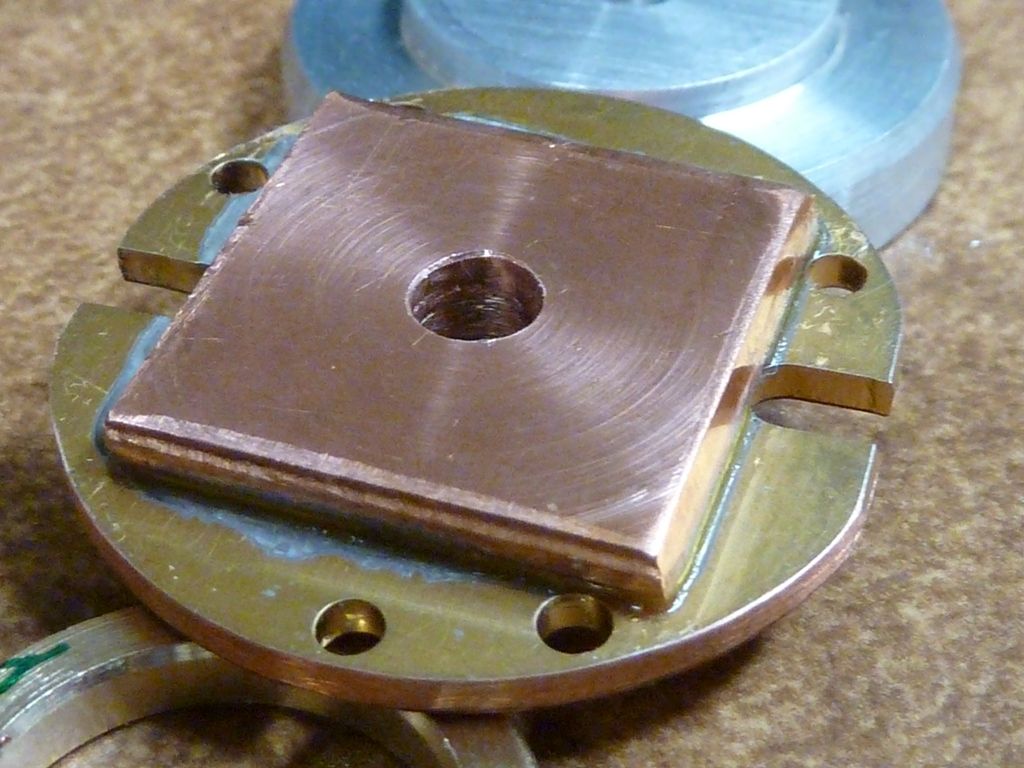
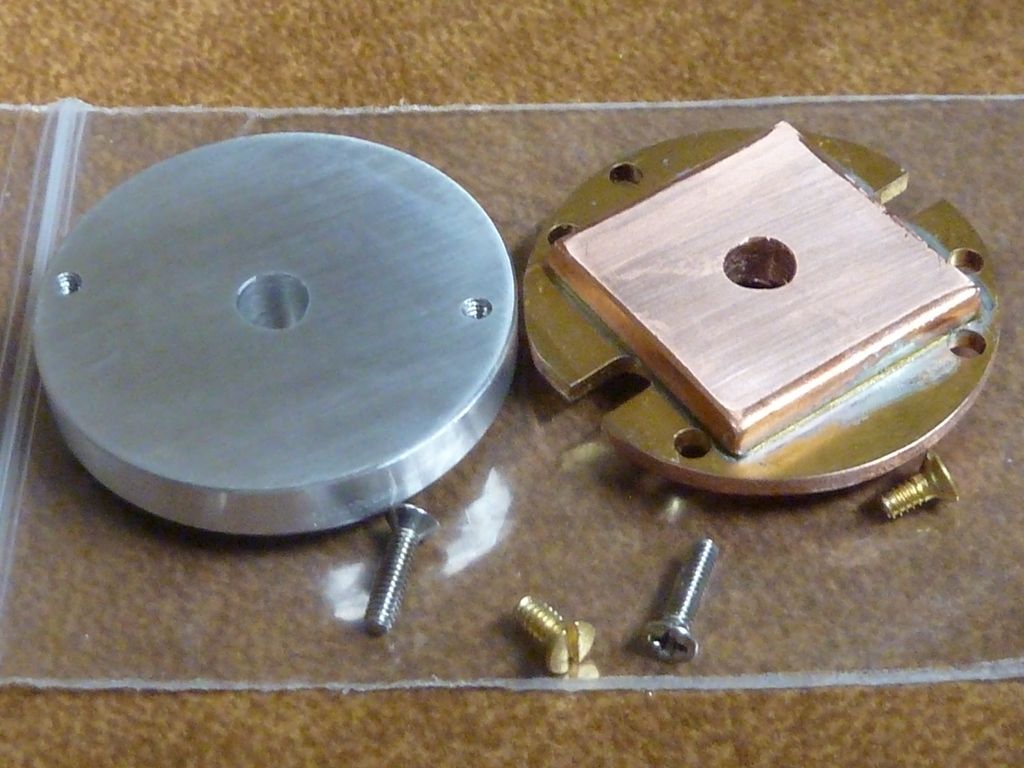
I got lots of pics for my previous triple and quad build, but sizes/mounting issues were different on this, I believe. This is what I had to do for the previous triple. I needed to add the copper square spacer because I chose not to use a lens. Also I drilled/tapped holes for screw mounts. The light turned out awesome though w/XP-L V6's!!
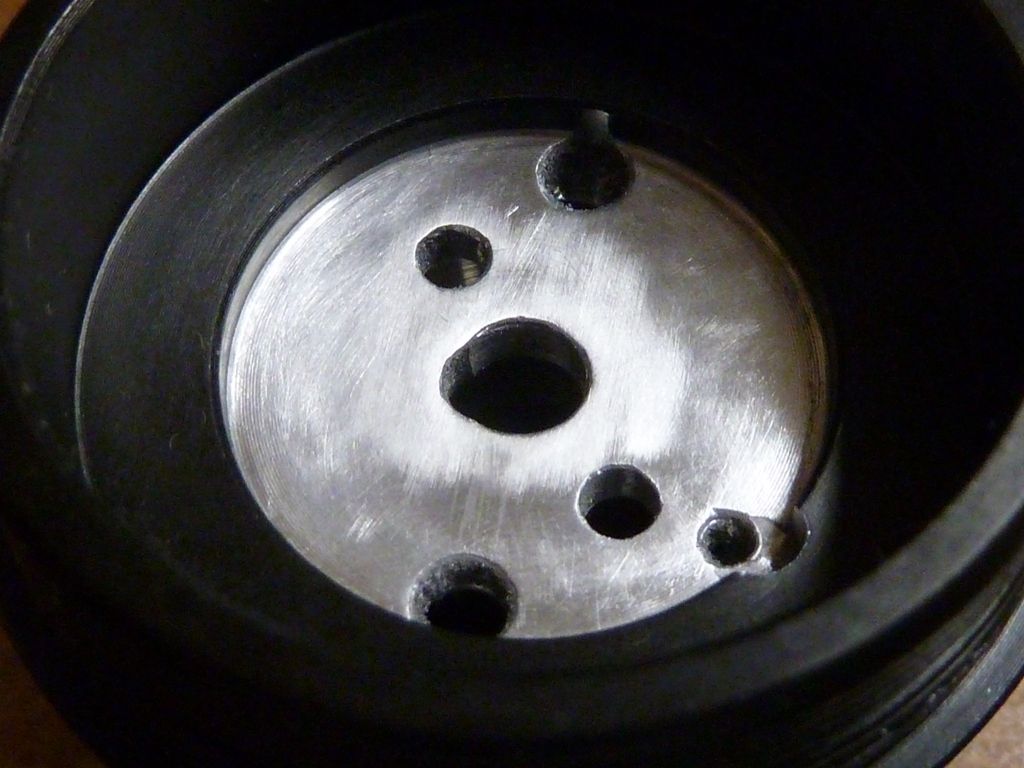

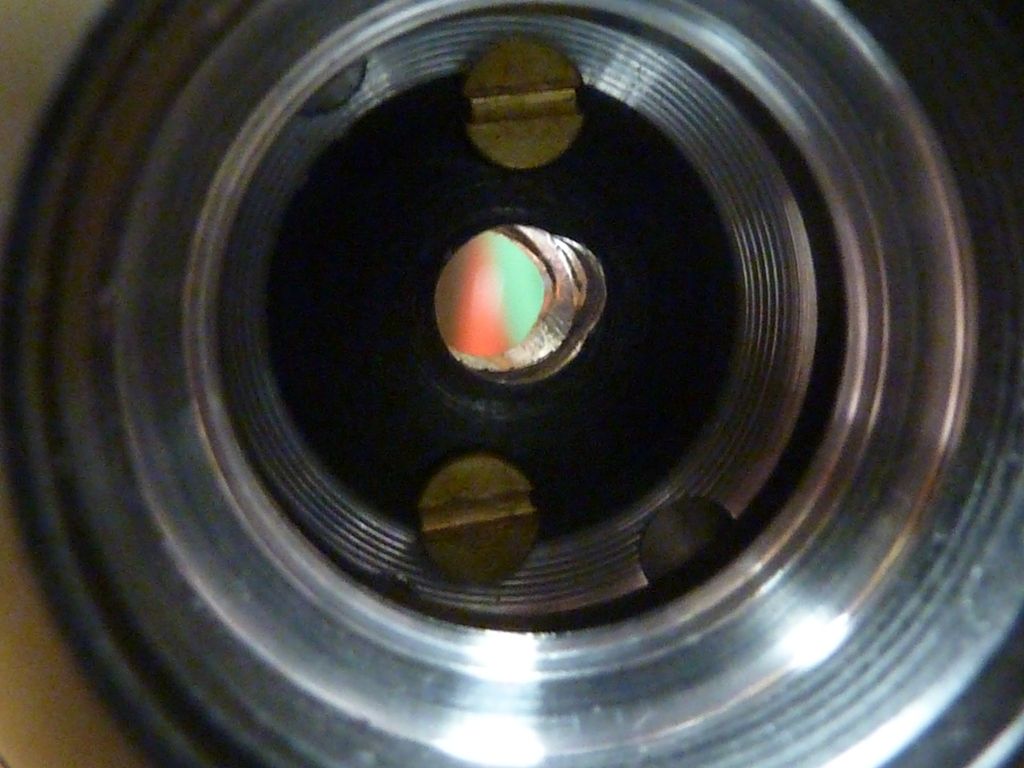
View from inside the pill/driver cavity:
A spacer is needed if u don’t want to use the glass lens, thanks for posting so few new members has a idea what to do, PM replied with tracking info ![]()
Do you have a link to a step-by step build for making a triple X6?
I documented one of my builds in german at TLF. I think you’d need to make an account so see the pictures. It’s not a step-by-step tutorial, but maybe it helps a bit. I also played around with optics a bit and made some comparisons. It would be quite time consuming to repost all of that thread and translate, but I could post some pictures if you guys are interested. Otherwise just create an account at TLF real quick and give it a look. Cheers!
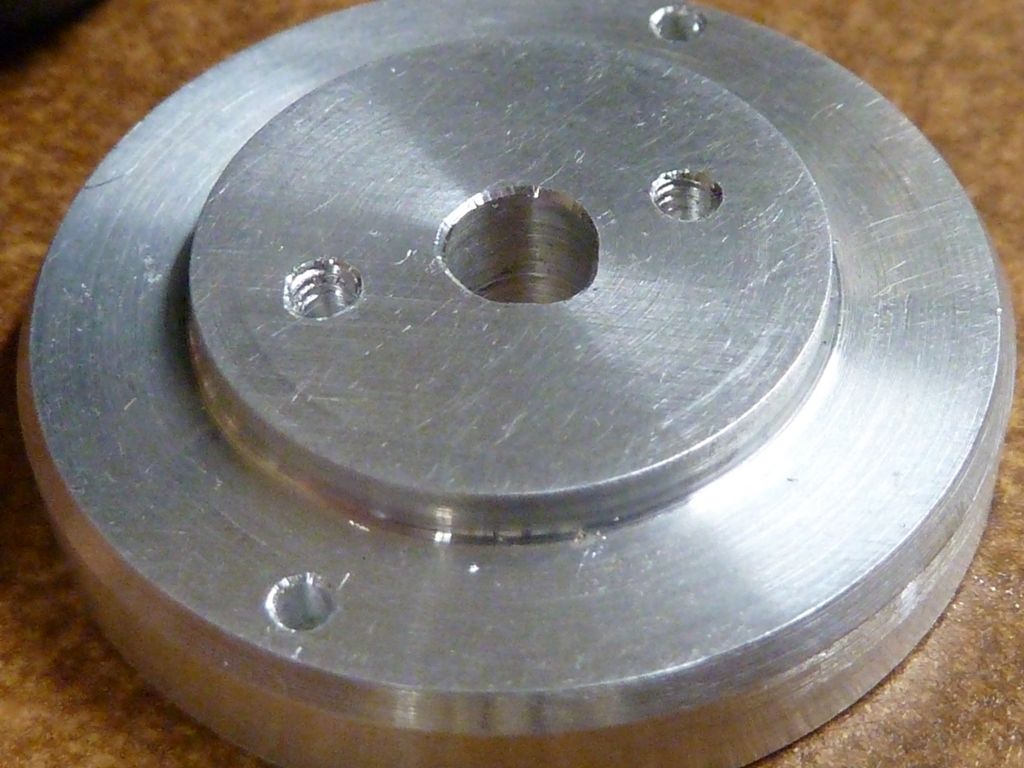
Think I posted in one of the old quad/triple offerings thread, or tagged onto Dale’s, but didn’t do a very detailed write-up on it. These can be done a few different ways, but I chose to secure the heat sink to the pill top by 2 screws fastened from inside the driver cavity. Then screwed down the MCPCB to the heat sink.
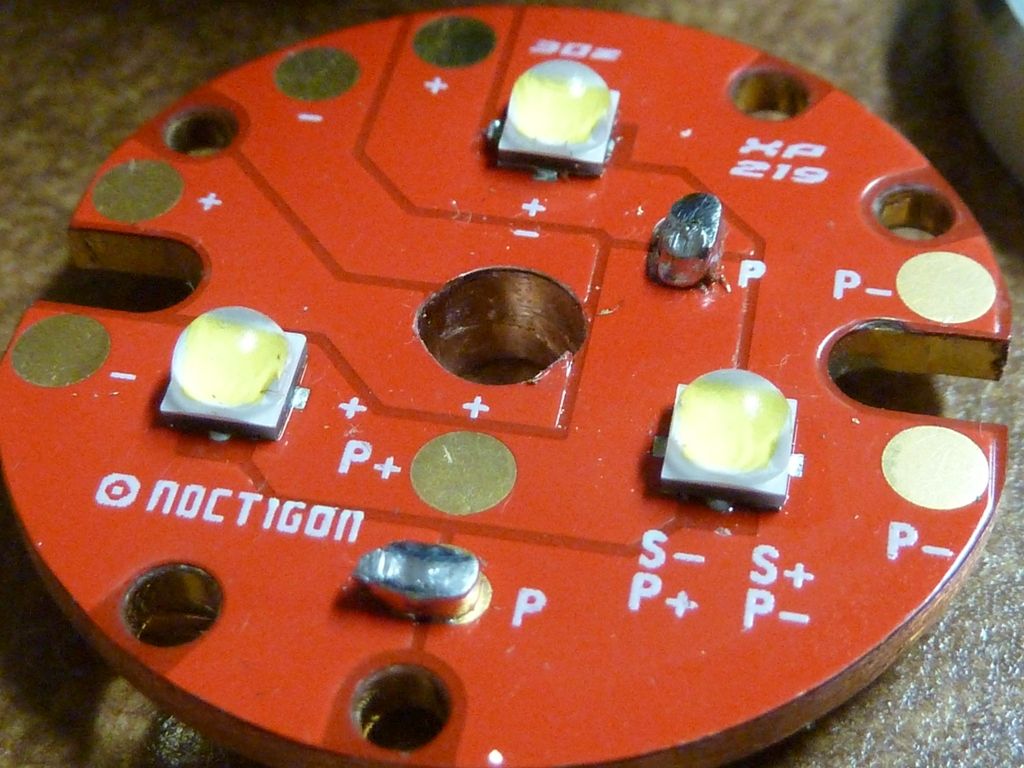
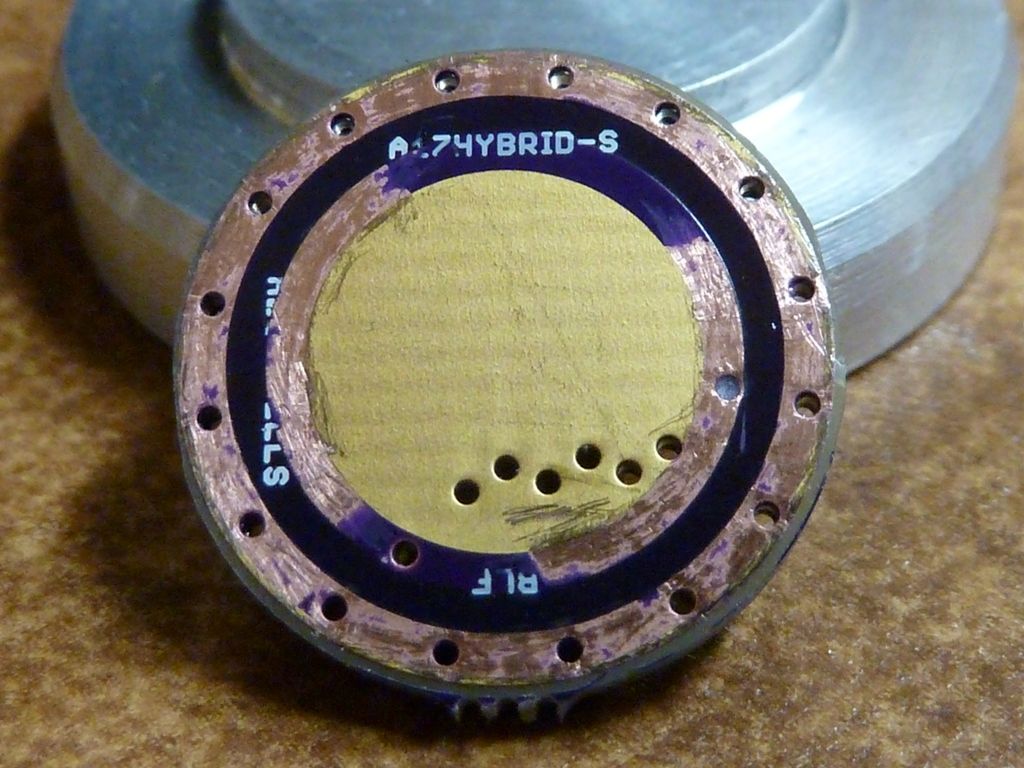
As you can see, I drilled the center hole thru the MCPCB and heat sink to run the wires, I believe they were 18 AWG. Possible I could have used 20 AWG teflon coated wire. The teflon coated wire in 20 AWG is about equal to 18 AWG silicone covered wire in resistance. The advantages of teflon is the thinness to run thru holes and route, disadvantages is the stiffness - they can rip pads right off the driver if you put any decent amount of pressure or stress on them, so you have to be extra careful when using them.
The resulting lumens from the triple equaled the quad X6 I built, using the same LED’s. Think I hit about 4200-4500 lumens.
There’s a lot of useful info in this thread. Comment #399 from Tom and some other comments helped me a lot almost a year back, when I considered myself a noob. Not the last time Tom helped me, thanks a lot Tom. I think I’m still a noob, but I got a bit better since then, thanks to BLF.
I know this is probably a stupid question… but where can I buy parts for this?
I need this host right?
http://www.gearbest.com/led-flashlights/pp_285242.html
Could someone point me in the right direction for an optic, Noctigon, and driver? I have no idea what sizes this kit uses. I bought this last year with the intention of building one, but never did.
Let’s see…
Noctigon:
There’s options so you can get the LED you want reflowed on to the mcpcb. Choose XP sized LEDs.
You’re going to have to sand it down to a smaller diameter to fit into the X6 head. The easiest way is to stick a screw and nut in the hole you drill in the center for the wires, mount it onto a drill, and spin it on top of a file or sandpaper.
http://www.mtnelectronics.com/index.php?route=product/product&path=63_64&product_id=401
Optics:
Driver:
Depending on what you want to get out from the light. But most usually go with the FET + 7135 for the output. The temperature sensor is pretty sweet.
Then of course you have the basics like thermal paste, 20 awg wire, etc. that I’m sure you’re familiar with. ![]()
I’m building the same thing right now .
Noctigon needs a little sanding , i did it by holding it with my hands , and turn it slowly on top of a file , for 4-5 minutes .
Also you need to drill the host (make the main hole for the wires .
There is a coupon for the host , bringing it down to 12$ . “X6HOSTCM”
Thanks a lot guys!