Hi everyone
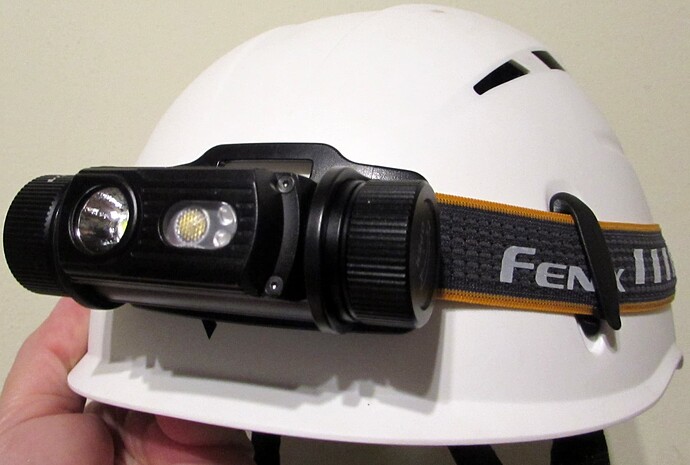
On this page I show you the Fenix HM70R, if I remember correctly it was released at the end of 2021, I was immediately attracted to this headlamp with an attractive line and excellent performance.
I didn’t buy it immediately because I had heard “rumors” of a possible release of a special “Raptor” version (intended for the Nordic market) which should have been released in mid-2022, this has not happened and seems to have been postponed (but it could also never happen) and in the end I decided to buy the official version of the HM70R.
One of the many reasons why I bought this model is also that I like to use headlamps and flashlights that have the same tint, a large part of my collection of lights is in a neutral tint, but if I decide to use a Fenix PD36R, PD36TAC or I don’t have a headlamp with the matching cold tint.
After buying the excellent HM61R model the previous year, I clicked to buy the HM70R, it has two LEDs, one (SST40) has a spot type beam and has a cool withe tint (about 5700/6000 K) the other one is XP-G2 HE (flood) led with neutral tint 4500/5000K) and high CRI, there are also two 2835 type red leds.
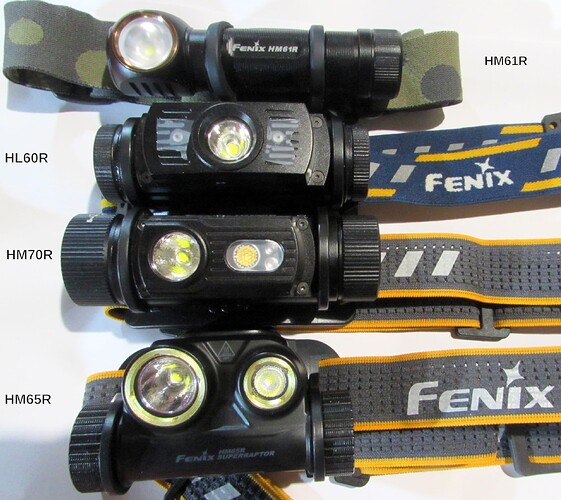
Compared to the HM61R the HM70R uses a 21700 battery with a capacity of 5000 mA, this means more weight and slightly larger dimensions but also a longer autonomy.The HM70R has a look reminiscent of the famous HL60R (with 18650 battery) called by many “the caver’s headlamp”, a HM60R model with 18650 battery has also been released.
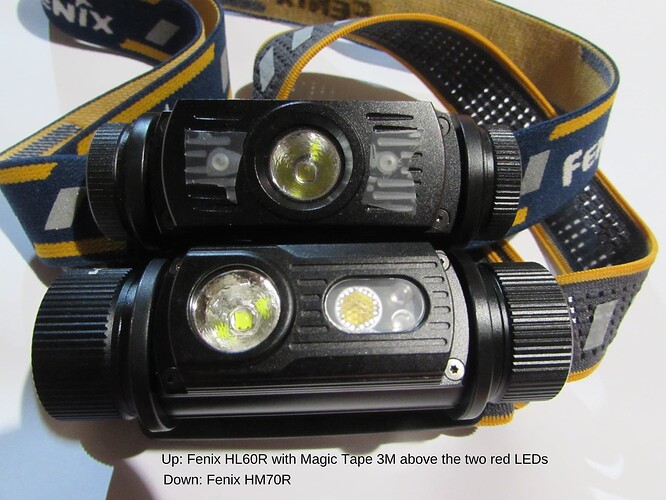
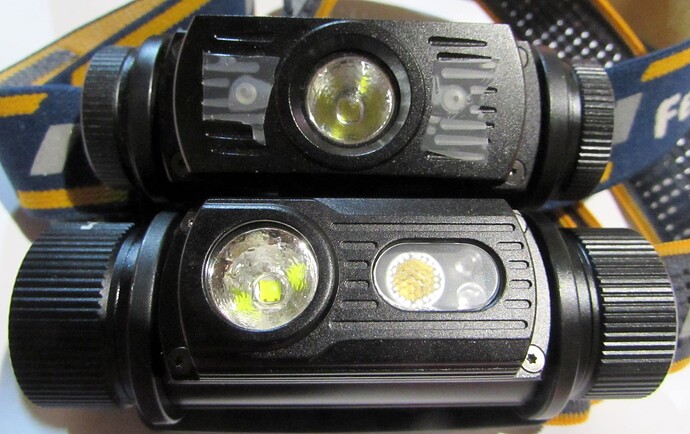
The first thing that struck me is that the HM70R is not as big as one might think from the photos, it is bigger than the HL60R but in my opinion it has very small dimensions (considering the type of battery and its performance)
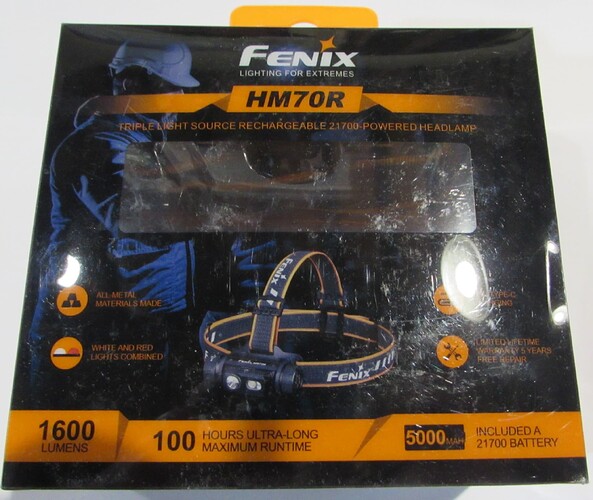
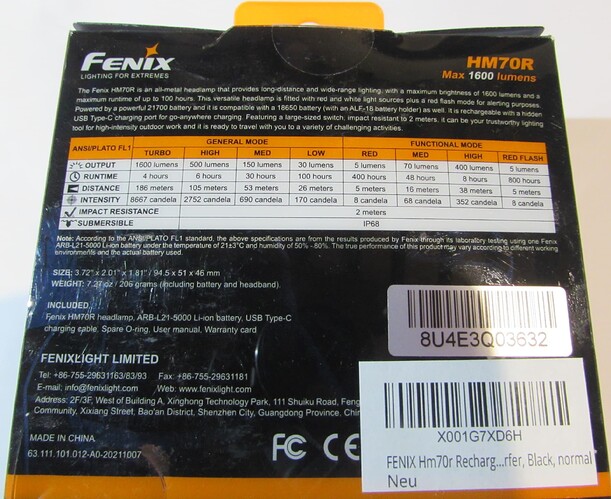
I show some photos of the packaging, front and back.
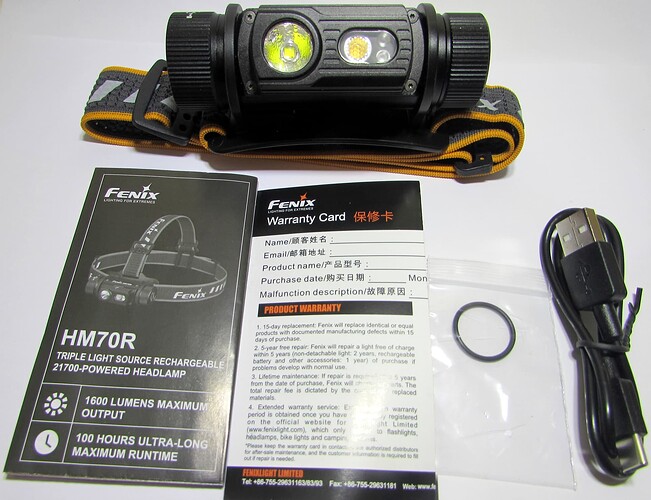
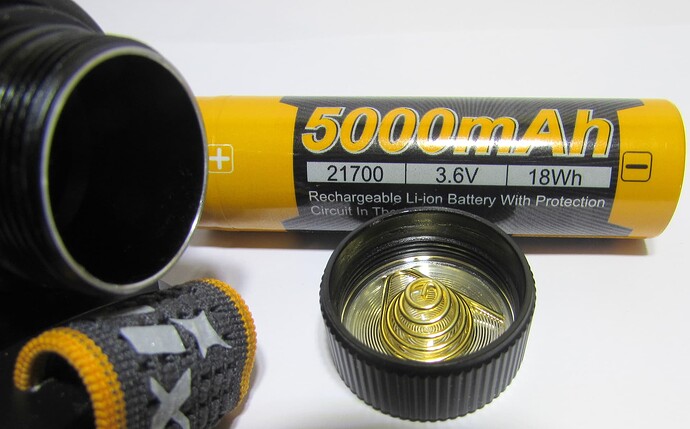
The content is the usual, small paper manual, warranty card, spare oring, USB-C cable for recharging.The flashlight is sold together with its 21700 Fenix ARB-L21 type battery with 5000mA capacity.
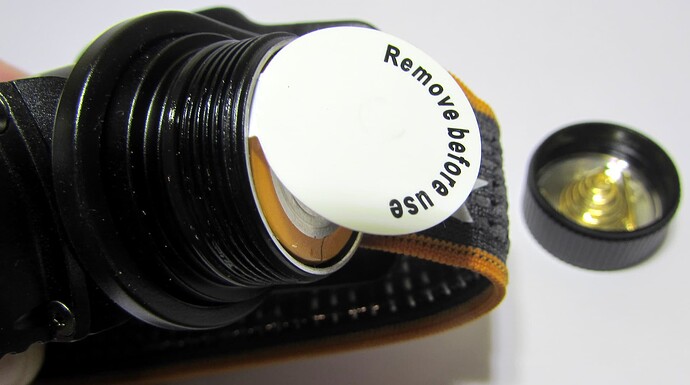
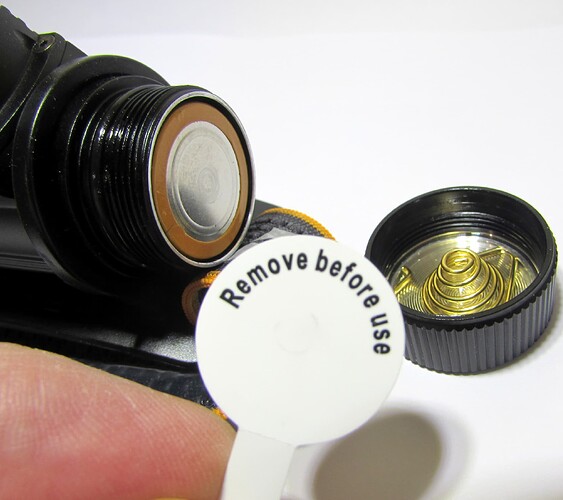
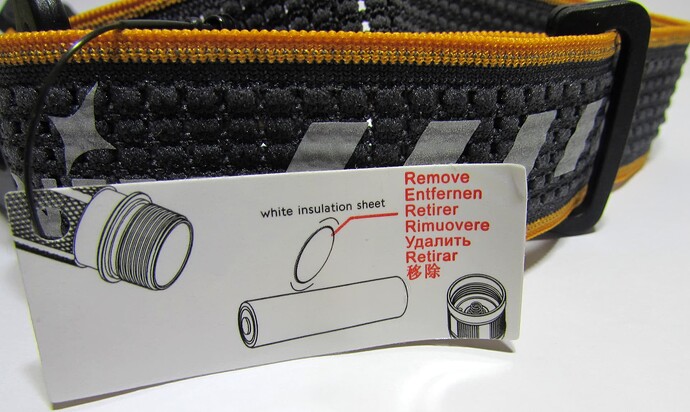
The battery is already inserted in the torch, but before using the HM70R it is necessary to unscrew the cap of the battery compartment and remove the plastic protection disc, this is an additional safety measure adopted by many manufacturers to remove the contact and allow the torch travels to the final customer without any possibility of accidental ignition.
Also attached to the top band is a plastic note reminding you to remove the plastic disc before using the headlamp.
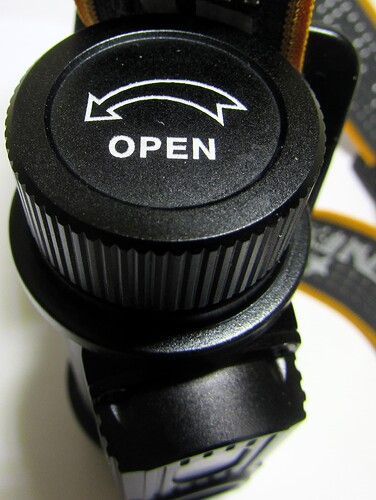
The battery cap is placed on the side and there is written: OPEN, an arrow shows the opening direction.
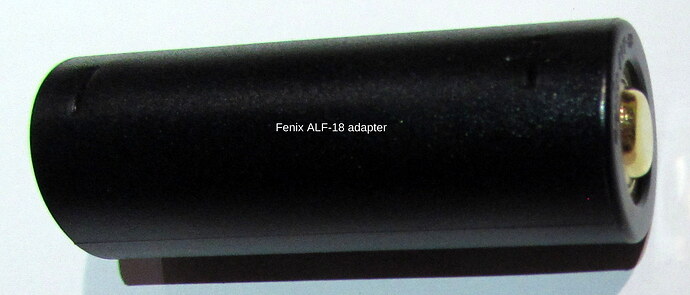
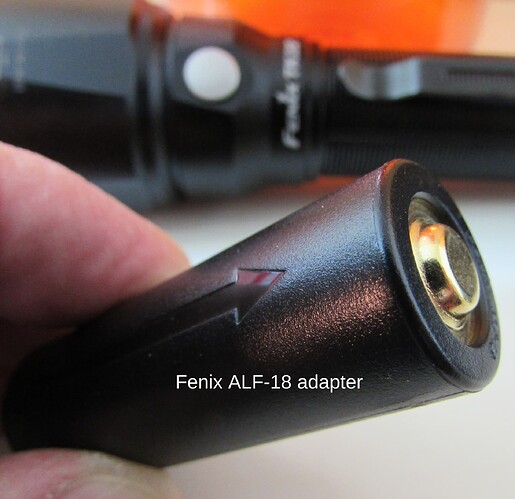
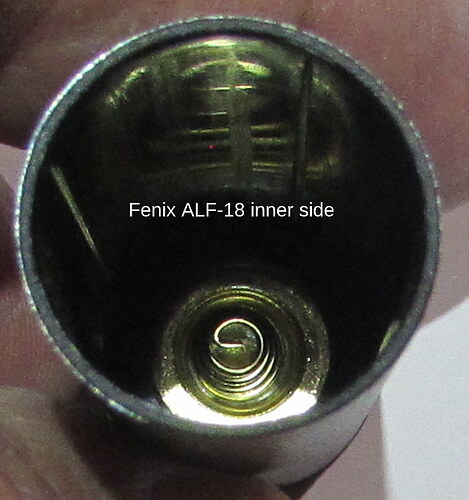
For those interested, I point out that a plastic adapter called ALF-18 is sold separately which allows you to use 18650 batteries on Fenix torches born to use 21700 batteries, it is only a plastic cylinder but it is very well made and has an internal spring (even flat 18650 batteries will work)
I bought one when I bought the PD36R and tried it, it works as promised… if you have 21700 flashlights I recommend buying at least one because in case of an emergency it allows you to use the 18650 batteries that we all have in abundance.
Like many Fenix lights of recent years here there is only one spring in the battery compartment, this forces you to use 21700 batteries with a protruding positive pole, the good news is that the Fenix battery is not a proprietary battery so any 21700 battery long enough and with a protruding pole projecting positive will work.
As spare batteries for my Fenix with 21700 batteries I use the Keeppower 21700 “USB Series” (acronym P2150TC) which have a low cost and a USB charging chip integrated into the battery (handy if something goes wrong) they fit perfectly.
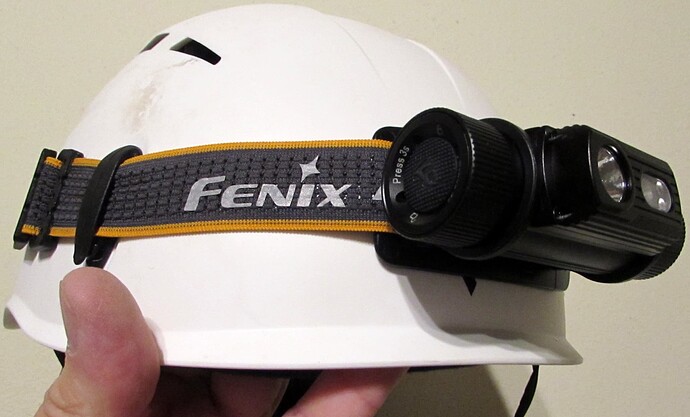
The HM70 has a good elastic band with Fenix logo and reflective bands, it can be seen very well in the dark and increases the safety of the user, it is in two pieces but I confirm that the upper piece of the band is easily removable.
I never use the upper part of the piston rings and it is the first thing I remove, but for some the upper band could be useful.
Being a Headlamp with 21700 battery it has its weight, but it is not excessive and I can use it for a long time without problems, but if you are a runner you will need the upper band.
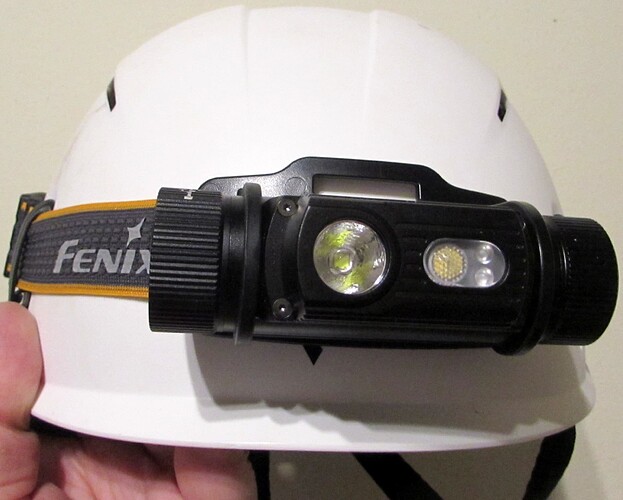
The upper band can also be useful if you plan to use the headlamp on a work helmet, it is not mandatory to use it but it could increase the seal if your helmet does not have a good lateral fastening.
My helmet has the attachment points and the top band is not needed.
On the scales my HM70R with the battery inserted weighs 193 grams but this value is without the upper elastic band, if you will use the upper band add 15 grams (total 208 g)
I don’t show any photos because my scale is caked with ground oats and looks awful.
Fenix declares 206 grams (7.27 oz) with battery and full headband, consider that my scale may not be accurate and I think their value is the real one.
The interface is very easy and accessible to everyone.
Through a side button you manage everything:
on/off - light safety lock
switching of light levels (4 main levels of spot light called “General mode”)
access to the “Functional Mode” menu where in this order we have a red light of 5 lumens, two Flood lights (70/400 lm) and then a red light with SOS flashing of 5 lumens.
For the main menu the brightness levels are:
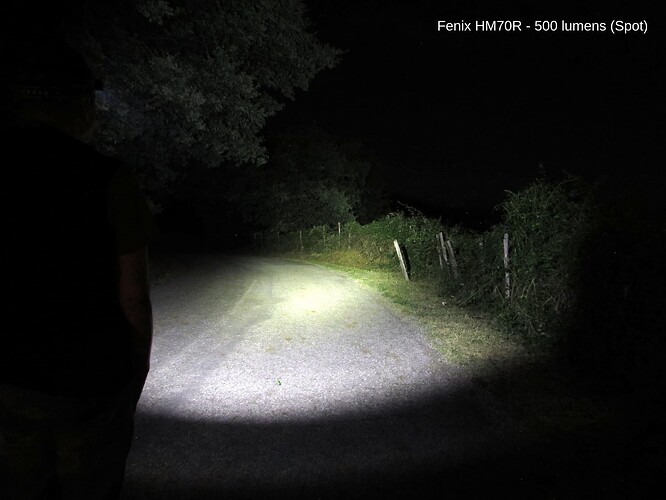
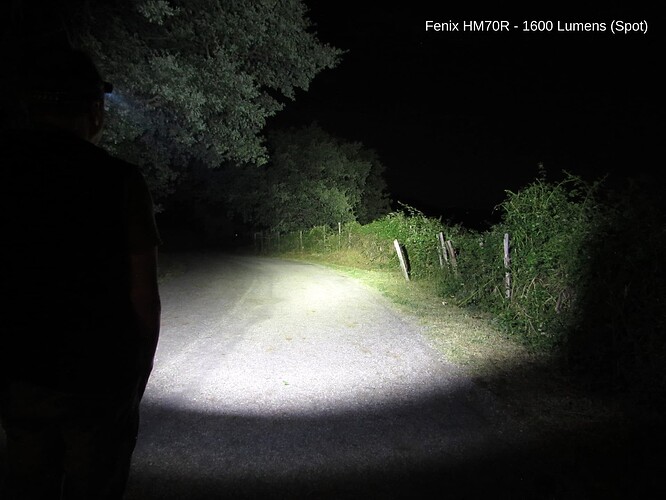
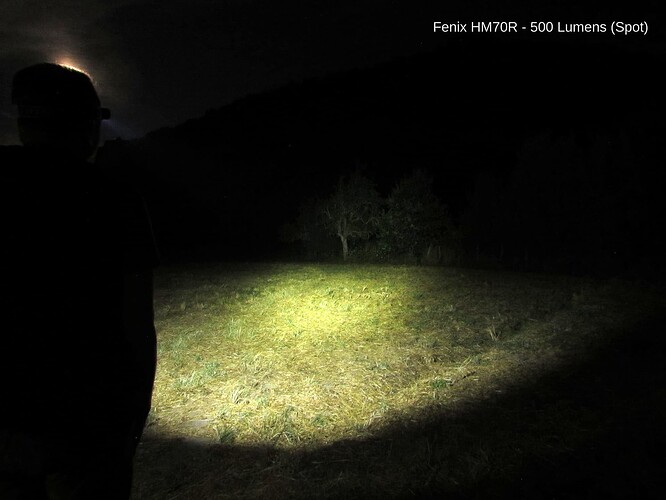
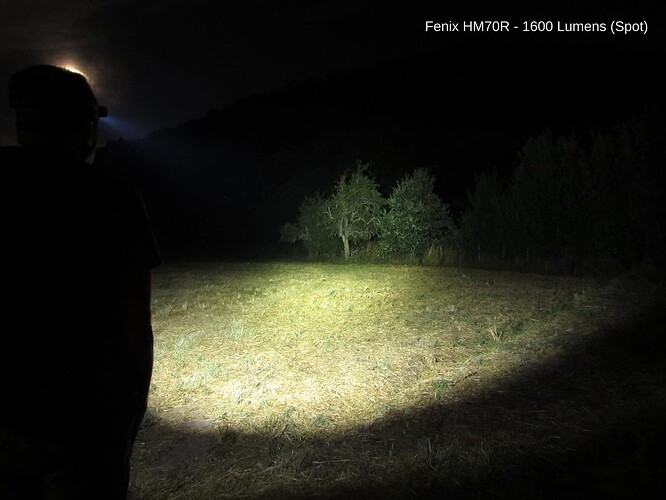
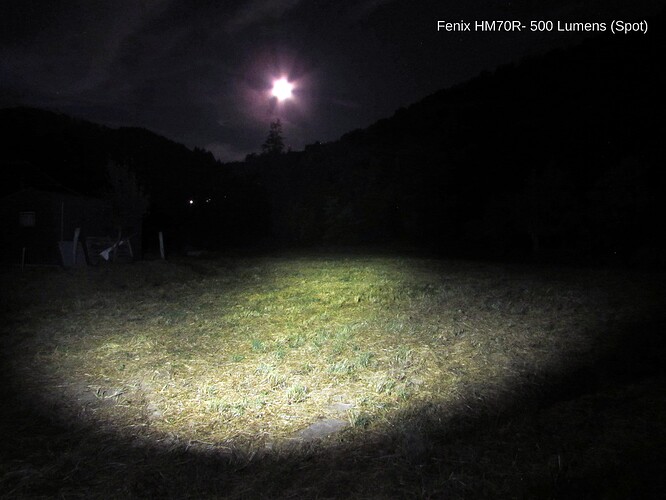
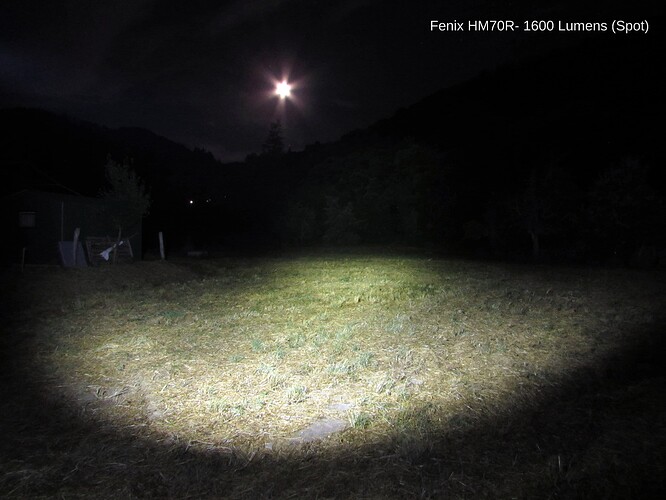
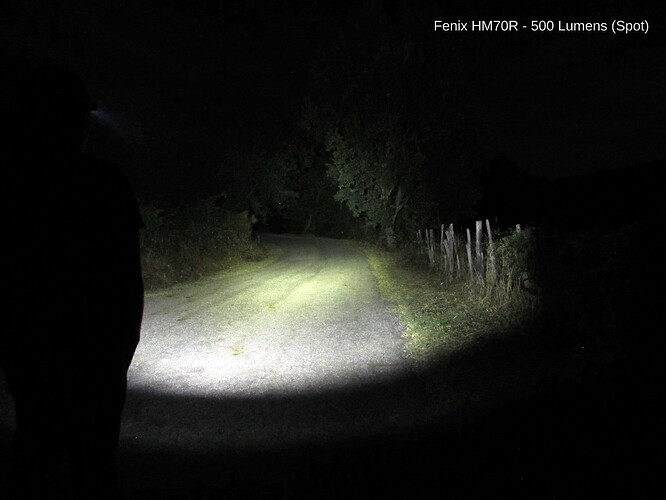
30 - 150 - 500 - 1600 lumens with cold light (approx. 5700/6000 K) and a spot beam which, except for the cold tint, resembles that of the HL60R
For the functional menu the levels are:
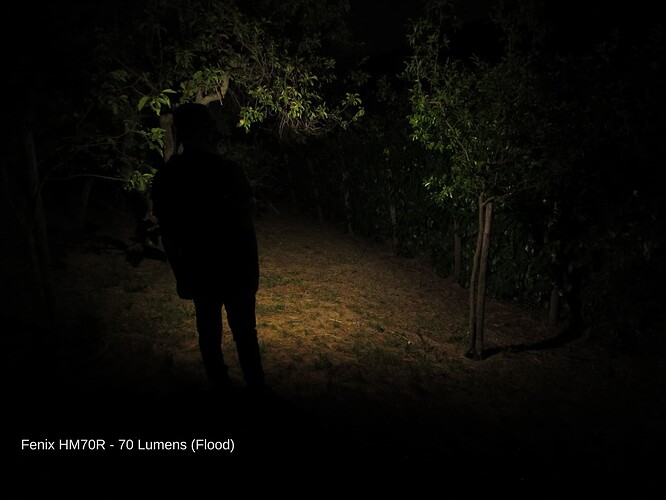
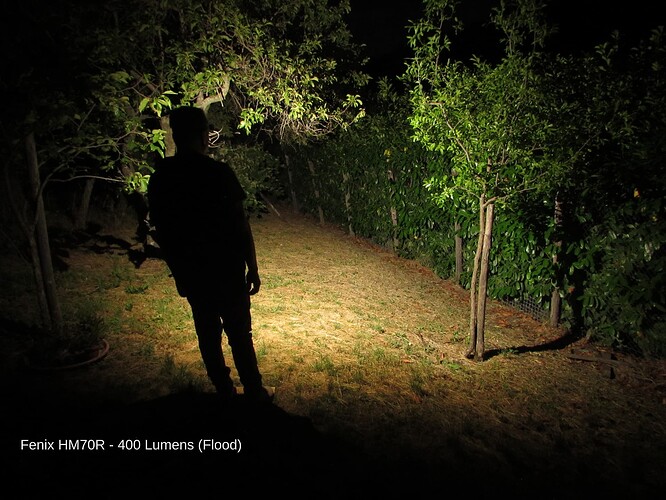
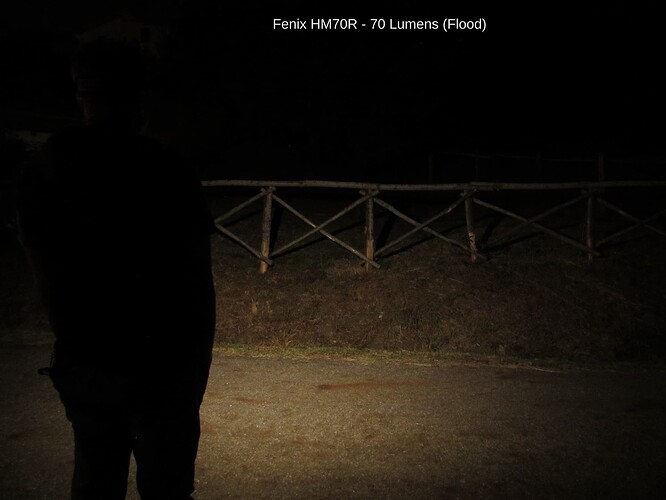
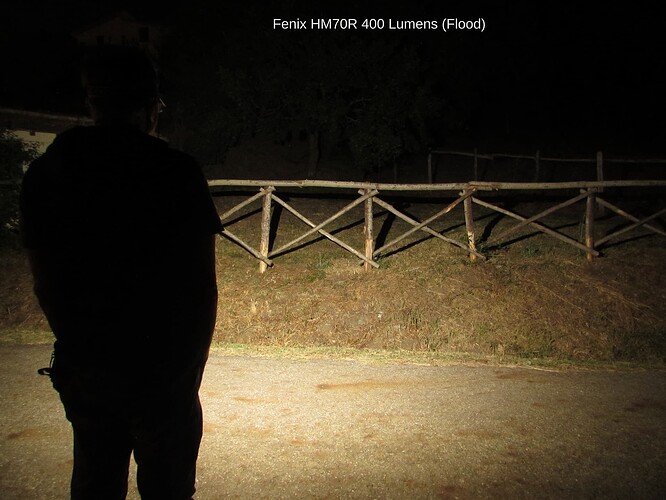
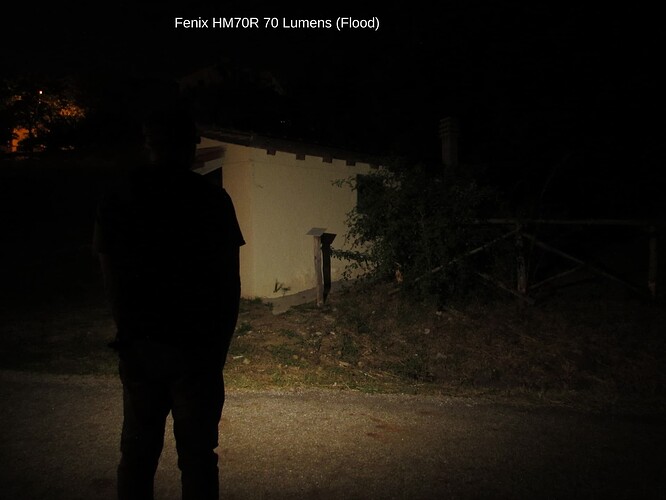
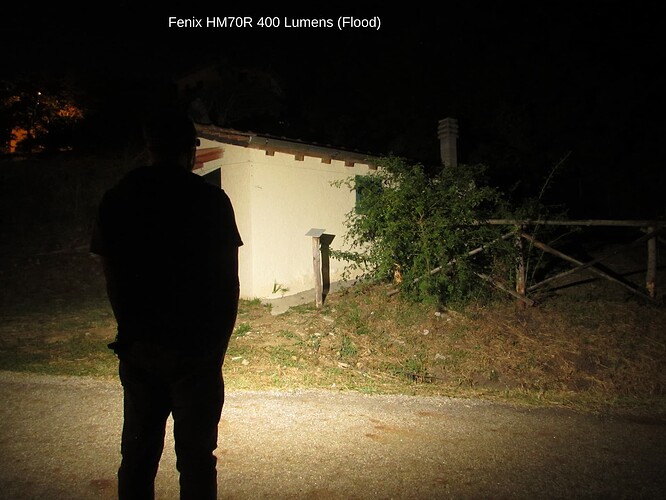
5 lumens_(red light) - 70 lumens - 400 lumens- SOS_(red light) - the two levels of 70 and 400 lumens have a very wide and pleasant flood beam, the tint is approximately 4500/5000 K with high color rendering.
The XP-G2 HE (High Efficiency) LED is placed under a small honeycomb TIR lens that can resemble that of the Armytek Wizard models or the secondary LED of the Fenix HM65R Headlamps.
On this headlamp the USB-C charging port is well protected, there are no rubber plugs that can wear out or detach.
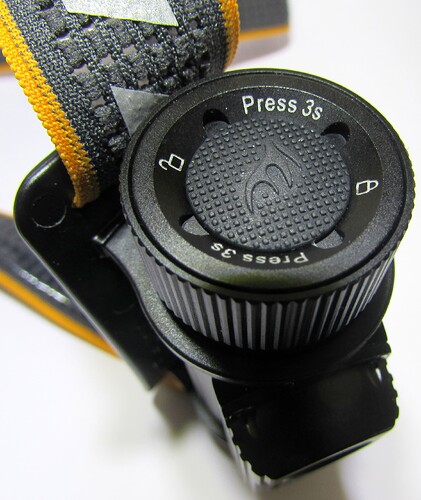
On one side (where there is the power button) a ring is rotated (also here there is an arrow showing the opening direction) by unscrewing it to reveal the charging port (this system has also been adopted on the recent Fenix TK20R V2 .0)
According to the manufacturer, recharging can take place at a speed of 2 A
This value can be influenced by the battery charge level.
The charge rate is fastest when the battery is almost empty and decreases (gradually) when it is almost full, the type of external power supply used can also affect the charge rate.
Embedded in the power button is a green/red indicator light, when the headlamp is plugged into the USB-C cable a red indicator light comes on while charging.
The indicator light also indicates battery charge this is the same system seen on the HM61R.
To know approximately the battery charge, turn on the flashlight and observe the color of the light.
If it is solid green the charge will be between 85% and 100% - if it is flashing green it will be between 50% and 85% - if it is solid red the charge will be between 25% and 50% - flashing red it is between 1% and 25%
All this is not indicated in real time but only when switched on.
If you are using the HM70R and want to know the remaining autonomy, switch it off and observe the color of the light when it is switched on.
Two brief explanations on the operation of the HM70R
Half second press: turn on
half second press: turn off
When it is on, just make a single click to scroll through the four levels Low, Med High Turbo.
Security lock: press and hold for 3 seconds, after 3 seconds the red leds flash three times and warn us that the lock was successful.
If you try to turn on the headlamp while the lock is active it will flash red to remind us that it is locked.
To unlock: press and hold for three seconds, if this is done correctly there will be three red flashes, the headlamp can now be used.
Personally I almost never use this feature, I prefer to loosen the battery cap 1/4 turn but it’s nice there is this feature available if you want.
When the flashlight is off and you want to access the “Functional menu” directly, just double click quickly, the HM70R will always turn on at the red light level of 5 lumens, once turned on, click normally to scroll through the successive light levels (note: this works only from OFF)
If the flashlight is already on and you are using the main led (General Mode) and you want to switch to the Functional menu just press and hold for 1 second, it will switch to the functional mode which always starts with red of 5 lumens.
The same is true if you’re using red light or one of the flood light levels, just press and hold for a second to switch to the last used spot light level (which remains stored).
I can’t confirm this but I read somewhere that lights manufactured from Autumn 2022 onwards will not keep Turbo level memory but if they are turned off at Turbo level they will only turn on at High
(hypothesis: perhaps this is a measure of protection against accidental ignition or to prevent the user from losing night vision? )
My HM70R keeps the memory of the Turbo so it was produced before autumn 2022.
This interface is easy to use and also intuitive once you understand how it works, as a user I just wanted the last flood level used to remain in memory without having to go through red every time.
Maybe it wasn’t possible to do it technically or maybe this is done to prevent someone from blinding themselves unintentionally.
If you are in the dark with your HM70R and want to use a low light level without the possibility of errors, just double click and the red light of 5 lumens will turn on.
If I’m walking with the flood light of 400 lumens and for a moment I want to change LEDs to see further, just press and hold for a second, it will switch to the LED spot on the last level used.
But if I want to go back to flood_400 lumens and I press for a second I don’t go back to that level but I always go back to the red level of 5 lumens, then I have to click twice more to go back to the 400 lumens_flood level.
This is one of the few things I didn’t like about the HM70R… but I can survive this, I just have to do two more clicks.
Another thing I didn’t like is the lack of a low level of white light, using the main led the lowest level is 30 lumens.
In the functional menu (led flood) there is only one level of 5 lumens of red light and then two levels of light 70 and 400 lumens of white light.
I would also have liked a low level of white light in this menu, for example 5 lumens (or 8 lumens as on the HM65R) or alternatively I would like to give up the SOS in red light to have an additional level of red light of 1 lumens as on the HM61R.
On the HM61R model in the functional menu there is the red of 1 lumens, then the red of 5 lumens, then the red flash of 5 lumens, here if in the future there was a HM70R V 2.0 I would like this.
It should be noted that there is no flashing red light on the HM70R, it is a real SOS (three dots, three lines, three dots) it is good to know so as not to trigger an unwanted emergency request by chance.
The lack of a low or ultra-low white light level is not a problem for me as I am always wearing multiple lights and have others that can do this but for single headlamp owners a low or moonlight level of white light may be important.
About the red light of the HM70R when I first used it I was a little disappointed because I expected to have the same vision I was used to with the HM61R, then using it I realized that it can’t be like the HM61R as the two leds on the HM61R are behind an opaque lens that spreads the beam.
In a nutshell, as a user experience I tell you that with the HM61R you have a very broad red light which is comfortable in a closed environment (house, tent) but it may be insufficient if you want to see further.
With the HM70R it’s different, it’s as if the red light was a little more concentrated and thrown.
I did a test trying to water the garden with the HM70R (with the summer heat and high temperatures insects throw themselves on any light source) the red light is the only alternative, in my garden with only 5 lumens of red light from the HM61R I have difficulty seeing while with HM70R I can do it much better.
After getting used to it, I can say with certainty that the 5 lumens of red light of the HM70R are also valid for the home, only that in a closed environment the red light of the HM61R is superior as a beam because it is wider (but however it loses its range ) so the final judgment is that the red light of the HM70R is satisfactory.
Again as a user experience I must say that I have changed my mind a lot about the red light, I have never considered it very important but in the summer it has its great utility to attract as few insects as possible both outdoors and also indoors if there are no mosquito nets on the windows.
Another advantage is that with the red light those close to us are less disturbed, while camping the red light is certainly very useful.
The old HL60R model had two 1 lumens red LEDs that were not very useful (full of concentric artifacts) but with the HM61R and HM70R models it is very different and you have a very pleasant vision.
I experimented with a little hack with the HM70R red light, if you use it indoors just use a very small piece of transparent 3M Magic Tape on one or both of the small red leds, this will diffuse the light and you wil
l have a very red flood light similar to that of the HM61R model.
The red light tone of HM70R is the same as HM61R (620nm)
Other manufacturers use a higher wavelength (650 nm) but the result is a very dark red which I don’t like at all, I prefer the light_red 620 nm light that Fenix uses.
Using the HM70R with the HI CRI flood led is very pleasant for the quality of the light emitted, with 70 lumens you can see very well in any indoor environment but also if you have to do something outdoors at close range.
For walking on an impervious, difficult and perhaps dangerous path, the 400 lumens level is perfect for seeing where you are stepping.
As a work light for electricians, workers or contractors, the HM70R is ideal, the neutral, HI CRI and wide beam LED allows you to distinguish colors well and this is indispensable in many work activities.
The younger sibling HL60R has built a reputation as a solid and robust headlamp and this larger version with 21700 battery is no different.
The four light levels of the LED spot are well spaced, the low one of 30 lumens (100 ANSI hours of runtime) and the one of 150 lumens (30 ANSI hours of runtime)
they are ideal for activities where little light is required and/or maximum duration is sought, after which one passes directly to a powerful level of 500 lumens (6 ANSI hours of runtime) and then reaches the level of 1600 lumens which, as you can imagine, emits a spectacular light, 8600 cd allow an ideal throw for a headlamp with a good compromise of lateral and depth vision.
Here I can say that I am quite satisfied, I really appreciate that a higher than normal High level was used (500 lumens instead of the usual 350/400 lumens) because this will be the most used level at least for my needs.
Wanting to ask for more, one might wish that the light levels had been five, with two High levels, one of 400 and the other of 600/650 lumens (as on the HM65R Super Raptor)
This may be a suggestion for the next version but having an extra light level also means an extra click that you have to do if you need to cycle between Low, Mid, High, Turbo.
Perhaps even a High level of 600 lumens like on HM61R V2.0 can be a suggestion for a future update of the HM70R.
While I have used the HM70R indoors for a long time I have not tested the HM70R thoroughly outdoors, only a few walks of about 30 minutes (I had to temporarily stop due to the summer heat and the usual summer invasion of wild boars with their young) but enough to be able to say that the Turbo is stable enough for at least 4 or 5 minutes, then it clearly starts to drop in power.
This shouldn’t be surprising because 1600 lumens on a headlamp is a lot and the HM70R isn’t as big as it may appear in the picture (to dissipate heat optimally you need a large, thick and therefore heavy light)
The few times I used it in tandem with the PD36R or PD36 TAC on summer nights I was thrilled.
After many minutes there is the usual drop in performance but I think it always remains around 800 lumens, with winter temperatures a higher power should be kept longer
I did a home test using the 400 lumens flood level to see if there is an aggressive stepdown, the result is decent.
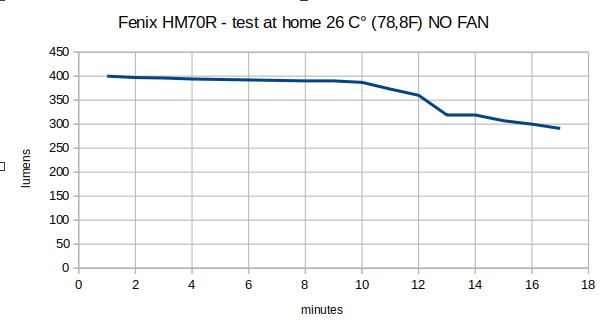
At home WITHOUT any ventilation and a temperature of 26 C° (78.8 Fahrenheit) I used the Flood level of 400 lumens for exactly 15 minutes.
At the start of the test the battery was at around 4.05V (I repeated the test twice)
There is a thermoregulation on the HM70R that intervenes when the heat is excessive but probably on this LED flood there is mainly a timer that decreases the brightness very progressively.
The HM70R makes a progressive and very slow but almost imperceptible decrease and after about 7 minutes it has lost only 2% of the initial value.
At 10 minutes into the test it lost only about 3% of its initial value
Around 10 and 30 seconds a more pronounced and rapid drop begins (but the heat has also increased)
14 minutes into the test, the headlamp temperature rose to about 40/43 degrees
At 15 minutes it lost about 23% of its initial brightness.
At minute 16 I try to use a small fan with cold air to see what happens, the flashlight seems to gain something in brightness for a moment but then it settles anyway on the same luminous value of the fifteenth minute.
At minute 17 there is a further drop and I interrupt the test (we are at about 27% of the initial value)
I turn the HM70R off and on again after about 5 seconds, it returns to a high value like the second minute after power on and seems to hold it without problems before starting to drop again very slowly.
If I had continued the test beyond minute 17 it would certainly have continued to drop and then remained stable at around 230/250 lumens for about 6 hours (as shown by other online reviews)
Fortunately, this Flood drop is low and occurs very, very slowly, it is not an aggressive stepdown like the HM65R/RT models (born and conceived as a headlamp for runners)
Probably here there is a choice by Fenix to extend the autonomy quite a bit by calculating that the user’s eyes get used to the light over time, with a slow decrease over tens of minutes most people will not notice the gradual decrease in brightness.
If the temperature allows it, turning the Headlamp off and on again will bring the brightness back to values close to the initial ones.
So an upvote here.
I expected this behavior, it must be remembered that the dimensions of this headlamp are not excessive and the small Flood XP-G2 LED is only an auxiliary LED, keeping the maximum power of 400 lumens could perhaps cause heat problems?
Or Fenix has tried to favor autonomy, perhaps because this type of LED absorbs a lot and consumes the battery (on the new HM71R there is an SST20 instead)
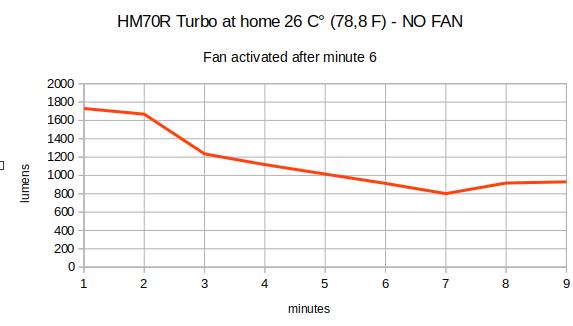
Later I did a short test (always at home) with the Turbo 1600 lumen level (main spot light led) here the heat is very hot and the environmental conditions of my test were certainly not ideal.
At home I immediately noticed a noticeable drop in power compared to when I used the HM70R walking on the street, even if it was a summer night the light evening wind helped a bit to keep the power high for longer.
It was hot in the house and there was no ventilation, only immediately after the sixth minute did I turn on a small fan with cold air (moderate air speed) immediately obtaining an evident increase in brightness.
The result is very good for me, 1600 lumens is a lot for a headlamp and you can’t expect much, on a cold and windy winter night the result would have been better.
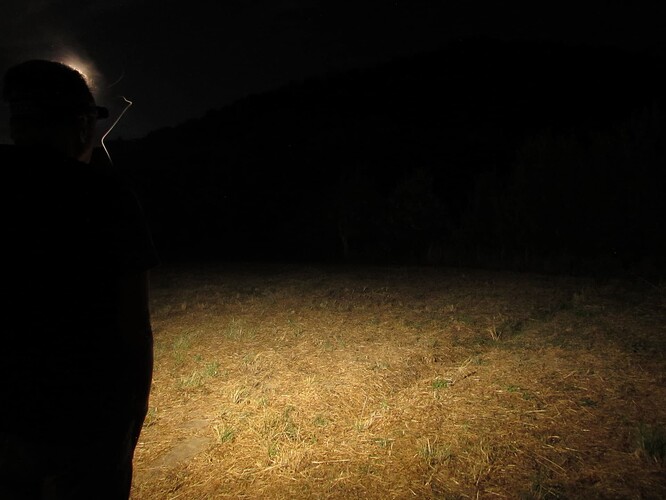
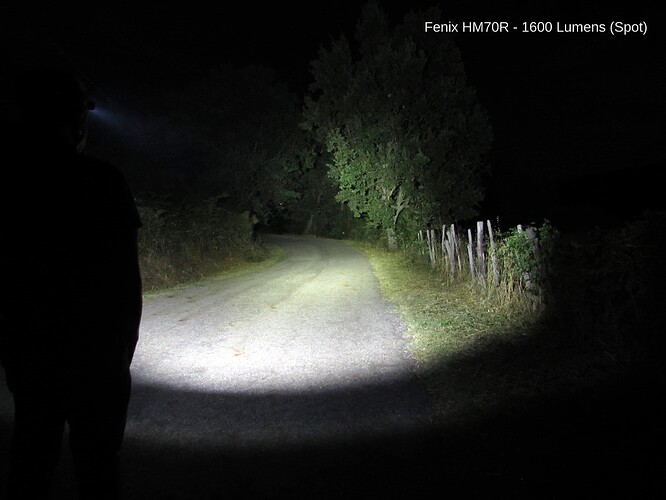
I show some beamshot done outside:
Conclusion, another great Fenix light, I’m surprised that the HM70R hasn’t had more notoriety for the moment (before buying it I found little information about it online)
Surely the HM70R is a worthy heir to the old HL60R, the price can be high compared to a headlamp like the HL60R model but it is justified by the performance (large battery, fast charging with well protected USB port, HI CRI flood led…)
I just wanted to see an additional light level on the functional menu (1 lumens of red light or 5 lumens of white light)
As a work light it is certainly ideal but I also consider it valid for trekking, it is true that there is a few grams more weight but also a larger battery that requires less frequent recharges.
For those who want something more compact and lighter, there is something very similar to the HM70R, it is the HM60R model that uses a 18650 battery, but the HM60R also has some small technical differences and is also designed for those who walk or run (it has a function which decreases or increases the brightness depending on the number of steps taken)
If you’ve read this far, it means you survived my translation with Google Translate, I hope it was understandable enough.
Thanks for reading and hello to all Flashaholics.
