Sorry, that was confusing. It seems as though the spindle is parallel with the bed, it's just that the jaws are not parallel with the chuck, so it sends the piece off in one direction (the runout gets worse the further down the piece you go). I've read about grinding jaws, but this thing was supposedly ground well within spec from the start. I might contact Shars and see what's up.
I need to read up on chip breaking, because these strands were 3+ feet long. At one point it got wrapped around the lead screw :(
This lathe stuff is fun. It helps if you use the right tool though, doh! I wanted to machine a pocket for the MCPCB but instead of using a boring bar I used a 1/4" right facing/turning tool, and I didn't realize there wasn't enough relief so the tool cut into the piece along with the carbide tip. Oh well. I switched to a boring bar this morning and cleaned up the inside.
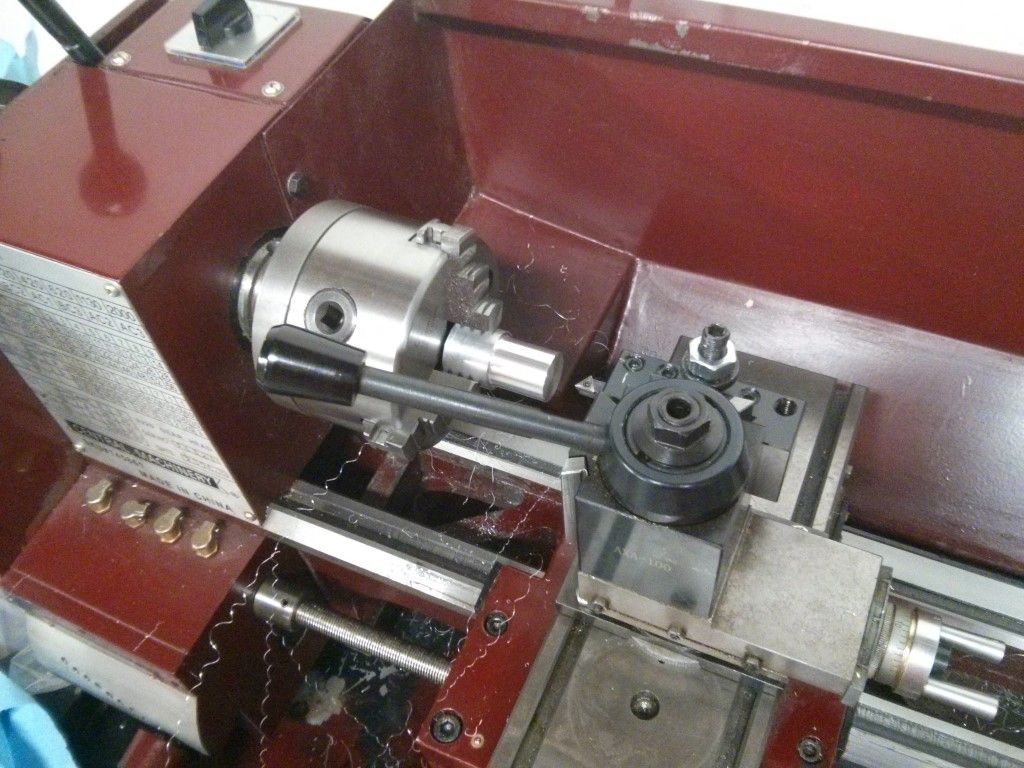
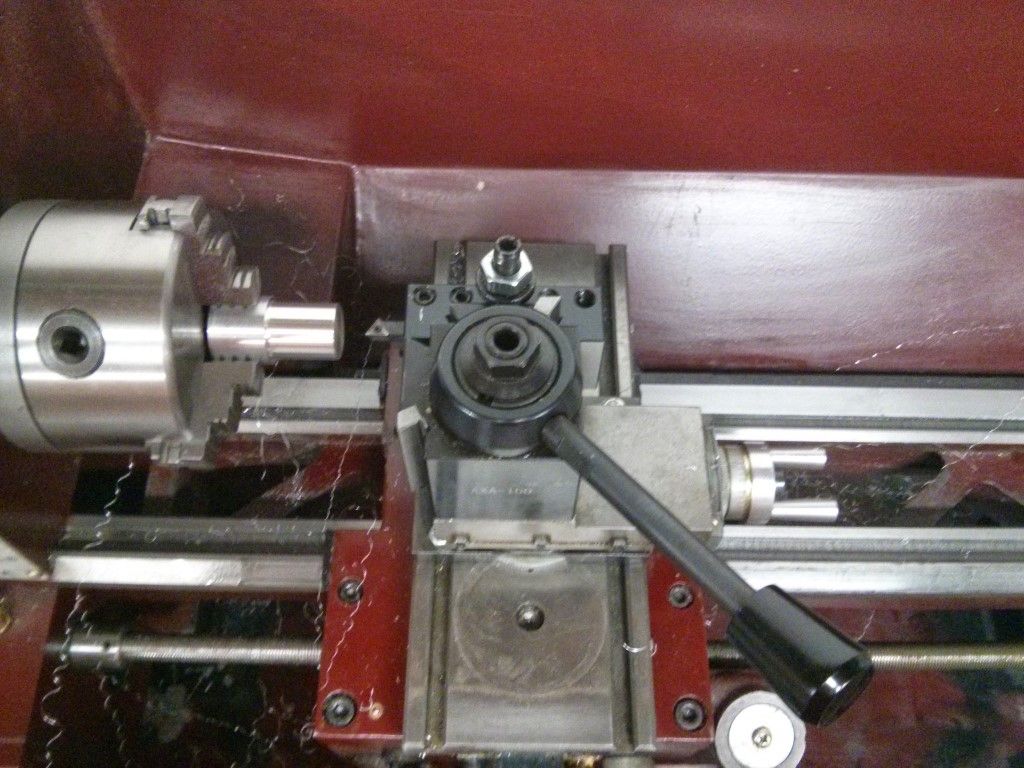
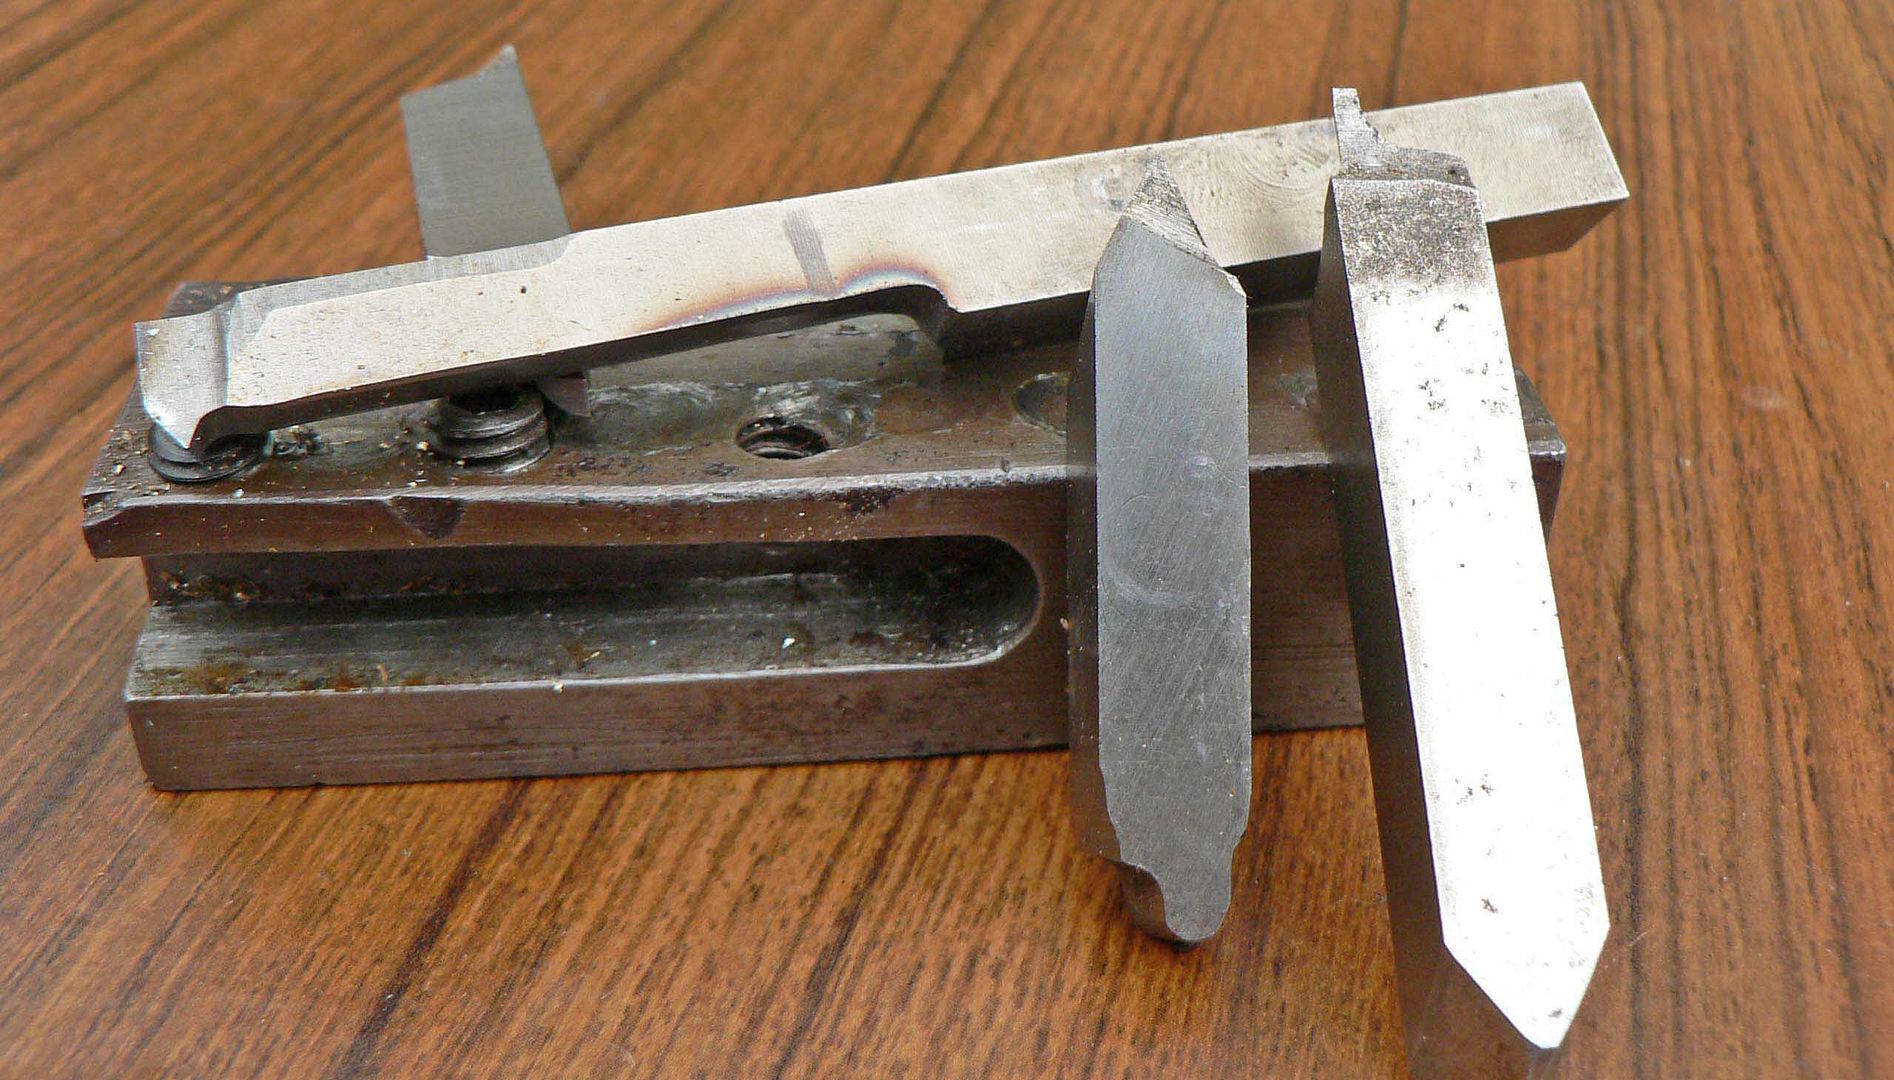
I need to see if I can adjust this wedge type QCTP. I can't even use the spindle-facing attachment point because the handle hits the tool holder before it clamps down...
Here it is fully open...
I'm thinking about buying some cheap digital calipers and mounting them up to use as a DRO. Keeping track of the marks on the wheels is a pain in the ass, and it would be nice to have a metric readout.
Most tools I use are 3/8'' HSS square that you can gring into all sorts of weird and wonderful shapes to do the type of thing your doing. Heres a couple but theres lots more.
I recommend that you learn to use the wheels. It's not that hard and any cheap DRO that you buy will be prone to goof up when you get coolant/oil/chips all over it.
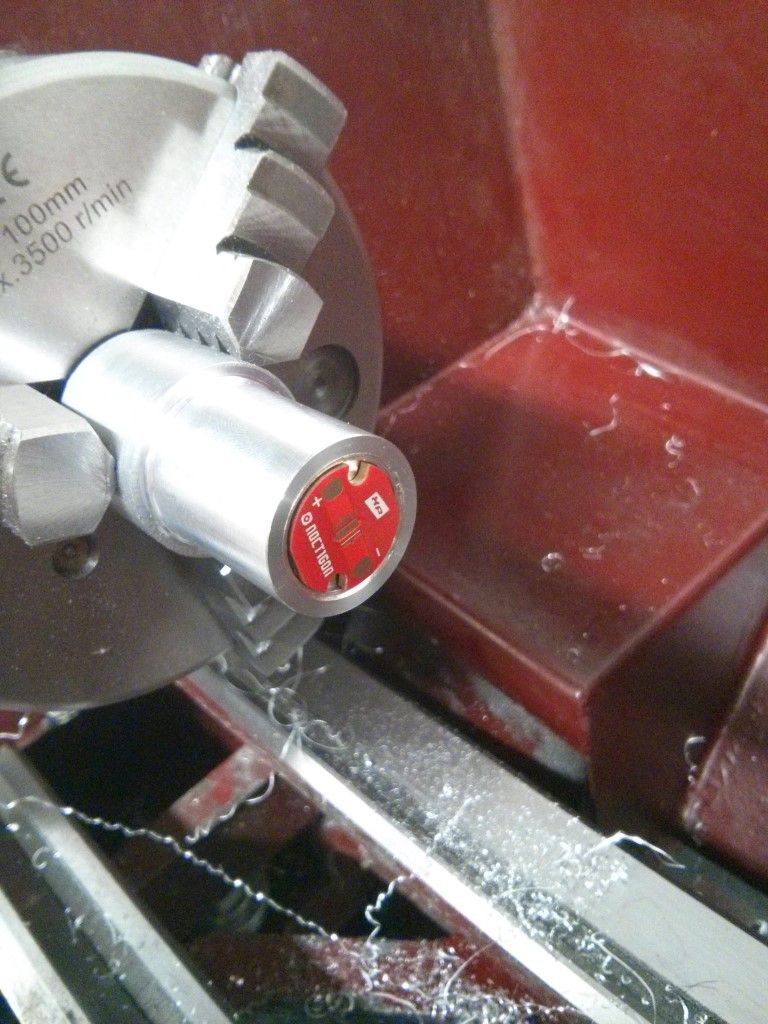
If you get good at machining…can I make a request…I need a convoy S2 pill/space all in one…threaded from front to back so I can solder the triple XP-G2 noctigon on there.
I can get .875 (21mm) or 1” copper round stock from these guys, not sure if the best or not on price…but I really would like an all-in-one pill for that kind of build
Awesome, thanks! I'm sure I'll kill way too much time watching those.
Ha, maybe a few years from now. It will probably be a while until I figure out threading. I don't plan to ever be half as good as the other members on here with a lathe, I just want to be able to turn a thing or two from time to time :)
Sad that such skill, expertise, and artistry is slowly fading away here in America…sure, there will always be machinists…but now they beep beep boop push a button and the machine does it…the “old school” way of manually slinging chips is rapidly fading
I thought the same thing about Eagle PCB as well…and after a few short video tutorials…I whipped up a board, is it professional…heck no, but if I can learn how, I am sure you can learn it 100x faster
I just wished my brother was still in Texas, he lives in Cody WY now…he has been a machinist for 20+ years, ran everything from old mechanical lathes/mills to CNC…not sure if he burned out on it…he drives a daggum bigrig now…sheesh
(me…I went the electronics route )
Oh, ChicagoX gave me a big binder with printouts from mini-lathe.com, really helpful.
The downside with this 9x20 is that it doesn't have a variable speed motor, have to keep changing belts. That one linked looks nice, I like that you can zero the handwheels.
do you have a DTI and holder or even just a dial indicator you can mount up somewhere? First order of business would be to test the spindle bore and register (flat bit that the bottom of the chuck butts up against) for runout. Should be less than a thou. Then take the back plate off the chuck and mount that on the spindle, then do the same for runout. It may be that either the chuck register or the back plate face is not completely flat or perpendicular to the spindle.
It doesn’t hurt to dial in the chuck to the lathe its going to be used on anyway. So, with the backplate off the chuck, put a nice fat o-ring on the spindle, thread the back plate on backwards so that it compresses the o-ring. This will force the backplate onto the threads so that it’s as true as you can get it. Take a light facing cut on the backplate register so there’s fresh metal all round. Then turn the back plate around (remove the o-ring) and re-indicate the face. You can then take a light facing cut of the backplate face. Then attach the chuck to the backplate and test for run out with a known good round and true piece of material (I think you can buy pieces for this exact purpose). Or if you’re a cheap ass like me, a inkjet printer rod. You can then do a 2 collar test to make sure your tailstock is aligned properly.
I very much doubt that your jaws need grinding, that’s something that needs to be done on old or heavily used chucks (like my 80+ yr old 3 jaw) that have bell mouthed or tapered jaws.
If you don’t have one already, get a 1in (and poss. 2in) and a set of telescoping bore gauges. For the work we do, they’re indispensable.
Maybe I forgot to say, but the runout on the adapter plate is good, along with the face of the chuck. Are you sure that same logic applies for Chinese chucks? ;)
My lathe was made in China. The chuck that came with it is pretty darn good. I'm going to look for the video where Tubalcain (mrpete222 on Youtube) checks his chuck jaws for wear.
Here it is.
Check your jaws with a feeler gauge like he does in the video and let us know what you find out. Notice that you MUST use a straight piece of work. I recommend drill rod.
I just picked up my piece of drill rod and tested out the runout. Starting with the chuck as I said before, the adapter plate has .001" runout, .001" runout on the outside of the chuck body, and .001" on the face of the body. The data sheet says it measured .0015" 50mm from the chuck jaws. I get various readings, anywhere from .004" to .006". One thing I realized is I really need to crank down on the chuck. When slightly tightening the chuck I can see that only the rear teeth of the jaws touch the workpiece, so it can be wiggled quite a bit. Tightening it down it certainly doesn't wiggle, but there's not too much consistency (which I know there really shouldn't be for a 3-jaw chuck).
I guess this will have to do. I might face the adapter just to get rid of the initial .001" of runout though.
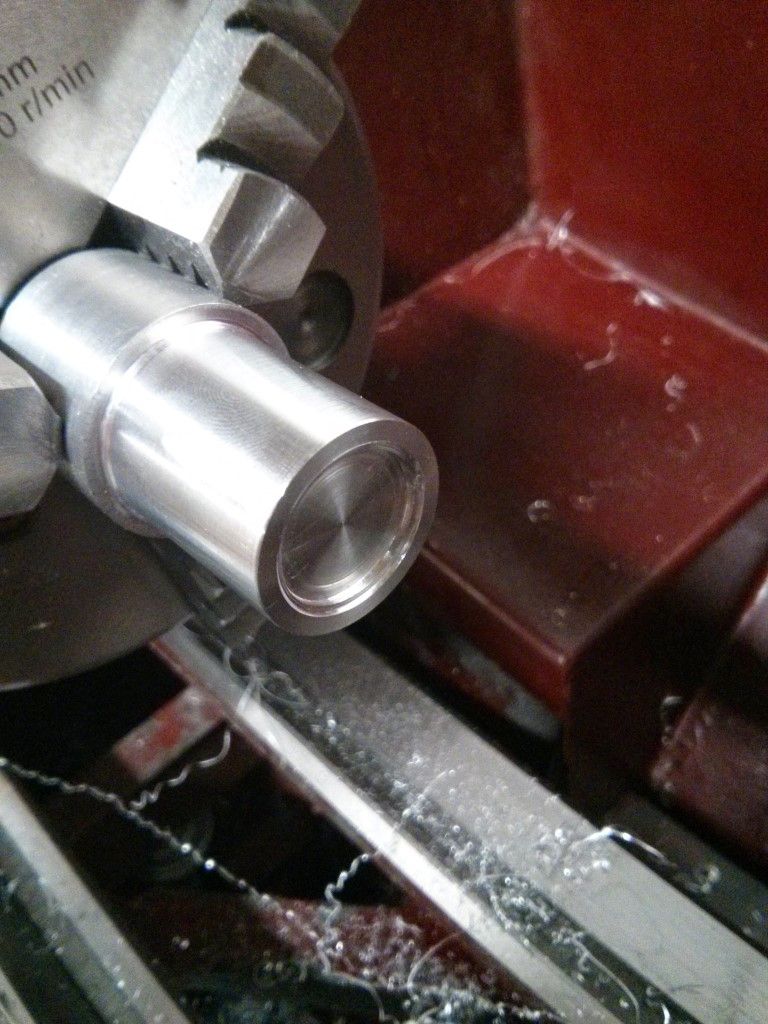
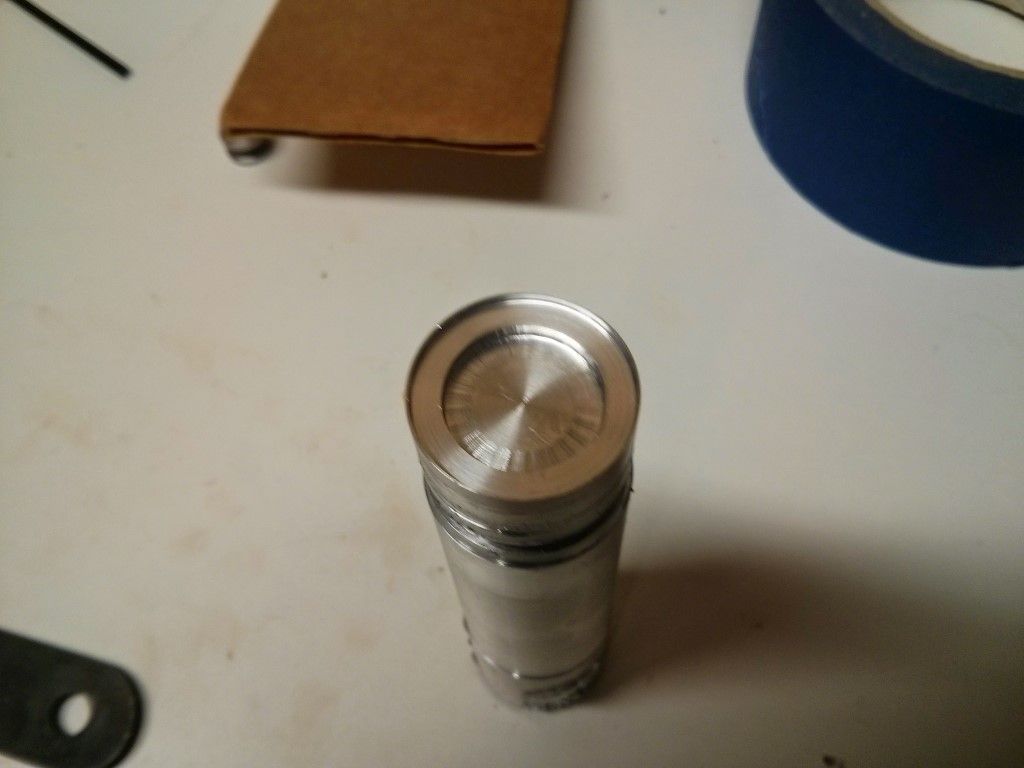
Well I need a lot of advice here. Attempted another iteration of my P60 pill. I made the pocket for the MCPCB slightly smaller so it will press-fit in. I also made a pocket for the turned down reflector to fit in so that it is centered.
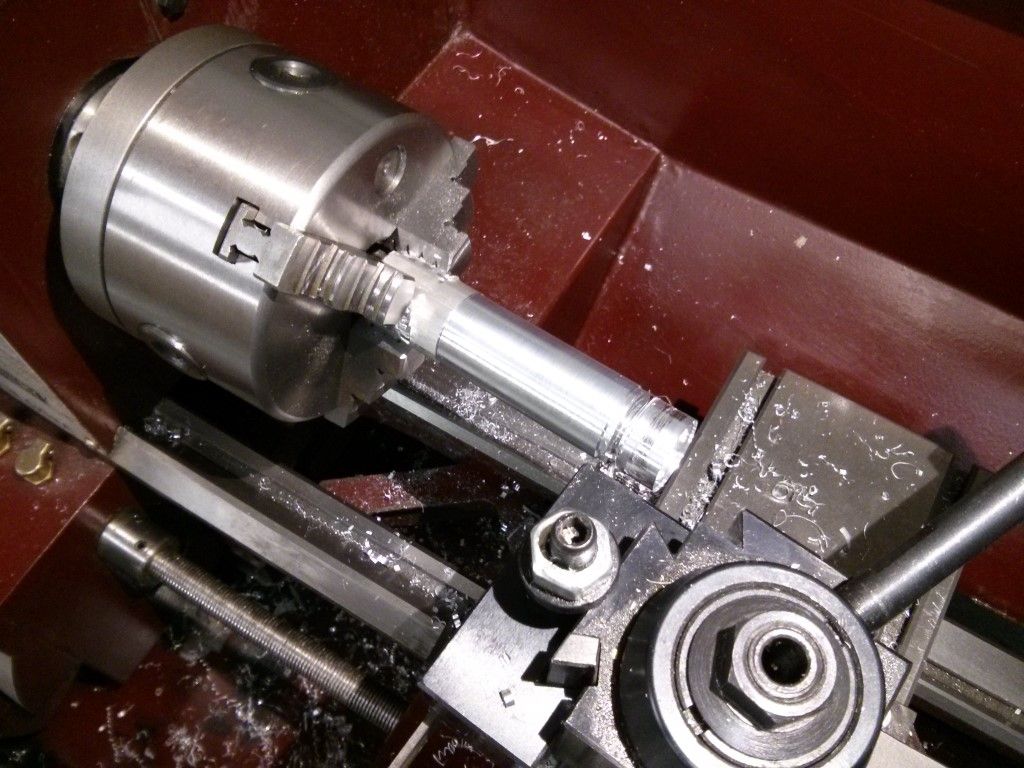
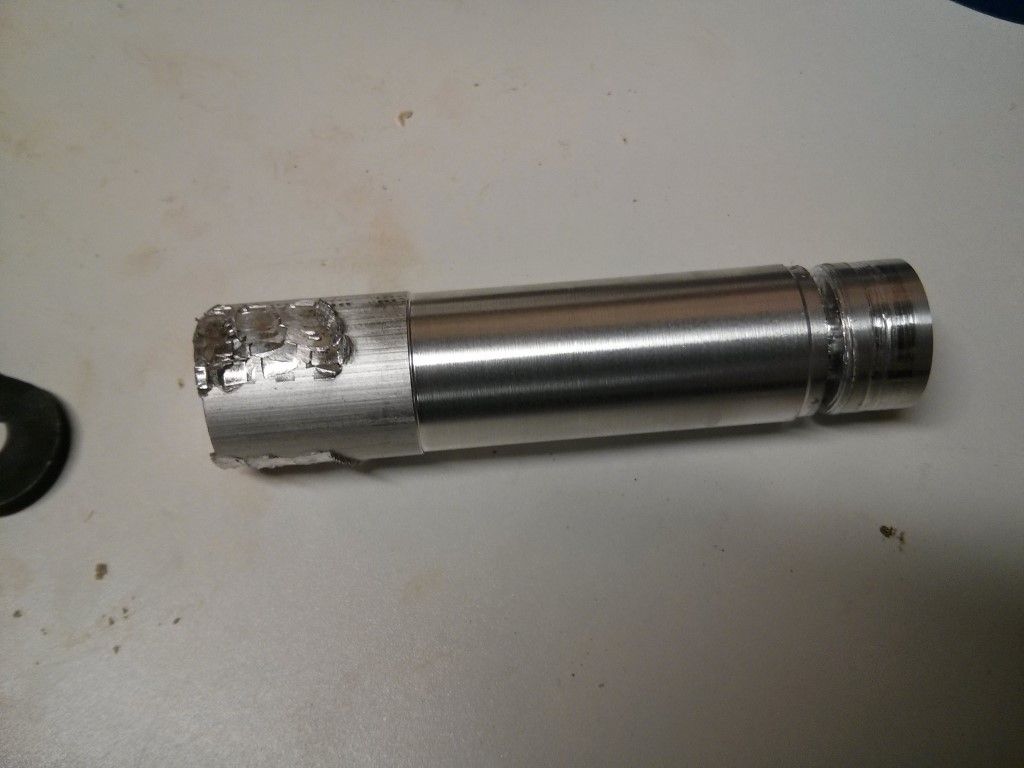
For the second time, while attempting to part the piece, it bound up and ruined the piece. The first time this happened it snapped the belt. I just assumed I was running it too fast. This time I ran it at 340 (?) RPMs. The cutoff tool was proceeding fine, not much chatter. The end of the tool was on the center line, and it seemed perpendicular to the piece. Then BAM. You can see it twisted the toolpost. What might I be doing wrong? I'm certainly at the limit of how long the piece can be, but I wanted to be able to machine 3 pills without having to waste the part that's in the chuck. Aluminium is pretty cheap though, so maybe I'll rethink that. However, the first time I had catastrophic parting failure, it was a much smaller piece.
Also, I should have taken pictures, but as for the pocket for the MCPCB, what is the best way to machine it? I tried to use a carbide boring bar, the smallest one I have, but the diameter of the pocket isn't wide enough for the me to machine the full face with just the boring bar. So I had to use a TE tool (TCMM with the point in the middle) to face the middle, but I can't go anywhere near to the edge because of the lack of relief. So once I faced the middle to the right depth, I switched over to a boring bar to face the rest and get the diameter right. The top picture is blurry, but you can see the result of chatter around the edge.
What should I do here, just get a smaller boring bar, maybe with a carbide insert?
When parting of everything must be rigid. If I can I have the work piece as close to the chuck as possible and the live center in the tailstock if needed. My lathe is really bad at parting of. I hear that the carbide tipped ones are better. Bucket I think has a 2mm carbide tipped tool. I dont even try to part of copper or mild steel.
As far as the pocket I use HSS ground up into a tool I can plunge into the end.
I know on harder metals Tubalcain and Abom79 use alot of lube oil (for different materials)
Almost every video I have seen them when they are cutting off an object
A. the cut point is very close to the chuck
B. They use machining fluid
How much material are you taking off on each pass?
You can definitely see from this image the “chatter” from the cutting insert by the piece being so far out from the chuck
MRsDNF is the machinist…I’m not a machinist (I just love watching those guys make chips )
I use Black Swan Dark Heavy cutting oil with great results on any metal. $36 bucks a gallon. And i cut it with mineral spirits to make it lighter, 2parts BS to 1part spirits. in a spray bottle. I also have a pan in the bed of my lathe with window screen to catch most of it and then strain thru cheese cloth to filter and reuse.