I just picked up my piece of drill rod and tested out the runout. Starting with the chuck as I said before, the adapter plate has .001" runout, .001" runout on the outside of the chuck body, and .001" on the face of the body. The data sheet says it measured .0015" 50mm from the chuck jaws. I get various readings, anywhere from .004" to .006". One thing I realized is I really need to crank down on the chuck. When slightly tightening the chuck I can see that only the rear teeth of the jaws touch the workpiece, so it can be wiggled quite a bit. Tightening it down it certainly doesn't wiggle, but there's not too much consistency (which I know there really shouldn't be for a 3-jaw chuck).
I guess this will have to do. I might face the adapter just to get rid of the initial .001" of runout though.
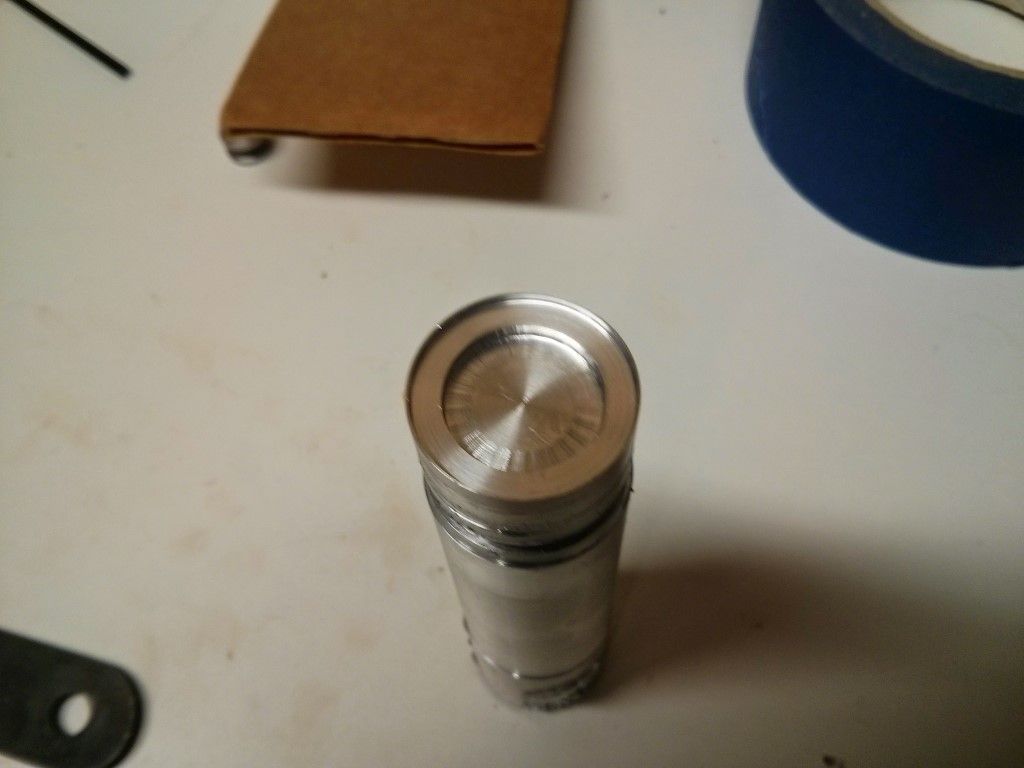
Well I need a lot of advice here. Attempted another iteration of my P60 pill. I made the pocket for the MCPCB slightly smaller so it will press-fit in. I also made a pocket for the turned down reflector to fit in so that it is centered.
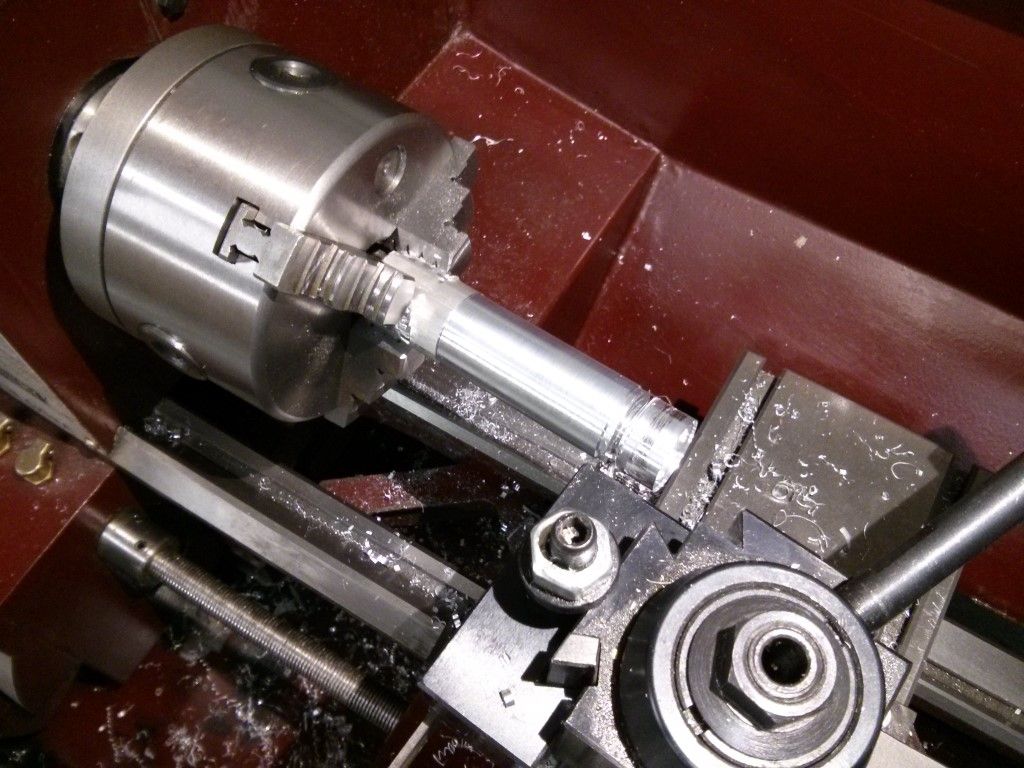
For the second time, while attempting to part the piece, it bound up and ruined the piece. The first time this happened it snapped the belt. I just assumed I was running it too fast. This time I ran it at 340 (?) RPMs. The cutoff tool was proceeding fine, not much chatter. The end of the tool was on the center line, and it seemed perpendicular to the piece. Then BAM. You can see it twisted the toolpost. What might I be doing wrong? I'm certainly at the limit of how long the piece can be, but I wanted to be able to machine 3 pills without having to waste the part that's in the chuck. Aluminium is pretty cheap though, so maybe I'll rethink that. However, the first time I had catastrophic parting failure, it was a much smaller piece.
Also, I should have taken pictures, but as for the pocket for the MCPCB, what is the best way to machine it? I tried to use a carbide boring bar, the smallest one I have, but the diameter of the pocket isn't wide enough for the me to machine the full face with just the boring bar. So I had to use a TE tool (TCMM with the point in the middle) to face the middle, but I can't go anywhere near to the edge because of the lack of relief. So once I faced the middle to the right depth, I switched over to a boring bar to face the rest and get the diameter right. The top picture is blurry, but you can see the result of chatter around the edge.
What should I do here, just get a smaller boring bar, maybe with a carbide insert?
When parting of everything must be rigid. If I can I have the work piece as close to the chuck as possible and the live center in the tailstock if needed. My lathe is really bad at parting of. I hear that the carbide tipped ones are better. Bucket I think has a 2mm carbide tipped tool. I dont even try to part of copper or mild steel.
As far as the pocket I use HSS ground up into a tool I can plunge into the end.
I know on harder metals Tubalcain and Abom79 use alot of lube oil (for different materials)
Almost every video I have seen them when they are cutting off an object
A. the cut point is very close to the chuck
B. They use machining fluid
How much material are you taking off on each pass?
You can definitely see from this image the “chatter” from the cutting insert by the piece being so far out from the chuck
MRsDNF is the machinist…I’m not a machinist (I just love watching those guys make chips )
I use Black Swan Dark Heavy cutting oil with great results on any metal. $36 bucks a gallon. And i cut it with mineral spirits to make it lighter, 2parts BS to 1part spirits. in a spray bottle. I also have a pan in the bed of my lathe with window screen to catch most of it and then strain thru cheese cloth to filter and reuse.
Your part is sticking out way to far. Parting off demands rigidity. You should not part off further than 1.5 x the diameter of the work from the chuck. Closer is better. Also, the compound and carriage should be locked down. Lastly the parting tool must be exactly perpendicular to the work piece. I have always used WD40 on aluminum and it works well. Oh yeah. RPM should be 1/3 of normal cutting speed.
Parting off caused me fits for a while. You will get it. Search for "parting of on an atlas lathe" on you tube. Tubalcain has a video on it.
Parting bit could be ground thinner also to relieve tool pressure. Positioning of the bit Ideally on spindle/work piece centerline (axis) or a smidge below. Contact at the front of the bit should be minimal I like a sharp angle back and less face contact. But a rigidly held work piece and tool is a must. I found with 6061 slower RPM’s with a light hand feed work the best, you can always back off when things go awry and you get a good fell of the tool pressure.
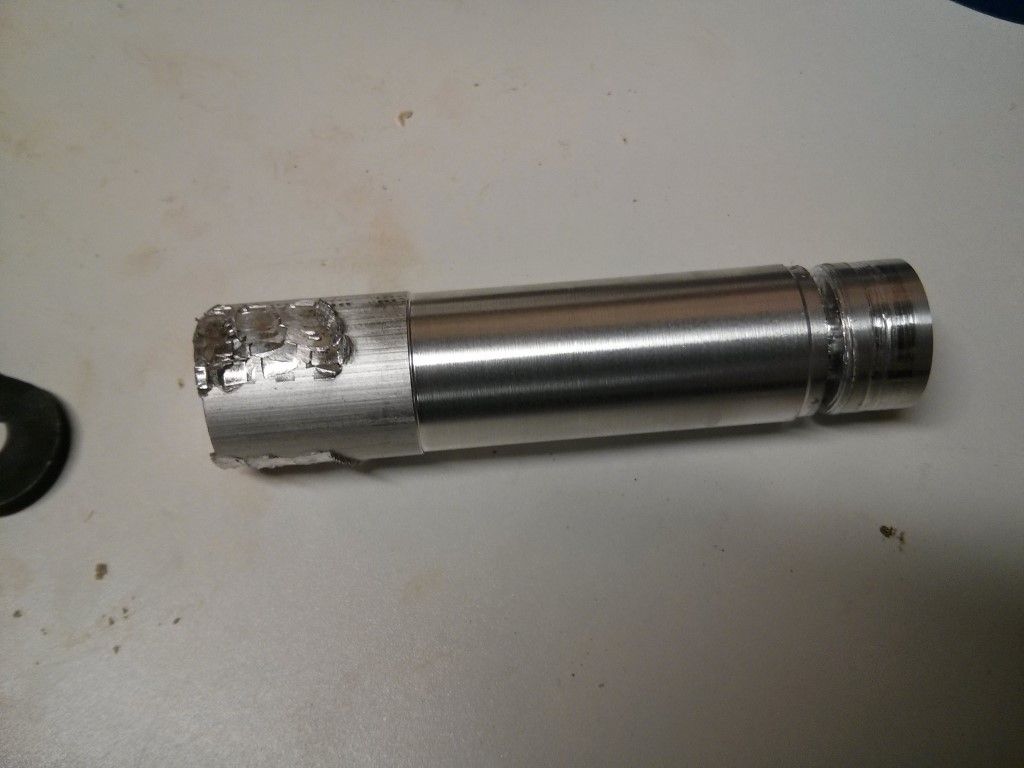
Thanks guys. From now on I'll just cut my 1" 6061 to about 2" in length and machine one pill out of it. Hate to scrap a whole inch for each one, but its better than scrapping an almost completed part. I might even just start the parting and then take it off, put it in a vise, and use a hacksaw for the rest.
I'm also going to try and grind some more relief on one of the 1/4" carbide insert tools (or maybe the boring bar) to see if I can use that for machining the pockets on each end for the MCPCB and driver. Or maybe I'll just get a piece of HSS and try to learn the art of tool grinding.
One other question, what kind of tape do you use around a finished piece when you have to chuck it up to face/bore the other end? I used blue painters tape for the first one and it seemed to work alright.
I use a split collar for rechucking parts that cannot be marred.
Pot Chuck #1: http://youtu.be/WBOzch-xng8
You can just use a hack saw to make split. I also mark it or split it by the number one jaw so I can put it in the same way every time. They are pretty repeatable.
Also, Kawi is right on about the parting bit. You need something thinner by the looks of things. I keep mine strictly at center height. Feeding in is partly by feel and partly voodoo. I have had more success when I start a little slow, then give it a bit more force once it bites. I adjust my feed rate by looking at how thick the chip is. Too thin is just as bad as too thick.
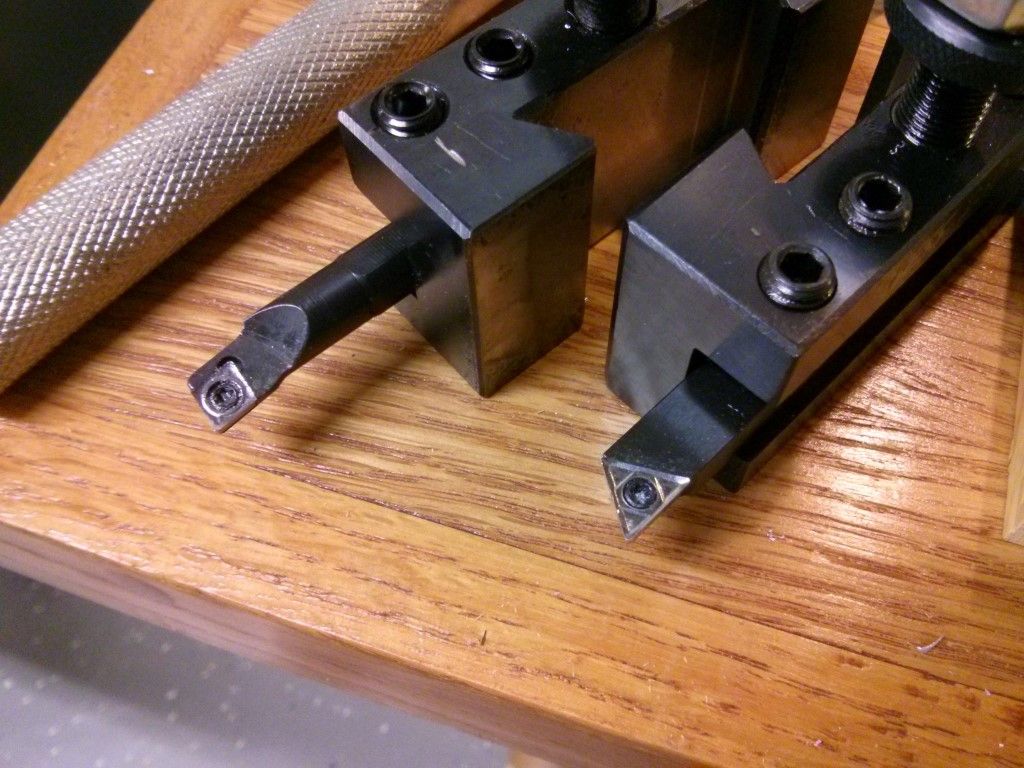
Bucket, first off, thanks for your videos! I just watched your "Carbide Inserts for Noobs" video. I picked up the tool shown above in 3/8", used off of Ebay. I now want to pick up some CCGX inserts for it and TCGX inserts for my cheap 3/8" turning tools. Where's the best place to get them? Seems the best deal I've found is just in packs of 10 off of Ebay.
Well a few goodies arrived. Got some extra AXA tool holders, some extra 3/8" indexable tool holders because they were cheap, a P1N cutoff blade, and some replacement set screws for the tool holders to replace the stripped out Chinese ones.
I got the SCLCR boring bar, which I ground down a bit so it can do the plunge cut for the LED pocket. I got the TCGX and CCGX inserts as well, and holy cow do they cut like butter!
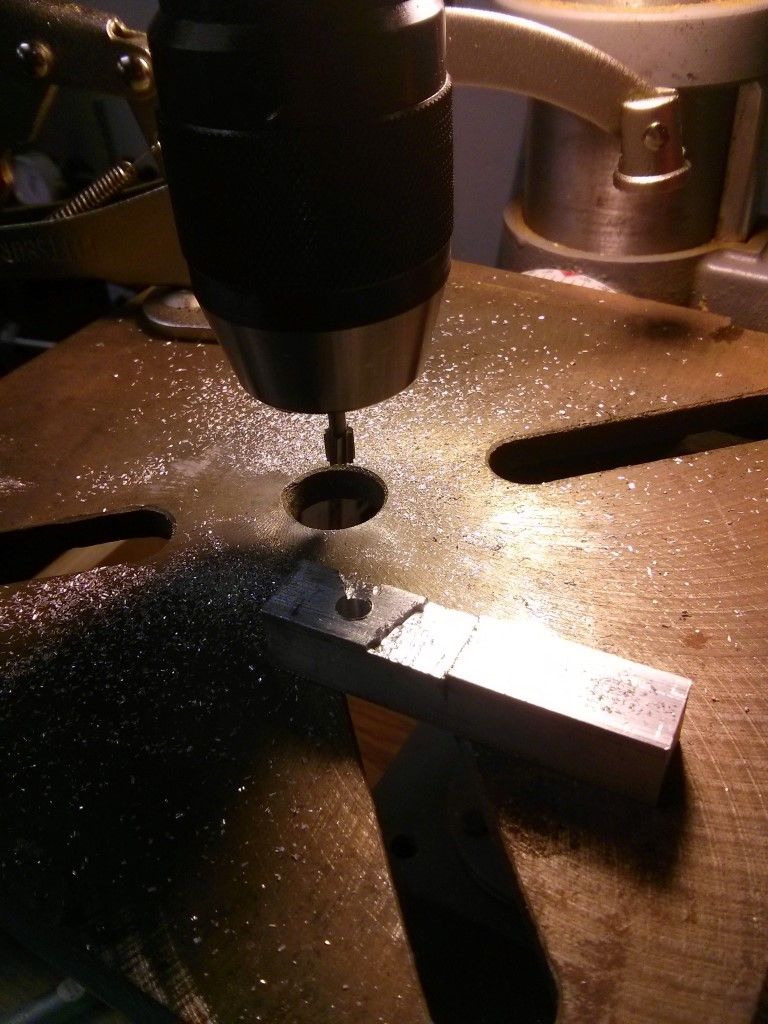
Picked up a high speed dremel bit and some 1/2" aluminum square to start building the brackets for mounting digital calipers for a ghetto DRO. It actually won't be that bad I don't think. Of course now I want a mill
That will be much much easier if you clamp it in a low profile drill press vise. Gives the part a much wider, more stable base. Leave the vise unclamped, just slide the whole thing around on the table by hand, also helps to keep your fingers farther away from the sharp bits.
As for your chuck, if the jaws don’t contact the work evenly along their length, then there’s something wrong with the chuck and you should return it for an exchange. You could rig up a jig to grind them with your Dremel, but you’re not likely to get it as good as a proper factory finish. Sounds like yours slipped through QC.
Parting off - as others have pointed out, this is just about the hardest operation you can do on the lathe, especially smaller hobby class lathes. There are a lot of things you can do, most of which have been pointed out. Another couple of tips are to grind some back rake on the tip of your parting tool and you could even grind a chip roller at the tip perpendicular to the cutting edge, which make help. If your tool doesn’t have built in back taper (top of the blade gets slightly thinner towards the tool post so that the sides of the tool don’t rub in the cut) you can double plunge your cut - cut a few mm in, back out, move the tool 0.5 or 1mm towards the chuck, cut a few mm in, move back, repeat. Use lots and lots of WD40 or alu specific cutting oil. Hone your cutting edge with a diamond hone or india/ arkansas stone. Keep the tool as far into the holder as clearance and depth of cut allows. Even then, you may only be able to part to a nub and break the piece off so you can turn it around and face it flat.
Carbide vs. HSS - I know that indexable tooling is a lot easier to get to grips with, but for lower powered hobby lathes (which even a lovely 9x20 such as yours is) HSS really is king. You can grind the profiles you need and make them specific to lower HP machines (smaller nose radii, more side and back rake etc) and materials, plus you can really shave off teeny tiny amounts of material where carbide will just want to rub. A bench grinder with a nice alu oxide wheel (a well dressed mid grit standard wheel will do in a pinch) and a handful of cheap bits off ebay will get you started. You can even buy bulk used lots to see what sort of grinds people use and copy them, plus there are a ton of articles and videos on how to grind bits. I had one of those 5pc 1/4 indexable sets when I started but I haven’t used them since I got a grinder and some HSS. I even ground a boring bar from a piece of 1/4 x 3/8 HSS which leaves a mirror finish.
Well things aren't going as smoothly as I had hoped. Got a piece of aluminum mounted to the carriage which will allow me to mount the caliper, but little did I know those cheap Chinese calipers really are hardened stainless. My HSS bit got started, but it's not going anywhere now even with a lot of pressure, different speeds, cutting oil, etc. I used a curved tip carbide bit with my dremel and that actually takes some metal off, but it will take forever to punch through. Going to try these from harbor freight - http://www.harborfreight.com/carbide-tip-glass-and-tile-cutting-drill-bits-piece-68168.html