Well, after leaving it sitting with no battery overnight, I just tried again. It worked normally for about 30 seconds, then started doing the same thing it did last night. I hooked it up to a power supply limited to 1 amp and fiddled with it for a few minutes, it slowly degraded into doing nothing except being stuck in hybrid mode. A double click sends it to turbo, and click and hold ramps up or down about 25% of the way. It will not go into regulated modes, it will not turn off, no alternate functions work except double click to turbo. When power is disconnected and reconnected it comes right back on in the hybrid ramp. Removed the optic and aux pcb to verify my thermal goo job. Looks fine. I’ve been putting thermal grease on CPUs for over a decade, I have a pretty good grasp of how much to use. Guessing my driver is toast. ![]()
Not the driver. The regulation chip. When shorted out the system overloads the 350mA 7135 regulation chip. Without that chip, only the MOSFET modes work.
Would that account for the other strange behavior? And I’m guessing that since I never touched the driver that this is a factory issue?
A lot of things ultimately could cause it, difficult to know in a particular light what is causing the issue without taking the light apart and checking the components. There really is a very small number of things that can be wrong, not likely to be a factory issue but it’s unclear what it could be.
You DID open it up, so it’s likely something that happened when you were working on it. Part and parcel of cracking one open, we have to be prepared to make repairs at that point as it’s on us for voiding the warranty. ![]()
Got no problems voiding warranties, in fact if I caused the issue I’m very confident I can un-cause it, but I’m not sure what to look for (other than obvious damage) or how to remove the driver. Is it the same idea as removing a D4 driver?
That’s a good point about the 7135 chip. I bet that’s it.
Removing the driver in the E07 will require a punch through the top to break the glue. You have to be careful, of course, not to rest your punch on a driver component. It can be helpful to heat the driver a little before attempting to remove it. A hot air station can do this pretty easy, or just holding the soldering iron on the ground ring of the driver until you feel some heat in the head should aid pushing the driver loose… Edit: Easy is key, don’t push too far as the switch wires will be broken. ![]()
I built my Ham’r light using 17 emitters in 5 sections, each section has it’s own driver or slave. So when I was testing a cell and accidentally slipped the wire and shorted it, all 5 drivers had burned 7135 chips that had to be replaced. Only takes a fraction of a second, but nonetheless the 7135 chips seem to be a weak link…
klrman: Is that the E07 in your profile picture? How did you get it in Purple AND Arctic Blue? I never found that option on Fireflies/Neals site. Should I have asked for it?
It was only there right at the beginning
I’m not sure he asked for that. Might be just what they shipped him though.
I agree. It looks GREAT in purple and blue. Wish mine were like that instead of all purple.
Dang, that’s unfortunate.
Agreed. This looks really, really great. The best looking option by a wide margin in my eyes (at least judging from the images). I guess I have to try and mod that as well. Not sure if that is hard or not (haven’t done it before but I have handsoldered SMD components before) and if I have to be careful with specs when choosing replacement SMD LEDs (package size, voltage, output, etc?)
Either that or wait for FireFlies to hopefully produce a new batch of those (with all the improvements they plan to do) and order a second one (and sell the first one off).
I ordered mine like this. The blue is pretty subtle because it lines up with the TIR and not in the gaps so you only see the blue at certain angles. It is cool but you aren’t missing a lot
Don’t want to speak for them, but pretty sure it’s just stock purple.
Once you make your leds brighter (thanks again DB Custom) they really stand out more, so when you simply take a picture with your phone up close it seems to alter the coloring to more blue.
Just took this with my phone, also very blue.

I ordered it in the beginning direct from Fireflies. On mine the blue is just as strong as the purple even though the blue hides a little and it is the best looking light in my collection. I turned the two screws 1/2 turn at a time on the aux board until I got the maximum brightness for the blue and purple leds.
Keep in mind that each set of colored leds are not the same from light to light. I got lucky and mine has a deep blue and deep purple. On my other E07 I just ordered purple only aux leds and they are a different tint. Very nice but not nearly as deep and rich as the combo led I got on my grey E07.
Here's a close up.
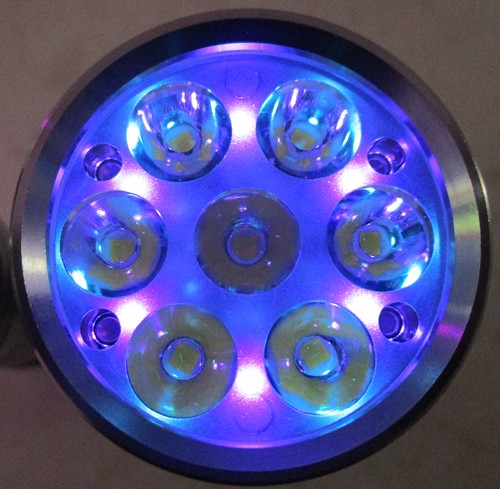
The adjustable AUX leds is a really nice feature… I like mine turned down as far as they can go. Less distracting but still usable as a locator in the dark.
DroooooooOOOL!!!
That looks AWESOME!!! :heart_eyes: :heart_eyes: :heart_eyes:
Your blue-purple version looks way better than - MD -’s all purple version.
Lexel can probably sell a custom aux board if people want super custom.
Heres my blue/purple E07 and my custom aux D4S:

I think MD is seeing blue because the aux board is blue. Look at my D4S with a white aux board. Much different appearance on the aux LEDs
I ordered direct from Fireflies as well, and asked for the Ice Blue/Purple combination, but only got the Purple. I do like the purple alone but some how the mix just really strikes a pleasant note… Still thinking about changing them myself.
ok, ok, everyone has me wanting to increase the brightness of my aux LEDs. Every time I try something it breaks however ![]() So, what do I need to do? Unscrew the bezel, then what? If there is a chance I will ruin something I don’t want to attempt it. Where are these screws that one adjusts? I think I read there are 4 of them, which are which? Sorry, I know this was already written, but it’s a lengthy thread. Thanks to anyone who instructs, it will be helpful to more than myself.
So, what do I need to do? Unscrew the bezel, then what? If there is a chance I will ruin something I don’t want to attempt it. Where are these screws that one adjusts? I think I read there are 4 of them, which are which? Sorry, I know this was already written, but it’s a lengthy thread. Thanks to anyone who instructs, it will be helpful to more than myself.
•
edit: Ok, I gave it a try, took the bezel off, then the lens and optic. Appears to be (3) pots to adjust? What kind of screwdriver fits in there? Do they just turn continually, so no chance to completely unscrew them? What 3 things do they adjust?
when putting it back together, do those (4) pegs on the optic have to be seated in the holes on the LED board? If they are not in the holes correctly and u try to tighten down the bezel, u could do some harm? One of my 4 pegs is a half a peg.
THANKS FOR ALL ADVICE!!!
Under the wires on top you will see three screws in a L-Shape around the center of the aux board, the bottom two screws in the L adjust inner and outer aux leds and the top screw in the L adjusts the low voltage led. I finally adjusted mine with the battery inserted and power on as TK suggested. Much easier as you can see right away when the brightness does a major jump. My screws had no stops and will keep turning so just do 1/2 turn at a time. Dale underneath this post has the perfect pic.
You just need to unscrew the bezel and that's it, it's right there.