I think a faulty head would still be worth some money though.
I don’t know, maybe i’ll open a WTB topic, or just get a ‘normal’ S41 which don’t seem to have these problems (or do they?)
Sorry if i came across as a vulture.
S41 still has problems. I had 2 fail on the same way with purple emitters.
Yes, i see they have the same optic with the 2 wobbly legs as well…

I see now it’s only 2 legs because they chose to screw the MCPCB on the head base, which only adds to the problem, because now the MCPCB can not move along with the optic…
Tighten the bezel and the optic is held in place by the LED domes and the 2 wobbly legs…
A recipe for disaster…
I guess the original design by Manker didn’t have screws holding the MCPCB in the head, so they could use an optic on 4 legs plus the MCPCB could move along with the optic…
Not just two legs, 2 legs that are too short to reach below the MCPCB to the head on the S41S. All pressure is sitting on the emitters.
I posted some pics of the S41 design in the other thread for comparison. Slightly different design but still a problem… 2 legs also, but they were supposed to sit on top of the MCPCB. However, the design did not account for the emitter base height. Legs do not touch MCPCB. I can not say if the latest S41 have moved to the S41S design or if they will.
Never bought a Manker branded E41. Don’t recall seeing pics of one opened.
My first repaired S41 only got 2 new emitters and kept all the original parts. Just don’t tighten it up too much.
Second got a TPad Quad soldered to the copper head, no screws. 4 legs on Carclo quad used. 24mm Carclo reduced to 22mm.
Great thread. Thanks for the infos vwpieces.
Too bad I couldn’t crack open the head. Last night I duct taped the bezel and copper separately, lined them with latex rubber, hose clamped them, then used two locking pliers … only resulted in shredded duct tape and scratched bezel from the force !! :rage:
So I’m gonna leave the head as is and make a beater instead. I deduced that Convoy S6 could lego with this, so I bought a host of that. Fingers crossed.
Try running it on turbo for about 30 seconds before trying to twist it off. This is what I did with my glued Manker E14, twisted off without a terrible amount of force.
Do you think it’d be turnable by hand if it was heated up like that? Also, when you turn it (if it can be turned), does that damage the components (e.g., the emitters) at all?
I can only speak to my experience, but yes, it twisted off pretty easily by hand with no damage whatsoever. YMMV!
I would use a small butane torch to heat the bezel up around where the threads are.
It will expand a little, the glue will soften and then apply force witch something rubber like inner tube of a bicycle wheel.
On turbo the copper piece will heat up first, possibly making it tighter rather than looser (although the glue will soften too of course).
(off topic) What does that mean?
You Make Me Vomit? :partying_face:
I used rubber inner tyre around the bezel and the heatsink, several times tightly wrapped around for grip, then on turbo with fresh (18350) battery until stepdown (40 seconds), and then it took all the force I had to get the bezel open. A tiny bit more glue, and it would not have worked. But there will also be copies with less glue than mine…
I tried several layers of Gorilla tape and a couple of wrenches and succeeded only in creating a slight nick on the bezel edge. Back to the drawing board - might try a heat method, dunno if anyone had success with the torch yet.
LOL, means “your mileage may vary”.
Wrenches create local pressure resulting in increased friction between the threads, strap wrenches are better for this reason, or strong hands :innocent:
Can't use my strap wrenches on this light - it's too small, they just don't work, tried many times. Turning 59 - my hands aren't as strong as they used to be, for sure.
My tips, i had a really stuck one, i was so close to giving in but i persisted… before you continue you have to accept that the optic and o-ring will probably melt.
A bicycle inner tube cut and wrapped round twice, 2 jubilee clips copper section in a vice not to tight just to hold the screw section of the jubilee to hold it steady , then using mole grips or anything that will fit over the head of the upper jubilee on the bezel try turning it.
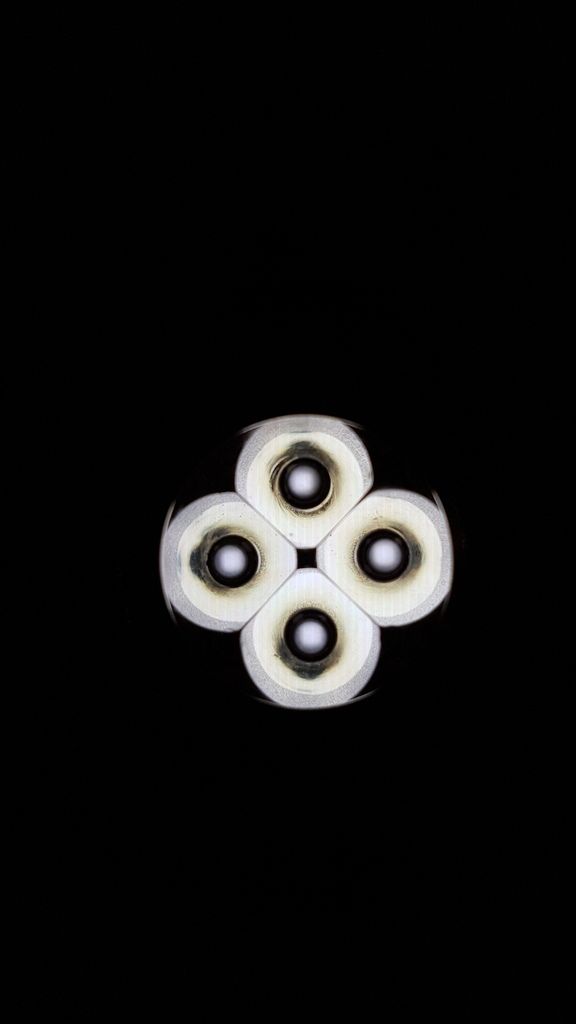
IF that doesn’t work then you will have to cycle it with heat which is what i had to do but i melted the optic and o-ring. (glass to optic o-ring size is 21.5mm by 1mm cross section FYI)
Tried the torch on the bezel, then using those "sticky" gloves - nothing, didn't budge, decent force. Then used a rubber tie down, cut up to 2 pieces - one in the vice on the copper section, one used on the bezel with a wrench - a lot of force, and nothing. This was my most effective attempt to date based on the force I could get on it, butstill nothing. Might have to re-visit the torch combined with the vice, as mattjk did.
Got my new 219c emitters today and fixed mine. I used a new 4 way optic and it fits my mcpcb perfectly…
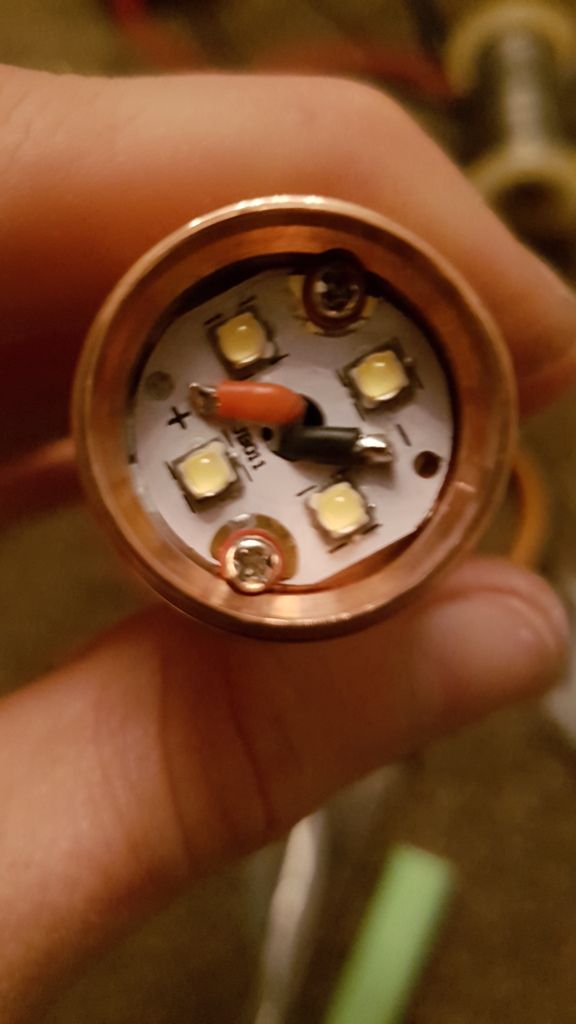
No blue just some pwm visible nice and even emitter though. Bezel tightens nice and tight with no rattle and minimal pressure.
Final pic
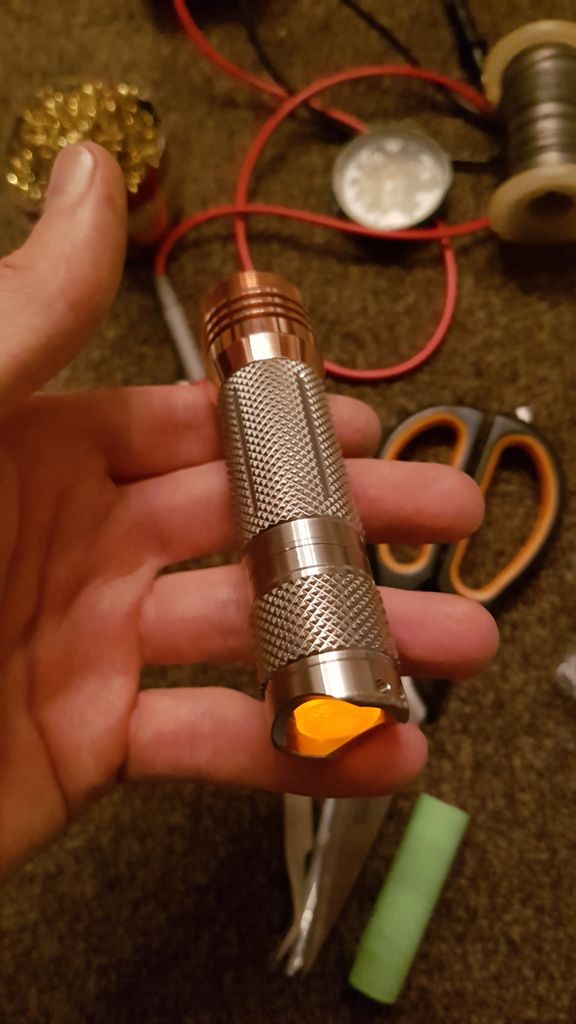
Will probably sell or give away the replacement head as i have a aluminium a6 tube i can screw onto it
I got mine to open by putting duct tape around. I used a duct tape that has some sort of fibres inside, so it does not stretch.
- About 1.5 turns on tape the bezel and another 1.5 turns on the body.
- Then use two of those Jaw locking pliers, one on the head and another on the body and just make sure their are really well gripped into the bezel and body.
- Put the light in turbo and let it heat up, if it jumps down in level, press once to jump back to turbo. I had to do it about 3 times, it was really hot.
- Then use the two jaw locking pliers and try to twist the bezel anticlockwise. Will require a lot of force and make sure the pliers are very tight but not too tight to damage the roundness of the bezel.
- Dont give up, try step 3 and 4 until its lose.
Hhmm - might have to try the two plier technique - vice on the copper side slips way too easy. Same problem with a Skilhunt H03 tonight - it's a tuff one, and slips in the vise.