So… I wanted to try my first mod. I thought about buying a host, but I wanted to try out modding an old flashlight for the first try.
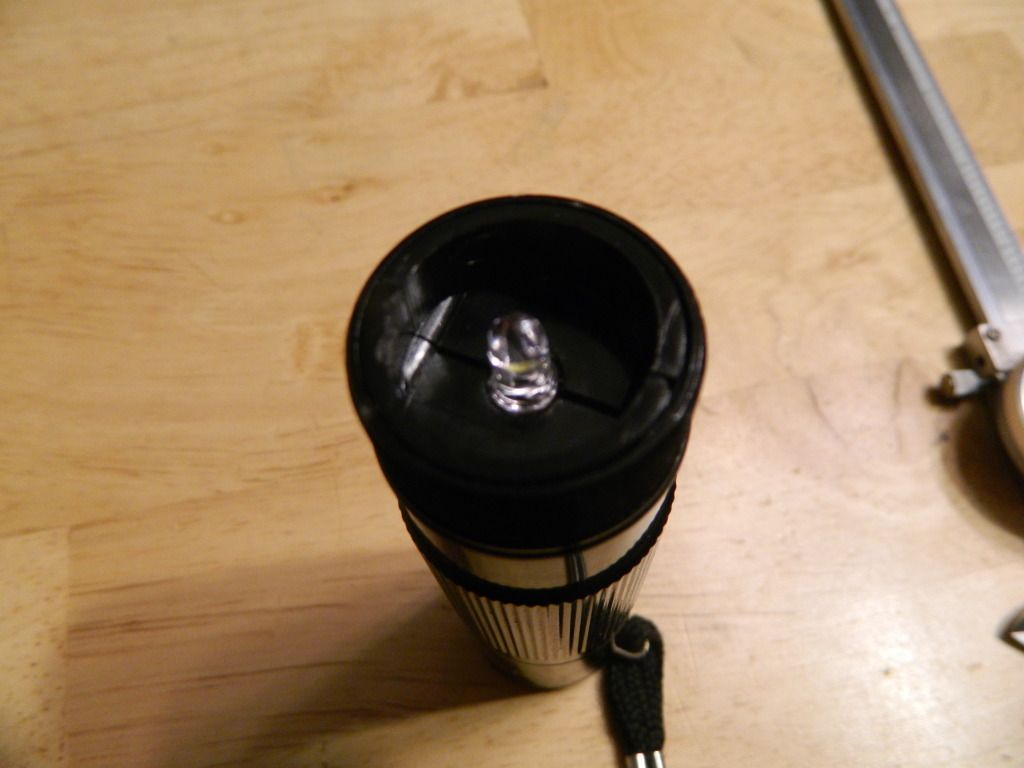
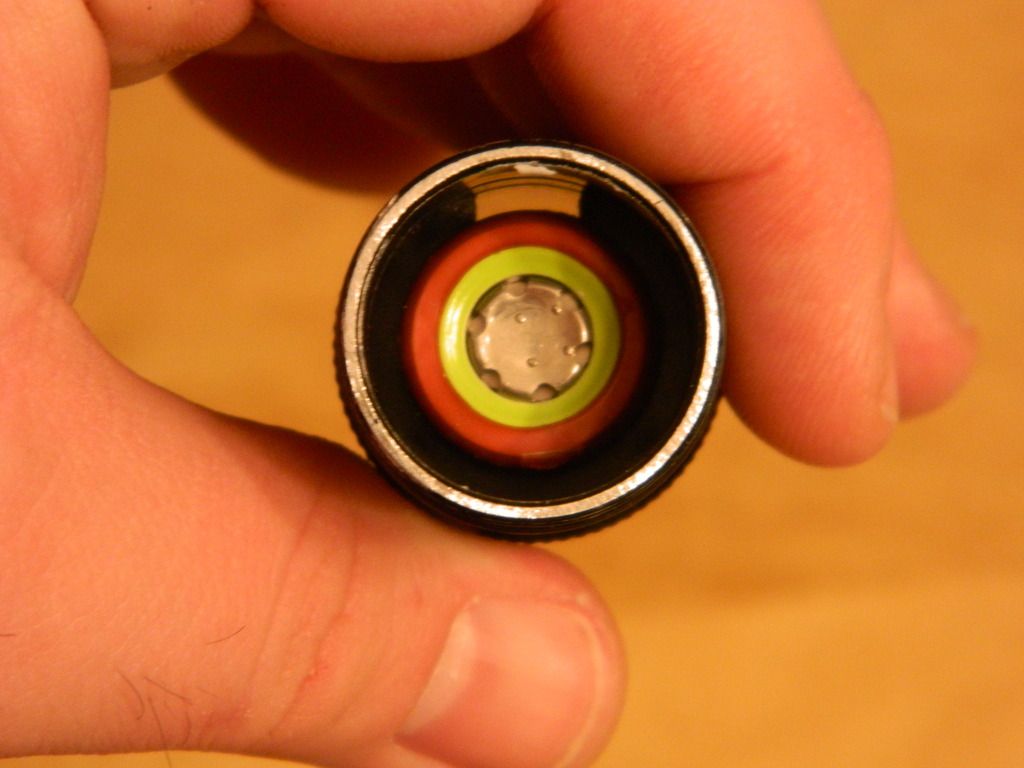
I guess mostly for nastalgia’s sake. I bought this Garrity 3-aaa with the single Nichia about 12 years ago and it faithfully served me on many backpacking trips and spent alot of time in the console of my car. I really like the beam profile, but hate the purple tint. So I was hoping to upgrade this into the modern era of Cree leds. As you can see from the pics this has a little shelf in the tube and a plastic “pill” that held the led and driver. I’m hoping to replace this with something and just have no where to begin.
I’m pretty confident of my soldering skills, but just not sure exactly what I am going to need to get this done. I know I’m going to need a driver and emitter, but not sure what I’m going to need for a pill to keep this all together.
Ideally I would like to switch this over to an 18650, and to have a very simple 3 mode flashlight with no disco modes. Doesn’t need to be bright or special. Just looking for an easy conversion to start and would love to hear what you guys would do with this.
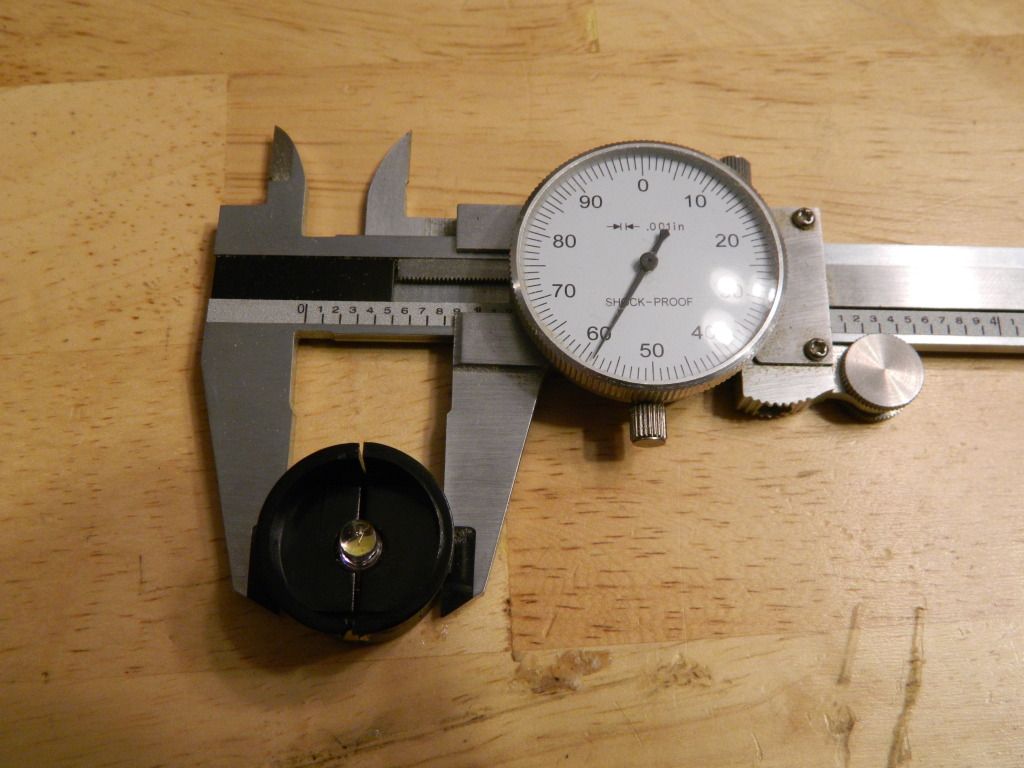
It’s hard for me to read the caliper from these small photos.
An 18650 battery is 18mm (.7086”) wide x 650mm (2.559”) long. Typically, we bore bodies to a little bit more for ease of use, so about .715”.
That plastic housing that holds the 5mm LED certainly has room available. My suggestion would be to duplicate that part in aluminum/ brass/ copper with room for a 20mm MPCB (the board a modern LED (XM-L/ XPG, .etc) sits upon at one end, and a 17mm driver at the other end.
**edit, sorry: decimal point in the wrong place. It would be an interesting flashlight with a 25” long battery….
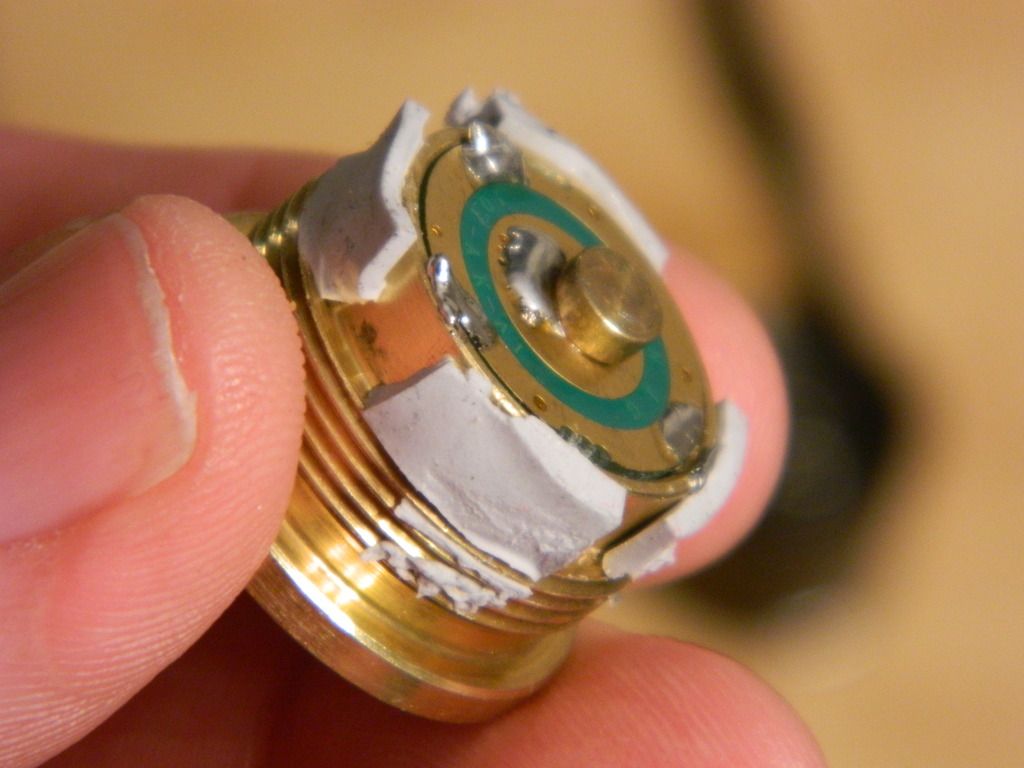
What I’m struggling with now is the negative contact. Currently the negative is running to a bare spot on the inside of the tube. I’m sure I can Jimmy and shim a pill in somehow, but the question is the negative contact. I don’t think the tube mates with the plastic holder because the negative contact is made on the side of the tube. So I don’t think the tube would mate with driver for the negative contact
Would the solution be to make a solder connection from the negative on the led to the tube?
(1) Plastic Pill: Modern LED lights generate heat, which conducts through the back of the LED. The LED is mounted on a metal circuitboard which then has a direct metal-to-metal connection to the outside body of the light. Your light has a plastic pill which severely limits your options.
Easiest is probably just to get a wide enough copper star and make sure the edges of the star are touching the body tube of the light. Slather on thermal grease around the edges and heat conduction should be fine for 1.5 amps or so. If you want to run at higher power, you’ll probably need a metal pill, which you’d likely have to custom-make.
(2) Battery length: 3xAAA is shorter than 1x18650: There may not be enough room inside the battery tube for both the star, pill, driver and new battery. This problem should be fixable. A custom pill could be made shorter than the stock plastic pill. Also depending on the tailcap configuration it might be possible to save a few mm there. Or you could dump the stock reflector and replace it with a shorter TIR optic, allowing the pill to move forward.
These problems are solvable, but this doesn’t sound at all like an easy project for your first flashlight mod. Rather than jumping straight into the deep-end you might have more success modding a more modern budget light and working your way up to this mod.
I think I’m onboard with everything Firelight2 is saying here.
I’ll underscore the fact that you’re starting with a pretty advanced mod. The car analogy might be that you decided to start a collection of personally souped-up drag-racing cars and for starters you’ll begin working on an obscure 1970’s Nissan miniature pickup truck. First you’ll need to gut the truck, remove the drivetrain including the rear axle - then have an axle shortened, get that slung under the truck with a driveshaft, plus figure out what engine might fit and fab mounts… then start doing normal drag stuff like clearancing wheel wells, tuning the engine, getting the torque converter or clutch and transmission picked out correctly, etc etc… that would be a terrible place for a beginner to start, right? Well…
IMO here are some beginner level tasks:
Beginner: Swapping a premounted LED+MCPCB solution with another one.
Beginner(+): Reflowing a bare LED onto a different MCPCB.
Beginner: Swapping a prebuilt driver with another one of the same size.
Beginner(+): piggybacking a prebuilt driver on a larger prebuilt (stripped) driver.
Beginner(+): spring bypasses
Beginner: Lego builds like a Solarforce w/ self-assembled dropin.
Beginner: Focusing reflectors w/ shims etc
Not beginner: Top-fuel 1970 Nissan micro-pickup
Now, with all that said - Firelight2 does bring up some potential saving grace by avoiding the custom pill. I’ll add another thought to that. None of this applies unless you want to move into some pretty advanced stuff for your first mod and feel comfortable with soldering, reflowing, physical hacking of various types… you could probably use the 3xAAA carrier with actual alkaline or NiMH AAA cells to DD a Nichia 219C due to it’s low vF. I have no real idea what your dimensions are since you didn’t post them in metric… (I honestly don’t know what units those are, they clearly are not actual inches. They don’t look like hundredths either, and now I’m out of patience guessing.) You could put a 219C on a big enough MCPCB to shove it down the tube for an interference fit like Firelight2 mentioned. You could either add a DD driver, which we’d help you figure out, or you could go fully DD I think. Actual direct drive might be best considering the losses you’ll probably see. Take a look at djozz’s results here for more info on the Vf vs output: Nichia 219C, testing a 5000K 83CRI emitter, comparing with a XP-G2 S4 2B and other leds
A. What units are these actually?
B. Does this thing include a reflector?
C. Very few members here have the patience to do the kind of cludgy, high-effort, low-return mod you are proposing.
1/2” copper pipe is 5/8” OD. You can buy it by the foot at the hardware store or a scrap dealer. Cut a piece to make the pill and make a cut down one side removing pi x the change in diameter you need to make it fit. Then cut and slice another piece and heat it to cherry red over the stove then open it up and roll it flat. Cut a couple pieces big enough to cover the end of the pill and solder them on and file/sand the whole thing round, smooth, and flat. A 15 mm driver will fit. It helps if you cut wire slots in the flattened pieces before you solder it up. You have an idea, just make things up as you go along. That’s what I do and keep using the good ideas and throw out the bad ones.
Sand off the anodizing. Then the copper pill can conduct to the tube. Likewise the spring at the negative end will need to contact bare metal. If the tube is big enough you could make a battery holder instead with both + and - at the driver end.
Thanks everyone for the help. I definitely have a direction now. The light is a mule and has no reflector. But after measuring I think I can find one to fit.
The caliper is in 1/10ths of inches.
Basically the inside of the tube is 23mm.
The plan at this point is to create a small pill that will press fit into the tube using a cut pipe as a sleeve like Rufus suggests to make a tight fit.
I’m planning on using a 20mm to 17mm adapter soldered on both both ends to retain the driver and emitter.
Then I can use a 17mm driver and emitter.
My question is this.
I’m going to run my negative to the driver and solder the negative ring on the driver to the pill, the same way it is on my convoy s2.
Do I need an insulator between between the mcpcb and the pill?
With the pill being part of the negative what stops it from shorting the led?
No insulator is needed or desired assuming you’re using a standard LED star (and not using one of the new Oslon LEDs). You should not use an insulator since you get much better heat conduction without one. For best results make sure your LED is mounted on a direct copper star, such as a Noctigon from Mountain Electronics.
Typical CREE or Nichia LEDs have 3 pads. The central pad is for heatsinking and connects directly to the star, which should have a metal-to-metal pathway all the way to the outside of the light. The remaining 2 pads for positive an negative contact are insulated. Only thing touching them should be the leadwires from the driver.
Sounds good. Don’t be too frustrated if you destroy the light or the something else bad happens.
Fortunately in most cases the LED’s thermal pad is electrically isolated from the +/- pads. While the thermal pad is electrically connected to any DTP MCPCB’s substrate, it doesn’t matter due to the isolation within the LED. So for example with a Cree XM-L2 or XP-G2 you’d be fine.
The last thing you want is to insulate things. I still think that Firelight2’s suggestion might be easier to implement than RBD’s, but that’s just my 2 cents. 26mm MCPCBs are available through Mountain Electronics, I’d consider trimming one of those down a good way to get the tight fit you need. You could even use the copper MCPCB as your BAT- hookup for the driver.
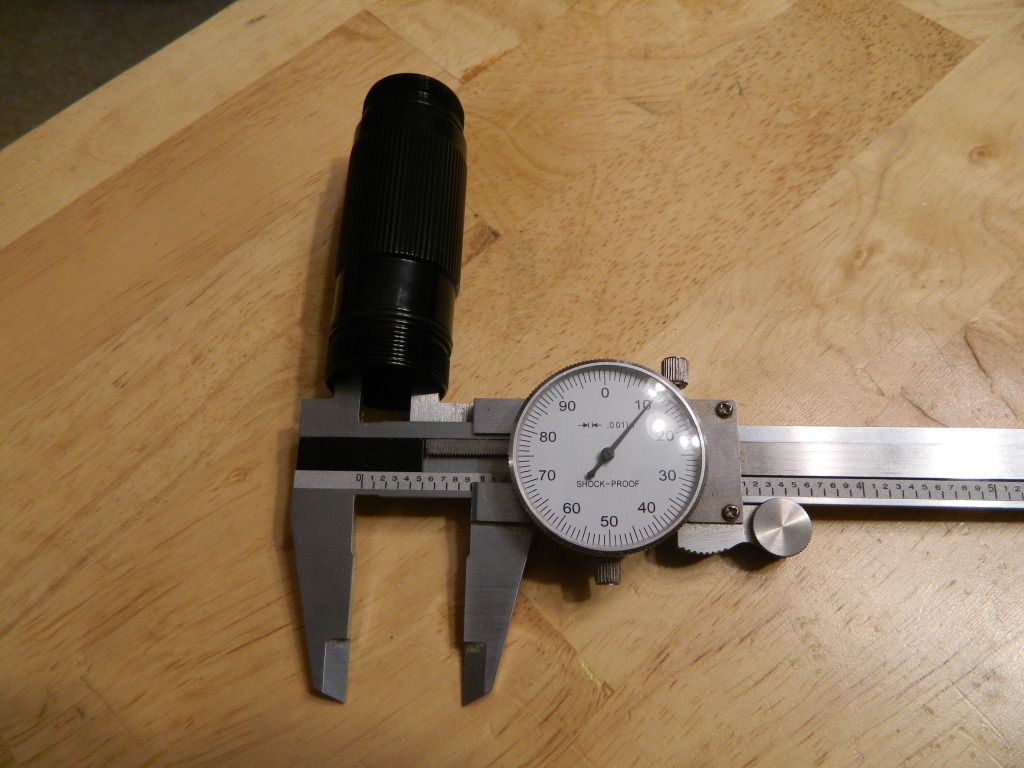
Lol. So I did some tinkering. It turns out a c8 pill rests perfectly on the top of the tube, and the head snugs it down into place perfectly and holds it tight. The retaining ring in the tube holds an 18650 perfectly with no rattlr
I put it all together with an 18650 and it all fits like a charm because the c8 is shorter than that plastic led holder
So… I’m going to take the weekend off.
On Monday all I’m going to need to do is take the annodizing of the threads so that it mates with the pill, or create a connection between the 2. And I should be in business.
I’m sure I may have to tinker with the fit, but the c8 pill looks rock solid to me.
I ran the c8 up against garrity head and it made a similar beam profile.
I’m pretty excited I don’t have to make a custom pill.
This might actually work, and it might be super easy to complete.
Once I get this thing operational I just have to address whether to keep the head and lens the same or try to squeeze in a reflector.
I have no clue if the beam will look like garbagr but I can tinker with that as well
Good stuff. Don’t worry if things don’t go as planned, you’ll just come up with another plan and perfect but unfinished never works better than imperfect but finished. Enjoy the process as you will only do one ever first mod. Also, there are lots of 20mm optics available, many that are self centering.
This project is back in business. Took a while to get the parts I needed. I’m putting pics up either tonight or tomorrow.
It has a single 18650 with a c8 pill in the head. I tried a few different LEDs and all of them end up with a square beam like a zoomie.
Last piece of the puzzle is knocking out the glued plastic optic and replacing with something that will hopefully get me back to a round beam. I can not find a reflector to fit to save my life so it’s going to stay a mule.
As you can see the plastic retaining ring holds an 18650 cell perfectly! what luck.
It’s an Osram LED 160-220 lumens 120 degree led. Cool White with some silver thermal paste under led
It’s a standard run of the mill C8 pill from fasttech with a Nanjg 101 driver. silicone thermal cubes to take up
the gap between the host and the bottom part of the pill. Small brass pill soldered to the driver so i can use buttom tops.
Yeah it’s a mess! but it’s a tight pressure fit into the tube, and it pretty much will fit any 18650 I own
The results!
The original flashlight beam was nothing more than a purple blob. Traveled about 10-15 feet at best.
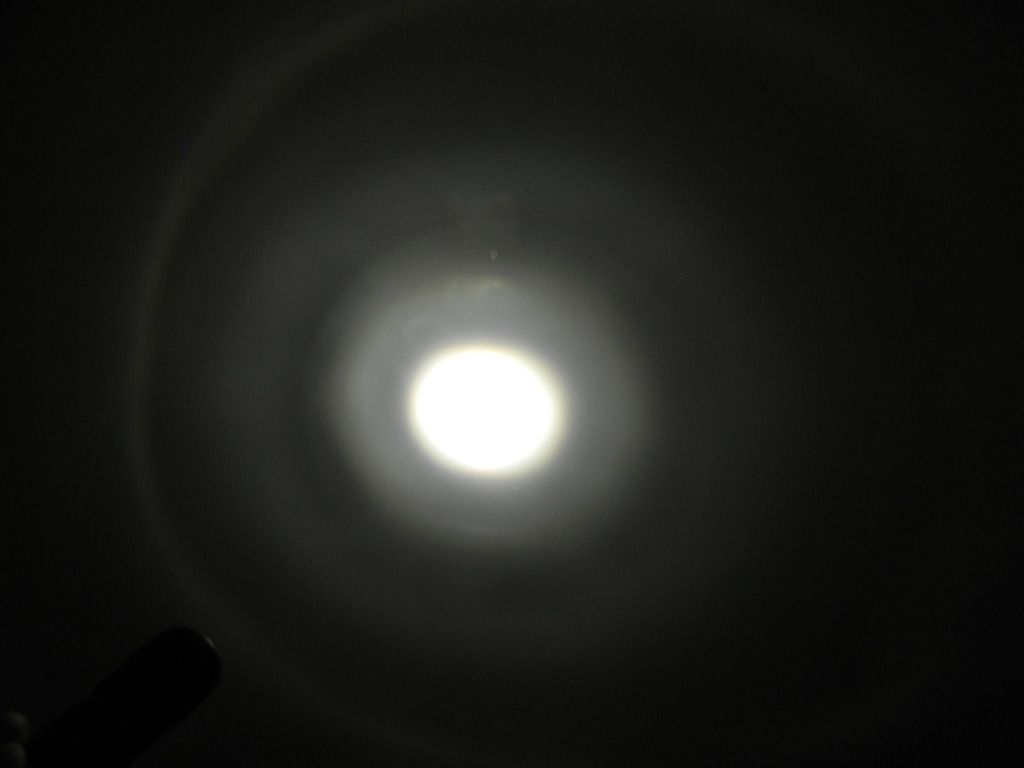
With the image over exposed you can see that there are still alot of artifacts and rings. Going to need a better optic.
Shot of my barn at about 20 yards.
OK! so was the project worth the result… probably not. Did I learn a boatload along the way, YES! I’m still going to replace the optic with something that will hopefully smooth out the beam and give it a nicer appearance. The current optic has many flaws and creates bad rings. I’m thinking maybe a diffuser? I really want to keep using this light for what I originally used it for, which was a reading light for when I’m camping.
I did have an xp-g2 led in there for a bit… it was substantially brighter, however it gave off a square beam with alot of flaws. Not the best LED for a mule I guess.
But the fit is perfect on this. The C8 pill sits perfectly on the tube and the head holds it in place with zero rattle. Once the tailcap is on the battery holds in place with no rattle either. I had to remove the annodizing on the top of the tube so that it makes contact with the pill.
I ended up getting 1.08a at the tailcap.
so Im definitely open to suggestions about replacing the optic. It’s a 20mm so I know there are a ton of options.
I just want something that will turn this into a nice reading light with a smith gentle round beam.
Thanks again for the ideas and tips along the way. This definitely made the Convoy m2 build I just did seem like a walk in the park compared to this.
If you’d like to try a defusing film, DC Fix “Sand” gives a heavy amount of diffusion. Search on BLF and CPF for some more info. I’d say that switching back to the XP-G2 w/ tight focus might make sense if you were going to add that much diffusion.