

Haven't seen any mod threads on this light. It's got a few quirks. So here's some info on it.
I bought it in this deal here because it had a tail clickie switch and a side momentary. I than sat on it forever. It's a pretty nice tube style light with a nice finish and machining. I don't normally like lights that narrow down at the top, but I have found it makes it much easier to put in your pocket. It has a nice grippy feel to with all the fins and such.
Tom E recently created firmware ("FW") for the Attiny 25/45/85 that can handle such a switch arrangement. So that prompted me to finally do this build. This also seems like a good host for testing thermal protection code as the light is small and heats up fast on DD.
Ingredients:
- F35 host
- Nichia 219C (D280, 5K tint, 83 Typ CRI)
- Wight's 17mm DD +7135
- Helios' momentary switch board and momentary switch
- Copper coupling and small bit of copper pipe and copper sheet (Optional)
The LED shelf is at the narrowest point in the light.
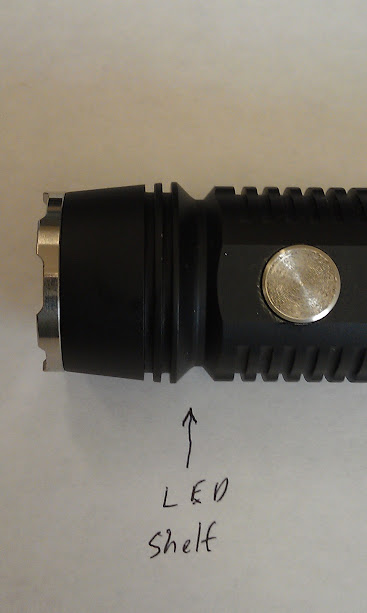
There seems to be plenty of thickness to pull away the heat, but it does result in close lead holes. I didn't want to use a 16mm base as I wanted the heat to get at close to the edge of the shelf as possible. So I just machined out a couple slots. In hindsight, I should have just drilled a couple holes in the MCPCB.

I like to fill the indentation on the back of the Sinkpads with solder. I really like that they press up the copper to be flush with the electrical contact pads.

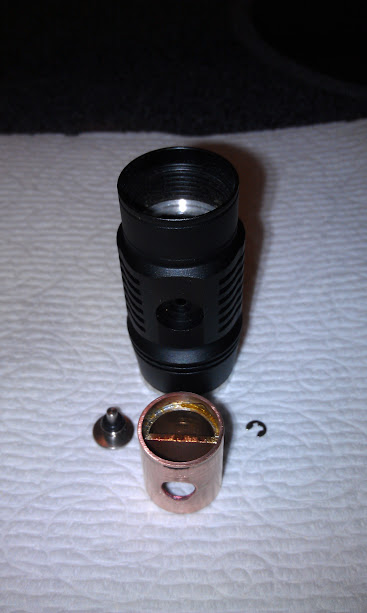
Here is the driver compartment. It is meant for a 20mm driver.

Here is the plunger for the momentary switch.

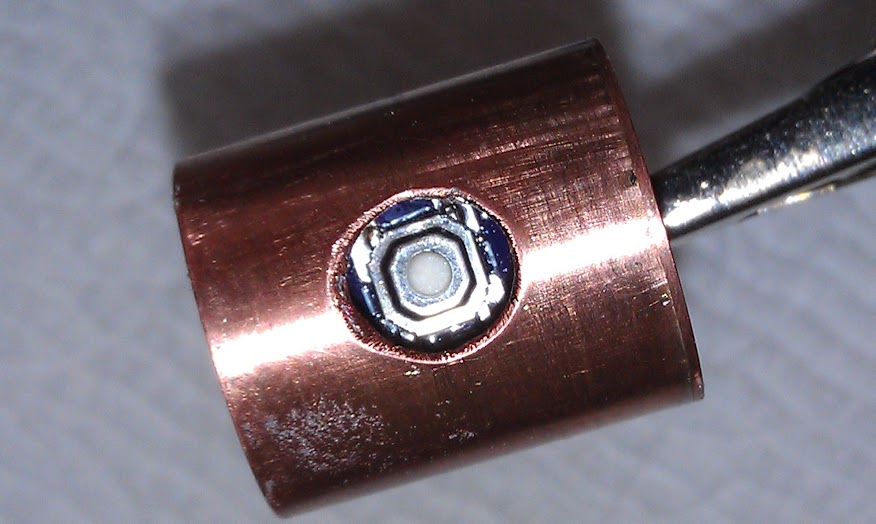
Covered one of the back contact pads on the Helios Momentary Switch PCB with Kapton tape. Then reflowed it to the copper adapter (See below pics).


You could use a wine bottle cork, plastic, compacted aluminum foil, etc to create a momentary switch holder. I used a 1/2" copper coupling and half cut of 1/2" copper pipe. I went this route because I need something to hold a 17mm driver too. Plus it will help deliver heat to the driver for thermal protection monitoring.


The top has to be notched to clear lead hole.


The 1/2" coupling is a very hard press fit. I totally don't recommend going that route. It was a real PITA to get pressed into place. I wish I had just slit the coupling length wise. That would also facilitate fine tuning as it would be removable. The coupling is a tad shorter than the driver bay so that the driver will stay centered.
Driver with a Attiny 45 SU. The inside OTC pad will be used for the momentary switch. The other side of the momentary switch is grounded via the reflow to the adapter.

Back of Driver. Used a short piece of 3/8" (I think) copper pipe and then put a spring inside it. The cell makes contact with the copper pipe, but the spring will keep contact should cell bounce.


The host tail switch is junk. It didn't work well and failed right away. I think it melted inside, but I have not checked yet. I need to find a replacement switch. For now I just have a copper disk that I pounded into a dome shape.


I have not taken any current or throw measurements yet. Puts out a lot of light for small, highish CRI emitter. Gets hot pretty fast on turbo. I may eventually go with a bigger emitter for more flood, but had to see what this emitter is like. This 219C is pretty sweet. I like warm tints but I find this tint to be quite nice. Renders colors nicely. KKW has a few for sale here.
I ordered some 4K from Cutter. They will be great mixed in a multi-emitter light. Starting to mod a Trustfire 12X type light (remember RaceR86's Retard Light?) for them.
Really bad conditions for beam shots here (raining and very humid), but I will take some soon.