Fasttech has now resistors on stock…
http://www.fasttech.com/products/1/10003143/1234400-0805-022r-smd-precision-resistors-100-piece
ZY-T13 arrived, keen to try the mod - are these the right resistors? (yes, complete noob)….
http://australia.rs-online.com/web/p/surface-mount-fixed-resistors/7215571/
It doesn’t matter which form the resistor has, as long you are capable to solder it in place.
so the linked one should do it fine.
Wow, did anyone try these? They look really small, discription says something like 3mm?
The numbers give info about size
0805 0.08inx0.05in=2mmx1.2mm
real pain in the butt to solder ![]()
except with the solder paste on clean board ![]()
haha… tell me about it. I did this about a month back and using a cheap soldering iron I managed to unsolder both stock resistors and “loose them”… haha…
After I found my nicer iron, I ended up just removing both resistors and soldering across both resistor contacts with a trim pot (the 2 resistors are in parallel, so both pads can be joined on the same side).
Just a quick question tho. When setting the pot, I didn’t have a decent meter on hand so just set it by “feel”… I mean… set it really low, and turned it up ½ turn at a time until the light flashed but didn’t turn on (protection on batteries?). I then backed it off ¼ turn and left it…. It works fine.
Using the meter today I found that it is drawing just a hair short of 2A at the tail. Am I correct to assume that 2A at the tail = 4A at the driver * 80% efficiency = 3.2A to the emitter? (which is on the high side but still safe).?
I have run the light for just over 15 and it got warm but not hot. For longer runs I’ll just run it on medium (which draws approx 0.75A at the tail).
Got my light from Wallbuys group buy.
Nice pcb, 2mm thick and about 25mm wide. But the use of thermal paste was horrible. Did not cover much.

I fixed the thermal paste issue (not pictured). After that I wanted to try a trimpot mod. Got mine from Fasttech.
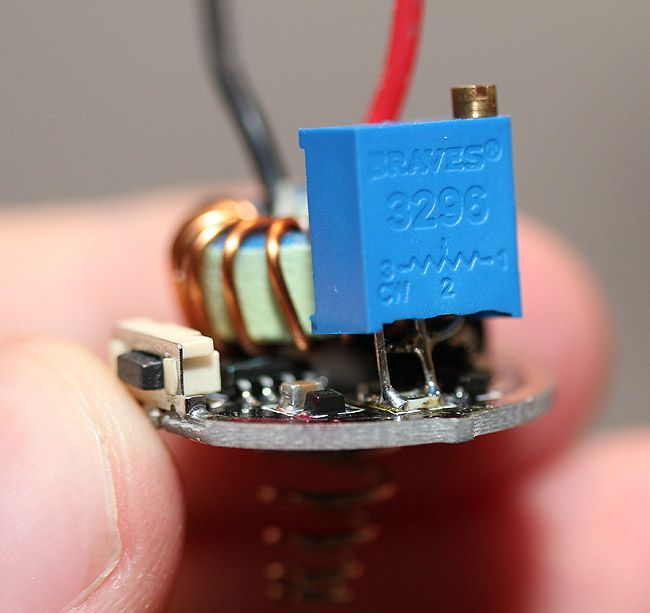
Adjusted for 3+ amps to the LED.

Tailcap reading after light was assembled, 1,55A.
Before mod, about 1A. I like this light now! Especially for the price!
You used this potentiometer, right?
nice mod, I like how the pot stands there like it ever was there.
Great post Race! I wonder how hard these drivers can be pushed before they become unreliable? All 5 of my T13’s had the same poorly applied thermal paste treatment as yours. Its hard to believe some of the shoddy work that comes out of china. I would think a monkey could be trained to do far better.
Yupp!
I don't think that the monkey would accept that price you paid for this flashlights, all 5 of them... P.S. I don't have any T13...
Thanks :)
Thanks for the feedback guys.
You have 5? I declare you to be the person who should push it further! ![]()
I only have 1, so I do not want to ruin the circuit board. ![]()
But I have played with the thought of 1 emitter with a deep reflector for some throw and 5+ Nichia on small TIR optics around. All inside the head of a T13 with a custom pill. One button for throw, one button for nice flood. Something like that…
That could have been a nice project in case the stock driver got fried…
I might put a 20mm cooper PCB in it some time in the future.
Or ill just buy the ZY-T08 and add XM-L2 on cooper to that instead.
In that light I could just push it to 4A or more with stock driver, and if something overheats and break. Simple driver swap.
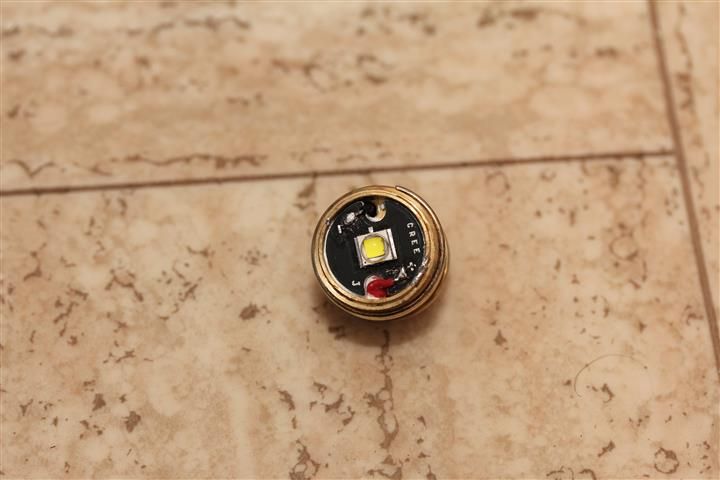
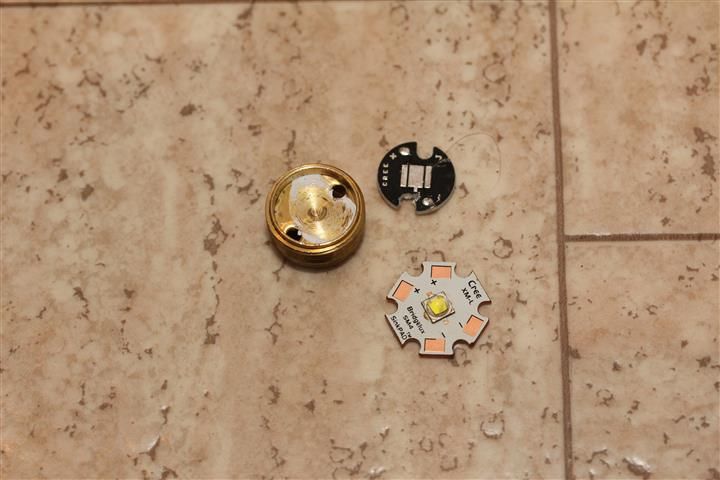
I lapped the base of the heatsink module because it was not finished right and had machining depressions in the aluminum, Used a flat steel screw with sandpaper and a drill I also lapped the star on a piece of glass so the heat can be transfered faster, using AS5 I can really tell that there is a good thermal path to the body, I also sanded down the white centering ring to about half thickness using sandpaper the beam becomes smaller and more intense.
Waiting for XM-L2’s in U2 bin to be available to upgrade it.


Can you please tell us how the screw turned the sandpaper without ripping yet? A pic might help.
3M sandpaper glued to the screw using this spray adhesive I bought at hobby lobby, once it dries it holds great, then just use the drill at low speed, it will polish the heat sink just fine.


Pics taken from this thread over here
Thanks Alex, and thanks for the link.
Just got 156 155 kcd measured on a mod'ed T13 - resistor mod to 1.7A tail (3.4A effective), de-domed XM-L2 T6 0D/SinkPAD, UCL/p lens. Maybe $18 or so in parts. It is de-domed, so has the usual characteristics (more neutral tint, loses brightness in flood) but still does over 1,000 1,030 lumens at 30 secs. If you did without the UCL/p, maybe $10-$12 in parts with results in the 140's kcd146 kcd.
Overall, a pretty simple mod - used the FT resistor trim pot.
Edited - see above (tried from memory at first)