what a great update, looks like you’re doing a fine job! Can’t wait to see the finished product and beam/ grass shots I don’t have much to offer other than it might be worth trying out an elliptical optic and to think about putting another light as low as possible. I’ve tried mowing with a headlamp and it’s nigh on impossible to see where you’ve cut as there aren’t any shadows to see. The lower the light, the longer the shadow cast or, put another way round the lower the light, the smaller the difference in height you can easily see.
now, the only downside would be that you can’t see round corners as well, so if you’re planning on doing some high speed/ high G cornering, you may have problems.
Hmm . . . wonder if I could deflect more light downward. I bought these 60 degree optics for this mod. I also have these 30 degree optics based on one of Old Lumens Mini-Mag mods. I did quickly try attaching the 60 degree ones but they wouldn't attach and I didn't want to force them. There is also a plastic "lens" which covers the entire front headlight area (see pic in the O.P.) which has some sort of elliptical diffusion built in. I'm hoping I don't lose too much light putting that back on. I need to play with "lens cover on", "lens cover off", "optics on", "optics off" to see what works best. I was hoping for a wide bright flood (little throw) so as to work for "cornering" too. The single XM-L flashlight test was good enough to get by so I don't see why these 2 XM-L's can't work even better.
Umm . . . no high speed mowing happening! And when I'm not mowing but just using the mower for other purposes there aren't many obstacles to deal with.
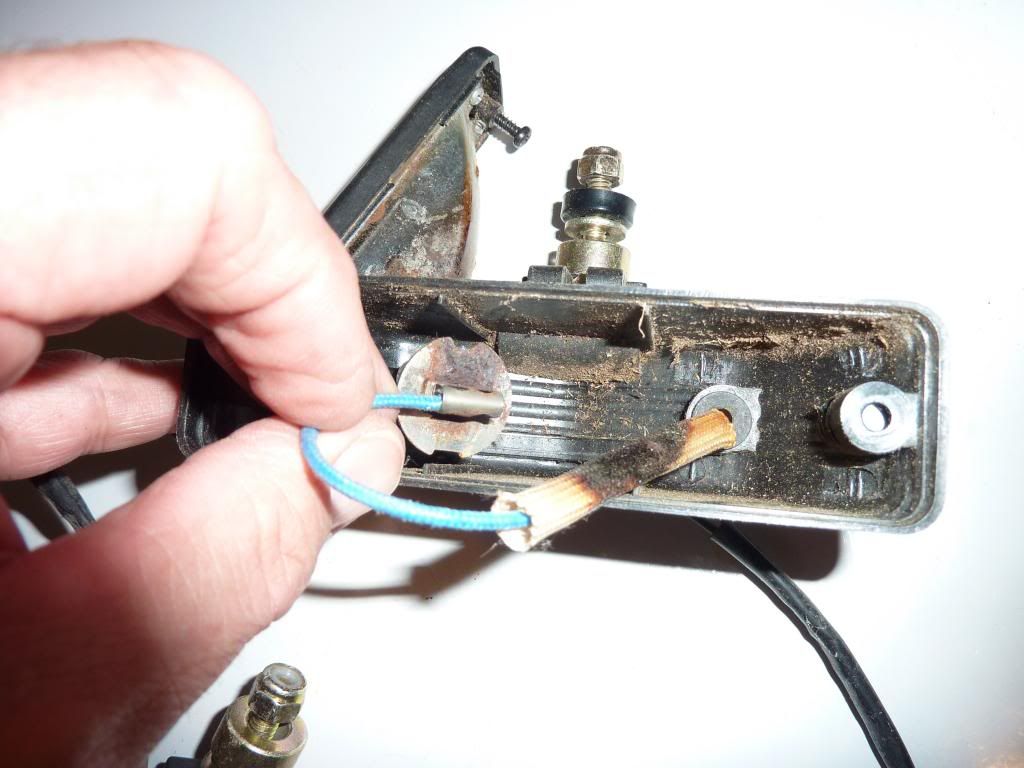
The headlights on my mower burned out some time ago, a combination of heat and moisture. The environment that have to live in is just too extreme. Here is a pic of the original Halogen fixtures.
From the picture you can see where extreme heat from the halogen bulb scorched the wire and where moisture corroded the socket for the bulb. Both fixtures failed this way shortly after I got the mower. So whatever I do to replace these has to be better than the original. garrybunk, I worry about those black heatsinks that you have mounted your XM-L’s to. From your picture, it appears that they are mounted under the hood, in proximity of the engine. It gets really hot under there when the engine is running. Additionally, the heat sinks, being black will absorb radiant heat from the engine and perhaps the muffler. Without the LED powered, it is quite possible that they could reach 200-250 degrees just from the heat absorbed in the engine compartment.
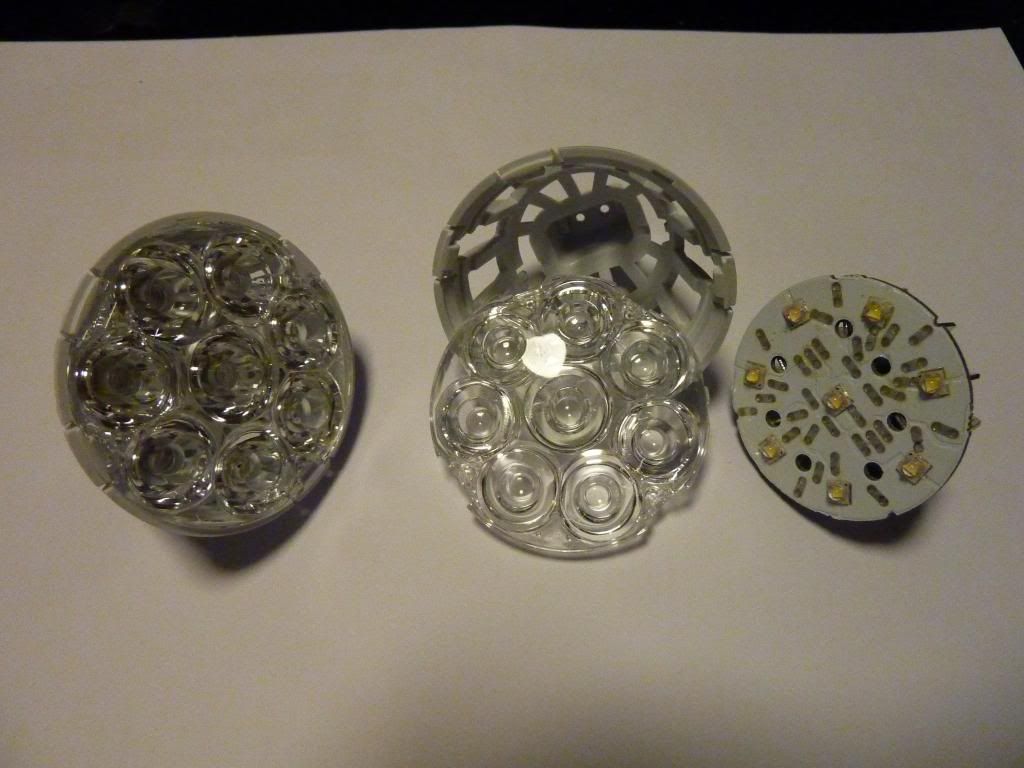
Because of this, I have postponed (procrastinated) doing anything. Anyway I was in Lowes the other day and ran into these on the clearance table. They were only $1.25 each and I couldn’t pass them up. There were 7 so I grabbed them all. My first thought was to use them on my mower. They are M16 base 12V with 8 emitters each. Rated at 313 lumens each (not Chinese Lumens, but real lumens) I would like to mount these in a separate enclosure, water tight and away from the heat. Even so just being outside in the heat of the day might be too much for them.
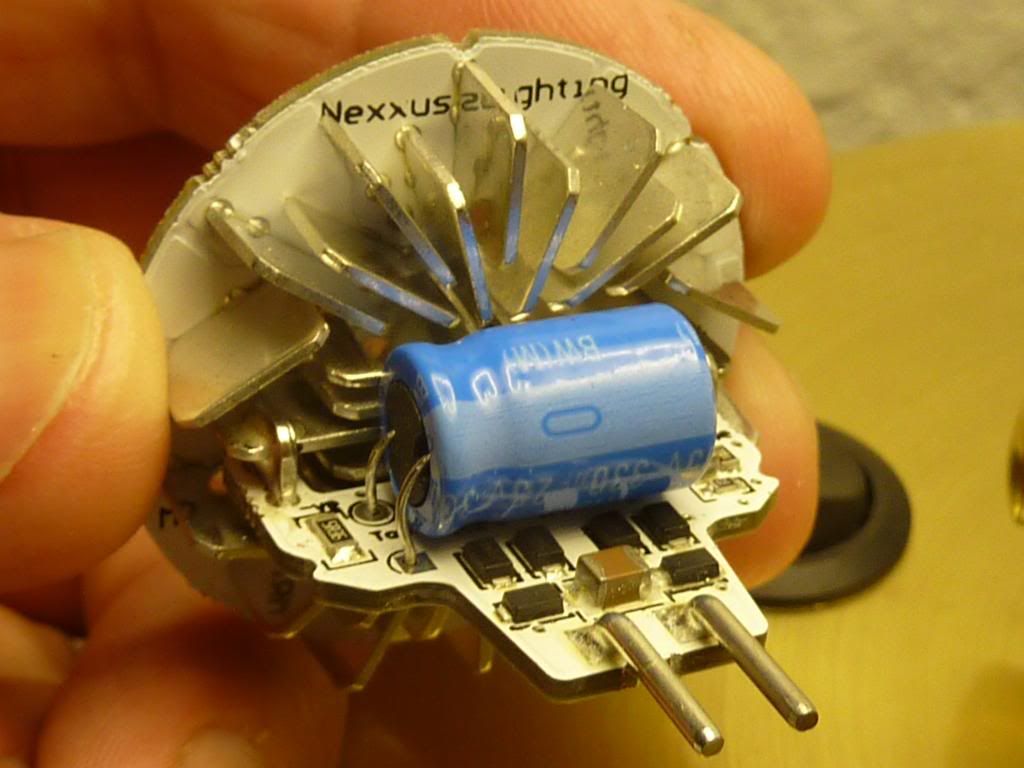
Each one has its own 12V driver with an integrated bridge rectifier, it’s those 4 diodes in a row near the pins.
I think these could work well if I can ensure that they will survive. meanwhile I just continue to procrastinate….
Of course you found a deal at Lowes! :) What tint are those? I briefly thought of those MR16 bulbs, but they weren't bright enough (just judging lumens #'s) and I needed/wanted a nice neutral white tint in order to see the detail of cut vs. uncut grass.
Yes, it sure does get hot there. I don't have any other solution though except to perhaps put in a sheet metal deflector of some sort to keep the heat from the muffler down low. With my new setup (just got those LM2596 boards in today) I will mount the circuits back under the "dash" away from the heat. I'll just have to see if the LED's survive.
You might want to measure how hot those sinks get on there own, while under the hood.
Yes, the sheet metal would help a lot. You did a good job - you realize you started this thread 18 months ago right? Perfection takes time!
Here is more info that you might want to know on this light.
4 - 7 of these would be really bright!
Basically it says 304 lumens, 2829K and CRI 82.9
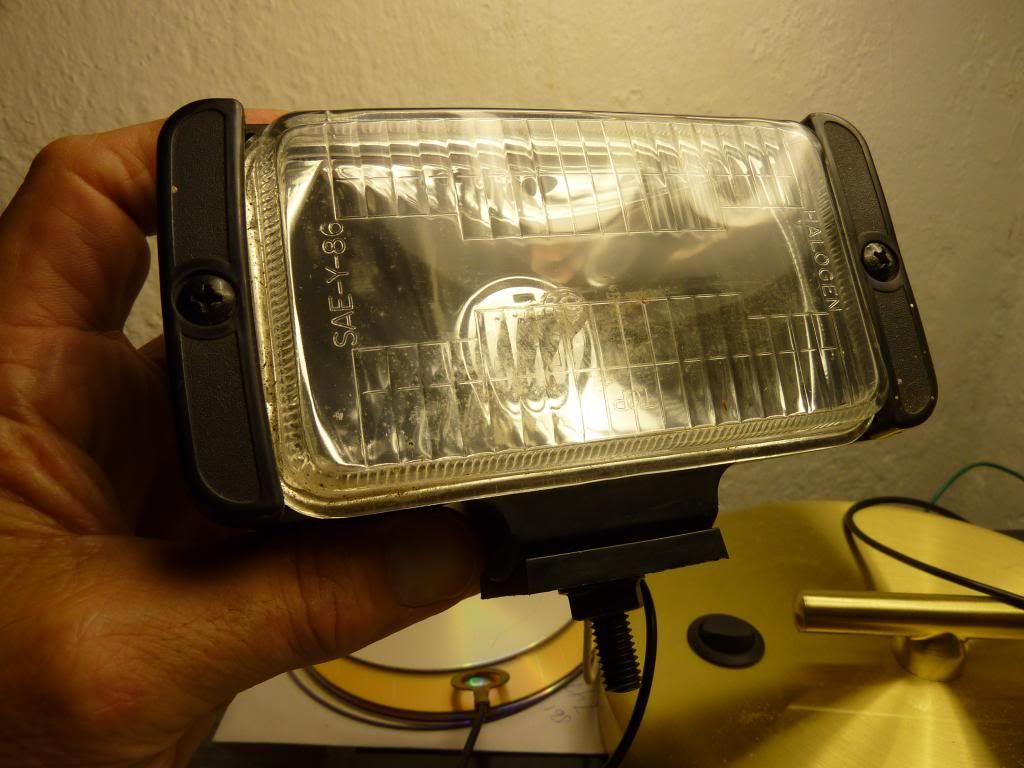
If I don’t use these, there is always this as the easy way out.
I was concerned about too much current draw with halogens. I don't think the lawnmower's recharging circuit can handle too much more than the stock bulbs.
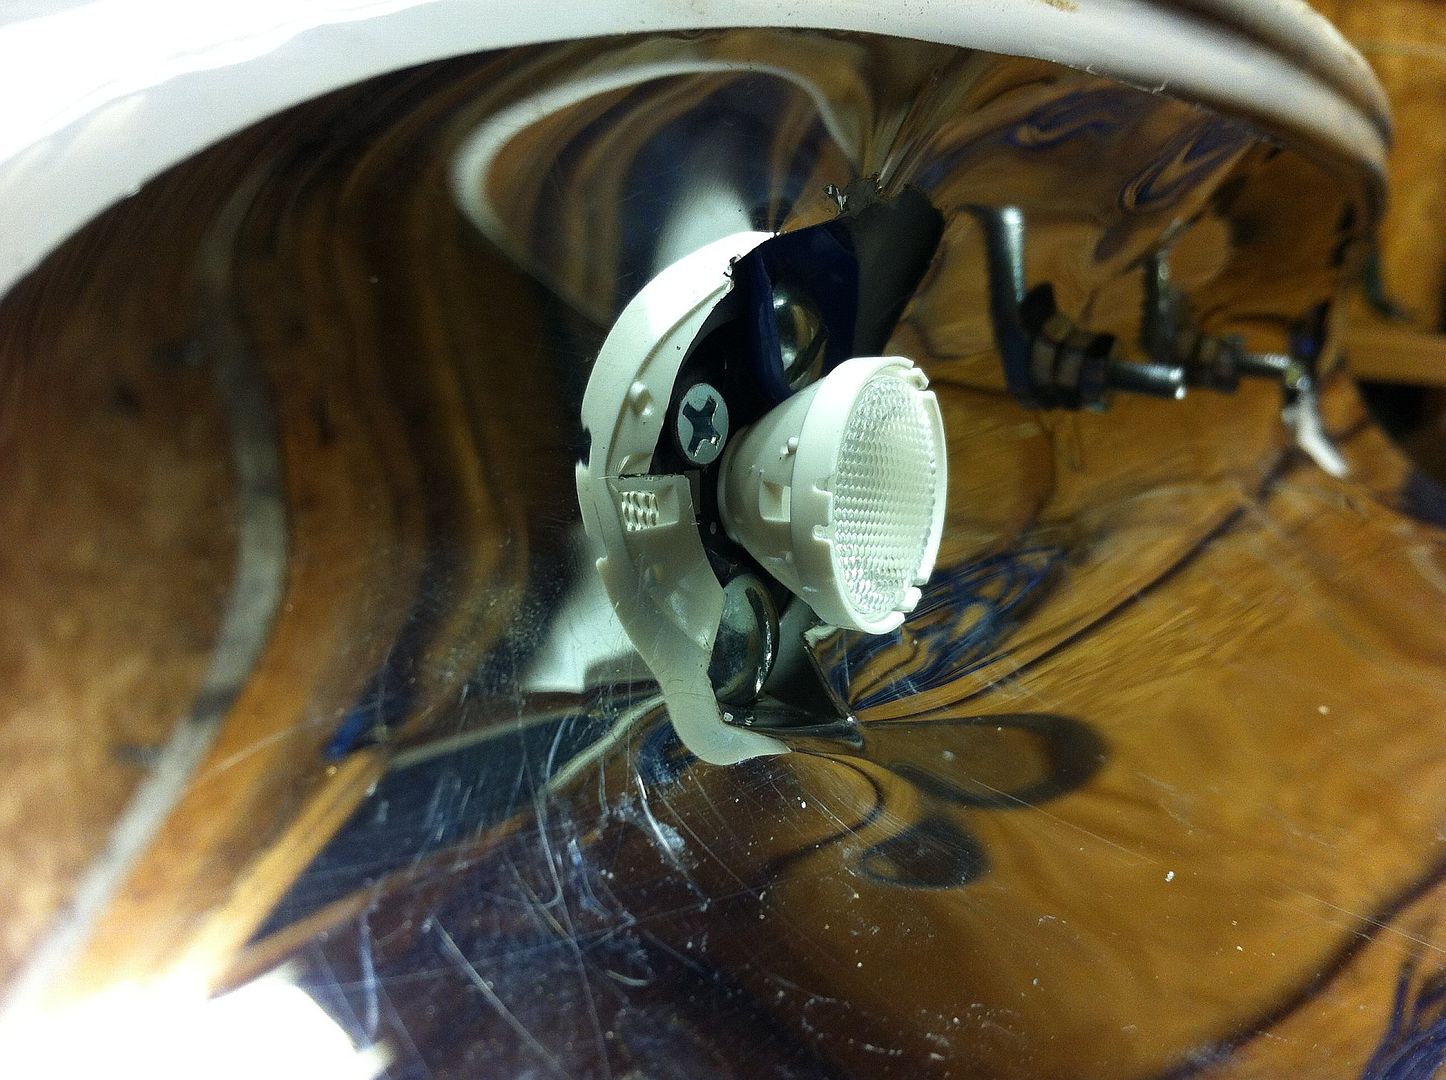
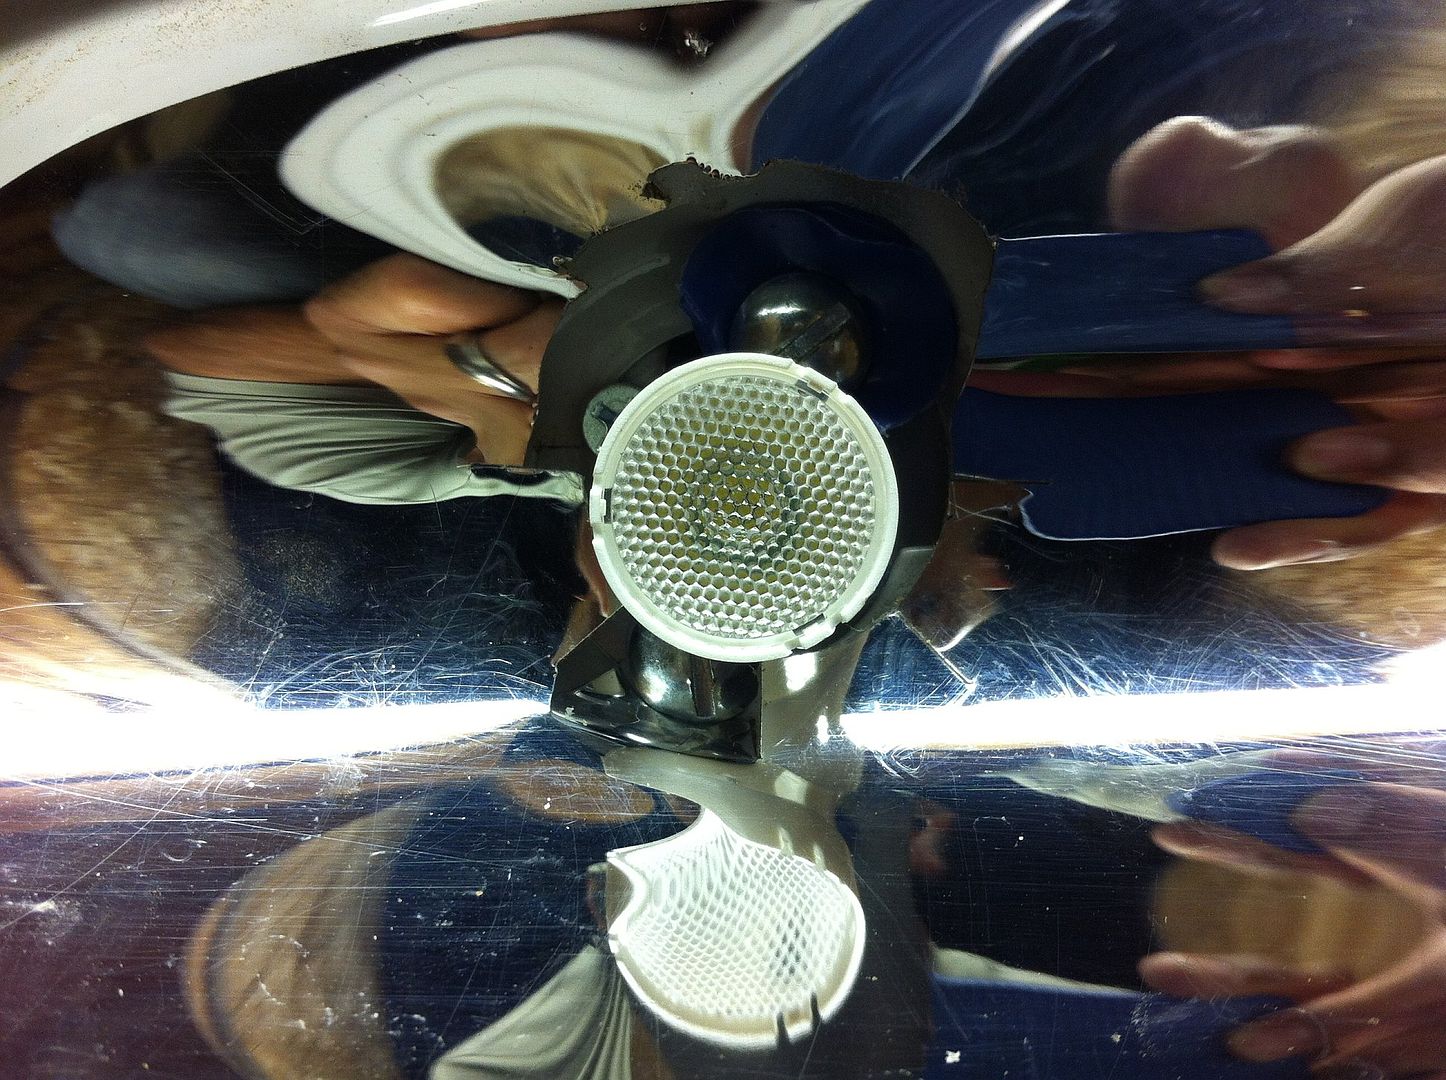
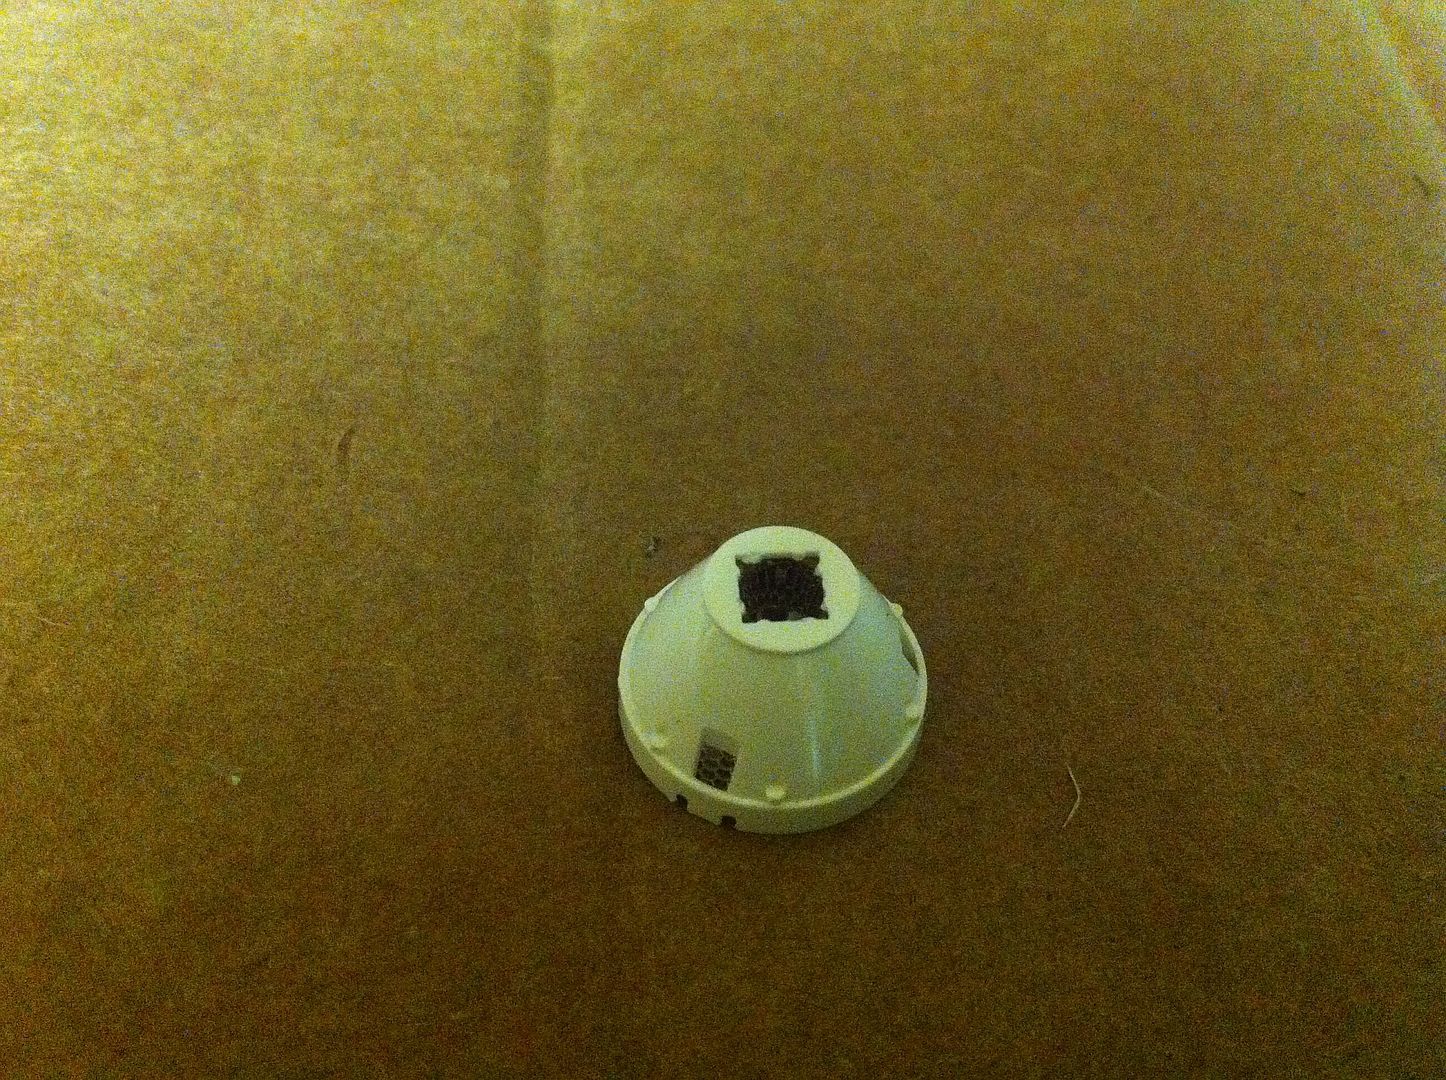
OK, I now have a problem with my 60 degree flood optics. I guess they were supposed to just snap over the emitter, but they don't. They will barely hang in place but then just fall off. So I need a way to hold them on that isn't permanent (as I will likely be swapping out these emitters for a warmer tint soon and don't want these all messed up). Any ideas? I was wondering about using very little high temp RTV silicone. Will that work? Anything better?
I think hot glue melts around 300-400 degrees F and it generally can removed cold fairly cleanly. Question it, would it soften up too much from the engine heat. I have used them on 3 watt emitters driven as hard as they could and the glue held up well on some off road lights.
Clear RTV silicone works fine, just use 3 equally spaced blobs and try not to get it all the way down into the joint so it'll be easy to cut with a razor later.
That holder is just to locate the optic on the LED, it doesn’t hold it there. I’d use non-acetic acid silicone as it is flexible enough not to crack with vibration or shock. I’ve tried hot melt glue and 5min epoxy and both eventually failed with use. I put a very thin line where the holder will sit, squish the optic down and let it dry. Then I build up the silicone between the star and the holder. To remove the optic, just pull and it comes right off. The silicone is a bit of a hassle to clean off the star, more so than hot melt glue, but it doesn’t take long.
to get more light downwards, you’ll have to physically tilt the LED down - the 60deg optics you have will throw a bit more down, but waste just as much upwards, which is why ellipticals are so neat for this sort of application. Still, optics are cheap and they’re not hard to swap in and out until you find what you want.
As for heat, a baffle would probably help, but at the end of the day you just have to try it and see. If it doesn’t work, I’m sure you’ll figure out something else!
Ok, I thought regular clear RTV wouldn't withstand the heat. The "non-acetic acid silicone" - think I may have trouble identifying that. Is it clearly labeled as such? At Home Depot?
I thought Hank's pic on the product page showed the optic "clipped", guess I was wrong.
Ok, I just did a little goggle-fu and came to the conclusion to try that as "neutral cure" (ie. non-acetic) silicones are hard to come by and somewhat expensive.
heat won’t be a problem. It is awkward to find - I spent a while in Home Depot reading the labels to find one that didn’t have acetic something or other in it (it makes the acetic acid/ vinegar smell as it cures). Can’t remember the name of it, although I can check my tube when I’m back home on Sunday.
You can probably use any old silicone for this, but it’s not recommended for electronics, especially in a sealed space, as the acetic acid fumes will corrode circuitry. I had this happen on a light I made many years ago, so I’ve avoided it since then.
Without reading through all 5 pages of this thread.
Say I wanted to convert my H3 driving lights (Same position as fog lights) to an MT-G2 emitter is there a driver available that doesn’t require modification and I can just wire it in and would be good to go? Suitable for automotive voltage range and with around 4A current output?
Since you don't need multiple modes, just on-off, forget the flashlight drivers and use one of these: http://www.ebay.com/itm/181089350031
Voltage & current output independently adjustable. I would run both LEDs off one board and powered by whatever supply voltage the original wiring sends to the original driving lights, but I'm sure at least a few folks here will say something about transient spikes and fire and instant death... but in practice, you just plug it together and it works. 'They' also can cite mountains of data on how running multiple LEDs in parallel will never work, inevitable variations between LEDs means one will go into thermal runaway and fail which then sends too much current to the other LEDs and then they fail too and then you catch on fire and die a horrible death... but LEDs in parallel here in Non-Theoretical World just work with none of the promised doom and gloom ever showing up.
But, LEDs are not likely to give an acceptable beam pattern in the original reflectors/lenses. You might be better off starting from scratch.
hahaha I see. Thanks for the help. I would prefer to run them independently of each other though if possible. They are currently plugged in as two separate lights and I would like to keep it that way. So I assume I would still need the same sort of driver just at 5A instead of that one which is 10A?
As for the beam pattern, it is not really of much concern to me. I don’t use these lights anyway. I really just want to experiment with how it would look. With what I have planned it will be completely reversible and I can just chuck the H3 globes back in if necessary.
EDIT:
What about one of these ones… eBay LINK Is 5A at 5v (25w) sufficient for a 6V MT-G2 as sold at IOS?
Using two regulator boards would keep the wire runs shorter, and would let each one run at 5A so they'll run cooler.
10A is the max, there's a pot onboard (blue rectangle with brass screw head on top) to limit the current, and another to limit the voltage. In practice the way you use it is to crank the current adjuster to a bit higher than your desired current (say 5.5A - the boards will survive a short circuit through a DVOM ammeter, that's the way they suggest to set them before connecting the load), then connect the LED and slowly adjust the voltage up until the current hits your 5A target.
I get it now. I didn’t read the specs properly before and didn’t notice the output is adjustable.
Did you check out the link I posted previously? What are your thoughts on one of those drivers? I like the simplicity in that its a set output and it is already in a sealed housing which makes installation easier. As these will be set up behind the front bumper low to the ground so being isolated from the elements is important.
The only thing though is I am not sure how the LED will run at 5v 5A when it is rated at 6v?