I wanted so bad to do that! ![]() Didn’t want to ruin the surprise though.
Didn’t want to ruin the surprise though. ![]()
Update bump.
And just like on my smaller AAA light, that looks AWESOME! More fins looks kick aus, deeper fins, yeah it looks really good. Nice choice to flush the fins, makes it more elegant than aggressive. ![]()
Scott, you took the pic from the wrong side of the light (you’re in the shadows) would help to fill in the light, use a white card and bounce light back in if you have to. ![]()
that means speechless... in case anyone was wondering 
FYI, I slipped the pill into the fins after reflowing the LEDs and the fins were instantly hot so thermal transfer is very good. Still haven’t had the time off yet to finish but cutting down the tube is next.
The driver is potted into the pill and wired to the LEDs. I pressed the pill into the head and dropped a 14500 and spacer into the tube and woohoo it works! 15/100 on the mods and nice and bright on high. This weekend should see the head finished and the battery tube well underway. I’ll post pics and another update tomorrow.
Sounds good. Any more pictures coming?
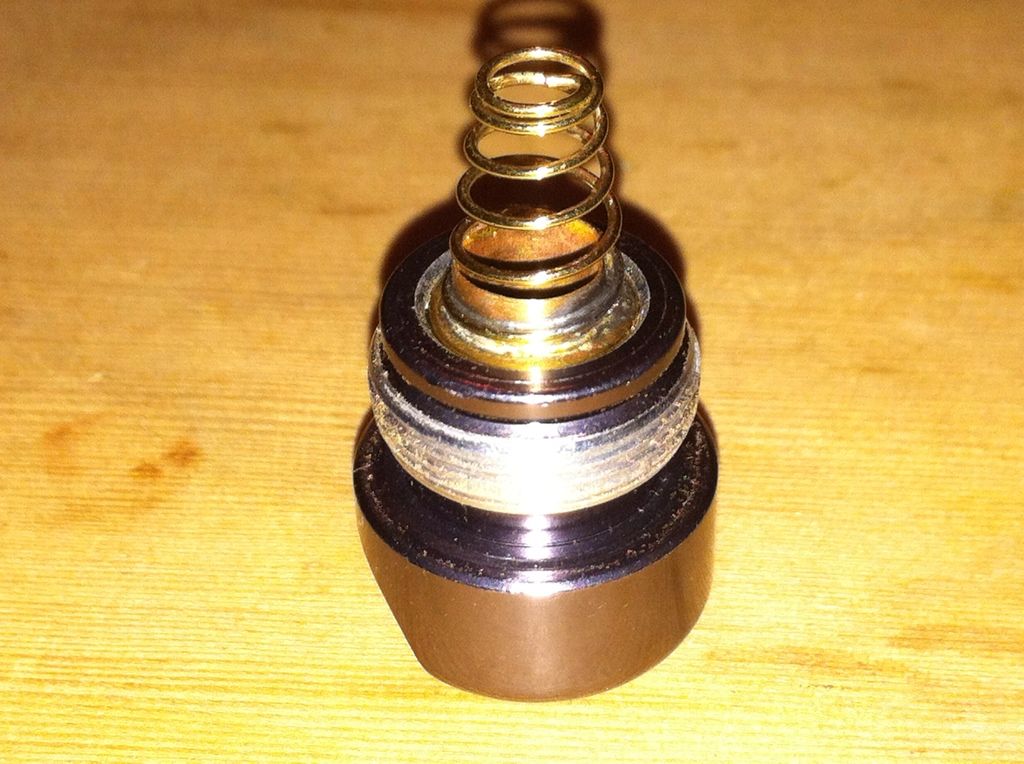
After pulling the stock spring and spare bulb holder I cut a few pieces of brass tubing and nabbed a washer and spring.
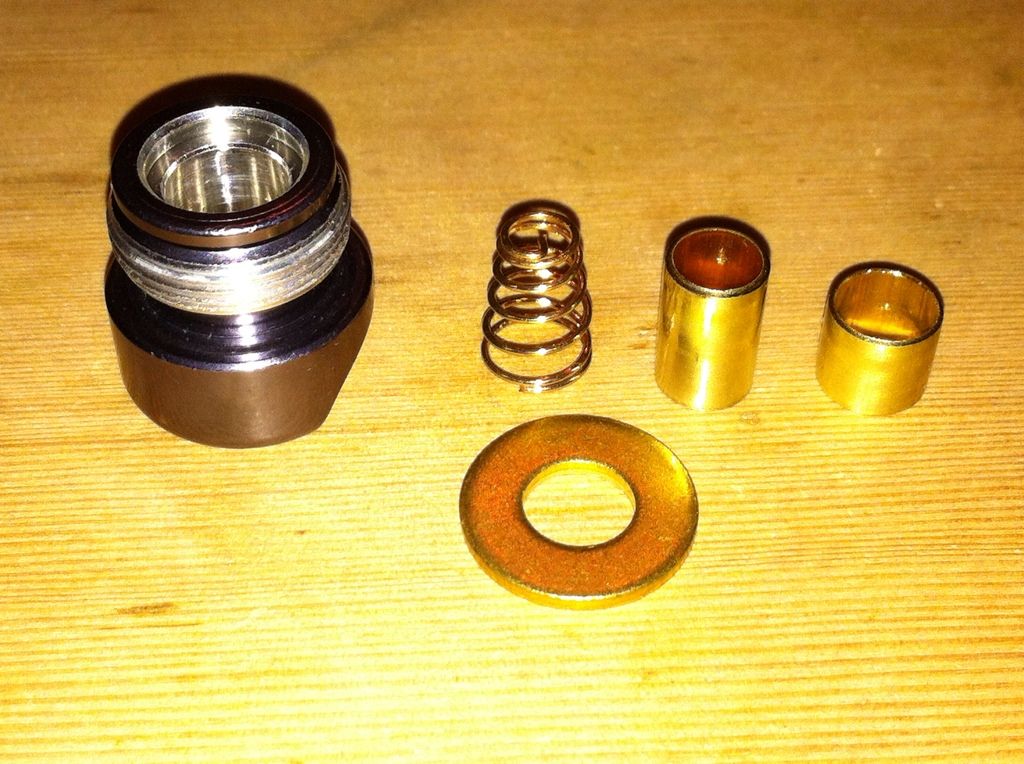
Then I soldered the brass pieces together, chucked it into the drill press to turn down the washer, and soldered the spring on top.
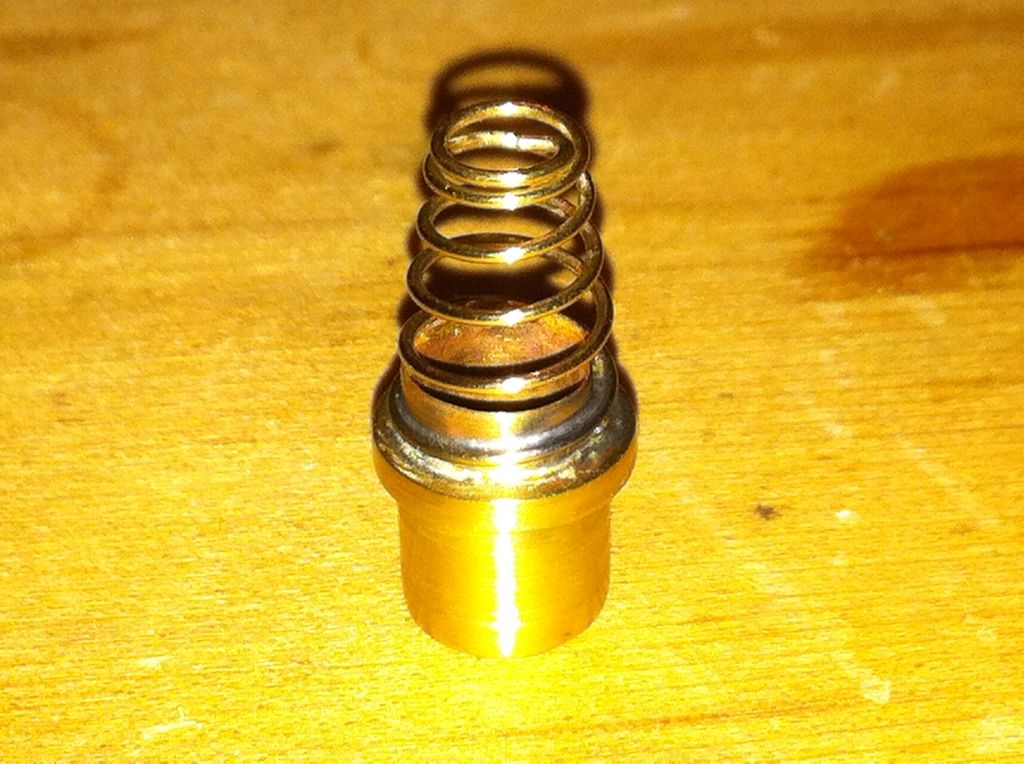
Lastly I used another short piece of tubing just larger than the spring along with the vise to press the whole shebang into the tailcap.
Off to the movies to see The Hobbit, part 2.
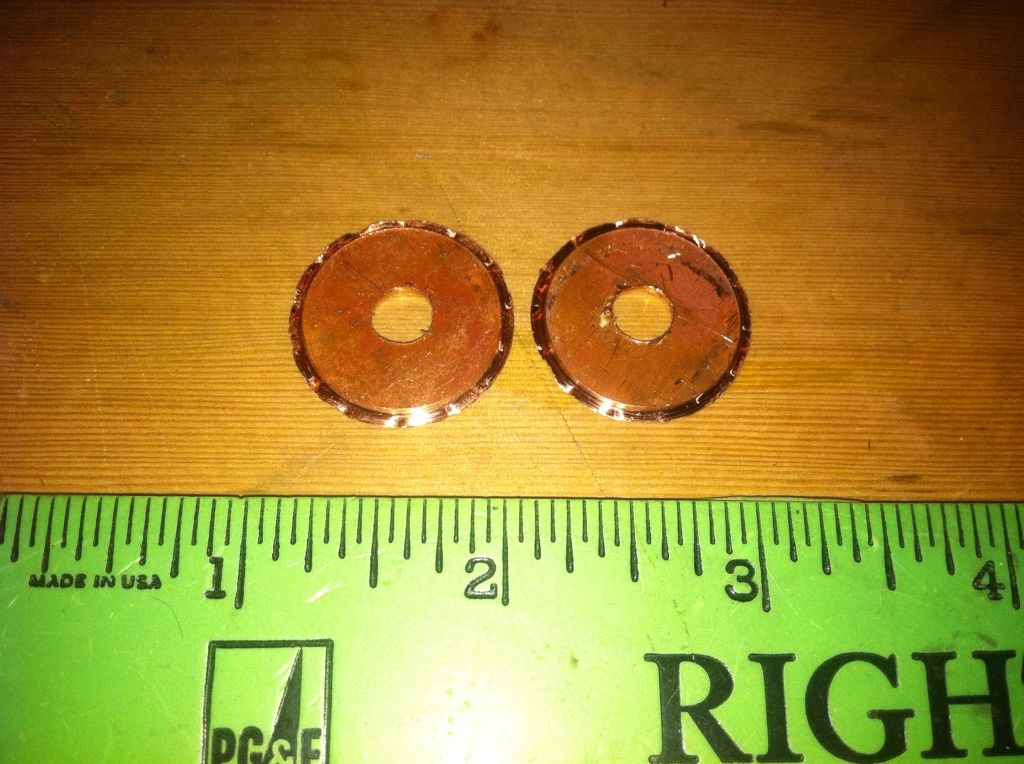
In no particular order I flattened a piece of copper…
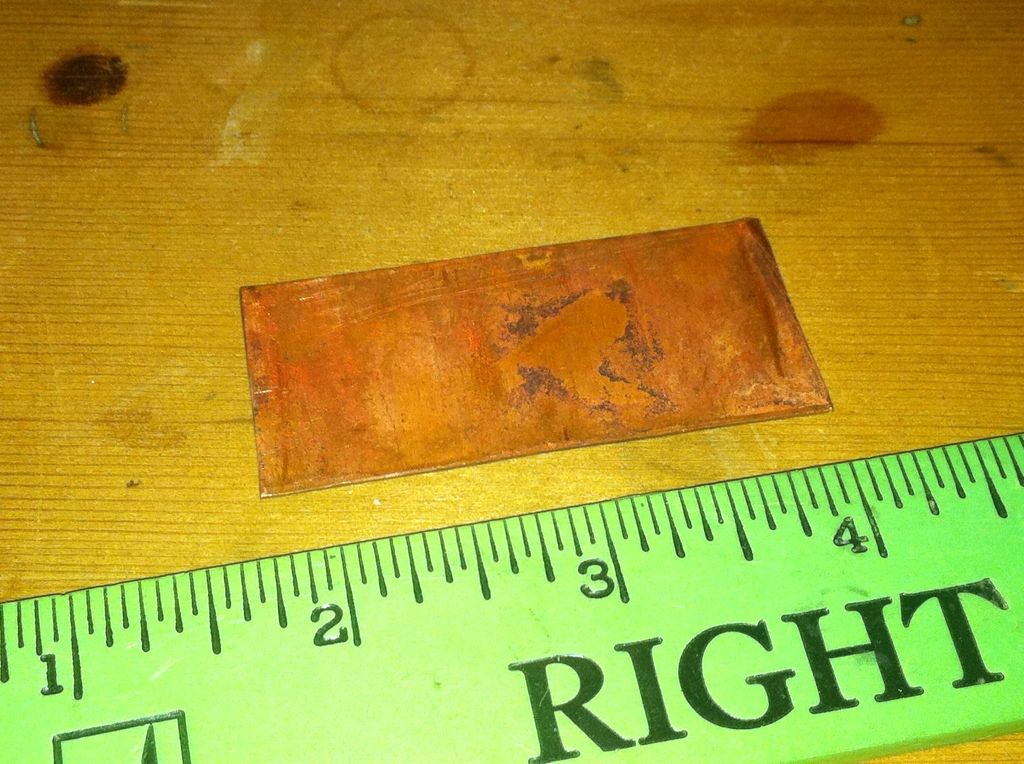
…punched out some copper discs…
…and chopped up the battery tube.
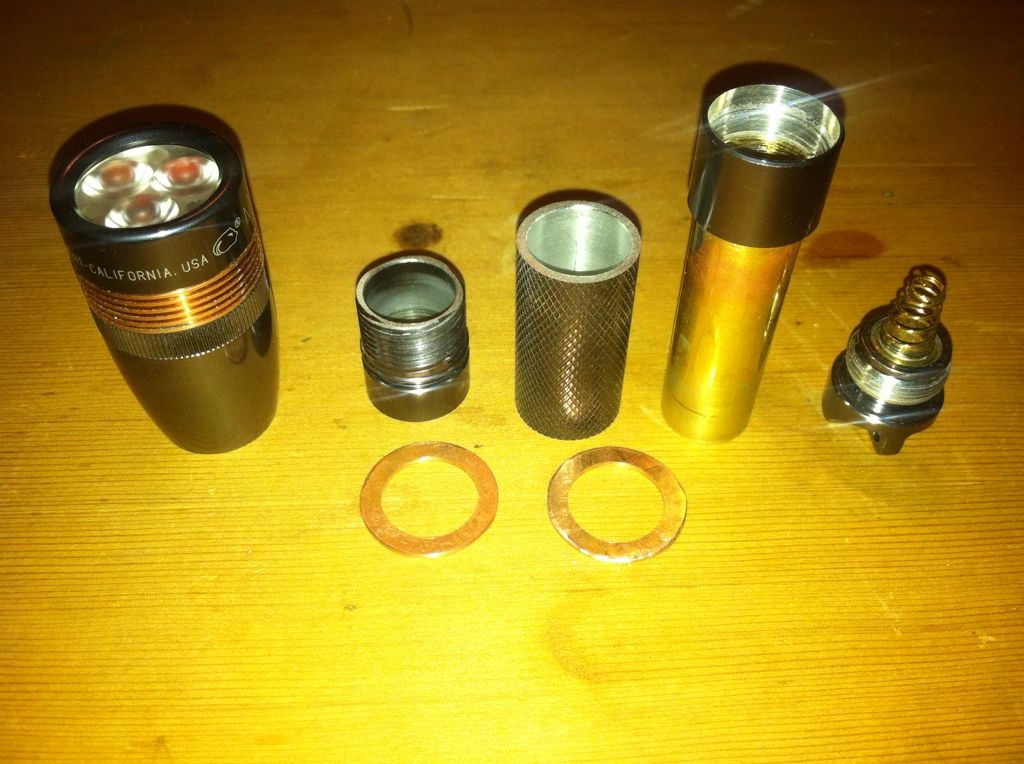
From this point on I spent most of the day reaming out the tube pieces to slip over the brass sleeve and likewise the copper bling discs that separate them. It’s time to get ready for another week of work so I’ll leave you with these last two images of the assembled but as yet unglued light.
Very nice!
How do you accomplish the ‘reaming out the tube pieces’ step?
Wind some sandpaper around a 1/2” bolt, stick it in a drill, and go.
-EDIT
I actually wind masking tape around the bolt, or drill bit(whatever is suitably sized) and the last few inches is sandpaper. Then I add small pieces of tape to incrementally increase the diameter and change the paper as needed. It’s slow but extremely accurate. It can take 1/2 an hour to increase .1 mm. The tricky parts were the ends where I had to preserve the tailcap threads on one and not ream too much inside the o-ring on the other. The copper discs were merely tedious since I had to ream almost 2mm of copper and was slower than aluminum.
What! No review on the Hobbit? I’ve been asked if I want to go. Do l?
They changed a few things but yes, go. It’s good.
End of review.
I did not see the first one. Should I see it first?
Fantastic effort by the way. MRT is getting one seriously custom built light with more hours spent building it than my last 3 builds put together. A big thanks for sharing.
You’ll definitely need to see them in order. They took a single book and broke it up into 3 movies.
Thanks, I like the way these come out but there is a ton of work involved.
The big brother is as gorgeous as the lil guy, and I’m more than a little jealous! lol
Bet you’re glad to seeing it coming to fruition, can’t wait to see how it performs…flawlessly I’m sure.
I think I’ll try the copper fins on a Solitaire next after I finish up a few things.
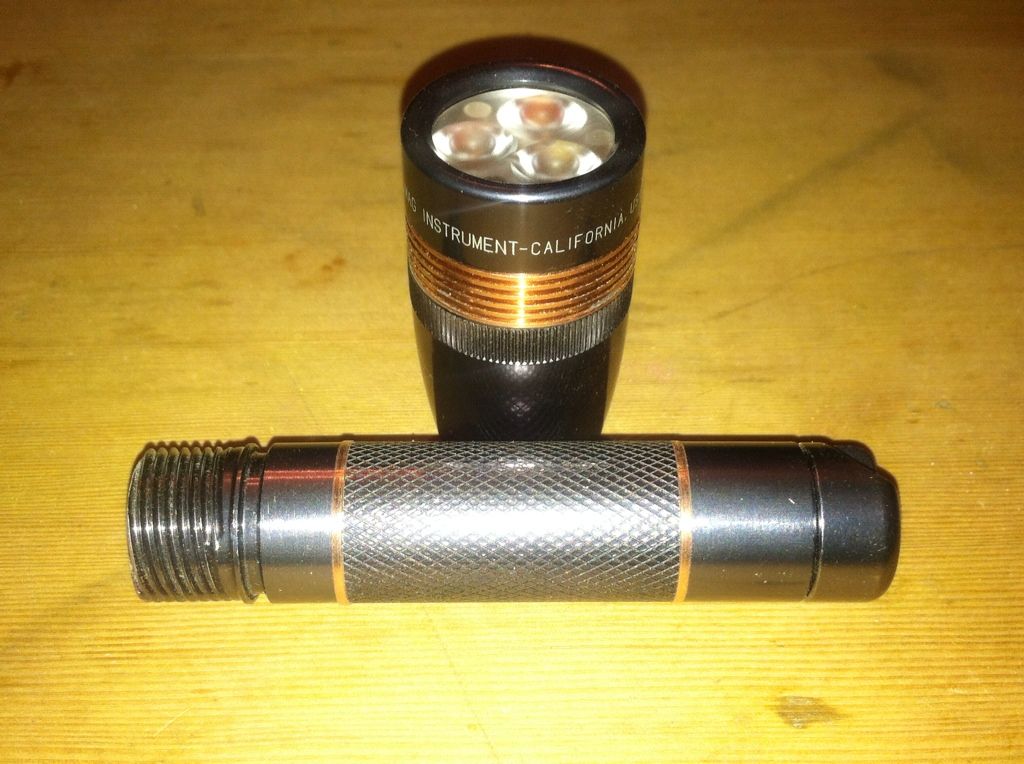
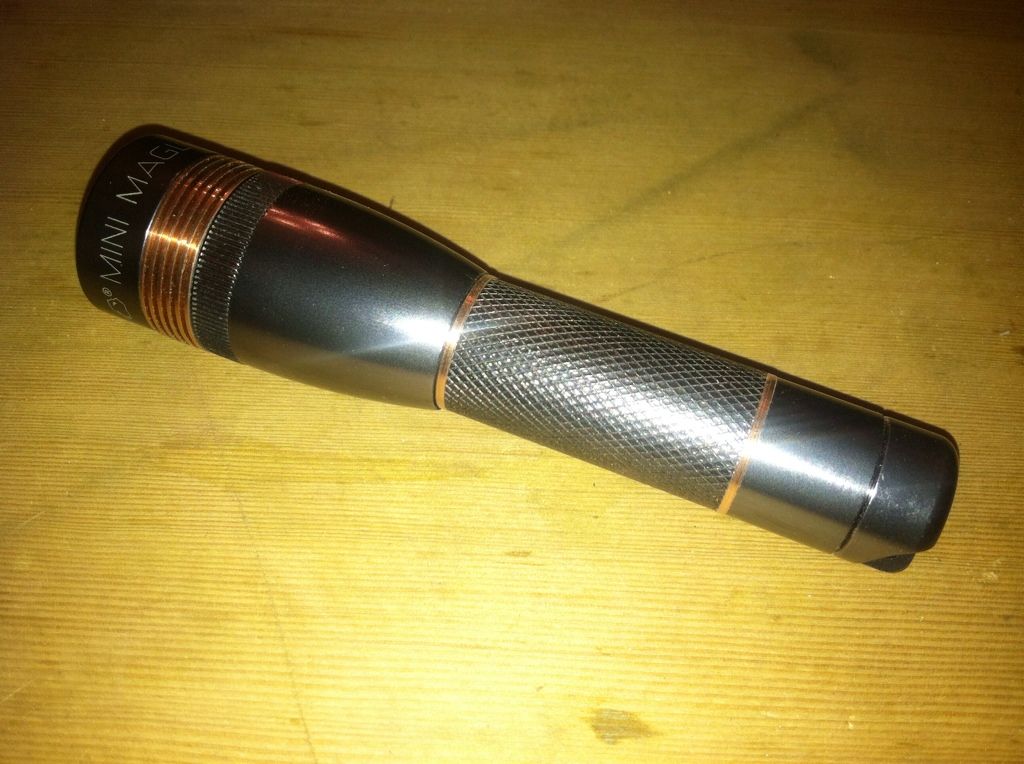
All the good parts are finished. All that remains is I want to put a different o-ring around /behind the Carclo triple before I epoxy the bezel threads back onto the fin sleeve but as you can see below, it works just fine.


Both shots taken with flash to “fill” and bring up the host.
That is a truly beautiful light. Great work!
I bid $20.00. No other offers. Wow. I won. Rufusbduck you know my address. Thanks heaps. This will look orsm next to my OL light.