Multimeter design
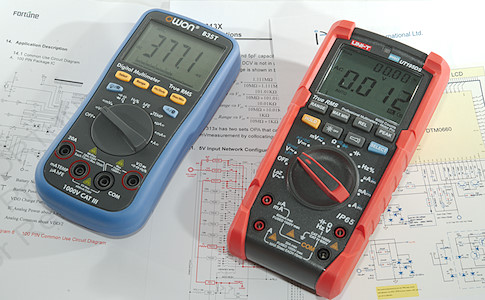
This is a look on how a typical modern multimeter is designed, it is not a look at any specific meter, but more the general ways the different ranges on a multimeter is made. The article will include schematics and photos of circuit boards.
It is based on all the meter I have teared down during my reviews and datasheets for some multimeter chips.
Contents
Protection
Range switch
Signal conditioning, ADC, reference, MCU and LCD driver
Voltage (DC)
Voltage AC
The rectifier
Low Z mode
Current
Ohm
Continuity
Diode
Temperature
Capacity
Frequency
Power supply
Conclusion
Notes

Lets start by a overview of the construction blocks in the meter.
-
Input terminals, there will usual be 3 or 4 terminals
-
Input protection, some protection is needed or the meter would not last long.
-
Range selection, a switch to select what to measure. It will switch signals and report actual range to the MCU.
-
Signal conditioning, adjust all the values the the ADC input range. This will be a mix of resistors and computer controlled switches, it may also contain a x10 amplifier.
-
ADC, convert the analog value to a digital value.
-
Reference, a reference voltage used for voltage and current ranges.
-
MCU, the micro controller controls everything and format the digital value for the display.
-
LCD driver, a LCD display requires some special voltages and scanning to work.
-
LCD display, most multimeters uses a LCD display
Protection
This is a separate article.
Range switch
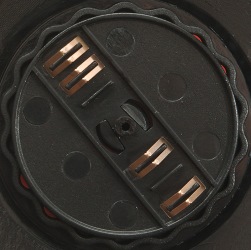
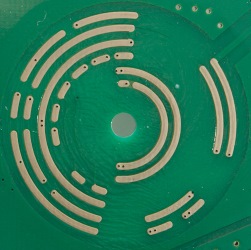
The range switch will switch connections with high voltage or too much current for the electronic switches and then it will have an encoding to notify the multimeter chip (or MCU) what range is selected. The simplest range switch only need to switch in/out the low voltage path for ohm/continuity/diode/capacity/mV/logical frequency/temperature, switch between uA/mA resistor and handle power on/off to the meter, the rest can be handled electronically. Most meters have more positions and uses a rotary switch that can do more stuff (Series capacitor on AC voltage, LowZ mode) or just signal to the multimeter chip to electronically switch. The range switch will probably also switch a few signals between the ohm/continuity/diode/capacity/mV/logical frequency/temperature ranges.
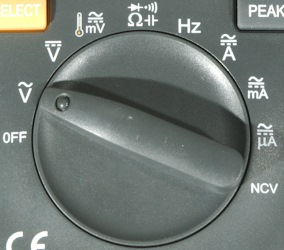
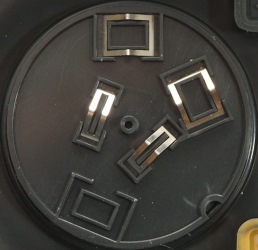
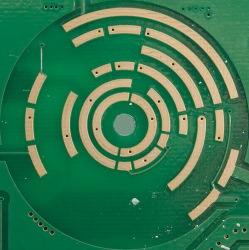
This range switch has 9 on position and with only 4 contacts it means that most of the contacts is used for telling the multimeter the actual position and not for switching signals around.
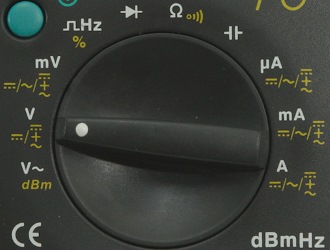
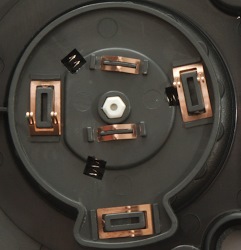
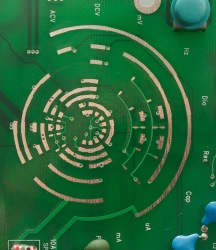
This range switch has marked the positions on the circuit board, but with the placement of the contacts it do not help much. Notice it has some patches on the circuit board to detect if the range switch is placed between legal positions.
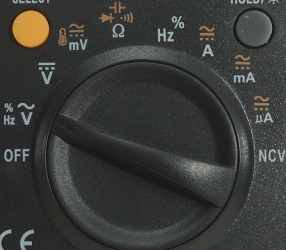
On this meter the contacts are placed in a line, this makes it easier to see the connections for each range.

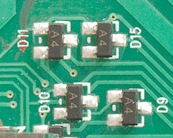
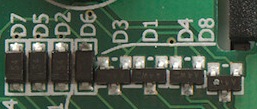
The designers of the multimeter chip and the designers of the multimeter do not always agree on how best to distribute the ranges on the switch and how to encode them, this is usual solved with a couple of diodes. Another solution is a microprocessor and maybe some IO expanders, but that is seldom used (Diodes are also used for other purposed in the multimeter).
Signal conditioning, ADC, reference, MCU and LCD driver
These parts are often combined in one or two chips, but in more advanced meter more chips are usual used.
Signal conditioning
This is mostly analog switches used to connect the different parts of the circuit, it is usual one chip, maybe supplemented with some external analog switches, high end meters may have more external switches due to more functions. The signals to switch are below 1 volt for most ranges, but can be a few volt for ohm, diode and continuity. A multimeter can have more than 100 of these switches, most inside the main multimeter chip.
There may also be a few OpAmps to amplify, rectify or do other signal processing.

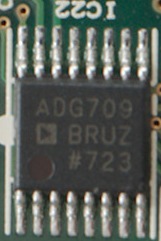
Some analog switch chips, the ADG709 is a 1 of 4 switch.
ADC
Converting an analog voltage to a digital value is the main function in a multimeter, they are usual some type of integrating converter, this means they measure over some time and a short spike will not affect the result much. It is best if the ADC can sample the input over a fixed time period like 0.1 second, this makes it possible to suppress most effects of 50Hz and 60Hz because there is a full number of cycles in that period.
The ADC will nearly always match the high mV range, i.e. 0.2V, 0.4V or 0.6V for 2000/4000/6000 count meters. Even for meters without mV ranges this is often the values used. Bench meters often use higher voltage.
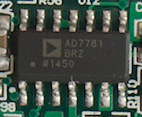

A few meters uses a stand alone ADC chip. The first one is 20 bit (1 000 000) the second one is 24 bits (16 000 000). The meters they are used in do not use the full resolution.
Reference
A reference will often be build into the ADC chip, but for better specifications an external one can be used.
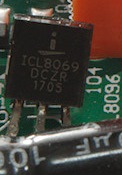

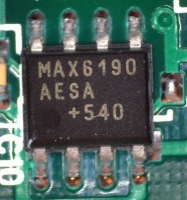
A reference is a sort of zener diode and long ago zener diodes was sometimes used, but today it is specialized chips.
MCU
Many multimeter chips has a build in processor, but not all. There are usual two reason for an external processor, either because the multimeter chips is missing one (i.e. it is a front end chip, with multiplexer and ADC only) or to add extra functions to the multimeter.
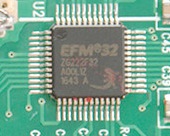
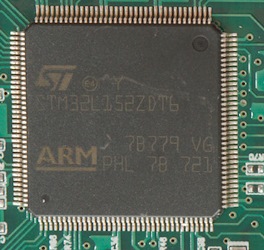
If the MCU chip has a LCD driver build in it needs a lot of connections, without the LCD driver it is more limited.
LCD driver
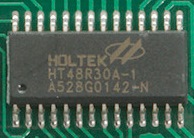
The LCD driver can be part of the multimeter chip, the MCU or it can be a standalone IC.
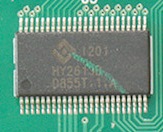
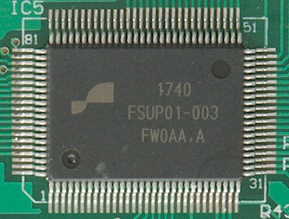
These chips needs a lot of connections to the LCD and not much else, data input can be a two wire serial bus.
This chip will often include a capacitive voltage booster for the LCD display.
Multimeter chips, a few examples
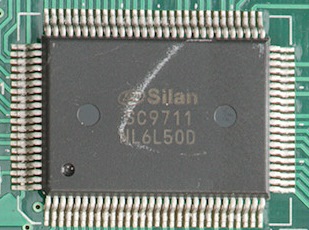
A standard 4000 count multimeter chip with front-end multiplexer, ADC, microprocessor and LCD driver in one chip.
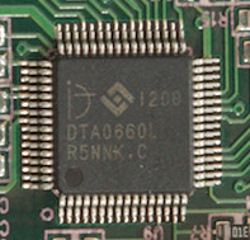
This is one of the very common chips in cheap meters, it has true RMS and a lot of functions and ranges. It shows 4 digit, but exactly how high it goes can be configured.
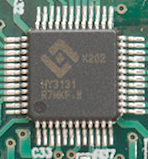
One of the most advanced multimeter front-end IC’s, it has multiple ADC converters, some with very good precision and many electronic switches to configure how it works, but it need a microprocessor to control it.
Voltage (DC)
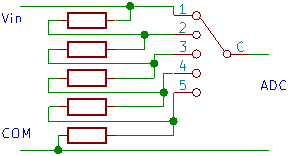
In manual range meters the voltage input was usual made this way, the “1” position on the switch was the most sensitive range (0.2V) and “5” the least sensitive range. This cannot be done in a autoranging meter, because Vin can be up to typically 1000V and a 1000V electronic switch is not a small cheap device.
Some modern manual range meters uses the same circuit as auto ranging meters, but with the auto range function disabled.
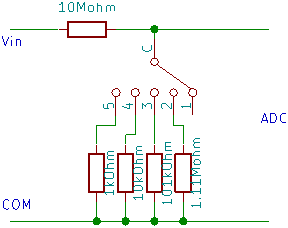
To fix this another input design is used, here there is always a 10Mohm resistor in series with the input voltage, at 1000V input this can only deliver 0.1mA to the switching chip. This is not a problem, chips are usual protected to handle a few mA during over/under-voltage on any input pins. The resistors at the bottom together with the 10Mohm defines the input impedance, if there is a mV range here it will be high input impedance (There are exceptions, see below).
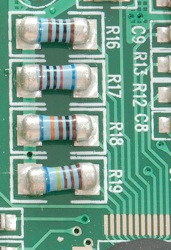
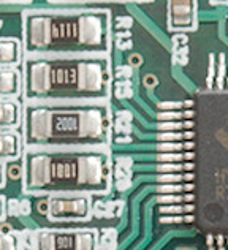
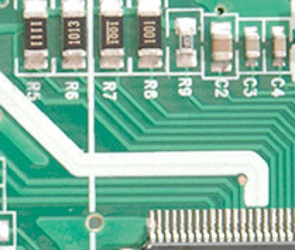
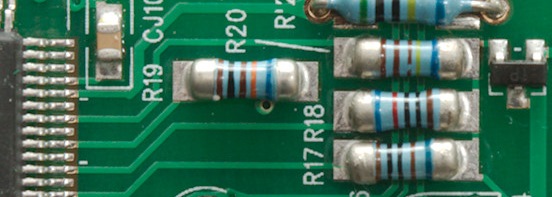
Here are a few examples of the bottom resistors from multimeters, the switch is inside the chip.
For this circuit to work the input impedance of the ADC must be very high, especially in the mV range where it has a 10Mohm in series with the signal. To avoid this high impedance and have better AC response many meters will have a separate mV range that goes more directly into the ADC chip.
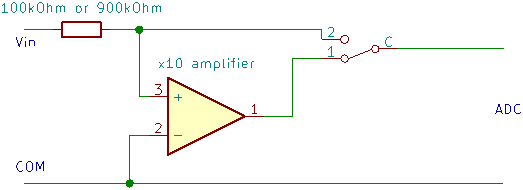
This is a typical better mV input (not all meters have x10 amplifier), the 100kOhm/900kOhm resistor is used on many meters and protects the chips from over voltage by limiting the current. The x10 gain could also be done by lowering the reference voltage to the ADC (some meters may do that).
The x10 amplifier can be an opAmp in the multimeter IC with external resistors.
This design also means the mV range has very high input impedance, most meters maintain that in DC, but will switch the 10Mohm from above to COM in AC to reduce the 50/60Hz pickup, this can be done electronically because it is the mV range, i.e. low voltage.
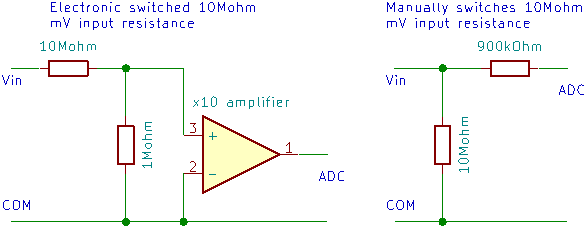
The two ways to get 10Mohm input impedance in mV range, in the first schematic the V range is used, but with a x10 amplifier electronically switched in. In the second schematic the 900kOhm resistor is manually switches in and the 10Mohm can be optionally grounded electronically for 10Mohm input impedance.
Voltage AC
The AC ranges uses the same circuit as above, but adds a rectifier, a series capacitor and sometimes a parallel capacitor. The rectifier circuit will usual be turned off when not needed, to save some power.
Series capacitor
Most multimeters will filter out any DC when measuring AC, this can be done with a series capacitor directly at the input or somewhere else in the circuit. The capacitor at the input is the best solution, because it guarantees that DC is ignored, doing it later will often mean that a large DC offset will confuse the AC reading.
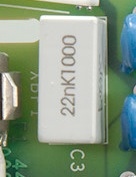
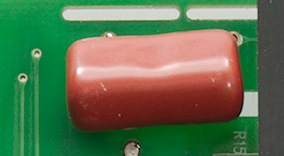
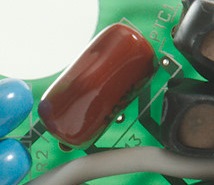
The capacitor is fairly large and often rated for 1000V.
Parallel capacitor
If a meter must measure voltage at higher frequencies (many kHz) there is a problem with the input design.
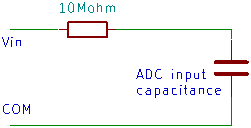
The input of the ADC, analog switches and other circuits has some capacity and even if it is only 10pF it will be significant (The impedance of 10pF at 10kHz is about 1.6Mohm).
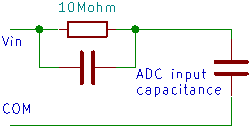
The obvious solution to this is a capacitor in parallel with the 10Mohm resistor
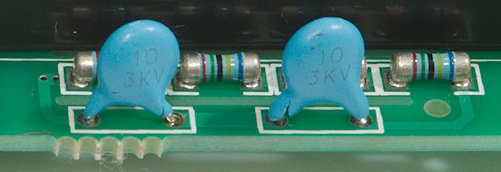
Here is an example, this is two 10pF 3kV capacitors in series in parallel with the 10Mohm input resistor (4 x 2.5Mohm in series).
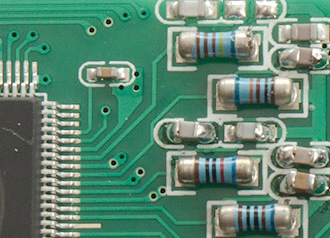
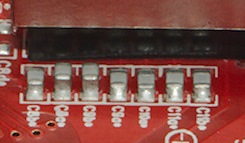
But when starting on this there will be a problem with ranges, the capacitive divider must match the resistive divider. For this reason there must also be capacitors in parallel with the range resistors. Some multimeter chips has a build in capacitor area that can be used for this, in other multimeters there is a couple of capacitors together with the range resistors. The capacitor may also be switchable, if it has a series resistor this can be done by the multimeter chip.
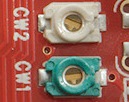
Some of these capacitors may be adjustable, they are labelled with C, not R, this means a capacitor. To adjust them a high voltage and high frequency sine wave is needed.
The rectifier
Averaging rectifier
It has been very common to use a averaging design, it works fine for sinus but shows about 10% to much for a square wave and may have less or more errors for other waveforms.
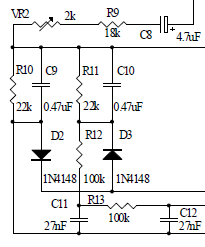
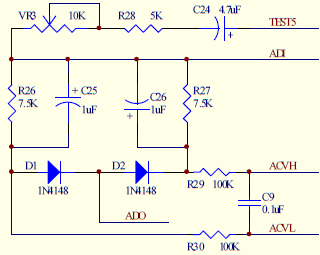
The circuit usual looks something like the above (It is from two different brands of multimeter chips), but fairly similar with two diodes, resistors, capacitors and a trimpot. The multimeter IC supplies an OpAmp and the AC input from a low impedance.
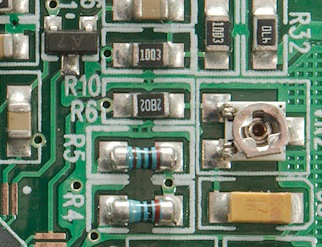
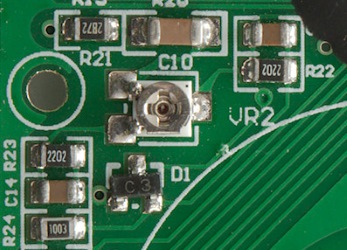
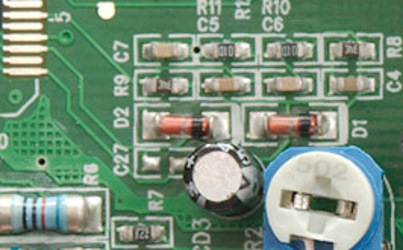
Here are a few examples from some multimeters, the diodes are often a 3 pin SMD part, then there are some resistors, capacitors and the trimpot, all usual mounted close to the multimeter chip.
True RMS rectifier
Better multimeters use a true RMS rectifier, this is a fairly complicated operation and is often implemented in a separate chip.
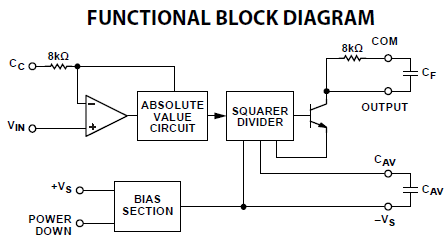
This is a block diagram of a RMS chip.
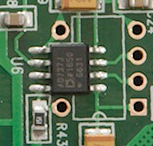
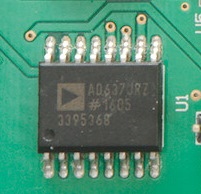

Here are some examples of true RMS chips.
Build-in rectifier
Some multimeter chips have a build-in rectifier, this may even be a RMS rectifier.

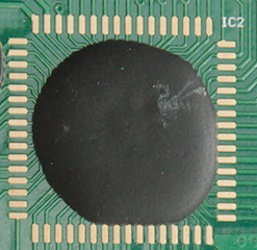
The most well know is the DTA0660 that is in a lot of cheap RMS multimeters, but often in a COP version (i.e. a black blob).
Even multimeters chips with build-in rectifier may use an external RMS converter in a high-end meter, because the external converter may have better specifications.
Low Z mode
On some multimeters a there is a special position on the range switch marked LowZ where the input impedance is lower than 10Mohm. Depending on the meter this may only work in AC or both in AC & DC, usual the meter is locked in the highest voltage range when LowZ is selected.
There is two ways this can be designed.
Fixed resistance
A fixed resistance across the input terminal, often around 300kOhm. It is limited how much current this will draw and it has to be a power resistor when the meter can work with up to 1000V (1000V over 300kOhm is 3.3W).


The first meter has two large SMD resistors in series for a total of 400kOhm, they must handle a total of 2.5 Watt at 1000V. The second meter is a large 300kOhm resistor.
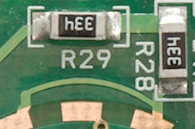
In a pocket meter there was space for 3 x 330kOhm, i.e. the LowZ is 1Mohm.
PTC
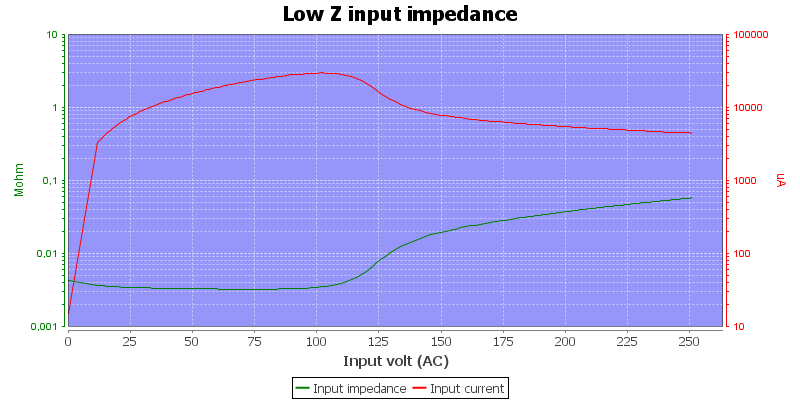
Another way to make a low input impedance is a PTC across the input terminals, this means a few kOhm in input impedance at low voltage, when voltage increase the PTC will warm up and increase input impedance. The power will be about 1 Watt.
This pull down is strong enough to hide voltage for a minor shock.
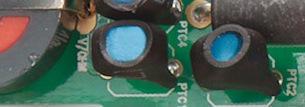
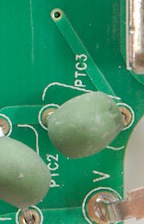
The LowZ PTC is mounted close to the input protections PTC’s on these meters. Using the LowZ range will often affect some other ranges for a time, because the PTC will warm the input protection PTC’s.
Current
Most multimeters have 6 current ranges, two uA, two mA and two A ranges, but there are meters with less or more ranges.
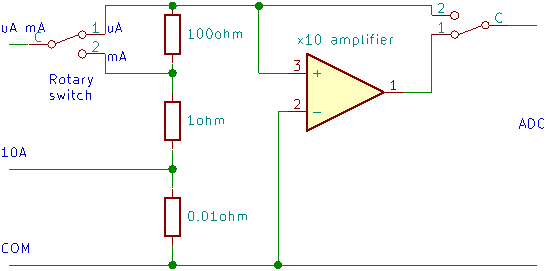
A typical current design is made this way with the first switch part of the rotary switch and the second switch electronic. The resistor values I have specified are the most common values (0.99ohm instead of 1ohm and 99ohm instead of 100ohm is also common). The current measuring is nearly always done at the 100ohm resistor, this saves a switch (It would not be possible to measure directly on the uA mA terminal due to contact resistance in the rotary switch).
The uA mA terminal can be shared with the volt terminal or be on its own, this do not change the circuit, but a separate uA mA terminal is safer than a shared terminal. The 10A terminal is always separate, the rotary switch cannot handle 10A current.
It is important that the resistor can handle the power, this is never a problem on the uA range (Except when overloaded), on the mA range the resistor must have some size: A 6000 count meter needs a 0.36 watt resistor. With the 10A shunt it is usual 1 watt for 10A and 4 watt for 20A.
To measure AC the signal is routed through the same rectifier as used for Volt AC, the x10 amplifier may be the same as used on the mV range.
Meters with low burden voltage will need some extra amplification between this and the ADC input.
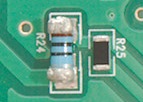

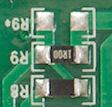
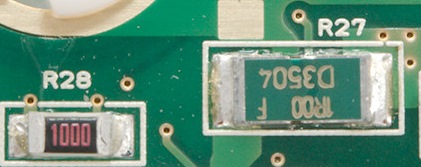
Some examples of uA and mA shunt resistors, one meter has space for two resistors in parallel for mA (R9 & R9\*).
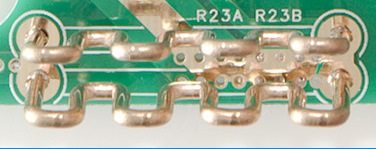


Some examples of 10A shunt resistors, there is significant size difference and the smallest one (R33) cannot handle 10A for long.
Ohm
Some believe that ohms is measured by sending a constant current through the resistor to measure the voltage. This may be the case on large bench meters, but smaller meters often do it another way.
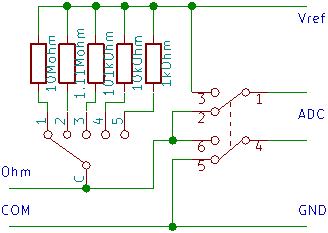
The idea is to make a voltage divider between an internal reference resistor and the external unknown resistor, then the ADC is used to measure the voltage across each of them and with a bit of math the unknown resistor can be calculated, this is called the ratio method. The range selection is done by switching between different reference resistors. The reference resistors and the switch is exactly the same as using during voltage measurement. The x10 amplifier may be used on the lowest ohms range. The reference voltage (Vref) do not affect the precision when doing ratio measurements. Measuring the internal reference resistors may be done with 4-terminal methods, i.e. separate multiplexers for current and measurement.
Some of the more advanced multimeter chips may be able to do both constant current and ratio measurements and may even switch method between ranges.
Continuity
This is basically one of the low ohms ranges, there is two ways to make it fast, either add a comparator or use a faster ADC (Some chips have multiple ADCs build-in).
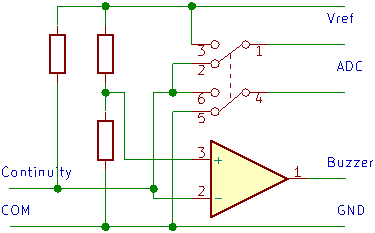
Here is the circuit with a comparator. The comparator is, of course, inside the multimeter chip.
Diode
For diode measurement the meter must supply a voltage and measure it. There is one small detail and that is the voltage, it needs the volt range not the mV range, this means a voltage divider must be present. This is not always the main voltage divider (Some meters do use the main voltage divider).
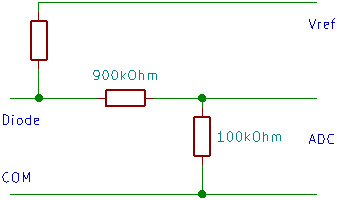
This is the typical circuit for diode, the Vref can be considerable higher for this mode, some meters go up to between 3V and 4V. For meters using the main divider the resistors will typically be 10Mohm/1.11Mohm instead of 900kOhm/100kOhm.
Temperature
Multimeters usually uses a Type K thermocoupler for temperature measurements, it gives about 40uV/°C and is a relative temperature measurement. The meter is configured similar to mV range or the most sensitive uA range, but with different scale and a offset based on a temperature sensor inside the multimeter IC. For good precision the meter needs some linearity compensation, especially below –40°C.
Capacity
Many multimeters can measure capacitance, they all do it by charging and discharging the capacitor at some rate and measure how fast it is, but the actual implementation varies.
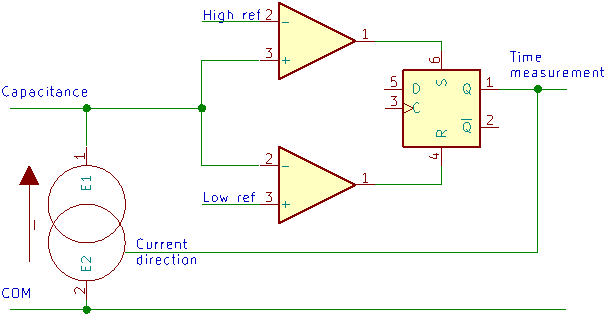
The variation is in the current generator, it can be the ohm circuit that is used to charge and maybe discharge the capacitor or it can be a dedicated circuit. Some meters will always use the same current and only the time changes, other will switch the current for some capacitance ranges and use maximum current and longer time for large capacitances. The logical input is often similar to mV ranges.
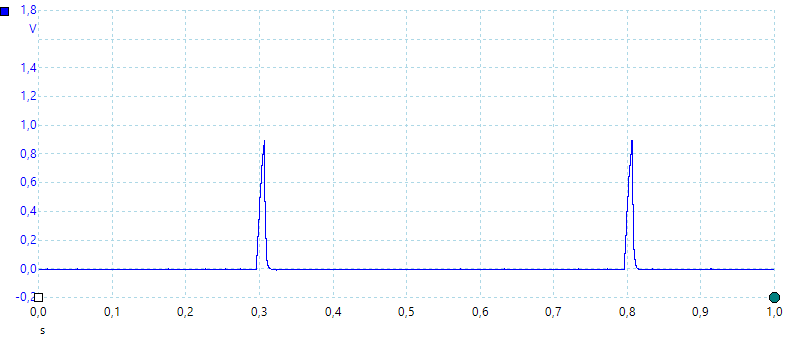
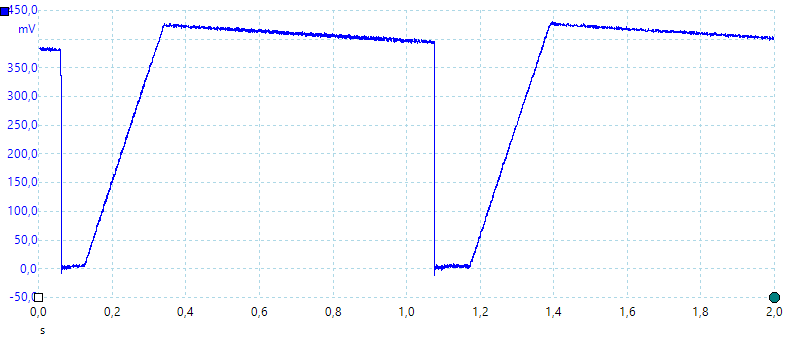
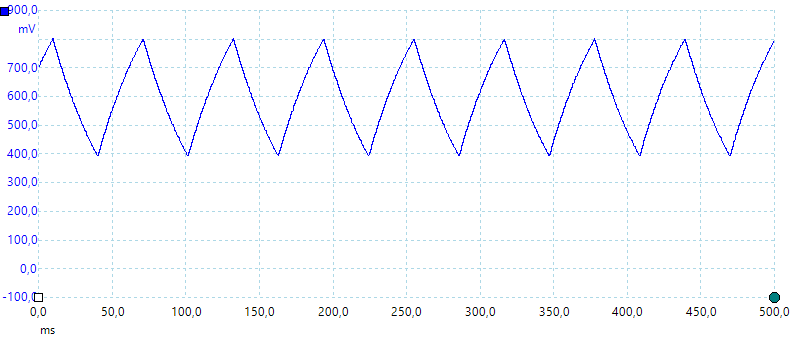
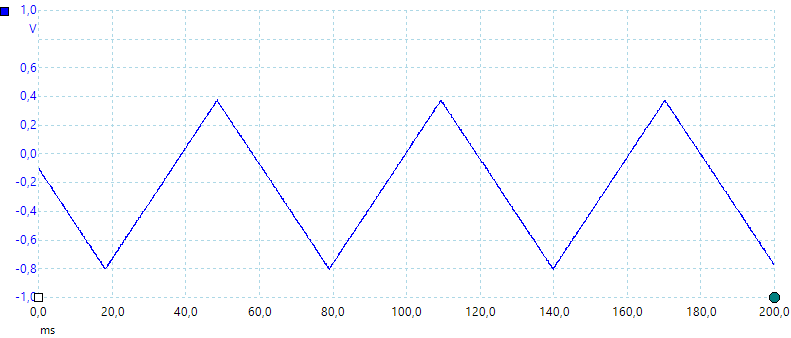
Four examples of the charge/discharge curves used to measure 1uF.
Frequency
Implementation of frequency counter varies, the input can be AC coupled by a capacitor, direct coupled with threshold at zero or at some small voltage, a few meters can even adjust the threshold some volts.
The counter will do automatic reciprocal counting at lower frequencies and usual works down to about 1Hz. The upper limit depends on signal level and input used, on voltage input the bandwidth is limited, but the input impedance is usual 10Mohm. The logical frequency input often works into megahertz, sometimes two digit megahertz, but only has a few kOhm in input impedance, at least for voltage above a few volts.
Power supply
Multimeter chips usual works on 2.4V to 3V, this means they will work perfectly on two AA/AAA batteries. Sometimes support circuit needs more voltage and more batteries are used. Some meters uses a 9V battery, even though they do not need higher voltage.
With higher voltage there is a need for a regulator, this is usual a 3 pin linear regulator. The multimeter chip may establish a virtual ground to handle both positive and negative inputs. There may also be a capacitive boost regulator in the multimeter chip for diode test with 3V.
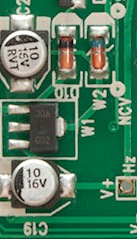
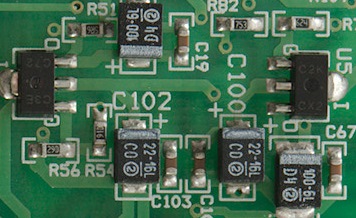
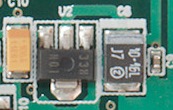

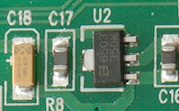
Here is a couple of examples, the chip size and the nearby capacitors are good indications of a power regulator, when it is connected to the battery input it is an even better indication.
Conclusion
I hope this article will give a better understanding on how a multimeter is designed/works and what the different parts inside the meter do.
Notes
For lots of multimeter reviews with tear-down and some explanation see here
