I have a couple of these Craftman/Diehard 19.2V Nicd batteries that are not holding charge, and I just got a new Ridgid drill, so now I’m thinking about modding the Diehard packs to use 6x18650.
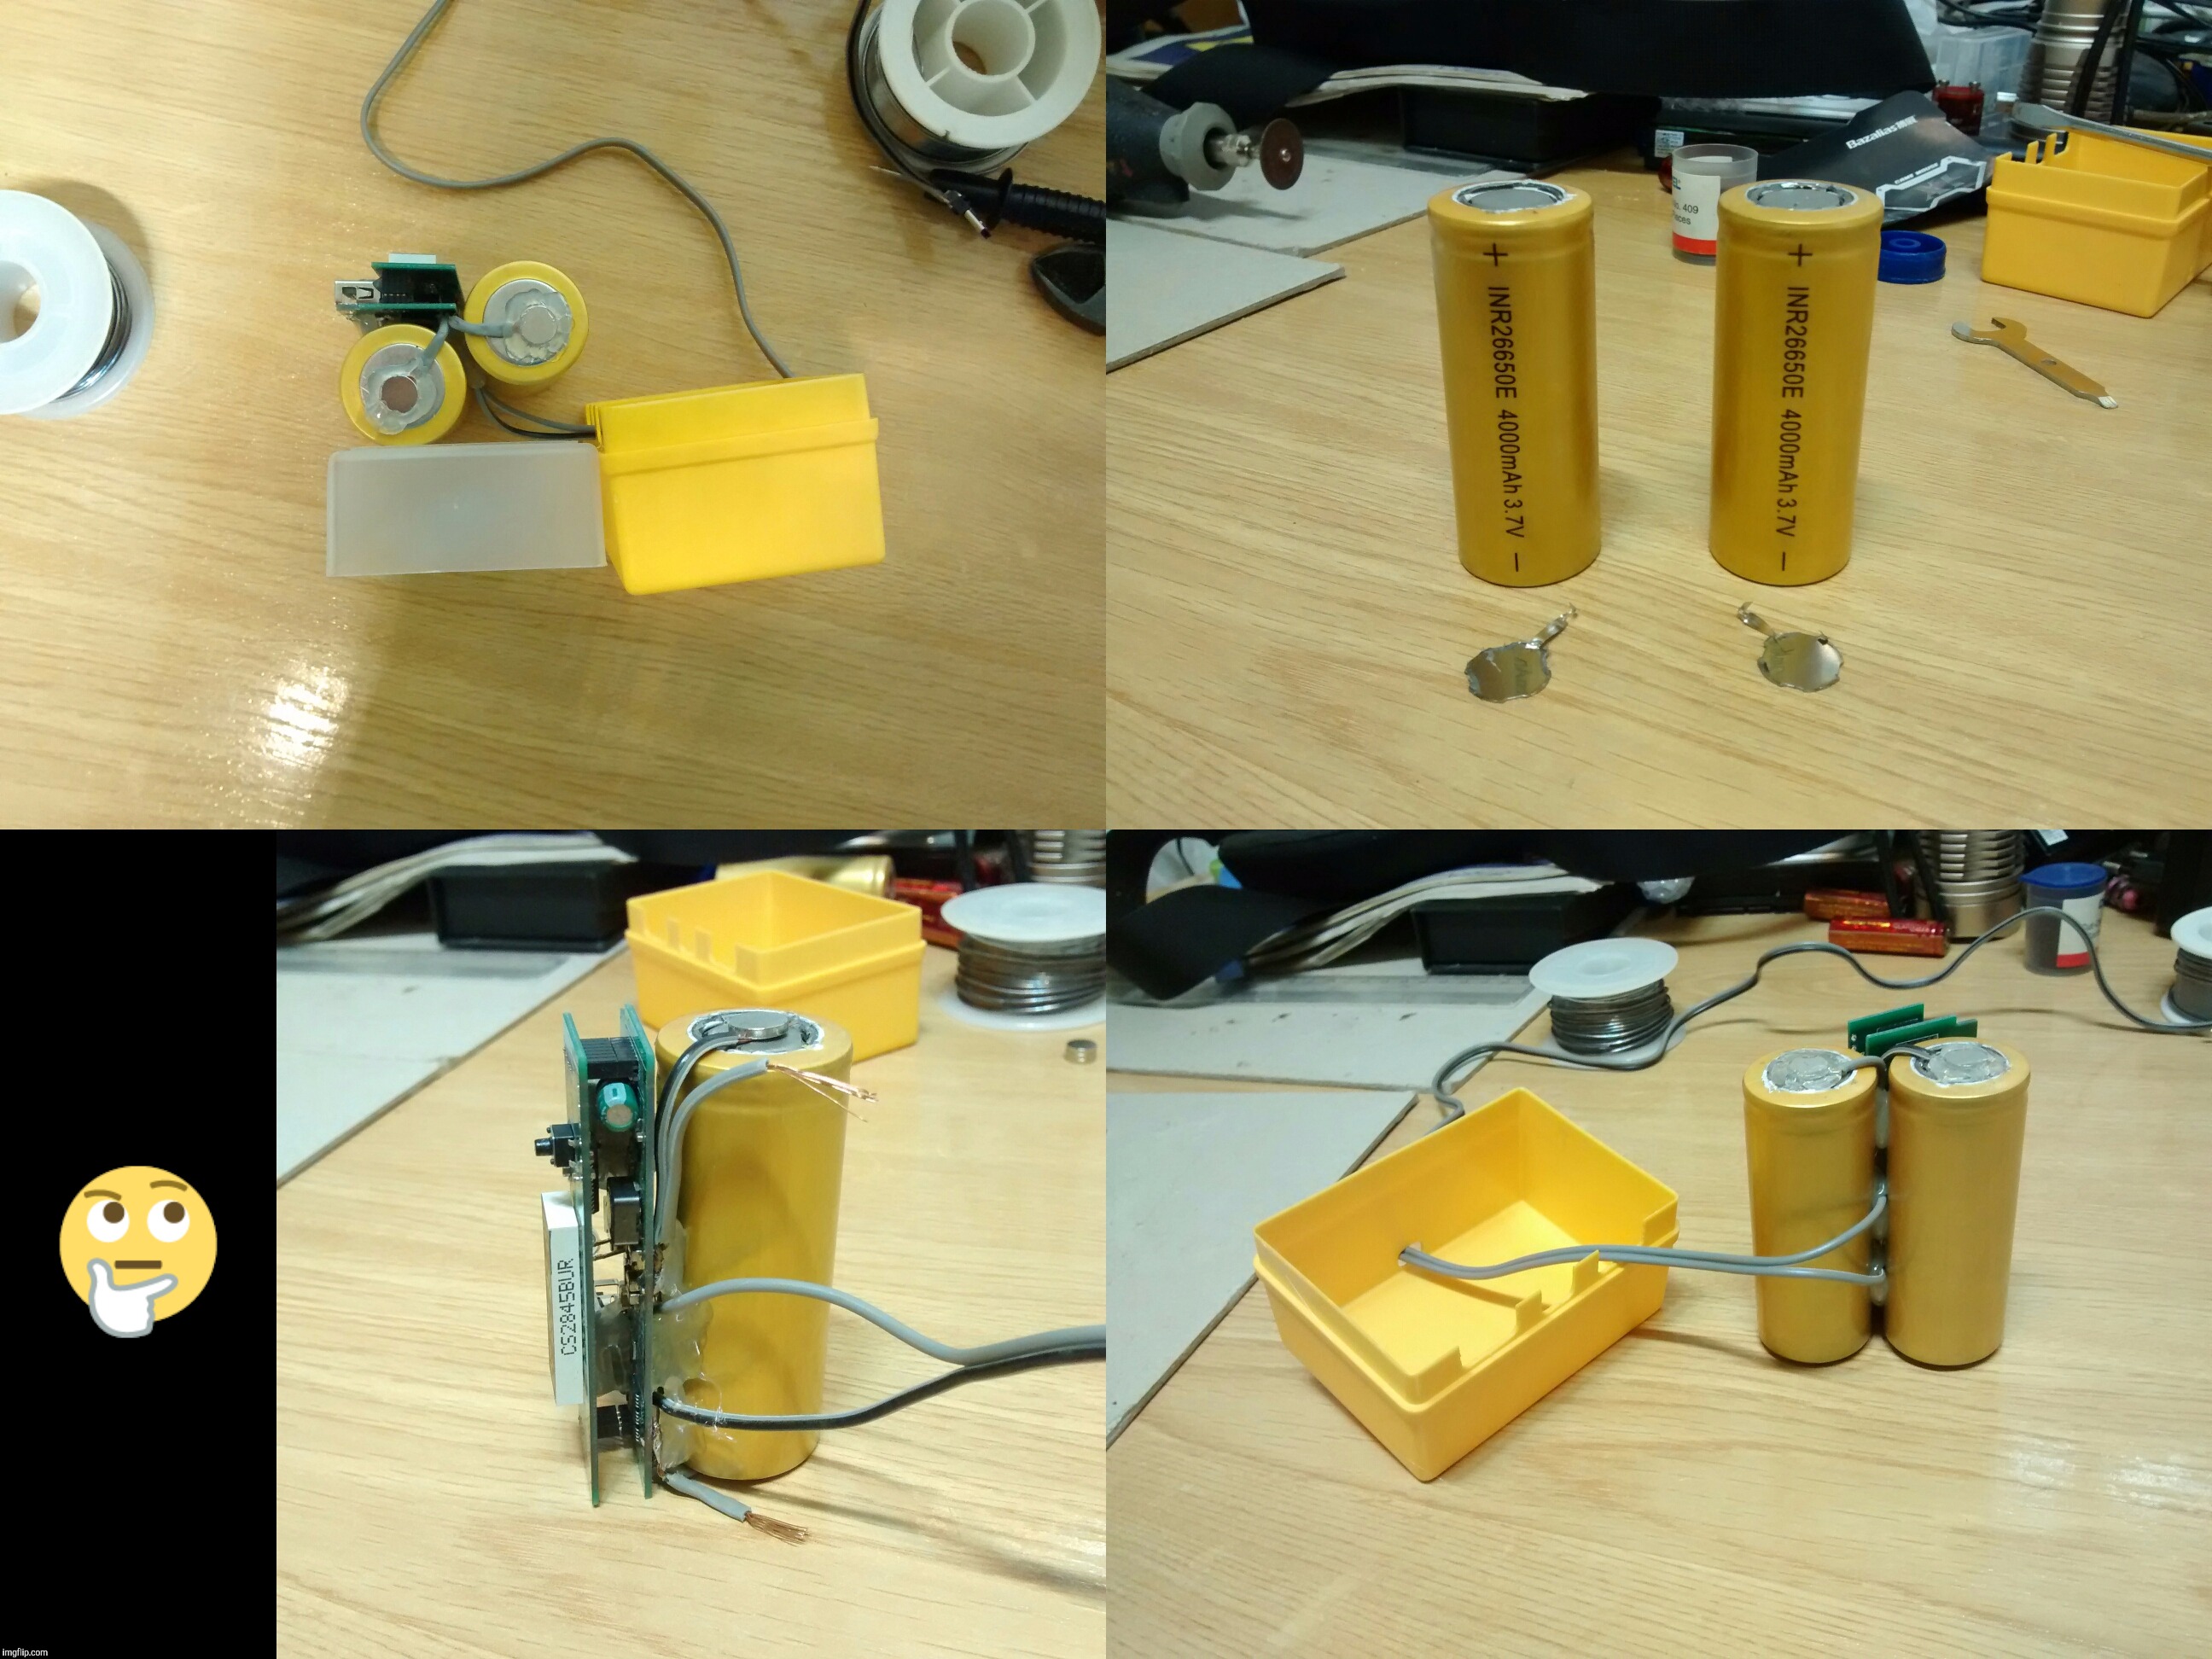
The internals of the battery look like this:
The connectors/contacts to the drill are soldered to/attached to a battery that is standing on its end, on top of the other batteries, like in the picture in that auction above.
I got some 3x18650 holders. They won’t fit into the battery housing as-is, but I think that if I cut a couple of the posts from the inside of the housing, the battery holders will fit in there, so I can stack 2 of the holders inside the housing.
For the connector to the drill, I’m thinking of separating that standing battery from the other batteries, and basically re-wire that one standing battery so that I get a + and a - lead, which I can attach to the 6x18650 batteries. Then, I can take that re-wired standing battery and maybe JBWeld it inside the plastic “column” of the battery housing, and that’s it.
I think that either Sawmaster or someone said they had a friend that had done something like this, but I haven’t seen any pictures, so this is what I came up with thus far.
These will melt with the often high current draw of a drill so would need rewiring with much heavier gauge.
(I did this with a dewalt drill once but took the cells out to charge each time)
How are you planning to charge it? Would some sort of balancing circuit not be required?
That connector should come off the top of the battery, which you should probably get rid of and replace with a piece of wood or something. and rewire the contacts as needed.
I’m not familiar with that particular drill/driver, but I have done this successfully on other drill/drivers. One was an old Milwaukee screwdriver that was originally 3.6v NiCad, used 3 sub-c batteries in series, or at least I think they were sub-c, been a long time. Pulled those and replaced them with a single high amp 18650. Then pulled the charger apart and replace the factory charging circuit with one for a single Li-ion. Got a small bump in power and speed, works better than when it was new. Still working to this day, one of my favorite tools.
A couple words of caution though, cordless drills will pull a lot of amps from the battery, make sure the cells are rated for that. And ditch the idea of using those plastic battery holders, they’ll never work correctly in this application. They’re built for low power requirements, and most are garbage even for that. Build your own pack. Get the cells arranged where they’ll fit in the holder, hot glue them together, then weld/solder battery tabs on. Just be cautious if you choose to solder onto the batteries, can be dangerous if done improperly. You could also check with some of the battery places in your area, some will weld tabs on your lack for a small price. If you already have them glued together, shouldn’t be much trouble for someone to weld you tabs.
-Michael
ETA: Here’s the old model I have, the new model is already Li-ion, but I can’t stand throwing out good tools, and there was no way I was paying $$$ for a replacement 3.6v battery.
As someone who has thought about something similar, easiest option would be a 5/6s rc lipo and a ballance charger for it. Also you are going to need some sort of voltage monitor
I’m like Texlite. I mean that Craftsman drill is STILL nice, but the batteries really were not that good.
To answer some questions:
1) I was thinking of using those plastic holders, but replacing the leads with heavier leads (from the holder to whatever connector). Would that be good enough (I don’t know about the springs and contacts in the holders)?
2) My charging approach was based on #1, i.e., I planned to just take the individual 18650s out and charge them.
3) Looking at that “standing battery” and the connector tabs on top, I don’t think it just pulls off. At least one of the tabs is soldered/welded directly to the positive contact on that standing battery. There’re various wires for the thermistor, etc. going all over the place. There’s another tab welded to the negative end of that battery. I think I can separate that one battery from the rest by pulling off that bottom tab, and then cutting maybe 1 or 2 of the other wires.
Anyway, that was why I was thinking to pull that whole standing battery off, basically intact. Kind of like using it as a “contact board” if I could analogize with flashlights :)…
I wouldn’t give up that easily. it’s not a bad idea. If this is something you would like to do, it is very doable. You may just need to continue to do a little more research.
You need high drain cells. I.e. Samsung 18650-25R
You need a protection circuit. eBay for under $5.
You need a balance charger with connector on the battery. $20 or if you can work out a holder, go ahead and use removable cells and charge with single cell charger.
There are some instructables out there as well as YouTube videos.
Although is was fun to do, it was too hard to do to make it worth while
It doesn’t make any economic sense and is dangerous
The new drills are cheap, powerful and charge up fast
Sorry to say, that old drill is just not worth anything to you. I just went thru all of this. I hung on to my old drills for several years even though I had no batteries
I finally donated them to a local charity and they were very happy to get them
I felt bad because I finally decided they were worthless. It was only then that I decided to donate them. Not exactly philanthropic of me, was it?
Yes, I already have another (2 drills) - got a new corded Ridgid and a cordless Ridgid.
Like you, it’s just that I hate seeing an otherwise good (and in really good shape, other than the batteries) drill go to waste. Just doesn’t seem right?
I appreciate the encouragements, but I’m on the fence now. I’ve closed up the battery that I was going to mod for now, but it’s still sitting there, “giving me the eye” every time I walk by it :)…
The hot glue prevents any chance for the wires to slip out of the magnet’s push force. The holding strenght is great but cables slip out easily, all of the metal surfaces involved are slippy.
You can also buy slightly bigger magnets if somewhat anal about this. I ordered a 100-pack of 8×1’5mm discs, strong enough, slim and I can use them on my 14500s.
What makes drill packs so hard to construct is that the connections may see 30 Amps or much more in heavy load situations.
The cells are usually spot welded with spot welds that are far more robust than the ones in laptop battery packs.
Awhile ago I expressed concern in the thread about ordering button top IMR’s. As far as I know, no OEM of IMR’s offer them. That means if a button top is added later by a third party and they used the typical weld technique used for ICR cells or laptop batteries, it could turn out later that it wasn’t good enough.
I cannot imagine how a magnet could offer a good enough connection at the current levels that IMR’s produce in a drill pack situation.
And as far as button top cells, I have seen some UltraFires button tops that have buttons that not welded at all.
I removed the “button tops” from my batteries with the aid of my über-multitool and a cut-off disk. They are aluminium caps with puny metal strips which are spot-welded over the flat tops. I also polished the flat top after stripping off the strips, for the sake of it.
I’ve been meaning to comment/ask about the current. When I took the pack apart, I notice that there’s a lead from the tab that is -, going down to a soldered connector at the bottom of the cluster of batteries, so I guess that is a lead going to ground. That lead is thicker than the other leads that are used in the battery, but it’s NOT that much thicker.
There’s also a rather thick tab that is welded(?) from the bottom of the standing batter to the top of one of the batteries that is in the cluster.
Are those two/different paths to ground (one going through the standing battery and the other going through all of the batteries in the cluster, in series)? Is that their balancing approach?
Also, and more interestingly, does that thicker lead carry all the current?
Ohaya, somewhere there is probably a fuseable link.
Modern drill packs have very sophisticated electronics in them to keep them safe. Each cell is monitored during charging and discharging. Most even have a temperature sensor that shuts it down if it gets to hot or cold.
Instead of using bare cells you might consider converting the tool to use an oem liion pack and charger. I picked up a 14.4V nimh Makita 3 3/8” trim saw for cutting cedar shingles but since all my other cordless tools use 18V LXT Makita packs I found a dock block at the sandwich shoppe and mated it to the 14.4V tool handle. Now instead of an anemic saw with a dedicated charger I have one that cuts the mustard and shares my other tool batteries. The ability to hot swap packs is a must for me and DC motors can handle somewhat more power than the packs usually feed them. If you have other battery powered tools that you like look for a parts-only dead one and transplant the quick connect section to your tool. How easy it is depends on your tool and the donor but it’s a similar idea to one that is used to power bike lights from tool packs for extended night rides.
Quite right, I once tested a 12V hairdryer motor attached to a 24VAC linear supply with just a rectifier bridge and a big capacitor. 30ish volts and more than 3 amps flowed through the motor, with its propeller attached: it pumped soo hard it willingly blasted-off. Scary it was to see the sparks-donut on the commutator, LOL!
By the way, I have a clipper machine which I thought its batteries were damaged, but they weren’t: I oiled the blades and worked like new! More than 2 years of use and the only oil those blades had ever seen was the one found in my (lack of) dranduff, no wonder the thing bogged down! ROFL!
Anyway, I had just purchased a couple of high-drain 14500 li-ions to convert it from 2S1P Ni-MH (2’4V) to 1S2P (3’6V) direct drive. With at least both 50% increase in RPMs and torque, it’s gonna be quite a fun machine after modding it. Hehehehehe…
I know it was said to just stick the contacts on top off a dowel, but the problem is that I still have not been able to remove that contact “assembly” from off of the standing battery.
As I said, at least one of the contact tabs (pretty thick on) is soldered to the + end of that battery, and I can probably either cut that off of pull it off, but it looks like the plastic part is also glued to the top of the battery.
Remember what the important part is. Destroy the cell if necessary to remove that part without damaging it. Demo is all about knowing what not to demo.