Really thanks for testing that, i am very curious about the results of this.
I have built my 1504 as wrote in the reply to djozz, i will do a real post about it with pictures soon.
Really thanks for testing that, i am very curious about the results of this.
I have built my 1504 as wrote in the reply to djozz, i will do a real post about it with pictures soon.
How do you mean no D-D, are you talking about Led4powers linear FET driver? Because normal FET driver like the BLF17DD would be considered a DD driver.
Which XP-L did you use, flux & hue bin?
My BLF17DD driven XP-L V6 3C pulled about 4.4-4.5 amps dedomed in a 1504. Measured output was something like 225kcd if my memory is correct. I posted results earlier in this thread.
I had an XP-L that pulled higher amps and had higher kcd but the LED was damaged. I haven’t tried another one since
KKW, was that with the 6A ebay switch & wire bypassed switch board like those you sold recently, or was it with the stock switch assembly, sorry if i have already asked this i don’t remember if i had or not.
It still kills me that a “damaged” LED produced more output. Any chance you could start feeding your dog a diet of Noctigon mounted LED’s? He may get even better results with more practice. :bigsmile:
No kidding and I may not be able to repeat it with another LED. I’ve tested that one several times with similar results so it wasn’t a one time deal. Instead of a wavien collar it just needed a doggy collar.
Without dedome.
Voltage pull is quite similar I guess. I thought with FET, it will easily hit 180-200Kcd mark.
If memory serves me correctly the kcd measurement was with either a completely stock tail, or one with a jumper wire. The amp measurement was done without the switch in the circuit.
Ok thanks ![]() and by jumper wire you mean wire bypassed switch board & spring right?
and by jumper wire you mean wire bypassed switch board & spring right?
Or do you mean that you used a jumper wire like with crocodile clips to connect + - on the light instead of the switch board assembly?
18ga jumper wire on the spring inside the tail. If it was there it was soldered to the board and then to the top of the spring and bottom of the brass button.
Current was tested with my DMM, and then verified with a .001 ohm shunt wire I made with the DMM measuring voltage drop across the shunt wire.
Ok, when you mention jumper wire you mean, wire bypassed spring.
I wonder how you measure current with a home made shunt wire? I burnt out my amp up to 10Amp measurement ability very quickly on my DMM, and i don’t even know how or why it burnt out, so i have been hesitant to buy another because it think i will just break that also.
If i could somehow make something like you did & use that it would be great ![]()
I tried to follow HKJ explanations he has on his site how to do measure amp in various ways this but i just didn’t understand it all.
It’s just figuring out the resistance per inch of the wire you want to use. Don’t go below .001 ohms or you’ll have no resolution in your measurement. .01 ohms would be a good compromise between its effects on the circuit and measurement resolution.
Here’s what mine looks like, I made it from 12ga wire and set it so that the test leads are as close to the insulation as possible so that I have a consistent point to measure from. Start out long and either use solder to lower the resistance to as close to your target as possible, or trim back a little insulation. Make sure that the tinned ends have enough contact area to reduce contact resistance, but small enough to be able to fit to get the measurement without being a pain.
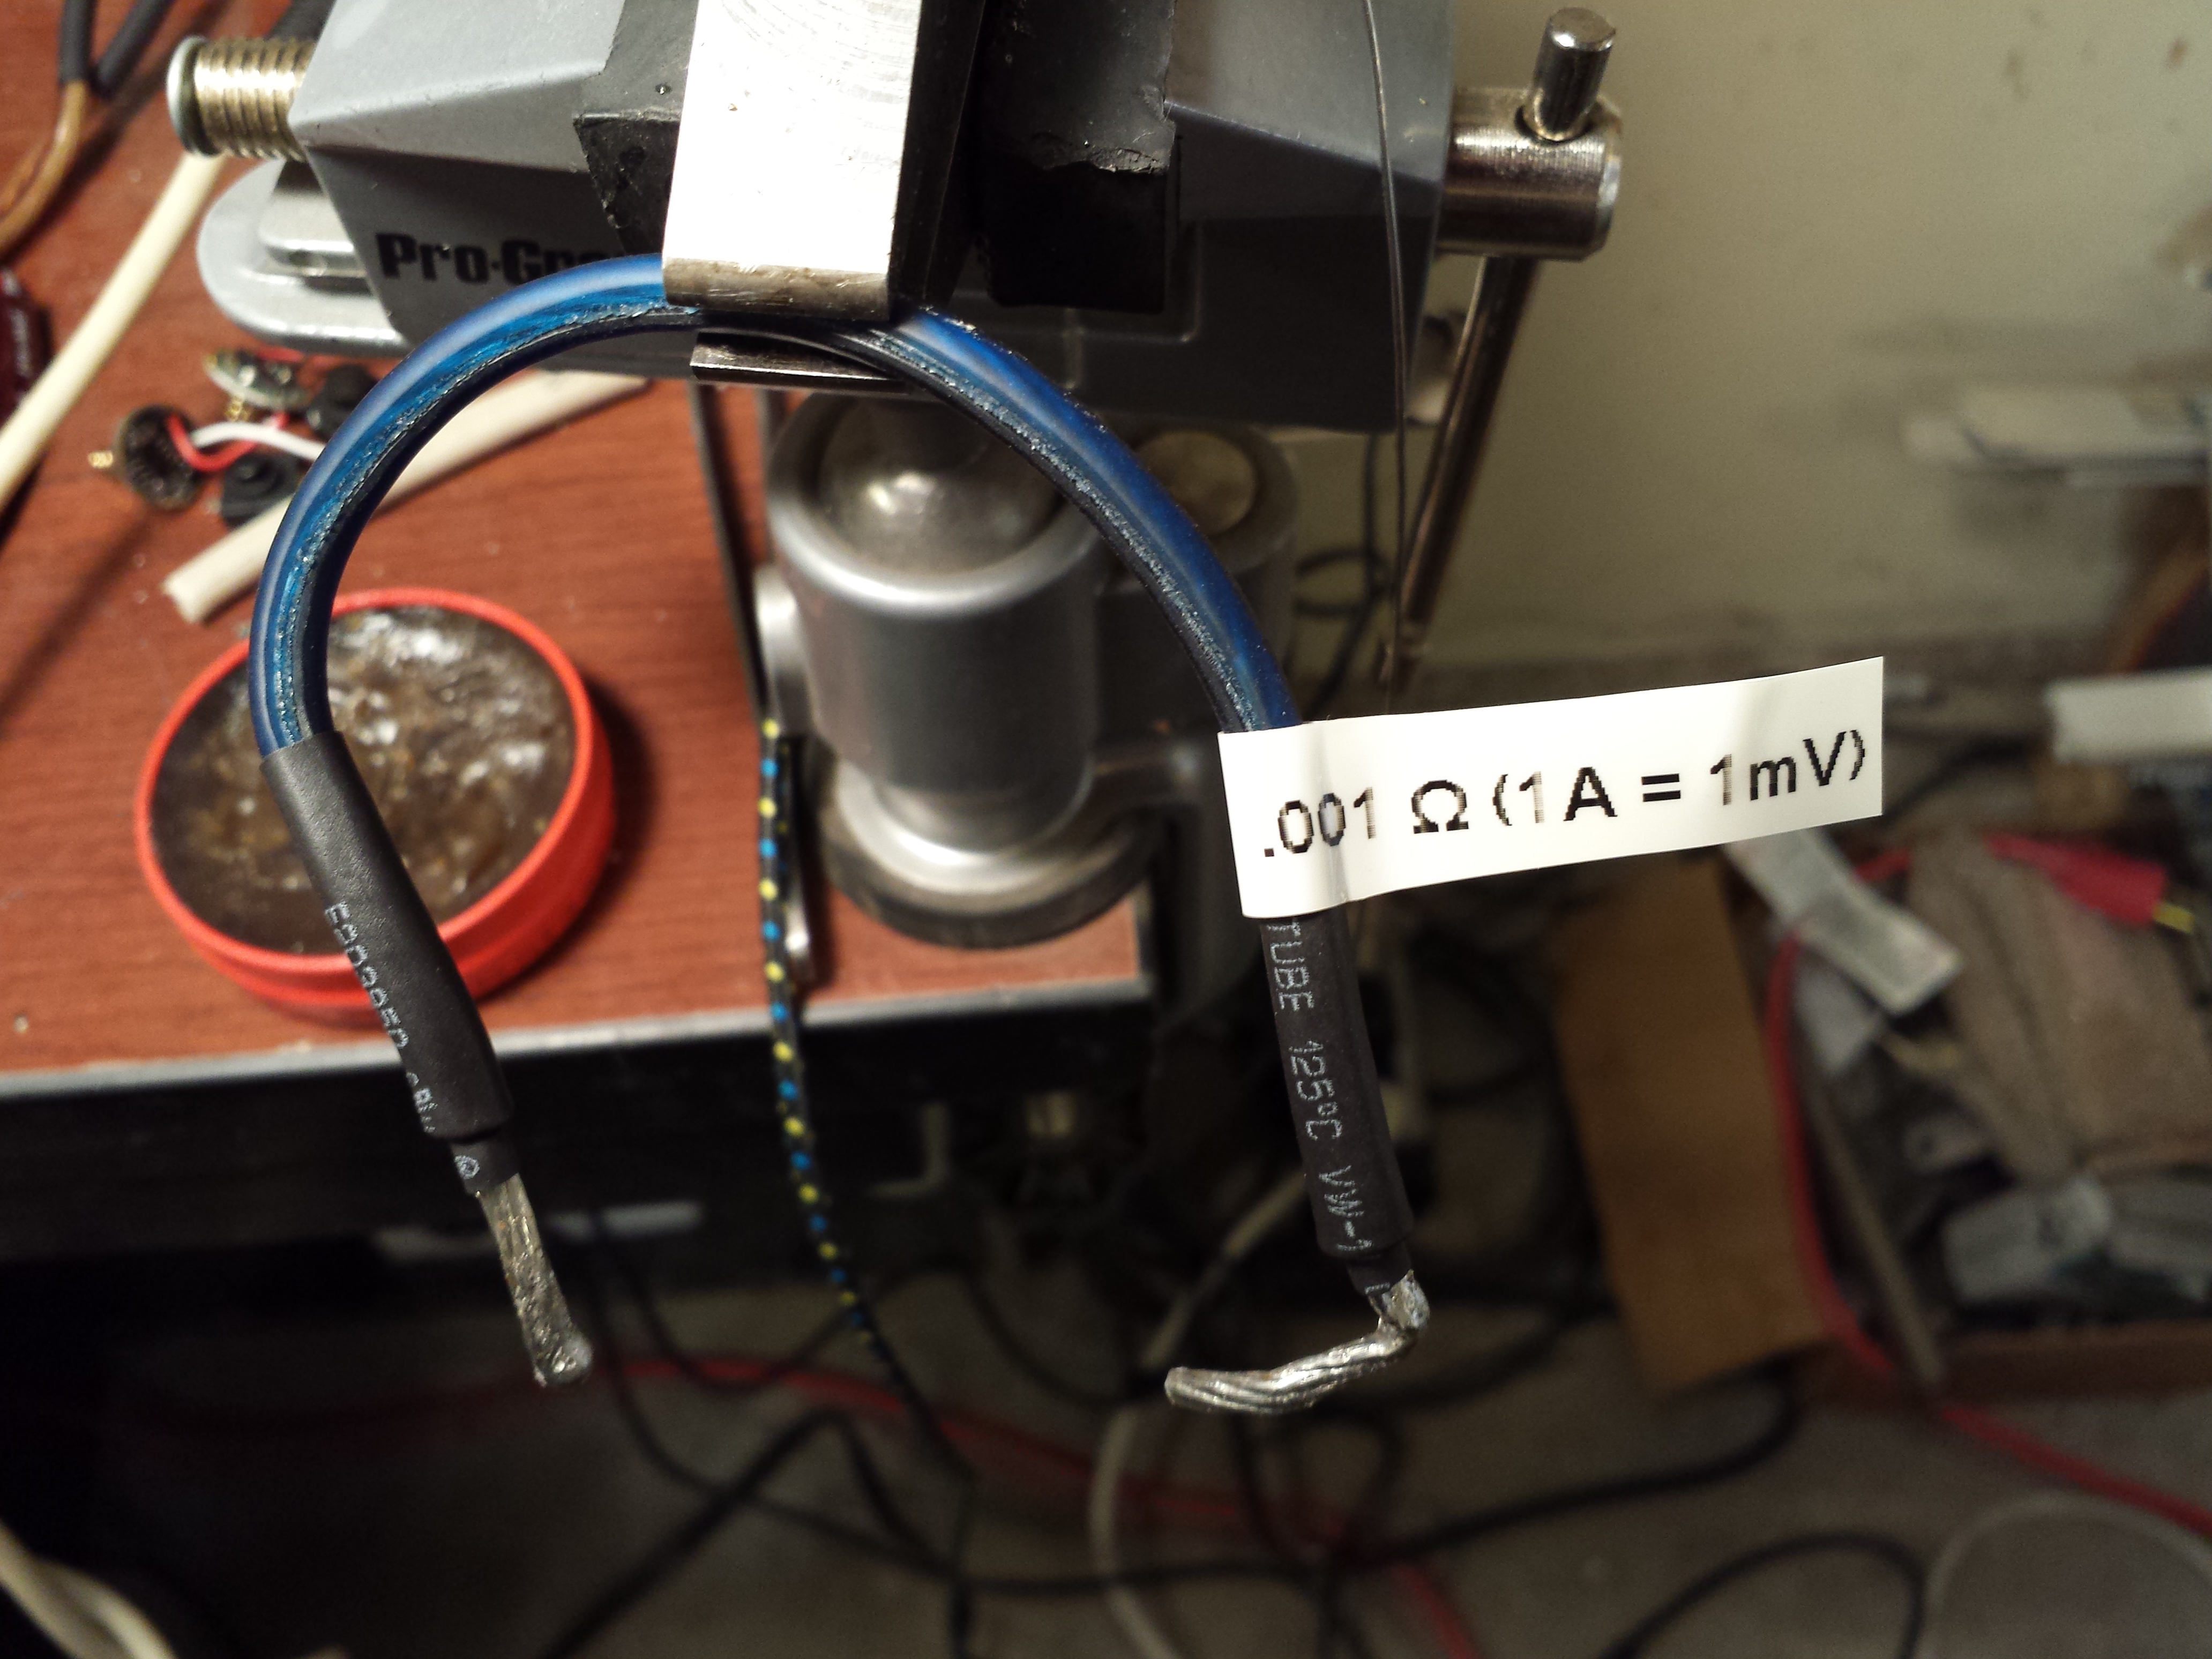
Ok, i think i got how can make a shunt wire.
And i understand i should measure volt losses that passes through it.
But how do i calculate that volt measurement + the 0.01 ohms value of the shunt to Amp? I am sure it is some embarrassingly simple ohms law thing, but i don’t know how………
If you’re shunt is .01 ohms you’ll divide the mA measurement by 10 to get the amps flowing in the circuit. With a .001 ohm shunt the mA measurement is the same as the number of amps.
I made my UF-1504 this week ![]()
I used a XP-L V6 1A on sinkpad from LEDDNA (strongly suspected to be V5’s) dedomed in thinner. The dedomed tint turned out really good ![]() or maybe i just like it more because it so strong & throwy in the 1504.
or maybe i just like it more because it so strong & throwy in the 1504.
I run it direct drive with a upgraded omten switch with a 18awg wire bypassed switch board + bypassed spring + drilled through brass post on the bottom spring, like this.


I you do this, you will need to sand down one side of the plastic switch holder that sits at the bottom, so the extra wire width will fit beside the switch.
I soldered the mcpcb to the brass pill with solder paste & a heat gun.

If somebody tries this, remember to press down evenly on the mcpcb when the solder paste liquefies, i didn’t at my first try so the mcpcb settled a little uneven, but it is easy to fix just heat it up again and press it down ![]()
And I soldered the mcpcb led negative directly to the brass pill ![]()

With no bat - wire, just the ground to the brass pill ![]()
I have really been enjoying it, i have probably used it every night since i made it, it throws very very well the furthest i have built yet by far, it doesn’t last very long running totally DD but, it is just to pop in a fresh battery to get the distance & brightness up again ![]()
I look forward to test the XP-G2 in it also for a bit more distance, and surprisingly i find the XP-L dedomed spot to be almost to big, because it is so bright & go so far it is sometimes a little hard not to point it where you shouldn’t in the dark.
I even had a run in with a neighbour, who wondered what in the world was reflecting of the white wall next to his and lighted up his whole house one evening ![]() And his house is total of axis from where i was standing.
And his house is total of axis from where i was standing.
It is so strange, nonflashlight people or muggles as TK calls them, gets really exited by throwy light surprisingly so even, i mean i get exited to that is why i build them, but there is something special in lighting up something far far away that really speaks to them.
Ok i think i got it, i will try to fix me a shunt wire sooner rather than later, thanks KKW.
Cajampa,
Kcd numbers please :)
Today I finally manage to made mine.
3.8A, XP-G2 S2 1A dedomed, battery is panasonic NCR2900PF
Measured at 7m... At very start(fresh battery) it did 385kcd but real number is 370KCD which is not to bad for a budget light.
But soon I will put pre-collimator lenses which should enlarge beam to more usable size(100% bigger surface) with only 5-10% expected lux drop.
Edit: The most accurate way of measuring higher(above 2A) tail cap current is this clamp meter UNI-T UT210E it cost 35$
I really don't get it why more people don't use it. Wrong measurements will go to history with this meter.
Sorry i can’t give any kcd measurement i don’t have a light meter yet. I have spent all my money on light & parts for lights so far, and this is the first light i have built where i had a want for one ![]()
I need to check out those old threads where these things are discussed & pick me a cheap but good one ![]()
Do you guys have any recommendation on light meters.
luminarium iaculator, any more detail of your build, like what driver for example? At 3.8A i would guess a AMC7135 based linear one.
The UNI-T UT210E, looks interesting a bit pricey, but then all good DC amp clamp meters are, i will keep that one it in mind if i find the budget for one in the future.
AMC7135(single mode) it was 2800 + 1050(3 chip stacked).
Try cell phone android/iphone lux meter. Plenty of guys reported excellent results.